grails -t forge create-app --data=hibernate7 com.example.demoThe Grails Framework
Authors: The Apache Grails Team
Version:
Table of Contents
1 Introduction
Many modern web frameworks in the Java space are more complicated than needed and don’t embrace the Don’t Repeat Yourself (DRY) principles.
Dynamic frameworks like Rails and Django helped pave the way to a more modern way of thinking about web applications. Grails builds on these concepts and dramatically reduces the complexity of building web applications on the Java platform. What makes it different, however, is that it does so by building on already established Java technologies like Spring and Hibernate.
Grails is a full stack framework and attempts to solve as many pieces of the web development puzzle through the core technology and its associated plugins. Included out the box are things like:
-
GORM - An easy-to-use Object Mapping library with support for SQL, MongoDB, Neo4j and more.
-
View technologies for rendering HTML as well as JSON
-
A controller layer built on Spring Boot
-
A plugin system featuring hundreds of plugins.
-
Flexible profiles to create Web applications, Rest applications, plugins and more.
-
An interactive command line environment and build system based on Gradle
-
An embedded Tomcat container which is configured for on the fly reloading
All of these are made easy to use through the power of the Groovy language and the extensive use of Domain Specific Languages (DSLs)
This documentation will take you through getting started with Grails and building web applications with the Grails framework.
In addition to this documentation, there are comprehensive guides that walk you through various aspects of the technology.
Finally, Grails is far more than just a web framework and is made up of various sub-projects. The following table summarizes some other key projects in the eco-system with links to documentation.
| Project | Description |
|---|---|
An Object Mapping implementation for SQL databases |
|
An Object Mapping implementation for the MongoDB Document Database |
|
An Object Mapping implementation for Neo4j Graph Database |
|
A View technology for rendering HTML and other markup on the server |
|
A View technology for rendering JSON on the server side |
|
Asynchronous programming abstraction with support for RxJava, GPars and more |
1.1 What's new in Grails 8?
This section covers all the new features introduced in Grails 8
Overview
Grails 8 is a major release that includes new features, improvements, and dependency upgrades. This release focuses on enhancing the developer experience, improving performance, and ensuring compatibility with the latest technologies.
For detailed information on how to upgrade to Grails 8, including major dependency changes, please see the Upgrading from Grails 7 to Grails 8 section. Notable new features are included below.
Platform Baseline
Grails 8 raises the standard build and runtime baseline to Java 21 and uses Gradle 9.8.0. The standard Grails BOM uses Groovy 5.1.3 and Spock 2.4-groovy-5.0.
Grails Micronaut Repository
Grails Micronaut is maintained and released from the Apache Grails Micronaut repository and consumes published Grails Core artifacts.
Spring Boot 4.1 and Spring Framework 7
Grails 8 is built on Spring Boot 4.1.1 and Spring Framework 7.0.9. This brings the Spring Boot 4 modular artifact layout, Spring Framework 7 API removals, Jackson 3, Tomcat 11 and Jakarta Servlet 6.1, plus Spring Boot 4.1 dependency management for Spring Security 7.1, Spring Data 2026.0 and Micrometer 1.17.
The Grails 8 upgrade guide calls out the major application-impacting changes and links to the Spring Boot 4.0 migration guide, Spring Boot 4.1 release notes and Spring Framework 7.0 release notes.
JSON Dates and Times Render as Spring Boot Renders Them
render … as JSON, respond and JSON views now write Date, Calendar, TimeZone, the java.sql date types,
the java.time date, time, duration and zone types and XMLGregorianCalendar the same way as Spring Boot’s default
Jackson JsonMapper, so a Grails application and a Spring Boot application return the same JSON for the same values:
java.sql.Time as "01:48:46", LocalTime as "01:48:46.407254", Duration as "PT1H30M", Year as a number,
ZoneId and TimeZone as their IDs, and Date, Calendar and ZonedDateTime map keys as their values
render. See the Date and Time Rendering sections of the REST and JSON Views guides, and the upgrade guide for the
types that render differently than in Grails 7.
Hibernate 7 Application Generation
Grails Forge can now generate applications configured for Grails Data with Hibernate 7.
The create-* commands also accept a new -d, --data option (the previous -g and --gorm flags remain supported as legacy aliases) with the values hibernate5, hibernate7, and mongodb; the legacy value hibernate is still accepted and selects Hibernate 5:
Applications generated for Hibernate 7 consume grails-hibernate7-bom consistently across the application dependencies, the buildscript classpath, and buildSrc.
This avoids the dependency resolution conflicts that occur when an application generated for Hibernate 5 is manually switched to grails-data-hibernate7 while the default grails-bom remains on the build classpath.
The database-migration feature also selects the matching grails-data-hibernate7-dbmigration plugin automatically.
Asynchronous Grails Data Application Generation
Grails Forge offers a new gorm-async feature that adds the asynchronous programming model for Grails Data — the AsyncEntity trait and the async namespace — to a generated application:
grails -t forge create-app --features=gorm-async com.example.demoThe feature layers on top of whichever GORM implementation is selected, defaulting to Hibernate when none is chosen.
The grails-datamapping-async artifact it brings in is intended for direct consumption by applications and libraries, so it moved from the org.apache.grails.data group to org.apache.grails; see the upgrade guide for the coordinate change.
Plugin Beans Register Before Spring Boot Auto-Configuration
Grails 8 unifies and retimes the plugin lifecycle so that the beans a plugin contributes are registered before Spring Boot processes its auto-configurations.
A plugin bean now takes precedence over a Spring Boot default guarded by @ConditionalOnMissingBean — Boot backs off in favour of the plugin’s bean, with no need to override or remove it afterwards.
Plugins register beans through the new beanRegistrar() hook, which returns a Spring Framework BeanRegistrar. Because BeanRegistrar is a functional interface, a closure coerced with as BeanRegistrar is all that is required:
import org.springframework.beans.factory.BeanRegistrar
import org.springframework.beans.factory.BeanRegistry
import org.springframework.core.env.Environment
import grails.plugins.Plugin

class MyGrailsPlugin extends Plugin {

    @Override
    BeanRegistrar beanRegistrar() {
        { BeanRegistry registry, Environment environment ->
            registry.registerBean('myService', MyServiceImpl)
        } as BeanRegistrar
    }
}
beanRegistrar() replaces the doWithSpring bean builder DSL, which is deprecated in Grails 8.
The DSL continues to work for now, but you are strongly urged to migrate.
See the upgrade guide for details.
Unit tests get the same hooks: a test declares its beans in a beans block, as an application or plugin does, or overrides beanRegistrar(), or declares a static nested @Configuration class — and doWithSpring() on the testing traits is deprecated to match.
See Unit Testing.
CLI Commands Move to Companion -cli Artifacts
Grails commands (ApplicationCommand implementations such as the dbm- database-migration
commands, the scaffolding generate- commands, url-mappings-report, and schema-export) no
longer ship inside the runtime plugin artifacts.
Each command-bearing module now publishes a companion artifact under its own Maven coordinate with
a -cli suffix — for example org.apache.grails:grails-core-cli and
org.apache.grails:grails-data-hibernate7-dbmigration-cli.
The command contract itself moved from grails.dev.commands. to org.apache.grails.core.cli.
in the new grails-core-cli artifact.
Applications consume cli artifacts through the new grailsCli Gradle configuration, which is
compile-visible for grails-app/commands sources and on the command-runner classpath, but never on
runtimeClasspath — commands and their CLI-only dependencies (such as grails-shell-cli) are
excluded from bootRun, bootJar, and bootWar entirely.
The Grails Gradle plugin provisions grailsCli automatically: it adds grails-core-cli and
grails-console, and discovers every companion cli artifact advertised by the application’s
dependency graph — a command-bearing plugin advertises its companion through the
Grails-Cli-Artifact manifest attribute of its runtime jar, and its commands are registered in a
META-INF/grails-cli.factories file inside the companion jar. Declaring a plugin is therefore all
that is needed; its commands (including the per-command Gradle tasks such as dbmUpdate) follow
automatically, even when the plugin is only a transitive dependency:
build.gradle
dependencies {
    // the dbm-* commands are discovered automatically: the plugin jar advertises
    // org.apache.grails:grails-data-hibernate7-dbmigration-cli, which is added to grailsCli
    implementation 'org.apache.grails:grails-data-hibernate7-dbmigration'
}
The auto-provisioning can be disabled with grails { cliAutoProvision = false }, in which case
grailsCli dependencies are declared explicitly.
The plugin can also provision grails-core-cli-legacy into a separate execution-only
grailsCliLegacy bucket when both cliAutoProvision (default true) and
legacyCommandSupport (default false) are enabled. That bucket contributes to
grailsCliClasspath, never to application or plugin compile classpaths. Opt in with
grails { legacyCommandSupport = true } so unchanged Grails 7 command plugins keep working
without a re-release, without leaking grails.dev.commands.* into the Grails 8
command-authoring ABI.
When that bridge is disabled, runtime command discovery still detects plugins that publish legacy
grails.dev.commands.ApplicationCommand factories without loading their command classes. Grails
logs the originating plugin artifact and appends the exact opt-in or upgrade remediation when an
unknown command is requested. The detection remains on the resolved command runtime classpath and
does not add a Gradle configuration-time dependency scan.
Plugin authors get the whole publishing side from the new
org.apache.grails.gradle.grails-plugin-cli Gradle plugin: it creates the cli source set as a
feature variant, wires the command contract onto its compile classpath, advertises the companion
from the runtime jar, and publishes it (via the Grails publish plugin) under the plugin’s
coordinate with the -cli suffix — the framework’s own command-bearing modules are built with the
same plugin.
This removes CLI-only dependencies — and their side effects, such as the WAR-deployment failure caused by a CLI Spring Boot initializer on the runtime classpath — from packaged applications.
The split does not hold up application upgrades on plugin re-releases: a plugin that ships no
commands is unaffected, and a command-bearing plugin that has not yet been rebuilt for Grails 8
keeps its runtime functionality. Its legacy grails.dev.commands.ApplicationCommand registrations
can continue to work through a deprecated compatibility layer when legacyCommandSupport is
enabled, so those commands remain available without a re-release; publishing a companion -cli
artifact is recommended when migrating to the Grails 8 command API. New commands should use
org.apache.grails.core.cli.*. A plugin that still authors legacy commands must explicitly compile
against grails-core-cli-legacy; consumers of an already-published legacy plugin enable the bridge
with grails { legacyCommandSupport = true } (or declare grailsCliLegacy themselves). See the
upgrade guide for the migration steps and the full upgrade-impact
breakdown.
GSP Tag Library Improvements
Grails 8 continues the move toward method-based TagLib handlers while preserving compatibility with existing closure-based tags.
Method-defined tags now bind named attributes more predictably, exclude inherited framework and Object methods from tag dispatch, and preserve real namespace property getters.
The Grails Gradle extension now defaults preserveParameterNames to true, so application Groovy compilation preserves method parameter names for features such as typed method TagLib arguments.
Tag library unit tests also clean up and rebuild TagLib metadata automatically between features.
Tests that use TagLibUnitTest no longer need to manage purgeTagLibMetaClass, and specs that mock additional tag libraries continue to work across feature methods.
Namespace-Aware Link Generation
Links, form actions, pagination links, sortable column links, redirects, chains, and includes now resolve the target controller namespace automatically when namespace is omitted.
In the normal case, where only one controller has the target name, controller and action are enough to generate the correct namespaced or non-namespaced URL.
If multiple controllers share the same name, specify namespace to choose one explicitly.
Use namespace="" in GSP markup, or namespace: null in Groovy code, to target a non-namespaced controller.
@GrailsCompileStatic on Controllers That Use Tag Libraries
Controllers annotated with @GrailsCompileStatic can now invoke tag library methods without compile-time errors.
Both calling patterns are supported out of the box:
import grails.compiler.GrailsCompileStatic

@GrailsCompileStatic
class BookController {

    def index() {
        // Direct call in the default namespace
        response.writer << link(controller: 'book', action: 'list')

        // Namespaced call via a dispatcher property
        response.writer << my.customTag(attr: 'value')
    }
}
@GrailsCompileStatic recognises controllers and tag libraries by convention and marks tag dispatch points as permissible dynamic calls, while leaving the rest of the class fully type-checked.
Opt All Controllers, Services and Tag Libraries into GrailsCompileStatic
Static compilation can now be enabled for every controller, service and tag library in an application from the nested compileStatic block of the grails build configuration, without annotating each class:
build.gradle
grails {
    compileStatic {
        controllers = true
        services = true
        tagLibs = true
    }
}
All three options are disabled by default and independent, or compileStatic { all = true } can be used as a shortcut to enable all of them. Any class that declares its own @CompileDynamic (or @GrailsCompileStatic/@CompileStatic/@GrailsTypeChecked/@TypeChecked) annotation keeps that setting, so the opt-in never overrides an explicit per-class choice. Tag libraries that still declare tags as closure fields (the deprecated form) are skipped automatically by the tagLibs opt-in and left dynamically compiled with a build warning, so define tags as methods to opt them in. See the GrailsCompileStatic section for details.
Generate an Application That Compiles Statically
Grails Forge has a new grails-compile-static feature that generates the compileStatic block with controllers, services and tagLibs enabled, adding gsp = true when the application uses GSP, so the generated controllers, services, tag libraries and views all compile statically:
grails -t forge create-app --features=grails-compile-static com.example.demoSee Static Compilation for what static compilation asks of a GSP page.
GORM Domain Classes Can Take Their Identity Type from the Datastore
A domain class that declares no id has always been given a Long one. That is right for Hibernate and
wrong for MongoDB, where a String id holding a generated ObjectId needs no sequence collection and
shards cleanly — but declaring String id ties the source to MongoDB. The nested gorm block of the
grails build configuration lets each domain class take the identity type of the GORM implementation it
is mapped with instead:
build.gradle
grails {
    gorm {
        defaultIdType = 'native'
    }
}
A domain class mapped with MongoDB is then given a String id while one mapped with Hibernate keeps
Long, so the same source works against either. The type is resolved when the domain class is compiled,
from its mapWith property and the GORM implementations on the compilation classpath, so an application
using more than one gets the right type for each domain class from the single setting. A domain class
that declares an id keeps the type it declares.
For a domain class shipped precompiled in a plugin, declare Serializable id in the plugin. The same
build setting is packaged as grails.gorm.defaultIdType and selects the effective persistent type at
runtime; no duplicate application configuration is required. Normal external configuration can still
override that property.
MongoDB maps that portable declaration to String for native and to Long for long; Hibernate
maps it to its native Long identity either way. The resolved type is cached in GORM’s mapping metadata,
so this adds no per-operation type lookup. Concrete identity declarations remain authoritative.
The default is defaultIdType = 'long', which is the behaviour of every earlier release. Turning it on
changes the type of a field that already holds data, so it is a choice to make when an application is
written rather than one to switch on over an existing database. See the
Identity Generation section of the GORM for MongoDB guide for
details.
GORM for Hibernate Locking Improvements
GORM for Hibernate 5 and Hibernate 7 gain three related locking capabilities. All of them require an active transaction, hold the lock until that transaction commits or rolls back, and are available on named connections (Book.secondary.lock(id, refresh: true), book.secondary.refresh(lock: true), within a transaction on that connection) and under a bound tenant. Datastores that do not support a capability throw UnsupportedOperationException rather than silently falling back to a plain refresh or an ordinary lock. The existing entity.lock(), DomainClass.lock(id) and entity.refresh() methods are unchanged; entity.mutex is built on the first of these capabilities and changes behaviour, as described below.
Refresh Under a Lock
The instance method refresh accepts a lock argument. lock: true reloads the entity’s database state and version under a pessimistic WRITE lock that is acquired before the state is read, and returns the same instance. It never checks the already-loaded version, which is what entity.lock() does and why a concurrent update between get() and lock() can still cause an optimistic locking failure.
Book.withTransaction {
    def book = Book.get(1)
    book.refresh(lock: true)
    if (book.title == 'Draft') {
        book.title = 'Ready for review'
        book.save(failOnError: true)
    }
}
lock also accepts a jakarta.persistence.LockModeType, or its name, to refresh under a different mode, for example book.refresh(lock: LockModeType.PESSIMISTIC_READ). lock: true is equivalent to lock: LockModeType.PESSIMISTIC_WRITE. lock: false and lock: LockModeType.NONE request no lock, so entity.refresh([:]), entity.refresh(lock: false) and entity.refresh(lock: LockModeType.NONE) behave exactly like entity.refresh(). Any other value throws IllegalArgumentException.
The instance must be attached to the current session; a detached instance is rejected with IllegalArgumentException on both Hibernate versions rather than being silently re-attached. Re-attach it with attach() first.
Refreshing discards unflushed entity changes, including changes to associated entities reached by configured refresh cascades; it does not refresh the whole object graph. Call refresh(lock: …) or lock(id, refresh: true) before making decisions based on the entity’s state or applying mutations. The lock applies to the refreshed entity’s own row; associated entities reloaded through the cascade are not guaranteed to be locked.
|
On Hibernate 5, a locked refresh also resets GORM’s dirty-checking state on the refreshed entity, its embedded components, and every initialized entity the refresh cascade reloaded, including associations reached through an embedded component, so the discarded edits do not schedule an update or bump a version at the next flush. A plain refresh() on Hibernate 5 leaves that state in place. Hibernate 7 resets it itself.
Lock by Identifier with Refresh
The static lock method accepts refresh: true. Book.lock(id, refresh: true) behaves like Book.lock(id), but when the entity is already managed in the current session it reloads that instance’s state and version under the lock instead of locking the already-loaded state, and returns that same managed instance. When the entity is not in the session it is loaded under the lock. null is returned when no row exists for the identifier. DomainClass.lock(id) and DomainClass.lock(id, refresh: false) continue to lock without refreshing.
Book.withTransaction {
    def book = Book.lock(1, refresh: true)
    if (book?.title == 'Draft') {
        book.title = 'Ready for review'
        book.save(failOnError: true)
    }
}
There is no entity.lock(refresh: true). Groovy resolves that call to the static lock(Serializable id) method with the options map as the identifier, so GORM now rejects it with an IllegalArgumentException naming the two supported forms instead of reporting a missing identifier.
Choosing the Lock Mode
The static lock method also accepts type, a jakarta.persistence.LockModeType or its name, to acquire a lock other than the default PESSIMISTIC_WRITE. It applies whether the entity is loaded by the call or is already managed in the session, and it can be combined with refresh: true to reload a managed instance under that mode. NONE is rejected.
Every lock mode is available to refresh(lock: …) and to the static type argument on both Hibernate 5 and Hibernate 7:
| Lock mode | Database lock | Effect |
|---|---|---|
|
Exclusive row lock, typically |
The default for |
|
Shared row lock, |
Other transactions cannot update the row but may take the same shared lock. Databases without shared row locks take an exclusive lock instead. |
|
Exclusive row lock |
As |
|
None |
The version is re-read when the transaction commits, and the commit fails if another transaction changed it. |
|
None |
The version is incremented when the transaction commits, so other transactions holding the previous version fail. |
|
None |
|
Book.withTransaction {
    def shared = Book.lock(1, type: LockModeType.PESSIMISTIC_READ)
    def current = Book.lock(2, refresh: true, type: LockModeType.PESSIMISTIC_READ)
}
Without an active transaction, refresh with a lock, lock(id, refresh: true) and any lock(id, …) call naming a type throw jakarta.persistence.TransactionRequiredException before anything is loaded. The database and transaction isolation level determine which state is visible. Locking does not guarantee that every concurrent attempt succeeds: deadlocks, lock timeouts, and transaction serialization failures remain possible. See the Optimistic and Pessimistic Locking section of the GORM for Hibernate 7 or Hibernate 5 guide for details.
Holding a Lock for a Block of Work
entity.mutex(Closure) locks an instance for the scope of a closure. It took an exclusive lock on the state already loaded, and because that lock is version-checked, a transaction that committed to the row after the instance was loaded failed the call with an optimistic locking failure and the closure never ran. Where the datastore supports a locked refresh, it now reloads the row under the lock instead, so it waits for the competing writer and the closure runs on the committed state. The lock is always exclusive; there is no argument to select another mode, because a shared or optimistic lock would not give the closure mutual exclusion.
Airport.withTransaction {
    def airport = Airport.get(10)
    airport.mutex {
        airport.name = 'Heathrow'
        airport.save(failOnError: true)
    }
}
Reloading discards unflushed changes to the instance, exactly as refresh(lock: true) does, so apply them inside the closure rather than before the call. mutex now also requires an active transaction and an attached instance. See the upgrade notes for the full list of consequences. Datastores that cannot reload under a lock keep their previous behaviour.
|
GORM for Hibernate 7 Persist and Merge Events
GORM for Hibernate 7 now starts tracking changes to an entity when it is persisted or merged, not only once its row has been inserted. Previously an entity whose identifier is generated before the insert, such as one mapped with id generator: 'increment' or any member of a tablePerConcreteClass hierarchy, was written with an INSERT immediately followed by an UPDATE of the same row and started at version 1. It now starts at version 0 with a single statement, as on Hibernate 5.
As part of this change, persistence event listeners on Hibernate 7 receive a PersistEvent (eventType Persist) for every explicit or flush-time cascaded persist and a MergeEvent (eventType Merge) for every merge. Neither event can be cancelled. Hibernate 5 continues to publish SaveOrUpdateEvent when an entity is saved, and publishes no event for a merge. A listener that switches over event.eventType with a default branch that throws should handle the new values. See the Events and Auto Timestamping section of the GORM for Hibernate 7 guide.
Default Security Response Headers
Servlet web applications now send a baseline set of browser hardening headers on every response:
X-Content-Type-Options: nosniff, X-Frame-Options: SAMEORIGIN, Referrer-Policy: strict-origin-when-cross-origin
and X-XSS-Protection: 0. HSTS and Content Security Policy can be turned on alongside them but are off by default,
because their right values depend on the deployment. Behind a TLS-terminating proxy, HSTS honors the scheme the proxy
forwards in X-Forwarded-Proto or Forwarded.
The headers are written when the response commits, and only if nothing else has set them, so a controller, an interceptor, another filter or Spring Security’s own header writers at Spring Boot’s default filter order win. Redirects, error pages, streamed bodies and responses served by other Grails filters, such as asset-pipeline assets, are covered too.
Everything is configurable under grails.security.headers.*: the whole filter, each header, and its value. A
deployment whose reverse proxy already sends these headers can set grails.security.headers.defaults: auto to send
only explicitly configured headers on proxied requests. See the Security section of the user guide and
the upgrade guide for details.
Agent Skills Published with Grails
Grails now publishes its app-facing Agent Skills with every release: org.apache.grails.skills:grails-developer, for building Grails applications, and org.apache.grails.skills:grails-8-upgrade, for upgrading an application from Grails 7. The jars use the SkillsJars layout and the Grails BOM manages them, so an application applies the SkillsJars Gradle plugin, declares the skills without a version, and runs ./gradlew extractSkillsJars to write the skills for its Grails version to the directory its AI coding agent reads. See Agent Skills.
Test HTTP Client Form Requests
Integration tests that implement HttpClientSupport can now use httpPostForm(…) to send application/x-www-form-urlencoded
request bodies. The helper URL-encodes form fields using UTF-8, and repeated values in a Collection or array are encoded as
repeated keys in insertion order.
Latency Testing Support
The new grails-testing-support-latency module injects artificial latency into the application under test, so that
requests randomly take longer. Slower responses widen the window in which timing bugs occur, turning intermittently
flaky functional tests — assertions that race a navigation, missing waits, ordering assumptions — into deterministic
failures. The module is inert until grails.testing.latency.enabled is set to true, and the delay range, the
fraction of requests affected, and the url patterns are all configurable. See the
Functional Testing section for details.
GORM for MongoDB: TTL, Text, and Reconciled Indexes
GORM for MongoDB can now declare a TTL index directly in the mapping DSL.
Adding expireAfterSeconds to the indexAttributes of a single date-valued property creates a TTL index, and MongoDB
automatically removes each document once it reaches the configured age:
class LoginEvent {
    Date dateCreated
    static mapping = {
        dateCreated index: true, indexAttributes: [expireAfterSeconds: 3600]
    }
}
A single property can likewise declare a $text index — or another special type such as 2dsphere — through
indexAttributes: [type: 'text'].
When the options of an already-created index change between restarts, GORM now reconciles the difference instead of only
logging a conflict. A changed TTL is applied in place with MongoDB’s collMod command — no drop, no rebuild — while any
other option change is applied by declaring indexAttributes: [recreateOnConflict: true].
GORM still never drops an index by itself. MongoDatastore.findUndeclaredIndexes() lists the indexes on mapped
collections whose keys no domain class declares any longer, and dropUndeclaredIndexes() drops them, as a deliberate
step once every instance runs the release that declares the indexes to keep. See the
Finding and Dropping Undeclared Indexes section of the GORM for MongoDB
guide. findMissingIndexes() lists the declared indexes their collections do not have, which shows when a build has
been forgotten with buildIndexes off, and buildIndexAsync() runs the index build in the background and returns a
CompletableFuture of its result, for a caller that needs to know when the build finished and what it applied.
GORM for MongoDB and Spring Data MongoDB Interoperability
A new optional module, grails-data-mongodb-spring-data, lets an application use GORM for MongoDB and
Spring Data MongoDB — its MongoTemplate and repositories — side by
side over the same MongoClient, database and codecs, and, within a single @Transactional method, the same
MongoDB transaction. When the module and spring-data-mongodb are on the classpath of a Spring Boot application that
already has a GORM MongoDatastore, it auto-configures a MongoDatabaseFactory, a MongoTemplate and a primary
transactionManager over GORM’s existing connection — GORM keeps ownership of the client:
@Transactional
void transfer(MongoTemplate mongoTemplate) {
    new Account(name: "from").save()                  // GORM
    mongoTemplate.insert(new LedgerEntry(amount: 10)) // Spring Data
    // both commit together, or neither is applied if an exception is thrown
}
The unified transaction shares GORM’s server-side ClientSession, so it requires GORM multi-document transactions to
be enabled (grails.mongodb.transactional = true). Spring Data repositories are enabled the usual way with
@EnableMongoRepositories, on a package separate from the GORM @Entity classes; only the connection, codecs and
session are shared, and the two object-mapping models stay separate. See the
Spring Data MongoDB Interoperability section of the GORM for MongoDB
guide for details.
GORM for MongoDB: Checkpoint and Restore with CRaC
An application using GORM for MongoDB can be checkpointed with CRaC and restored,
both while it is running and as its application context refreshes (-Dspring.context.checkpoint=onRefresh). GORM opens
no connection to MongoDB until the application context starts its datastore, which is also when the declared indexes are
built, and around a checkpoint it stops the client of every connection and starts it again after the restore. The
MongoClient it hands out, the mongo bean among them, stays the same object throughout, so code holding it keeps
working after a restore. In a Spring Boot application GORM now declares the MongoClient bean itself, built from Spring
Boot’s settings the way Spring Boot builds its own, so that client takes part as well. An embedded MongoDB is started
with the application context when the process is checkpointed as the context refreshes. See the Advanced Configuration
section of the GORM for MongoDB guide.
Read-Only Transactions Do Not Flush the Session
@ReadOnly and @Transactional(readOnly = true) now mean the same thing on every GORM datastore: a read-only
transaction commits without flushing the session. Hibernate, Neo4j and the simple map datastore already behaved this
way, and GORM for MongoDB was the exception — a read-only commit there flushed whatever the session had queued, so
read-only code could persist another caller’s unflushed writes, and a read-only transaction started while a session was
flushing (for example from a validator or a beforeInsert event) could re-enter validation.
AbstractSession now passes the transaction definition to beginTransactionInternal(TransactionDefinition) rather than
discarding it, so a datastore can act on readOnly and on anything else the definition carries. Session also gained
hasPendingOperations(), and DatastoreTransactionManager uses it to log a warning when a read-only transaction commits
while its session still holds queued inserts, updates or deletes, so a write that a read-only transaction used to persist
by accident is reported rather than silently dropped. This is a behavior change for MongoDB code that saves without
flush: true and relies on a later read-only transaction to persist the write; see the
upgrade guide and the
Read-Only Transactions section of the GORM for MongoDB guide.
Ahead-of-Time Processing
A Grails application can now be processed by Spring’s ahead-of-time engine. Applying Spring Boot’s AOT plugin adds a
processAot task, which generates the bean definitions as Java source at build time instead of deriving them from
classpath scanning and annotations on every start:
build.gradle
apply plugin: 'org.springframework.boot.aot'

tasks.named('processAot') {
    systemProperty 'grails.env', 'production'
}
java -Dspring.aot.enabled=true -jar build/libs/myapp.jarAOT processing is also what a GraalVM native image requires: Spring Boot refuses to start an image without a
build-time generated initializer. Reachability metadata for the application’s own artefacts and compiled pages is
written from the build output, and traceNativeMetadata records what the framework reflects on along a request path.
See the Ahead-of-Time Processing section for what it changes at runtime and what it does not yet cover.
Ahead-of-Time Caching
On JDK 25 or later, grails.aotCache trains a JDK AOT cache by running the packaged application once and recording
the classes it loaded and linked and the methods it ran, so the next start reads that work rather than repeating it:
build.gradle
grails {
    aotCache {
        enabled = true
        paths = ['/', '/login', '/book/index']
    }
}
See the Ahead-of-Time Caching section, which includes measured figures and the conditions under which a JVM will decline a cache.
Banner Colour, Container Version and Start Mark
The startup banner is coloured, reports the servlet container it is running on, and says how the application was
started where that is worth saying — NATIVE for an image, AOT CACHE for a JVM given a cache to read, AOT for one
running generated bean definitions. An ordinary start says nothing.
Spring Security and the servlet container are also shown by default now. What allows that is a smaller change
underneath: a version shown by default that cannot be determined is left out rather than shown as unknown, so
an application without Spring Security says nothing about it instead of saying it does not know. One asked for
by name still reads unknown, because saying nothing about what was asked for reads as the option having been
ignored. See
Customizing the Application Class for the full set of banner options, and the
upgrade guide for how to restore the previous output.
Message Bundles Resolved by Spring Boot
Internationalization now runs on Spring Boot’s own MessageSourceAutoConfiguration. Grails' custom
message source is gone, and with it the classpath*:*.properties scan it performed at start-up.
The base names Spring Boot needs are recorded at build time, per application and per plugin, so the
whole spring.messages.* surface works as it does in any Boot application:
spring:
    messages:
        cache-duration: 5s
        use-code-as-default-message: true
Those properties were previously ignored, because Grails' own message source claimed the bean.
Because discovery no longer scans, the message bundles an application and its plugins ship are known ahead of time. Grails registers the GraalVM resource hints for them — including plugin bundles and any base name an application configures itself, neither of which Spring Boot’s own registrar covers.
Plugin message bundles must now be namespaced on the plugin name — spring-security-core.properties
rather than messages.properties — so that two plugins cannot shadow one another. See
[upgrading80x] for the details.
Quartz Scheduling Survives a Bad Schedule
The Quartz plugin no longer lets one broken schedule take an application with it. A trigger that can
never fire — a cron expression whose last occurrence has passed, an end time
already gone by — is reported in the log and left unscheduled instead of stopping startup, and
quartz.failOnNeverFiringTriggers restores the old behaviour for anyone who wants a bad schedule to fail
a deployment.
Jobs are also stamped with the application that registered them, so an application starting up removes only its own jobs from the job store. Two applications, or a clustered application and code scheduling through the Quartz API, can now share Quartz tables without one deleting the other’s jobs and triggers.
The scheduling methods a job class gets say what is wrong when they are misused: a null repeat interval,
cron expression, date or trigger names the argument that is missing, and calling them on a job the
scheduler does not know about explains why it is not registered — neither ends in a NullPointerException
any more. See Long-Running Jobs for what a job that outlives its trigger’s
interval needs, and [upgrading80x] for the details.
Compiled Tag Resolution
Tag libraries are now described when they are compiled, and that description resolves tag calls in pages, tag libraries and controllers compiled afterwards. In a tag library or a controller, a call whose namespace and tag are known is compiled into a direct invocation rather than being dispatched through the metaclass, and no tag methods are installed onto tag library, page or dispatcher metaclasses to make dispatch work:
class BookController {
    def index() {
        String markup = g.link(controller: 'book')   // compiled into a direct invocation
    }
}
The same applies to a call written without a namespace, to calls written inside a closure such as a
tag body, and to a tag expression in a GSP declaring compileStatic. The tag itself is still selected
by name when the call runs, so a tag library that overrides another, one registered while the
application is running, and the order tag libraries are registered in all behave exactly as before. A
namespace no compiled tag library declares, and a name something else in scope answers to, are left to
dispatch as they did.
A tag that no compiled tag library declares is left to resolve at runtime with nothing reported, since a namespace can legitimately hold tag libraries carrying no description. An application whose tag libraries are all described can ask for an error instead:
build.gradle
grails {
    compileStatic {
        strictTags = true
        dynamicTagNamespaces = ['legacy']   // registered while the application runs
    }
}
Defining a tag as a Closure field remains supported but is deprecated and now warns at compile time:
a closure carries no signature, so nothing about a call to such a tag can be checked. Define tags as
methods taking Map attrs and, where a body is needed, Closure body. See
Compiled Tag Resolution.
Mapping Every Controller as a REST Resource
A resources mapping can now be applied to every controller at once by capturing the controller in
the URL and passing * instead of a controller name:
"/$controller"(resources: '*')This generates the same mappings the named form generates, but resolves the controller from the
request rather than from the mapping, so an application whose controllers all follow the RESTful
resource conventions declares them once instead of once per controller. The includes and excludes
parameters work as they do for a named resource, and the mapping can be placed inside a group:
group "/api/v1", {
    "/$controller"(resources: '*', excludes: ['create', 'edit'])
}
The controller and action captured from the URL are validated as they are for any other wildcard mapping. Because the controller is not known until a request is matched, the URL must capture it and child resources cannot be nested within the mapping. See Mapping to REST resources.
Separate Recipient and Sender Overrides for Mail
The Mail plugin can now override the recipients and the sender of outgoing mail separately.
grails.mail.overrideToAddress replaces every to, cc and bcc address and keeps the sender the
application sets, and grails.mail.overrideFromAddress replaces the sender without redirecting the
recipients:
application-test.yml
grails:
    mail:
        overrideToAddress: test-inbox@example.com
grails.mail.overrideAddress still replaces both, and the two new properties take precedence over it when
both are set. It now also replaces a from set in the sendMail closure. See
Mail Configuration, and the upgrade guide
for what this means for an application that sets overrideAddress.
1.1.1 Updated Dependencies
Grails 8.0.0 ships with the following foundational dependency versions:
-
Java 21 minimum baseline
-
Groovy 5.1.3
-
Spring Framework 7.0.9
-
Spring Boot 4.1.1
-
Gradle 9.8.0
-
Spock 2.4-groovy-5.0
See the Grails BOM dependency table for the complete managed dependency set, including the Hibernate BOM variants.
2 Getting Started
2.1 Installation Requirements
Before installing Grails you will need a Java Development Kit (JDK) installed with the minimum version denoted in the table below. Download the appropriate JDK for your operating system, run the installer, and then set up an environment variable called JAVA_HOME pointing to the location of this installation.
We recommend Liberica JDK 21 LTS based on Spring’s JDK recommendation.
| Grails version | JDK version (minimum) |
|---|---|
8 |
21 |
7 |
17 |
6 |
11 |
5 |
8 |
Grails applications are built with Gradle. Gradle does not need to be installed separately: a generated application includes the Gradle wrapper (gradlew), which downloads the right Gradle version on first use. Grails 8 requires Gradle 9.7 or later and generates applications with Gradle 9.8.0.
To automate the installation of Grails we recommend SDKMAN which greatly simplifies installing and managing multiple Grails versions.
On some platforms (for example macOS) the Java installation is automatically detected. However in many cases you will want to manually configure the location of Java. For example, if you’re using bash or another variant of the Bourne Shell:
export JAVA_HOME=/Library/Java/Home
export PATH="$PATH:$JAVA_HOME/bin"
On Windows you would have to configure these environment variables in My Computer/Advanced/Environment Variables
|
2.2 Downloading and Installing
There are many ways to create a Grails application. The best way is to use either start.grails.org or use the Grails CLI via SDKMAN. SDKMAN greatly simplifies installing and managing multiple Grails versions.
Types of command-line interface (CLI)
Historically, Grails had one CLI - grails shell, until grails forge was introduced in Grails 6.
Grails Shell CLI
The historical grails shell CLI has been a core part of the Grails Framework since its inception, providing command-line tools for project creation, code generation, and application management.
Nearly all historical references to the grails or grailsw commands pertain to grails shell functionality.
The grails shell CLI relies on Profiles, consisting of skeleton directories and YAML-based configurations for application generation.
However, this approach is less flexible than the feature-rich application generation capabilities of grails forge.
The Grails Wrapper is a lightweight script (grailsw) and the accompanying JAR file is designed to bootstrap and load the CLI within a Grails Application.
The grails shell CLI provides most of the same application generation functionality provided by grails forge.
Importantly, it can also run scripts, such as run-app that call Gradle and/or your Grails Application.
Most Grails plugins still include Grails Scripts that execute within grails shell CLI and have not yet been migrated to Gradle tasks.
IntelliJ IDEA’s Grails plugin depends on grails shell for code generation and Grails command execution.
Extending application generation in the grails shell CLI is straightforward: developers can create a Custom Profile and reference it as a Maven dependency, which is generally simpler than customizing grails forge.
Restoration of Grails Shell CLI
In Grails 6.0.0, grails shell CLI was removed and replaced with grails forge CLI.
However, in Grails 6.2.1, the grails shell CLI, along with Grails Profiles and the Wrapper were restored, empowering users to choose their preferred CLI and reclaiming functionalities that had not yet been fully transitioned to the grails forge CLI combined with Gradle tasks.
Grails Shell CLI and Gradle
Certain grails shell CLI commands overlap with Gradle tasks.
For Gradle these use a variety of Gradle tasks provided by Gradle, Spring Boot, Grails or a Grails Plugin.
Partial list, for illustration purposes:
| grails shell CLI | Gradle | Integration |
|---|---|---|
|
|
run-app is a Grails Script from the Base Grails Profile commands directory and ultimately calls the Gradle bootRun task |
|
|
run-app is a Grails Script from the Base Grails Profile commands directory and ultimately calls the Gradle bootRun task |
|
|
package is a YAML file from the Base Grails Profile commands directory which is converted by YamlCommandFactory, when Grails CLI starts, into a Grails Command which ultimately calls the Gradle assemble task |
|
|
None. The Grails Script GenerateAll.groovy and the Grails Command GenerateAllCommand.groovy both come from the Scaffolding Plugin and have duplicate functionality |
|
|
Both are provided by DbmUpdateCommand.groovy in the database migration plugin |
|
|
Both are provided by DbmGenerateChangelogCommand.groovy in the database migration plugin |
|
|
None. The Grails Script s2-quickstart.groovy and the Grails Command S2QuickstartCommand.groovy both come from the Grails Spring Security Core Plugin and have duplicate functionality |
Additional details on these commands are covered in other sections of Grails documentation.
Grails Forge CLI
In Grails 6, grails forge was introduced to replace the application generation features of grails shell CLI, while forcing the transition of all other historical CLI functionality directly to Gradle tasks.
This new CLI offers a superior architecture for application generation, particularly when incorporating multiple features, and starts and generates applications faster than the grails shell CLI.
grails forge also powers start.grails.org and the "New Grails Project" feature in JetBrains' IntelliJ IDEA via the Grails Plugin.
Unfortunately, in Grails 6, but corrected for 7, the grails forge CLI was invoked using the historical grails command, which confused users due to its markedly different feature set and architecture.
The grails forge CLI is dedicated solely to initial application generation and the subsequent creation of components such as domains, controllers, services, interceptors, and tag libraries, which is all it can do.
This CLI is entirely offline with precompiled templates and does not run or use Gradle or your Grails Application.
With the grails forge CLI, the goal was to transition all other historical capabilities provided by the grails shell CLI to Gradle tasks.
Although some advancements have been made in this transition, substantial work is still outstanding.
The grails forge can be extended by forking the repository and hosting your own Grails Application Forge internally, which is generally more complex than extending grails shell with a custom profile.
Both CLIs exist in Grails 8
For the reasons listed above, Grails 8 includes both CLIs and a combined delegating CLI that can invoke either CLI. grails-shell, grails-profiles, grails-wrapper and grails-forge projects are now all part of the grails-core project and are released together.
Grails 8 provides the following commands in any Grails install:
-
grails-forge-cli- the forge cli that was shipped asgrailsinitially in Grails 6. This CLI has both interactive completion & bash autocompletion. Long term, we intend to fold the legacy shell functions into it - including the ability to create custom commands & supporting a custom layout. -
grails-shell-cli- the legacy shell cli that IntelliJ uses. This CLI has only interactive completion. Historically, this shell has not had autocompletion. -
grails- a new, delegating shell application that will call eithergrails-shell-cliorgrails-forge-cli. By default,./grailsusesgrails-shell-clifor backwards compatibility. To usegrails-forge-cli, pass the-tor--typeargument:$ ./grails -t forge
Install with SDKMAN
To install the latest version of Grails using SDKMAN, run this on your terminal:
$ sdk install grailsYou can also specify a version
$ sdk install grails 8.0.0You can find more information about SDKMAN usage on the SDKMAN Docs.
After installing, all three CLI commands: grails, grails-shell-cli, and grails-forge-cli will be available.
Manual installation
For manual installation follow these steps:
-
Download a binary distribution of Grails and extract the resulting zip file to a location of your choice. Then add the bin directory to your system path.
Unix/Linux
-
This can be done by adding
export PATH="$PATH:/path/to/grails/bin"to your profile
Windows
-
Copy the path to the bin directory inside the grails folder you have downloaded, for example,
C:\path_to_grails\bin
-
Go to Environment Variables, you can typically search or run the command below, the type env and then Enter
Start + R
-
Edit the Path variable on User Variables / System Variables depending on your choice.
-
Paste the copied path in the Path Variable.
If Grails is working correctly you should now be able to type grails --version in the terminal window and see output similar to this:
Grails Version: 8.0.0Grails Wrapper
The original CLI binaries can be quite large.
When installing via SDKMAN or via a download, we include a single shadowJar that contains both shells and the associated scripts to invoke them.
However, when a project is generated, we also include a wrapper grailsw that can be checked into source control.
This wrapper will download the CLI’s to ~/.grails/wrapper/myGrailsVersion and invoke them when calling grailsw.
It is meant to be a light weight option if SDKMAN is not available.
2.3 Creating an Application
To create a Grails application you first need to familiarize yourself with the usage of the grails command which is used in the following manner:
$ grails <<command name>>Run create-app to create an application:
The create-app command is supported by both the Grails Shell CLI and the Grails Forge CLI.
|
Grails Shell CLI
$ grails create-app myappGrails Forge CLI
$ grails -t forge create-app myappThis will create a new directory inside the current one that contains the project. Navigate to this directory in your console:
$ cd myapp2.4 Creating a Simple Web Application with Grails
Step 1: Create a New Project
Open your command prompt or terminal.
Navigate to the directory where you want to create your Grails project:
$ cd your_project_directoryCreate a new Grails project with the following command:
$ grails -t forge create-app myapp
You can omit -t forge, to generate the application with Grails Shell CLI and profiles
|
Step 2: Access the Project Directory
Change into the "myapp" directory, which you just created:
$ cd myappStep 3: Start Grails Interactive Console
Start the Grails Forge CLI interactive console by running the "grails" command:
$ grails -t forgeStep 4: Create a Controller
In the Grails interactive console, you can use auto-completion to create a controller. Type the following command to create a controller named "greeting":
grails> create-controller greetingThis command will generate a new controller named "GreetingController.groovy" within the grails-app/controllers/myapp directory. You might wonder why there is an additional "myapp" directory. This structure aligns with conventions commonly used in Java development, where classes are organized into packages. Grails automatically includes the application name as part of the package structure. If you do not specify a package, Grails defaults to using the application name.
For more detailed information on creating controllers, you can refer to the documentation on the create-controller page.
Step 5: Edit the Controller
Open the "GreetingController.groovy" file located in the "grails-app/controllers/myapp" directory in a text editor.
Add the following code to the "GreetingController.groovy" file:
package myapp

class GreetingController {

    def index() {
        render "Hello, Congratulations for your first Grails application!"
    }
}
The action is simply a method. In this particular case, it calls a special method provided by Grails to render the page.
Step 6: Run the Application
Grails framework now relies on Gradle tasks for running the application. To start the application, use the following Gradle bootRun command:
$ ./gradlew bootRunYour application will be hosted on port 8080 by default. You can access it in your web browser at:
Now, it’s important to know that the welcome page is determined by the following URL mapping:
class UrlMappings {
    static mappings = {
        "/$controller/$action?/$id?(.$format)?"{
            constraints {
                // apply constraints here
            }
        }

        "/"(view:"/index")
        "500"(view:'/error')
        "404"(view:'/notFound')
    }
}
This mapping specifies that the root URL ("/") should display the "index.gsp" view, which is located at "grails-app/views/index.gsp." This "index.gsp" file serves as your welcome or landing page. The other entries in the mapping handle error pages for HTTP status codes 500 and 404.
Grails URL Convention Based on Controller and Action Name
Grails follows a URL convention that relies on the names of controllers and their actions. This convention simplifies the creation and access of various pages or functionalities within your web application.
In the provided code example:
package myapp

class GreetingController {

    def index() {
        render "Hello, Congratulations for your first Grails application!"
    }
}-
The
GreetingControllerclass represents a controller in Grails. -
Inside the controller, there’s an
indexaction defined as a method. In Grails, actions are essentially methods within a controller that handle specific tasks or respond to user requests.
Now, let’s understand how the Grails URL convention works based on this controller and action:
-
Controller Name in URL:
-
The controller name, in this case, "GreetingController," is used in the URL. However, the convention capitalizes the first letter of the controller name and removes the "Controller" suffix. So, "GreetingController" becomes "greeting" in the URL.
-
-
Action Name in URL:
-
By default, if you don’t specify an action in the URL, Grails assumes the "index" action. So, in this example, accessing the URL
/greeting
-
See the end of the controllers and actions section of the user guide to find out more on default actions.
Optional: Set a Context Path
If you want to set a context path for your application, create a configuration property in the "grails-app/conf/application.yml" file:
server:
    servlet:
        context-path: /myapp
With this configuration, the application will be available at: http://localhost:8080/myapp/
Alternatively, you can also set the context path via the command line:
grails> run-app -Dgrails.server.servlet.context-path=/helloworldAlternatively, you can set the context path from the command line when using Gradle to run a Grails application. Here’s how you can do it:
$ ./gradlew bootRun -Dgrails.server.servlet.context-path=/your-context-pathReplace /your-context-path with the desired context path for your Grails application. This command sets the context path directly via the -Dgrails.server.servlet.context-path system property.
For example, if you want your application to be available at "http://localhost:8080/myapp," you can use the following command:
$ ./gradlew bootRun -Dgrails.server.servlet.context-path=/myappThis allows you to configure the context path without modifying the application’s configuration files, making it a flexible and convenient option when running your Grails application with Gradle.
Optional: Change Server Port
If port 8080 is already in use, you can start the server on a different port using the grails.server.port system-property:
$ ./gradlew bootRun -Dgrails.server.port=9090Replace "9090" with your preferred port.
Note for Windows Users
It may also be necessary to enclose the system properties in quotes on Windows:
./gradlew bootRun "-Dgrails.server.port=9090"
Conclusion
Your Grails application will now display a "Hello, Congratulations on your first Grails application!" message when you access it in your web browser.
Remember, you can create multiple controllers and actions to build more complex web applications with Grails. Each action corresponds to a different page accessible through unique URLs based on the controller and action names.
2.5 Using Interactive Mode
Since 3.0, Grails has an interactive mode which makes command execution faster since the JVM doesn’t have to be restarted for each command. To use interactive mode simply type 'grails' from the root of any projects and use TAB completion to get a list of available commands. See the screenshot below for an example:
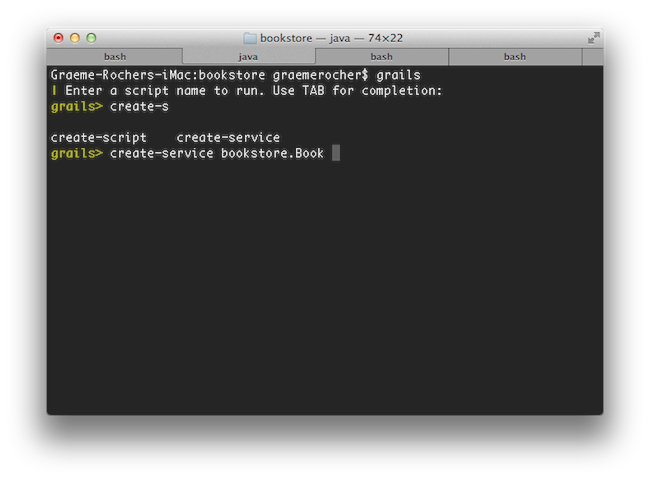
In Grails 8, both the Grails Shell CLI and the Forge CLI are available. Interactive mode is part of the Grails Shell CLI and is accessed by typing grails without additional arguments. Grails Forge CLI is accessed as grails -t forge.
|
For more information on the capabilities of interactive mode refer to the section on Interactive Mode in the user guide.
The Grails Shell Command-line Interface (CLI) offers an interactive mode, which you can access by entering "grails" in your Terminal application or Linux Command Line.
Once you’re in the command-line interface, you can enhance your efficiency by utilizing the TAB key for auto-completion. For instance:
grails> create
create-app            create-plugin         create-webapp
create-controller     create-restapi
create-domain-class   create-web-plugin
This interactive mode provides a convenient way to explore available Grails commands and options, making your Grails development workflow more efficient and user-friendly.
For more information on the capabilities of interactive mode, refer to the section on Interactive Mode in the user guide.
2.6 Getting Set Up in an IDE
Because Grails is built upon the Spring Framework (Spring Boot), the Gradle build tool, and the Groovy programming language, it is possible to develop Grails application using most popular JVM Integrated Development Environments (IDEs). Some IDEs offer more specialized support for Grails, while others may offer basic support for managing dependencies/plugins, running Gradle tasks, code-completion and syntax highlighting.
1. IntelliJ IDEA
IntelliJ IDEA is a widely used IDE for Grails development. It offers comprehensive support for Groovy and Grails, including features like code-completion, intelligent code analysis, and seamless integration with Grails artefacts.
The new Apache Grails Maven Coordinates are supported in IntelliJ IDEA 2025.2 and later releases via the Grails Plugin.
IntelliJ IDEA also provides powerful database tools that work with Grails' GORM (Grails Object Relational Mapping) seamlessly. It offers both a Community (free) and Ultimate (paid) edition, with the latter offering more advanced Grails support via the regularly updated Grails Plugin, including an embedded version of the Grails Forge, and view resolution for both GSPs and JSON views.
For larger projects, it may be beneficial to adjust memory settings, based on available system RAM, by increasing -Xmx (maximum Java heap size) and -XX:ReservedCodeCacheSize (JIT compiler maximum code cache size). Edit these settings under Help→Custom VM Options, by adding one setting per line. Example for a small project: -Xmx2048m -XX:ReserveCodeCacheSize=128m and for a large project: -Xmx6144m -XX:ReservedCodeCacheSize=512m
|
2. Visual Studio Code (VS Code)
Visual Studio Code is a lightweight, open-source code editor developed by Microsoft. While it’s not a full-fledged IDE, it offers powerful extensions for Grails and Groovy development. You can install extensions like code-groovy and Grails for VS Code to enhance your Grails developer experience.
VS Code provides features such as syntax highlighting, code navigation, and integrated terminal support. It’s a great choice for developers who prefer a lightweight and customizable development environment.
3. STS (Spring Tool Suite)
The Spring Tool Suite (STS) is set of IDE tools designed for Spring Framework development, with versions based on both VS Code and Eclipse. This section focuses on the Eclipse version.
STS can work as an effective Grails developer platform when used with the Groovy Development Tools plugin (which can be installed using the Eclipse Marketplace). STS does not offer specific support for Grails artefacts or GSP views.
4. Netbeans
Apache Netbeans does not offer specific support for Grails, but it will import Grails applications as Gradle projects and provides reasonable editing support for Groovy and GSP views.
5. TextMate, VIM, and More
There are several excellent text editors that work nicely with Groovy and Grails. Here are some references:
-
A bundle is available for Groovy / Grails support in Textmate.
-
A plugin can be installed via Sublime Package Control for the Sublime Text Editor.
-
The emacs-grails extension offers basic support for Grails development in Emacs.
These text editors, along with the provided extensions and configurations, can enhance your Groovy and Grails development experience, offering flexibility and customization to meet your coding preferences.
2.7 Agent Skills
Grails publishes Agent Skills that teach AI coding agents how to work with Grails. A skill is a SKILL.md file of instructions that an agent loads when a task calls for it.
| Skill | Coordinates | Use |
|---|---|---|
|
|
Building Grails applications: controllers, services, GORM, views, plugins, and testing with Spock and Geb |
|
|
Upgrading an application from Grails 7 to Grails 8 |
The skills are released with Grails, under the same version, and the Grails BOM manages them, so an application gets the skills written for the Grails version it builds with.
Adding the Skills to an Application
Agents read skills from directories in the repository rather than from the classpath. The SkillsJars Gradle plugin extracts skill jars into such a directory. Apply it, declare the skills in the skill configuration it adds, and set the directory to write them to:
build.gradle
plugins {
    // the application's other plugins
    id 'com.skillsjars.gradle-plugin' version '0.1.4'
}

dependencies {
    skill 'org.apache.grails.skills:grails-developer'
    skill 'org.apache.grails.skills:grails-8-upgrade'
}

skillsjars {
    outputDir = layout.projectDirectory.dir('.agents/skills')
}
Use version 0.1.4 or later of the SkillsJars Gradle plugin. Earlier versions have issues that prevent using it with third-party skills such as the Grails skills.
Then extract them:
./gradlew extractSkillsJarsEach skill is written to a directory named after its path in the jar, such as .agents/skills/skillsjars__apache__grails-core__grails-developer/SKILL.md. Set outputDir to the directory your agent reads skills from; Claude Code, for example, reads .claude/skills. -PoutputDir=<directory> overrides it for a single run.
extractSkillsJars deletes everything in the output directory before it writes the skills, and clean deletes the directory. Point it at a directory that holds only extracted skills, not one with skills the project keeps itself.
|
The skill configuration stays off the application’s compile and runtime classpaths. The Grails Gradle plugin applies the Grails BOM to it, as it does to the application’s other configurations, which is why the dependencies need no version.
Treat the extracted skills as build output: exclude them from version control and run extractSkillsJars again after upgrading Grails, so the skills match the new version.
|
Builds Without the Grails Gradle Plugin
A build that does not apply the Grails Gradle plugin, such as the root of a multi-project build whose Grails applications are subprojects, applies the SkillsJars Gradle plugin the same way and adds the Grails BOM to the skill configuration itself:
build.gradle
dependencies {
    skill platform('org.apache.grails:grails-bom:8.0.0')
    skill 'org.apache.grails.skills:grails-developer'
}
Grails 7 Applications
The upgrade skill is for applications still on Grails 7. They apply the SkillsJars Gradle plugin as above, but the Grails 7 BOM does not manage the skills, so they name the version:
build.gradle
dependencies {
    skill 'org.apache.grails.skills:grails-8-upgrade:8.0.0'
}
Once the application is on Grails 8, the version can be dropped.
The SkillsJars Layout
Each Grails skill jar holds its skill under META-INF/skills/apache/grails-core/<skill>/, the layout defined by SkillsJars, so other SkillsJars tools, such as its Maven plugin, extract the Grails skills as well. Skills published by other projects in that layout can be added to the skill configuration alongside them.
2.8 Grails Directory Structure and Convention over Configuration
Grails adopts the "convention over configuration" approach to configure itself. In this approach, the name and location of files are used instead of explicit configuration. Therefore, it’s essential to become familiar with the directory structure provided by Grails. Here’s a breakdown of the key directories and links to relevant sections:
-
grails-app- Top-Level Directory for Groovy Sources-
conf- Configuration Sources -
controllers- Web Controllers - Responsible for the "C" in MVC (Model-View-Controller). -
domain- Application Domain - Represents the "M" in MVC. -
i18n- Supports Internationalization (i18n). -
services- The Service Layer. -
taglib- Tag Libraries. -
utils- Houses Grails-specific utilities. -
views- Groovy Server Pages (GSP) or JSON Views - Responsible for the "V" in MVC. -
commands- Custom Grails Commands - Create your own Grails CLI commands.
-
-
src/main/groovy- Supporting Sources -
src/test/groovy- Unit Tests -
src/integration-test/groovy- Integration Tests - For testing Grails applications at the integration level. -
src/main/scripts- Code generation scripts.
Understanding this directory structure and its conventions is fundamental to efficient Grails development.
2.9 Running and Debugging an Application
Grails applications can be run with the built in Tomcat server using the run-app command which will load a server on port 8080 by default:
grails run-appYou can specify a different port by using the -port argument:
grails run-app -port=8090Note that it is better to start up the application in interactive mode since a container restart is much quicker:
$ grails
grails> run-app
| Grails application running at http://localhost:8080 in environment: development
grails> stop-app
| Stopping application...
| Application stopped.
grails> run-app
| Grails application running at http://localhost:8080 in environment: development
You can debug a grails app by simply right-clicking on the Application.groovy class in your IDE and choosing the appropriate action (since Grails 3).
Alternatively, you can run your app with the following command and then attach a remote debugger to it.
grails run-app --debug-jvmMore information on the run-app command can be found in the reference guide.
Via Gradle, Grails applications can be executed using the built-in application server using the bootRun command. By default, it launches a server on port 8080:
$ ./gradlew bootRunTo specify a different port, you can set the system property -Dgrails.server.port as follows:
$ ./gradlew bootRun -Dgrails.server.port=8081For debugging a Grails app, you have two options. You can either right-click on the Application.groovy class in your IDE and select the appropriate debugging action, or you can run the app with the following command and then connect a remote debugger to it:
$ ./gradlew bootRun --debug-jvmFor more information on the bootRun command, please refer to the bootRun section of the Grails reference guide.
2.10 Testing an Application
The create-* commands in Grails automatically create unit or integration tests for you within the src/test/groovy directory. It is of course up to you to populate these tests with valid test logic, information on which can be found in the section on Unit and integration tests.
To execute tests you run the test-app command as follows:
grails test-appGradle offers a convenient feature where you can automatically generate unit and integration tests for your application using the create-* commands. These generated tests are stored in the src/test/groovy and src/integration-test/groovy directories. However, it is your responsibility to populate these tests with the appropriate test logic. You can find comprehensive guidance on crafting valid test logic in the section dedicated to Unit and Integration Tests.
To initiate the execution of your tests, including both unit and integration tests, you can utilize the Gradle check task. Follow these steps:
-
Open your terminal or command prompt and navigate to your Grails project’s root directory.
-
Execute the following Gradle command:
$ ./gradlew checkBy running the
checktask, you ensure that all tests in your Grails project, including the ones you’ve created and populated with test logic, are executed. This comprehensive testing approach contributes significantly to the robustness and overall quality of your application. -
Viewing Test Reports: After running your tests, Grails generates test reports that provide valuable insights into the test results. You can typically find these reports in the
build/reports/testsdirectory of your Grails project. Open these reports in a web browser to view detailed information about test outcomes, including passed, failed, and skipped tests.
Remember, testing is not just a process; it’s a fundamental practice that enhances your Grails application’s reliability. Viewing test reports helps you analyze and understand the test results, making it easier to identify and address any issues.
By following these testing practices and reviewing test reports, you can deliver a high-quality Grails application to your users with confidence.
2.11 Deploying an Application
Grails applications can be deployed in a number of different ways.
If you are deploying to a traditional container (Tomcat, Jetty etc.) you can create a Web Application Archive (WAR file), and Grails includes the war command for performing this task:
grails warThis will produce a WAR file under the build/libs directory which can then be deployed as per your container’s instructions.
Note that by default Grails will include an embeddable version of Tomcat inside the WAR file, this can cause problems if you deploy to a different version of Tomcat. If you don’t intend to use the embedded container, replace spring-boot-starter-tomcat with spring-boot-starter-tomcat-runtime in build.gradle:
providedRuntime "org.springframework.boot:spring-boot-starter-tomcat-runtime"The -runtime variant was introduced in Spring Boot 4.
It contributes only the integration classes Spring Boot needs to start in an external Servlet container, without bundling the embedded Tomcat distribution into the WAR.
If you are building a WAR file to deploy on Tomcat 7 then in addition you will need to change the target Tomcat version in the build. Grails is built against Tomcat 8 APIs by default.
To target a Tomcat 7 container, insert a line to build.gradle above the dependencies { } section:
ext['tomcat.version'] = '7.0.59'
Grails 5 contains dependencies that require javax.el-api:3.0 (eg.: datastore-gorm:7.x, spring-boot:2.x) which is only supported starting from Tomcat 8.x+, based on the tomcat version table!
|
Unlike most scripts which default to the development environment unless overridden, the war command runs in the production environment by default. You can override this like any script by specifying the environment name, for example:
grails dev warIf you prefer not to operate a separate Servlet container then you can simply run the Grails WAR file as a regular Java application. Example:
grails war
java -Dgrails.env=prod -jar build/libs/mywar-0.1.war
When deploying Grails you should always run your containers JVM with the -server option and with sufficient memory allocation. A good set of VM flags would be:
-server -Xmx768MVia Gradle, Grails applications offer multiple deployment options.
For traditional container deployments, such as Tomcat or Jetty, you can generate a Web Application Archive (WAR) file using the Gradle war task as follows:
$ ./gradlew warThis task generates a WAR file with a -plain suffix within the build/libs directory, ready for deployment according to your container’s guidelines.
By default, the war task runs in the production environment. You can specify a different environment, such as development, by overriding it in the Gradle command:
$ ./gradlew -Dgrails.env=dev warIf you prefer not to use a separate Servlet container, you can create and run the Grails WAR file as a regular Java application:
$ ./gradlew bootWar
$ java -jar build/libs/mywar-0.1.war
When deploying Grails, ensure that your container’s JVM runs with the -server option and sufficient memory allocation. Here are recommended VM flags:
-server -Xmx1024M
2.12 Supported Jakarta EE Containers
The Grails framework requires that runtime containers support Servlet 6.0.0 and above. By default, Grails framework applications are bundled with an embedded Tomcat server. For more information, please see the Deployment section of this documentation.
In addition, read the Grails Guides for tips on how to deploy Grails to various popular Cloud services.
2.13 Creating Artefacts
Grails provides a set of useful CLI commands for various tasks, including the creation of essential artifacts such as controllers and domain classes. These commands simplify the development process, although you can achieve similar results using your preferred Integrated Development Environment (IDE) or text editor.
For instance, to create the foundation of an application, you typically need to generate a domain model using Grails Commands:
The create-app and create-domain-class commands are supported in both the Grails Shell CLI and the Grails Forge CLI.
Grails Forge CLI
$ grails -t forge create-app myapp
$ cd myapp
$ grails -t forge create-domain-class book
Grails Shell CLI
$ grails create-app myapp
$ cd myapp
$ grails create-domain-class book
Executing these commands will result in the creation of a domain class located at grails-app/domain/myapp/Book.groovy, as shown in the following code:
package myapp

class Book {
}
The Grails CLI offers numerous other commands that you can explore in the Grails command line reference guide.
| Using interactive mode enhances the development experience by providing auto-complete and making the process smoother. |
2.14 Generating an Application
Quick Start with Grails Scaffolding
To get started quickly with Grails it is often useful to use a feature called scaffolding to generate the skeleton of an application. To do this use one of the generate-* commands such as generate-all, which will generate a controller (and its unit test) and the associated views:
grails generate-all helloworld.BookGradle Quick Start with Grails Scaffolding
To quickly initiate your Grails project, you can employ the runCommand Gradle task. This task allows you to generate the essential structure of an application swiftly. Specifically, when running the following command, you can create a controller (including its unit tests) and the associated views for your application:
$ ./gradlew runCommand -Pargs="generate-all myapp.Book"2.15 Development Reloading
Spring Boot Developer Tools, JRebel, IntelliJ IDEA Enhanced HotSwap in Debug Mode, and Hotswap Agent are tools designed to improve developer productivity by enabling application reloading during development, reducing the need for full application restarts. Since Grails is built on Spring Boot, all four tools are compatible, but they differ in mechanisms, features, and trade-offs. Spring Boot Developer Tools is the default in Grails, replacing older agents like Spring Loaded (no longer maintained and lacking support for Java 17+). Hotswap Agent and JRebel offer more advanced "true" hot swapping capabilities.
Spring Boot Developer Tools
Spring Boot Developer Tools is a feature of Spring Boot that provides automatic restarts and live reload capabilities. It is enabled by default in generated Grails applications. When you make changes to your code, the application automatically restarts, allowing you to see the changes without manually stopping and starting the server. Best developer reloading tool to start with.
For larger applications, you may need to adjust the default settings for optimal performance. This works well until your application becomes very large, at which point restarts may take longer or fail.
Please see the Spring Boot documentation for more details: Spring Boot Developer Tools.
| You can use Spring Developer Tools in combination with a browser extension to get automatic browser refresh when you change anything in your Grails application. |
Reloading Mechanism: Auto-restarts the application context on code changes using dual class loaders; supports live reload for static resources like views/templates.
JRebel
JRebel is a commercial tool that provides advanced hot swapping capabilities, allowing developers to make changes to their code without restarting the application. It supports a wide range of frameworks and libraries, including Grails. JRebel requires a license for use.
Please see the JRebel documentation for more details: JRebel.
Alternatively, use the JRebel plugin for IntelliJ IDEA: JRebel IntelliJ Plugin.
Reloading Mechanism: True hot swapping via bytecode instrumentation; reloads classes, configurations, and resources without restarting the JVM, preserving application state.
IntelliJ IDEA Enhanced HotSwap in Debug Mode
IntelliJ IDEA Enhanced HotSwap is a feature available in the IntelliJ IDEA IDE that allows developers to reload code changes while debugging their applications. When running a Grails application in debug mode, IntelliJ IDEA can reload modified classes without requiring a full application restart. This feature is particularly useful for making quick changes and testing them during a debugging session.
Reloading Mechanism: Enhanced hot swapping using IntelliJ’s debugging capabilities; reloads modified classes during a debug session, with limitations on structural changes.
Please see the IntelliJ IDEA documentation for more details: IntelliJ IDEA Enhanced HotSwap.
Using JetBrains' Runtime and jvmArgs -XX:+AllowEnhancedClassRedefinition on the bootRun task overcomes some of these limitations.
Hotswap Agent
Hotswap Agent support for Grails is considered experimental, and it may not work in all cases. Known limitations are documented here.
Hotswap Agent is an open-source tool that provides advanced hot swapping capabilities for Java applications. It allows developers to make changes to their code without restarting the application. Hotswap Agent supports a wide range of frameworks and libraries, including Spring Framework and Spring Boot.
Reloading Mechanism: True hot swapping using DCEVM (Dynamic Code Evolution VM) to patch the JVM; reloads classes and resources, supporting structural changes.
Running the Grails Application in Debug Mode
Enables limited dynamic reloading via standard JVM hot swapping. This feature is built into the JVM and does not require additional configuration beyond starting the application with debugging enabled. Supports automatic reloading of static content (such as CSS, JavaScript, or HTML templates) without restarting the application. You can modify and reload Java code changes without a full restart, but this is limited to non-structural modifications. Changes that affect class or method signatures (e.g., adding new methods, fields, or constructors; changing method parameters; or modifying class hierarchies) are not supported and will require a restart. This limitation stems from the JVM’s hot swapping constraints.
Reloading Mechanism: standard JVM hot swapping
Running More Than One Instance of a Checkout
Two Gradle builds of one checkout share its build/ directory. While an application runs from build/, another build of the same checkout (a second instance on another port, tests run alongside it, an IDE or a tool compiling in the same tree) rewrites the classes it runs from, and Spring Boot Developer Tools restarts the running application into a half-written build.
Give each instance a build directory of its own instead, by setting layout.buildDirectory from a Gradle property for every project in the build:
build.gradle
allprojects {
    def instanceBuildDir = providers.gradleProperty('instanceBuildDir')
    if (instanceBuildDir.present) {
        layout.buildDirectory = layout.projectDirectory.dir(instanceBuildDir.get())
    }
}
Then start each instance with a build directory, a port and a Gradle project cache of its own:
./gradlew bootRun -PinstanceBuildDir=instances/8081/build \
    --project-cache-dir=instances/8081/.gradle \
    --args='--server.port=8081'
The project cache (the checkout’s .gradle/ directory) does not move with the build directory, and two builds running at once contend for it, so --project-cache-dir gives each build its own. Keep it beside the build directory, not inside it, or clean deletes the project cache of the build running it. Named build and .gradle, the two stay out of version control, since a generated application’s .gitignore ignores both names at any depth.
The Grails Gradle plugin tells the application where its build directory is. It passes grails.project.class.dir, grails.project.resource.dir and grails.project.target.dir to bootRun and the other forked JavaExec and Test tasks, so development reloading compiles a changed class and copies a changed message bundle into that instance’s build directory, the application reads its resources from there, and each instance keeps its own development restart marker. An @Integration test without an applicationClass finds the application class next to its own compiled classes, wherever the build directory is.
Development reloading also compiles a change in a plugin subproject whose sources it watches, into the same relative path under that subproject. Move every project’s build directory the same way, relative to itself, as the allprojects block above does.
|
3 Upgrading from the previous versions
Data Binding Defaults
Grails 8 retains permissive mass data binding by default for compatibility, so properties without a bindable constraint continue to bind. Properties marked bindable: false remain non-bindable in either mode. Empty include lists bind no properties.
Applications can opt into deny-by-default mass data binding by setting grails.databinding.denyByDefault=true. In secure mode, declare each permitted property with bindable: true, add it to an explicit include list, or list it in @BindAllowed; only in this mode does bindable: true act as a restrictive allowlist.
An empty include list passed directly to SimpleDataBinder now binds no properties. The grails.databinding.denyByDefault setting does not change this direct binder behavior.
In compatibility mode, a bindData call that supplies only exclude continues to bind every other eligible property. Secure mode also applies the generated allowlist when only exclude is supplied.
Values of typed Map properties are converted to the declared value type. Conversion failures are added to the binding errors and data binding listeners receive the corresponding events.
The values true, false, 'true', and 'false' are accepted for grails.databinding.denyByDefault, ignoring case and surrounding whitespace for strings. An unrecognised value logs a warning and enables secure deny-by-default binding.
XML Parsing Defaults
XML that Grails parses on an application’s behalf is read with external entity expansion, external DTD retrieval and DTD grammar loading disabled. This closes the XXE vector: an entity that points at a file on disk contributes nothing to the parsed document, and a DTD that a document names is skipped rather than fetched.
How a DOCTYPE declaration is treated depends on where the document comes from.
Request bodies are refused if they declare one. An application/xml, text/xml or application/hal+xml request body, or a string passed to XML.parse, that carries a DOCTYPE is rejected rather than bound: binding fails with the invalidRequestBody error code and the target is left unpopulated. This is stricter than blocking external entities, because a body whose DOCTYPE is entirely internal and harmless is refused too, and there is no setting that relaxes it. A client that sends a declaration, which is unusual for an API payload, needs to omit it.
Descriptors that Grails reads from the classpath may declare one. JSP tag library descriptors and web.xml are trusted input and routinely carry a DOCTYPE; jakarta.servlet.jsp.jstl ships several such descriptors, among them c-1_0-rt.tld, which the default grails.gsp.tldScanPattern scans. These are parsed with the declaration permitted and the entity and DTD hardening above still in force, so the DTD a descriptor names is never retrieved. The same applies to response.xml in a controller unit test, whose document is the controller’s own output.
The plugin descriptor grails-plugin.xml is the exception among the descriptors. Grails generates it during compilation and never writes a DOCTYPE, so both the compiler that rewrites it and the plugin discovery that reads it back use the strict parser. A descriptor that has been hand-edited to add a declaration is refused: at compile time it is discarded and regenerated, and at runtime the plugin it describes is skipped.
3.1 Upgrading from Grails 7 to Grails 8
Upgrade Instructions for Grails and Related Dependencies
To ensure compatibility with Grails 8.0.0, please review the following upgrade instructions carefully. This guide outlines the necessary steps and warnings to upgrade your Grails project from Grails 7.x to Grails 8.
|
Before you start: add the Spring Boot properties migrator.
It is the fastest way to find deprecated or relocated configuration properties in your build.gradle
Boot the application once; the migrator logs warnings for every deprecated property it finds and, in many cases, applies the rename automatically at runtime so the app keeps starting. Remove the dependency once your configuration is clean. |
|
Let your coding agent work through this guide.
Grails publishes the build.gradle
|
1. Java 21 Minimum Requirement
Grails 8 requires a minimum of Java 21 to both build and run Grails applications. This is an increase from Grails 7, which required Java 17. Update your project’s toolchain, CI pipelines, and deployment environments to use JDK 21 or later.
1.1 Gradle 9.7 Minimum Requirement
The Grails 8 Gradle plugins require Gradle 9.7 or later.
Grails 7 applications were generated with a Gradle 8.14.x wrapper, and a wrapper carried over from Grails 7 does not work with Grails 8.
The Groovy compiler configuration that the Grails Gradle plugin sets up relies on the groovyOptions.configurationScriptFile property, which only exists from Gradle 9.7 on.
On an older Gradle version compileGroovy fails with a NoSuchMethodError for GroovyCompileOptions.getConfigurationScriptFile().
Update the Gradle wrapper of your project as part of the upgrade:
./gradlew wrapper --gradle-version 9.8.0Afterwards, check that the distributionUrl in gradle/wrapper/gradle-wrapper.properties points to the new version.
Gradle 9 has breaking changes of its own that may affect your build scripts and other Gradle plugins you use; consult the Gradle 9 upgrade guide.
See also Generated Groovy Compiler Configuration Scripts if your build assigns a Groovy compiler configuration script itself.
2. Spring Boot 4.1.x
Grails 8 upgrades from Spring Boot 3.5.x to Spring Boot 4.1.x. This crosses the Spring Boot 4 major release boundary and adopts the Spring Boot 4.1 managed stack used by Grails 8: Spring Framework 7.0.x, Spring Security 7.1.x, Spring Data 2026.0.x, Micrometer 1.17.x, Jackson 3.1.x, Tomcat 11.0.x, and Jakarta Servlet 6.1. The upgrade includes the Spring Boot 4 module split, removed Spring Framework 6 deprecations, and additional Spring Boot 4.1 removals of APIs and properties that were deprecated in Spring Boot 4.0.
For full details, consult:
3. Spring Boot Autoconfigure Modularization
Spring Boot 4 split the monolithic spring-boot-autoconfigure module into domain-specific modules.
Auto-configuration classes have moved to new packages.
If your application imports or references auto-configuration classes directly, you will need to update those references.
Notable module changes:
-
Web MVC auto-configuration classes moved to
org.springframework.boot:spring-boot-webmvc -
Servlet auto-configuration classes moved to
org.springframework.boot:spring-boot-servlet -
MongoDB auto-configuration classes moved to
org.springframework.boot:spring-boot-mongodb -
Spring Integration auto-configuration moved to
org.springframework.boot:spring-boot-integration. An application that depends onspring-integration-corealone no longer gets Spring Boot’sintegrationGlobalPropertiesbean or itsspring.integration.*properties; addspring-boot-starter-integration, orspring-boot-integrationalongside your Spring Integration modules, to keep them.
For example, if your code imports MongoAutoConfiguration:
// Before (Grails 7 / Spring Boot 3.x)
import org.springframework.boot.autoconfigure.mongo.MongoAutoConfiguration

// After (Grails 8 / Spring Boot 4.x)
import org.springframework.boot.mongodb.autoconfigure.MongoAutoConfiguration
In addition to the auto-configuration class moves, two foundational interfaces were relocated out of nested packages and into org.springframework.boot directly:
| Before (Spring Boot 3.x) | After (Spring Boot 4.x) |
|---|---|
|
|
|
|
The old locations are deprecated but retained for upgrade ease.
If your application or plugin contributes an EnvironmentPostProcessor or BootstrapRegistryInitializer, update both the import and the corresponding META-INF/spring.factories key:
META-INF/spring.factories - Before
org.springframework.boot.env.EnvironmentPostProcessor=com.example.MyPostProcessorMETA-INF/spring.factories - After
org.springframework.boot.EnvironmentPostProcessor=com.example.MyPostProcessor4. Spring Boot Configuration Property Changes
4.1 MongoDB Configuration
Spring Boot 4 renamed the MongoDB configuration property namespace for Spring Boot’s own auto-configuration.
If your application.yml or application.groovy uses spring.data.mongodb. properties for Spring Boot auto-configuration, you must rename them to spring.mongodb..
Note that Grails GORM for MongoDB uses its own mongodb.* configuration namespace, which is unaffected by this change.
application.yml - Before (Grails 7)
spring:
    data:
        mongodb:
            host: localhost
            port: 27017
            database: mydb
application.yml - After (Grails 8)
spring:
    mongodb:
        host: localhost
        port: 27017
        database: mydb
4.2 Multipart Upload Configuration
The grails.controllers.upload.* configuration properties are no longer supported.
Applications that still define any property under grails.controllers.upload fail at startup with migration instructions.
This startup check is a migration aid for Grails 8 only and will be removed in Grails 9, after which leftover grails.controllers.upload properties are silently ignored.
Move those settings to Spring Boot’s spring.servlet.multipart.* namespace:
application.yml - Before (Grails 7)
grails:
    controllers:
        upload:
            maxFileSize: 200000
            maxRequestSize: 200000
application.yml - After (Grails 8)
spring:
    servlet:
        multipart:
            maxFileSize: 200MB
            maxRequestSize: 200MB
Spring Boot also provides spring.servlet.multipart.location, spring.servlet.multipart.fileSizeThreshold, spring.servlet.multipart.enabled, spring.servlet.multipart.resolveLazily, and spring.servlet.multipart.strictServletCompliance as replacements for the corresponding legacy settings. See the Spring Boot multipart application properties reference for the complete list.
Unlike the Grails 7 default, the multipart location is not set to System.getProperty("java.io.tmpdir"); when spring.servlet.multipart.location is not configured, the resulting MultipartConfigElement has an empty location and uploads use the servlet container’s temporary directory. This can matter when the container’s temporary storage is constrained or when an application expects uploaded files in java.io.tmpdir.
When no upload limits are configured, Spring Boot’s defaults apply: 1MB per file and 10MB per request. Set spring.servlet.multipart.maxFileSize and spring.servlet.multipart.maxRequestSize explicitly if your application requires different limits.
5. Hibernate ORM Package Relocations
Spring Framework 7 removed the org.springframework.orm.hibernate5 package entirely.
Grails 8 vendors these classes from Spring Framework 6.2.x into grails-data-hibernate5-spring-orm and grails-data-hibernate7-spring-orm so that both Hibernate 5 and Hibernate 7 users have a drop-in replacement.
This change is transparent for most applications since Grails manages the Hibernate integration internally. However, if your application directly imports any of the following classes, you must update your import statements based on which Hibernate version you are using.
5.1 Hibernate 5 (Default)
If your application uses the default Grails Hibernate 5 integration (org.apache.grails:grails-hibernate5 / grails-data-hibernate5-spring-orm), replace the org.springframework.orm.hibernate5 package prefix with org.grails.orm.hibernate.support.hibernate5:
| Before (Spring Framework 6 / Grails 7) | After (Grails 8 — Hibernate 5) |
|---|---|
|
|
|
|
|
|
|
|
|
|
|
|
|
|
All other classes from org.springframework.orm.hibernate5 follow the same pattern — replace the org.springframework.orm.hibernate5 prefix with org.grails.orm.hibernate.support.hibernate5.
5.2 Hibernate 7
If your application has opted in to Hibernate 7 (org.apache.grails:grails-hibernate7 / grails-data-hibernate7-spring-orm), the equivalent vendored classes live under org.grails.orm.hibernate.support.hibernate7:
| Before (Spring Framework 6 / Grails 7) | After (Grails 8 — Hibernate 7) |
|---|---|
|
|
|
|
|
|
|
|
|
|
|
|
|
|
All other classes follow the same pattern — replace the org.springframework.orm.hibernate5 prefix with org.grails.orm.hibernate.support.hibernate7.
| See 26. Hibernate 5 to Hibernate 7 Migration below if you are also upgrading from Hibernate 5 to Hibernate 7 as part of this Grails 8 migration. |
6. HttpStatus.MOVED_TEMPORARILY Removed
Spring Framework 7 removed the deprecated HttpStatus.MOVED_TEMPORARILY constant.
Use HttpStatus.FOUND instead - both represent HTTP 302 with no behavioral change.
If your application references HttpStatus.MOVED_TEMPORARILY directly (for example, in custom redirect logic or interceptors), update the reference:
// Before
import org.springframework.http.HttpStatus
response.status = HttpStatus.MOVED_TEMPORARILY.value()

// After
import org.springframework.http.HttpStatus
response.status = HttpStatus.FOUND.value()
7. Micronaut Integration
The Grails Micronaut plugin and its BOMs are now maintained and released from the Apache Grails Micronaut repository. Applications using Grails Micronaut should follow that project’s upgrade and dependency-management documentation.
8. Enum Serialization Default Changed
As announced in the Grails 7.0.2 deprecation notice, the SimpleEnumMarshaller is now the default for JSON and XML enum serialization in Grails 8.
Enums are serialized as simple string values (e.g., "SUBMIT") instead of the verbose legacy format with type metadata.
If you previously opted in via configuration, you can now remove it:
application.yml - this is now the default and can be removed
grails:
    converters:
        json:
            enum:
                format: simple
        xml:
            enum:
                format: simple
The legacy org.grails.web.converters.marshaller.json.EnumMarshaller and org.grails.web.converters.marshaller.xml.EnumMarshaller classes were removed in Grails 8.
There is no Grails 8 configuration switch that restores the verbose enum-object shape.
If an external API contract still requires that shape, register a custom object marshaller explicitly.
9. Jackson 3 is the New Default
Spring Boot 4 ships Jackson 3 (tools.jackson.*) and auto-configures a JsonMapper bean instead of the Jackson 2 ObjectMapper.
Grails 8 follows that change: any Grails module that previously declared com.fasterxml.jackson.core:jackson-databind (Jackson 2) now declares tools.jackson.core:jackson-databind (Jackson 3.1.x via the Spring Boot 4.1 BOM).
What stayed the same:
-
Jackson annotations. All
@JsonProperty,@JsonCreator,@JsonIgnore,@JsonInclude,@JsonIgnoreProperties, etc. remain atcom.fasterxml.jackson.annotation.*. The Spring Boot 4 BOM explicitly permits thejackson-annotations2.x artifact alongside the Jackson 3 BOM, so existing annotated DTOs and domain classes do not need to change. -
The
readTree(String),writeValueAsString(…), andreadValue(…)method names on the mapper are unchanged.
What changed (and what you need to do if your code touches Jackson directly):
| Concern | Jackson 2 | Jackson 3 |
|---|---|---|
Package |
|
|
Default mapper type |
|
|
Construction |
|
|
Exceptions |
|
|
Default date format |
Numeric timestamps |
ISO-8601 strings |
If you inject the auto-configured mapper:
Spring Boot 4 provides a tools.jackson.databind.json.JsonMapper bean instead of com.fasterxml.jackson.databind.ObjectMapper.
Update injection points to expect JsonMapper.
If you must stay on Jackson 2 temporarily: Spring Boot 4 still manages the Jackson 2 BOM and provides an opt-in toggle so the auto-configured mapper preserves Jackson 2 defaults:
application.yml
spring:
    jackson:
        use-jackson2-defaults: true
This is intended as a migration aid only; new code should target Jackson 3.
Spring Boot Jackson helper class renames. If your code uses Spring Boot’s Jackson helpers, rename them to the Jackson 3 equivalents:
| Spring Boot 3.x (Jackson 2) | Spring Boot 4.x (Jackson 3) |
|---|---|
|
|
|
|
|
|
|
|
|
|
Configuration property renames.
The spring.jackson.* namespace was reorganized.
The spring-boot-properties-migrator (see the tip at the top of this guide) will detect most of these and warn at boot time:
| Before | After |
|---|---|
|
|
|
|
|
|
Module auto-detection. Jackson 3 auto-detects all Jackson modules on the classpath by default. If you need to disable this — for example, to avoid an unwanted module being picked up — set:
application.yml
spring:
    jackson:
        find-and-modules: false
10. Theme Support Removed
Spring Framework 7 removed the theme infrastructure entirely. The following theme-specific classes and interfaces no longer exist:
-
org.springframework.ui.context.ThemeSource -
org.springframework.ui.context.Theme -
org.springframework.ui.context.support.SimpleTheme -
org.springframework.web.servlet.theme.SessionThemeResolver
JstlUtils itself still exists in Spring WebMVC 7.0, but its theme-related methods have been removed.
|
If your application uses Spring theme resolution (for example, switching CSS stylesheets via ThemeResolver), you must replace this with your own implementation.
This was deprecated in Spring Framework 6.0 and fully removed in 7.0.
GSP layouts and views that relied on theme resolution will need to use alternative approaches such as configuration properties or session-based preferences managed in application code.
11. Embedded Server Module Relocations
Spring Boot 4 reorganized embedded server classes into separate modules. If your application or tests reference these classes directly, update the imports:
| Before (Spring Boot 3.x / Grails 7) | After (Spring Boot 4.x / Grails 8) |
|---|---|
|
|
|
|
|
|
|
|
|
|
Applications using embedded Tomcat or Jetty should check for any direct class references and update accordingly.
The spring-boot-tomcat module must now be an explicit dependency if you reference Tomcat classes directly.
Undertow support is now provided by the Grails Undertow plugin.
Spring Boot 4 removed its Undertow support (spring-boot-starter-undertow) before Undertow shipped Servlet 6.1 compatibility.
Undertow has since released Servlet 6.1 support, and Grails 8 restores Undertow as an embedded servlet container through the grails-undertow plugin, which bundles the Spring Boot Undertow web server support.
Applications that previously used spring-boot-starter-undertow should replace it with:
implementation 'org.apache.grails:grails-undertow'The existing server.undertow.* configuration properties continue to work.
Note that server.undertow.max-http-post-size now defaults to 2MB, matching Undertow’s hardened default (CVE-2024-3884, CVE-2024-4027); set it to -1 to restore the previous unlimited behavior.
The Grails Forge generator offers Undertow as a selectable servlet implementation again (for example, --servlet=undertow on the API/CLI, or the grails-undertow feature).
12. HandlerAdapter.getLastModified Removed
Spring Framework 7 removed the deprecated getLastModified method from the HandlerAdapter interface.
If your application implements HandlerAdapter directly and overrides this method, remove the override.
The framework no longer calls this method for Last-Modified header management.
13. Spring Security Filter Ordering
Spring Boot 4 removed the SecurityProperties.DEFAULT_FILTER_ORDER constant.
Spring Security is moving toward the fluent HttpSecurity configuration API for filter chain management, rather than explicit filter ordering via constants.
If your application references DEFAULT_FILTER_ORDER for custom filter positioning, replace it with the concrete value -100 (computed as OrderedFilter.REQUEST_WRAPPER_FILTER_MAX_ORDER - 100).
Longer term, consider migrating to the fluent HttpSecurity API for filter chain configuration.
14. Spring Dependency Management Plugin Replaced by Gradle Platforms
Grails 8 standardizes on Gradle’s native platform() dependency management and no longer applies the io.spring.dependency-management plugin.
The Grails Gradle Plugin now contributes grails-bom as a Gradle platform() to eligible declarable project configurations, and a new bundled plugin (org.apache.grails.gradle.bom-property-overrides, applied automatically by the Grails Gradle Plugin) preserves the property-based version-override workflow that Spring DM provided.
The platform is contributed lazily, when a configuration’s dependencies are observed (through resolution, publication, or incoming.dependencies), so configurations populated on demand through defaultDependencies, such as the Grails profile configuration, keep their defaults.
Dedicated tool and annotation-processor classpaths, including the jacoco plugin’s jacocoAgent and jacocoAnt configurations, are excluded from automatic platform application so the application BOM does not change their transitive dependency versions.
Until dependencies are observed, the auto-applied platform is not visible in a configuration’s declared dependencies or allDependencies; build logic that looks for it should inspect incoming.dependencies or the resolution result instead.
No action is required for most applications.
The standard gradle.properties and ext['…'] override forms continue to work exactly as before:
build.gradle
ext['slf4j.version'] = '2.0.9'gradle.properties
slf4j.version=2.0.9The grails { springDependencyManagement = … } flag on GrailsExtension is deprecated.
For backward compatibility, setting it to false is still honored and is equivalent to grails { bom = null }: it suppresses the automatic Grails BOM platform() application, just as it previously prevented the Spring Dependency Management BOM from being applied.
New builds should use grails { bom = null } instead.
Two Spring DM features have no automatic migration.
If your build.gradle uses either of the patterns below, update it as follows:
| Spring DM pattern (Grails 7) | Grails 8 replacement |
|---|---|
|
|
Version-range strings (e.g. |
Now applied as Gradle strict version constraints, which use Gradle’s range semantics. Concrete versions are unaffected. Only relevant if you consume a custom BOM whose |
Behavioural difference to be aware of: conflict resolution.
The BOM’s default managed versions are applied via a regular Gradle platform(), which participates in standard conflict resolution (highest-version-wins).
A transitive dependency can therefore pull a non-overridden managed version higher than the BOM default.
If you require Spring DM’s "BOM wins always" behaviour for the default managed versions, declare enforcedPlatform("org.apache.grails:grails-bom:$grailsVersion") instead of relying on the auto-applied non-enforced platform.
An explicit property override (ext['…'] or gradle.properties) is applied as a strict constraint and always wins - including when it downgrades a version - so overrides behave as they did under Spring DM.
Overriding a property that selects an imported BOM’s version (for example spring-boot.version) re-imports that BOM at the overridden version and applies its updated managed set.
Grails BOMs now follow the upstream BOM property names.
Where a Grails BOM overrides a version that an upstream BOM also manages - spring-boot-dependencies, or a BOM Spring Boot imports - it declares the override under the upstream BOM’s own property name.
One property therefore sets the version in both BOMs, and the property names in the Spring Boot documentation work unchanged in a Grails build.
For a module Spring Boot manages through an imported BOM, that is the property Spring Boot imports the BOM with: jackson-bom.version moves every Jackson 3 module, whether grails-bom pins it or not.
An override under a property name no BOM declares is silently ignored, so rename any Grails-specific property your build sets in gradle.properties or ext['…'], along with a Jackson 2 version set under Spring Boot 3’s property name:
| Grails 7 property | Grails 8 property |
|---|---|
|
|
|
|
Builds that adopted a Grails 8 milestone or release candidate should rename jackson2.version to jackson-2-bom.version, jackson3.version to jackson-bom.version, and, with grails-neo4j-bom, neo4j-driver.version to neo4j-java-driver.version.
Selecting or opting out of the auto-applied BOM.
The Grails Gradle plugin applies a single Grails BOM automatically, selected by the grails.bom property. Its value is the BOM artifact name within the org.apache.grails group, which the plugin resolves as org.apache.grails:$bom:$grailsVersion.
It defaults to grails-bom, which preserves the Grails 7 behaviour and is the right choice for the vast majority of applications.
Exactly one Grails BOM is ever applied; the BOMs are split by integration, so the plugin never layers two of them.
Set it to null to suppress the automatic BOM application entirely - for example when you intentionally want to manage Grails dependency versions yourself (consuming Grails modules from a different curated platform):
build.gradle
grails {
    bom = null
}
When set to null, the Grails Gradle plugin will not declare a Grails platform()/enforcedPlatform() on your configurations and will not apply the org.apache.grails.gradle.bom-property-overrides plugin.
You are responsible for declaring the BOM yourself and, if you still want gradle.properties / ext['…'] overrides, applying id 'org.apache.grails.gradle.bom-property-overrides' explicitly.
15. Spring Boot Starter Renames
Spring Boot 4 renamed several starters as part of its modularization effort.
If your build.gradle references any of the following, update the artifact id:
| Before (Spring Boot 3.x) | After (Spring Boot 4.x) |
|---|---|
|
|
|
|
|
|
|
|
|
|
|
|
build.gradle - Before
implementation 'org.springframework.boot:spring-boot-starter-web'
implementation 'org.springframework.boot:spring-boot-starter-aop'
build.gradle - After
implementation 'org.springframework.boot:spring-boot-starter-webmvc'
implementation 'org.springframework.boot:spring-boot-starter-aspectj'
If you want a faster, lower-friction migration that pulls in all Spring Boot modules without picking starters individually, Spring Boot 4 ships spring-boot-starter-classic (and spring-boot-starter-test-classic) as a transitional fallback.
This is intended as a stopgap; new code should target the modular starters.
|
16. WAR Deployment Uses spring-boot-starter-tomcat-runtime
For WAR deployment to an external Servlet container, Spring Boot 4 introduced a dedicated spring-boot-starter-tomcat-runtime artifact that contributes only the integration classes needed to start under an external container, without bundling the embedded Tomcat distribution into the WAR.
Replace the previous "change scope to provided/`testImplementation`" idiom with the new starter:
build.gradle - Before
providedRuntime 'org.springframework.boot:spring-boot-starter-tomcat'build.gradle - After
providedRuntime 'org.springframework.boot:spring-boot-starter-tomcat-runtime'The Grails deployment guides have been updated to reflect this idiom.
Embedded Tomcat usage (the default for grails run-app and bootable WARs) continues to use spring-boot-starter-tomcat unchanged.
17. Test Infrastructure Changes
Spring Boot 4 made several breaking changes to its test infrastructure.
Most Grails tests use GrailsUnitTest, GrailsWebUnitTest, and Integration and are unaffected, but if your application uses @SpringBootTest directly the following apply.
@SpringBootTest no longer auto-configures MockMvc, WebClient, or TestRestTemplate.
Add the corresponding @AutoConfigureMockMvc / @AutoConfigureWebClient / @AutoConfigureTestRestTemplate annotations to opt in.
// Before
@SpringBootTest
class MyControllerSpec extends Specification {
    @Autowired MockMvc mockMvc      // injected automatically
    @Autowired TestRestTemplate rest // injected automatically
}

// After
@SpringBootTest
@AutoConfigureMockMvc
@AutoConfigureTestRestTemplate
class MyControllerSpec extends Specification {
    @Autowired MockMvc mockMvc
    @Autowired TestRestTemplate rest
}
@MockBean and @SpyBean were removed.
Replace them with @MockitoBean and @MockitoSpyBean from org.springframework.test.context.bean.override.mockito.
The new annotations work as fields in test classes only — they cannot be declared in @Configuration classes.
// Before
import org.springframework.boot.test.mock.mockito.MockBean
@SpringBootTest
class MyServiceSpec extends Specification {
    @MockBean BookRepository repo
}

// After
import org.springframework.test.context.bean.override.mockito.MockitoBean
@SpringBootTest
class MyServiceSpec extends Specification {
    @MockitoBean BookRepository repo
}
MockitoTestExecutionListener was removed.
If your test infrastructure registers it explicitly, remove the registration; Spring’s bean override support handles @MockitoBean directly.
TestRestTemplate package change.
TestRestTemplate moved to org.springframework.boot.resttestclient.
Update the import.
A new RestTestClient and corresponding @AutoConfigureRestTestClient annotation are also available as a fluent alternative.
17.1 Test Helpers Moved to Test Fixtures
Several legacy Grails test helpers are no longer included in the production classpath. They are published as Gradle test fixtures instead, so applications and plugins that use them directly must request the fixture variant explicitly.
This affects the following helpers:
-
grails.plugin.json.view.test.JsonViewTestand related JSON view test helpers -
org.grails.gorm.graphql.testing.GraphQLSchemaSpec -
org.grails.gorm.graphql.testing.MockDataFetchingEnvironment -
grails.util.GrailsWebMockUtil -
Mock resource and plugin helpers from
grails-core, includingMockResourceLoader,MockStringResourceLoader,MockFileResource,MockPluginDiscovery, andMockGrailsPluginManager
If your tests import one of these classes, add the corresponding testFixtures(…) dependency to the configuration that compiles those tests:
build.gradle
dependencies {
    testImplementation testFixtures('org.apache.grails:grails-core')
    testImplementation testFixtures('org.apache.grails.web:grails-web-common')
    testImplementation testFixtures('org.apache.grails:grails-views-gson')
    testImplementation testFixtures('org.apache.grails.data:grails-data-graphql-core')
}
Only add the fixture dependencies that provide helpers used by the project.
Do not add them to implementation, because these artifacts contain test infrastructure and should not be part of the application runtime classpath.
18. DevTools Live Reload Disabled by Default
Spring Boot 4 changed the default of spring.devtools.livereload.enabled from true to false.
If you rely on browser live reload during development, opt in explicitly under the development environment so non-development environments still honor the new Spring Boot 4 default:
application-development.yml
spring:
    devtools:
        livereload:
            enabled: true
Apps generated by the Grails Forge with the spring-boot-devtools reloading option do set this property automatically in application-development.yml, restoring Grails 7 livereload behavior for the dev profile only.
You can opt out by changing the value to false or by deleting the application-development.yml block after generation.
Existing Grails 7 applications that opt in to devtools must add this configuration manually.
|
19. Spring Retry No Longer Managed
Spring Boot 4 removed spring-retry from its managed dependencies.
Spring for Apache Kafka and Spring AMQP have moved off Spring Retry to Spring Framework’s new retry support; if you used Spring Retry transitively through those projects you may not need it any more.
If your application directly uses @Retryable, @EnableRetry, or @Recover, declare the dependency explicitly in build.gradle:
build.gradle
implementation 'org.springframework.retry:spring-retry'
The grails-bom pins a known-good Spring Retry version (2.0.x), so you do not need to specify a version when your build uses the Grails BOM, whether it is auto-applied by the Grails Gradle plugin or declared explicitly.
Override the BOM-managed version in your build if you need a newer release.
|
20. Other Default Behavior Changes
Spring Boot 4.0 and 4.1 made several smaller default-behavior changes that you may notice but rarely require code changes:
-
Spring Boot 4.1 removes Spring Boot 4.0 deprecations. If you tested against an earlier Grails 8 snapshot or Spring Boot 4.0.x directly, remove any use of APIs, methods, or configuration properties that were only deprecated there before moving to the current Grails 8 line.
-
The Spring Boot
BuildInfotask writesMETA-INF/build-info.propertiesby default. If your build, packaging, or tests readbuild-info.propertiesfrom the root of the generated resources directory, update them to readMETA-INF/build-info.propertiesor configure the task’sfilenameproperty. -
Spring Data JPA repository bootstrap modes were tightened. Grails GORM is unaffected, but applications that also use Spring Data JPA directly should review any
spring.data.jpa.repositories.bootstrap-modesetting when moving to Spring Boot 4.1. -
Derby support is deprecated in Spring Boot. Grails does not use Derby by default, but applications that added Derby through Spring Boot auto-configuration should plan a migration to H2, HSQLDB, or another supported database.
-
Logback default charset is now
UTF-8for log files (aligning with the existing Log4j2 default). Console output usesConsole#charset()if available, otherwiseUTF-8. If your log scraping tooling assumed a platform-default charset, switch it to UTF-8. -
Liveness and readiness probes are enabled by default on the Health endpoint. The
livenessandreadinesshealth groups are exposed automatically. To disable, set:application.ymlmanagement: endpoint: health: probes: enabled: false -
HttpMessageConvertersis deprecated. If your application contributedHttpMessageConverterbeans through this class, switch to the newClientHttpMessageConvertersCustomizerandServerHttpMessageConvertersCustomizerinterfaces. -
JSpecify nullability annotations. Spring Framework 7 deprecated
org.springframework.lang.Nullableandorg.springframework.lang.NonNullin favor of the JSpecify annotations (org.jspecify.annotations.Nullable,org.jspecify.annotations.NonNull). The Spring annotations still work, so this is non-blocking, but new code should prefer the JSpecify equivalents. -
Resource[]values expand location patterns. Aclasspath*:or other location pattern converted toResource[]now resolves to every matching resource, or to an empty array when nothing matches, as it does in a plain Spring application. Previously Grails' conversion of aStringto aResourcealso handledResource[]values one element at a time, soclasspath*:META-INF/spring.integration.propertiesbecame a single resource with the pattern as its path, and loading it failed when it was opened. This applies toResource[]properties of beans declared inresources.groovy,doWithSpring, XML, or by a library, whether the value is a single pattern, a comma-delimited String, or a list or array of locations, to@Valueinjection into aResource[]field, and toconfig.getProperty(name, Resource[]), including list-valued configuration entries. Placeholders in the pattern are resolved from the environment. AResourcevalue still resolves a single location. A list or array of locations is also collected into a set, as Spring does: a list that names the same location twice now gives one resource instead of two, while a comma-delimited String keeps both. Anullelement in a list or array now fails the conversion instead of becoming anullentry, so a bean property given such a list fails at startup. -
Namespaced link generation is namespace-aware. When a link, form action, pagination link, sortable column link, redirect, chain, or include targets a controller without an explicit
namespace, Grails now resolves the namespace automatically. The name is resolved nearest scope first: the current request’s namespace if it defines a controller with that name, then the non-namespaced controller, then the namespace of the only controller with that name.controllerandactiontherefore generate the correct namespaced or non-namespaced URL, and a link rendered from a namespace stays in it when that namespace defines the target. A name defined only in namespaces other than the default and the current one is ambiguous: Grails logs a warning and the link must specifynamespaceto choose the target explicitly. A name no registered controller has stays in the namespace the link is made from, where a link previously dropped the namespace; a redirect to such a name has always stayed in it. A page rendered by a controller in theadminnamespace that links withcontroller: 'other', action: 'list'now generates/admin/other/listwhen noOtherControlleris registered, and so does a unit test that setswebRequest.controllerNamespaceitself; aControllerUnitTest, which leaves the request namespace unset, still generates/other/list. Passnamespaceto target another namespace. A redirect naming no namespace is resolved exactly as a link is, from the namespace of the controller issuing it; previously it was forced into that namespace, so a redirect to a controller defined only in another namespace produced a URL for a controller that does not exist. Passnamespace: nullfrom Groovy code ornamespace=""in a GSP tag to target the non-namespaced controller explicitly. -
A resource link targets the most specific controller serving its domain class. A link, form or redirect built from a domain instance, such as
<g:link resource="${book}">,redirect book, or theselflink of a HAL, Atom or JSON:API response, previously always targeted the controller named after the domain class, even when that controller did not exist. It now targets the nearest controller serving the domain class, a controller serving it when it is named after it or extendsRestfulControllerparameterised on it, such asPeopleController extends RestfulController<Person>or a controller scaffolded with@Scaffold(Person), and defines the action the link targets: the controller handling the request when it serves it, then the one serving it in the request’s namespace, then in the default namespace, then in any namespace, the one named after the domain class settling a tie within a namespace. An application with one controller per domain class is unaffected. Where two controllers serve the same domain class, a link to it rendered by one of them now stays in that controller rather than moving to the one named after the domain class. Pass thecontrollerattribute where a link should leave the current controller. See Mapping to REST resources. Controllers generated bygenerate-controllerandgenerate-async-controllernow redirect a form save or update withredirect action: "show", id: book.idrather thanredirect book, so a generated controller that is renamed still redirects to itself; a controller generated earlier and since renamed can be changed the same way. -
A read-only transaction no longer flushes the session. A read-only transaction (
@ReadOnly,@Transactional(readOnly = true)) commits without flushing the session on every GORM datastore. Hibernate, Neo4j and the simple map datastore already behaved this way; GORM for MongoDB flushed the session when a read-only transaction committed, and no longer does.So on MongoDB, a write saved without
flush: truebefore read-only code ran in the same session used to be persisted as a side effect of the read. It is now left queued: the read-only transaction does not write it, and it is written by whatever flushes the session next (a read-write commit,save(flush: true), the flush at the end of the request), or discarded when the session closes if nothing does. Flush such writes explicitly withsave(flush: true), or perform them in a read-write transaction. To make this discoverable, a read-only transaction that commits while its session holds pending inserts, updates or deletes now logs a warning fromorg.grails.datastore.mapping.transactions.DatastoreTransactionManagernaming the session. See Read-Only Transactions in the GORM for MongoDB guide.A GORM datastore implementation outside the Grails repository inherits this if it uses
SessionOnlyTransaction; one that supplies its ownTransactioncan honourreadOnlyby overriding the newAbstractSession.beginTransactionInternal(TransactionDefinition), which now receives the transaction definition instead of discarding it. -
A transaction started inside another joins it. On GORM for MongoDB, a transactional service method called from another, or
withTransactioninsidewithTransaction, began a second transaction on the same session instead of joining the first. The inner one committed on its own and the outer one’s commit then did nothing: without a session bound for the request, the outer transaction’s writes after the call were never saved, and with one they were saved when the request ended, outside any transaction (not at all if a read-only call had left the session inCOMMITflush mode). With multi-document transactions enabled, beginning the inner transaction also discarded the writes the outer one had flushed before the call. Now the inner transaction joins the outer one, everything commits once when the outer one does, and a joined transaction that fails rolls the whole transaction back. Hibernate and Neo4j already joined. On Neo4j, though, a joined transaction that failed rolled the transaction back on the spot, so writes the outer code made after catching the failure ran outside any transaction and were committed as they ran; the transaction is now only marked rollback-only, and those writes roll back with it. The simple map datastore, whichDataTestunit tests run on, joins now too, so a nested transaction’s writes are flushed at the outer commit instead of when it returns. Its sessions also share one identifier count now: an insert in one session could take the identifier of an insert another session had not yet flushed, or of an entry still present after a delete, and overwrite it. A write inwithNewSessioninside a transaction was lost that way.These follow from the surrounding transaction now being recognized, on MongoDB and the simple map datastore:
-
PROPAGATION_REQUIRES_NEWsuspends the surrounding transaction and runs in a session of its own (on Neo4j too), where it used to begin on the surrounding transaction’s session. The new session starts empty: an entity loaded in the surrounding transaction belongs to that session and should be loaded again inside, and settings made on the surrounding session, such as the database or collection chosen withwithDatabaseorwithCollection, do not carry over. -
PROPAGATION_NOT_SUPPORTEDsuspends the surrounding transaction,PROPAGATION_MANDATORYinside a transaction works where it always threw, andPROPAGATION_NEVERandPROPAGATION_NESTEDinside a transaction throw. -
A read-write transaction started inside a read-only one joins it and is read-only, as on Hibernate, where it used to commit on its own. A write it leaves queued is not saved by the read-only commit, which logs a warning naming the session. Call such a method from read-write code, or give it
PROPAGATION_REQUIRES_NEW. A write it flushes explicitly withsave(flush: true)is saved, but outside any transaction, so a later failure cannot roll it back. -
Transactional code run from a transaction’s
afterCommitorafterCompletioncallbacks, such as an@TransactionalEventListener, begins a transaction of its own. -
A read-only transaction puts the session’s flush mode back when it completes (on Neo4j too). It used to leave the session in
COMMITmode, so a session bound for the whole request was not flushed when the request ended. -
Committing a transaction that is no longer active throws
IllegalTransactionStateException, where the commit used to be skipped without a word.Without multi-document transactions, GORM for MongoDB does not flush before a query while a transaction is in progress, so a write a joined transaction leaves queued is not visible to a query later in the same transaction. It used to be, because the inner transaction flushed it when it returned. Use
save(flush: true)where a later query in the transaction must see the write. This includes integration tests annotated with@Rollback, whose service calls now join the test’s transaction. With multi-document transactions enabled, GORM for MongoDB flushes before a query inside the server-side transaction, as Hibernate does, so the query sees the write, and a rollback still takes it back.With multi-document transactions enabled on MongoDB, a read-only transaction no longer starts a server-side transaction, and beginning a transaction on a session whose server-side transaction is still active throws
IllegalTransactionStateExceptioninstead of discarding it. See Nested Transactions in the GORM for MongoDB guide.A GORM datastore implementation outside the Grails repository whose transaction manager replaces
doBeginmust handle a transaction object that holds no session: aPROPAGATION_REQUIRES_NEWtransaction arrives that way once the surrounding one is suspended, and needs a session of its own.
-
-
bindDatacan clear omitted included fields.bindData(target, source, [include: […], clearMissing: true])now clears included properties that are absent from the binding source. The behavior is opt-in, requires anincludelist, and does not apply globally. ExistingbindDatacalls withoutclearMissing: truekeep omitted fields unchanged. -
GORM for MongoDB builds its indexes when the datastore starts, not when it is created. Creating a
MongoDatastoreno longer connects to MongoDB or builds the declared indexes, whichever constructor creates it, including one given an application’s ownMongoClient. In an application Spring starts the datastore beforeBootStrapruns, so nothing changes there; code that creates aMongoDatastoreitself and expects its indexes once the constructor returns has to callstart(), although the first GORM query or save on a datastore nothing has started also starts it. See Upgrade Notes in the GORM for MongoDB guide. -
GORM for MongoDB rejects Map criterion values that contain
$keys.findWhere,findAllWhere, criteria queries, thewhereDSL and dynamic finders now throwInvalidDataAccessResourceUsageExceptionwhen aMappassed as a criterion value contains a key starting with$at any level, on any property type including enums. MongoDB interprets such a value document as an operator expression rather than as a value. Maps without such keys are still sent as literal subdocument comparisons, so exact matches onMapproperties, dotted paths and array elements are unchanged, and geospatial criteria are exempt. Code that deliberately passed an operator document through a criteria value should use the nativefind(Bson)API instead. -
GORM for MongoDB no longer ends the index build on a
uniqueindex over duplicate values. A declareduniqueindex that could not be built because documents already shared a value ended the index build with aDuplicateKeyException: the indexes declared after it were not built, and with the default synchronous build the application did not start. It is now counted as a failed declaration like any other index the server refuses, logged atERROR, and the build goes on; the application starts without that index. Remove the duplicates and build the index again to create it. See Upgrade Notes in the GORM for MongoDB guide. -
GORM for MongoDB builds only the indexes of the domain classes mapped to each connection. The index build of a named connection also created the indexes of classes mapped only to another connection, in its own database. Each connection now builds the indexes of the classes mapped to it, including those mapped to
ConnectionSource.ALL. Indexes already created elsewhere are left in place. See Upgrade Notes in the GORM for MongoDB guide.
21. Tag Library Test Cleanup Changes
Grails 8 removes the purgeTagLibMetaClass test hook used by some web and TagLib unit tests.
TagLib metaclass cleanup now happens automatically as part of the web test infrastructure, so test specs should delete any custom purgeTagLibMetaClass property or getter.
If your tests use TagLibUnitTest and mock additional tag libraries with mockTagLib(…) or mockTagLibs(…), those mocked tag libraries are rebuilt automatically between feature methods.
No replacement flag is required.
Mocked tag libraries are cleared after each feature method.
If your tests call mockTagLib directly (for example, when implementing GrailsWebUnitTest instead of TagLibUnitTest), move the call from setupSpec() to setup() so the mock is re-applied before every feature.
TagLibUnitTest handles this automatically, but GrailsWebUnitTest does not.
|
// Before
class MyTagLibSpec extends Specification implements TagLibUnitTest<MyTagLib> {
    boolean getPurgeTagLibMetaClass() {
        true
    }
}

// After
class MyTagLibSpec extends Specification implements TagLibUnitTest<MyTagLib> {
}
22. Method-based TagLib Handlers
Grails 8 introduces method-based tag handler syntax as the recommended way to define tags. Closure-based handlers are still supported for backward compatibility.
import grails.gsp.Tag

class DemoTagLib {
    static namespace = 'demo'

    def greet(Map attrs) {
        out << "Hello, ${attrs.name}!"
    }

    @Tag
    def greeting(String name) {
        out << "Hello, ${name}!"
    }
}
Method tags with the conventional signatures def tag(Map attrs), def tag(Closure body), and def tag(Map attrs, Closure body) are discovered automatically. Zero-argument method tags and method tags that bind named attributes directly to method parameters must use @grails.gsp.Tag; this avoids exposing ordinary public helper methods as tags.
Grails Gradle application builds preserve Java and Groovy method parameter names by default (see §22.3 below).
If you compile TagLib classes outside those plugins, enable Java -parameters and Groovy groovyOptions.parameters = true so @Tag methods can bind attributes by parameter name.
To exclude a conventional public method from being exposed as a tag (for example, a helper that must remain public to satisfy an interface), annotate it with @grails.gsp.NotATag:
import grails.gsp.NotATag

class DemoTagLib {
    def greet(Map attrs) {
        out << "Hello, ${attrs.name}!"
    }

    @NotATag
    def helper(Map attrs) { /* ... */ }
}
The compile-time deprecation warning emitted for closure-based tag fields can be silenced by setting the system property grails.taglib.warnDeprecatedClosures=false.
22.1 Behavior change: tag method registration
In Grails 7, the metaclass tag dispatchers registered for the taglib’s own namespace did not override existing methods. Because method-based tags are now real methods on the TagLib class, those dispatchers must override methods of the same name so that function-style invocation (for example tagLib.myTag(attrs)) returns captured tag output rather than writing directly to out.
If a TagLib intentionally defines a method that shares a name with a default-namespace tag in another TagLib, the locally defined method will be shadowed by the tag dispatcher. Rename the helper method or move it behind a different namespace if the previous behavior is required.
This shadowing is not reported at runtime by default. To audit which TagLib methods are being overridden by tag dispatchers, enable DEBUG logging for org.grails.taglib.TagLibraryMetaUtils in logback.xml (or logback-spring.xml):
<logger name="org.grails.taglib.TagLibraryMetaUtils" level="DEBUG"/>Each override is logged as Registering tag dispatcher <namespace>:<tagName> over existing method <Class>.<method>(<paramTypes>). Inspect the output after application startup; any entry whose <Class> is one of your own TagLibs identifies a method that has been replaced by the dispatcher.
22.2 Behavior change: parameter-name binding for Map and Closure parameters
Method-based tag handlers bind attributes to method parameters by parameter name. Two reserved names participate in this resolution:
-
A
Map-typed parameter namedattrsreceives the full attributes map. -
A
Closure-typed parameter namedbodyreceives the tag body.
In earlier iterations of the method-based handler implementation, a Closure-typed parameter was bound to the body regardless of its parameter name, while a Map-typed parameter required the literal name attrs. That asymmetry has been removed. Both reserved names are now applied consistently: a Closure parameter named anything other than body is treated as a normal named attribute (and must be supplied by name), just as a Map parameter named anything other than attrs is.
If you have method-based tag handlers whose Closure parameter uses a name other than body, rename the parameter so the body binds as expected:
import grails.gsp.Tag

class DemoTagLib {

    // Will NOT receive the tag body; `renderer` is treated as a named attribute.
    @Tag
    def before(Closure renderer) {
        out << renderer.call()
    }

    // Receives the tag body.
    @Tag
    def after(Closure body) {
        out << body.call()
    }
}
If parameter names are not preserved at compile time (see §22.3 below for the preserveParameterNames Gradle extension property), the first Map parameter is bound to attrs and the first Closure parameter is bound to body regardless of declared names, matching the behavior of closure-based tag handlers.
22.3 Grails Gradle Extension Preserves Parameter Names By Default
In Grails 8, the Grails Gradle extension defaults preserveParameterNames to true.
This configures Groovy compilation to retain method and constructor parameter names in generated class files.
This behavior supports framework features that bind by parameter name, including method-based TagLib handlers annotated with @grails.gsp.Tag:
import grails.gsp.Tag

class DemoTagLib {
    @Tag
    def greeting(String name) {
        out << "Hello, ${name}!"
    }
}
If you need the previous Groovy compiler behavior, disable it in build.gradle:
grails {
    preserveParameterNames = false
}
This Gradle extension property controls Groovy compilation only (groovyOptions.parameters).
Java parameter-name preservation is enabled by the Spring Boot Gradle plugin, which adds -parameters to every JavaCompile task by default since Spring Boot 3.2. Grails 8 applications inherit this through the Spring Boot Gradle plugin and require no additional configuration for Java sources.
|
If you compile TagLib classes outside the Grails Gradle plugin (for example, in a standalone Groovy module, a plain Spring Boot application that does not apply org.springframework.boot, or a build that disables the Spring Boot plugin’s compiler configuration), enable parameter-name preservation explicitly so @grails.gsp.Tag methods can bind attributes by parameter name:
tasks.withType(JavaCompile).configureEach {
    options.compilerArgs.add('-parameters')
}

tasks.withType(GroovyCompile).configureEach {
    groovyOptions.parameters = true
}
Without these flags, Parameter.getName() returns synthetic names such as arg0, the attribute lookup misses, and the call surfaces as MissingMethodException at runtime.
The @Tag-annotated method itself produces no compile-time warning, because preservation is a property of the build, not of the source file.
23. Known Plugin Incompatibilities
A Grails 7 plugin is not automatically incompatible with Grails 8. A plugin resolving, appearing in the load order, and letting the application start is encouraging, but it is not enough to establish compatibility. Exercise the plugin’s documented public behavior, including web requests, outbound calls, serialization, commands, and any domain traits or annotations it exposes.
When a released Grails 7 plugin fails, first check whether the maintainer has published a Grails 8 version. Some failures have a temporary application-side workaround. Others are binary incompatibilities in already-published bytecode and require the plugin author to rebuild and release the plugin against Grails 8. Do not add framework-internal compatibility classes to an application to work around those failures.
Use the first distinctive failure to choose the next step:
-
NoClassDefFoundErrormentioningcom/fasterxml/jackson/databind/exc/InvalidDefinitionExceptionwhile creatingOrderedFormContentFilter: add the BOM-managed Jackson 2jackson-databinddependency described below, then retest the plugin’s public behavior. -
Could not find org.grails:…:.: use a plugin version built againstorg.apache.grails, or use narrowly targeted dependency substitution as a temporary migration aid. -
MissingPropertyExceptionorMissingMethodExceptionfromMetadata: the plugin must be rebuilt against the typed metadata API. -
MalformedParameterizedTypeExceptionmentioning$Trait$FieldHelper,NoClassDefFoundErrormentioningObjectUtil,IncompatibleClassChangeErrorinvolvingHttpHeaders, or an unexpected internal property after using a plugin annotation: the plugin must be rebuilt for Grails 8.
23.1 Metadata dynamic and map-style access
A plugin that reads metadata through Metadata.current.'some.key' or Metadata.current.get('some.key') can start normally and fail only when that code path runs. The usual symptoms are MissingPropertyException or MissingMethodException, often as an HTTP 500 on a plugin endpoint. See Issue #16122.
Plugin authors must replace the removed dynamic accessors with the typed public API:
// Grails 7
def version = Metadata.current.'info.app.grailsVersion'
def name = Metadata.current.get('info.app.name')

// Grails 8
String version = Metadata.current.getProperty('info.app.grailsVersion', String, null)
String name = Metadata.current.getProperty('info.app.name', String, null)
For a nested metadata value that does not need type conversion, Metadata.current.navigate('some', 'nested', 'key') is also available. This is a rebuild-only change for a published binary plugin. No Metadata compatibility shim is available.
23.2 Groovy 4 trait and AST-transform bytecode
Groovy 5 can compile application code against a Groovy 4 plugin, but the following generated-bytecode patterns are known to be incompatible. These failures commonly occur only when the plugin’s public feature is used, rather than at dependency resolution or startup. Rebuild the plugin with Grails 8 and Groovy 5. Consumers cannot reliably repair an already-published jar.
-
Generic traits with fields. A Grails 7 plugin that exposes a generic trait with fields can fail when an application implements that trait. JavaBeans, Spring, or Jackson introspection then throws
MalformedParameterizedTypeExceptionmentioning<Trait>$Trait$FieldHelper. The plugin’s trait must be recompiled with Groovy 5. See Issue #16123. Non-generic traits are not affected by this specific issue. -
AST transformations that target private trait methods. A plugin transformation can compile successfully but silently lose a private trait method from the emitted application class. Using the annotated public feature then throws
MissingPropertyExceptionfor an unexpected internal property. Plugin authors should change the transform to target a member emitted on the implementing class, then rebuild with Groovy 5. See Issue #16126. -
@Immutableclasses. A Groovy 4-compiled@Immutableclass can throwNoClassDefFoundError: org/apache/groovy/runtime/ObjectUtilwhen constructed on Groovy 5. The missing call is generated by Groovy 4’s AST transformation, so updating application source does not fix a released plugin jar. Rebuild affected plugin artifacts with Groovy 5. See Issue #16128.
See Apache Groovy 5 Behavior Changes for source-level Groovy 5 changes that may affect the rebuilt plugin.
23.3 Jackson 2 dataformats without Jackson 2 databind
Grails 8 uses Jackson 3 for databind, while a released plugin may still bring Jackson 2 Smile, CBOR, or YAML dataformat artifacts. If one of those dataformats is present while Jackson 2 databind is absent, Spring Framework detects an incomplete Jackson 2 classpath and application startup fails with NoClassDefFoundError: com/fasterxml/jackson/databind/exc/InvalidDefinitionException, usually while creating OrderedFormContentFilter. Jackson 2 core, annotations, and XML dataformat alone do not trigger this specific failure.
The immediate consumer workaround is to supply the matching Jackson 2 databind artifact while the plugin is being migrated:
build.gradle
dependencies {
    implementation 'com.example:plugin-that-needs-jackson2-dataformats:1.0.0'

    // Keep the Jackson 2 runtime classpath complete.
    runtimeOnly 'com.fasterxml.jackson.core:jackson-databind'
}
Use the Jackson 2 version managed by the Grails and Spring Boot platform. Do not add a version if the active BOM already manages it. Plugin authors should release a Grails 8 version that migrates to Jackson 3 where possible, or declares a complete, compatible Jackson 2 runtime when it must retain Jackson 2 dataformats. See Issue #16124 and Jackson 3 is the New Default.
23.4 Pre-Apache org.grails coordinates
Some older plugins import a pre-Apache org.grails BOM and declare versionless org.grails:* dependencies. Grails 8 does not publish those coordinates. Gradle often reports an unhelpful empty-version error such as Could not find org.grails:grails-core:..
No complete, general coordinate substitution map exists. A narrowly targeted application-level substitution rule can resolve some plugins, but module names and binary compatibility are not always one-to-one after the Apache group rename. Treat substitution as a temporary diagnostic or migration aid, not proof that a plugin is compatible. The supported migration is for plugin authors to rebuild against org.apache.grails coordinates and publish a Grails 8 release. See Issue #16125.
build.gradle - Plugin author migration
// Before: imported by an early Grails 7 plugin POM
implementation platform('org.grails:grails-bom:7.0.0-M1')

// After: compile against the Apache Grails 8 BOM
implementation platform("org.apache.grails:grails-bom:$grailsVersion")
23.5 Spring Framework 7 HttpHeaders binary incompatibility
Spring Framework 7’s HttpHeaders no longer implements MultiValueMap. A Grails 7 plugin compiled against Spring 6 can therefore boot and then throw IncompatibleClassChangeError when it passes HttpHeaders to an API expecting MultiValueMap, often during an outbound HTTP request. See Issue #16127.
Plugin authors must compile against Spring Framework 7 and use the HttpHeaders-typed API. Remove any explicit MultiValueMap cast so recompilation selects Spring 7’s HttpEntity(T, HttpHeaders) constructor instead of the deprecated HttpEntity(T, MultiValueMap) constructor:
// Grails 7 / Spring 6 code that selected the MultiValueMap API
HttpHeaders headers = new HttpHeaders()
new HttpEntity(body, (MultiValueMap<String, String>) headers)

// Grails 8 / Spring 7: use the HttpHeaders API
HttpHeaders headers = new HttpHeaders()
new HttpEntity(body, headers)
Changing only an application’s dependencies cannot repair the plugin’s existing bytecode. Upgrade to a plugin release compiled for Grails 8, or ask the maintainer to publish one.
23.6 Commands and plugin bean timing
For a released Grails 7 plugin that implements grails.dev.commands.ApplicationCommand, keep the default cliAutoProvision = true and enable grails { legacyCommandSupport = true }. Run its commands with ./gradlew runCommand "-Pargs=<command> <arguments>" or through the shell. Legacy commands do not create named Gradle tasks. Script, YAML, and profile commands do not need this bridge.
The complete command migration, including the legacy bridge, script packaging, and companion artifact support delivered by PR #16011, PR #16082, and PR #15948, is covered in CLI Commands Move to Companion -cli Artifacts. Plugin authors should still migrate commands to the current API and publish companion -cli artifacts.
The plugin bean lifecycle change is not a compatibility bridge. Existing doWithSpring plugins still run, but PR #15934 moved them before Spring Boot auto-configuration. During that callback, the initializing application is available through the plugin’s grailsApplication property, but it has not yet been published to the process-global Holders.grailsApplication fallback. Plugins that read the global Holder from doWithSpring must instead use their injected application, configuration, or environment. See Plugin Beans Now Register Before Spring Boot Auto-Configuration for the timing change and migration to beanRegistrar().
Plugin compatibility continues to evolve. Check the plugin’s release notes and the Grails external-plugin issues for current status.
24. Custom JSON View Converters
JSON views now use Groovy’s groovy.json.JsonGenerator implementation instead of the previous Grails-specific
JSON generator infrastructure.
If you previously customized JSON view rendering with Grails-specific generator classes, migrate that logic to a
groovy.json.JsonGenerator.Converter implementation.
This change applies to JSON views rendered by the grails-views-gson module.
The grails.converters.JSON.registerObjectMarshaller(…) API is still used by the grails-converters module
for render … as JSON and related converter-based rendering.
To migrate your custom converters:
-
Implement
groovy.json.JsonGenerator.Converter(was previouslygrails.plugin.json.builder.JsonGenerator.Converter) -
Change the file name of the converter registration service loader to
src/main/resources/META-INF/services/groovy.json.JsonGenerator$Converter(was previouslysrc/main/resources/META-INF/services/grails.plugin.json.builder.JsonGenerator$Converter)
25. Rendering Enum values as JSON
It is no longer possible to render a single enum value as JSON using the render(Number.ONE as JSON) syntax.
Previously, rendering an enum value would produce a JSON string with the type and name of the enum value like:
{
  "enumType": "com.example.Number",
  "name": "ONE"
}
Rendering an enum value as JSON will now instead throw a ConverterException.
See PR 15212 for more details on this change.
26. Hibernate 5 to Hibernate 7 Migration
Grails 8 supports both Hibernate 5 (the default) and Hibernate 7.
If you are upgrading from Grails 7 and also want to migrate from Hibernate 5 to Hibernate 7, apply the grails-hibernate7-bom and the Hibernate 7 plugin in addition to the standard Grails 8 upgrade steps.
build.gradle — switch to Hibernate 7
dependencies {
    implementation enforcedPlatform("org.apache.grails:grails-hibernate7-bom:$grailsVersion")
    implementation 'org.apache.grails:grails-hibernate7'
}
The following sections cover every breaking change introduced between Hibernate ORM 5.6.x (used by Grails 7) and Hibernate ORM 7.0.x, and what you need to do in your Grails application.
26.1 Hibernate Session API Removals
Hibernate 7 removed long-deprecated Hibernate-specific session methods in favour of the standard JPA equivalents.
GORM’s dynamic methods (save(), delete(), get(), load(), merge(), etc.) are not affected — these go through GORM’s own persistence API and have been updated internally.
You are only affected if your code calls the Hibernate Session or StatelessSession directly (e.g. inside a withSession or withStatelessSession block).
| Removed (Hibernate 5/6) | Replacement (Hibernate 7 / JPA) |
|---|---|
|
|
|
|
|
|
|
|
|
|
|
|
26.2 Removed Hibernate Annotations
The following Hibernate-specific annotations were removed in Hibernate 7. Where a replacement exists, migrate before upgrading.
| Removed annotation | Action required |
|---|---|
|
Replace with |
|
Replace with |
|
Remove — proxy configuration is no longer supported |
|
Remove and use |
|
Remove — custom persisters are no longer supported |
|
Remove — behaviour is now configurable via |
|
Remove — custom SQL loaders are no longer supported; use |
Grails domain classes that use the mapping { } DSL are not affected by annotation removals.
These annotations only apply if you are using Hibernate annotations directly on Java or Groovy classes.
|
26.3 CascadeType.SAVE_UPDATE Removed
CascadeType.SAVE_UPDATE (a Hibernate-specific cascade type) was removed in Hibernate 7.
Persisting a transient entity that has detached associations now throws EntityExistsException instead of silently merging.
If your domain mapping or annotated classes used cascade = CascadeType.SAVE_UPDATE, replace it with cascade = CascadeType.ALL or cascade = [CascadeType.PERSIST, CascadeType.MERGE] as appropriate.
Also note that automatic cascade = CascadeType.PERSIST on @Id and @MapsId associations was removed.
If you relied on this implicit behaviour, add an explicit cascade = CascadeType.PERSIST to the @ManyToOne or @OneToOne carrying @MapsId.
26.4 Detached Entity Operations
Calling refresh() or lock() on a detached entity now throws IllegalArgumentException (JPA specification compliance).
In Hibernate 5 and 6 this was silently permitted.
If your code calls entity.refresh() or entity.lock() after the Hibernate session has been closed or the entity has been evicted, you must either re-attach the entity first (via session.merge()) or reload it before refreshing.
26.5 Native Query Temporal Type Changes
Native SQL queries (via executeQuery, withCriteria, or a raw Session.createNativeQuery) now return java.time types (LocalDate, LocalTime, LocalDateTime) instead of the legacy java.sql types (java.sql.Date, java.sql.Time, java.sql.Timestamp).
If your code casts results from native queries to java.sql date/time types, update those casts to use the java.time equivalents, or set the following property to restore legacy behaviour during a phased migration:
application.yml
hibernate:
    query:
        native:
            prefer_jdbc_datetime_types: true
26.6 StatelessSession Now Uses Second-Level Cache by Default
StatelessSession in Hibernate 7 participates in the second-level cache by default (it did not in Hibernate 5/6).
If you use withStatelessSession for bulk operations where cache bypass was intentional, disable caching explicitly:
YourDomain.withStatelessSession { StatelessSession session ->
    session.setCacheMode(CacheMode.IGNORE)
    // ... bulk operations
}
26.7 DDL Schema Changes
If you use dbCreate = 'create-drop' or dbCreate = 'update' in development, or generate a schema with the schema-export command, be aware of the following DDL differences in Hibernate 7.
| Database | Column type | Change |
|---|---|---|
All |
|
Now maps to |
Oracle |
|
Now maps to |
Oracle |
|
Precision changed to 9 digits (nanoseconds). Existing columns with lower precision will need migration. |
SQL Server |
|
Precision changed to 7 digits (100 nanoseconds). Existing columns will need migration. |
MySQL / MariaDB |
Array-mapped columns |
Now stored as JSON instead of |
If you have an existing production database, validate the schema diff before enabling dbCreate = 'update' or running Liquibase migrations after the Hibernate 7 upgrade.
|
26.8 Hibernate 6 Intermediate Changes
Hibernate 7 builds on Hibernate 6, which itself introduced breaking changes relative to Hibernate 5. The changes in Hibernate 6 that are most likely to affect a Grails application are listed here for completeness.
HQL / criteria result type: An HQL query with a JOIN but no explicit SELECT clause now returns the root entity type (List<Person>) instead of List<Object[]>.
If you depended on the old tuple-style result, add an explicit SELECT clause to your query.
Ordinal HQL parameters: Ordinal parameters changed from 0-based to 1-based indexing (:?1, :?2, …).
The GORM dynamic finders and criteria API are not affected; only raw HQL strings with ordinal parameters need updating.
Legacy Hibernate Criteria API removed: The legacy Criteria / DetachedCriteria API from Hibernate 5 was removed in Hibernate 6.
GORM’s createCriteria() and withCriteria() DSL are implemented on top of the JPA Criteria API and are not affected.
Boolean type mappings: If your schema used string-based boolean type names (e.g. type: 'yes_no'), migrate to the corresponding converter class (YesNoConverter).
javax.persistence → jakarta.persistence: This migration was already required for Grails 7; Grails 8 continues to require jakarta.*.
26.9 Join-Table Foreign-Key Column Names
This change affects only a unidirectional hasMany — a collection with no belongsTo and no reciprocal hasMany on the other side. A bidirectional many-to-many association (both sides declare hasMany, or one side uses belongsTo) is not affected: both of its join-table foreign-key columns are still derived from the class names, identical to Grails 7.
In Grails 7 (Hibernate 5), the default foreign-key column that referenced the associated entity in a unidirectional hasMany join table was derived from the simple name of that entity’s domain class, after applying the column naming strategy.
For example, the domain class Book produced the foreign-key column book_id, even when its physical table was mapped to a different name.
In Grails 8 (Hibernate 7), that foreign-key column is instead derived from the physical table name of the associated domain class.
The physical name includes an explicit table mapping and any transformation made by a custom physical naming strategy.
For example, given the following mapping:
class Book {
    static mapping = {
        table 'catalog_book'
    }
}

class Shelf {
    String label

    static hasMany = [books: Book] // unidirectional: no belongsTo, no reciprocal hasMany
}
Grails 7 used book_id by default in the shelf_books join table, whereas Grails 8 uses catalog_book_id. The other column in that same join table (shelf_id, derived from the owning Shelf class) is unchanged.
This is a breaking schema change for an existing database if its join table still uses the Grails 7 column name.
To keep the existing schema unchanged, configure the join table and its foreign-key column explicitly in the static mapping block:
class Shelf {
    String label

    static hasMany = [books: Book]

    static mapping = {
        books joinTable: [
            name: 'shelf_books',
            key: 'shelf_id',
            column: 'book_id'
        ]
    }
}
Replace shelf_books, shelf_id, and book_id with the table and column names already used by your database.
Declaring all three names prevents the naming strategy from changing the mapping during the upgrade.
Separately, the element column of a basic (non-enum) collection (e.g. static hasMany = [items: String]) is now resolved through the naming strategy’s column naming rules instead of its table naming rules for the property-name prefix, producing a <property>_<element-type identifier> column name. An enum collection is unaffected: its element column has no property-name prefix and already used the column naming rules before this change. Most naming strategies apply the same transformation to both, so this only matters if your custom PhysicalNamingStrategy implements toPhysicalColumnName and toPhysicalTableName differently.
26.10 Table-per-Hierarchy Discriminator Defaults
A table-per-hierarchy tree with no discriminator mapping uses the same defaults as Grails 7: a column named class that stores the fully qualified name of each class. Tables created by Grails 7 need no change.
8.0.0-RC1 and 8.0.0-RC2 named the column DTYPE and stored the simple name of each subclass, for example com.example.Vehicle, Car and SportsCar. A table created by either release candidate now fails dbCreate: 'validate' with missing column [class], and its subclass rows no longer match. To keep that layout without migrating the data, map the column on the root class and the simple name on each subclass:
class Vehicle {
    static mapping = {
        discriminator column: 'DTYPE'    // the root value stays the fully qualified class name
    }
}

class Car extends Vehicle {
    static mapping = {
        discriminator 'Car'
    }
}

class SportsCar extends Car {
    static mapping = {
        discriminator 'SportsCar'
    }
}
27. GORM Properties Are Nullable by Default
Grails 8 changes the validation default so that an unconstrained persistent (domain) property is nullable by default rather than required.
This aligns Grails with the rest of the JVM persistence/validation ecosystem (JPA/Hibernate, Spring Data, Micronaut Data and Jakarta Bean Validation), all of which treat an unconstrained property as valid when null.
Previously every domain property without an explicit constraint had an implicit nullable: false applied, so save() failed validation when the property was null.
From Grails 8 such a property is optional unless you declare otherwise:
class Book {
    String title    // Grails 7: required, Grails 8: nullable

    static constraints = {
        title nullable: false   // declare explicitly to keep it required
    }
}
This change also affects persistence mapping. Columns for unconstrained properties are
nullable by default, so schema creation and schema migration can produce nullable columns
where Grails 7 produced NOT NULL columns. Review existing schemas and declare
nullable: false explicitly for properties that must remain required before running
schema migration or diff tools.
Command objects are unaffected: Validateable command-object properties remain non-nullable by default, except for collections and maps, which remain nullable by default.
The exception is a property that a command object imports with importFrom from a domain class that declares no nullable constraint for it.
It gets the domain class’s nullable default, so it is nullable unless you restore the required-by-default behaviour (below).
To restore the legacy required-by-default behaviour for an entire application, set the new grails.gorm.default.nullable property to false:
application.yml
grails:
    gorm:
        default:
            nullable: false
The existing grails.gorm.default.constraints wildcard form also works:
application.groovy
grails.gorm.default.constraints = {
    '*'(nullable: false)
}
Domains mocked with DataTest or DomainUnitTest use the same settings as the running application.
They are read from application.yml or application.groovy.
A specification can also set them in doWithConfig:
class BookSpec extends Specification implements DomainUnitTest<Book> {

    @Override
    Closure doWithConfig() {{ config ->
        config.grails.gorm.default.nullable = false
    }}
}
28. Apache Groovy 5 Behavior Changes
Grails 8 upgrades from Apache Groovy 4 to Apache Groovy 5. Most applications need no changes, but a few stricter behaviors can affect application code.
28.1 Assigning a static field from a static closure requires the class name
Under Groovy 5 with static compilation (@CompileStatic / @GrailsCompileStatic), assigning to a static field from inside a static closure - such as the constraints, mapping, or namedQueries blocks of a statically compiled class - no longer resolves an unqualified field name to the enclosing class’s static field.
Qualify the assignment with the class name:
@GrailsCompileStatic
class Book implements Validateable {
    static boolean constraintsClosureCalled = false

    static constraints = {
        // Groovy 4: an unqualified assignment resolved to Book.constraintsClosureCalled
        // Groovy 5: the field must be qualified with the class name
        Book.constraintsClosureCalled = true
    }
}
Reading a static field is unaffected; only assignment from within the static closure needs the class-name qualifier.
28.2 Probing a ConfigObject for a missing key
In Groovy 5, indexing a groovy.util.ConfigObject with the subscript operator for a key that does not exist creates and inserts an empty nested ConfigObject for that key, rather than reading back as a falsy value.
Code that walks a configuration source with [] and expects a missing key to be null should test for the key explicitly before reading it:
// Under Groovy 5 this inserts an empty entry for a missing key
def value = configObject[key]

// Probe without creating an entry
def value = configObject.containsKey(key) ? configObject.get(key) : null
Grails applies this guard internally when resolving Spring profile activation keys; you only need it in application code that navigates a raw ConfigObject by subscript.
28.3 A getter on a map no longer hides behind a map entry
In Groovy 4, reading or writing a property on a class that implements Map always addressed a map entry.
In Groovy 5 a public JavaBean accessor declared on such a class is resolved first, so an entry whose name matches an accessor becomes unreadable, and assigning to it throws groovy.lang.ReadOnlyPropertyException.
This affected params, where getRequest() and getIdentifier() made request parameters named request and identifier unreachable.
Grails 8 removes those accessors, so params behaves as it did in Grails 7 - every parameter name is an ordinary map entry, in dotted and subscript form, and under static compilation:
params.identifier = 'id1'       // the request parameter, not a property
params['request'] = 'req1'      // the request parameter, not the HttpServletRequest
Two methods changed as a result:
| Grails 7 | Grails 8 |
|---|---|
|
|
|
|
The same change applies to the attrs map passed to a GSP tag, whose internal implementation renames isGspTagSyntaxCall() to gspTagSyntaxCall().
Its setter is retained, so assigning attrs.gspTagSyntaxCall still invokes that setter rather than storing an attribute - as in Grails 7.
Subscript assignment, attrs['gspTagSyntaxCall'] = value, now stores an attribute of that name, as attrs.put('gspTagSyntaxCall', value) does; in Grails 7 it invoked the setter.
When adding a class that extends grails.util.TypeConvertingMap, do not declare a no-argument getX() or isX() method on it, or the entry x becomes unreachable for the same reason. Statically compiled callers bind directly to the accessor, so the collision cannot be corrected at runtime.
|
29. MIME Types Are Now Framework Defaults
Grails 8 ships the full set of supported MIME types as built-in framework defaults.
Previously every newly generated application declared a grails.mime.types block in grails-app/conf/application.yml; the Grails Forge and the application profiles no longer generate that block, because the framework now supplies the same defaults out of the box.
The built-in defaults cover all, atom, css, csv, form, html, js, json, multipartForm, pdf, rss, text, hal and xml, the same set new applications historically declared.
No action is required.
A declared grails.mime.types still replaces the defaults, exactly as in Grails 7. Your existing block remains authoritative and you get precisely the types you declared (including a deliberately narrowed set). New applications simply no longer need the block, because the framework supplies these defaults when none is configured.
Optional: merge instead of replace.
If you would rather add to the defaults than re-declare them, set grails.mime.mergeDefaults to true. Your declared entries are then merged over the built-in defaults. An entry replaces the default for its extension, and any extension you do not declare keeps its default, so you can register a single custom type without restating the full list:
application.yml
grails:
    mime:
        mergeDefaults: true
        types:
            custom: application/vnd.example+json
30. Accept Header Honored for All Clients
Grails 8 honors the HTTP Accept header for content negotiation for every client by default, including browsers.
In Grails 7 and earlier, the Accept header was ignored for the major browser rendering engines: grails.mime.disable.accept.header.userAgents defaulted to ['Gecko', 'WebKit', 'Presto', 'Trident'].
That was a workaround for very old browsers (Firefox 2 and 3) whose Accept header ranked XML above HTML.
Modern browsers send a well-formed header that already prioritizes HTML (text/html at q=1.0, application/xml at q=0.9), so the workaround is no longer needed.
The practical effect of the old default was that a browser-issued fetch() or XMLHttpRequest call requesting application/json would receive HTML instead of JSON, because those calls do not send an X-Requested-With: XMLHttpRequest header (only libraries such as jQuery add it automatically).
In Grails 8 such a request correctly receives JSON.
What changed: grails.mime.disable.accept.header.userAgents now defaults to unset, so no user agents are filtered.
Most applications need no action.
Browser page loads still resolve to HTML because modern browsers rank text/html highest, and withFormat { html { } json { } } continues to serve HTML to browsers and JSON to clients that ask for it.
respond endpoints without an HTML view now error for browser requests.
Because browsers now negotiate text/html, an action that uses respond(…) but has no corresponding HTML view (GSP) can no longer return JSON to a browser by accident. It negotiates html and attempts to render the missing view, which results in an error.
Previously the browser’s Accept header was ignored, so such an endpoint happened to return JSON.
If you have browser-facing respond endpoints, add an HTML view for the action (or render an appropriate response directly).
API clients that send a specific Accept such as application/json are unaffected.
To restore the Grails 7 behavior of ignoring the Accept header for browsers, set the property explicitly:
application.yml
grails:
    mime:
        disable:
            accept:
                header:
                    userAgents:
                        - Gecko
                        - WebKit
                        - Presto
                        - Trident
31. @EnableWebMvc No Longer Added to Grails Applications
In earlier versions, Grails added Spring’s @EnableWebMvc annotation to the generated Application class at compile time.
@EnableWebMvc is a Spring Framework configuration annotation that is not intended to be combined with Spring Boot: it imports DelegatingWebMvcConfiguration, which eagerly registers a fixed set of MVC beans and switches off Spring Boot’s WebMvcAutoConfiguration.
In a Boot application this produced bean-definition override warnings at startup (for example for localeResolver and internalAutoProxyCreator) and prevented Boot’s conditional, more configurable auto-configuration from taking effect.
Grails 8 removes the auto-injected @EnableWebMvc.
Spring Boot’s WebMvcAutoConfiguration is now active for Grails servlet web applications, which is the intended Boot behavior and resolves those override warnings.
No action is required for most applications. Grails adapts internally so the change is transparent. The notes below explain the behavioral differences this introduces and the configuration toggles available if you need to control them.
31.1 Boot’s default view resolver is removed automatically
With WebMvcAutoConfiguration active, Boot contributes a catch-all defaultViewResolver (an InternalResourceViewResolver).
For a Grails application that does not use JSP/InternalResource views (for example a REST/JSON-views application) this resolver maps any unmatched view name to a servlet forward, which can surface as:
Circular view path [index]: would dispatch back to the current handler URLTo prevent this, Grails removes Boot’s defaultViewResolver for every Grails servlet web application so that Grails' own view resolution is used instead.
If you need to keep Boot’s defaultViewResolver (for example, an application that genuinely relies on JSP/InternalResource views), opt out:
application.yml
grails:
    web:
        removeDefaultViewResolverBean: false
In GSP applications the GSP view resolver continues to be installed as the primary viewResolver, controlled as before by spring.gsp.replaceViewResolverBean.
The earlier spring.gsp.removeDefaultViewResolverBean property (from when this removal lived in the GSP module) is still honoured for backward compatibility but is deprecated — defaultViewResolver removal is now handled centrally for all Grails servlet web applications by the grails.web.removeDefaultViewResolverBean property above, which takes precedence. Setting the old name logs a deprecation warning at startup.
|
31.2 GrailsWebRequest binding
With WebMvcAutoConfiguration active, Boot would otherwise register its own RequestContextFilter that rebinds a plain ServletRequestAttributes, replacing the GrailsWebRequest bound earlier in the filter chain.
Downstream code that expects a GrailsWebRequest would then fail with a ClassCastException.
Grails 8 registers its request-binding filter as a RequestContextFilter bean so that Boot’s filter backs off and the GrailsWebRequest remains bound for the whole request.
This is handled internally and requires no configuration changes.
Applications that defined their own GrailsWebRequestFilter bean, or their own grailsWebRequestFilter filter-registration bean, continue to override the Grails-provided ones.
31.3 Boot’s static resources and welcome page are removed
With WebMvcAutoConfiguration active, Boot would register a catch-all static-resource handler (classpath:/META-INF/resources/, /resources/, /static/, /public/) and a WelcomePageHandlerMapping that serves a static index.html for the root path.
In a Grails application these can shadow URL mappings — a request that should fall through to Grails' URL-mapping error handling could instead be served as a static resource, and / could return a static index.html rather than being handled by your UrlMappings.
So that Grails' own URL mappings and resource handling stay in control, Grails 8 disables both by default:
-
spring.web.resources.add-mappingsdefaults tofalse, which disables Boot’s catch-all static-resource handler. Re-enable it withspring.web.resources.add-mappings: true. -
Boot’s welcome-page mapping is removed so
UrlMappingsowns/. Opt out withgrails.web.removeWelcomePageMapping: false.
31.4 Other Boot MVC features now active
Because Boot’s WebMvcAutoConfiguration is now active, a handful of its features that @EnableWebMvc previously suppressed take effect for Grails servlet web applications.
None require action for a typical application, but they are behavioral differences worth knowing about when you upgrade:
-
Form-content filter for
PUT/PATCH/DELETE. AFormContentFilterparsesapplication/x-www-form-urlencodedbodies ofPUT,PATCHandDELETErequests so their fields are visible through the standardrequest.getParameter(…)API (and therefore inparams). Boot’sOrderedFormContentFilterprovides it for a default application; for an application that declares@EnableWebMvc— where Boot’s MVC auto-configuration backs off — Grails contributes an equivalent filter itself, so form parameters behave the same either way. In Grails 7 onlyPUTandPATCHbodies were parsed (byGrailsParameterMap) andDELETEwas not; all three are now handled uniformly by the filter. It is enabled by default viaspring.mvc.formcontent.filter.enabled; setting that tofalsedisablesPUT/PATCH/DELETEform-parameter parsing entirely. An application that reads those bodies itself can disable it:application.ymlspring: mvc: formcontent: filter: enabled: false -
spring.mvc.andspring.web.properties now apply. Properties such asspring.web.locale,spring.mvc.format.date/time/date-time, andspring.web.resources.*were inert before and now take effect. Review any of these you may have set inadvertently (for example copied from Boot documentation). -
View resolution. For non-GSP applications the primary
viewResolveris now Boot’sContentNegotiatingViewResolver, which negotiates and delegates to the available view resolvers. GSP applications continue to use the GSP view resolver as before. -
Conversion and message converters.
mvcConversionServiceis now Boot’sApplicationConversionService(which honours thespring.mvc.format.*properties above), and the MVC HTTP message converters pick up Boot’s customizations, including the application’s JacksonObjectMapper. This mainly affects MVC-layer data binding and@RestController-style endpoints.
31.5 Locale resolution
Grails' locale resolution — including ?lang= switching via SessionLocaleResolver — continues to work as before, and the resolver strategy is now configurable through grails.i18n.localeResolver (session (default), cookie, acceptHeader or fixed).
Applications that opt into @EnableWebMvc are unaffected too: Grails removes the AcceptHeaderLocaleResolver that Spring’s WebMvcConfigurationSupport would otherwise contribute, so the configured Grails resolver still wins.
32. More Framework Beans Are Cleanly Overridable
Several Grails framework beans that were previously registered unconditionally are now guarded with @ConditionalOnMissingBean, so a bean of the same name (or type) defined in an application configuration class (a @Bean method) takes precedence cleanly instead of relying on bean-definition overriding:
-
i18n:
localeResolver,localeChangeInterceptorandmessageSource -
URL mappings:
grailsCorsFilter,urlMappingsErrorPageCustomizerandurlMappingsInfoHandlerAdapter -
Controllers:
exceptionHandler -
Cache:
grailsCacheManagerandcustomCacheKeyGenerator
No action is required.
The framework beans still register by default; this only changes what happens when you define your own.
Previously, defining one of these beans produced a bean-definition override (with a startup warning, or a failure when spring.main.allow-bean-definition-overriding is false).
Now the framework bean simply backs off.
The clean back-off applies to beans that are registered before auto-configuration conditions are evaluated: @Bean methods in application configuration classes, and — as of the retimed plugin lifecycle (see Plugin Beans Now Register Before Spring Boot Auto-Configuration below) — beans contributed through a plugin’s doWithSpring or beanRegistrar().
Beans contributed through the application’s resources.groovy or resources.xml register later and continue to take effect through bean-definition overriding, exactly as in previous releases.
The one exception is a @Configuration class registered there, which is no longer processed — see @Configuration classes registered in resources.groovy below.
|
33. Plugin Beans Now Register Before Spring Boot Auto-Configuration
In Grails 7 and earlier, the beans a plugin contributed through doWithSpring were registered after Spring Boot had processed its auto-configurations.
A plugin that wanted to replace a Boot-provided bean therefore had to rely on bean-definition overriding, and Boot beans guarded by @ConditionalOnMissingBean never saw the plugin’s bean in time to back off.
In Grails 8 the plugin lifecycle is unified and retimed: plugin bean definitions — both doWithSpring and the new beanRegistrar() hook — are drained into the bean definition registry before Spring Boot expands its auto-configurations. The practical effects are:
-
Plugin beans win
@ConditionalOnMissingBeanraces. When a plugin registers a bean, a Boot auto-configuration bean of the same name or type that is guarded by@ConditionalOnMissingBeannow backs off in favor of the plugin’s bean. Plugins no longer need to override or remove Boot’s defaults after the fact. -
A single plugin manager and
GrailsApplication. The plugin manager and thegrailsApplicationare built once, early in the context lifecycle, and reused for the rest of startup, so plugins are loaded by a single manager pass rather than a throwaway pass followed by the real one. The globalHolders.grailsApplicationfallback is published after plugindoWithSpringandbeanRegistrar()callbacks complete; plugins must not use it during those callbacks. -
Artefact discovery happens earlier. Controllers, services, domain classes and other artefacts are discovered before plugin beans are registered, because core plugins iterate the application’s artefacts while defining beans. The set of discovered artefacts is unchanged — only the timing moved.
-
Side-effectful
doWithSpringclosures still run once, just earlier. Closures that readgrailsApplication.configcontinue to work; the configuration is fully loaded (including plugin-contributed configuration) before any bean-definition code runs. -
The application class is instantiated a second time during early artefact discovery. A throwaway instance is created solely to compute the application’s class scan; the real lifecycle bean is still created by Spring. An application-class constructor with side effects therefore runs twice per boot, so keep application-class constructors free of side effects.
-
Plugins that inspect the bean definition registry see a pre-auto-configuration registry. A
doWithSpringclosure that checks for the presence of a bean definition (for exampledispatcherServletas a "web application" signal) now runs before Spring Boot has registered its auto-configured beans, so such a check returnsfalsewhere it previously returnedtrue. Plugin code should test a registration-order-independent signal instead — for example whether the application context is a web application context. -
The
annotationHandlerMappingandannotationHandlerAdapterbeans were removed. These duplicated the request-mapping infrastructure that Spring’s own MVC configuration already provides and were never consulted at runtime, but with plugin beans now registering first the bare duplicate adapter started shadowing Spring’s fully configured one.@Controllerannotated beans continue to be handled by Spring Boot’s standard MVC infrastructure.
The bean builder DSL is deprecated. doWithSpring() on GrailsApplicationLifeCycle and grails.plugins.Plugin is deprecated as of Grails 8 — it continues to work, but the recommended way to register beans is the new beanRegistrar() hook, which returns a Spring Framework org.springframework.beans.factory.BeanRegistrar.
Before (deprecated bean builder DSL):
import grails.plugins.Plugin

class MyGrailsPlugin extends Plugin {

    @Override
    Closure doWithSpring() {
        { ->
            myService(MyServiceImpl) {
                timeout = config.getProperty('myPlugin.timeout', Integer, 30)
            }
        }
    }
}
After (Spring BeanRegistrar). BeanRegistrar is a functional interface, so a closure coerced with as BeanRegistrar is all that is required — a separate class is optional and only worth it for more involved or reusable registration:
import grails.plugins.Plugin
import org.springframework.beans.factory.BeanRegistrar
import org.springframework.beans.factory.BeanRegistry
import org.springframework.core.env.Environment

class MyGrailsPlugin extends Plugin {

    @Override
    BeanRegistrar beanRegistrar() {
        { BeanRegistry registry, Environment environment ->
            registry.registerBean('myService', MyServiceImpl) { spec ->
                spec.supplier { context ->
                    new MyServiceImpl(timeout: environment.getProperty('myPlugin.timeout', Integer, 30))
                }
            }
        } as BeanRegistrar
    }
}
Both hooks may be used on the same plugin during migration; when a registrar and the DSL register a bean under the same name, the registrar’s definition wins.
Unit tests follow. doWithSpring() on the GrailsUnitTest trait — and so on every testing trait — is deprecated too. A test now declares its beans in a beans block with the beans DSL, as an application or plugin does; overrides beanRegistrar(), applied where an application’s is; or declares a static nested @Configuration class, which its context registers ahead of the framework’s auto-configurations. A beans block compiles into one such class, named BeansConfiguration, so a test that already declares a nested class of that name must rename it. A test that includes a plugin through getIncludePlugins() also gets the beans the plugin’s beans block declares, which defineBeans(plugin) cannot apply. See Unit Testing.
A unit test now registers an included plugin’s doWithSpring and beanRegistrar beans before its configuration is read, as an application’s early phase does. So a @ConditionalOnMissingBean bean, including one in the framework’s own auto-configurations, backs off from them in a test as it does in an application. A test’s doWithSpring bean now replaces an included plugin’s bean of the same name, where the plugin’s used to win. What a test’s doWithConfig sets now also reaches the Spring Environment before the context’s configuration is read, so a property condition, the framework’s @ConditionalOnProperty included, sees it; it used to reach only grailsApplication.config and ${} placeholders.
A test that already has a static nested @Configuration class meant for something other than its own context — one built for an ApplicationContextRunner, say — now has it registered there as well; override getConfigurationClasses() to leave it out.
A beans block names a nested type’s bean by its simple name. In 8.0.0-M6 and 8.0.0-RC1, bean(Outer.Helper) with no name given registered a bean named outer$Helper. It is now helper, the type’s decapitalized simple name, as documented. Name it explicitly, bean('outer$Helper', Outer.Helper), if anything looks it up by the old name.
Bean-definition overriding edge case. Grails defaults spring.main.allow-bean-definition-overriding to true, and under that default nothing changes: an application bean (from the application class, resources.groovy or resources.xml) that uses the same name as a plugin bean still replaces the plugin’s bean. However, because plugin beans now register earlier and application beans register in a separate, later step, an application that explicitly sets spring.main.allow-bean-definition-overriding to false will see a BeanDefinitionOverrideException for an application bean that shadows a plugin bean — in previous releases the two definitions were merged before a single registry write, so the shadowing was silent even with overriding disabled.
@Configuration classes registered in resources.groovy are no longer processed. In Grails 7 and earlier, a class annotated with @Configuration could be registered as a bean in the application’s resources.groovy or resources.xml, or in the doWithSpring of the Application class, and its @Bean methods, @Import and @Enable… annotations were still honored. This is a breaking change in Grails 8: those bean definitions register after Spring has finished parsing configuration classes, so such a class is now created as a plain bean and none of the beans it declares are registered. No error or warning is reported — the beans are simply missing. The same applies to the application’s beanRegistrar().
@Configuration classes contributed by a plugin’s doWithSpring or beanRegistrar() are not affected, because plugin beans now register before configuration classes are parsed.
resources.groovy and resources.xml are for defining beans. Register a configuration class with Spring directly instead, either by importing it from the Application class:
import org.springframework.context.annotation.Import

import grails.boot.GrailsApp
import grails.boot.config.GrailsAutoConfiguration

@Import(MyConfiguration)
class Application extends GrailsAutoConfiguration {

    static void main(String[] args) {
        GrailsApp.run(Application, args)
    }
}
or by annotating the Application class with @ComponentScan so that configuration classes in the application’s packages are discovered.
Alternatively, declare the beans themselves — in resources.groovy, or in a beans block on the Application class (see Configuring Additional Beans).
Plugin authors who previously told users to replace a plugin-provided @Configuration class through resources.groovy should ship that class as a Spring Boot auto-configuration and let users customize it through @ConditionalOnMissingBean-guarded beans or configuration properties instead.
34. Compile-Time GORM Query Safety Check
Grails 8 adds a compile-time check that can break existing builds: passing a GORM query method (find, findAll, executeQuery, executeUpdate, and the Neo4j Cypher equivalents) a String-typed variable that was built from an interpolated GString is now a compile error, not just a discouraged pattern.
def vulnerable() {
    String query = "from Book as b where b.title = ${params.title}"  // fails to compile
    def books = Book.executeQuery(query)
}
This is flagged because passing the GString directly to executeQuery is safe — GORM binds the interpolated value as a query parameter — but assigning it to a String-typed local first causes Groovy to coerce it to a plain String at that point, silently discarding the safe binding; the interpolated value is then embedded as raw, unescaped query text. See SQL injection for the full explanation and examples.
If the interpolated expressions are values, fix it by keeping the query a GString all the way to the call, or by using named/positional parameters instead. If they are HQL fragments — restrictions or an order by clause chosen at runtime — do not switch to a GString: GORM would bind the fragment as a parameter value and the query would no longer work. Interpolating or appending constant text (string literals, static final constants, ternaries over them, and locals that only ever hold such text) is recognized as safe and is not flagged, so the usual dynamic-restriction idioms, including query += " and …", compile unchanged. For a call site that has been reviewed and is genuinely safe, add @SuppressWarnings("GormUnsafeQueryString") to the declaration of the variable that holds the query text, or to the enclosing method, rather than restructuring the code. See SQL injection for the details of what counts as constant text.
This check runs automatically wherever grails-datamapping-core is on the compile classpath, with no opt-in configuration required. If it produces a false positive with no workaround, the whole check can be disabled by setting the protectSqlInjectionAttacks system property to false (it defaults to true) — this is a last-resort, build-wide kill switch, not a substitute for the per-declaration or per-method @SuppressWarnings above.
The same check also emits (non-build-breaking) compile-time warnings, not errors, for two related but lower-confidence patterns: a String-typed field assigned an interpolated GString and later read through this.field in a query call, and query text built with + concatenation from a non-constant value (constant text is never flagged) with no GString involved. Neither of these fails the build, but both are worth reviewing — see SQL injection for examples of both.
Most applications and plugins need no action. Behavior only changes where a plugin bean and a conditional Boot bean competed for the same name or type — the plugin bean now wins, which is almost always the intended outcome.
35. Extension API Compatibility Notes
Most Grails applications do not call the Grails extension APIs listed below directly. They can affect applications, plugins, or build logic that import these public classes or override these public extension points directly. Unsupported internal implementation details are not covered here.
| Module | Changed or removed API | Migration note |
|---|---|---|
|
|
Do not depend on that plugin override to contribute codec bean definitions.
Custom plugins should register their own beans from their own |
|
|
Update direct imports, overrides, and binary integrations that referenced the Spring Boot 3 return type. |
|
|
Use Groovy’s |
|
|
Update custom bootstrapping code or subclasses that construct |
|
|
Import replacement types from the |
|
Legacy mixin transform APIs such as |
Replace legacy mixin usage with Groovy traits, extension methods, or explicit composition. |
|
|
Use |
|
|
Use the current plugin-discovery APIs and |
|
|
Code that imported the auto-configuration method should use the current |
|
|
Now |
|
|
Now |
|
|
Now |
|
|
Use the |
|
|
Register these task types through Gradle task registration and update custom plugins that subclass |
|
|
Use |
|
JLine 2 |
Implement the JLine 3 |
|
|
Custom context subclasses should use supported Spring lifecycle extension points instead of overriding this removed hook. Spring theme APIs removed from the same area are covered in section 10. |
36. Logback Configuration No Longer Generated by Default
Newly generated Grails 8 applications no longer include a grails-app/conf/logback-spring.xml file.
Logging still works out of the box. A generated application depends on grails-logging, which brings in Spring Boot’s logging starter, so Logback and Spring Boot’s own default Logback configuration apply automatically when the application supplies no configuration of its own. This matches the Spring Boot convention of needing no logging configuration file unless one is actually required.
This change affects application generation only. Existing applications that already contain grails-app/conf/logback-spring.xml are unaffected and continue to use that file.
|
With no configuration file present you get Spring Boot’s defaults: an INFO root level and a colorized console pattern. Levels and patterns can be tuned from application.yml with no XML:
application.yml
logging:
    level:
        root: INFO
        com.example.myapp: DEBUG          # your packages
        org.hibernate.SQL: DEBUG          # see the generated SQL
    pattern:
        console: "%d{HH:mm:ss.SSS} %-5level %logger{36} - %msg%n"
    file:
        name: logs/myapp.log              # setting this activates Spring Boot's file appender
Per-environment logging also needs no XML. Grails environments map to Spring profiles, so an environments block in application.yml applies levels to a single environment — for example, verbose logging for your own packages in development only:
application.yml
environments:
    development:
        logging:
            level:
                com.example.myapp: DEBUG
A profile-specific grails-app/conf/application-development.yml containing the same logging.level entries works as well.
Add a logback-spring.xml file when properties are not enough — for example custom appenders, structured/JSON output, or per-environment appender routing. Use the -spring variant (not plain logback.xml), because it is processed by Spring Boot and unlocks <springProfile> and <springProperty>. Note that once the file exists it replaces Spring Boot’s bundled configuration entirely, so it must declare its own appenders — the simplest approach is to compose Spring Boot’s own includes:
grails-app/conf/logback-spring.xml
<?xml version="1.0" encoding="UTF-8"?>
<configuration>
    <include resource="org/springframework/boot/logging/logback/defaults.xml"/>
    <include resource="org/springframework/boot/logging/logback/console-appender.xml"/>

    <root level="INFO">
        <appender-ref ref="CONSOLE"/>
    </root>

    <springProfile name="development">
        <logger name="org.hibernate.SQL" level="DEBUG"/>
    </springProfile>
</configuration>
When generating a project with Grails Forge, select the Logback Configuration feature to have a starter grails-app/conf/logback-spring.xml — the configuration shown above composed with a <springProfile name="development"> block — generated for you.
|
37. CLI Commands Move to Companion -cli Artifacts
Grails commands (ApplicationCommand implementations) no longer ship inside runtime plugin
artifacts. Each command-bearing module publishes a companion artifact under its own coordinate with
a -cli suffix, and commands are registered in a dedicated META-INF/grails-cli.factories file
instead of META-INF/grails.factories.
Package rename. The command contract moved from grails.dev.commands. (in grails-core) to
org.apache.grails.core.cli. (in the new org.apache.grails:grails-core-cli artifact). Update
imports in your grails-app/commands classes:
// Grails 7
import grails.dev.commands.ApplicationCommand
import grails.dev.commands.ExecutionContext

// Grails 8
import org.apache.grails.core.cli.ApplicationCommand
import org.apache.grails.core.cli.ExecutionContext
New grailsCli configuration. The Grails Gradle plugin registers a grailsCli configuration
that is compile-visible for grails-app/commands sources and on the command-runner classpath, but
never on runtimeClasspath — so commands and their CLI-only dependencies are excluded from
bootRun, bootJar, and bootWar.
CLI dependencies are discovered automatically. The plugin adds
org.apache.grails:grails-core-cli (the command contract) and org.apache.grails:grails-console
(the command runner) to grailsCli, and walks the application’s resolved dependency graph —
including transitive plugins — for jars carrying the Grails-Cli-Artifact manifest attribute,
adding each advertised companion automatically. The per-command Gradle tasks (e.g. dbmUpdate)
are registered from those companions as well, so no buildscript classpath entry is required. In
most applications, upgrading therefore requires no build changes to keep plugin commands
working:
build.gradle
dependencies {
    // the dbm-* commands are discovered automatically: the plugin jar advertises
    // org.apache.grails:grails-data-hibernate7-dbmigration-cli, which is added to grailsCli
    implementation 'org.apache.grails:grails-data-hibernate7-dbmigration'
}
The console and shell tasks also draw from the provisioned cli tier, so the
console "org.apache.grails:grails-console" dependency that earlier Grails versions generated in
build.gradle is no longer needed and can be removed (the console configuration itself remains
for additional console-only dependencies).
The deprecated Grails 7 command contract is isolated in
org.apache.grails:grails-core-cli-legacy. When both cliAutoProvision (default true) and
legacyCommandSupport (default false) are enabled, the plugin adds this artifact to the
execution-only grailsCliLegacy bucket. grailsCliClasspath includes that bucket, but application
and plugin compile classpaths do not. Opt in so existing Grails 7 command plugins keep working
without exposing the deprecated API to new command sources.
Two flags control auto-provisioning:
-
cliAutoProvision(defaulttrue) controls the modern CLI tier:grails-core-cli,grails-console, and discovered companion-cliartifacts. -
legacyCommandSupport(defaultfalse) controls only the Grails 7 application-command bridge. It is consulted only whencliAutoProvisionis also enabled.
Disable the modern CLI tier with grails { cliAutoProvision = false } and declare dependencies
explicitly when full control over the command classpath is preferred:
build.gradle
grails {
    cliAutoProvision = false
}

dependencies {
    implementation 'org.apache.grails:grails-data-hibernate7-dbmigration'
    grailsCli 'org.apache.grails:grails-core-cli'
    grailsCli 'org.apache.grails:grails-console'
    grailsCli 'org.apache.grails:grails-data-hibernate7-dbmigration-cli'
    grailsCliLegacy 'org.apache.grails:grails-core-cli-legacy'
}
grails-console is not optional in that list. It carries the entry points the Gradle tasks
run - grails.ui.console.GrailsSwingConsole, grails.ui.shell.GrailsShell,
grails.ui.command.GrailsApplicationContextCommandRunner and
grails.ui.script.GrailsApplicationScriptRunner. Earlier versions reached them through the console
configuration that the application generator wrote into every build.gradle, so the tasks worked
without any CLI tier at all. Generated applications no longer declare that dependency, so with
auto-provisioning off and grails-console omitted, console, shell, runCommand, runScript and
urlMappingsReport fail with Could not find or load main class.
|
Keep modern companion auto-provisioning while enabling only the Grails 7 bridge:
build.gradle
grails {
    legacyCommandSupport = true
}
The renamed framework command packages are:
| Grails 7 | Grails 8 (-cli artifact) |
|---|---|
|
|
|
|
|
|
|
|
|
|
|
|
37.1 Backwards Compatibility for Existing Command Plugins
Grails 8 provides a deprecated, execution-only compatibility layer for already-published Grails 7 command
plugins. Application commands created with create-command that implement
grails.dev.commands.ApplicationCommand or grails.dev.commands.GrailsApplicationCommand remain
available without a plugin re-release when the bridge is enabled. The deprecated
grails.dev.commands.* types are retained in org.apache.grails:grails-core-cli-legacy, which is
provisioned only on the command runner classpath when both cliAutoProvision and
legacyCommandSupport are enabled (legacyCommandSupport defaults to false), and registrations
in META-INF/grails.factories under grails.dev.commands.ApplicationCommand continue to be
discovered at runtime.
Enable the bridge in the consuming application:
build.gradle
grails {
    legacyCommandSupport = true
}
Or set the project property grailsLegacyCommandSupport=true.
When the bridge is disabled, Grails still inspects legacy META-INF/grails.factories resources at
command runtime without loading their command classes. If a plugin still publishes
grails.dev.commands.ApplicationCommand entries, Grails logs an error naming the plugin artifact.
An unknown command also includes the remediation to enable legacyCommandSupport or upgrade the
plugin. This detection does not resolve application dependencies during Gradle configuration.
Grails logs a one-time deprecation warning when it uses this compatibility layer. It is intended to keep existing published plugins working while plugin authors migrate; it is deprecated and may be removed in a future major release. No removal major has been announced.
Legacy application commands do not receive a dedicated Gradle task. Run them through the generic
runCommand task (or the shell, which routes legacy adapters there), for example:
./gradlew runCommand "-Pargs=generate-controller example.Book"Named per-command Gradle tasks remain available only for migrated commands published in a
companion -cli artifact.
New and migrated commands should always compile against org.apache.grails.core.cli.* from
grails-core-cli. A plugin that intentionally continues to author commands against the deprecated
contract must declare compileOnly 'org.apache.grails:grails-core-cli-legacy' explicitly. Consumers
of already-published Grails 7 command plugins must opt in with
grails { legacyCommandSupport = true } (or declare grailsCliLegacy themselves).
What just works:
-
Code generation scripts created with
create-script, including scripts packaged asMETA-INF/commands/.groovysuch asaudit-quickstartands2-quickstart, remain executable through the CLI. When a plugin publishes a companion-cliartifact, those scripts (andMETA-INF/commands/.yml/*.jsonmulti-step commands undersrc/main/scripts) are packaged into the companion only - not the runtime plugin jar - and stay available viagrailsCliClasspath. Plugins without a companion continue to shipsrc/main/scriptsin the runtime jar, matching Grails 7 packaging. -
Existing published Grails 7 application-command plugins continue to work on Grails 8 without a re-release once
legacyCommandSupportis enabled.
What consumers of Grails 7 command plugins must do:
-
Enable
grails { legacyCommandSupport = true }(or-PgrailsLegacyCommandSupport=true), or declaregrailsCliLegacy 'org.apache.grails:grails-core-cli-legacy'explicitly whencliAutoProvisionis disabled.
What plugin authors must do:
-
Migrate application commands to the
org.apache.grails.core.cli.*API and register them inMETA-INF/grails-cli.factories. -
Publish commands in a companion
-cliartifact for the CLI classpath split and per-command Gradle task support. See Creating Custom Commands for the complete workflow. Applyingorg.apache.grails.gradle.grails-plugin-clialso routessrc/main/scriptsinto that companion automatically - leave scripts undersrc/main/scriptsor place them undersrc/cli/resources/META-INF/commands. -
The
copyCommandsandcopyTemplatestasks stage into a directory of their own instead of writing into theprocessResourcesoutput, and are registered when the plugin is applied rather than inafterEvaluate. They are stillCopytasks, and paths are still relative toMETA-INF/templates(orMETA-INF/commands), so a build script that configures them only needs to drop theafterEvaluate { }wrapper that used to be required:tasks.named('copyTemplates', Copy) { from(layout.projectDirectory.dir('grails-app/views')) { into('views') } } -
After first applying
grails-plugin-clion a project that was already built without it, consider running./gradlew cleanonce. Older plugin packaging wrote command scripts directly intobuild/resources/main/META-INF/commands; the first build on 8.0 drops those files, but the empty directories they lived in remain until the build directory is cleaned. Fresh builds never place companion scripts on the runtime classpath.
| The compatibility layer applies only to the legacy application-command contract. Independently of it, a Grails 7 plugin that relies on APIs removed in Grails 8, Spring Boot 4, or other Grails 8 changes still requires an update. |
38. jQuery Webjar Upgraded to 4.0.0
The jQuery webjar managed by the grails-bom (org.webjars.npm:jquery) moves from 3.7.1 to 4.0.0.
jQuery 4 is a major release: it drops Internet Explorer and other legacy browsers and removes long-deprecated utilities such as jQuery.trim, jQuery.type, jQuery.isArray, jQuery.isFunction, jQuery.proxy, and jQuery.isWindow.
See the jQuery 4.0 Upgrade Guide for the complete list of changes.
Because the version is managed by the BOM, any application that references the jQuery webjar without an explicit version picks up 4.0.0 automatically once it adopts the Grails 8 BOM. This includes the generated create-app welcome page, whose assets have been verified against 4.0.0.
If your application’s own JavaScript relies on the removed APIs, migrate those call sites. If you are not ready to migrate, pin the previous version in your gradle build:
gradle.properties
jquery.version=3.7.139. spring-security-ui Rewritten on Bootstrap 5
The spring-security-ui plugin’s screens are rewritten on Bootstrap 5 with no bundled styling of their own.
The plugin no longer ships or depends on jQuery UI, jquery-form, jGrowl, DataTables, bgiframe or the bundled jdMenu/positionBy plugins, and every plugin stylesheet and image has been removed — dialogs are Bootstrap modals, tabs are nav-tabs, notifications render through g:flashMessages, and the autocomplete search uses a native datalist.
jQuery (4.x) and Bootstrap are expected from the host application, as provided by the create-app layout.
Plugin pages now render through the host application’s own layout — configured with grails.plugin.springsecurity.ui.gsp.parentLayout (default main) — inheriting its theme, including Bootstrap dark mode, locale selector and branding.
The security menu and login state are contributed to the host navbar through nav and navActions content blocks, which the create-app layout renders with <g:pageProperty name="page.nav"/> and <g:pageProperty name="page.navActions"/>; a custom layout that wants the menu in its navbar renders the same page properties.
If you upgrade an application that customized the plugin:
-
Views previously copied into the application with
s2ui-overridereference removed stylesheets and rely on the old table-based markup of thes2uifield-row tags, which now emit Bootstrap form groups; regenerate or update those copies. -
CSS written against the old
s2ui_*andjd_menuclasses no longer has anything to match; restyle against Bootstrap classes. -
Applications that used the plugin’s transitive webjars (jQuery UI, jGrowl, DataTables, jquery-form) must now declare those dependencies themselves.
-
The
grails.plugin.springsecurity.ui.Constantsclass and thespring-security-ui-register.jsandspring-security-ui-*stylesheet assets have been removed. -
LogoutControllernow declares a computedallowedMethodsrestricting its action to POST whilelogout.postOnlyis active (the default), making the restriction visible to tooling such as the create-app welcome page.
40. Stack Trace Filterer Configuration Reaches All Callers
grails.logging.stackTraceFiltererClass and grails.exceptionresolver.logFullStackTraceOnFilter now also
apply to paths outside the exception resolver — including GSP view-render exceptions — so the same two keys
control which filterer is used and whether it emits, everywhere the framework filters a stack trace, not
just for resolver-driven requests.
grails-app/conf/application.yml
grails:
    logging:
        stackTraceFiltererClass: com.example.MyStackTraceFilterer
    exceptionresolver:
        logFullStackTraceOnFilter: false
Applications that previously had to silence the StackTrace logger in logback purely to suppress
render-time noise can set logFullStackTraceOnFilter: false instead and reach every caller of the filterer.
The configured filterer is resolved once during application startup, before the application context
refreshes. Any context not started through SpringApplication — the CLI, plain main() usage, Grails unit
tests — keeps the previous fallback behaviour unchanged: a plain DefaultStackTraceFilterer with no
configuration applied. The filterer is JVM-global rather than per-context, so in a JVM hosting more than one
application context the last one booted supplies the filterer for all of them.
41. Jansi Removed and Developer Tooling Off the Application Classpath
Grails no longer depends on a separate ANSI library. The console renders its escape sequences directly,
and the FuseSource Jansi artifact - unmaintained, and the subject of an unfixed CVE - is gone from the
dependency graph along with the org.jline:jansi fork that briefly replaced it.
At the same time, developer-only tooling no longer ships with an application. These artifacts could reach an application’s production runtime classpath, by a different route for each:
-
org.apache.grails:grails-console- the Swing console, the Groovy shell, and the script and command runners - and theorg.apache.groovy:groovy-console,groovy-groovyshandgroovy-swinglibraries it brings with it, through theconsoleconfiguration the application generator declared -
the JLine family, including
org.jline:jansi, and the FuseSource Jansi artifact, declared directly by the generated build
None of these are on an application’s runtime classpath now. They are provisioned onto the grailsCli
configuration instead, which the Grails Gradle plugin puts on the compile and test classpaths but never on
runtimeClasspath - so bootRun, bootJar and bootWar no longer carry them. The console and shell
tasks are unaffected and continue to work exactly as before.
What you need to change
Applications generated by earlier versions of Grails declare Jansi explicitly:
build.gradle
runtimeOnly "org.fusesource.jansi:jansi"Delete that line. New projects are generated without it.
If your own code imports Jansi directly, it must move off it - there is no Grails-managed replacement
coordinate. Application code that needs coloured output should use Spring Boot’s
org.springframework.boot.ansi.AnsiOutput, or JLine’s org.jline.utils.AttributedStringBuilder if the
project already depends on JLine.
If your code, or a runtimeOnly dependency of it, genuinely needs the Groovy shell, Swing console or JLine
at application runtime, declare that dependency explicitly rather than relying on the starter:
build.gradle
runtimeOnly "org.apache.groovy:groovy-groovysh"Controlling ANSI output
Jansi’s global switch went away with the library. Console colour is now driven by Spring Boot’s own property, so it is configured in one place alongside the rest of the application’s output settings:
application.yml
spring:
    output:
        ansi:
            enabled: never   # always | detect | never
detect is the default and keeps the previous behaviour - colour only when the attached terminal
supports it. never suppresses it entirely, and always forces it on even when the terminal is not
detected as capable, which is useful for CI logs that render ANSI.
The same property works as a system property, which is how the CLI reads it since it has no Spring
Environment to bind from:
grails -Dspring.output.ansi.enabled=never run-appNote that passing -D to gradlew sets the property on the Gradle daemon, not on the JVM that
bootRun forks for your application, so it has no effect there. To disable colour for bootRun, use
the application.yml form above or set it on the task itself:
tasks.named('bootRun') {
    systemProperty 'spring.output.ansi.enabled', 'never'
}
If you previously disabled colour through Jansi’s own switch, replace it - the property no longer has any effect now that the library is gone:
| Before | Now |
|---|---|
|
|
Remove withJansi from your Logback configuration
Logback’s ConsoleAppender has a withJansi option that loads org.fusesource.jansi.AnsiConsole by
name to wrap the output stream. With Jansi gone from the dependency graph, an application that still
enables it logs a warning on every startup and falls back to the plain stream:
-WARN in ch.qos.logback.core.ConsoleAppender[STDOUT] - Failed to create AnsiPrintStream. Falling back
on the default stream. java.lang.ClassNotFoundException: org.fusesource.jansi.AnsiConsole
Delete the element from grails-app/conf/logback.xml or logback-spring.xml:
<appender name="STDOUT" class="ch.qos.logback.core.ConsoleAppender">
    <withJansi>true</withJansi>   (1)
    <encoder>
        ...
    </encoder>
</appender>| 1 | remove this line |
Nothing is lost. Coloured log output comes from Spring Boot’s ColorConverter - the %clr(…) tokens
in the encoder pattern - which is independent of Jansi and honours spring.output.ansi.enabled. The
withJansi option only wrapped the stream for legacy Windows consoles.
Applications generated by recent versions of Grails already omit it: Jansi’s global System.out
replacement breaks console logging after a Spring Boot DevTools restart
(issue #15663), so it was removed from the
generated configuration before Jansi itself was dropped. Only applications carrying older
configuration forward need this change.
GrailsConsole moved to a companion artifact
The console classes are developer tooling, so they now ship as grails-bootstrap’s CLI companion
rather than in the artifact applications depend on. These types moved out of
`org.apache.grails.bootstrap:grails-bootstrap and into
org.apache.grails.bootstrap:grails-bootstrap-cli:
-
grails.build.logging.GrailsConsole -
grails.build.logging.ConsoleLogger -
grails.build.logging.GrailsEclipseConsole -
org.grails.build.logging.GrailsConsolePrintStream -
org.grails.build.logging.GrailsConsoleErrorPrintStream -
org.grails.build.logging.GrailsConsoleAntBuilder -
org.grails.build.logging.GrailsConsoleBuildListener -
org.grails.build.interactive.CandidateListCompletionHandler
The URL mappings report renderer moved the same way, out of org.apache.grails:grails-url-mappings
and into org.apache.grails:grails-url-mappings-cli:
-
org.grails.web.mapping.reporting.AnsiConsoleUrlMappingsRenderer
Their package names are unchanged - only the artifact that carries them is different.
Command code needs no change: the CLI tier is auto-provisioned onto grailsCli, so commands in
grails-app/commands and in a plugin’s src/cli continue to see GrailsConsole as before.
If application code (not command code) references any of these types, it was relying on developer
tooling being present at runtime. Prefer a logger, or Spring Boot’s
org.springframework.boot.ansi.AnsiOutput for coloured output. If the dependency is genuinely
required, declare the companion explicitly:
build.gradle
implementation "org.apache.grails.bootstrap:grails-bootstrap-cli"Test code that extended GrailsConsolePrintStream to capture output does not need it: that class
routes output through the CLI console, which a test almost never wants. Extend java.io.PrintStream
directly instead.
42. Plugin Authors: Separate Source Sets for the CLI Tier
This affects plugins that apply org.apache.grails.gradle.grails-plugin-cli and therefore publish a
companion -cli artifact.
Previously the cli source set’s output and its dependencies were added to the plugin’s test
classpath, so unit tests saw CLI classes and CLI-only libraries that an application never receives. A test
could pass against something that was not actually there in production.
The cli tier now has its own test source sets:
| Source set | Purpose |
|---|---|
|
Tests for CLI classes. Runs as the |
|
CLI tests that need a booted application - a command starts one the same way the shell does. Runs as the
|
Both are created by org.apache.grails.gradle.grails-plugin-cli, so there is nothing to declare: create the
folder, add a spec, and the task picks it up.
src/test no longer sees the CLI tier at all. Move any existing spec that exercises a command or another
CLI class into src/test-cli, or into src/integration-test-cli if it boots an application.
Both CLI test source sets can read the module’s main and test output, so shared fixtures stay where they
are. src/integration-test-cli additionally reuses src/integration-test/resources when that folder exists,
since both integration phases boot the same application and its configuration should not be duplicated.
The relationship between the source sets is deliberately one-way: CLI tests may use test fixtures, but
ordinary tests never see CLI classes, which is what keeps the test classpath a faithful stand-in for
production.
43. gspCompile Configuration Removed
The org.apache.grails.gradle.grails-gsp plugin no longer registers a gspCompile configuration.
It dated back to the original Ant-based GSP compiler, where it carried the classpath that compiler ran against. Once GSP compilation moved to a forked compile task the configuration’s only remaining content was a hardcoded servlet API dependency, and that dependency has itself been removed — the servlet API already reaches GSP compilation through the regular compile classpath, at the version the BOM manages.
GSPs continue to compile against the project’s compileClasspath, its compiled classes, and — for a WAR
build — providedCompile. No application that leaves the configuration alone is affected.
A build that declares dependencies on gspCompile fails with Could not find method gspCompile(). Move
those declarations to compileOnly, which places them on the compile classpath that GSP compilation uses:
build.gradle
dependencies {
    // Grails 7
    // gspCompile 'com.example:some-library:1.0'

    // Grails 8
    compileOnly 'com.example:some-library:1.0'
}
44. grails.spring.bean.packages Scanning Fixed Outside the Project Directory
The component scan driven by grails.spring.bean.packages resolved its search root from a probe of the
working directory — it looked for a grails-app directory or an Application.groovy beside it — and
returned nothing when neither was there. An application started from anywhere other than its project root
therefore registered none of the @Component classes in the configured packages, silently.
That covers most production shapes: a systemd unit with its own WorkingDirectory, a container with a
WORKDIR, an application server. java -jar build/libs/app.jar run from the project root was unaffected,
which is why the gap survived. The scan now uses Spring’s own resource resolution, so the packages are
scanned wherever the process is started from.
grails-app/conf/application.yml
grails:
    spring:
        bean:
            packages:
                - com.example.components
Applications deployed this way will start getting beans they previously did not. The scan registers
every @Component, @Service, @Repository and @Controller in the listed packages. Two things to check
before upgrading:
-
A class in one of those packages that was never actually reaching the context — because it duplicates a bean the application defines elsewhere, or because it was left behind — now registers. A duplicate under the same bean name will fail startup rather than pass silently.
-
Beans that were previously absent may now participate in autowiring by type, so an injection point that resolved unambiguously before can become ambiguous.
Removing the packages from grails.spring.bean.packages, or the stray classes from those packages, restores
the previous set of beans.
45. GORM API Resolution Moves to a Registry
GORM no longer allocates an API object for every (entity, connection) pair up front. Per-entity, per-qualifier
state now lives in a registry (org.grails.datastore.gorm.GormRegistry), and APIs are built on first use by a
pluggable factory. For applications this is invisible — Book.list(), dynamic finders, and
Book.withNewSession { } behave as before. It does change some extension points that out-of-tree GORM
implementations subclass.
GormEnhancer
org.grails.datastore.gorm.GormEnhancer’s public constructors, `enhance()/enhance(PersistentEntity),
dynamicEnhance, and the transactionManager field are all unchanged in behaviour and signature (the
transactionManager field is now @Deprecated and immutable after construction — read it, don’t assign it).
The following members were removed:
| Removed | Migration note |
|---|---|
|
Use |
|
Moved to |
|
The |
|
Internal helpers of the old per-method reflective registration mechanism, replaced wholesale by the registry
and its |
A new registerApiFactories() hook is called once, before any entity is registered. Adapters that build
specialised API objects should override it:
class MyGormEnhancer extends GormEnhancer {

    @Override
    protected void registerApiFactories() {
        GormRegistry.instance.registerApiFactory(MyDatastore, new MyGormApiFactory())
    }
}
Earlier snapshots of this work registered API factories from registerConstraints(Datastore).
Move that code to registerApiFactories(); factory registration must not depend on the constraints lifecycle step.
|
CurrentTenantHolder.get()
grails.gorm.multitenancy.CurrentTenantHolder.get() — the no-argument form — now throws TenantException when
different datastores hold different tenants on the calling thread, rather than returning an arbitrary one of
them. Pass the datastore you are operating on:
CurrentTenantHolder.get(datastore)See Multi-Tenancy for the full multi-tenancy API.
Tenants.withId(Class, Serializable, Closure)
grails.gorm.multitenancy.Tenants had two distinct 3-argument withId overloads that both erased to
withId(Class, Serializable, Closure) at the bytecode level:
// removed - resolved a datastore by its own type
static <T> T withId(Class<? extends Datastore> datastoreClass, Serializable tenantId, Closure<T> callable)

// kept - resolves the datastore that maps a domain class
static <T> T withId(Class domainClass, Serializable tenantId, Closure<T> callable)
The datastore-class overload relied on GormEnhancer.findDatastoreByType(Class), which was one of the internal
per-method-dispatch helpers removed as part of the registry migration (see GormEnhancer
above), so it could not be carried forward under its own name. Only the domain-class overload remains.
Because both overloads share one erased signature, a call site that used to pass a datastore class -
Tenants.withId(SomeDatastore, tenantId) { … } - still compiles unchanged against the domain-class overload.
It no longer resolves the datastore you named: getDatastoreForDomain(SomeDatastore) looks SomeDatastore up as
if it were a domain class, finds no entity registered under that name, and falls through to the application’s
DEFAULT datastore. On a single-datastore application this is indistinguishable from the old behaviour. On a
multi-datastore application it silently binds the tenant against the wrong datastore - no exception, no log -
which can surface much later as a cross-database read or write.
If you have a call site that passes a Datastore subclass to this method, migrate it to look the datastore up
explicitly and call the datastore-instance overload instead. Tenants.datastoreLocator still resolves a
datastore by its type - only the withId(Class, ..) shortcut for it is gone:
MultiTenantCapableDatastore datastore = Tenants.datastoreLocator.getDatastore(SomeDatastore) as MultiTenantCapableDatastore
Tenants.withId(datastore, tenantId) { ... }
or pass an actual domain class if that is what you meant:
Tenants.withId(SomeDomainClass, tenantId) { ... }46. Startup Banner Shows the Servlet Container and Spring Security
The banner now reports the servlet container it is running on, and the version of Spring Security where the
application has it, without being asked for either. Both were previously opt-in through
grails.banner.versions.include.
What made them opt-in was that a version which could not be determined was shown as unknown, so turning one
on by default would have printed Spring Security: unknown for every application without it. A version shown
by default that cannot be determined is now left out instead, which is what allows the two to be shown at all.
A version the application asked for by name still reads unknown where it cannot be determined, since saying
nothing about something that was asked for reads as the option having been ignored.
The container is named as itself: an application on Tomcat shows Tomcat, one on Jetty shows Jetty. It is
configured under the single key container, whichever container that turns out to be.
To restore the previous banner, exclude them:
grails-app/conf/application.yml
grails:
    banner:
        versions:
            exclude:
                - container
                - spring-security
An application that already asked for spring-security under grails.banner.versions.include keeps working
and needs no change — the option is still recognised, and the version is shown either way. The same is true
of tomcat, jetty and undertow, which remain available for an application that wants to be told about a
particular container whether or not it is the one serving; naming one as well as taking the default shows it
once, not twice.
A version option that names none of the known keys is now reported as a warning after the banner is printed, rather than being dropped in silence. ==== 47. Message Bundles Resolved by Spring Boot
Grails no longer registers a messageSource bean. Spring Boot’s MessageSourceAutoConfiguration
supplies a standard ResourceBundleMessageSource, and Grails contributes only the base-name list, which
it records at build time rather than discovering by scanning the classpath at runtime.
Most applications need no change. The rest of this section covers the cases that do.
spring.messages.* is now the configuration surface
spring.messages.* was previously ignored, because Grails' own message source claimed the bean name and
Boot’s auto-configuration backed off. It is now honoured in full — encoding, cache-duration,
fallback-to-system-locale, always-use-message-format, use-code-as-default-message and
common-messages.
Two Grails settings give way to it:
| Setting | Replacement | Status |
|---|---|---|
|
|
Deprecated, still honoured for now — see below |
|
None |
Ignored |
grails.i18n.cache.seconds is still honoured as a temporary upgrade aid: it is translated into
spring.messages.cache-duration and logs a deprecation warning. As before, it applies only when reload
is enabled, so an application that set it for development keeps the timing it had. Setting
spring.messages.cache-duration explicitly always wins. Migrate before it is removed.
grails.i18n.filecache.seconds has no replacement and is ignored: it tuned the file-timestamp re-check
of the message source Grails used to own, which Spring Boot’s has no equivalent for.
grails.i18n.availableLocales.includePlugins is replaced by grails.i18n.include-plugin-bundles, which
now governs both message resolution and the locales offered by a language selector, so the two can no
longer disagree.
Plugin authors: base names must be namespaced
A plugin’s message bundle base names must be its plugin name, or that name followed by a hyphen and a suffix:
grails-app/i18n/spring-security-core.properties            (1)
grails-app/i18n/spring-security-core_fr.properties
grails-app/i18n/spring-security-core-validation.properties (2)| 1 | the plugin’s own name |
| 2 | further bundles inside its namespace |
The plugin build fails otherwise. A plugin shipping messages.properties used to contribute messages as
a fallback behind the application’s own bundle; Spring resolves a base name to the first matching
resource on the classpath, so such a bundle would now silently shadow, or be shadowed by, the
application’s. Rename it into the plugin’s namespace.
Applications are unaffected — there is only one application, so its base names cannot collide.
A namespaced bundle still works under Grails 7, so a plugin does not need a separate source branch to
support both. Grails 7 discovers a plugin’s bundles by scanning the plugin jar’s root for
*.properties and matching locale suffixes; it never inspects the base name, so
spring-security-core.properties and spring-security-core_fr.properties are found exactly as
messages.properties was. The spring-security-core plugin has shipped this layout for years. Rename
once, and the same source builds for both: Grails 7 finds the bundles by scanning, Grails 8 through the
generated descriptor.
Every bundle needs a locale-independent file
Spring Boot’s auto-configuration only activates when a configured base name has a bundle without a
locale suffix, and it contributes the whole messageSource bean. An application shipping only
messages_de.properties would therefore have had no message source at all, so the build now rejects it.
Ambiguous base names must be declared
A base name ending in a valid locale identifier is ambiguous: api_fr.properties reads as base name
api in French. Likewise api_errors.properties alongside api.properties reads as a mistyped locale
variant of api. Both fail the build; declare the base name when the inference is wrong:
grails {
    i18n {
        basenames = ['api', 'api_errors']
    }
}
PluginAwareResourceBundleMessageSource removed
org.grails.spring.context.support.PluginAwareResourceBundleMessageSource and the Grails fork of
ReloadableResourceBundleMessageSource beside it are removed. Code that injected MessageSource is
unaffected. Code that cast the bean to either type, or called getBundleCodes(), must be updated —
inject MessageSource and use its interface, or declare your own bean, which Boot’s auto-configuration
backs off from.
Language selectors read the same plugin set as message resolution
The locales offered by g:localeSelect available="true" now come from the recorded bundles rather than a
classpath scan, and they follow exactly the plugin set that message resolution uses. A plugin that was
evicted, excluded, or failed to load no longer contributes a language entry, so a selector can no longer
offer a translation whose messages will not resolve.
An application that declares its own AvailableLocaleResolver bean must supply the effective descriptors
instead of a ClassLoader; most applications simply rely on the one Grails registers.
Reloading during development
Editing a value in an existing bundle still reloads without a restart: Grails contributes a short
spring.messages.cache-duration when reload is enabled, in place of the grails.i18n.cache.seconds it
used to apply to its own message source.
Adding or removing a base name now needs a restart, because Spring Boot reads the configured base names once when it builds the message source.
48. CAS Single Sign-Out Is Opt-In
grails.plugin.springsecurity.cas.useSingleSignout now defaults to false. It previously defaulted
to true, so every CAS application registered the CAS client’s SingleSignOutFilter whether or not
it wanted single sign-out.
The default changed because enabling single sign-out is a security trade-off rather than a free
feature. CAS maps the service ticket to the HTTP session id, so single sign-out cannot work while
session fixation prevention is replacing the session when the user authenticates. Enabling
cas.useSingleSignout disables session fixation prevention, and an application should make that
choice deliberately.
If your application relies on CAS single sign-out, enable it explicitly:
grails-app/conf/application.groovy
grails.plugin.springsecurity.cas.useSingleSignout = trueThe plugin logs a warning at startup when it is enabled, noting that session fixation prevention has been disabled.
Single sign-out did not actually work before Grails 8, so an application upgrading from an
earlier version is unlikely to lose working behaviour. The plugin set
useSessionFixationPrevention = false from doWithSpring, but it declares loadAfter =
['springSecurityCore'], so the core plugin had already defined sessionAuthenticationStrategy from
the original value. The filter was registered, the session was still replaced on login, and CAS
logout requests silently matched nothing. Grails 8 also redefines sessionAuthenticationStrategy
from the CAS plugin, so enabling cas.useSingleSignout now has the documented effect.
The Spring Security CAS configuration reference in this guide documents the setting in full.
49. GSPs Record a Source Checksum Instead of a Modification Time
A GSP used to carry the modification time of its .gsp source, precompiled pages baking it into the
generated class as a LAST_MODIFIED constant. Git stores no modification times, so every fresh clone or CI
checkout gave each source a new one, and the generated classes differed on every checkout even when the
sources were byte-for-byte identical. Because LAST_MODIFIED was a compile-time constant it was part of the
class’s ABI, so the difference survived even Gradle’s compile-classpath normalization and every task
downstream of a jar containing precompiled GSPs missed the build cache.
Grails 8 records a SOURCE_CHECKSUM of the page source instead, for pages compiled at build time and at
runtime alike. Identical sources now compile to identical bytes on every machine.
Runtime reloading, described in
Making Changes to a Deployed Application, is unaffected: a page is
reloaded when its source no longer matches the recorded checksum. Detection is more accurate than it was.
An edit is caught whenever the source’s modification time or length moves, which any ordinary save does;
previously a save landing within the old granularity window went unnoticed until a later edit moved it
clear. In the other direction, a page whose modification time moves without its content changing is no
longer recompiled, so touching a file — or a build step copying views into place — no longer reloads pages
that did not actually change. If you were using touch to force a page to recompile, edit the page instead.
Removed API. GroovyPageMetaInfo.getLastModified(), setLastModified(long) and
applyLastModifiedFromResource(Resource) are gone, as are GroovyPageParser.getLastModified() and
setLastModified(long). Use GroovyPageMetaInfo.getSourceChecksum() to identify the source a page was
compiled from. Generated page classes no longer declare a LAST_MODIFIED constant.
Removed setting. grails.gsp.reload.granularity is gone. It existed to absorb rounding differences
between modification times, which comparing content does not need; setting it now has no effect.
grails.gsp.reload.interval is unchanged.
A GSP precompiled by Grails 7 and shipped inside a binary plugin carries no checksum. Such a page is served normally; it is simply never reload-checked, which was already the case for views resolved out of a plugin jar.
50. The Hidden HTTP Method Filter Is Disabled by Default
Grails has always registered a servlet filter that rewrites a POST into a PUT, PATCH or DELETE when the
request carries a _method parameter or an X-HTTP-Method-Override header. It runs ahead of the dispatcher — and ahead of the Spring Security filter chain. As of Grails 8 it is no longer registered by default.
Browser forms keep working. The _method parameter is still honoured; it is resolved inside the dispatcher
instead, after multipart handling and after the filter chain. <g:form method="DELETE">, the scaffolded views
and existing GSP templates need no changes.
50.1 Why the default changed
The filter reads a request parameter before the dispatcher runs. Because a MultipartConfigElement is attached
to the dispatcher servlet registration, the servlet container resolves it at filter time, so reading _method
on a multipart/form-data POST forces the container to parse the entire body — writing its temporary files — before the request has been routed or authenticated. An unauthenticated request can therefore cause uploads
to be written to disk.
Spring Boot disabled its equivalent filter by default in 2.2 for the same reason: it "causes early consumption of a request body if the body may contain parameters".
The filter is also wider than Spring’s. Spring’s HiddenHttpMethodFilter reads only the _method parameter and
honours only PUT, PATCH and DELETE. The Grails filter additionally trusts the X-HTTP-Method-Override
header — which any client can set — and applies any method name it is given, including GET. The
in-dispatcher resolution that replaces it accepts the parameter only, and only those three methods.
50.2 What changes for an application
-
POSTto a member URL now reachesupdate. Aresourcesmapping generatesPOST /books/$idalongsidePUT /books/$id.RestfulControllerhas permittedPOSTforupdatesince Grails 3 (issue #9926, raised because AngularJS$resourceand the clients modelled on it POST to save an existing object) but no mapping was ever generated for it. That is now fixed, and it is what lets a client submit without a_methodparameter.This is a route that did not exist before, so a
POSTan application previously rejected at the member URL now reachesupdate. An authorization rule written to permitPOSTto the collection —POST /booksto create — will permitPOST /books/1too wherever it is expressed as a prefix. Review any rule that grantsPOSTon aresourcespath before upgrading, or keep the route out entirely by enabling the filter as described below. -
<g:form>is unchanged. A form asking forPUT,PATCHorDELETEstill submits aPOSTcarrying a_methodfield, and the dispatcher resolves it. The route above is a fallback for a request that arrives without the parameter — an AngularJS-style client, or a hand-written form — rather than a replacement for it: it reachesupdatealone, so it answers for neither aPATCHnor aDELETEform, it is not generated for a singularresourcemapping, and it says nothing about a URL an application has mapped toPUTitself. -
Servlet filters see the real request method. This is the one consequence that fails silently. A
POSTcarrying_method=DELETEnow reaches Spring Security and every servlet filter as aPOST, because the rewrite happens inside the dispatcher. A security rule matchingDELETE /books/will no longer fire for a browser form submit, and since the URL is unchanged,updateanddeletecannot be told apart by path either. Review any authorization rule keyed on the HTTP method before upgrading.** -
X-HTTP-Method-Overrideis no longer honoured, and a_methodvalue other thanPUT,PATCHorDELETEis ignored rather than applied. This one fails silently for a non-browser client: a proxy or SDK that rewritesDELETEintoPOSTplus the header now has itsPOST /books/1answered byupdatewith a200, while the caller believes it issued aDELETE. Enable the filter for an application any such client talks to, which restores both the header and the unrestricted method names. -
A filter registered by the application does not by itself select filter mode. The mode is read from
grails.web.hiddenmethod.filter.enabledandspring.mvc.hiddenmethod.filter.enabledonly. An application that registers its ownHiddenHttpMethodFilterbean without setting either property gets that filter and the dispatcher-mode behaviour described here, including the generatedPOSTmember route. Set the property alongside the bean. -
A controller’s
request.methodreportsPOST. The servlet request reports the method the request arrived as — the one Spring Security saw and the access log recorded. That is deliberate: with the rewrite moved out of the filter chain, a request object that reported anything else would put back the divergence between what an application sees and what the infrastructure saw.Everything Grails resolves from the request answers with the overridden method instead, so that an application behaves the same whichever mode is in force:
Reports the overridden method Reports the method on the wire URL mapping resolution, including a method-keyed
controller/actionnamerequest.method, and the servlet request generallyallowedMethodsSpring Security and every other servlet filter
Link generation, when no
methodattribute is givenThe container’s access log
RenderContext.getHttpMethod()Command object initialization, and whether a request body is bound
Anything branching on
request.methoditself for aPUT,PATCHorDELETEform submit needsallowedMethods, separate actions, or its own read of the parameter. Enabling the filter restores the old reading, as described below.
50.3 Restoring the previous behaviour
grails-app/conf/application.yml
grails:
    web:
        hiddenmethod:
            filter:
                enabled: true
That restores the filter exactly as it behaved in Grails 7, including the header and the unrestricted method
names, and suppresses the POST member route so the mappings a resources block generates are unchanged.
Spring Boot’s spring.mvc.hiddenmethod.filter.enabled selects the same mode, registering Spring’s filter
rather than the Grails one. Either property is enough: whichever is set, a filter is on the chain, the
dispatcher stops resolving _method itself, and the POST member route is not generated.
Spring’s filter is contributed by WebMvcAutoConfiguration, which backs off entirely for an application
declaring @EnableWebMvc. Grails contributes its own filter in that case, so asking for Boot’s still leaves a
filter on the chain rather than silently leaving none. Previously the two definitions could also collide on the
shared hiddenHttpMethodFilter bean name and fail application startup; they no longer can.
|
51. Tag Libraries Are Described When Compiled
Tag calls are resolved against a description each tag library contributes as it is compiled, and a resolved call is compiled into a direct invocation. The tag itself is still selected by name when the call runs, through the same lookup dynamic dispatch uses, so a tag library that overrides another and the order tag libraries are registered in behave as before. A call into a namespace no compiled tag library declares — a tag library from a plugin built against an earlier version of Grails, or one registered while the application runs — is left to dispatch exactly as it did.
Three things are worth knowing when upgrading.
A tag that no compiled tag library declares is left to resolve at runtime, and nothing is reported.
Setting grails { compileStatic { strictTags = true } } makes it a compilation error instead, which
is worth doing once to find misspelled tags, but is not the default because a namespace can
legitimately hold tag libraries that carry no description. Where an application registers tag
libraries while it runs, name their namespaces in
grails { compileStatic { dynamicTagNamespaces = […] } } so that they are never checked.
Strict checking applies only where the source says a call is a tag: one naming its namespace, and one
written as markup. A call written without a namespace is never checked, and a namespaced expression in
a page is checked only when that page declares compileStatic.
A call written without a namespace is not compiled at all unless the build asks for it with
grails { compileStatic { unqualifiedTagCalls = true } }. Whether a bare name is a tag depends on what
else answers to it, and not all of that is visible when compiling — a method Groovy gives every object,
a delegate an enclosing closure is handed, an overload the tag library also declares — so by default
such a call is dispatched exactly as it was before this release.
Where it is turned on, a call written without a namespace reaches a tag only when nothing nearer
answers to the name: not a method of the class, not one it inherits, not a field, property or local,
not a method Groovy provides, and not a name inside a closure, whose delegate is only known when it
runs. A method added to a controller or tag library while the application runs, through a plugin’s
doWithDynamicMethods, is not visible when the calling code is compiled, so a call that used to reach
such a method and shares its name with a tag would reach the tag instead. Declare the method on the
class, name the namespace in dynamicTagNamespaces, or call the tag with its namespace.
Naming a namespace in dynamicTagNamespaces turns rewriting off for it entirely, not just the
reporting: calls into it are dispatched exactly as they were before this release. That is the escape
hatch for a namespace whose tags are decided while the application runs.
Tags defined as closures now warn at compile time. They still work and are called the same way, but a
closure carries no signature, so nothing about a call to such a tag can be checked. This covers the
def form as well as the explicitly typed one, and the def form is the one most tag libraries are
written in:
// Before - both forms warn
def hello = { attrs ->
    out << "Hello ${attrs.name}"
}

Closure goodbye = { Map attrs ->
    out << "Goodbye ${attrs.name}"
}

// After
def hello(Map attrs) {
    out << "Hello ${attrs.name}"
}

def goodbye(Map attrs) {
    out << "Goodbye ${attrs.name}"
}
A tag taking a body becomes a method with a second Closure body parameter:
// Before
def wrapped = { attrs, body ->
    out << '<div>' << body() << '</div>'
}

// After
def wrapped(Map attrs, Closure body) {
    out << '<div>' << body() << '</div>'
}
Tags Are No Longer Installed Onto Metaclasses
Dispatching a tag no longer works by installing a method for every tag, and a property for every namespace, onto the metaclass of every tag library, controller and page. Tags are resolved through the tag library lookup instead. Calling a tag — from a page, a tag library or a controller, with or without its namespace — is unaffected.
What changes is code that inspected the metaclass to find tags. A check such as
tagLib.metaClass.respondsTo(tagLib, 'someTag')answered true before because the tag had been installed there, and now answers false. Call the tag,
or consult the tag library lookup, instead of asking the metaclass what it holds.
The methods that performed the installation are deprecated or removed:
| Member | Replacement |
|---|---|
|
Removed. Nothing needs to be initialised. |
|
Removed. |
|
Removed. |
|
Retained but does nothing. A page now declares |
|
Deprecated. Unit test support still uses them so that a tag method can be called directly on a tag library under test. |
TagLibraryMetaUtils.methodMissingForTagLib is not deprecated — it is the dynamic dispatch path a call
into an undescribed namespace still takes.
A Method-Declared Tag Called Without a Namespace Returns Its Output
A class that can call tags but is not a tag library — a controller — reaches a tag written without a
namespace through methodMissing on the TagLibraryInvoker trait. That used to end in a direct call
on the tag library bean. For a tag declared as a closure this made no difference, because the call
landed on a generated wrapper that captured output anyway; for one declared as a method there was no
wrapper, so the method ran with nothing captured and its own return value came back.
Both forms now capture, so a method-declared tag returns what it wrote:
class ReportTagLib {
    static namespace = 'g'

    def summary(Map attrs) {
        out << 'the output'
        'the return value'      (1)
    }
}

class ReportController {
    def index() {
        String result = summary(id: 1)   // 'the output', previously 'the return value'
    }
}| 1 | a tag’s return value is not what a caller receives; what it writes is |
A tag called with its namespace, and any tag called from a GSP, already captured, so only an unqualified call from a controller to a method-declared tag changes.
52. Quartz Job Scheduling Behavior Changes
Three behaviors of the Quartz plugin changed in this release. All three concern what happens when something about a schedule is wrong; none of them require a change to a job class.
52.1 A trigger that can never fire no longer stops startup
A job whose trigger has no possible fire time — a cron expression whose last occurrence is in the past, or an end time that has already passed — used to make the application fail to start, because the scheduler rejects such a trigger:
org.quartz.SchedulerException: Based on configured schedule, the given trigger will never fire.
The plugin now reports the trigger as an error in the log and leaves it unscheduled, so the rest of the application’s jobs and triggers are scheduled and the application starts. The job itself is still registered, so it can be triggered and rescheduled at runtime.
To go back to a failing startup, set quartz.failOnNeverFiringTriggers:
application.yml
quartz:
    failOnNeverFiringTriggers: true
52.2 An application only removes the jobs it registered itself
When an application starts, the plugin removes the jobs in the job store which are no longer enabled job artefacts of the application. It used to consider every job in the store, which with a persistent job store deleted the jobs and triggers of anything else using it — another application, or code that schedules through the Quartz API.
Every job the plugin registers now carries the name of the application that registered it, taken from
info.app.name or from the application metadata when that is unset, and only jobs carrying that name are
removed. Two consequences for an application with quartz.jdbcStore enabled:
-
Two applications sharing a job store must not share an application name. Instances of one application do share it — that is what makes a clustered deployment clean up after itself — but two different applications on the same Quartz tables each need their own
info.app.name. An application which does not name itself registers its jobs under the default name, which every unnamed application shares; withquartz.jdbcStoreenabled the plugin warns about that at startup. -
A job written to the store by Grails 7 or earlier carries no application name, so it is never removed automatically. A job class you deleted while running an older version leaves a row behind; remove it with
jobManagerService.removeJob(group, name)or from the Quartz tables.
52.3 Scheduling methods report what is wrong instead of failing with a null pointer
The static scheduling methods every job class gets — schedule, reschedule, unschedule,
triggerNow, removeJob — used to fail with a NullPointerException when called with a null argument,
or on a job the scheduler does not know about. They now raise:
-
an
IllegalArgumentExceptionnaming the argument that is null. Note that a null argument resolves toschedule(Trigger)whichever method the caller meant, because the runtime type ofnullcarries no information, so the message points at the other arguments too. -
an
IllegalStateExceptionwhen the job is not registered with a scheduler — the plugin is disabled, the job is disabled withjobEnabled = false, or the class is not a job artefact of the application.
An application that caught NullPointerException around these calls has to catch those instead. See
Dynamic Job Scheduling.
53. request Is No Longer a MultipartHttpServletRequest
The request object Grails exposes to controllers, tag libraries and GSPs is now always the outermost
servlet request. Previously, for a file upload, Grails replaced it with the resolved
MultipartHttpServletRequest, which discarded the request wrappers contributed by other filters — the
hidden HTTP method filter, Spring Security, and any application filter.
All file upload methods work exactly as before:
def upload() {
    def file = request.getFile('myFile')
    if (file.empty) {
        flash.message = 'file cannot be empty'
        render(view: 'uploadForm')
        return
    }
    file.transferTo(new File('/some/local/dir/myfile.txt'))
}request.getFiles(name), request.getFileNames(), request.getFileMap(), request.getMultiFileMap()
and request.getMultipartContentType(name) are likewise unchanged, as is binding a file through
params:
def img = new Image(params)What no longer works is treating request as a MultipartHttpServletRequest by type:
// Before
if (request instanceof MultipartHttpServletRequest) {
    def file = ((MultipartHttpServletRequest) request).getFile('myFile')
}

// After
def file = request.getFile('myFile')
Calling one of the file methods on a request that is not a file upload throws IllegalStateException
with a diagnostic message, the same way it previously failed with MissingMethodException.
53.1 Oversized uploads now reach the application’s error handling
An upload larger than spring.servlet.multipart.maxFileSize or spring.servlet.multipart.maxRequestSize
(1MB per file and 10MB per request by default, see Multipart Upload
Configuration) fails when the servlet container parses the request parts, and every parameter read on
that request fails with it from then on. Because Grails reads request parameters on paths that run
before, alongside and after the handler — to resolve the _method override, whenever a filter such as
Spring Security builds params, in the locale-change interceptor, and in the exception resolver’s
request log — that failure used to abort the request inside the filter chain, where no exception
handler could see it. The application was left with the container’s own error page.
Those reads now tolerate a multipart request the container refuses to parse, so the failure surfaces
where Spring raises it, as a
org.springframework.web.multipart.MultipartException/MaxUploadSizeExceededException during
dispatch. The exception is available to HandlerExceptionResolver beans, and the response is a 413
rendered through the application’s error dispatch instead of the container’s own error page.
A "413" response code URL mapping handles it, the same way a "404" or "500" mapping handles those
statuses:
"413"(controller: 'errors', action: 'tooLarge')The mapped action runs on the container’s error dispatch, so request.dispatcherType is ERROR and
params is empty — the container never parsed the request. request.getFile(..) is unavailable there
for the same reason. The upload itself is gone by then; the action’s job is to render the response.
The parameters of such a request are empty everywhere, not just in the error handler. The request
cannot reach the originally requested controller either way — DispatcherServlet rejects it before
handler resolution — so outside the error handler this is only observable in a filter that inspects
params ahead of the dispatch.
Servlet container differences
Tomcat and Jetty both surface the failure to the application as described above. Undertow applies the
limit while it reads the request entity and refuses the request at the HTTP layer, so no application
code runs at all: the response is a bare 413 with an empty body, and a "413" mapping is not
consulted. Raising spring.servlet.multipart.maxRequestSize raises the point at which Undertow
refuses, but there is no way to render a body for a request the container never dispatches.
53.2 An error handler that fails is no longer forwarded to from inside itself
A "500" (or exception-specific) URL mapping that names a controller is reached by forwarding to it.
That forward re-enters the DispatcherServlet, and the forwarded dispatch resolves the same status
code mapping again. An error handler that failed for a reason belonging to the request rather than to
the moment — an unparseable multipart body, a missing collaborator — therefore failed again inside its
own forward, and that failure forwarded to it once more, until the dispatch stack overflowed.
The error handler is no longer forwarded to while a forward to it is already running. The repeat
failure is logged and the exception is returned to the DispatcherServlet, which reports it through
the container, so the response is a single container-level error rather than a dispatch that never
terminates. Once the forward returns, a later error on the same request — from an enclosing request
whose include failed, for instance — is forwarded to the error handler as before.
54. Request Processing Behaviour Changes
Four changes fall out of Grails 8 delegating more of the request path to Spring.
54.1 API versioning headers are now emitted for Grails-mapped requests
UrlMappingsHandlerMapping previously assembled its own handler execution chain rather than using
Spring’s. As a result, Grails-mapped requests skipped the interceptor Spring adds for API versioning,
so the Deprecation, Sunset and Link headers configured through spring.mvc.apiversion.* were
never sent. The chain is now assembled by Spring, and those headers are emitted as configured.
If an application relied on those headers being absent, unset the corresponding
spring.mvc.apiversion.* configuration.
54.2 The LocaleContext is restored rather than cleared
At the end of a request Grails previously called LocaleContextHolder.setLocale(null), which discarded
any LocaleContext established earlier in the filter chain by non-Grails code. Grails now saves and
restores the previous LocaleContext, matching Spring’s own RequestContextFilter.
54.3 The application attributes object is shared per servlet context
GrailsApplicationAttributes was constructed once per request. It is now created once per servlet
context and reused, so the beans it caches are resolved once rather than on every request. It is
rebuilt automatically if the ApplicationContext is replaced.
Applications that implemented GrailsApplicationAttributes themselves must ensure their
implementation holds no request-scoped state and is safe to use from multiple request threads.
54.4 GrailsWebRequest.setMultipartRequest(..) is deprecated
setMultipartRequest(HttpServletRequest) installed the resolved multipart request on the web request. With
the substitution gone the resolver publishes it as a request attribute instead, and Grails finds it there or
by unwrapping. The method still works — it publishes its argument and discards the cached params — but a
caller that has one should move to letting the resolver publish it, or set the attribute directly:
// Before
webRequest.setMultipartRequest(resolved)

// After
request.setAttribute(WebUtils.MULTIPART_HTTP_SERVLET_REQUEST_ATTRIBUTE, resolved)
webRequest.multipartRequestResolved()
54.5 GrailsWebRequest.getCurrentRequest() returns what getRequest() returns
getCurrentRequest() existed to hand back the resolved multipart request in place of the request Grails was
bound to. That substitution is gone (see 53. request Is No Longer a `MultipartHttpServletRequest`), so
the two accessors now answer with the same object. The method stays, and calling it is fine; there is simply
nothing left that distinguishes the two.
Code that reaches for the uploaded files of a multipart request should use the request.getFile(..) methods
described in section 53.
Tests that mock a GrailsWebRequest and stub getCurrentRequest() need updating. getRequest() is
final on Spring’s ServletRequestAttributes, so getCurrentRequest() was the only stubbable request
accessor, and framework code now calls getRequest() directly. Drive a real GrailsWebRequest over a
MockHttpServletRequest rather than stubbing the accessor:
// Before
def webRequest = Mock(GrailsWebRequest)
webRequest.getCurrentRequest() >> request

// After
def webRequest = new GrailsWebRequest(request, response, servletContext)
55. URL Mapping Names Come From the URI, Not From Request Parameters
A mapping that captures its controller, action or namespace from the URL — "/$controller/$action?/$id?",
the default mapping every application starts with — used to resolve those names by reading the request’s
parameters during dispatch. The values were normally the ones the URI supplied, because the match wrote its
captures over the request parameters first. But a token the URI did not supply left whatever the request
carried under that name in place, and the request’s own value decided the route.
A request for /article?action=gallery therefore reached ArticleController.gallery() instead of the
controller’s default action: the optional $action token captured nothing, and the query string filled the
gap. The same held for controller and namespace, and for a form body as well as a query string.
Captured names now come from the match itself. A token the URI does not supply is simply absent, and a request parameter of the same name has no say in routing:
grails-app/controllers/UrlMappings.groovy
static mappings = {
    "/$controller/$action?/$id?"()
}| Request | Grails 7 | Grails 8 |
|---|---|---|
|
|
|
|
|
the default action of |
params.action still holds gallery in both versions — only the routing decision changed.
Choosing an action from a request parameter is still supported, by asking for it explicitly with a closure:
grails-app/controllers/UrlMappings.groovy
static mappings = {
    "/$controller" {
        action = { params.goHere }
    }
}
A closure supplied by the mapping keeps reading request state, exactly as before, and mappings that use one are unaffected by this change.
Two consequences beyond the routing fix. Request parameters are now built once per request rather than once
per candidate mapping, since candidates no longer have to be configured onto the request to be identified.
And grails.web.mapping.UrlMappingInfo gains a
isNameResolutionRequestDependent() method for callers that resolve names themselves; it is a default
method that reports true, so an implementation outside the framework keeps its current behaviour without
changes.
56. Coordinate Changes
grails-datamapping-async provides the asynchronous programming model for Grails Data — the
AsyncEntity trait and the async namespace — and is meant to be depended on directly by
applications and libraries. Groups nested below org.apache.grails are reserved for implementation
details of Grails, so the artifact moved from the org.apache.grails.data group to
org.apache.grails. The artifact id is unchanged:
build.gradle
implementation "org.apache.grails:grails-datamapping-async"The RENAME.md reference table in the
grails-core repository maps previous coordinate names to new names. The rename_gradle_artifacts.sh
script in the etc/bin directory of the
grails-core repository rewrites both the Grails 6 (org.grails:grails-datastore-gorm-async) and the
Grails 7 (org.apache.grails.data:grails-datamapping-async) coordinates in a project’s Gradle files:
./rename_gradle_artifacts.sh -l my/project/location57. importJavaTime Removed
The org.apache.grails.gradle.grails-app plugin no longer accepts importJavaTime.
The flag added java.time to the star imports of every Groovy compilation. Groovy 5, which Grails 8
requires, imports that package by default, so on Grails 8 the flag added an import the compiler already
had:
// Grails 8, no configuration and no import statement
class Book {
    LocalDate published
    Duration readingTime
}
A build that sets it fails with Could not set unknown property 'importJavaTime'. Delete the line; there
is no replacement:
build.gradle
grails {
    // Grails 7
    // importJavaTime = true

    // Grails 8 - java.time is a Groovy 5 default import
}
importGrailsCommonAnnotations and starImports are unchanged, and both still default to off.
importGrailsCommonAnnotations no longer probes the compile classpath before adding
grails.gorm.annotation and grails.plugin.scaffolding.annotation. When the flag is set both packages are
imported whether or not they are present — a star import of an absent package contributes no classes and is
not an error in Groovy, so the probe changed nothing it could observe. An application that relied on the
import being omitted when the package was absent sees no difference in compiled output.
58. Non-Public Bean Classes Are Marshalled, and Reported Once
Groovy 4 stamped ACC_PUBLIC on anonymous inner classes; Groovy 5, which Grails 8 builds on, does not.
Reflection cannot invoke a method on a class that is not public from another package, even when the method
itself is public, so code that marshalled an anonymous class perfectly well under Grails 7 started failing on
Grails 8 with ConverterException wrapping IllegalAccessException. Nothing in the application changed —
only the class modifier the compiler emits.
A second failure in the same code path is fixed alongside it: converting any Serializable bean threw
IllegalArgumentException, because the marshaller asked whether a private static final long
serialVersionUID field was accessible before checking that it was static, which the JDK rejects. Practically
every serializable bean declares that field, so this affected a large share of objects passed to as JSON.
Grails 8 adds compatibility handling for the non-public case, and reports each such class once so that the code can be corrected — see 58.2 below. The shape that hits it is an anonymous implementation of a public interface:
def show() {
def user = new UserDetails() {
@Override Collection<? extends GrantedAuthority> getAuthorities() { [new SimpleGrantedAuthority('ROLE_ADMIN')] }
@Override String getPassword() { null }
@Override String getUsername() { 'user' }
}
render([user: user] as JSON)
}
Ordinary Groovy code is unaffected. Property access and method calls through the metaclass still work
on such an object from any package, as does the JDK’s Introspector; only raw reflection against the method
as the non-public class declares it fails. That is what bean marshalling was doing.
|
58.1 Public Fields of Non-Public Classes Are Now Included
Java and Groovy beans are now treated alike. A public instance field declared on a class that is not
public was silently omitted from the JSON or XML body when the bean was a plain Java object; it is now
included, as it always was for a Groovy bean. If a field was being dropped by accident and should stay out
of the payload, exclude it explicitly or register an ObjectMarshaller for the class:
def json = someObject as JSON
json.excludes = ['nickname']
render jsonA public field that cannot be read at all — because its class is in a named module that does not open
its package — is skipped, and the rest of the object still converts. A getter in that same situation is
not skipped: the conversion fails, as it did before Grails 8.
58.2 The Warning
Reading a bean whose class is not public is compatibility handling rather than a supported contract, so each such class is reported once:
Class [com.example.DemoController$1] is not public. Grails reads its properties through compatibility
handling that may be withdrawn in a future major release. Declare it as a named public class so that it
reads as a standard JavaBean, or register an ObjectMarshaller for it if the class is not yours. To silence
this, set the log level of [org.apache.grails.common.reflect.ReflectionUtils] above WARN. (warned once per class)The fix is to declare the class public — as a named class where it is currently anonymous — or, for a class
you do not own, to register an ObjectMarshaller for it. Classes from the JDK, Groovy, and Spring are never
reported, since an application cannot declare those public.
To silence the warning instead:
application.yml
logging:
level:
org.apache.grails.common.reflect.ReflectionUtils: ERROR59. Interceptor URI Matching Uses the Dispatched Path
Interceptors that match on uri, with match(uri: …) or excludes(uri: …), now match the same path that URL
mappings route on: percent escapes are decoded, matrix parameters (;name=value) are removed and the context path is
stripped before the pattern is applied. Previously the raw request URI was matched, so an encoded (/%61dmin/users)
or matrix-parameter (/admin;x=1/users) request could reach a controller without triggering an interceptor declared
for /admin/**. Interceptors matched by controller, action or namespace are unaffected.
Review interceptors that use uri matching for the following changes:
-
Interceptors combining
match(uri:)with anexcludes(…)now run under a context path. In earlier versions a matcher that paired auripattern with any exclusion (excludes(uri:),excludes(controller:),excludes(action:)or a closure) never matched when the application was deployed under a non-root context path (for exampleserver.servlet.context-path=/app), because the exclusion check required the pattern to match both the context-prefixed and the context-relative request URI, which a pattern such as/api/cannot do. Only that shape was affected:matchAll()with exclusions,match(controller:)and other name-based matchers,match(uri:)without an exclusion, anduripatterns that match both forms such as/all ran as expected. The affected shape now behaves as configured, so an interceptor written that way starts executing under a context path. -
Patterns are matched against the path within the application only. A pattern is no longer also compared with the context-prefixed request URI, so
match(uri: '/*/*')no longer matches/app/saveunder the context path/app. Patterns that begin with the context path, such asmatch(uri: '/app/admin/**'), are still accepted for backwards compatibility. -
Includes are matched against the included path. During a
<g:include>orRequestDispatcherinclude,urimatchers see the included path rather than the URI of the outer request. This is consistent with the controller selected for the include and withmatch(controller:)matchers, which already matched the included controller. -
Custom
grails.interceptors.Matcherimplementations receive the canonical path. Theuriargument passed todoesMatchis now the decoded, application-relative path without matrix parameters. A newdoesMatch(String uri, UrlMappingInfo info, String method, String contextPath)default method also supplies the context path; override it when a matcher needs the context-prefixed form.
The Spring Security plugin applies the same canonicalization when matching ipRestrictions patterns and when the
AntPathRequestMatcher compatibility class selects a filter chain, so an encoded or matrix-parameter variant of a
restricted path is subject to the same restriction as the plain path.
The canonical form follows the URI and Servlet specifications, with two deliberate exceptions. Path parameters are
removed from each segment before percent-decoding, as Jakarta Servlet 6.0 section 3.5.2 requires of containers, so an
encoded semicolon (%3B) is a literal character and not a parameter delimiter (RFC 3986 section 2.2). Percent-encoded
unreserved characters such as %61 are decoded (RFC 3986 section 2.3), and the path is decoded exactly once
(RFC 3986 section 2.4). The exceptions are inherited from Spring’s UrlPathHelper, which Grails URL mapping dispatch
has used since Grails 3: the context path is compared case-insensitively although RFC 3986 section 6.2.2.1 and
RFC 9110 section 4.2.3 define paths as case-sensitive, and during a RequestDispatcher include the included path is
matched. Interceptors and the Spring Security matchers follow dispatch on both points because a matcher that
disagrees with dispatch lets a request reach a controller without its interceptors or restrictions.
60. Sort and Order Query Arguments Are Validated
Grails 8 checks the sort and order arguments of list(), dynamic finders, where queries, criteria queries and listOrderBy* before the query is built, on both Hibernate 5 and Hibernate 7. A client-supplied sort value used to be interpolated into the query, and the entry points did not agree on how a bad value was handled. They now fail the same way everywhere, with an IllegalArgumentException whose message deliberately does not echo the value.
A sort key must be a property path made up of identifiers separated by dots, such as "title" or "author.name", that resolves through the domain class mapping. A dotted key whose first segment is an alias created with createAlias or declared in a where query is still left to the query to resolve. Anything else is rejected with the message Invalid sort property:
-
A value carrying a second expression, a direction or a function call, for example
"title, id","title desc"or"upper(title)". -
A bare name that is not a property of the domain class. Previously this reached Hibernate and failed with a Hibernate exception or a
NullPointerException. -
A path into an unknown property of an association, or into a property that is not an association, for example
"author.unknown"or"title.length".
An order value must be "asc" or "desc", compared case-insensitively with surrounding whitespace ignored. Any other value is rejected with the message Invalid sort direction. Previously most entry points treated anything other than desc as ascending, so a typo such as order: "descending" silently sorted ascending. The value is checked even when no sort argument is given.
With Hibernate 7, list() additionally requires each fetch key to name a persistent property, and rejects anything else with the message Invalid fetch property.
Applications that pass request parameters straight through to these methods no longer need their own checks. Code that relied on an invalid value being ignored must now pass asc or desc and a real property name. To return a different response for a bad value, catch IllegalArgumentException where the query is issued:
def index(Integer max) {
try {
respond Book.list(max: max, sort: params.sort, order: params.order)
} catch (IllegalArgumentException ignored) {
render status: 400
}
}61. XML Request Bodies That Declare a DOCTYPE Are Refused
XML that Grails parses on an application’s behalf is now read with external entity expansion, external DTD retrieval and DTD grammar loading disabled. Earlier releases set these parser features under identifiers the parser did not recognise, so the parser’s own defaults applied instead.
An application/xml, text/xml or application/hal+xml request body, or a string passed to XML.parse, that declares
a DOCTYPE is additionally refused rather than bound, whether or not the declaration references anything external.
Binding such a body fails with the invalidRequestBody error code. There is no setting that relaxes this; a client that
sends a declaration needs to omit it.
Descriptors that Grails reads from the classpath, such as JSP tag library descriptors and web.xml, and the
response.xml accessor in controller unit tests are not affected. They may declare a DOCTYPE, though the DTD it names
is never retrieved. The plugin descriptor grails-plugin.xml is not among them: Grails generates it and never writes a
declaration, so it is read strictly at compile time and at runtime alike.
See [upgrading] for the full description of the XML parsing defaults.
62. Generated Groovy Compiler Configuration Scripts
On Gradle 9.7+, configure groovyOptions.configurationScriptFile before task execution. Assigning
groovyOptions.configurationScript from compileGroovy.doFirst { … } fails because Gradle has
already finalized the compiler options. Grails prepares the combined compiler script before compilation.
If another task generates your compiler script, prefer passing that task’s output provider to
configurationScriptFile. The provider carries both the file location and its producing task, so
Grails can prepare the combined script after your script is generated.
Declare the generated script as an output and connect it through its provider:
build.gradle
import org.gradle.api.DefaultTask
import org.gradle.api.file.RegularFileProperty
import org.gradle.api.tasks.OutputFile
import org.gradle.api.tasks.TaskAction
import org.gradle.api.tasks.compile.GroovyCompile
import org.gradle.work.DisableCachingByDefault
@DisableCachingByDefault(because = 'Writing a short compiler script is inexpensive')
abstract class GenerateCompilerScript extends DefaultTask {
@OutputFile
abstract RegularFileProperty getOutputFile()
@TaskAction
void generate() {
def script = outputFile.get().asFile
script.parentFile.mkdirs()
script.text = "withConfig(configuration) { imports { star 'java.nio.file' } }"
}
}
def generateUserConfigScript = tasks.register('generateUserConfigScript', GenerateCompilerScript) {
outputFile.set(layout.buildDirectory.file('user-config.groovy'))
}
tasks.named('compileGroovy', GroovyCompile) {
groovyOptions.configurationScriptFile.set(generateUserConfigScript.flatMap { it.outputFile })
}No separate dependsOn is needed for this producer. If the script’s content depends on task properties
or other files, declare those as task inputs so changes regenerate the script.
Existing builds can also keep the plain file assignment with an explicit compile dependency:
build.gradle (alternative wiring for the producer above)
tasks.named('compileGroovy', GroovyCompile) {
dependsOn generateUserConfigScript
groovyOptions.configurationScript = file('build/user-config.groovy')
}Grails matches the configured file against the declared outputs of the compile task’s direct
dependencies and orders script preparation after the matching producer. This preserves the Grails 7
pattern when the producer declares the exact script file as an output, whether through an @OutputFile
property as GenerateCompilerScript does above or through outputs.file(…) on an ad-hoc task. A
dependency that declares only a containing output directory, writes the file without declaring it as an
output, or is reachable only through another task’s dependsOn cannot be identified this way. Such a
build fails from a clean checkout before compilation starts, with a validation error on the
generateCompileGroovyGrailsCompilerConfig task that Grails registers:
A problem was found with the configuration of task ':generateCompileGroovyGrailsCompilerConfig' (type 'GrailsCompilerConfigScriptTask').
Input file does not exist
... property 'configurationScript' specifies file '.../build/user-config.groovy' which doesn't existIf you see this error, expose the script as an output file and use the provider wiring instead.
An existing, checked-in compiler script can still use a plain file assignment without a producer. Tasks that only generate source or classpath entries do not need additional ordering against compiler-script preparation: Grails does not read the compile or runtime classpath to prepare its script.
63. count() Returns Long
count() and the count property return Long instead of Integer:
// Grails 7
Integer total = Book.count()
// Grails 8
Long total = Book.count()How wide the underlying value is depends on the datastore. Hibernate counts with SQL COUNT() and Neo4j
with Cypher count(), both 64-bit. MongoDB aggregates with {$sum: 1}, which returns Int32 and promotes
to Int64 once the total exceeds it, so the width depends on how many documents the collection holds. Only
the in-memory datastore is fixed at 32 bits, and it returns a list size. GormStaticApi.count() narrowed the datastore
result with intValue(), which truncates silently, so
a table with more than Integer.MAX_VALUE rows reported a wrong and possibly negative count with no
error. Long is the only type that holds every value a datastore can produce here, so it is what the API
now declares.
The change affects GormStaticOperations.count() and getCount(), the count() and count members
generated on every domain class, and RestfulController.countResources(). Dynamic Groovy is unaffected:
Book.count() == 5, int n = Book.count() and arithmetic on the result all continue to work, because
Groovy converts between numeric types on assignment and compares them by value.
Code that is statically compiled, or that overrides one of these methods, needs updating:
@CompileStatic
class ReportService {
// Grails 7
// Integer bookCount() { Book.count() }
// Grails 8
Long bookCount() { Book.count() }
}
class BookController extends RestfulController<Book> {
// Grails 7
// protected Integer countResources() { ... }
// Grails 8
protected Long countResources() { ... }
}Java callers assigning the result to an Integer or int need an explicit conversion, since Long does
not unbox to int:
long total = Book.count(); // auto-unboxes, no change needed
int small = Book.count().intValue(); // only when the count is known to be smallA GSP that declares the count in a typed model directive should declare it as Number, which accepts
whatever a controller supplies:
@{ model="List<Book> bookList; Number bookCount" }JSON views declare their model the same way, and bind it the same way, so a model block naming the count
with a concrete numeric type needs the same treatment:
grails-app/views/book/index.gson
model {
Iterable<Book> bookList
// Grails 7
// Integer bookCount
Long bookCount // or Number, to accept either width
}HalViewHelper.paginate() and links() now declare total as Long, and paginate() declares offset
as Long with it. Callers are unaffected, because Groovy widens an Integer argument to Long in both
dynamic and statically compiled code, but anyone implementing HalViewHelper has to update their
signatures.
The GraphQL count field changes type with it. graphql-java maps Long to
ExtendedScalars.GraphQLLong, so a schema that exposed
type Query {
personCount: Int
}now exposes
type Query {
personCount: Long
}Queries that select the field are unchanged and the JSON value is unchanged, but generated clients and
schema snapshots need regenerating. The count fetcher previously narrowed the datastore result to fit
Int, so counts above Integer.MAX_VALUE were truncated there too.
Paginated list responses already type totalCount as Long through the same type manager, in
DefaultGraphQLPaginationResponseHandler, so this aligns the count field with a scalar the schema
already used rather than introducing a new one.
64. Grails Plugins Run for a Grails Application Only
In earlier Grails 8 milestones, the Grails plugin lifecycle ran for any Spring Boot application that had
grails-core on its class path, whether or not it was a Grails application. An application that depended on
a Grails library — GSP for its views, say — had Grails plugin beans registered alongside the library’s own
auto-configuration. This could prevent the context from starting because of duplicate beans or circular
references. Grails 7 did not run the plugin lifecycle for a context that omitted the Grails application class.
The lifecycle now runs only for a Grails application: one that GrailsApp launched, or one where a source of
the context is a Grails application class, which is what grails-app/init/Application.groovy is. A Grails
application is unaffected either way. A Spring Boot application using a Grails library gets that library’s
auto-configuration and nothing else.
This matters if you deliberately put a Grails plugin on the class path of an application that is not a Grails
application and relied on its doWithSpring or beanRegistrar beans being contributed. Those beans are no
longer registered. A plugin that also publishes an auto-configuration — as the Grails modules do, and as
@GrailsBeans generates for a plugin’s beans block — continues to contribute through Spring Boot’s own
auto-configuration, which needs no lifecycle.
Inside a Grails application, @SpringBootTest(classes = SomeConfig) uses the explicitly named configuration
classes. If those sources do not include the Grails application class, the plugin lifecycle does not run.
This matches Grails 7. Earlier Grails 8 milestones attempted to register plugin beans in this context; with
Hibernate, that could fail during startup because a plain Spring Boot application disallows circular references.
A bare @SpringBootTest can discover the application’s Application class automatically, so it does not
need an explicit classes attribute to select the Grails lifecycle. When specifying custom configuration
classes, include Application only if the test needs the Grails plugin runtime:
// A context using only this configuration, without the Grails plugin lifecycle
@SpringBootTest(classes = SomeConfig)
class ConfigurationSpec extends Specification { }
// Include the application and start through its main method to apply GrailsApp's defaults
@SpringBootTest(classes = [Application, SomeConfig], useMainMethod = SpringBootTest.UseMainMethod.ALWAYS)
class ApplicationSpec extends Specification { }Selecting the application class and applying the startup defaults from GrailsApp are separate concerns.
By default, @SpringBootTest does not invoke the application’s main method. In a Grails application with
Hibernate, it can therefore fail on bean overriding or circular references even when the application class
is selected. Use useMainMethod = SpringBootTest.UseMainMethod.ALWAYS, as above, or set both
spring.main.allow-bean-definition-overriding=true and spring.main.allow-circular-references=true on the
test. This startup limitation also existed before the lifecycle change.
@Integration tests are unaffected: they name the application class and invoke its main method. So are
tests using the grails-testing-support unit test mixins, which build their context without the lifecycle
either way.
65. sitemesh.decorator.default Is Consulted for the Default Layout
The SiteMesh 3 integration resolved the default layout from grails.sitemesh.default.layout, falling back to
the legacy grails.views.layout.default. With neither set it used the implicit application layout.
SiteMesh’s own sitemesh.decorator.default is now consulted as a last fallback, after both Grails keys. It is
the property a Spring Boot application rendering views with GSP configures, and a Grails application has it
set from the Grails keys already, so it decides only where neither Grails key is set.
This changes behaviour for a Grails application that set sitemesh.decorator.default and neither Grails key:
it was decorated with the implicit application layout and is now decorated with the layout that property
names. Set grails.sitemesh.default.layout to be explicit, or remove sitemesh.decorator.default to keep the
implicit application layout. An application that sets either Grails key is unaffected — those still win.
66. Promise Execution and Async Request Migration
The default PromiseFactory now uses JDK CompletableFuture; it is no longer an ExecutorPromiseFactory or an ExecutorService. Inject PromiseFactory for promise operations rather than casting it to the legacy executor implementation. Explicit GPars and RxJava providers remain available.
In applications, promises and the default event bus share Boot’s named applicationTaskExecutor. This changes the usual execution policy from an expanding cached pool to Boot’s configured executor (normally eight core threads with an unbounded queue). Review blocking workloads and configure spring.task.execution.pool and shutdown settings accordingly, or enable spring.threads.virtual.enabled on Java 21+. Avoid waiting synchronously for nested tasks in the same saturated pool. If Boot does not provide the named executor, Grails supplies an eight-core-thread managed fallback. Standalone promise factories retain a cached pool.
The FutureTask-based promise implementations, PromiseFactoryBean, AsyncController.startAsync(), and the Grails-specific Servlet async wrappers are deprecated for removal. Replace custom legacy factory wiring with the async plugin and Boot executor configuration; replace manual Servlet dispatch/completion with a returned Promise. Existing Groovy task, tasks, then, and onError entry points remain supported.
Both eager web promises and returned promises now honor spring.mvc.async.request-timeout; the Servlet container default applies when unset (normally 30 seconds on Tomcat), rather than an infinite timeout for eager web promises. Timeouts return HTTP 503 and can use a 503 URL mapping. Set a timeout explicitly if your application requires long-running responses. With the default and virtual-thread factories, single and aggregate error callbacks receive the original failure, while both direct and chained get() methods use the Future contract’s ExecutionException wrapper.
The grails.async.promiseFactory=virtual-thread opt-in now uses the same CompletableFuture implementation with its own decorated executor; it no longer relies on the deprecated FutureTask classes. Its default event bus remains asynchronous and its web tasks propagate request context. Its aggregate onComplete resolves to the callback’s result, and aggregate onError observes the original failure while leaving the returned promise failed, rather than recovering to an empty list.
67. GORM for Hibernate 7 Tracks Changes From Persist, Not From Insert
GORM for Hibernate 7 now activates its dirty-check tracking when an entity is persisted or merged rather than after its row has been inserted. Two observable behaviours change for existing applications on Hibernate 7. Applications on Hibernate 5 are unaffected.
67.1 A New Entity Starts at Version 0
An entity whose identifier is generated before the insert, for example one mapped with
id generator: 'increment' or 'assigned', or any member of a tablePerConcreteClass hierarchy, was
written with an INSERT immediately followed by an UPDATE of the same row, so it started at version 1.
It now starts at version 0 and costs a single statement, as on Hibernate 5 and as entities using the
default identity generator always did.
Code that compared such a version against 1, or that counted statements or update events for a new entity, needs to expect the value it would have had on Hibernate 5:
def book = new Book(title: 'Grails').save(flush: true) // id generator: 'increment'
assert book.version == 0 // was 1 before Grails 8.067.2 Persistence Listeners Receive Persist and Merge Events
An AbstractPersistenceEventListener on Hibernate 7 now receives a PersistEvent (eventType Persist)
for every explicit or flush-time cascaded persist, and a MergeEvent (eventType Merge) for every
merge. Neither can be cancelled. Hibernate 5 publishes SaveOrUpdateEvent when an entity is saved and
publishes no event for a merge.
A listener that switches over event.eventType and throws in its default branch must handle the new
values:
@Override
protected void onPersistenceEvent(AbstractPersistenceEvent event) {
switch (event.eventType) {
case Persist: // new on Hibernate 7
case Merge: // new on Hibernate 7
case PreInsert:
// ...
break
default:
throw new IllegalStateException("Unhandled ${event.eventType}")
}
}68. lock(id) Applies the Multi-Tenancy Filter
DomainClass.lock(id) loaded the row by identifier, and Hibernate’s tenant filter does not apply to a load
by identifier. A MultiTenant entity could therefore be locked, and returned, by a tenant that does not own
it, even though get(id) correctly returned null for the same identifier.
The lock now loads a multi-tenant entity through a query, as get(id) does, so it resolves within the bound
tenant and returns null for a row that belongs to another one. Entities that are not multi-tenant are
unaffected, and so is the statement issued for them.
Code that relied on lock(id) reaching across tenants has to bind the owning tenant explicitly:
Tenants.withId('tenant1') {
Book.lock(id)
}69. Instance Operations on a Named-Connection Static API Use That Connection
Reaching an instance operation through a named-connection static API - Book.secondary.save(book),
Book.secondary.delete(book) and so on - resolved the instance API for the default connection rather than
for secondary. With only the named connection’s session open, which is the normal arrangement, the call
failed with No Session found for current thread:
Book.secondary.withNewSession {
Book.secondary.withTransaction {
Book.secondary.save(book) // threw: resolved the default connection
}
}Every such operation now resolves the connection the handle was obtained for: save, insert, merge,
delete, attach, isAttached, discard, ident, lock, mutex, refresh and instanceOf. The example
above now saves to secondary.
GORM for Hibernate 5 needed a second fix for this to take effect. Its static API discarded the connection
qualifier it was created with and reported DEFAULT for every connection, so a named-connection handle could
not resolve anything but the default one. It now records its own qualifier, as GORM for Hibernate 7 already
did. Anything that reads the qualifier of a Hibernate 5 named-connection static API therefore sees the real
connection name where it previously saw default.
Applications using a single datasource are unaffected, and so is the instance form book.secondary.save(),
which already resolved the named connection.
70. mutex Reloads the Instance Under the Lock
entity.mutex { } took an exclusive lock on the instance’s already-loaded state and ran the closure. Because
that lock is version-checked, a transaction that committed to the row between the load and the mutex call
made it fail with an optimistic locking failure - the closure never ran.
Where the datastore supports it, GORM for Hibernate 5 and 7 included, mutex now acquires the lock without a
version check and reloads the row under it, so it waits for a competing writer and the closure runs on the
committed state. The lock stays exclusive; there is no argument to weaken it, since a shared or optimistic
lock would not give the closure mutual exclusion.
Three consequences for existing code:
-
Unflushed changes to the instance are discarded, as they are for
refresh. Apply changes inside the closure, not before themutexcall:book.title = 'new title' book.mutex { book.save() } // the pending title is discarded by the reload book.mutex { // apply the change inside instead book.title = 'new title' book.save() } -
An active transaction is required. Without one the call now throws
jakarta.persistence.TransactionRequiredException. -
The instance must be attached to the current session; a detached one throws
IllegalArgumentException. Re-attach it withattach()first.
Code that relied on mutex failing fast on a stale version should check the version itself, or use
entity.lock(), which is unchanged.
Datastores that cannot reload under a lock keep their previous behaviour.
71. id generator: 'sequence' Derives Its Name From the Table on Hibernate 7
On GORM for Hibernate 7, mapping an identifier with id generator: 'sequence' and no params: [sequence:
'…'] failed at session factory bootstrap:
static mapping = {
id generator: 'sequence' // threw: Unable to determine implicit sequence name for target table 'null'
}Hibernate’s own generator-creation path supplies the target table so it can derive an implicit sequence name when none is given; the Grails-specific path that constructs the generator directly did not. The table name is now supplied the same way, so the mapping above starts the application.
The derived name is not the one Grails 7 used. Hibernate 7 names the sequence after the entity’s table with
its own _SEQ suffix, where Grails 7 on Hibernate 5 gave every such mapping the same hibernate_sequence:
id generator: 'sequence' on table book |
Sequence |
|---|---|
Grails 7, on Hibernate 5 |
|
Grails 8, on Hibernate 7 |
|
An application whose schema is created at startup is unaffected. One that upgrades against an existing database has to either add the new sequences to that schema or keep the old name explicitly:
static mapping = {
id generator: 'sequence', params: [sequence: 'hibernate_sequence']
}Mappings that already name a sequence are unaffected, and so is GORM for Hibernate 5.
72. Calls on a Class Inside a Named Connection’s Session or Transaction Use That Connection
Inside a session or transaction opened through a named connection - Book.secondary.withTransaction { },
Book.secondary.withNewSession { } and the like - the calls on Book itself, such as Book.get(id) or
book.save(), used the default connection. With only the named connection’s session open, a save failed
with No Session found for current thread, and a read went to the default database:
Book.secondary.withTransaction {
def book = Book.get(42) // read from the default database
book.save() // threw: No Session found for current thread
}Whether the save threw depended on what else was open. With a default-connection session open further out,
as the open-session-in-view interceptor or an outer @Transactional provides, it succeeded and wrote the
instance to the default database, silently.
They now use the connection whose session or transaction the block opened, as they do inside
withConnection, and the example above reads and saves through secondary. Other domain classes are not
affected, and an operation that names a connection keeps it. The same holds inside a method annotated
@Transactional(connection = 'secondary'), for every domain class mapped to secondary; a class that is not
mapped to it keeps its own connection, and a multi-tenant class is left to its tenant, as it was before. Code that relied on the old routing changes
behaviour without failing, so look for it: a copy between connections written as
Book.legacy.withTransaction {
Book.legacy.list().each { new Book(name: it.name).save() } // meant for the default database
}used to write the copies to the default database, and now writes them back into legacy. Code that reached
the default connection from inside such a block by calling the class directly has to name it now:
Book.secondary.withTransaction {
Book.'default'.withSession { Book.count() } // counts the default database
}A method annotated @Transactional without a connection, called from inside such a block, does not reset the
routing. Its transaction is the default connection’s, but the calls it makes on a class the block routes still
reach the block’s connection, so those writes join the transaction the block opened rather than the one the
method began - including under propagation = REQUIRES_NEW, whose separate transaction then covers none of
them. Name the connection, as in @Transactional(connection = 'secondary'), where the method’s own transaction
has to cover its writes.
Applications using a single datasource are unaffected.
73. Default Security Response Headers
Grails 8 registers a servlet filter that sends default browser hardening headers (X-Content-Type-Options: nosniff, X-Frame-Options: SAMEORIGIN, Referrer-Policy: strict-origin-when-cross-origin, X-XSS-Protection: 0) on the responses of every servlet web application, so an upgraded application sends these headers without any change on your part.
The filter is registered at GrailsFilters.FIRST, ahead of the other Grails filters, and writes its headers when the response commits, only if nothing else has set them by then, so values set by your controllers, interceptors, custom filters, or Spring Security header writers at Spring Boot’s default spring.security.filter.order are preserved.
If you order the Spring Security chain ahead of GrailsFilters.FIRST, its header writers (other than the X-Frame-Options writer) find the Grails value already present and leave it; disable the corresponding grails.security.headers.<header> in that case.
Filters ordered ahead of GrailsFilters.FIRST, such as Spring Boot’s forwarded-header filter and, in a WAR deployment, its ErrorPageFilter, run outside the Grails filter, so a response one of them serves itself receives no default headers.
If a reverse proxy in front of the application already sends these headers (for example through nginx’s add_header), set grails.security.headers.defaults: auto so requests that arrive through the proxy (detected from forwarded request headers, server.forward-headers-strategy, or an active cloud platform) receive only the headers you configure explicitly, or strip the application’s copies at the proxy.
To disable or customize the Grails defaults, configure grails.security.headers.*; see the Security guide’s HTTP Security Headers section for the full list and the reverse-proxy guidance.
74. Scaffolded Views Are Compiled With the Application
In Grails 7 a scaffolded view was expanded from its template and compiled on the first request that asked
for it. In Grails 8, the pages of every controller annotated @Scaffold, the application’s or a plugin’s, are
expanded at build time by the generateScaffoldedViews task, into build/generated/scaffolded-views, and
compiled by compileGroovyPages in the same compilation as grails-app/views, under a grails-scaffolded
directory that no controller’s views resolve from. The resolver still chooses the
template for a request exactly as before, and serves the page compiled from that template when there is one,
so a request gets the same page it did. Which pages are compiled, and what happens to the others, is
described in the Scaffolding guide.
compileGroovyPages takes the pages as its generatedViews, beside its source, so a build that sets the
source itself still compiles them. In a project that scaffolds nothing, generateScaffoldedViews writes
nothing.
A scaffolding template of the application’s own, in src/main/templates/scaffolding or packaged under
META-INF/templates/scaffolding, is now compiled at build time, so one that cannot be expanded, or whose page
does not compile, fails the build as a view that does not compile does - where in Grails 7 it failed on the
first request for the view. A page expanded from a template a dependency supplies that cannot be compiled
does not fail the build: it is left out, the build output names it, and it is expanded when it is first
rendered, as in Grails 7.
The generateScaffoldedViews task of 8.0.0-RC1 wrote pages into the controllers' view directories and had
templateClasspath and applicationViews properties. Both are gone: the templates are read from the
runtimeClasspath the pages are expanded on, and a view the application declares needs no exclusion, since
it takes precedence over any scaffolded page when a request is resolved. A build that configures either
property fails with an unknown property; remove the setting.
8.0.0-RC1 also compiled a scaffolding project’s views from a copy made by a stageGroovyPages task, which
it registered only when a controller source mentioned @Scaffold - decided by
GroovyPagePlugin.scaffoldsAnyController. Both are gone: nothing is copied, and every project generates the
pages its scaffolded controllers need, a plugin’s among them. A build that refers to stageGroovyPages
fails with an unknown task; remove the reference.
75. File Renders Default to Attachment Disposition
Grails 8 makes render(file: …) safer by default. File responses now set
Content-Disposition: attachment unless you opt out. If a fileName is supplied
(or derived from a File), unsafe characters in that name are escaped before the
header is written.
Use inline: true when the file should stay inline, or set the
Content-Disposition header yourself before calling render — Grails leaves an
existing header alone.
render(file: new File(absolutePath), fileName: 'report.pdf')
render(file: new File(absolutePath), inline: true)76. A List of Objects in Configuration Binds to Its Declared Type
A list of objects in application.yml or application.groovy, such as:
application.yml
springdoc:
group-configs:
- group: sales
paths-to-match: /api/v1/**is now presented to Spring element by element, under the indexed names Spring Boot binds a list from,
such as springdoc.group-configs[0].group, the way Spring Boot’s own YAML loader presents it. A
@ConfigurationProperties class declaring a List of objects is bound with instances of that type.
Previously the whole list was also presented under its own name, so Spring Boot bound it as a list of
maps, and code reading the declared type failed with a ClassCastException. springdoc failed that
way on springdoc.group-configs before the application could start.
Environment.getProperty('springdoc.group-configs') now returns null and
Environment.containsProperty returns false, as they do in a Spring Boot application, so a
@Value('${springdoc.group-configs}') without a default fails to resolve, as does a ${…}
placeholder naming the list anywhere else. Read such a list through grailsApplication.config,
which is unchanged, or bind it. The same applies to a list holding lists of objects, such as
rows: [[{a: 1}], [{b: 2}]], whose objects are presented under names such as rows[0][0].a, and to
a list mixing plain values and objects, such as mixed: [a, {b: 1}], presented as mixed[0] and
mixed[1].b. Within such a list, an empty object, an empty list or a null value is presented as an
empty string under its own name, such as empty[0] for empty: [{}], as Spring Boot presents it. A
list of plain values only, such as names: [a, b], is presented as before.
What reads the names the configuration presents sees the change too:
-
The
config-reportcommand lists such a list as a row for each value, such asspringdoc.group-configs[0].group, rather than one row for the list. -
GORM used outside a Grails application, given a
ConfigurableEnvironmentit copies the property names of, no longer finds the list under its own name. In a Grails application a datastore is givengrailsApplication.config, and sees the list as before.
77. JSON Rendering of Dates and Times Matches Spring Boot
JSON rendered by grails.converters.JSON (render … as JSON, and respond for a JSON request) and by JSON views,
including g.render, writes date and time values the same way as Spring Boot’s default Jackson JsonMapper. The
exceptions are listed in the notes at the end of this section.
77.1 What 8.0.0 Restores From Grails 7
8.0.0-RC1 changed how grails.converters.JSON and grails.converters.XML render some dates. 8.0.0 renders them as
Grails 7 did, so an application upgrading from Grails 7 needs no change for these:
| Value | 8.0.0-RC1 | Grails 7 and 8.0.0 |
|---|---|---|
A |
|
|
A |
|
|
A |
a failure to render it |
rendered as a |
See #16406.
77.2 Values That Render Differently Than in Grails 7
Review these where an application or its clients read them:
| Value | Grails 7 | Grails 8 |
|---|---|---|
|
|
|
A |
the key’s |
a |
A |
|
|
A |
|
|
A |
the offset in hours only, such as |
the offset in hours and minutes, such as |
A |
|
|
Data binding binds a Month from its number as well as its name, as Spring Boot reads it: 9, "9" and "SEPTEMBER"
bind to SEPTEMBER. Grails 7 bound a number through Spring’s conversion service by ordinal, so 9 bound to OCTOBER.
JSON views write Date and Calendar map keys with grails.views.json.generator.dateFormat, in the configured
timeZone and locale, as they write those values. As with Spring Boot’s spring.jackson.date-format, the date format
no longer applies to java.sql.Time values, which are written as "01:48:46".
77.3 Values Grails 7 Did Not Render as Values
These rendered as an object of their properties, as {}, or not at all, and now render as values:
| Type | Grails 7 | Grails 8 |
|---|---|---|
|
|
|
|
an object of its properties |
|
|
an object of its properties |
|
|
an object of its properties, or |
|
|
an object of their properties, or |
|
|
an object of its properties, or |
|
|
an object of their properties, including the zone rules, or |
|
|
an object of its properties, or a failure to render it |
|
|
an object of its properties |
as a |
|
a failure to render it |
|
77.4 Keeping the Grails 7 Rendering
To keep the Grails 7 rendering of a type, register an object marshaller for it with grails.converters.JSON, for
example in BootStrap.init, and a groovy.json.JsonGenerator.Converter for it in JSON views, as described in
section 24, Custom JSON View Converters:
DateTimeFormatter utc = DateTimeFormatter.ofPattern("yyyy-MM-dd'T'HH:mm:ss.SSS'Z'").withZone(ZoneOffset.UTC)
JSON.registerObjectMarshaller(java.sql.Time) { java.sql.Time time ->
utc.format(Instant.ofEpochMilli(time.time))
}A JSON views converter that returns new Date(time.time) for a java.sql.Time writes it with the configured
dateFormat, as Grails 7 did. Map keys are not rendered by marshallers or converters: to keep the toString() of a date
key, convert the keys to strings before rendering the map, for example with
map.collectEntries { key, value → [(key.toString()): value] }.
The default JSON marshallers have implicit priorities that follow their order (-1, -2, and so on), and the marshallers
added in 8.0 shift those, so a marshaller registered with an explicit negative priority may now come before or after
different defaults. Marshallers registered with the default priority of 0, or higher, still take precedence over all
of the defaults. A marshaller registered for Date or Calendar, like grails.converters.json.date set to
javascript, changes how those values render with grails.converters.JSON, but not map keys of those types, which
keep the form in the table above. JSON views format date map keys with dateFormat, as described above.
Enums render by name(), as described in section 8, Enum Serialization Default Changed, while Jackson 3 writes an
enum’s toString(), and a java.time.Month as its number. The two differ for Month ("SEPTEMBER" in Grails, 9 in
Spring Boot) and for enums that override toString(), such as java.time.temporal.ChronoUnit ("SECONDS" in Grails,
"Seconds" in Spring Boot). To render a Month as its number, register
JSON.registerObjectMarshaller(Month) { Month month → month.value } and a JSON views converter that returns
month.value.
|
An OffsetTime keeps its seconds and writes a fraction of a second with only the digits it needs, such as
"03:00:00-03:00", as JSON views have written it since Grails 7, where Spring Boot writes "03:00-03:00". JSON views
write a year before 1 AD or after 9999 as Grails 7 did.
|
The HAL renderer, grails.rest.render.hal.HalJsonRenderer for application/hal+json, writes values with Groovy’s
default JSON generator and is not changed.
|
78. A Date With an Offset Is Bound to the Instant It Names
When controllers, command objects and bindData bind a request, a date and time in its ISO 8601
form, with a T between the date and the time, which is how Grails renders a date in JSON, is now
read first, before the formats that grails.databinding.dateFormats lists are tried. Previously:
-
2024-05-01T10:00:00Z, which 8.0.0-RC1 renders for aDateor aCalendarwhose milliseconds are zero, and which a client may send for any date, was read by theyyyy-MM-dd’T’HH:mm:ss’Z'format as a time in the zone of the server, so it was bound off by the offset of that zone. -
2024-05-01T10:00:00+02:00was read byyyyy-MM-dd’T’HH:mm:ss, which left the offset unread, and was bound as a time in the zone of the server. -
A fraction of a second of fewer than three digits, such as the
.5of10:00:00.5Z, was read as milliseconds, so as 5 rather than 500. -
An
OffsetDateTimeor aZonedDateTimecould not be bound from2024-05-01T10:00:00Zor2024-05-01T10:00:00+02:00, which is how Grails renders them, and aLocalDateTimeor aLocalTimecould not be bound from a value with a fraction of a second.
Each is now bound to what it names. A server running in UTC saw the first two bound correctly before, and sees no change.
The formats in grails.databinding.dateFormats are then tried in order, and a format that reads all
of the value is now used before an earlier one that reads only the start of it. A value that no format
reads all of is bound as before, by the first format that reads the start of it: 2024-05-01 10:00
is still bound as midnight by yyyy-MM-dd, losing the time. Add a format that reads the whole value,
such as yyyy-MM-dd HH:mm, to keep the time.
The date scalars of GraphQL, which read grails.databinding.dateFormats too, are not changed.
79. Asset Pipeline Wildcards Stand for One Directory
Grails 8 uses asset-pipeline 5.2, which resolves a % or * component of an asset path, in a require
directive, an <asset:…> tag or a Sass import, the same way wherever the asset is found: as exactly one
directory.
In Grails 7, which used asset-pipeline 5.0, a % could stand for any number of directories when the asset
was in a jar, as the files of every webjar are, and in the manifest that a packaged application serves its
assets from. webjars/%/dist/jquery.js found webjars/jquery/3.7.1/dist/jquery.js, and now finds nothing,
since one % cannot stand for both jquery and 3.7.1.
Write a % in place of each directory, as applications generated by create-app do for the version
directory of each webjar, or use the new %% (or **), which stands for zero or more directories:
grails-app/assets/javascripts/application.js
//= require webjars/jquery/%/dist/jquery.js
//= require webjars/%%/dist/js/bootstrap.bundle.jsIn a CSS require block, write % and %% rather than * and **, because */ ends the comment the
block is written in. A path with one % for each directory, including every path create-app has
generated, resolves as before, unless more than one directory matches (see below).
When several directories match, the highest version is used: 5.1.2 over 4.3.0, 10.0.0 over 9.0.0,
and a release over its own pre-releases. Before, the first match found was used, in the order of the file
system, the jars on the classpath or the manifest. Where %% can match at more than one depth, the match with
the fewest directories wins, so a copy of a library that another webjar bundles further down is not picked
up. Hidden directories, whose names start with ., are never matched, and a wildcard inside a file name,
such as jquery-%.js, no longer resolves in a packaged application, as it never resolved in development.
A path that no longer resolves does not fail the build: assetCompile logs Unable to Locate Asset: <path>
and leaves the file out, and an <asset:…> tag renders the path unchanged, which the browser then fails to
load. Check the assetCompile output for that warning after upgrading.
The includes and excludes patterns of the assets block in build.gradle, which select the files
assetCompile processes, are not changed.
|
80. Stricter Closure Typing for GORM Criteria Closures
GORM’s criteria closure methods (where, whereLazy, build, buildLazy, projections,
and, or, not, find, get, list, count, asBoolean and the closure subquery forms
of in, inList, notIn, eqAll, gtAll, ltAll, geAll, leAll, gtSome, geSome,
ltSome and leSome) now declare
strategy = Closure.DELEGATE_FIRST in their @DelegatesTo annotations. This matches the
resolve strategy GORM already applies at runtime and fixes a @CompileStatic bug where the
restrictions of a criteria closure nested inside another criteria closure were added to the
enclosing criteria instead of the new one. Projection blocks resolved against the enclosing
criteria for the same reason, silently dropping their projections. See
Issue #16425.
Statically compiled applications can be affected in two ways.
Forwarding a Closure parameter to one of these methods no longer compiles. A method
Closure parameter with the default OWNER_FIRST strategy cannot be passed to a
DELEGATE_FIRST parameter:
@CompileStatic
static DetachedCriteria<Book> withExtra(Closure extra) {
new DetachedCriteria<Book>(Book).where(extra)
// [Static type checking] - Closure parameter with resolve strategy OWNER_FIRST
// passed to method with resolve strategy DELEGATE_FIRST
}Declare the same strategy on your parameter, or cast the argument:
static DetachedCriteria<Book> withExtra(
@DelegatesTo(value = DetachedCriteria, strategy = Closure.DELEGATE_FIRST) Closure extra) {
new DetachedCriteria<Book>(Book).where(extra)
}
// or
new DetachedCriteria<Book>(Book).where((Closure) extra)Name resolution inside a criteria closure now prefers the criteria delegate, which is what dynamic code already did. A property or method that exists both on the enclosing class and on the criteria now resolves to the criteria:
@CompileStatic
class BookQueries {
List<Order> getOrders() { ... }
DetachedCriteria<Book> query() {
new DetachedCriteria<Book>(Book).where {
inList 'name', orders // now reads the criteria's orders, not getOrders()
}
}
}81. XML-Safe HTML Escaping Is the Default
When grails.views.gsp.htmlcodec is not set, the HTML codec, which GSP uses to escape ${} expressions and
which encodeAsHTML() applies, now uses the XML-safe escaping that applications generated by create-app
and Grails Forge have selected with htmlcodec: xml since Grails 2.3. Before, it used HTML4 style escaping.
New applications no longer have the setting, since it is now the default.
Applications that set htmlcodec: xml are not affected, and can keep or remove the setting. Applications
without the setting now get different escaped output:
-
Non-ASCII characters are written as they are instead of as named entities:
Göstais no longer escaped asGösta. -
@, the backslash and the backtick are escaped as@,\and`, the non breaking space and the line and paragraph separators as numeric character references, and control characters other than tab, line feed and carriage return are dropped.
Tests that compare escaped markup exactly may need to be updated. An application that serves pages in a character set that cannot represent every character, such as ISO-8859-1, and relies on the named entities, can restore HTML4 style escaping:
application.yml
grails:
views:
gsp:
htmlcodec: html482. Mail Plugin: overrideAddress Also Replaces an Explicit Sender
grails.mail.overrideAddress now also replaces a from set in the sendMail closure. In Grails 7, it replaced every to, cc and bcc address and the default sender, and an explicit from was kept.
To keep the sender your application sets, while still redirecting every recipient, use the new grails.mail.overrideToAddress in place of overrideAddress:
application-development.yml
grails:
mail:
overrideToAddress: test-inbox@example.com # redirect all recipients (to, cc, bcc) onlyTo set a fixed sender without redirecting recipients, use the new grails.mail.overrideFromAddress. See Mail Configuration for how the three properties interact.
83. GORM Dynamic Finder Classes Replaced
The dynamic finder implementations in the org.grails.datastore.gorm.finders package no longer form an inheritance hierarchy. The following public classes have been removed:
-
AbstractFinder -
AbstractFindByFinder -
FindByFinder -
FindByBooleanFinder -
FindAllByFinder -
FindAllByBooleanFinder -
FindOrCreateByFinder -
FindOrSaveByFinder -
CountByFinder
DynamicFinder is now a concrete class that only parses a finder method name and builds its query criteria. It no longer implements FinderMethod, has no invoke or doInvokeInternal methods, and its constructor takes a method pattern, the junction operators, a MappingContext and a boolean-clause flag. Finder execution lives in three classes that compose a DynamicFinder instead of extending it and are created through static factory methods:
import org.grails.datastore.gorm.finders.CountFinder
import org.grails.datastore.gorm.finders.ListResultFinder
import org.grails.datastore.gorm.finders.SingleResultFinder
SingleResultFinder.findBy(datastoreResolver, mappingContext) // findBy*
SingleResultFinder.findByBoolean(datastoreResolver, mappingContext) // find<Boolean>By*
SingleResultFinder.findOrCreateBy(datastoreResolver, mappingContext) // findOrCreateBy*
SingleResultFinder.findOrSaveBy(datastoreResolver, mappingContext) // findOrSaveBy*
ListResultFinder.findAllBy(datastoreResolver, mappingContext) // findAllBy*
ListResultFinder.findAllByBoolean(datastoreResolver, mappingContext) // findAll<Boolean>By*
CountFinder.countBy(datastoreResolver, mappingContext) // countBy*Each factory also accepts a Datastore, or only a MappingContext for a finder that parses method names without executing queries. ListOrderByFinder keeps its constructors but no longer extends AbstractFinder, and the list of finders a DetachedCriteria consults is now typed as List<FinderMethod>.
Applications are unaffected: dynamic finders such as Book.findByTitle('The Stand') behave as before. A GORM datastore implementation or plugin outside the Grails repository that extends one of the removed classes, or that calls new FindByFinder(…) and its siblings when building its finder list, must switch to the factory methods above. Code that only holds finders as FinderMethod compiles unchanged.
84. Interceptors Can Read the Model of a Template Render
The model property of an interceptor now returns the map that an action passed to
render(template: …, model: …). Before, it returned null for a template render, because a template render
produces no ModelAndView. Responses rendered from a view are not affected.
The template has already been rendered when after() runs, so the model can be inspected but not changed. Review
interceptors that check model != null, or use model?., before changing the model, since that code now also runs
for template renders:
-
Changes to the map have no effect on the response, and they change the map that the action passed.
-
If the action passed an immutable map, such as one created with
Map.of(…), changing it throws anUnsupportedOperationException. Before,model?.foo = 'bar'did nothing.
Objects passed with bean or collection are not part of model. See
Defining Interceptors.
3.2 Upgrading from Grails 7.1 to Grails 7.2
Upgrade Instructions for Grails 7.1 to Grails 7.2
This guide outlines the changes introduced in Grails 7.2 and the steps required to upgrade your application.
1. SiteMesh 3 Filter-less Integration
Grails 7.2 upgrades the SiteMesh 3 integration to a filter-less architecture. Decoration is now performed by a Spring MVC ViewResolver rather than a Servlet filter. This change improves performance, eliminates ordering issues with other filters, and correctly supports async controller return types (Callable, @Async).
What Changed
-
The
SiteMeshFilterservlet filter is no longer active. The filter-based integration only activates whensitemesh.integration=filteris set explicitly, so the two integrations are mutually exclusive by configuration. -
Layout resolution and decoration are now handled by
Sitemesh3LayoutView(a SpringView) andCaptureAwareContentProcessor. -
GSP pages populate a
Sitemesh3CapturedPageat render time via thegrailsLayoutcapture tag library. SiteMesh no longer parses the raw HTML response to extract head/body/title.
Required Actions
For most applications no changes are required. The filter-less integration is a drop-in replacement: layouts, <g:layoutHead>, <g:layoutTitle>, <g:layoutBody>, <g:pageProperty>, <g:applyLayout>, and layout-by-convention all behave identically to the previous release.
|
The guidance below applies only when the SiteMesh 3 integration is in use. The legacy |
When using the SiteMesh 3 integration, the following SiteMesh 2-era configuration properties are no longer consulted and can be removed from your application.yml if present:
# Remove these — no longer used by the SiteMesh 3 integration in Grails 7.2.
# (Retain them if your application still uses the grails-layout / SiteMesh 2 plugin.)
grails.gsp.view.layoutViewResolver: false
sitemesh.filter.order: ...
sitemesh.decorator.tagRuleBundles: ...Configuring the Default Layout
The default layout is still configured via:
grails-app/conf/application.yml
grails:
sitemesh:
default:
layout: applicationLayout Cache Tuning (Optional)
In non-development environments, layout paths are cached by controller/action pair. The cache TTL can be tuned independently of the GSP reload interval using a dedicated key:
grails-app/conf/application.yml
grails:
sitemesh:
layout:
cache:
interval: 5000 # milliseconds, default 5000This replaces any reliance on grails.gsp.reload.interval for layout cache expiration in previous snapshots.
Async Controller Support
The filter-less architecture correctly handles Grails controllers that return Callable or use @Async. Previously, async dispatch could cause decoration to run on a different thread from the one that populated the SiteMesh request scope, leading to empty layouts or stale content. This is resolved in 7.2.
Content Blocks
Content blocks (the <content tag="…"> pattern) continue to work as before. The GSP preprocessor maps them to <grailsLayout:captureContent tag="…"> at compile time, and the captured buffers are passed directly to the layout without an additional HTML parse.
<%-- Page --%>
<content tag="sidebar">
... sidebar content ...
</content>
<%-- Layout --%>
<div id="sidebar">
<g:pageProperty name="page.sidebar" />
</div>3.3 Upgrading from Grails 7.0 to Grails 7.1
Upgrade Instructions for Grails and Related Dependencies
To ensure compatibility with Grails 7.1.x, please review the following upgrade instructions carefully. This guide outlines the necessary steps & warnings to upgrade your Grails project.
1. Groovy Changes
The Grails Gradle Plugins now automatically disables invokedynamic for all GroovyCompile tasks (see #15293). If you have a manual tasks.withType(GroovyCompile) block in your build.gradle that sets indy = false, you can safely remove it:
build.gradle - remove this block (no longer needed)
// This is now handled by the Grails Gradle Plugin - remove it
tasks.withType(GroovyCompile).configureEach {
groovyOptions.optimizationOptions.indy = false
}To re-enable invokedynamic, use the grails extension in your build.gradle:
build.gradle
grails {
indy = true
}2 Breaking changes
2.1 Plugin configuration and Spring Conditional Annotations
Spring Boot’s @Configuration related classes have support for conditional bean wiring. In prior versions of Grails, annotations such as @ConditionalOnProperty could not be used for configuration stored in a plugin’s plugin.groovy or plugin.yml files. To support plugin configuration, plugin loading & configuration were split in Grails 7.1.x. Plugin loading related code was thus reworked and may break some applications if they relied on their own plugin loader.
As a result of these changes, if your application extends the GrailsApplicationPostProcessor or DefaultGrailsPluginManager there are breaking constructor changes.
A new class, PluginDiscovery, was extracted from the Grails Plugin Manager logic and is now a dependency of these classes.
|
2.2 Greedy Extension Parameter Matching in URL Mappings
Grails 7.1 introduces a new greedy extension parameter marker (+) for URL mappings that provides more intuitive handling of file extensions in URLs with multiple dots.
The Problem with Default Behavior
By default, Grails URL mappings with optional extensions split at the first dot in the path:
"/$id(.$format)?"(controller: 'user', action: 'profile')When matching the URL /test.test.json:
- id = test (stops at first dot)
- format = test.json (everything after first dot)
This can be problematic when IDs legitimately contain dots, such as file names, qualified class names, or version numbers.
New Greedy Matching Behavior
The new + marker enables greedy matching, which splits at the last dot instead:
"/$id+(.$format)?"(controller: 'user', action: 'profile')Now the same URL /test.test.json matches as:
- id = test.test (everything up to last dot)
- format = json (extension after last dot)
Syntax
The + marker is added after the variable name and before the optional marker:
Required parameter with greedy extension:
"/$id+(.$format)?"(controller: 'file', action: 'download')Optional parameter with greedy extension:
"/$id+?(.$format)?"(controller: 'resource', action: 'show')Use Cases
Greedy extension matching is particularly useful for:
-
File downloads with complex names:
"/files/$filename+(.$format)?"(controller: 'file', action: 'download')Matches
/files/document.final.v2.pdf→filename=document.final.v2,format=pdf -
Versioned resources:
"/api/$resource+(.$format)?"(controller: 'api', action: 'show')Matches
/api/user.service.v1.json→resource=user.service.v1,format=json -
Qualified class names:
"/docs/$className+(.$format)?"(controller: 'documentation', action: 'show')Matches
/docs/com.example.MyClass.html→className=com.example.MyClass,format=html
Behavior Details
-
With dots: The greedy marker splits at the last dot, treating everything before as the parameter value and everything after as the extension
-
Without dots: URLs without any dots match entirely as the parameter with no format
-
Extension optional: When the extension is marked optional
(.$format)?, URLs work both with and without extensions
Examples:
"/$id+(.$format)?"(controller: 'resource', action: 'show')
// URL Matches:
/test.test.json → id='test.test', format='json'
/test.json → id='test', format='json'
/simpletest → id='simpletest', format=null
/foo.bar.baz.xml → id='foo.bar.baz', format='xml'Backward Compatibility
The + marker is opt-in and fully backward compatible:
-
Existing URL mappings without the
+marker continue to work as before (splitting at the first dot) -
No changes are required to existing applications
-
The feature can be adopted incrementally on a per-mapping basis
2.3 GormService API Changes
The grails.plugin.scaffolding.GormService class has been updated to fix a thread-safety issue and improve API clarity.
Changes
-
The
resourcefield type changed fromGormAllOperations<T>toClass<T> -
A new
gormStaticApifield of typeGormAllOperations<T>was added with thread-safe lazy initialization using@Lazy -
The constructor no longer instantiates the resource class - it now stores the Class reference directly
Migration Impact
If your code extends GormService or accesses its fields:
Accessing GORM operations: Previously the resource field provided GORM operations. Now use the gormStaticApi field instead:
// Before (7.1.x and earlier)
class MyService extends GormService<MyDomain> {
void myMethod() {
def result = resource.list() // resource was GormAllOperations<T>
// ...
}
}
// After (7.1.x with fix)
class MyService extends GormService<MyDomain> {
void myMethod() {
def result = gormStaticApi.list() // use gormStaticApi instead
// ...
}
}Accessing the domain class: If you need the Class reference, the resource field is now properly typed as Class<T>:
// Before
Class<MyDomain> clazz = resource.getClass() // awkward, resource was an instance
// After
Class<MyDomain> clazz = resource // resource is now the Class itself2.4 Enhanced Audit Metadata Support
Grails 7.1 introduces comprehensive audit metadata support with new annotations for tracking both temporal information (when changes occurred) and auditor information (who made changes). This aligns with Spring Data’s auditing model while maintaining GORM’s flexibility.
New Annotations
Four new annotations have been added to simplify audit tracking:
-
@CreatedDate- Automatically populated with the creation timestamp on insert -
@LastModifiedDate- Automatically populated with the modification timestamp on insert and update -
@CreatedBy- Automatically populated with the current auditor on insert -
@LastModifiedBy- Automatically populated with the current auditor on insert and update
These annotations work with various temporal types including Date, LocalDateTime, Instant, OffsetDateTime, and ZonedDateTime.
Example Domain Class
import grails.gorm.annotation.CreatedBy
import grails.gorm.annotation.CreatedDate
import grails.gorm.annotation.LastModifiedBy
import grails.gorm.annotation.LastModifiedDate
import java.time.LocalDateTime
class Book {
String title
String author
@CreatedDate
LocalDateTime created
@LastModifiedDate
LocalDateTime modified
@CreatedBy
String createdBy
@LastModifiedBy
String modifiedBy
static constraints = {
title blank: false
author blank: false
// Auditor fields should be nullable for anonymous operations
createdBy nullable: true
modifiedBy nullable: true
}
}Configuring AuditorAware
To populate @CreatedBy and @LastModifiedBy fields, you need to provide an AuditorAware bean that returns the current auditor:
src/main/groovy/com/example/SpringSecurityAuditorAware.groovy
package com.example
import groovy.transform.CompileStatic
import org.grails.datastore.gorm.timestamp.AuditorAware
import org.springframework.security.core.Authentication
import org.springframework.security.core.context.SecurityContextHolder
@CompileStatic
class SpringSecurityAuditorAware implements AuditorAware<String> {
@Override
Optional<String> getCurrentAuditor() {
Authentication authentication = SecurityContextHolder.getContext()
.getAuthentication()
if (authentication == null || !authentication.isAuthenticated()) {
return Optional.empty()
}
String username = authentication.getName()
// Don't set auditor for anonymous users
if (username == 'anonymousUser') {
return Optional.empty()
}
return Optional.of(username)
}
}Register the bean in your Application.groovy:
grails-app/init/com/example/Application.groovy
import org.grails.datastore.gorm.timestamp.AuditorAware
import org.springframework.context.annotation.Bean
class Application extends GrailsAutoConfiguration {
static void main(String[] args) {
GrailsApp.run(Application, args)
}
@Bean
AuditorAware<String> auditorAware() {
return new SpringSecurityAuditorAware()
}
}Auditor Field Types
Auditor fields can be different types depending on your needs:
-
String- for username strings -
Long- for user ID references -
Custom types - for embedding user objects
Example with different auditor types:
class Document {
String title
@CreatedDate
LocalDateTime created
@CreatedBy
String createdByUsername // Store username as String
@LastModifiedBy
Long lastModifiedById // Store user ID as Long
static constraints = {
createdByUsername nullable: true
lastModifiedById nullable: true
}
}Constraints on Auditor Fields
Unlike timestamp fields, auditor fields can have constraints applied to them. This is useful for:
-
Setting
maxSizeon String auditors to match database column definitions -
Applying validation rules
-
Customizing database mapping
class Task {
String name
@CreatedBy
String createdBy
@LastModifiedBy
String modifiedBy
static constraints = {
name blank: false
// Apply constraints to auditor fields
createdBy nullable: true, maxSize: 100
modifiedBy nullable: true, maxSize: 100
}
}Deprecation of @AutoTimestamp
The @AutoTimestamp annotation is now deprecated in favor of the more explicit @CreatedDate and @LastModifiedDate annotations:
// Old (deprecated)
@AutoTimestamp(AutoTimestamp.EventType.CREATED)
LocalDateTime created
@AutoTimestamp
LocalDateTime modified
// New (recommended)
@CreatedDate
LocalDateTime created
@LastModifiedDate
LocalDateTime modifiedThe @AutoTimestamp annotation is marked with @Deprecated(forRemoval = true) and will be removed in Grails 8.0.
Migration Guide
To migrate from @AutoTimestamp to the new annotations:
-
Replace
@AutoTimestamp(AutoTimestamp.EventType.CREATED)with@CreatedDate -
Replace
@AutoTimestamp(or@AutoTimestamp(EventType.UPDATED)) with@LastModifiedDate -
Optionally add
@CreatedByand@LastModifiedByfields for auditor tracking -
Implement and register an
AuditorAwarebean if using auditor fields -
Remove
nullable: trueconstraints from timestamp fields (no longer needed) -
Keep
nullable: trueon auditor fields (required for anonymous operations)
Automatic Imports for Annotations
To reduce boilerplate when using audit annotations, you can enable automatic imports for common Grails annotations in your build.gradle:
build.gradle
grails {
importGrailsCommonAnnotations = true
}When enabled, this automatically imports:
-
jakarta.validation.constraints.*- Jakarta validation annotations -
grails.gorm.annotation.*- All GORM annotations including@CreatedDate,@LastModifiedDate,@CreatedBy,@LastModifiedBy -
grails.plugin.scaffolding.annotation.*- Scaffolding annotations (if grails-scaffolding is in classpath)
With this setting, you can use the annotations without explicit imports:
// No import statements needed!
class Book {
String title
@CreatedDate // Automatically imported
LocalDateTime created
@LastModifiedDate // Automatically imported
LocalDateTime modified
@CreatedBy // Automatically imported
String createdBy
@NotBlank // jakarta.validation.constraints.NotBlank imported
@Size(max = 255) // jakarta.validation.constraints.Size imported
String author
}Custom Star Imports
You can also configure custom star imports for your own packages independently:
build.gradle
grails {
starImports = ['java.util.concurrent', 'groovy.transform', 'com.myapp.annotations']
}This allows you to use classes from these packages without explicit imports throughout your Groovy code. The starImports configuration works independently and will be combined with any imports from importGrailsCommonAnnotations or importJavaTime flags if those are also enabled.
2.5 Scaffolding Namespace View Defaults
Grails 7.1 introduces an opt-in feature for scaffolding that allows namespace-specific scaffolded templates to take priority over non-namespaced view fallbacks.
Background
Previously, when a namespace controller requested a view, the scaffolding plugin would only generate a scaffolded view if no view existed at all. This meant that if you had:
-
A namespace controller (e.g.,
namespace = 'admin') -
A non-namespaced view in
grails-app/views/event/index.gsp -
A namespace-specific scaffolded template in
src/main/templates/scaffolding/admin/index.gsp
The non-namespaced view would always be used, and the namespace-specific scaffolded template would be ignored.
New Behavior
With the new enableNamespaceViewDefaults configuration, namespace-specific scaffolded templates can now override non-namespaced view fallbacks. This provides better support for namespace-specific customization of scaffolded views.
Configuration
To enable this feature, add the following to your application.yml:
application.yml
grails:
scaffolding:
enableNamespaceViewDefaults: trueView Resolution Priority
When enableNamespaceViewDefaults is enabled, the view resolution priority for namespace controllers is:
-
Namespace-specific view (e.g.,
grails-app/views/admin/event/index.gsp)-
If exists → used (highest priority)
-
-
Namespace-specific scaffolded template (e.g.,
src/main/templates/scaffolding/admin/index.gsp)-
If exists and no namespace view → used (overrides fallback)
-
-
Non-namespaced view fallback (e.g.,
grails-app/views/event/index.gsp)-
Used if no namespace view or scaffolded template exists
-
-
Non-namespaced scaffolded template (e.g.,
src/main/templates/scaffolding/index.gsp)-
Used if no views exist at all
-
Example Use Case
This feature is useful when you want different scaffolded views for different namespaces:
// Regular event controller
@Scaffold(RestfulServiceController<Event>)
class EventController {
}
// Admin event controller with namespace
@Scaffold(RestfulServiceController<Event>)
class EventController {
static namespace = 'admin'
}With enableNamespaceViewDefaults: true, you can provide:
-
src/main/templates/scaffolding/index.gsp- Default scaffolded template -
src/main/templates/scaffolding/admin/index.gsp- Admin-specific scaffolded template
The admin controller will use the admin-specific template even if a non-namespaced view exists.
Backward Compatibility
This feature is disabled by default (false), ensuring complete backward compatibility. Existing applications will continue to work without any changes. Enable the feature only when you need namespace-specific scaffolded template support.
2.6 Enhanced Display Constraint with DisplayType Enum
Grails 7.1 enhances the display constraint with a new DisplayType enum that provides fine-grained control over where properties appear in scaffolded views.
New DisplayType Values
The display constraint now accepts a DisplayType enum value in addition to boolean values:
| Value | Description |
|---|---|
|
Display in all views. Overrides the default blacklist for properties like |
|
Never display in any view. Equivalent to |
|
Display only in input views (create and edit forms). |
|
Display only in output views (show and index/list views). |
Example Usage
import static grails.gorm.validation.DisplayType.*
class Book {
String title
String isbn
Date dateCreated
Date lastUpdated
String internalNotes
static constraints = {
dateCreated display: ALL // Override blacklist, show in all views
lastUpdated display: OUTPUT_ONLY // Show only in show/index views
isbn display: INPUT_ONLY // Show only in create/edit forms
internalNotes display: NONE // Never show
}
}Backward Compatibility
Boolean values continue to work as before:
-
display: true- Default behavior (property is displayed) -
display: false- Equivalent toDisplayType.NONE
No changes are required for existing applications using boolean values.
2.7 @Scaffold Annotation (Preferred Approach)
Starting in Grails 7.1, the @Scaffold annotation is the preferred approach for enabling scaffolding on controllers and services. While the legacy static scaffold = Domain syntax is still supported, the annotation provides additional features and flexibility.
Benefits of @Scaffold
-
Supports both controllers and services - The annotation works on both artefact types
-
Custom class extension - Specify a custom class to extend using the generic syntax
-
Service-backed controllers - Create controllers that delegate to a service layer for better separation of concerns
-
Read-only mode - Built-in support for read-only scaffolding
Migration Examples
Basic controller scaffolding:
// Legacy syntax
class BookController {
static scaffold = Book
}
// New preferred syntax
import grails.plugin.scaffolding.annotation.Scaffold
@Scaffold(Book)
class BookController {
}Scaffolded service:
import grails.plugin.scaffolding.annotation.Scaffold
@Scaffold(Book)
class BookService {
}Service-backed controller (delegates to BookService):
import grails.plugin.scaffolding.annotation.Scaffold
import grails.plugin.scaffolding.RestfulServiceController
@Scaffold(RestfulServiceController<Book>)
class BookController {
}Custom class to extend:
import grails.plugin.scaffolding.annotation.Scaffold
import com.example.MyCustomService
@Scaffold(MyCustomService<Book>)
class BookService {
}Read-only scaffolding:
import grails.plugin.scaffolding.annotation.Scaffold
@Scaffold(domain = Book, readOnly = true)
class BookController {
}CLI Commands
New CLI commands are available to generate scaffolded controllers and services:
# Generate a scaffolded controller
grails create-scaffold-controller Book
# Generate a scaffolded service
grails create-scaffold-service Book
# Generate both service and controller
grails generate-scaffold-all BookThese commands support options like --extends to specify a custom class to extend, --namespace for controller namespacing, and --service to use RestfulServiceController.
For full details, see the Scaffolding documentation.
2.8 URL Mapping Group Defaults
The group method in URL mappings now accepts default parameters that are inherited by all child mappings:
group "/api", namespace: 'api', controller: 'resource', {
"/list"(action: 'list') // inherits namespace and controller
"/show"(action: 'show') // inherits namespace and controller
}Nested groups merge defaults — inner groups inherit and can extend or override outer group defaults. Child mappings can override any default explicitly. This is a new additive feature and does not affect existing URL mappings.
For full details, see the Group Defaults documentation.
2.9 URL Mapping Wildcard Validation
Grails now validates wildcard-captured URL mapping variables ($controller, $action, $namespace) against registered controller artefacts at request time. When a captured value does not match a registered artefact, the mapping is skipped and the next mapping is tried.
This is a new behavior that is enabled by default. It allows patterns like:
group "/topics", {
"/$action"(controller: 'topic') // tried first — only matches real actions
"/$id"(controller: 'topic', action: 'show') // fallback for non-action values
}Hardcoded controller/action values in mappings are not affected — only wildcard-captured values are validated.
If this causes issues with existing URL mappings, you can disable it in application.yml:
grails:
urlmapping:
validateWildcards: false2.10 ContainerGebSpec Context Path Support
ContainerGebSpec now automatically includes the server’s servlet context path in the browser’s base URL. Previously, if your application configured a context path via server.servlet.context-path, the ContainerGebSpec base URL would only include the protocol, hostname, and port — causing all page navigations to miss the context path and result in 404 errors.
Starting in Grails 7.1, the context path is looked up from the Spring Environment at test setup time and appended to the base URL automatically. No changes are required in your test code — Geb page URLs should remain relative to the context root (e.g., static url = 'greeting'), and the framework handles prepending the context path.
Example
application.yml
server:
servlet:
context-path: /myapp// Page URL is relative — no need to include /myapp
class GreetingPage extends Page {
static url = 'greeting'
static at = { title == 'Greeting' }
}
// Navigation automatically resolves to http://host:port/myapp/greeting
@Integration
class MySpec extends ContainerGebSpec {
void 'should reach the greeting page'() {
expect:
to(GreetingPage)
}
}2.11 Flash Messages Tag (g:flashMessages)
Grails 7.1 introduces a new <g:flashMessages /> tag that renders flash.message, flash.error, and flash.warning as Bootstrap 5 dismissible alerts with appropriate styling (success, danger, and warning respectively).
The tag automatically prevents duplicate rendering — if called in both a page and its layout, only the first invocation produces output. All flash content is HTML-encoded to prevent XSS.
The default layout (main.gsp) and all scaffolding templates now use this tag. If your application has custom views that render flash messages manually, you can replace the boilerplate:
<%-- Before --%>
<g:if test="${flash.message}">
<div class="alert alert-primary" role="alert">${flash.message}</div>
</g:if>
<%-- After --%>
<g:flashMessages />The tag supports optional attributes for customizing CSS classes, icons, ARIA role, and dismissibility. Applications that do not use Bootstrap can override the defaults globally under grails.views.gsp.flashMessages.* in application.yml:
grails:
views:
gsp:
flashMessages:
messageClass: 'notification is-success'
messageIcon: 'fa-solid fa-check'
errorClass: 'notification is-danger'
errorIcon: 'fa-solid fa-triangle-exclamation'
warningClass: 'notification is-warning'
warningIcon: 'fa-solid fa-circle-exclamation'See the ../ref/Tags%20-%20GSP/flashMessages.html[flashMessages] tag reference for full details.
2.12 Exception Log Line Includes Per-Request Context
GrailsExceptionResolver now appends a parenthesised clause of per-request context — the current auditor and,
optionally, the remote client address — to its exception log headline:
RuntimeException occurred when processing request: [GET] /admin/users/42 (ip: 198.51.100.42, user: alice)
The auditor entry reuses the same AuditorAware resolution that populates @CreatedBy / @LastModifiedBy
(see section 2.4), so no second "current user" bean is needed. The IP entry is
HttpServletRequest.getRemoteAddr() — behind a reverse proxy, set server.forward-headers-strategy: native so
the address reflects the real client.
Impact
Any log parser, alert rule, or log-aggregation query that matches on the exact exception headline format will need to tolerate the optional ` (ip: <value>, user: <value>)` suffix. Both entries are opt-in — the auditor entry is gated to avoid writing user identifiers (typically PII) into exception logs without an explicit decision, and the remote-address entry is gated for the same reason. Toggle each independently:
grails-app/conf/application.yml
grails:
exceptionresolver:
logAuditor: true # add ' user: <value>' when an AuditorAware bean is registered
logRemoteAddr: true # add ' ip: <value>'With both disabled — the default — the headline matches its pre-7.1 form. See the Logging Full Stack Traces section of the user guide for details.
2.13 StackTrace Logger Side-Effect Emission
Pre-7.1, DefaultStackTraceFilterer.filter(Throwable) emitted the unfiltered stack trace to the dedicated
StackTrace logger as a side effect of cleaning the trace. The 7.1 PR that fixed duplicate-per-cause logging
removed this emission, breaking applications that relied on it for non-resolver code paths (for example,
scheduled jobs that call GrailsUtil.sanitizeRootCause(ex) before logging via their own logger, or custom
exception handlers that route the cleaned exception elsewhere).
The side-effect emission has been restored as the default and is now controlled by a dedicated property:
grails-app/conf/application.yml
grails:
exceptionresolver:
logFullStackTraceOnFilter: true # default; preserves pre-7.1 emissionSet to false to disable the side-effect emission and rely solely on logFullStackTrace for resolver-driven
output. The two flags interact — if both are enabled, a request exception with N causes produces N+1 StackTrace
records (one resolver-driven plus one per throwable visited by the recursive filter walk). The Logging Full
Stack Traces section of the user guide includes a matrix of behaviours for the four flag combinations.
3.4 Upgrading from Grails 6 to Grails 7.0
Upgrade Instructions for Grails and Related Dependencies
To ensure compatibility with Grails 7.0.x, please review the following upgrade instructions carefully. This guide outlines the necessary steps & warnings to upgrade your Grails project.
1. Java 17 as baseline:
Starting from Grails 7, Java 17 serves as the baseline requirement for the framework, matching Spring Framework and Spring Boot’s minimum Java version. When upgrading to Grails 7, ensure that your project is configured to use Java 17. Updating to Java 17 allows you to take advantage of the latest features, security enhancements, and performance improvements provided by Java 17.
Please make sure to update your project’s Java version to 17 before proceeding with the Grails 7 upgrade. Doing so will ensure a seamless transition to the latest version of Grails and enable you to enjoy all the benefits that Java 17 has to offer.
2. Groovy 4.0.x as a baseline:
Grails 7.0.x adopts Groovy 4.0.30 as it’s baseline requirement. Several changes in Groovy 4 can affect your application. Changes that may affect a Grails Application or Plugin include:
-
GROOVY-10621 - Primitive booleans will no longer generate the form of isProperty & getProperty. They will only generate isProperty(). For Grails Domain objects, grails sometimes generates these properties. It is advisable to switch to the new form of the property.
-
GROOVY-5169 & GROOVY-10449 - Fields with a public modifier were not returned with MetaClassImpl#getProperties() in groovy 3, but are now.
-
Closures using the DELEGATE_FIRST strategy now behave differently. The resolution order in Groovy 3 used to be Delegate’s invokeMethod, Owner’s invokeMethod, Delegate’s invokeMissingMethod, Owner’s invokeMissingMethod. In Groovy 4, the order is now Delegate’s invokeMethod, Delegate’s invokeMissingMethod, Owner’s invokeMethod, Owner’s invokeMissingMethod.
-
Closures defined in a parent class that reference its private properties or methods may no longer have access to them in subclasses. See GROOVY-11568 for more details.
-
Some older libraries may include an older version of groovy, but still be compatible with Groovy 4. One example is GPars. In your gradle file, you can force a dependency upgrade via this code:
build.gradle
configurations.configureEach {
resolutionStrategy.eachDependency { DependencyResolveDetails details ->
if (details.requested.group == 'org.codehaus.groovy') {
details.useTarget(group: 'org.apache.groovy', name: details.requested.name, version: '{groovyVersion}')
}
}
}-
By default, Groovy 4 switches away from callsite optimizations and uses invokedynamic instead. This can result in performance regressions compared to Grails 6. The Grails Gradle Plugins now automatically disables invokedynamic for all
GroovyCompiletasks (see #15293). If you have a manualtasks.withType(GroovyCompile)block in yourbuild.gradlethat setsindy = false, you can safely remove it:
build.gradle - remove this block (no longer needed)
// This is now handled by the Grails Gradle Plugin - remove it
tasks.withType(GroovyCompile).configureEach {
groovyOptions.optimizationOptions.indy = false
}To re-enable invokedynamic, use the grails extension in your build.gradle:
build.gradle
grails {
indy = true
}3. Unified Project Version
Grails 7 moved to a mono repository.
As part of this move, all projects that make up a grails release now have a common version.
Setting grailsVersion in gradle.properties is the proper way to specify a set of dependencies that are compatible with each other for a given Grails release.
Please remove older properties such as gormVersion & grailsGradlePluginVersion and exclusively use this property going forward.
gradle.properties
grailsVersion=8.0.0
4. Unified Bill of Materials
Previously Grails did not have a single Bill of Materials (BOM). Instead it had a micronaut-bom and a spring-bom that existed side by side. As of Grails 7, a grails-bom is published that inherits from the spring-bom and the micronaut-bom is not included by default.
Grails 7 introduces a BOM that includes all the dependencies required for a Grails application. This BOM is available in the org.apache.grails:grails-bom artifact. The BOM is automatically applied when a Grails Gradle plugin is applied via the Spring Dependency Management plugin. For projects that do not use a Grails Gradle plugin, you can apply the BOM via a Gradle Platform:
build.gradle
dependencies {
implementation platform("org.apache.grails:grails-bom:{GrailsVersion}")
}Because all Grails projects will apply the Grails Gradle plugin, the BOM is automatically applied. You can override a version in the BOM by setting the associated Gradle property. The possible gradle properties are generated as part of this documentation. Please see Grails BOM Dependencies for a quick reference.
4.1 BOM Property Changes
The initial Grails 7.0.0 release had an issue where properties in the bom were not correctly populated. The 7.0.4 release restored properties, but the naming was inconsistent and duplicated. Later versions of Grails 7 reworked the properties for the following reasons:
-
to follow previous naming strategies used by Grails 6 and earlier.
-
to remove duplicate properties.
-
to clearly delineate between profile dependencies.
-
to remove non-published projects.
-
to fix invalid versions for properties used by asciidoctor & rxjava.
Detailed differences follow in subsequent sections.
4.2 Property Name Standardization
In the prior 7.0.0 Grails versions, there were numerous duplicated properties for third-party dependencies, with one variant using hyphens (e.g., byte-buddy.version) and an identical one using dots (e.g., byte.buddy.version), both set to the same value. This applies to properties like:
asset-pipeline-gradle.version / asset.pipeline.gradle.version byte-buddy.version / byte.buddy.version commons-text.version / commons.text.version directory-watcher.version / directory.watcher.version grails-publish-plugin.version / grails.publish.version (though this is slightly inconsistent in naming) javaparser-core.version / javaparser.core.version bootstrap-icons.version / bootstrap.icons.version (literal duplicate entries) commons-codec.version / commons.codec.version geb-spock.version / geb.spock.version asset-pipeline-bom.version / asset.pipeline.bom.version spock.version / spock.bom.version (values match but names differ slightly) jackson.version / jackson.bom.version groovy.version / groovy.bom.version selenium.version / selenium.bom.version
To resolve this duplication and standardize naming conventions, the Grails team has consolidated these properties. All dotted variants have been removed. Only the hyphenated forms are retained (e.g., byte-buddy.version, asset-pipeline-gradle.version).
Additionally, Grails-specific properties in earlier Grails 7 versions used dots in their names (e.g., grails.async.version, grails.data.hibernate5.version). These have been refactored to use hyphens instead (e.g., grails-async.version, grails-data-hibernate5.version). This aligns them with the third-party property naming convention.
These changes eliminate redundancy and enforce consistency across the Grails bom & the boms it inherits.
4.3 Profile Properties are renamed
In previous Grails 7 versions, profile-specific properties were not prefixed with grails-profile. These have been corrected as follows:
base.version - grails-profile-base.version plugin.version - grails-profile-plugin.version profile.version - grails-profile-profile.version rest.api.version - grails-profile-rest-api.version rest.api.plugin.version - grails-profile-rest-api-plugin.version web.version - grails-profile-web.version web.plugin.version - grails-profile-web-plugin.version
4.4 Removal of Redundant or Unused Properties
Several groups of related properties have been consolidated or removed in later Grails 7 versions:
-
Liquibase: (liquibase-hibernate5.version, liquibase.version, liquibase.cdi.version, liquibase.core.version, liquibase5.hibernate.version) have been replaced by
liquibase-hibernate5.version -
MongoDB: (mongodb.version, bson.version, mongodb.driver.core.version, mongodb.driver.sync.version, bson.record.codec.version) have been replaced by
mongodb.version -
Sitemesh: (starter-sitemesh.version, spring.boot.starter.sitemesh.version) have been consolidated to
starter-sitemesh.version -
Ant: (ant.version and ant.junit.version) have been consolidated to
ant.version -
Spring Boot sub-components: (spring.boot.cli.version and spring.boot.gradle.plugin.version) have been consolidated to use
spring-boot.version -
Asciidoctor Gradle: asciidoctor.gradle.jvm.version was renamed to
asciidoctor-gradle-jvm.version -
Spring Boot dependencies:
spring.boot.dependencies.versionwas renamed tospring-boot.version -
Liquibase Hibernate: liquibase.hibernate5.version & liquibase-hibernate5.version were consolidated to liquibase-hibernate5.version
4.5 Specific Property Value Changes
rxjava properties were incorrect previously, they are now fixed per the below:
-
rxjava.version(for RxJava 1.x, groupId io.reactivex) was set to 3.1.11 instead of 1.3.8 -
rxjava2.version(for RxJava 2.x, groupId io.reactivex.rxjava2) was set to 3.1.11 instead of 2.2.21 -
rxjava3.version(for RxJava 3.x, groupId io.reactivex.rxjava3) was set to 3.1.11 and remains 3.1.11
4.6 Additions and Refinements in <dependencyManagement>
Several boms are imported and previously used customized property names for them. They now align with a single property name. Most importantly, spring-boot-dependencies now uses ${spring-boot.version} (aligning with the removal of spring.boot.dependencies.version).
All published Grails projects continue to have separate properties to allow for overriding their versions individually.
5. Coordinate Changes
Grails has transitioned to the Apache Software Foundation (ASF).
As a result, the group ID for Grails artifacts has changed to org.apache.grails.
This change applies to all Grails packages, including core plugins and core dependencies, maintained by the Grails team.
When upgrading to Grails 7, ensure that you update your build configuration to use the new group ID.
There is a RENAME.md in the grails-core repository that maps previous coordinate names to new names.
Additionally, there is a script to aid in the updating of Grails projects to the new coordinates.
The script is located in the etc/bin directory of the grails-core repository and can be run as follows:
./rename_gradle_artifacts.sh -l my/project/locationThis script will scan any gradle file and attempt to update both exclusions & dependencies to the new coordinates.
6. Gradle Changes:
One of the major changes in Grails 7 is the modernization of it’s build system. As a side effect of this modernization, the Grails build is fully parallel & lazy. Moreover, most tasks have been enhanced to be cacheable. When updating to Grails 8.0.0, there may be required updates to various tasks we distribute since the inputs of those tasks have changed to support lazy configuration.
6.1. Gradle Plugin Changes
As part of the cacheable task changes, some tasks have slightly new behaviors:
-
FindMainTask can now fail for non-plugins: If an Application class is not found & the project has a Grails gradle plugin applied, the FindMainTask will now fail.
-
FindMainTask is now cacheable - restarting with bootRun should not force a recompile of the application if no changes have been made.
-
Configuration tasks have been added to customize compileGroovy tasks. These tasks allow for proper metadata being passed to the Groovy compiler to ensure the AST transformations know if code is a Grails Plugin or a Grails Application. In the event these tasks do not run or are caching incorrectly, you may observe incorrect UrlMapping resolution. Please report any instances of this happening so it can be addressed.
-
groovyVersionis nowgroovy.versionto match upstream Spring BOM property names. If you still define groovyVersion to override the groovy version & use the Spring Dependency Management plugin, you will need to change this property togroovy.versionin yourgradle.propertiesfile. -
While the Spring Dependency Management plugin is still used by default, it can now be disabled by setting the property
springDependencyManagementon thegrailsextension.
6.2. Upgrading Gradle:
It is recommended to set your gradle version to a version of 8.14.4 or higher:
./gradlew wrapper --gradle-version 8.14.4This command will download the specified Gradle version and update the Gradle wrapper settings in your project.
6.3. Check Gradle Version:
After the command finishes, you can verify that the Gradle version has been updated by checking the gradle-wrapper.properties file located in the gradle/wrapper directory.
The distributionUrl in the file should now point to the specified Gradle version’s distribution:
distributionUrl=https\://services.gradle.org/distributions/gradle-8.14.4-bin.zip
6.4. Removed Gradle Plugins
The grails-doc plugin has been removed. Documentation generation is no longer provided by Grails.
7. Reproducible Builds:
The ASF strongly encourages reproducible builds as part of it’s security requirements. We have begun making the Grails build reproducible - that is, if you build with the same settings as the GitHub action the produced artifacts should be identical. We have starting addressing reproducible builds under the ticket #14679.
A side effect of making our builds reproducible is that Grails applications can also now be reproducible. The benefits of reproducible builds are well documented, but for Grails applications, some of the side effects include:
-
Improved build times - since the build is reproducible, Gradle can cache the results of the build and reuse them in future builds.
-
Minimizing rebuilds - if the build is reproducible, Gradle can avoid unnecessary rebuilds of tasks that have not changed.
-
Improved security - reproducible builds can help to ensure that the build process is not tampered with, and that the resulting artifacts are exactly what was intended.
To make your local build reproducible, you’ll want to set the environment variable SOURCE_DATE_EPOCH to a fixed date.
For Grails, we set this value to the last commit in git via the bash command: SOURCE_DATE_EPOCH=$(git log -1 --pretty=%ct)
8. Spring 6.2.x:
Grails 7.0.x is built on the Spring Framework, version 6.2.x. If your project uses Spring-specific features, refer to the Upgrading to Spring 6 guide.
This update introduces enhancements and fixes to the Spring Framework, providing you with the latest improvements in dependency injection, web frameworks, and other Spring-related functionalities.
9. Spring Boot 3.5.x:
Grails 6 used Spring Boot 2.7.x. Grails 7.0.x updates this to Spring Boot 3.5.x. For more information, consult the release notes for previous Spring Boot releases: 1. Spring Boot 3.5 Release Notes 2. Spring Boot 3.4 Release Notes 3. Spring Boot 3.3 Release Notes 4. Spring Boot 3.2 Release Notes 5. Spring Boot 3.1 Release Notes 6. Spring Boot 3.0 Release Notes
10. Upgrading Your Project:
In addition to the coordinate changes, the version updates, and the build updates, to upgrade your project it is advised to use an application generator and compare it to your existing project. The preferred app generator for Grails is start.grails.org. Please note that several previously required gradle configurations have been integrated into the Grails Gradle Plugins as defaults. Compare a freshly generated application to your application and apply any associated changes.
10.1 Building the Project:
After comparing to a generated build & updating your gradle files, you can now build your Grails project using the updated Gradle version:
./gradlew buildThis will initiate the build process with the new Gradle version.
11. Grails CLI
Both the legacy grails-shell-cli and grails-forge-cli are now included with Grails 7. Please see the Downloading & Installing section of this guide for important background on how to use the Grails CLI commands.
12. Breaking changes
Grails 7 introduces several breaking changes that may require updates to your application.
12.1
Due to the significant changes in Grails 7, all prior Grails Plugins will need updated to work with Grails 7. For plugins in the Grails Plugins GitHub organization, the Grails Core team is updating them as time permits and when requested. If there is a plugin that you require updating, please reach out via ticket to see if we can help.
12.2 javax → Jakarta
Spring has switched from javax to jakarta packages. Please consult the Spring upgrade guides for the impacts of this change.
Gradle Javax-to-Jakarta EE migration plugins, such as the gradle-jakartaee-migration-plugin, provide transforms and dependency substitutions to ease the migration from Java EE (javax.) to Jakarta EE (jakarta.). These plugins can help mitigate upgrade challenges with older dependencies that still use javax. until they are updated or replaced with alternative solutions.
To apply and configure the gradle-jakartaee-migration-plugin in your build.gradle, you can use the following snippet:
build.gradle
plugins {
id 'com.netflix.nebula.jakartaee-migration' version '1.0.0'
}
jakartaeeMigration {
// Exclude Grails dependencies since AST and jakartaeeMigration are not compatible
excludeTransform('org.apache.grails:**')
excludeTransform('org.apache.grails.**:**')
// Exclude logback-core to avoid extra logback debug messages
excludeTransform('ch.qos.logback:logback-core')
// enable automatic migration from EE 8 (javax) or earlier to EE 10 (jakarta) or later
migrate()
}12.3 Removed libraries/classes
-
The
grails-web-fileuploadlibrary, including its sole classContentLengthAwareCommonsMultipartResolver, has been removed. This change was necessitated by the removal of the superclassCommonsMultipartResolverin Spring 6. TheContentLengthAwareCommonsMultipartResolverwas originally introduced to address a bug in Safari back in 2007, but it is likely no longer needed. Spring has transitioned away fromCommonsMultipartResolverand now recommends using the built-in support for multipart uploads provided by servlet containers. For more information on handling file uploads in Spring Boot, please refer to the relevant sections of the Spring Boot documentation and the Spring Framework 6 upgrade guide. -
Removed deprecations:
-
org.grails.spring.beans.factory.OptimizedAutowireCapableBeanFactory -
GrailsPlugin#checkForChangesExpected -
GrailsClassUtils#isGetter(String, Class[])- useisGetter(String, Class, Class[])instead. -
GrailsClassUtils#getPropertyForGetter(String)- usegetPropertyForGetter(String, Class)instead. -
AbstractGrailsClass#getPropertyDescriptors- usegetMetaPropertiesinstead. -
org.grails.core.metaclass.BaseApiProvider- use traits instead. -
Several static variables on
ClosureEventTriggeringInterceptor- use the variables onAbstractPersistentEventinstead. -
grails.testing.gorm.DataTest#dataStore- useDataTest#datastoreinstead.
-
-
The following deprecated classes were removed, please use the suggested replacement:
-
grails.core.GrailsTagLibClass→grails.core.gsp.GrailsTagLibClass -
org.grails.core.artefact.TagLibArtefactHandler→org.grails.core.artefact.gsp.TagLibArtefactHandler -
org.grails.core.DefaultGrailsTagLibClass→org.grails.core.gsp.DefaultGrailsTagLibClass -
org.grails.plugins.CodecsGrailsPlugin→org.grails.plugins.codecs.CodecsGrailsPlugin -
grails.artefact.AsyncController→grails.async.web.AsyncController -
grails.beans.util.LazyBeanMap→grails.beans.util.LazyMetaPropertyMap -
org.grails.plugins.databinding.DataBindingGrailsPlugin→DataBindingConfiguration
-
12.4 Micronaut in Grails is now supported via the plugin grails-micronaut
In Grails 4 to Grails 6, Micronaut was integrated by making Micronaut the parent context of the Grails application. As of Grails 7, Micronaut is set up via the micronaut-spring-starter using the grails-micronaut plugin. Discussion around this change can be found here.
To enable Micronaut in your Grails application, two steps must be completed. First, the grails-micronaut plugin needs added to the build file. Second, the property micronautPlatformVersion needs set to your desired version. Only Micronaut 4.9.2 or higher is supported for Grails.
Here’s an example build file:
build.gradle
dependencies {
implementation 'org.apache.grails:grails-micronaut'
}Here’s an example gradle.properties file:
gradle.properties
micronautPlatformVersion=4.9.2Please note that, due to this issue, Spring Boot DevTools does not work with the Micronaut integration.
The Grails Gradle Plugin automatically configures Groovy-based Micronaut bean registration via AST transforms (micronaut-inject-groovy on compileOnlyApi). Groovy classes annotated with @Singleton, @Factory, @ConfigurationProperties, etc. are processed automatically.
If your project contains Java source files with Micronaut annotations (e.g. @Singleton, @Factory), you must manually add the Micronaut annotation processor to your build.gradle. The annotation processor is not configured automatically because it is incompatible with Groovy incremental compilation (see #15211). For projects that mix Java and Groovy Micronaut beans, consider splitting them into separate source sets or modules to avoid incremental compilation issues.
|
build.gradle - Adding annotation processor for Java Micronaut beans
dependencies {
annotationProcessor platform("io.micronaut.platform:micronaut-platform:$micronautPlatformVersion")
annotationProcessor 'io.micronaut:micronaut-inject-java'
annotationProcessor 'jakarta.annotation:jakarta.annotation-api'
}
The Grails Gradle Plugin automatically configures the Spring Boot bootJar and bootWar tasks to use the CLASSIC loader implementation when grails-micronaut is detected. This is required for java -jar execution to work correctly with the Micronaut-Spring integration (see #15207). If you have explicitly set loaderImplementation in your build.gradle, you can remove it as the plugin now handles this automatically.
|
12.5 hibernate-ehcache
The org.hibernate:hibernate-ehcache library is no longer provided by the org.apache.grails:grails-hibernate5 plugin. If
your application depends on hibernate-ehcache, you must now add it explicitly to your project dependencies.
Since hibernate-ehcache brings in a conflicting javax version of org.hibernate:hibernate-core, it is
recommended to exclude hibernate-core from the hibernate-ehcache dependency to avoid conflicts:
build.gradle
dependencies {
implementation 'org.hibernate:hibernate-ehcache:5.6.15.Final', {
// exclude javax variant of hibernate-core
exclude group: 'org.hibernate', module: 'hibernate-core'
}
runtimeOnly 'org.jboss.spec.javax.transaction:jboss-transaction-api_1.3_spec:2.0.0.Final', {
// required for hibernate-ehcache to work with javax variant of hibernate-core excluded
}
}12.6 H2
The test database H2 is stricter about reserved keywords. If you use H2 in your application, please take a look at this pull request for examples of these new restrictions.
12.7 Removal of Test Dependencies from Production Classpath
Prior versions of Grails included test dependencies on the production classpath.
These are now removed in Grails 7. If you still need them, you can add them to your implementation configuration in your build.gradle file.
12.8 Jar Artifact name changes
Jar artifacts produced by Grails Plugins will no longer have the suffix -plain.
Please see ticket #347 for details.
12.9 Java 20+ Date Formatting Changes
In Java 20+, Unicode CLDR42 was implemented which changed the space character preceding the period (AM or PM) in formatted date/time text from a standard space (" ") to a narrow non-breaking space (NNBSP: "\u202F"). Additionally, when using the LONG or FULL timeStyle with dateStyle, the date and time separator has changed from ' at ' to ', '. IE. January 5, 1941, 8:00:00 AM UTC vs. January 5, 1941 at 8:00:00 AM UTC
12.10 Container runtime environment is now required for standard Geb functional and integration tests
The Grails Geb Plugin has received a significant update, introducing test fixtures that enable ubiquitous containerized browser testing.
This new approach is now the recommended way to write functional tests in Grails, but it requires a container runtime environment.
The previous method using WebDriver binaries remains supported for backward compatibility, although matching driver and browser versions can be challenging.
Key Features
By extending your test classes with ContainerGebSpec, your tests will automatically leverage a containerized browser provided by Testcontainers. This setup eliminates the need for managing browser versions and ensures consistent test environments.
Requirements
To use ContainerGebSpec, ensure that you have a compatible container runtime installed. Supported options include:
-
Docker Desktop
-
OrbStack (macOS only)
-
Rancher Desktop
-
Podman Desktop
-
Colima (macOS and Linux)
How It Works
Once a compatible container runtime is installed, no additional configuration is needed. Simply extend your test classes with ContainerGebSpec (instead of GebSpec), and the following will happen:
-
A container will be started automatically when you run your integration tests.
-
The container will be configured to launch a browser capable of accessing your application under test.
With this setup, you gain the benefits of containerized testing, such as isolation, reproducibility, and reduced setup complexity.
12.11 Asset Pipeline
The asset pipeline has a new home. Version 5.0.12 and forward is compatible with Grails 7.x.
Updated maven coordinates:
build.gradle
cloud.wondrify:asset-pipeline-gradle
cloud.wondrify:asset-pipeline-grailsGradle plugin:
build.gradle
plugins {
id "cloud.wondrify.asset-pipeline"
}
or
apply plugin: "cloud.wondrify.asset-pipeline"12.12 API Changes
As part of any major release, APIs can change. For Grails 7.0, the list of renamed APIs follows:
-
GrailsClassUtils#isMatchBetweenPrimativeAndWrapperTypes → GrailsClassUtils#isMatchBetweenPrimitiveAndWrapperTypes
12.13 Layout Plugins
Grails 7 has two different layout engines: Sitemesh 2.6.x & Sitemesh 3.x. The Sitemesh2 plugin is named grails-layout and the Sitemesh 3 plugin is grails-sitemesh3. The grails-layout plugin is what has traditionally shipped with Grails. The grails-sitemesh3 plugin is functional, but has some known issues. Please see the thread Grails 7 & Reverting Sitemesh 3 for the history of why we did not exclusively use grails-sitemesh3 for Grails 7.
12.14 grails-layout Configuration
If you decide to use the grails-layout plugin, several changes have occurred:
Add the following dependency to your project:
build.gradle
implementation "org.apache.grails:grails-layout"Package Changes:
-
grails.web.sitemesh → org.apache.grails.web.layout
-
org.grails.web.sitemesh → org.apache.grails.views.gsp.layout
Notable Class Moves:
-
org.grails.web.servlet.view.GrailsLayoutViewResolver → org.apache.grails.web.layout.EmbeddedGrailsLayoutViewResolver
-
org.grails.web.servlet.view.SitemeshLayoutViewResolver → org.apache.grails.web.layout.GrailsLayoutViewResolver
-
org.grails.web.sitemesh.GrailsLayoutView → org.apache.grails.web.layout.EmbeddedGrailsLayoutView
-
org.grails.web.sitemesh.SitemeshLayoutView → org.apache.grails.web.layout.GrailsLayoutView
-
org.grails.web.sitemesh.GSPSitemeshPage → org.apache.grails.web.layout.GSPGrailsLayoutPage
Property Changes:
-
grails.sitemesh.default.layout → grails.views.layout.default
-
grails.sitemesh.enable.nongsp → grails.views.layout.enable.nongsp
-
org.grails.web.sitemesh.GrailsLayoutView.GSP_SITEMESH_PAGE → org.apache.grails.web.layout.EmbeddedGrailsLayoutView.GSP_GRAILS_LAYOUT_PAGE
Tag namespace changes:
-
sitemesh → grailsLayout
12.15 Tomcat 10.1.42 introduced limits for part count and header size in multipart/form-data requests
These limits can be customized using server.tomcat.max-part-count and server.tomcat.max-part-header-size respectively.
server.tomcat.max-part-count default is 10
server.tomcat.max-part-header-size defalt is 512B
12.16 servletContext no longer included by default in generated Bootstrap init{}
The servletContext is no longer included by default in the generated Bootstrap class. If you need access to the servletContext, you can inject it into your Bootstrap class using:
ServletContext servletContext12.17 Development Reloading
For Grails 7, as was the case with Grails 4 and 5 and shell-generated applications in 6, Spring Boot Developer Tools is used by default for development reloading within generated applications.
To learn more about development reloading options, please see the Development Reloading section of this guide.
12.18 grails-i18n plugin
org.apache.grails:grails-i18n has been changed to org.apache.grails.i18n:grails-i18n and is provided transitively, remove org.apache.grails:grails-i18n and org.grails:grails-plugin-i18n from your dependency list
12.19 hibernate.cache.region.factory_class
org.hibernate.cache.ehcache.SingletonEhCacheRegionFactory is deprecated in Hibernate 5.6 and is not compatible with org.hibernate:hibernate-core-jakarta:5.6.15.Final, which is used in Grails 7.
application.yml
hibernate:
allow_update_outside_transaction: true
cache:
queries: false
use_second_level_cache: true
use_query_cache: false
region:
factory_class: 'org.hibernate.cache.ehcache.SingletonEhCacheRegionFactory'If your application sets hibernate.cache.region.factory_class to org.hibernate.cache.ehcache.SingletonEhCacheRegionFactory it will add the non-jakarta version of hibernate-core to your classpath which will cause NoClassDefFoundError and ClassNotFoundException errors.
You will need to change it to jcache and add the Ehcache dependency as follows:
application.yml
hibernate:
allow_update_outside_transaction: true
cache:
queries: false
use_second_level_cache: true
use_query_cache: false
region:
factory_class: 'jcache'build.gradle
implementation 'org.ehcache:ehcache', {
capabilities {
requireCapability('org.ehcache:ehcache-jakarta')
}
}Alternatively, you can define the hibernate-ehcache dependency explicitly and adjust it to exclude hibernate-core and add the jboss-transaction-api_1.3_spec see Hibernate-ehcache
12.20 A Grails project cannot be both a plugin & an Application
In previous versions of Grails, it was possible to apply both the grails-plugin and grails-web Gradle plugins in build.gradle.
This would force the project to be both a Grails Plugin and a Grails Application.
This scenario is not supported and can lead to unexpected behavior due to the AST transforms.
Starting with Grails 7, a validation error will trigger if both a Grails Application Gradle Plugin & a Grails Plugin Gradle Plugin are configured in build.gradle for the same Gradle Project.
12.21 exploded is supported again to enable multi-project reloading
Earlier versions of Grails supported an exploded Gradle configuration that forced defined plugins to use class and resource files, instead of jar files, on the Grails Application runtime classpath if several conditions were true:
-
the property
grails.run.activewas set -
the plugin project had the property
explodedset totrueprior to the application of thegrails-pluginGradle plugin -
plugins were added to the Grails Application project via the
pluginsblock inside of thegrailsextension inbuild.gradleinstead of thedependenciesblock -
the property
explodedwas set on thegrailsextension inbuild.gradleof the Grails Application project
The exploded setup facilitates better class reloading behavior.
For Grails 7, it has been simplified to the following:
-
In the plugin project, apply the gradle plugin
org.apache.grails.gradle.grails-exploded -
In the application project, define plugins inside of the
pluginsblock of thegrailsextension inbuild.gradle:
grails {
plugins {
implementation project(":my-plugin")
}
}
Expanded class files & resource files will only be used over the jar file if the plugin applies the gradle plugin org.apache.grails.gradle.grails-exploded & the plugin is a subproject of your Gradle build.
|
12.22 Database Migration Plugin migrations directory in the main sourceSet
It is no longer necessary to add the grails-app/migrations directory to the main sourceSet in order for the Database Migration Plugin to find your changelogs.
This is now done automatically by the org.apache.grails.gradle.grails-plugin Gradle plugin.
The following code can be removed from your build.gradle file:
build.gradle
sourceSets {
main {
resources {
srcDir 'grails-app/migrations'
}
}
}12.23 Test & JavaExec JVM Args no longer set by default
Previously tasks of type Test & JavaExec had several JVM args set by default to facilitate faster startup times in larger projects.
These settings are removed by default in Grails 7. To restore the old behavior, configure the Test & JavaExec tasks as follows:
tasks.withType(Test).configureEach {
jvmArgs('-XX:+TieredCompilation', '-XX:TieredStopAtLevel=1', '-XX:CICompilerCount=3')
}
tasks.withType(JavaExec).configureEach {
jvmArgs('-XX:+TieredCompilation', '-XX:TieredStopAtLevel=1', '-XX:CICompilerCount=3')
}12.24 MongoDB
Instant persistence switched from epoch milliseconds (BSON int64) to BSON DateTime (same BSON type as java.util.Date); LocalDateTime continues to be converted to BSON DateTime using the configured zone. If you currently using domain objects with property type Instant, you will need to convert them prior to upgrading. For more info, see #15111.
db.Example.updateMany(
{ created: { $type: "long" } },
[ { $set: { created: { $toDate: "$created" } } } ]
);12.25 JSON Rendering of Date/Time Types
JSON rendering of java.util.Calendar, java.time.Instant, java.time.LocalDate, java.time.LocalDateTime, java.time.OffsetDateTime, and java.time.ZonedDateTime has been updated for consistency across both standard JSON converters (render … as JSON) and JSON views (.gson files).
Changes to JSON Output
Calendar: Previously rendered as a complex object with all properties. Now consistently renders as ISO-8601 format with Z suffix:
// Before
{"timestamp": {"time": 1759869218602, "timeZone": {...}, "firstDayOfWeek": 1, ...}}
// After
{"timestamp": "2025-10-07T21:14:31Z"}Instant: Previously rendered as either epoch milliseconds (standard converters) or a complex object structure (JSON views). Now consistently renders as ISO-8601 format with Z suffix:
// Before (standard converters)
{"timestamp": 1759869218602}
// Before (JSON views)
{"timestamp": {"epochSecond": 1759869218, "nano": 602000000}}
// After (both)
{"timestamp": "2025-10-07T21:14:31.602Z"}LocalDate: Previously rendered as a complex object structure. Now consistently renders as ISO-8601 date format (YYYY-MM-DD):
// Before
{"date": {"year": 2025, "month": "OCTOBER", "dayOfMonth": 8, ...}}
// After
{"date": "2025-10-08"}LocalDateTime: Previously rendered as a complex object structure (JSON views) or inconsistently. Now consistently renders as ISO-8601 format without timezone (matching Spring Boot behavior):
// Before (JSON views)
{"dateTime": {"year": 2025, "month": "OCTOBER", "dayOfMonth": 7, ...}}
// After (both)
{"dateTime": "2025-10-07T21:14:31"}
LocalDate and LocalDateTime do not include timezone information, so they render without the Z suffix, unlike Date, Calendar, and Instant which represent specific points in time.
|
OffsetDateTime: Previously rendered as a complex object structure. Now consistently renders as ISO-8601 format with timezone offset:
// Before
{"dateTime": {"offset": {...}, "year": 2025, "month": "OCTOBER", ...}}
// After
{"dateTime": "2025-10-08T00:48:46.407254-07:00"}ZonedDateTime: Previously rendered with zone ID brackets like [America/Los_Angeles]. Now consistently renders as ISO-8601 format with timezone offset only (matching Spring Boot):
// Before
{"dateTime": "2025-10-08T00:48:46.407254-07:00[America/Los_Angeles]"}
// After
{"dateTime": "2025-10-08T00:48:46.407254-07:00"}java.util.Date: Now renders as ISO-8601 with Z suffix including milliseconds:
// Before
{"created": "2025-10-07T21:14:31Z"}
// After
{"created": "2025-10-07T21:14:31.407Z"}
java.util.Date and Calendar have millisecond precision (3 decimal places: .SSS), while Java 8 date/time types (Instant, OffsetDateTime, ZonedDateTime) have nanosecond precision (up to 9 decimal places, with trailing zeros dropped per ISO-8601 spec). This matches Spring Boot’s Jackson serialization behavior.
|
Migration Impact
If your application or API consumers depend on the previous JSON format for Calendar, Instant, LocalDate, LocalDateTime, OffsetDateTime, or ZonedDateTime fields:
-
API Responses: Client applications may need updates to parse the new ISO-8601 string format instead of epoch milliseconds or object structures.
-
Date Parsing: The new format is a standard ISO-8601 string that can be parsed using
Instant.parse(),LocalDate.parse(),LocalDateTime.parse(),OffsetDateTime.parse(), orZonedDateTime.parse()with appropriate formatters. -
Consistency:
-
Temporal types with timezone information (
Date,Calendar,Instant) render with Z suffix (UTC) -
LocalDate(date only) renders as YYYY-MM-DD -
LocalDateTime(date and time, no timezone) renders without Z suffix -
OffsetDateTimeandZonedDateTimerender with their timezone offset (e.g.,-07:00) -
All formatting matches Spring Boot’s behavior
-
-
ZonedDateTime: Note that the zone ID (e.g.,
[America/Los_Angeles]) is no longer included in the output, matching Spring Boot’s behavior.
This change applies to both the grails-converters module (standard JSON rendering) and the grails-views-gson module (JSON views).
12.26 Enum JSON/XML Serialization
As of Grails 7.0.2, enum serialization has been enhanced to support round-trip compatibility between JSON/XML serialization and deserialization. The legacy enum marshaller, which produced verbose output with type metadata, has been deprecated in favor of a simpler format that matches how enums are expected on input.
Legacy Behavior (Deprecated)
Previously, enums were serialized with metadata:
JSON:
{
"stage": {
"enumType": "com.example.ChallengeStage",
"name": "SUBMIT"
}
}XML:
<stage enumType="com.example.ChallengeStage">SUBMIT</stage>This format is asymmetric - when POSTing data, you send "stage":"SUBMIT", but when GETting data, you receive the verbose object structure.
New Behavior (Recommended)
The new SimpleEnumMarshaller serializes enums as simple string values, providing round-trip compatibility:
JSON:
{
"stage": "SUBMIT"
}XML:
<stage>SUBMIT</stage>Now the format you POST is the same format you GET back.
Migration
To opt-in to the new behavior, add the following to your application.yml:
application.yml
grails:
converters:
json:
enum:
format: simple
xml:
enum:
format: simpleDeprecation Timeline
-
7.0.2: Legacy
EnumMarshallerdeprecated (default),SimpleEnumMarshalleravailable via config -
8.0:
SimpleEnumMarshallerwill become the default
The legacy org.grails.web.converters.marshaller.json.EnumMarshaller and org.grails.web.converters.marshaller.xml.EnumMarshaller classes are marked as @Deprecated(forRemoval = true, since = "7.0.2") and will be removed in Grails 8.0.
13. Upgrading the Spring Security Plugin
If your application uses the Grails Spring Security plugin, please consult the Upgrading from Previous Versions section of the Spring Security plugin documentation for specific upgrade instructions related to Grails 7.
14. Changes in CLI- and Forge-generated configuration files
From Grails 7.0.11 onwards, the CLIs (grails-shell-cli and grails-forge-cli) and the Grails Forge website no longer include several previously generated properties in application.yml.
Most of the removed entries simply restated framework defaults, so omitting them reduces clutter without changing behavior. However, grails.urlmapping.cache.maxsize is a special case: older generated applications explicitly set it to 1000, while the framework default is now 5000. If you want to preserve the older generated cache size, keep that property in your application.
If the application you are upgrading relies on a custom value for any of the following properties, or if you want to preserve the previous generated value of grails.urlmapping.cache.maxsize, keep that setting in your application.yml file.
These are the properties that were removed from generated application.yml files:
application.yml
grails:
controllers:
defaultScope: singleton # already framework default
converters:
encoding: UTF-8 # already framework default
mime:
disable:
accept:
header:
userAgents: # already framework default
- Gecko
- WebKit
- Presto
- Trident
urlmapping:
cache:
maxsize: 1000 # Attention! framework default: 5000
views:
default:
codec: html # redundant because GSP expressions already default to html encoding
gsp:
codecs:
expression: html # already framework default
taglib: none # already framework default
staticparts: none # already framework default15. grails-micronaut-bom Required when using Micronaut
Grails 7 introduces a dedicated grails-micronaut-bom for projects that integrate with Micronaut.
The Micronaut platform declares its own managed versions for libraries such as javaparser-core that conflict with the versions managed by grails-bom.
Without an enforced BOM, Gradle’s default conflict resolution (highest version wins) allows the Micronaut platform to silently override grails-bom versions, leading to binary incompatibilities at runtime.
The grails-micronaut-bom layers Micronaut-specific overrides on top of grails-bom. When applied as enforcedPlatform, all of its constraints become strictly versioned and cannot be overridden by any transitive dependency.
Regular Grails projects (without Micronaut) should continue to use platform("org.apache.grails:grails-bom:$grailsVersion") and will receive the Spring-managed dependency versions. Applying enforcedPlatform to those projects is unnecessary and would force grails-bom versions over Spring’s managed defaults.
The Grails Gradle Plugin will error at configuration time if grails-micronaut is detected and grails-micronaut-bom is not applied as enforcedPlatform.
build.gradle
dependencies {
// enforcedPlatform on grails-micronaut-bom is required when using grails-micronaut
implementation enforcedPlatform("org.apache.grails:grails-micronaut-bom:$grailsVersion")
implementation 'org.apache.grails:grails-micronaut'
}The Micronaut auto-setup (which performs the validation along with other Micronaut-specific configuration) defaults to on. It can be disabled via the grails extension when a project deliberately deviates from the recommended setup:
build.gradle
grails {
micronautAutoSetup = false // not recommended
}
Applications generated by the Grails Forge automatically use enforcedPlatform on grails-micronaut-bom when the Micronaut feature is selected.
|
3.5 Upgrading from Grails 5 to Grails 6
Upgrade Instructions for Grails and Related Dependencies
To ensure compatibility with Grails 6, you must update the following versions in your project:
1. Java 11 as Baseline:
Starting from Grails 6, Java 11 serves as the baseline requirement for the framework. When upgrading to Grails 6, ensure that your project is configured to use Java 11. This compatibility with Java 11 allows you to take advantage of the latest features, security enhancements, and performance improvements provided by Java 11.
Please make sure to update your project’s Java version to 11 before proceeding with the Grails 6 upgrade. Doing so will ensure a seamless transition to the latest version of Grails and enable you to enjoy all the benefits that Java 11 has to offer.
2. The New Grails CLI:
Grails 6 comes with a completely revamped and highly efficient Command Line Interface (CLI) that enables you to generate applications and plugins at a remarkable speed. For instance, you can now use the new CLI to create a new Grails 6 application with the following command:
grails create-app my-appThe new CLI also allows you to generate plugins easily. For example, to create a new plugin named "my-plugin," you can use the following command:
grails create-plugin my-pluginOne notable improvement in Grails 6 is that it no longer supports certain commands that performed redundant tasks, such as the outdated grails run-app command. Instead, it recommends using the Gradle bootRun task for running your application, which offers better performance and functionality.
For example, to run your Grails 6 application, you can use the following command:
./gradlew bootRunAs a result of these improvements, the new CLI provides a more streamlined and efficient way to work with Grails applications and plugins.
Overall, Grails 6 offers a significantly improved development experience with its new CLI, optimized commands, and advanced features for generating applications and plugins.
3. Setting Grails Version and Grails Gradle Plugin:
To upgrade to Grails 6, it’s important to configure the appropriate versions in the gradle.properties file as shown below:
gradle.properties
grailsVersion=6.0.0
grailsGradlePluginVersion=6.0.0By specifying the above versions, you’ll gain access to the latest features, improvements, and bug fixes introduced in Grails 6. Upgrading to this version empowers your application with enhanced performance and improved security. Additionally, it allows you to leverage the latest advancements in the Grails framework for a more efficient and secure development experience.
4. GORM Version:
If your project utilizes GORM, ensure to update the version in the gradle.properties file as demonstrated below:
gradle.properties
gormVersion=8.0.0By upgrading to GORM 8.0.0, you will benefit from essential updates and optimizations. This upgrade guarantees seamless interactions with your database and enhances your data management experience. Staying current with GORM allows you to take advantage of the latest database features and improvements, thereby optimizing the performance and functionality of your application.
5. Gradle Version:
Grails 6 uses Gradle 7.6.2 which offers performance improvements, bug fixes, and new features over previous versions. Upgrading to the latest Gradle version helps accelerate your build processes and ensures compatibility with other dependencies.
5.1. Upgrade to Gradle 7.6.2
Run the following command to update the Gradle wrapper to the desired version (e.g., Gradle 7.6.2):
./gradlew wrapper --gradle-version 7.6.2This command will download the specified Gradle version and update the Gradle wrapper settings in your project.
5.2. Check Gradle Version:
After the command finishes, you can verify that the Gradle version has been updated by checking the gradle-wrapper.properties file located in the gradle/wrapper directory. The distributionUrl in the file should now point to the Gradle 7.6.2 distribution:
distributionUrl=https\://services.gradle.org/distributions/gradle-7.6.2-bin.zip5.3. Build the Project:
After updating the Gradle wrapper, you can now build your Grails project using the updated Gradle version:
./gradlew buildThis will initiate the build process with the new Gradle version.
6. Embracing Modern Plugin Management with Grails 6
In Gradle, there are two main ways to add plugins to your project: the plugins block and the apply plugin statement.
Grails 6 introduces a significant change in how plugins are managed by adopting the Gradle plugins block instead of the traditional apply plugin statements. This shift streamlines the project’s build configuration and brings it more in line with modern Gradle conventions. New Grails projects will now utilize the plugins block to manage plugin dependencies and configurations.
Using the plugins Block in Grails 6:
With the new approach, adding plugins to a Grails 6 project is more explicit and organized. In your build.gradle file, you can declare plugins within the plugins block, specifying the plugin’s ID and version.
Here’s an example of adding the views-json plugin using the plugins block:
build.gradle
plugins {
id 'org.grails.plugins.views-json' version '3.0.0'
}Managing Multiple Plugins:
The plugins block allows you to add multiple plugins, each on its own line. This enhances clarity and makes it easier to manage plugin dependencies.
build.gradle
plugins {
id 'org.grails.plugins.views-json' version '3.0.0'
// Add other plugins as needed
}Moving Older Applications to the New Approach:
If you are migrating an older Grails application to Grails 6, you can update the plugin declarations from apply plugin to the plugins block. For example, if your previous application used the views-json plugin, you can modify the build.gradle as follows:
Before (Using apply plugin):
build.gradle
apply plugin: 'org.grails.plugins.views-json'After (Using plugins Block in Grails 6):
build.gradle
plugins {
id 'org.grails.plugins.views-json' version '3.0.0'
}By migrating to the plugins block, your Grails 6 project will adhere to modern Gradle conventions, making it easier to manage plugin dependencies and configurations. This new approach maintains consistency and enhances the overall structure of the project, ensuring a smoother and more efficient development process.
7. GORM for MongoDB Sync Driver:
The GORM for MongoDB is updated to support the latest mongodb-driver-sync. If you are using GORM for MongoDB and making use of specific MongoDB Driver or low-level Mongo API features, consider checking the Upgrading to the 4.0 Driver guide.
This update ensures seamless integration with MongoDB, access to new features, and improved performance while interacting with your MongoDB database.
8. Asset Pipeline Plugin:
In Grails 6, there is an update to the Asset Pipeline Plugin, which is now version 4.3.0. The Asset Pipeline Plugin is a crucial component in Grails applications, responsible for managing frontend assets like stylesheets, JavaScript files, and images. The update to version 4.3.0 brings several improvements and new features to enhance the management and processing of frontend assets in your Grails projects.
The asset-pipeline plugin 4.3.0 offers new features for managing and processing your frontend assets, ensuring they are efficiently bundled and served to your users.
9. Spring 5.3:
Grails 6 is built on Spring 5.3.27. If your project uses Spring-specific features, refer to the Upgrading to Spring 5.3 guide.
Spring 5.3 introduces enhancements and fixes to the Spring framework, providing you with the latest improvements in dependency injection, web frameworks, and other Spring-related functionalities.
10. Spring Boot 2.7:
Grails 6 updates to Spring Boot 2.7. For more information, consult the Spring Boot 2.7 Release Notes
Spring Boot 2.7 comes with new features, performance enhancements, and compatibility improvements, making it a solid foundation for your Grails application.
11. Micronaut 3.9.3:
Grails 6 is shipped with Micronaut 3.9.3. If you are using specific Micronaut features, refer to the Upgrading to Micronaut 3.x guide.
Micronaut 3.9.3 brings new capabilities, improvements, and bug fixes, empowering your application with a powerful and lightweight microservices framework.
12. Micronaut for Spring 4.5.1:
Grails 6 is updated to use Micronaut for Spring 4.5.1. For more information, check out the release notes.
Micronaut for Spring 4.5.1 provides seamless integration between Micronaut and Spring, allowing you to leverage the strengths of both frameworks in your Grails project.
12.27 stop-app no longer uses JMX or the Actuator shutdown endpoint
The interactive CLI stop-app command no longer stops a running application through JMX or the Spring Boot Actuator /actuator/shutdown endpoint. Both mechanisms were unreliable on current JDKs and default configurations.
Instead, run-app records the application’s process id in a PID file (build/run-app.pid) and stop-app reads that file to stop the process directly. As a result:
-
The
--hostand--portoptions ofstop-apphave been removed.stop-appnow stops the application started byrun-appfor the current project. If you previously scriptedgrails stop-app --host=… --port=…, drop those options. -
stop-apponly stops an application that was started withrun-appfor the same project. It can be invoked from interactive mode or from a separate terminal. -
On Linux and macOS the application is shut down gracefully (the equivalent of
SIGTERM), so JVM shutdown hooks and Spring’s orderly shutdown run. On Windows the application is terminated on a best-effort basis and a graceful shutdown is not guaranteed. -
Every
bootRuninvocation (including a direct./gradlew bootRun) now writesbuild/run-app.pidwhile the application is running; the file is removed once the application stops. Customizing the Gradle build directory (layout.buildDirectory) is not supported bystop-app, which always looks for the PID file under the conventionalbuilddirectory.
13. Upgrading the Spring Security Plugins
As of Grails 7, the Spring Security plugins — Core, ACL, CAS, LDAP, OAuth2, REST, and UI — are part of Grails core and are documented in the Security > Spring Security section of this guide. This section covers upgrading an application from the Grails 6.x era (plugin versions 5.x/6.x, Spring Security 5.8.x) to Grails 7 (Spring Security 6.x).
| Documentation for earlier, independently-versioned plugin releases remains available at the legacy Spring Security plugin documentation site. |
Dependency Changes
All Spring Security plugin artifacts have moved to the org.apache.grails group. The most notable change is that spring-security-core has been renamed to grails-spring-security (dropping the -core suffix).
Update your build.gradle dependencies as follows:
| Old Dependency | New Dependency |
|---|---|
|
|
|
|
|
|
|
|
|
|
|
|
|
|
|
|
|
|
|
|
|
|
The coordinate rename script described in the Coordinate Changes section above also updates these Spring Security artifacts automatically.
Example
A typical Spring Security Core dependency change:
build.gradle
// Before (Grails 6)
implementation 'org.grails.plugins:spring-security-core:6.1.1'
// After (Grails 7)
implementation 'org.apache.grails:grails-spring-security'| With the unified Grails BOM, versions are managed automatically when using a Grails Gradle plugin. You no longer need to specify the version explicitly. |
REST Plugin Token Storage Submodules
If you use the Spring Security REST plugin with a specific token storage backend, note the following renames:
-
spring-security-rest-gormis nowgrails-spring-security-rest-datamapping(reflecting the rename of GORM to Grails Data Mapping) -
spring-security-rest-grailscacheis nowgrails-spring-security-rest-grails-cache -
spring-security-rest-memcachedis nowgrails-spring-security-rest-memcached -
spring-security-rest-redisis nowgrails-spring-security-rest-redis
Spring Security 6.x Changes
The underlying Spring Security framework has been upgraded from 5.8.x to 6.x. Key changes that may affect your application:
-
Jakarta EE namespace: Spring Security 6 uses
jakarta.servletinstead ofjavax.servlet. See the Spring Security Migration Guide for details. -
Security filter chain configuration: The
WebSecurityConfigurerAdapterhas been removed in Spring Security 6. If you have custom security configurations extending this class, you will need to migrate to the component-based approach described in Spring Security without the WebSecurityConfigurerAdapter. The Grails Spring Security plugin handles the core filter chain configuration internally through thegrails.plugin.springsecurity.*namespace, so for most apps no migration is needed. However, user-defined@Bean SecurityFilterChain,@Bean WebSecurityCustomizer,@Bean AuthenticationManager, and@Bean UserDetailsManagerbeans are not automatically wired into the plugin’s filter chain, authentication providers, or user lookup. See the "Coexistence with the component-based Spring Security configuration model" section in the Installation chapter for the full coexistence matrix and the equivalent plugin configuration for each pattern. -
Default security behaviors: Some default behaviors have changed in Spring Security 6 (e.g., CSRF protection, session management). Review the Spring Security reference documentation for the complete list of changes.
Configuration Compatibility
The grails.plugin.springsecurity.* configuration namespace remains unchanged. Your existing application.groovy or application.yml security configuration should work without modification after updating the dependencies.
If you encounter any issues during the upgrade, please file an issue at the grails-core GitHub repository.
14. Changes in CLI- and Forge-generated configuration files
From Grails 7.0.11 onwards, the CLIs (grails-shell-cli and grails-forge-cli) and the Grails Forge website no longer include several previously generated properties in application.yml.
Most of the removed entries simply restated framework defaults, so omitting them reduces clutter without changing behavior. However, grails.urlmapping.cache.maxsize is a special case: older generated applications explicitly set it to 1000, while the framework default is now 5000. If you want to preserve the older generated cache size, keep that property in your application.
If the application you are upgrading relies on a custom value for any of the following properties, or if you want to preserve the previous generated value of grails.urlmapping.cache.maxsize, keep that setting in your application.yml file.
These are the properties that were removed from generated application.yml files:
application.yml
grails:
controllers:
defaultScope: singleton # already framework default
converters:
encoding: UTF-8 # already framework default
mime:
disable:
accept:
header:
userAgents: # already framework default
- Gecko
- WebKit
- Presto
- Trident
urlmapping:
cache:
maxsize: 1000 # Attention! framework default: 5000
views:
default:
codec: html # redundant because GSP expressions already default to html encoding
gsp:
codecs:
expression: html # already framework default
taglib: none # already framework default
staticparts: none # already framework default15. grails-micronaut-bom Required when using Micronaut
Grails 7 introduces a dedicated grails-micronaut-bom for projects that integrate with Micronaut.
The Micronaut platform declares its own managed versions for libraries such as javaparser-core that conflict with the versions managed by grails-bom.
Without an enforced BOM, Gradle’s default conflict resolution (highest version wins) allows the Micronaut platform to silently override grails-bom versions, leading to binary incompatibilities at runtime.
The grails-micronaut-bom layers Micronaut-specific overrides on top of grails-bom. When applied as enforcedPlatform, all of its constraints become strictly versioned and cannot be overridden by any transitive dependency.
Regular Grails projects (without Micronaut) should continue to use platform("org.apache.grails:grails-bom:$grailsVersion") and will receive the Spring-managed dependency versions. Applying enforcedPlatform to those projects is unnecessary and would force grails-bom versions over Spring’s managed defaults.
The Grails Gradle Plugin will error at configuration time if grails-micronaut is detected and grails-micronaut-bom is not applied as enforcedPlatform.
build.gradle
dependencies {
// enforcedPlatform on grails-micronaut-bom is required when using grails-micronaut
implementation enforcedPlatform("org.apache.grails:grails-micronaut-bom:$grailsVersion")
implementation 'org.apache.grails:grails-micronaut'
}The Micronaut auto-setup (which performs the validation along with other Micronaut-specific configuration) defaults to on. It can be disabled via the grails extension when a project deliberately deviates from the recommended setup:
build.gradle
grails {
micronautAutoSetup = false // not recommended
}
Applications generated by the Grails Forge automatically use enforcedPlatform on grails-micronaut-bom when the Micronaut feature is selected.
|
16. Upgrading the Quartz Plugin
As of Grails 7, the Quartz plugin is part of Grails core and is documented in the Background Jobs > Advanced Scheduling section of this guide.
| Documentation for earlier, independently-versioned plugin releases remains available at the legacy Quartz plugin documentation site. |
16.1 Coordinate Changes
The plugin artifact has moved to the org.apache.grails group and has been renamed from quartz to grails-quartz, matching the naming convention used by the other Grails plugins.
| Grails 6 Coordinate | Grails 7 Coordinate |
|---|---|
|
|
The coordinate rename script described in the Coordinate Changes section above also updates this artifact automatically.
The version is now managed by the Grails BOM, so it should be removed from the dependency declaration:
build.gradle
dependencies {
// Grails 6
// implementation 'org.grails.plugins:quartz:2.0.13'
// Grails 7
implementation 'org.apache.grails:grails-quartz'
}16.2 spring-context-support
The plugin builds its scheduler from SchedulerFactoryBean and its job factory from AdaptableJobFactory, both of which live in org.springframework:spring-context-support. Plugin version 4.0.x did not declare that dependency, and it is not reliably inherited from the rest of the stack, so an application failed at startup with:
java.lang.NoClassDefFoundError: org/springframework/scheduling/quartz/AdaptableJobFactoryuntil spring-context-support was added by hand. This affected any application using the standalone plugin releases, including one generated with the grails-quartz feature.
The dependency is now declared by the plugin and comes in transitively. If you added it explicitly as a workaround, it can be removed:
build.gradle
dependencies {
implementation 'org.apache.grails:grails-quartz'
// no longer required -- provided transitively by grails-quartz
// implementation 'org.springframework:spring-context-support'
}16.3 Job Class Properties
Job configuration properties such as concurrent, sessionRequired, description, and group must be declared as static rather than def. This changed in plugin version 2.0.13, so applications coming from an older release need to update their job classes:
class MyJob {
// Grails 6 and earlier
// def concurrent = false
static concurrent = false
static triggers = {
simple repeatInterval: 5000L
}
void execute() {
// ...
}
}See the Job Properties section for the full set of supported properties and their defaults.
3.6 Upgrading from Grails 4 to Grails 5
Bump up Grails Version
You will need to upgrade your Grails version defined in gradle.properties as:
gradle.properties
...
grailsVersion=5.2.0
...Apache Groovy 3.0.7
Grails 5.1.1 provide support for Groovy 3. We would recommend you to please check the Release notes for Groovy 3 to update your application in case you are using a specific feature which might not work in Groovy 3.
Define groovyVersion in gradle.properties to force the application to use Groovy 3.
Grails 5.1 app’s gradle.properties
gradle.properties
...
groovyVersion=3.0.7
...Bump up GORM Version
If you were using GORM, you will need to update the version defined in gradle.properties as:
gradle.properties
...
gormVersion=7.2.0
...Bump up gradle version
Grails 5.2.x uses gradle 7.2
gradle-wrapper.properties
...
distributionUrl=https\://services.gradle.org/distributions/gradle-7.2-bin.zip
...Also you can run this command
./gradlew wrapper --gradle-version 7.2GORM for MonogDB Sync Driver
The GORM for MongoDB is updated to support latest mongodb-driver-sync. If you are using GORM for MongoDB and doing something specific to MongoDB Driver or low level Mongo API then you might want to take a look at Upgrading to the 4.0 Driver
Bump up Asset Pipeline plugin version
The previous version of asset-pipeline is not supported with Grails 5.0 as it is compiled with a version of Groovy which is binary incompatible with Groovy 3. So, please update the plugin version to 3.2.4.
Disabled StringCharArrayAccessor by default
The previous version of Grails use the StringCharArrayAccessor which is enabled by default and provides optimized access to java.lang.String internals. In Grails 5.0 it is disabled by default but you can enable it by setting a system property with name stringchararrayaccessor.disabled and value false.
| Enabling StringCharArrayAccessor would show IllegalReflectiveAccess warnings as it uses reflection to do the optimizations. |
Changes in profile.yml and feature.yml files in Grails Profiles
The format of how dependencies are defined in features and profiles has been changed. See the section on Application Profiles for more information.
Deprecation of dot navigation of Grails configuration
In order to reduce complexity, improve performance, and increase maintainability, accessing configuration through dot notation (config.a.b.c) has been deprecated. This functionality will be removed in a future release.
Also, you would see a warning message if you are accessing configuration through the dot notation.
The recommended way to access configuration is:
grailsApplication.config.getProperty("hola", String.class)Deprecated Classes
Spring 5.3
Grails 5.0.0.RC1 is built on Spring 5.3.2 See the Upgrading to Spring 5.3 if you are using Spring specific features.
Spring Boot 2.4
Grails 5.1.1 updates to Spring Boot 2.6. Please check Spring Boot 2.6 Release Notes for more information.
Micronaut 3.2.0
Grails 5.1.1 is shipped with Micronaut 3.2.0. Please check the Upgrading to Micronaut 3.x if you are using a specific feature.
Micronaut for Spring 4.0.1
Grails 5.1.1 is updated to Micronaut for Spring 4.0.1, please check out release notes for more information.
Gradle 7.x
Compile dependency configuration as well as others have been removed from Gradle 7.x. In previous version they were deprecated.
Replace configurations:
build.gradle
...
compile -> implementation
testCompile -> testImplementation
runtime -> runtimeOnly
...| More information in Gradle upgrade docs Gradle upgrade docs |
Plugins in multi-project setup
If you have grails plugins as part of multi-project builds you should also replace the compile with implementation configuration.
Additionally if your main application relied on the dependencies declared by the plugin you need to apply further changes.
To make the dependencies available again you have to declare them with api configuration. You also have to apply the java-library gradle plugin in your plugin project.
| More information gradle java-library-plugin |
3.7 Upgrading from Grails 3.3.x to Grails 4
Bump up Grails Version
You will need to upgrade your Grails version defined in gradle.properties.
Grails 3 app’s gradle.properties
gradle.properties
...
grailsVersion=3.3.8
...Grails 4 app’s gradle.properties
gradle.properties
...
grailsVersion=4.0.4
...Bump up GORM Version
If you were using GORM, you will need to update the version defined in gradle.properties.
Grails 3 app’s gradle.properties
gradle.properties
...
gormVersion=6.1.10.RELEASE
...Grails 4 app’s gradle.properties
gradle.properties
...
gormVersion=7.0.4
...Move GORM DSL Entries to runtime.groovy
GORM DSL entries should be move to runtime.groovy. For instance, using following GORM configuration in the application.groovy is not supported and will break the application:
grails.gorm.default.mapping = {
id generator: 'identity'
}Spring 5 and Spring Boot 2.1
Grails 4.0 is built on Spring 5 and Spring Boot 2.1. See the migration guide and release notes if you are using Spring specific features.
Hibernate 5.4 and GORM 7.x
Grails 4.x supports a minimum version of Hibernate 5.4 and GORM 7.x. Several changes have been made to GORM to support the newer version of Hibernate and simplify GORM itself.
The details of these changes are covered in the GORM upgrade documentation.
Spring Boot 2.1 Actuator
Please check the Spring Boot Actuator documentation since it has changed substantially from Spring Boot 1.5 the version Grails 3.x used.
If you had configuration such as:
grails-app/conf/application.yml - Grails 3.3.x
endpoints:
enabled: false
jmx:
enabled: true
unique-names: truereplace it with:
grails-app/conf/application.yml - Grails 4.x
spring:
jmx:
unique-names: true
management:
endpoints:
enabled-by-default: falseSpring Boot Developer Tools and Spring Loaded
Previous versions of Grails used a reloading agent called Spring Loaded. Since this library is no longer maintained and does not support Java 11 support for Spring Loaded has been removed.
As a replacement, Grails 4 applications include Spring Boot Developer Tools dependencies in the build.gradle build script. If you are migrating a Grails 3.x app, please include the following set of dependencies:
build.gradle
.
..
...
configurations {
developmentOnly
runtimeClasspath {
extendsFrom developmentOnly
}
}
dependencies {
developmentOnly("org.springframework.boot:spring-boot-devtools")
...
..
}
...
..
.Also you should configure the necessary excludes for Spring Developer Tools in application.yml:
spring:
devtools:
restart:
exclude:
- grails-app/views/**
- grails-app/i18n/**
- grails-app/conf/**The above configuration prevents the server from restarting when views or message bundles are changed.
| You can use Spring Developer Tools in combination with a browser extension such as the Chrome LiveReload extension to get automatic browser refresh when you change anything in your Grails application. |
Spring Boot Gradle Plugin Changes
Grails 4 is built on top of Spring Boot 2.1. Grails 3 apps were built on top of Spring Boot 1.x.
Your Grails 3 app’s build.gradle may have such configuration:
build.gradle
bootRun {
addResources = true
...
}Grails 4 apps are built on top of Spring Boot 2.1. Starting from Spring Boot 2.0, the addResources property no longer exists. Instead, you need to set the sourceResources property to the source set that you want to use. Typically that’s sourceSets.main. This is described in the Spring Boot Gradle plugin’s documentation.
Your Grails 4 app’s build.gradle can be configured:
build.gradle
bootRun {
sourceResources sourceSets.main
...
}Building executable jars for Grails Plugins
The bootRepackage task has been replaced with bootJar and bootWar tasks for building executable jars and wars respectively. Both tasks extend their equivalent standard Gradle jar or war task, giving you access to all of the usual configuration options and behaviour.
If you had configuration such as:
build.gradle | Grails 3
// enable if you wish to package this plugin as a standalone application
bootRepackage.enabled = falsereplace it with:
build.gradle | Grails 4
// enable if you wish to package this plugin as a standalone application
bootJar.enabled = falseUpgrading to Gradle 5
Grails 3 apps by default used Gradle 3.5. Grails 4 apps use Gradle 5.
To upgrade to Gradle 5 execute:
./gradlew wrapper --gradle-version 5.0Due to changes in Gradle 5, transitive dependencies are no longer resolved for plugins. If your project makes use of a plugin that has transitive dependencies, you will need to add those explicitly to your build.gradle file.
If you customized your app’s build, other migrations may be necessary. Please check Gradle Upgrading your build documentation. Especially notice, that default Gradle daemon now starts with 512MB of heap instead of 1GB. Please check Default memory settings changed documentation.
Groovy language update to 2.5.6
Keep in mind, that with grails 4.0.x there is a minor groovy language upgrade (e.g. 3.3.9. used groovy 2.4.x), which requires a couple of changes, that are immediately obvious when trying to compile your source code. However there are also issues with changed implementations of core linkedlist functions! Check an overview of the breaking changes here: Breaking changes of Groovy 2.5
Removed date helper functions
Most common issue is that date util functions have been moved to individual project, e.g new Date().format("ddMMyyyy") no longer works without adding:
build.gradle
dependencies {
implementation "org.codehaus.groovy:groovy-dateutil:3.0.4"
}Changed linked list method implementations
Check whether you are using the groovy version of linkedlist implementations:
-
[].pop()- will no longer remove the last, but the first element of the list. Replace it with[].removeLast()is recommended. -
[].push(..)- will no longer add to the end, but to the beginning of the list. Replace it with[].add(..)is recommended.
H2 Web Console
Spring Boot 2.1 includes native support for the H2 database web console. Since this is already included in Spring Boot the equivalent feature has been removed from Grails. The H2 console is therefore now available at /h2-console instead of the previous URI of /dbconsole. See Using H2’s Web Console in the Spring Boot documentation for more information.
Upgrade Hibernate
If you were using GORM for Hibernate implementation in your Grails 3 app, you will need to upgrade to Hibernate 5.4.
A Grails 3 build.gradle such as:
build.gradle
dependencies {
...
implementation "org.grails.plugins:hibernate5"
implementation "org.hibernate:hibernate-core:5.1.5.Final"
}will be in Grails 4:
build.gradle
dependencies {
...
implementation "org.grails.plugins:hibernate5"
implementation "org.hibernate:hibernate-core:5.4.0.Final"
}Migrating to Geb 2.3
Geb 1.1.x (a JDK 1.7 compatible version) was the version shipped by default with Grails 3. Grails 4 is no longer compatible with Java 1.7. You should migrate to Geb 2.3.
In Grails 3, if your build.gradle looks like:
build.gradle
dependencies {
testCompile "org.grails.plugins:geb:1.1.2"
testRuntime "org.seleniumhq.selenium:selenium-htmlunit-driver:2.47.1"
testRuntime "net.sourceforge.htmlunit:htmlunit:2.18"
}In Grails 4, you should replace it with:
build.gradle
buildscript {
repositories {
...
}
dependencies {
...
classpath "gradle.plugin.com.energizedwork.webdriver-binaries:webdriver-binaries-gradle-plugin:$webdriverBinariesVersion" (1)
}
}
...
..
repositories {
...
}
apply plugin:"idea"
...
...
apply plugin:"com.energizedwork.webdriver-binaries" (1)
dependencies {
...
testCompile "org.grails.plugins:geb" (4)
testRuntime "org.seleniumhq.selenium:selenium-chrome-driver:$seleniumVersion" (5)
testRuntime "org.seleniumhq.selenium:selenium-firefox-driver:$seleniumVersion" (5)
testRuntime "org.seleniumhq.selenium:selenium-safari-driver:$seleniumSafariDriverVersion" (5)
testCompile "org.seleniumhq.selenium:selenium-remote-driver:$seleniumVersion" (5)
testCompile "org.seleniumhq.selenium:selenium-api:$seleniumVersion" (5)
testCompile "org.seleniumhq.selenium:selenium-support:$seleniumVersion" (5)
}
webdriverBinaries {
chromedriver "$chromeDriverVersion" (2)
geckodriver "$geckodriverVersion" (3)
}
tasks.withType(Test) {
systemProperty "geb.env", System.getProperty('geb.env')
systemProperty "geb.build.reportsDir", reporting.file("geb/integrationTest")
systemProperty "webdriver.chrome.driver", System.getProperty('webdriver.chrome.driver')
systemProperty "webdriver.gecko.driver", System.getProperty('webdriver.gecko.driver')
}gradle.properties
gebVersion=2.3
seleniumVersion=3.12.0
webdriverBinariesVersion=1.4
hibernateCoreVersion=5.1.5.Final
chromeDriverVersion=2.44 (2)
geckodriverVersion=0.23.0 (3)
seleniumSafariDriverVersion=3.14.0| 1 | Includes Webdriver binaries Gradle plugin. |
| 2 | Set the appropriate Webdriver for Chrome version. |
| 3 | Set the appropriate Webdriver for Firefox version. |
| 4 | Includes the Grails Geb Plugin dependency which has a transitive dependency to geb-spock. This is the dependency necessary to work with Geb and Spock. |
| 5 | Selenium and different driver dependencies. |
Create also a Geb Configuration file at src/integration-test/resources/GebConfig.groovy.
src/integration-test/resources/GebConfig.groovy
import org.openqa.selenium.chrome.ChromeDriver
import org.openqa.selenium.chrome.ChromeOptions
import org.openqa.selenium.firefox.FirefoxDriver
import org.openqa.selenium.firefox.FirefoxOptions
import org.openqa.selenium.safari.SafariDriver
environments {
// You need to configure in Safari -> Develop -> Allowed Remote Automation
safari {
driver = { new SafariDriver() }
}
// run via “./gradlew -Dgeb.env=chrome iT”
chrome {
driver = { new ChromeDriver() }
}
// run via “./gradlew -Dgeb.env=chromeHeadless iT”
chromeHeadless {
driver = {
ChromeOptions o = new ChromeOptions()
o.addArguments('headless')
new ChromeDriver(o)
}
}
// run via “./gradlew -Dgeb.env=firefoxHeadless iT”
firefoxHeadless {
driver = {
FirefoxOptions o = new FirefoxOptions()
o.addArguments('-headless')
new FirefoxDriver(o)
}
}
// run via “./gradlew -Dgeb.env=firefox iT”
firefox {
driver = { new FirefoxDriver() }
}
}Deprecated classes
The following classes, which were deprecated in Grails 3.x, have been removed in Grails 4. Please, check the list below to find a suitable replacement:
Removed Class |
Alternative |
|
|
|
|
|
|
|
|
|
|
|
|
|
|
|
|
|
Use traits instead. |
|
|
|
|
|
|
|
Use the |
|
|
|
|
|
Use the |
|
|
|
|
|
Handled by |
|
Use |
|
|
|
|
|
|
|
|
|
|
|
|
|
|
|
|
|
|
|
|
|
|
|
|
|
|
|
|
|
|
|
|
|
|
|
|
|
|
|
|
|
|
|
|
|
|
|
|
|
|
|
|
|
|
|
|
|
|
|
Replaced by newer version of commons-validation |
|
Replaced by newer version of commons-validation |
|
Replaced by newer version of commons-validation |
|
Replaced by newer version of commons-validation |
|
Replaced by newer version of commons-validation |
|
|
Grails-Java8
For those who have added a dependency on the grails-java8 plugin, all you should need to do is simply remove the dependency. All of the classes in the plugin have been moved out to their respective projects.
Profiles Deprecation
A few of the profiles supported in Grails 3.x will no longer be maintained going forward and as a result it is no longer possible to create applications when them in the shorthand form. When upgrading existing projects, it will be necessary to supply the version for these profiles.
-
org.grails.profiles:angularjs→org.grails.profiles:angularjs:1.1.2 -
org.grails.profiles:webpack→org.grails.profiles:webpack:1.1.6 -
org.grails.profiles:react-webpack→org.grails.profiles:react-webpack:1.0.8
Scheduled Methods
In Grails 3 no configuration or additional changes were necessary to use the Spring @Scheduled annotation. In Grails 4 you must apply the @EnableScheduling annotation to your application class in order for scheduling to work.
4 Configuration
It may seem odd that in a framework that embraces "convention-over-configuration" that we tackle this topic now. With Grails' default settings you can actually develop an application without doing any configuration whatsoever, as the quick start demonstrates, but it’s important to learn where and how to override the conventions when you need to. Later sections of the user guide will mention what configuration settings you can use, but not how to set them. The assumption is that you have at least read the first section of this chapter!
4.1 Configuration Types
Configuration in Grails is generally split across 2 areas: build configuration and runtime configuration.
Build configuration is generally done via Gradle and the build.gradle file. Runtime configuration is by default specified in YAML in the grails-app/conf/application.yml file.
If you prefer to use Grails 2.0-style Groovy configuration then it is possible to specify configuration using Groovy’s ConfigSlurper syntax. Two Groovy configuration files are available: grails-app/conf/application.groovy and grails-app/conf/runtime.groovy:
-
Use
application.groovyfor configuration that doesn’t depend on application classes -
Use
runtime.groovyfor configuration that does depend on application classes
|
This separation is necessary because configuration values defined in Error occurred running Grails CLI: startup failed:script14738267015581837265078.groovy: 13: unable to resolve class com.foo.Bar |
For Groovy configuration the following variables are available to the configuration script:
| Variable | Description |
|---|---|
userHome |
Location of the home directory for the account that is running the Grails application. |
appName |
The application name as it appears in build.gradle. |
appVersion |
The application version as it appears in build.gradle. |
For example:
my.tmp.dir = "${userHome}/.grails/tmp"Accessing Configuration with GrailsApplication
If you want to read runtime configuration settings, i.e. those defined in application.yml, use the grailsApplication object, which is available as a variable in controllers and tag libraries:
class MyController {
def hello() {
def recipient = grailsApplication.config.getProperty('foo.bar.hello')
render "Hello ${recipient}"
}
}The config property of the grailsApplication object is an instance of the Config interface and provides a number of useful methods to read the configuration of the application.
In particular, the getProperty method (seen above) is useful for efficiently retrieving configuration properties, while specifying the property type (the default type is String) and/or providing a default fallback value.
class MyController {
def hello(Recipient recipient) {
//Retrieve Integer property 'foo.bar.max.hellos', otherwise use value of 5
def max = grailsApplication.config.getProperty('foo.bar.max.hellos', Integer, 5)
//Retrieve property 'foo.bar.greeting' without specifying type (default is String), otherwise use value "Hello"
def greeting = grailsApplication.config.getProperty('foo.bar.greeting', "Hello")
def message = (recipient.receivedHelloCount >= max) ?
"Sorry, you've been greeted the max number of times" : "${greeting}, ${recipient}"
}
render message
}
}Notice that the Config instance is a merged configuration based on Spring’s PropertySource concept and reads configuration from the environment, system properties and the local application configuration merging them into a single object.
GrailsApplication can be easily injected into services and other Grails artifacts:
import grails.core.*
class MyService {
GrailsApplication grailsApplication
String greeting() {
def recipient = grailsApplication.config.getProperty('foo.bar.hello')
return "Hello ${recipient}"
}
}Configuration Metadata
Grails framework modules publish standard Spring Boot configuration metadata in
META-INF/spring-configuration-metadata.json. IDEs use this metadata for key completion, types, descriptions, defaults,
and value hints. The Grails configuration report command and the
Application Properties reference use its property and group
entries.
The configuration report includes the properties of the Grails namespaces, grails., dataSource. and hibernate.,
from all metadata on the classpath. A Grails plugin can publish metadata for its own namespace in the same way, and the
report includes all of the properties a plugin documents, each group in its own section. This also applies to a plugin
that is on the classpath as the output directories of its Gradle build instead of a JAR, such as a plugin project that
runs the report itself, as long as it uses the default output directories for its classes and resources. The metadata
of other libraries, such as Spring Boot, is left out of the report.
For configuration classes written in Groovy, Grails collects metadata with a compiler AST transformation. The
transformation writes the metadata of each @ConfigurationProperties class to its own build-time file next to the
compiled classes, and the build merges those files after compilation. Nothing is added to the compiled classes, and
the per-class files are not packaged. Java configuration classes are inspected from their compiled bytecode. This
avoids Java annotation processing on Groovy sources, which would interfere with incremental Groovy compilation.
Some plugins, such as Spring Security, declare their defaults in a Groovy configuration script rather than in a configuration class. The published metadata covers those settings as well. The script is read without being executed: a literal value becomes the documented default, while a value that comes from a method call, an environment block, or another dynamic expression is listed without a default, because its result depends on where the application runs.
The generated metadata describes bindable fields and bean properties. A module can also provide
META-INF/additional-spring-configuration-metadata.json for descriptions, hints, legacy or indirect properties, and
other details that cannot be derived safely from bytecode or static DSL syntax. Curated values override generated values
for the same property. The module build merges all generated and curated entries into the single standard
META-INF/spring-configuration-metadata.json resource published in the module JAR.
Generated types follow the Spring Boot convention of naming primitives by their wrapper, for example
java.lang.Boolean. Properties contributed by a Groovy @Delegate field are generated when the delegate is compiled
by the same module; otherwise the build asks for them to be described in the curated metadata.
Only compile-time constant Groovy initializers are emitted as generated defaults. Defaults calculated by constructors, method calls, environment checks, system properties, or other dynamic expressions are intentionally omitted unless a curated metadata overlay supplies an authoritative value.
GrailsConfigurationAware Interface
Accessing configuration dynamically at runtime can have a small effect on application performance. An alternative approach is to implement the GrailsConfigurationAware interface, which provides a setConfiguration method that accepts the application configuration as a parameter when the class is initialized. You can then assign relevant configuration properties to instance properties on the class for later usage.
The Config instance has the same properties and usage as the injected GrailsApplication config object. Here is the service class from the previous example, using GrailsConfigurationAware instead of injecting GrailsApplication:
import grails.core.support.GrailsConfigurationAware
class MyService implements GrailsConfigurationAware {
String recipient
String greeting() {
return "Hello ${recipient}"
}
void setConfiguration(Config config) {
recipient = config.getProperty('foo.bar.hello')
}
}Spring Value Annotation
You can use Spring’s Value annotation to inject configuration values:
import org.springframework.beans.factory.annotation.*
class MyController {
@Value('${foo.bar.hello}')
String recipient
def hello() {
render "Hello ${recipient}"
}
}
In Groovy code you must use single quotes around the string for the value of the Value annotation otherwise it is interpreted as a GString not a Spring expression.
|
As you can see, when accessing configuration settings you use the same dot notation as when you define them.
4.1.1 YML Configuration
The application.yml file was introduced in Grails 3.0, and YAML is now the preferred format for configuration files.
Using system properties / command line arguments
Suppose you are using the JDBC_CONNECTION_STRING command line argument and you want to access the same in the yml file then it can be done in the following manner:
production:
dataSource:
url: '${JDBC_CONNECTION_STRING}'Similarly system arguments can be accessed.
You will need to have this in build.gradle to modify the bootRun target if grails run-app or ./gradlew bootRun is used to start the application
bootRun {
systemProperties = System.properties
}For testing the following will need to change the test task as follows
test {
systemProperties = System.properties
}Default Configuration
Grails will read application.(properties|yml) from the ./config or the current directory by default.
4.1.2 External Configuration
While Grails will check for configuration in application.(properties|yml) by default, it’s useful to load configuration from other locations.
There are many use cases for external, optional configuration, but two important ones are:
-
Production Environments - sensitive information may need to be separated from the code.
-
Development Environments - development environment specific configuration that will vary.
As of Grails 7.0, external configuration is supported via the property grails.config.locations.
Any configuration that is not found, will be skipped and not error.
YML Example
grails:
config:
locations:
- classpath:myconfig.groovy
- classpath:myconfig.yml
- classpath:myconfig.properties
- file:///etc/app/myconfig.groovy
- file:///etc/app/myconfig.yml
- file:///etc/app/myconfig.properties
- ~/.grails/myconfig.groovy
- ~/.grails/myconfig.yml
- ~/.grails/myconfig.properties
- file:${catalina.base}/myconfig.groovy
- file:${catalina.base}/myconfig.yml
- file:${catalina.base}/myconfig.propertiesGroovy Example
grails.config.locations = [
"classpath:myconfig.groovy",
"classpath:myconfig.yml",
"classpath:myconfig.properties",
"file:///etc/app/myconfig.groovy",
"file:///etc/app/myconfig.yml",
"file:///etc/app/myconfig.properties",
"~/.grails/myconfig.groovy",
"~/.grails/myconfig.yml",
"~/.grails/myconfig.properties",
'file:${catalina.base}/myconfig.groovy',
'file:${catalina.base}/myconfig.yml',
'file:${catalina.base}/myconfig.properties',Prefix Explanations
Each configuration location can be prefixed to indicate where to look for the configuration:
* classpath: - indicates to search the classpath for the file.
Wildcards are not supported.
* file: - indicates to search for a file based on the path. ~/ maps to the user home directory.
If not specified, the prefix is assumed to be a file based location.
Advanced Usage: Wildcard Support
It is possible to use * as wildcards in the filename part of the configuration when using a file specific configuration:
grails:
config:
locations:
- file:/etc/app/myconfig*.groovy
- ~/.grails/myconfig*.groovygrails.config.locations = [
"file:/etc/app/myconfig*.groovy",
"~/.grails/myconfig*.groovy",
]
Wildcards are in the order they are found in the locations list, but the order of the expanded locations for each wildcard is not guaranteed, and it is dependent on the OS used.
|
Advanced Usage: Adding configuration to the Classpath
If you wish to make your Grails application pull external configuration from classpath when running locally, but you do not wish to get it packed into the assembled artifact (i.e. place the external configuration file in e.g. /external-config instead of /conf), then you can include the external configuration file to the classpath by adding the following line to build.gradle:
tasks.named('bootRun').configure {
it.doFirst {
classpath += files("external-config")
}
}
tasks.withType(Test).configureEach {
doFirst {
classpath += files("external-config")
}
}Alternatively, you can add it to your dependencies block:
runtimeOnly files('external-config') // provided to ensure that external config is not included in the war fileAdvanced Usage: Debugging
In the event that you need to debug external configuration, you can enable logging for grails.config.external to DEBUG in your logback.xml.
Further Configuration Customization
As Grails is a SpringBoot configuration options are available as well, for documentation please consult: https://docs.spring.io/spring-boot/4.1.1/reference/features/external-config.html
4.1.3 Built-in Properties
Grails has a set of core settings that are worth knowing about. Their defaults are suitable for most projects, but it’s important to understand what they do because you may need one or more of them later.
Runtime settings
On the runtime front, i.e. grails-app/conf/application.yml, there are quite a few more core settings:
-
grails.enable.native2ascii- Set this to false if you do not require native2ascii conversion of Grails i18n properties files (default: true). -
grails.converters.encoding- The character encoding for converter output (JSON or XML) and for the response content types stamped by the default renderers used byrespond()(default: 'UTF-8'). -
grails.views.default.codec- Sets the default encoding regime for GSPs - can be one of 'none', 'html', or 'base64' (default: 'none'). To reduce risk of XSS attacks, set this to 'html'. -
grails.views.gsp.encoding- The file encoding used for GSP source files (default: 'utf-8'). -
grails.mime.file.extensions- Whether to use the file extension to dictate the mime type in Content Negotiation (default: true). -
grails.mime.types- A map of supported mime types used for Content Negotiation. -
grails.serverURL- A string specifying the server URL portion of absolute links, including server name e.g. grails.serverURL="https://my.yourportal.com". See createLink. Also used by redirects. -
grails.views.gsp.layout.preprocess- Determines whether layout preprocessing happens. Disabling this slows down page rendering, but if you need Grails' layout implementation to parse the generated HTML from a GSP view, then disabling it is the right option. Don’t worry if you don’t understand this advanced property: leave it set to true. -
grails.reload.excludesandgrails.reload.includes- Configuring these directives determines the reload behavior for project specific source files. Each directive takes a list of strings that are the class names for project source files that should be excluded from reloading behavior or included accordingly when running the application in development with thebootRuntask. If thegrails.reload.includesdirective is configured, then only the classes in that list will be reloaded.
4.1.4 Logging
Logging is handled by the Logback logging framework. A new application works with zero logging configuration: it depends on grails-logging, which brings in Spring Boot’s logging starter, so Logback and Spring Boot’s default Logback configuration (an INFO root logger and a colorized console pattern) are applied automatically. See the Spring Boot Logging and Logging Extensions documentation for all the available options.
As of Grails 8, newly generated applications no longer include a grails-app/conf/logback-spring.xml file; logging works out of the box using Spring Boot’s defaults. Add the file (see below) only when you need to customize logging.
|
For most needs, levels and patterns can be adjusted entirely from application.yml without any XML:
application.yml
logging:
level:
root: INFO
com.example.myapp: DEBUG # your packages
org.hibernate.SQL: DEBUG # see the generated SQL
file:
name: logs/myapp.log # activates Boot's file appender only when no logback-spring.xml is present
# (otherwise include Boot's file-appender.xml in that file)Per-environment levels need no XML either. Grails environments map to Spring profiles, so an environments block in application.yml applies levels to a single environment — for example, verbose logging for your own packages in development only (a profile-specific application-development.yml works as well):
application.yml
environments:
development:
logging:
level:
com.example.myapp: DEBUGFurther Spring Boot logging properties cover most remaining needs — output patterns, logger groups, per-appender thresholds, and rotation of the file appender:
application.yml
logging:
pattern:
console: "%d{HH:mm:ss.SSS} %-5level %logger{36} - %msg%n"
file: "%d %-5level [%thread] %logger : %msg%n"
group:
myapp: # define a named group of loggers...
- com.example.myapp.api
- com.example.myapp.security
level:
myapp: DEBUG # ...and set one level for the whole group
web: DEBUG # predefined group: Spring web loggers
threshold:
console: INFO # per-appender thresholds
file: WARN
logback:
rollingpolicy:
max-file-size: 10MB
max-history: 7
total-size-cap: 100MBSpring Boot predefines the web and sql logger groups. The logging.threshold. and logging.logback.rollingpolicy. properties are consumed by Spring Boot’s appenders, so they apply whenever those appenders are in use — either with no configuration file, or from a logback-spring.xml that composes Boot’s console-appender.xml / file-appender.xml includes (see below).
For quick diagnosis there are also two top-level shortcuts: debug: true raises a curated set of core loggers (embedded container, Hibernate, Spring Boot) to DEBUG, and trace: true does the same at TRACE. Console color can be controlled with spring.output.ansi.enabled (detect (the default), always or never).
When properties are not enough — custom appenders, structured output, or per-environment appender routing — add a grails-app/conf/logback-spring.xml file. Use the -spring variant (not plain logback.xml), because it is processed by Spring Boot and unlocks <springProfile> and <springProperty>. The Grails environments development, test and production map to the corresponding Spring profiles, so <springProfile name="development"> blocks configure environment-specific logging — one of the features lost when Logback removed Groovy configuration. Note that once the file exists it replaces Spring Boot’s bundled configuration entirely, so it must declare its own appenders; the simplest approach is to compose Spring Boot’s own defaults.xml and console-appender.xml includes with a <root> that references the CONSOLE appender.
When generating a project with Grails Forge, select the Logback Configuration feature to start with a ready-made grails-app/conf/logback-spring.xml in exactly that shape, including a <springProfile name="development"> block.
|
Everything above works the same with or without the file, with these boundaries: without a logback-spring.xml you give up anything only XML can express — most notably <springProfile>-conditional appenders and routing (per-environment levels still work via the environments block). Conversely, activating a file appender purely by setting logging.file.name only works without the file; when a logback-spring.xml is present it replaces Spring Boot’s bundled configuration, so file output requires including Boot’s file-appender.xml in it.
The filename logback.xml still works but logback-spring.xml is now recommended
|
More information can be found in the official Logback documentation.
Structured Logging
Grails does not enable structured logging. Existing Logback configuration and plain-text output remain unchanged
unless an application explicitly selects a Spring Boot structured format. Spring Boot 4.1 provides the JSON format
IDs ecs (Elastic Common Schema), gelf (Graylog Extended Log Format), and logstash for console and file output.
For the complete reference, see the Spring Boot structured logging documentation.
Configure the console and file outputs independently in grails-app/conf/application.yml:
grails-app/conf/application.yml
logging:
structured:
format:
console: ecs
file: logstash
json:
exclude: process.pid
rename:
log.level: severity
add:
service.team: web
stacktrace:
root: first
max-length: 1024
max-throwable-depth: 20
include-common-frames: true
include-hashes: truelogging.structured.json.include limits output to selected paths. Use exclude, rename, and add to remove,
rename, or add JSON members. The stacktrace settings control root-cause order, length, throwable depth, common
frames, and hashes. Use logging.structured.format.console and logging.structured.format.file only with Spring
Boot’s default Logback configuration, or update a custom logback-spring.xml to use Spring Boot’s structured encoder.
Structured formats include MDC entries and SLF4J fluent key-value pairs. For example, application code can add both:
import org.slf4j.LoggerFactory
import org.slf4j.MDC
class AuditService {
private static final log = LoggerFactory.getLogger(AuditService)
void record(String orderId) {
MDC.put('tenantId', 'acme')
try {
log.atInfo().addKeyValue('order.id', orderId).log('Order accepted')
} finally {
MDC.remove('tenantId')
}
}
}Structured logging does not enable tracing. When Micrometer tracing is configured, tracing owns the traceId and
spanId MDC context that structured formats include. To copy selected baggage fields to MDC, configure
management.tracing.baggage.correlation.fields, for example:
grails-app/conf/application.yml
management:
tracing:
baggage:
correlation:
fields: tenantId4.1.4.1 Logger Names
Grails artifacts (controllers, services …) get injected a log property automatically.
Prior to Grails 3.3.0, the name of the
logger for Grails Artifact followed the convention grails.app.<type>.<className>, where type is the
type of the artifact, for example, controllers or services, and className is the fully
qualified name of the artifact.
Grails 3.3.x simplifies logger names. The next examples illustrate the changes:
BookController.groovy located at grails-app/controllers/com/company NOT annotated with @Slf4j
Logger Name (Grails 3.3.x or higher) |
Logger Name (Grails 3.2.x or lower) |
|
|
BookController.groovy located at grails-app/controllers/com/company annotated with @Slf4j
Logger Name (Grails 3.3.x or higher) |
Logger Name (Grails 3.2.x or lower) |
|
|
BookService.groovy located at grails-app/services/com/company NOT annotated with @Slf4j
Logger Name (Grails 3.3.x or higher) |
Logger Name (Grails 3.2.x or lower) |
|
|
BookService.groovy located at grails-app/services/com/company annotated with @Slf4j
Logger Name (Grails 3.3.x or higher) |
Logger Name (Grails 3.2.x or lower) |
|
|
BookDetail.groovy located at src/main/groovy/com/company annotated with @Slf4j
Logger Name (Grails 3.3.x or higher) |
Logger Name (Grails 3.2.x or lower) |
|
|
4.1.4.2 Masking Request Parameters From Stacktrace Logs
When Grails logs a stacktrace, the log message may include the names and values of all of the request parameters for the current request.
To mask out the values of secure request parameters, specify the parameter names in the grails.exceptionresolver.params.exclude config property:
Parameter names are matched case-insensitively.
grails-app/conf/application.yml
grails:
exceptionresolver:
params:
exclude:
- password
- creditCardRequest parameter logging may be turned off altogether by setting the grails.exceptionresolver.logRequestParameters
config property to false. The default value is true when the application is running in DEVELOPMENT mode and false for all other
environments.
grails-app/conf/application.yml
grails:
exceptionresolver:
logRequestParameters: false4.1.4.3 Logging Full Stack Traces
When a request-handling exception reaches GrailsExceptionResolver, Grails emits a single log record to the
org.grails.web.errors.GrailsExceptionResolver logger at ERROR level. That record contains the HTTP method and
request URI alongside a filtered stack trace — framework internals such as java.lang.reflect, jakarta.servlet,
org.codehaus.groovy.runtime, and similar dispatch/plumbing frames are trimmed out so that application code is the
first thing visible on the trace.
For most operational use the filtered trace is what you want: it surfaces the application frames that actually matter and keeps the log readable. For cases that need the untrimmed trace — routing the raw frames to a separate audit file, correlating with an APM tool, or debugging dispatcher internals — Grails exposes an opt-in:
grails-app/conf/application.yml
grails:
exceptionresolver:
logFullStackTrace: trueThe setting defaults to false.
When enabled, Grails emits an additional log record to a dedicated logger named StackTrace, containing the
unfiltered stack trace as it was captured at throw time. This record is written before the filter step runs,
so no frames are lost. Each request-handling exception therefore produces two log records:
-
A
StackTracelogger record with the full, unfiltered trace (headerFull Stack Trace:). -
A
GrailsExceptionResolverlogger record with the filtered trace and the request-context headline (<ExceptionType> occurred when processing request: [<METHOD>] <uri>).
The two records carry different trace content — that is the value of the opt-in. The StackTrace record includes
every reflection, dispatch, and servlet frame; the GrailsExceptionResolver record shows only application code.
Routing the StackTrace Logger To a Separate Appender
Enabling logFullStackTrace alone will cause the unfiltered trace to appear on whatever appender the root logger
is configured with — typically the console — in addition to the filtered trace from the resolver logger. If that is
not what you want, pair the opt-in with a Logback configuration that routes the StackTrace logger to its own
appender and disables additivity so it does not bubble up to the root:
grails-app/conf/logback.xml
<appender name="STACK_FILE" class="ch.qos.logback.core.FileAppender">
<file>logs/stacktraces.log</file>
<encoder>
<pattern>%date %msg%n%ex%n</pattern>
</encoder>
</appender>
<logger name="StackTrace" level="ERROR" additivity="false">
<appender-ref ref="STACK_FILE"/>
</logger>With this configuration the unfiltered trace is written only to logs/stacktraces.log, which you can rotate and
retain independently. The console continues to show the concise, filtered resolver record as before.
Suppressing the StackTrace Logger
Setting the StackTrace logger level to OFF in Logback makes the opt-in a no-op, regardless of the
logFullStackTrace property value:
grails-app/conf/logback.xml
<logger name="StackTrace" level="OFF"/>This is useful if the property is enabled in a shared application.yml but a particular environment needs to
silence the extra record.
Side-Effect Emission From the Filterer
In addition to the resolver-driven emission described above, DefaultStackTraceFilterer.filter(Throwable) emits
the unfiltered stack trace to the StackTrace logger as a side effect before trimming the trace in place.
This preserves the pre-7.1 behaviour where any caller of the filterer — GrailsExceptionResolver,
GroovyPageView.deepSanitize, GrailsUtil.sanitizeRootCause, or custom plugin code — produced a StackTrace
log record. It means non-resolver code paths (for example, a scheduled job that calls
GrailsUtil.sanitizeRootCause(ex) before logging via its own logger) continue to populate the StackTrace
appender without an explicit emission call.
Both grails.logging.stackTraceFiltererClass and grails.exceptionresolver.logFullStackTraceOnFilter
apply outside the exception resolver too — including GSP view-render exceptions — so this property controls
emission everywhere the filterer is used, not just for resolver-driven requests. In any context not started
through SpringApplication — the CLI, plain main() usage, Grails unit tests — the previous fallback
behaviour applies unchanged: a plain DefaultStackTraceFilterer with no configuration applied. The
configured filterer is JVM-global rather than per-context, so in a JVM hosting more than one application
context the last one booted supplies the filterer for all of them. Custom StackTraceFilterer
implementations that don’t extend DefaultStackTraceFilterer are responsible for their own logging policy.
|
The behaviour is enabled by default. To disable the side-effect emission and rely solely on
logFullStackTrace for resolver-driven output, set:
grails-app/conf/application.yml
grails:
exceptionresolver:
logFullStackTraceOnFilter: falseWhen the side-effect emission is enabled and logFullStackTrace is also enabled, a request exception produces
both — one resolver-driven record (top-level exception with the full cause chain) and one record per throwable
visited by the recursive filter walk. This matches pre-7.1 multiplicity. Pick the combination that suits your
log-routing setup:
logFullStackTrace |
logFullStackTraceOnFilter |
Behaviour for a request exception with N causes |
|---|---|---|
|
|
N |
|
|
1 |
|
|
N+1 |
|
|
1 resolver record only. Silent on |
Including Per-Request Context in the Exception Log
The resolver can append a small parenthesised clause of per-request context — the current user and the remote client address — to the exception headline:
RuntimeException occurred when processing request: [GET] /admin/users/42 (ip: 198.51.100.42, user: alice) Stacktrace follows:
When both pieces of context apply they share a single clause ((ip: …, user: …)); when only one applies the
clause collapses to that one entry. When neither applies, the headline is unchanged.
Current User
When the application has registered an AuditorAware bean (see the GORM audit timestamps section), the resolver
calls getCurrentAuditor() on that bean and includes ` user: <value>` in the clause, reusing the same auditor
resolution that populates @CreatedBy and @LastModifiedBy fields. This avoids registering a second "current
user" bean purely for logging.
The appended value is the toString() of whatever the AuditorAware implementation returns — typically a
username string or a numeric id, depending on the type parameter chosen for the bean. If no AuditorAware bean
is registered, or if it returns Optional.empty() for the current request (for example, an unauthenticated
request), no user: entry is emitted.
Disabled by default to avoid writing user identifiers (which may be PII — usernames, email addresses, numeric ids) into exception logs without an explicit decision. To opt in, set:
grails-app/conf/application.yml
grails:
exceptionresolver:
logAuditor: trueRemote Client Address
The resolver can also include the remote client address (HttpServletRequest.getRemoteAddr()) as ` ip: <value>`
in the clause. Disabled by default to avoid writing client IPs into exception logs without an explicit decision.
To opt in, set:
grails-app/conf/application.yml
grails:
exceptionresolver:
logRemoteAddr: trueWhen the application is behind a reverse proxy, getRemoteAddr() returns the proxy’s address, not the real
client’s. To see the real client IP in the log, configure the servlet container to honour forwarded headers —
for Spring Boot embedded Tomcat, set server.forward-headers-strategy: native in application.yml:
grails-app/conf/application.yml
server:
forward-headers-strategy: nativeWith that in place, Tomcat’s RemoteIpValve populates remoteAddr from the X-Forwarded-For header before
the resolver reads it. The valve only honours the header when the immediate peer is in its trusted-proxy list
(loopback and RFC 1918 ranges by default; configurable via server.tomcat.remoteip.internal-proxies), so
spoofed headers on direct requests are ignored.
Custom Address Resolution
Applications that need a different strategy — for example, reading X-Forwarded-For without container-level
forwarded-header handling — can override GrailsExceptionResolver.resolveRemoteAddr(HttpServletRequest) in a
subclass and register that subclass as the active resolver bean. The override receives the raw request and
returns a string that is appended verbatim as ip: <value>; returning null or an empty string omits the
entry. Be aware that any strategy which trusts request headers without a proxy-trust check is open to header
spoofing by clients that connect directly to the server.
4.1.4.4 External Configuration File
If you set the configuration property logging.config, you can instruct Logback to use an external configuration file.
grails-app/conf/application.yml
logging:
config: /Users/me/config/logback-spring.xmlAlternatively, you can supply the configuration file location with a system property:
$ ./gradlew -Dlogging.config=/Users/me/config/logback-spring.xml bootRun
Or, you could use an environment variable:
$ export LOGGING_CONFIG=/Users/me/config/logback-spring.xml
$ ./gradlew bootRun4.1.5 GORM
| GORM for Hibernate runs on Hibernate 5.6 by default, with Hibernate 7.4 available as a drop-in replacement. If you are moving an application to Hibernate 7, see the Hibernate 5 to Hibernate 7 Migration guide for the full list of differences and workarounds. |
Grails provides the following GORM configuration options:
-
grails.gorm.failOnError- If set totrue, causes thesave()method on domain classes to throw agrails.validation.ValidationExceptionif validation fails during a save. This option may also be assigned a list of Strings representing package names. If the value is a list of Strings then the failOnError behavior will only be applied to domain classes in those packages (including sub-packages). See the save method docs for more information.
For example, to enable failOnError for all domain classes:
grails:
gorm:
failOnError: trueand to enable failOnError for domain classes by package:
grails:
gorm:
failOnError:
- com.companyname.somepackage
- com.companyname.someotherpackage4.1.6 Configuring an HTTP proxy
To setup Grails to use an HTTP proxy there are two steps. Firstly you need to configure the grails CLI to be aware of the proxy if you wish to use it to create applications and so on. This can be done using the GRAILS_OPTS environment variable, for example on Unix systems:
export GRAILS_OPTS="-Dhttps.proxyHost=127.0.0.1 -Dhttps.proxyPort=3128 -Dhttp.proxyUser=test -Dhttp.proxyPassword=test"
The default profile repository is resolved over HTTPS so https.proxyPort and https.proxyUser are used, however the username and password are specified with http.proxyUser and http.proxyPassword
|
For Windows systems the environment variable can be configured under My Computer/Advanced/Environment Variables.
With this configuration in place the grails command can connect and authenticate via a proxy.
Secondly, since Grails uses Gradle as the build system, you need to configure Gradle to authenticate via the proxy. For instructions on how to do this see the Gradle user guide section on the topic.
4.2 The Application Class
Every new Grails application features an Application class within the grails-app/init directory.
The Application class subclasses the GrailsAutoConfiguration class and features a static void main method, meaning it can be run as a regular application.
4.2.1 Executing the Application Class
There are several ways to execute the Application class, if you are using an IDE then you can simply right click on the class and run it directly from your IDE which will start your Grails application.
This is also useful for debugging since you can debug directly from the IDE without having to connect a remote debugger when using the run-app --debug-jvm or ./gradlew bootRun --debug-jvm command from the command line.
You can also package your application into a runnable WAR file, for example:
$ grails package
$ java -jar build/libs/myapp-0.1.war$ ./gradlew bootWar
$ java -jar build/libs/myapp-0.1.warThis is useful if you plan to deploy your application using a container-less approach.
Building the Application
GrailsApp.run(Application, args) is the shortest way to start a Grails application. When the application needs configuring before it starts — additional profiles, default properties, or a parent/child context hierarchy — use GrailsAppBuilder, the Grails counterpart of Spring Boot’s SpringApplicationBuilder. Every method of the Spring Boot builder is available and returns the GrailsAppBuilder, and the application it runs is a GrailsApp, so the Grails startup defaults apply:
import grails.boot.GrailsAppBuilder
import grails.boot.config.GrailsAutoConfiguration
class Application extends GrailsAutoConfiguration {
static void main(String[] args) {
new GrailsAppBuilder(Application)
.profiles('metrics')
.properties('server.port=8081')
.run(args)
}
}The builder’s child(), parent() and sibling() methods arrange contexts in a hierarchy as Spring Boot’s do, and every context of the hierarchy is started by a GrailsApp. Exactly one of them is the Grails application: the one whose sources include the Application class, a GrailsAutoConfiguration subclass. The plugin lifecycle runs there only, and the other contexts are plain Spring contexts that reach the Grails beans through their parent; a hierarchy member whose sources hold no application class logs at INFO that it starts as a plain Spring context, where a standalone GrailsApp with the same sources would run the lifecycle. As in Spring Boot, the parent cannot host an embedded web server, so a web application is the child of a parent holding the shared configuration, and a Grails application that serves no web requests can be the parent of plain Spring children. Keep the parent to plain @Configuration classes and leave auto-configuration to the Grails application.
4.2.2 Customizing the Application Class
There are several ways in which you can customize the Application class.
Customizing Scanning
By default Grails will scan all known source directories for controllers, domain class etc., however if there are packages in other JAR files you wish to scan you can do so by overriding the packageNames() method of the Application class:
class Application extends GrailsAutoConfiguration {
@Override
Collection<String> packageNames() {
super.packageNames() + ['my.additional.package']
}
...
}Registering Additional Beans
The Application class can also be used as a source for Spring bean definitions, simply define a method annotated with the Bean and the returned object will become a Spring bean. The name of the method is used as the bean name:
class Application extends GrailsAutoConfiguration {
@Bean
MyType myBean() {
return new MyType()
}
...
}Bean Definition Overriding and Circular References
By default Grails starts the application context with bean definition overriding and circular references enabled, because many plugins rely on contributing or replacing beans during startup. These two behaviors map onto the standard Spring Boot spring.main properties and both default to true in Grails.
If you want stricter startup semantics — for example to catch an accidental bean name clash or an unintended circular dependency — you can disable either behavior in application.yml:
spring:
main:
allow-bean-definition-overriding: false
allow-circular-references: false
These default to true in Grails to preserve compatibility, which differs from a plain Spring Boot application where both default to false. Disabling them can cause startup failures if a plugin (or your own configuration) registers a bean that is already defined or depends on a circular reference, so change these values with care.
|
Customizing the Banner
The banner that is printed on application startup can be customized in several ways. You can use the Spring Boot way and provide your own banner text file by placing a file named banner.txt in the src/main/resources directory of your application. This will replace the default Grails banner described below.
To turn off the banner completely, set the spring.main.banner-mode property to off in the application.yml file:
spring:
main:
banner-mode: "off"The default Grails banner is configurable via the following configuration properties:
grails:
banner:
art:
display: true # Whether to display the banner art (default: true).
file: 'banner.txt' # Path to a custom banner file on the classpath (default: null).
# The colour to show the art in, where the terminal colours output at all (default: 214).
# A number selects one of the 256 colours a terminal offers; a name selects one of the
# eight it has always had; 'none' leaves the art uncoloured. A value that is neither
# falls back to the default. Named colours are:
# black, red, green, yellow, blue, magenta, cyan, white
# bright_black, bright_red, bright_green, bright_yellow,
# bright_blue, bright_magenta, bright_cyan, bright_white
color: 214
mark:
# Says how the application was started, centred under the art and above the versions:
# NATIVE for a GraalVM image, AOT CACHE for a JVM given a cache to read with
# -XX:AOTCache, AOT for one running bean definitions that were generated ahead of time.
# An ordinary start says nothing at all.
display: true # (default: true)
# Its own colour, brighter than the art, so the mark is not read as the last line of the
# drawing above it. Same values as grails.banner.art.color (default: 226, bright yellow).
color: 226
text: '' # Say this instead of what was detected; empty shows nothing.
versions:
display: true # Whether to display version information (default: true).
include:
# Include an optional version (default: []). A library that is not on the classpath, or
# that records no version, is left out rather than shown as unknown -- so including one
# costs nothing where it does not apply.
# The container being served on is already shown by default, under 'container'. These name
# a particular one instead, for an application that wants to be told about it whether or
# not it is the one serving.
# Valid options are:
- tomcat
- jetty
- undertow
exclude:
# Exclude any of the versions shown by default (default: []).
# Use 'container' to leave out the servlet container, whichever one it is.
# Valid options are:
- app
- grails
- groovy
- jvm
- spring-boot
- spring
- spring-security
- container
order:
# Optional ordering in which to display the versions in the banner.
# You can specify any number of the options listed below
# to move them to the top of the list in the specified order.
# If no config is specified, the default order is:
- app
- jvm
- grails
- groovy
- spring-boot
- spring
- spring-security
- container
- tomcat
- jetty
- undertowIt is also possible to customize the Grails banner by overriding any or all of the following methods of the GrailsBanner class and assigning it to the banner property of the GrailsApp class:
import grails.boot.GrailsApp
import grails.boot.banner.GrailsBanner
import grails.boot.config.GrailsAutoConfiguration
import org.springframework.core.env.Environment
class Application extends GrailsAutoConfiguration {
static void main(String[] args) {
def app = new GrailsApp(Application)
app.banner = new GrailsBanner(
// You can specify any path on the classpath here,
// typically stored in src/main/resources.
// This will take precedence over the 'grails.banner.art.file' config value
bannerFile: 'my-banner.txt', // default: 'grails-banner.txt' (provided by Grails)
// Number of blank lines to print for padding
paddingTop: 10, // default: 1
artPaddingBottom: 1, // default: 0
paddingBottom: 10 // default: 1
) {
@Override
String createBannerArt(Environment env) {
// This will take precedence over the bannerFile property
'MY CUSTOM BANNER!'
}
@Override
Map<String, String> createBannerVersions(Environment env) {
// Return a map of version names to version values
super.createBannerVersions(env) + ['Some version': '1.0.0']
}
@Override
boolean shouldDisplayArt(Environment env) { true }
@Override
boolean shouldDisplayVersions(Environment env) { true }
@Override
GrailsBanner.VersionsFormatter createVersionsFormatter() {
// You can provide your own implementation of the VersionsFormatter interface:
def functionalInterfaceExample = { Map<String, String> versions, int bannerWidth ->
// Return a list of strings representing the lines printed,
// in this case, one single line with all versions, comma-separated
[versions.collect { k, v -> "$k: $v" }.join(', ')]
} as GrailsBanner.VersionsFormatter
// or customize the default implementation:
def customizingDefaultExample = new GrailsBanner.DefaultVersionsFormatter(
margin: 10, // min spaces to the left and right before breaking, default: 4
maxItemsPerRow: 3, // 0 or negative = unlimited, default: 0
itemSeparator: ' <> ', // default: ' | '
pairSeparator: '-> ' // default: ': '
)
return functionalInterfaceExample
}
}
app.run(args)
}
}4.2.3 The Application LifeCycle
The Application class also implements the GrailsApplicationLifeCycle interface which all plugins implement.
This means that the Application class can be used to perform the same functions as a plugin. You can override the regular plugins hooks such as doWithSpring, doWithApplicationContext and so on by overriding the appropriate method:
class Application extends GrailsAutoConfiguration {
@Override
Closure doWithSpring() {
{->
mySpringBean(MyType)
}
}
...
}The Application class can also define its beans at compile time instead, by declaring a beans property. No annotation is needed — beans is a convention on this class, just as doWithSpring is — see Configuring Additional Beans.
4.3 Environments
Per Environment Configuration
Grails supports the concept of per environment configuration. The application.yml and application.groovy files in the grails-app/conf directory can use per-environment configuration using either YAML or the syntax provided by ConfigSlurper. As an example consider the following default application.yml definition provided by Grails:
environments:
development:
dataSource:
dbCreate: create-drop
url: jdbc:h2:mem:devDb;LOCK_TIMEOUT=10000;DB_CLOSE_ON_EXIT=FALSE
test:
dataSource:
dbCreate: update
url: jdbc:h2:mem:testDb;LOCK_TIMEOUT=10000;DB_CLOSE_ON_EXIT=FALSE
production:
dataSource:
dbCreate: update
url: jdbc:h2:prodDb;LOCK_TIMEOUT=10000;DB_CLOSE_ON_EXIT=FALSE
properties:
jmxEnabled: true
initialSize: 5
...The above can be expressed in Groovy syntax in application.groovy as follows:
dataSource {
pooled = false
driverClassName = "org.h2.Driver"
username = "sa"
password = ""
}
environments {
development {
dataSource {
dbCreate = "create-drop"
url = "jdbc:h2:mem:devDb"
}
}
test {
dataSource {
dbCreate = "update"
url = "jdbc:h2:mem:testDb"
}
}
production {
dataSource {
dbCreate = "update"
url = "jdbc:h2:prodDb"
properties {
jmxEnabled = true
initialSize = 5
}
}
}
}Or the equivalent in application.yml:
dataSource:
pooled: false
driverClassName: "org.h2.Driver"
username: "sa"
password: ""
environments:
development:
dataSource:
dbCreate: "create-drop"
url: "jdbc:h2:mem:devDb"
test:
dataSource:
dbCreate: "update"
url: "jdbc:h2:mem:testDb"
production:
dataSource:
dbCreate: "update"
url: "jdbc:h2:prodDb"
properties:
jmxEnabled: true
initialSize: 5Notice how the common configuration is provided at the top level and then an environments block specifies per environment settings for the dbCreate and url properties of the DataSource.
Packaging and Running for Different Environments
Grails' command line has built in capabilities to execute any command within the context of a specific environment. The format is:
grails <<environment>> <<command name>>In addition, there are 3 preset environments known to Grails: dev, prod, and test for development, production and test. For example to create a WAR for the test environment you would run:
grails test warTo target other environments you can pass a grails.env variable to any command:
grails -Dgrails.env=UAT run-app./gradlew bootRun -Dgrails.env=UATProgrammatic Environment Detection
Within your code, such as in a Gant script or a bootstrap class you can detect the environment using the Environment class:
import grails.util.Environment
...
switch (Environment.current) {
case Environment.DEVELOPMENT:
configureForDevelopment()
break
case Environment.PRODUCTION:
configureForProduction()
break
}Per Environment Bootstrapping
It’s often desirable to run code when your application starts up on a per-environment basis. To do so you can use the grails-app/init/BootStrap.groovy file’s support for per-environment execution:
ServletContext servletContext
def init = {
environments {
production {
servletContext.setAttribute("env", "prod")
}
development {
servletContext.setAttribute("env", "dev")
}
}
servletContext.setAttribute("foo", "bar")
}Generic Per Environment Execution
The previous BootStrap example uses the grails.util.Environment class internally to execute. You can also use this class yourself to execute your own environment specific logic:
Environment.executeForCurrentEnvironment {
production {
// do something in production
}
development {
// do something only in development
}
}4.4 The DataSource
Since Grails is built on Java technology setting up a data source requires some knowledge of JDBC (the technology that stands for Java Database Connectivity).
If you use a database other than H2 you need a JDBC driver. For example for MySQL you would need Connector/J.
Drivers typically come in the form of a JAR archive. It’s best to use the dependency resolution to resolve the jar if it’s available in a Maven repository, for example you could add a dependency for the MySQL driver like this:
dependencies {
runtimeOnly 'mysql:mysql-connector-java:5.1.29'
}Once you have the JAR resolved you need to get familiar with how Grails manages its database configuration. The configuration can be maintained in either grails-app/conf/application.groovy or grails-app/conf/application.yml. These files contain the dataSource definition which includes the following settings:
-
driverClassName- The class name of the JDBC driver -
username- The username used to establish a JDBC connection -
password- The password used to establish a JDBC connection -
url- The JDBC URL of the database -
dbCreate- Whether to auto-generate the database from the domain model - one of 'create-drop', 'create', 'update', 'validate', or 'none' -
pooled- Whether to use a pool of connections (defaults to true) -
logSql- Enable SQL logging to stdout -
formatSql- Format logged SQL -
dialect- A String or Class that represents the Hibernate dialect used to communicate with the database. See the org.hibernate.dialect package for available dialects. -
readOnly- Iftruemakes the DataSource read-only, which results in the connection pool callingsetReadOnly(true)on eachConnection -
transactional- Iffalseleaves the DataSource’s transactionManager bean outside the chained BE1PC transaction manager implementation. This only applies to additional datasources. -
persistenceInterceptor- The default datasource is automatically wired up to the persistence interceptor, other datasources are not wired up automatically unless this is set totrue -
properties- Extra properties to set on the DataSource bean. See the Tomcat Pool documentation. There is also a Javadoc format documentation of the properties. -
jmxExport- Iftrue, registers JMX MBeans for the Tomcat JDBC pool DataSources that havejmxEnabled = truein their properties (defaults to false) -
type- The connection pool class if you want to force Grails to use it when there are more than one available.
A typical configuration for MySQL in application.groovy may be something like:
dataSource {
pooled = true
dbCreate = "update"
url = "jdbc:mysql://localhost:3306/my_database"
driverClassName = "com.mysql.jdbc.Driver"
dialect = org.hibernate.dialect.MySQL5InnoDBDialect
username = "username"
password = "password"
type = "com.zaxxer.hikari.HikariDataSource"
properties {
jmxEnabled = true
initialSize = 5
maxActive = 50
minIdle = 5
maxIdle = 25
maxWait = 10000
maxAge = 10 * 60000
timeBetweenEvictionRunsMillis = 5000
minEvictableIdleTimeMillis = 60000
validationQuery = "SELECT 1"
validationQueryTimeout = 3
validationInterval = 15000
testOnBorrow = true
testWhileIdle = true
testOnReturn = false
jdbcInterceptors = "ConnectionState;StatementCache(max=200)"
defaultTransactionIsolation = java.sql.Connection.TRANSACTION_READ_COMMITTED
}
}When GORM for Hibernate is applied, it always creates a default data source, and that data source is available as the dataSource bean, to inject by name or by type, even when the application has no dataSource block. Without a dataSource block, it connects to the in-memory H2 database jdbc:h2:mem:grailsDB, which requires the H2 driver on the classpath.
To run without this default data source, exclude GORM for Hibernate by its plugin name, hibernate, with the grails.plugin.excludes setting. None of its beans, such as hibernateDatastore, sessionFactory and transactionManager, are registered then, and the application has a dataSource bean only when it has a dataSource block:
grails:
plugin:
excludes: hibernate| When configuring the DataSource do not include the type or the def keyword before any of the configuration settings as Groovy will treat these as local variable definitions and they will not be processed. For example the following is invalid: |
dataSource {
boolean pooled = true // type declaration results in ignored local variable
...
}Example of advanced configuration using extra properties:
dataSource {
pooled = true
dbCreate = "update"
url = "jdbc:mysql://localhost:3306/my_database"
driverClassName = "com.mysql.jdbc.Driver"
dialect = org.hibernate.dialect.MySQL5InnoDBDialect
username = "username"
password = "password"
type = "com.zaxxer.hikari.HikariDataSource"
properties {
// Documentation for Tomcat JDBC Pool
// https://tomcat.apache.org/tomcat-7.0-doc/jdbc-pool.html#Common_Attributes
// https://tomcat.apache.org/tomcat-7.0-doc/api/org/apache/tomcat/jdbc/pool/PoolConfiguration.html
jmxEnabled = true
initialSize = 5
maxActive = 50
minIdle = 5
maxIdle = 25
maxWait = 10000
maxAge = 10 * 60000
timeBetweenEvictionRunsMillis = 5000
minEvictableIdleTimeMillis = 60000
validationQuery = "SELECT 1"
validationQueryTimeout = 3
validationInterval = 15000
testOnBorrow = true
testWhileIdle = true
testOnReturn = false
ignoreExceptionOnPreLoad = true
// https://tomcat.apache.org/tomcat-7.0-doc/jdbc-pool.html#JDBC_interceptors
jdbcInterceptors = "ConnectionState;StatementCache(max=200)"
defaultTransactionIsolation = java.sql.Connection.TRANSACTION_READ_COMMITTED // safe default
// controls for leaked connections
abandonWhenPercentageFull = 100 // settings are active only when pool is full
removeAbandonedTimeout = 120
removeAbandoned = true
// use JMX console to change this setting at runtime
logAbandoned = false // causes stacktrace recording overhead, use only for debugging
// JDBC driver properties
// Mysql as example
dbProperties {
// Mysql specific driver properties
// https://dev.mysql.com/doc/connector-j/en/connector-j-reference-configuration-properties.html
// let Tomcat JDBC Pool handle reconnecting
autoReconnect=false
// truncation behaviour
jdbcCompliantTruncation=false
// mysql 0-date conversion
zeroDateTimeBehavior='convertToNull'
// Tomcat JDBC Pool's StatementCache is used instead, so disable mysql driver's cache
cachePrepStmts=false
cacheCallableStmts=false
// Tomcat JDBC Pool's StatementFinalizer keeps track
dontTrackOpenResources=true
// performance optimization: reduce number of SQLExceptions thrown in mysql driver code
holdResultsOpenOverStatementClose=true
// enable MySQL query cache - using server prep stmts will disable query caching
useServerPrepStmts=false
// metadata caching
cacheServerConfiguration=true
cacheResultSetMetadata=true
metadataCacheSize=100
// timeouts for TCP/IP
connectTimeout=15000
socketTimeout=120000
// timer tuning (disable)
maintainTimeStats=false
enableQueryTimeouts=false
// misc tuning
noDatetimeStringSync=true
}
}
}More on dbCreate
Hibernate can automatically create the database tables required for your domain model. You have some control over when and how it does this through the dbCreate property, which can take these values:
-
create - Drops the existing schema and creates the schema on startup, dropping existing tables, indexes, etc. first.
-
create-drop - Same as create, but also drops the tables when the application shuts down cleanly.
-
update - Creates missing tables and indexes, and updates the current schema without dropping any tables or data. Note that this can’t properly handle many schema changes like column renames (you’re left with the old column containing the existing data).
-
validate - Makes no changes to your database. Compares the configuration with the existing database schema and reports warnings.
-
any other value - does nothing
Setting the dbCreate setting to "none" is recommended once your schema is relatively stable and definitely when your application and database are deployed in production. Database changes are then managed through proper migrations, either with SQL scripts or a migration tool like Flyway or Liquibase. The Database Migration plugin uses Liquibase.
If you are migrating from Hibernate 5 to Hibernate 7, some column types change in generated DDL (for example char now maps to varchar(1), and timestamp precision changes on some databases). Review the Hibernate 5 to Hibernate 7 Migration guide before enabling dbCreate = 'update' against an existing database.
|
4.4.1 DataSources and Environments
The previous example configuration assumes you want the same config for all environments: production, test, development etc.
Grails' DataSource definition is "environment aware", however, so you can do:
dataSource {
pooled = true
driverClassName = "com.mysql.jdbc.Driver"
dialect = org.hibernate.dialect.MySQL5InnoDBDialect
// other common settings here
}
environments {
production {
dataSource {
url = "jdbc:mysql://liveip.com/liveDb"
// other environment-specific settings here
}
}
}4.4.2 Automatic Database Migration
The dbCreate property of the DataSource definition is important as it dictates what Grails should do at runtime with regards to automatically generating the database tables from GORM classes. The options are described in the DataSource section:
-
create -
create-drop -
update -
validate -
no value
When dbCreate is not set, it defaults to none in every environment, so no tables are generated. A newly created application sets it to "create-drop" for the development environment in application.yml, but at some point in development (and certainly once you go to production) you’ll need to stop dropping and re-creating the database every time you start up your server.
It’s tempting to switch to update so you retain existing data and only update the schema when your code changes, but Hibernate’s update support is very conservative. It won’t make any changes that could result in data loss, and doesn’t detect renamed columns or tables, so you’ll be left with the old one and will also have the new one.
Grails supports migrations with the Liquibase-based Database Migration plugin.
Automatic LiquibaseAutoConfiguration Exclusion
When the Database Migration plugin is on the classpath, Grails automatically excludes Spring Boot’s LiquibaseAutoConfiguration to prevent conflicts. The plugin manages Liquibase through its own lifecycle, and Spring Boot’s auto-configuration would create duplicate SpringLiquibase beans that cause lock contention and startup failures.
This exclusion is applied at compile time via the @EnableAutoConfiguration(excludeName=…) annotation on your Application class. You no longer need to manually add spring.liquibase.enabled: false to your application.yml.
To disable the automatic exclusion, add the following to your project’s gradle.properties:
systemProp.grails.autoconfigure.exclude.liquibase=false4.4.3 Transaction-aware DataSource Proxy
The actual dataSource bean is wrapped in a transaction-aware proxy so you will be given the connection that’s being used by the current transaction or Hibernate Session if one is active.
If this were not the case, then retrieving a connection from the dataSource would be a new connection, and you wouldn’t be able to see changes that haven’t been committed yet (assuming you have a sensible transaction isolation setting, e.g. READ_COMMITTED or better).
4.4.4 Database Console
The H2 database console is a convenient feature of H2 that provides a web-based interface to any database that you have a JDBC driver for, and it’s very useful to view the database you’re developing against. It’s especially useful when running against an in-memory database.
You can access the console by navigating to http://localhost:8080/h2-console in a browser. See the Spring Boot H2 Console Documentation for more information on the options available.
The H2 console is disabled by default (unless you are using Spring Boot’s developer tools) and must be enabled by configuring the spring.h2.console.enabled property with a value of true.
|
The H2 console is only intended for use during development so care should be taken to ensure that spring.h2.console.enabled is not set to true in production.
|
4.4.5 Multiple Datasources
By default all domain classes share a single DataSource and a single database, but you have the option to partition your domain classes into two or more data sources.
Configuring Additional DataSources
The default DataSource configuration in grails-app/conf/application.yml looks something like this:
dataSource:
pooled: true
jmxExport: true
driverClassName: org.h2.Driver
username: sa
password:
environments:
development:
dataSource:
dbCreate: create-drop
url: jdbc:h2:mem:devDb;LOCK_TIMEOUT=10000;DB_CLOSE_ON_EXIT=FALSE
test:
dataSource:
dbCreate: update
url: jdbc:h2:mem:testDb;LOCK_TIMEOUT=10000;DB_CLOSE_ON_EXIT=FALSE
production:
dataSource:
dbCreate: update
url: jdbc:h2:prodDb;LOCK_TIMEOUT=10000;DB_CLOSE_ON_EXIT=FALSE
properties:
jmxEnabled: true
initialSize: 5This configures a single DataSource with the Spring bean named dataSource. To configure extra data sources, add a dataSources block (at the top level, in an environment block, or both, just like the standard DataSource definition) with a custom name. For example, this configuration adds a second DataSource, using MySQL in the development environment and Oracle in production:
dataSource:
pooled: true
jmxExport: true
driverClassName: org.h2.Driver
username: sa
password:
dataSources:
lookup:
dialect: org.hibernate.dialect.MySQLInnoDBDialect
driverClassName: com.mysql.jdbc.Driver
username: lookup
password: secret
url: jdbc:mysql://localhost/lookup
dbCreate: update
environments:
development:
dataSource:
dbCreate: create-drop
url: jdbc:h2:mem:devDb;LOCK_TIMEOUT=10000;DB_CLOSE_ON_EXIT=FALSE
test:
dataSource:
dbCreate: update
url: jdbc:h2:mem:testDb;LOCK_TIMEOUT=10000;DB_CLOSE_ON_EXIT=FALSE
production:
dataSource:
dbCreate: update
url: jdbc:h2:prodDb;LOCK_TIMEOUT=10000;DB_CLOSE_ON_EXIT=FALSE
properties:
jmxEnabled: true
initialSize: 5
...
dataSources:
lookup:
dialect: org.hibernate.dialect.Oracle10gDialect
driverClassName: oracle.jdbc.driver.OracleDriver
username: lookup
password: secret
url: jdbc:oracle:thin:@localhost:1521:lookup
dbCreate: updateYou can use the same or different databases as long as they’re supported by Hibernate.
If you need to inject the lookup datasource in a Grails artefact, you can do it like this:
DataSource dataSource_lookup| While defining multiple data sources, one of them must be named "dataSource". This is required because Grails determines which data source is the default by determining which one is named "dataSource". |
Configuring Domain Classes
If a domain class has no DataSource configuration, it defaults to the standard 'dataSource'. Set the datasource property in the mapping block to configure a non-default DataSource. For example, if you want to use the ZipCode domain to use the 'lookup' DataSource, configure it like this:
class ZipCode {
String code
static mapping = {
datasource 'lookup'
}
}A domain class can also use two or more data sources. Use the datasources property with a list of names to configure more than one, for example:
class ZipCode {
String code
static mapping = {
datasources(['lookup', 'auditing'])
}
}If a domain class uses the default DataSource and one or more others, use the special name 'DEFAULT' to indicate the default DataSource:
class ZipCode {
String code
static mapping = {
datasources(['lookup', 'DEFAULT'])
}
}If a domain class uses all configured data sources, use the special value 'ALL':
class ZipCode {
String code
static mapping = {
datasource 'ALL'
}
}Namespaces and GORM Methods
If a domain class uses more than one DataSource then you can use the namespace implied by each DataSource name to make GORM calls for a particular DataSource. For example, consider this class which uses two data sources:
class ZipCode {
String code
static mapping = {
datasources(['lookup', 'auditing'])
}
}The first DataSource specified is the default when not using an explicit namespace, so in this case we default to 'lookup'. But you can call GORM methods on the 'auditing' DataSource with the DataSource name, for example:
def zipCode = ZipCode.auditing.get(42)
...
zipCode.auditing.save()As you can see, you add the DataSource to the method call in both the static case and the instance case.
A session or transaction opened through a namespace covers the whole block. Inside ZipCode.auditing.withTransaction { } or ZipCode.auditing.withNewSession { }, the calls on ZipCode itself use the 'auditing' DataSource, whose session and transaction are the ones open:
ZipCode.auditing.withTransaction {
def zipCode = ZipCode.get(42) // read from 'auditing'
zipCode.code = '99501'
zipCode.save() // written to 'auditing', in its transaction
}Other domain classes are not affected, and an operation inside the block that names a DataSource, such as ZipCode.lookup.count(), uses the one it names. A method annotated @Transactional(connection = 'auditing') routes in the same way, for every domain class mapped to the 'auditing' DataSource; a class that is not mapped to it keeps its own, and a multi-tenant class is left to its tenant, since a transaction opened for a DataSource does not say which tenant the operations in it belong to.
Hibernate Mapped Domain Classes
You can also partition annotated Java classes into separate datasources. Classes using the default datasource are registered in grails-app/conf/hibernate.cfg.xml. To specify that an annotated class uses a non-default datasource, create a hibernate.cfg.xml file for that datasource with the file name prefixed with the datasource name.
For example if the Book class is in the default datasource, you would register that in grails-app/conf/hibernate.cfg.xml:
<?xml version='1.0' encoding='UTF-8'?>
<!DOCTYPE hibernate-configuration PUBLIC
'-//Hibernate/Hibernate Configuration DTD 3.0//EN'
'https://hibernate.sourceforge.net/hibernate-configuration-3.0.dtd'>
<hibernate-configuration>
<session-factory>
<mapping class='org.example.Book'/>
</session-factory>
</hibernate-configuration>and if the Library class is in the "ds2" datasource, you would register that in grails-app/conf/ds2_hibernate.cfg.xml:
<?xml version='1.0' encoding='UTF-8'?>
<!DOCTYPE hibernate-configuration PUBLIC
'-//Hibernate/Hibernate Configuration DTD 3.0//EN'
'https://hibernate.sourceforge.net/hibernate-configuration-3.0.dtd'>
<hibernate-configuration>
<session-factory>
<mapping class='org.example.Library'/>
</session-factory>
</hibernate-configuration>The process is the same for classes mapped with hbm.xml files - just list them in the appropriate hibernate.cfg.xml file.
Services
Like Domain classes, by default Services use the default DataSource and PlatformTransactionManager. To configure a Service to use a different DataSource, use the static datasource property, for example:
class DataService {
static datasource = 'lookup'
void someMethod(...) {
...
}
}A transactional service can only use a single DataSource, so be sure to only make changes for domain classes whose DataSource is the same as the Service.
Note that the datasource specified in a service has no bearing on which datasources are used for domain classes; that’s determined by their declared datasources in the domain classes themselves. It’s used to declare which transaction manager to use.
If you have a Foo domain class in dataSource1 and a Bar domain class in dataSource2, if WahooService uses dataSource1, a service method that saves a new Foo and a new Bar will only be transactional for Foo since they share the same datasource. The transaction won’t affect the Bar instance. If you want both to be transactional you’d need to use two services and XA datasources for two-phase commit, e.g. with the Atomikos plugin.
GORM Data Service Datasource Inheritance
When using GORM Data Services (the @Service annotation), the service automatically inherits the datasource from its domain class’s mapping block. This means you do not need to explicitly specify @Transactional(connection = '…') if the domain class already declares its datasource.
For example, given a domain class mapped to the 'lookup' datasource:
class ZipCode {
String code
static mapping = {
datasource 'lookup'
}
}A GORM Data Service targeting this domain class will automatically route all auto-implemented operations (save, get, delete, find, count) to the 'lookup' datasource:
@Service(ZipCode)
abstract class ZipCodeService {
abstract ZipCode get(Serializable id)
abstract ZipCode save(ZipCode zipCode)
abstract ZipCode delete(Serializable id)
abstract List<ZipCode> findAllByCode(String code)
}If you need to override the inherited datasource, you can still use an explicit @Transactional(connection = '…') annotation on the service, which takes precedence:
@Service(ZipCode)
@Transactional(connection = 'auditing')
abstract class ZipCodeAuditService {
abstract ZipCode save(ZipCode zipCode)
}GORM Data Services and Multiple Datasources
GORM Data Services provide a type-safe, statically compiled approach to multi-datasource access. When a @Service abstract class needs to route operations to a non-default datasource, declare the target connection with @Transactional(connection = 'name').
Basic Pattern
Define an interface for your data access methods and an abstract class that declares the connection:
import grails.gorm.services.Service
interface BookDataService {
Book get(Serializable id)
Book save(Book book)
void delete(Serializable id)
List<Book> findAllByAuthor(String author)
Long count()
}import grails.gorm.services.Service
import grails.gorm.transactions.Transactional
import groovy.transform.CompileStatic
@CompileStatic
@Service(Book)
@Transactional(connection = 'books')
abstract class BookService implements BookDataService {
// All interface methods are auto-implemented by GORM
// and route to the 'books' datasource automatically.
}The @Transactional(connection = 'books') annotation on the abstract class ensures that all auto-implemented methods (get, save, delete, findBy*, countBy*, etc.) route to the books datasource. Without this annotation, queries route to the datasource inherited from the domain class’s mapping block, or the default datasource if none is declared.
The @Service(Book) annotation identifies the domain class but does not determine which datasource to use. If Book declares datasource 'books' in its mapping block, the service inherits that datasource automatically. Use @Transactional(connection = 'books') on the abstract class to explicitly override the datasource routing.
|
How Connection Routing Works
When GORM compiles a @Service abstract class, the ServiceTransformation AST transform:
-
Copies the
@Transactional(connection = 'books')annotation from the abstract class to the generated implementation class -
For each auto-implemented method, resolves the connection identifier via
findConnectionId() -
Generates method bodies that use the appropriate connection, routing CRUD operations and
DetachedCriteria-based finder queries to the specified datasource
This means auto-implemented methods like get(), save(), delete(), findBy*(), countBy*(), @Where-annotated methods, @Query-annotated methods, and DetachedCriteria-based queries all respect the connection parameter without requiring manual implementations.
Complex Queries Using Domain Static Methods
Auto-implemented Data Service methods cover most query patterns, including dynamic finders with comparators (Between, Like, InList, IsNull, etc.), pagination via a Map parameter, and property projections. For queries that require HQL, criteria builders, or aggregate functions, call domain static methods directly. When a domain class declares a non-default datasource in its mapping block, GORM registers its static API under that datasource. Methods like Book.executeQuery(), Book.createCriteria(), and Book.withCriteria() automatically route to the correct datasource:
import groovy.transform.CompileStatic
import grails.gorm.services.Service
import grails.gorm.transactions.Transactional
@CompileStatic
@Service(Book)
@Transactional(connection = 'books')
abstract class BookService implements BookDataService {
// Auto-implemented methods from interface are inherited
// and route to 'books' datasource automatically.
List getTopAuthors(int limit) {
Book.executeQuery('''
SELECT b.author, COUNT(b) as bookCount
FROM Book b
GROUP BY b.author
ORDER BY bookCount DESC
''', Collections.emptyMap(), [max: limit])
}
List<Book> searchWithCriteria(String titlePattern, String author) {
Book.createCriteria().list {
like('title', "%${titlePattern}%")
eq('author', author)
order('title', 'asc')
} as List<Book>
}
}These domain static methods all route to the datasource declared in the domain’s mapping block:
| Method | Description |
|---|---|
|
HQL/JPQL queries |
|
Bulk UPDATE/DELETE statements |
|
Criteria query |
|
Criteria builder for complex queries |
|
Where query |
|
Manual transaction management |
|
Obtain a new session for the domain’s datasource |
|
Total record count |
|
Find by primary key |
|
Paginated list |
Domain static methods work under @CompileStatic and route to the correct datasource automatically. The namespace syntax (e.g., Book.books.get(42)) is only needed when a domain is mapped to multiple datasources and you need to target a specific one.
|
Consuming Multi-Datasource Data Services
Other services inject the Data Service interface type. Spring resolves the abstract class bean automatically:
import groovy.transform.CompileStatic
@CompileStatic
class LibraryService {
BookDataService bookDataService // injected automatically
Map getLibraryStats() {
Long totalBooks = bookDataService.count()
List<Book> recentBooks = bookDataService.findAllByAuthor('Tolkien')
[total: totalBooks, tolkienBooks: recentBooks.size()]
}
}The consuming service does not need @Transactional(connection = 'books'). The Data Service handles datasource routing internally. If the consuming service coordinates writes across multiple Data Services, annotate the orchestrating method with @Transactional to ensure atomicity on the default datasource.
Data Services can also inject other Data Services. @CompileStatic works on @Service abstract classes that declare @Service-typed properties:
import grails.gorm.services.Service
interface AuthorDataService {
Author get(Serializable id)
Author save(Author author)
}import groovy.transform.CompileStatic
import grails.gorm.services.Service
import grails.gorm.transactions.Transactional
@CompileStatic
@Service(Author)
@Transactional(connection = 'books')
abstract class AuthorService implements AuthorDataService {
BookDataService bookDataService // injected @Service property
Map getAuthorWithBooks(Serializable authorId) {
Author author = get(authorId)
List<Book> books = bookDataService.findAllByAuthor(author.name)
[author: author, books: books]
}
}When the Spring context initializes the generated implementation class, it autowires all @Service-typed properties by type. By the time any user code runs, injected Data Services are fully available.
Multi-Tenancy with Multiple Datasources
Domain classes that use the MultiTenant trait and declare an explicit non-default datasource (e.g., datasource 'analytics') route correctly through Data Services. GORM preserves explicit datasource qualifiers for multi-tenant entities, so Data Services using @Transactional(connection = 'analytics') work the same way as for non-tenant domain classes:
import grails.gorm.MultiTenant
class Metric implements MultiTenant<Metric> {
String name
BigDecimal value
static mapping = {
datasource 'analytics'
}
}import grails.gorm.services.Service
import grails.gorm.transactions.Transactional
import groovy.transform.CompileStatic
@CompileStatic
@Service(Metric)
@Transactional(connection = 'analytics')
abstract class MetricService {
abstract Metric get(Serializable id)
abstract Metric save(Metric metric)
abstract List<Metric> list()
}The connection parameter on the abstract class routes all auto-implemented operations - including save(), get(), and delete() - to the analytics datasource, regardless of multi-tenancy mode (DATABASE or DISCRIMINATOR).
Transactions across multiple data sources
Grails does not by default try to handle transactions that span multiple data sources.
You can enable Grails to use the Best Effort 1PC pattern for handling transactions across multiple datasources. To do so you must set the grails.transaction.chainedTransactionManager.enabled setting to true in application.yml:
grails:
transaction:
chainedTransactionManager:
enabled: trueThe Best Efforts 1PC pattern is fairly general but can fail in some circumstances that the developer must be aware of.
This is a non-XA pattern that involves a synchronized single-phase commit of a number of resources. Because the 2PC is not used, it can never be as safe as an XA transaction, but is often good enough if the participants are aware of the compromises.
The basic idea is to delay the commit of all resources as late as possible in a transaction so that the only thing that can go wrong is an infrastructure failure (not a business-processing error). Systems that rely on Best Efforts 1PC reason that infrastructure failures are rare enough that they can afford to take the risk in return for higher throughput. If business-processing services are also designed to be idempotent, then little can go wrong in practice.
The BE1PC implementation was added in Grails 2.3.6. . Before this change additional datasources didn’t take part in transactions initiated in Grails. The transactions in additional datasources were basically in auto commit mode. In some cases this might be the wanted behavior. One reason might be performance: on the start of each new transaction, the BE1PC transaction manager creates a new transaction to each datasource. It’s possible to leave an additional datasource out of the BE1PC transaction manager by setting transactional = false in the respective configuration block of the additional dataSource. Datasources with readOnly = true will also be left out of the chained transaction manager (since 2.3.7).
By default, the BE1PC implementation will add all beans implementing the Spring PlatformTransactionManager interface to the chained BE1PC transaction manager. For example, a possible JMSTransactionManager bean in the Grails application context would be added to the Grails BE1PC transaction manager’s chain of transaction managers.
You can exclude transaction manager beans from the BE1PC implementation with this configuration option:
grails:
transaction:
chainedTransactionManager:
enabled: true
blacklistPattern: '.*'The exclude matching is done on the name of the transaction manager bean. The transaction managers of datasources with transactional = false or readOnly = true will be skipped and using this configuration option is not required in that case.
XA and Two-phase Commit
When the Best Efforts 1PC pattern isn’t suitable for handling transactions across multiple transactional resources (not only datasources), there are several options available for adding XA/2PC support to Grails applications.
The Spring transactions documentation contains information about integrating the JTA/XA transaction manager of different application servers. In this case, you can configure a bean with the name transactionManager manually in resources.groovy or resources.xml file.
4.5 Versioning
Detecting Versions at Runtime
You can detect the application version using Grails' support for application metadata using the GrailsApplication class. For example within controllers there is an implicit grailsApplication variable that can be used:
def version = grailsApplication.metadata.getApplicationVersion()You can retrieve the version of Grails that is running with:
def grailsVersion = grailsApplication.metadata.getGrailsVersion()or the GrailsUtil class:
import grails.util.GrailsUtil
...
def grailsVersion = GrailsUtil.grailsVersion4.6 Dependency Resolution
Dependency resolution is handled by the Gradle build tool, all dependencies are defined in the build.gradle file. Refer to the Gradle user guide for more information.
5 The Command Line
Grails 3.0’s command line system differs greatly from previous versions of Grails and features APIs for invoking Gradle for build related tasks, as well as performing code generation.
When you type:
grails <<command name>>Grails searches the profile repository based on the profile of the current application. If the profile is for a web application then commands are read from the web profile and the base profile which it inherits from.
Since command behavior is profile specific the web profile may provide different behavior for the run-app command then say a profile for running batch applications.
When you type the following command:
grails run-appIt will first search the application, and then the profile for commands:
-
PROJECT_HOME/src/main/scripts/run-app.groovy -
<profile>/commands/run-app.groovy -
<profile>/commands/run-app.yml
To get a list of all commands and some help about the available commands type:
grails helpwhich outputs usage instructions and the list of commands Grails is aware of:
grails <<environment>>* <<target>> <<arguments>>*'
| Examples:
$ grails dev run-app
$ grails create-app books
| Available Commands (type grails help 'command-name' for more info):
| Command Name Command Description
----------------------------------------------------------------------------------------------------
clean Cleans a Grails application's compiled sources
compile Compiles a Grails application
...| Refer to the Command Line reference in the Quick Reference menu of the reference guide for more information about individual commands |
Arguments
The grails command is a front to a gradle invocation, because of this there can be unexpected side-effects.
For example, when executing grails -Dapp.foo=bar run-app the app.foo system property won’t be available to your application. This is because bootRun in your build.gradle configures the system properties.
To make this work you can simply append all System.properties to bootRun in build.gradle like:
bootRun{
systemProperties System.properties // Please note not to use '=', because this will override all configured systemProperties. This will append them.
}Or if you only want to pass through a limited set, you can prefix your system properties using an arbitrary prefix and configure bootRun like:
bootRun{
bootRun {
systemProperties System.properties.inject([:]){acc,item-> item.key.startsWith('boot.')?acc << [(item.key.substring('boot.'.length())):item.value]:acc }
}
}In this example only system properties starting with boot. are passed through.
Application and JVM arguments should be specified in bootRun as well.
bootRun{
bootRun {
jvmArgs('-Dspring.output.ansi.enabled=always')
args('--app.foo=bar','--app.bar=foo') // Override the `app.foo` and `app.bar` config options (`grailsApplication.config`)
}
}Non-interactive mode
When you run a script manually, and it prompts you for information, you can answer the questions and continue running the script. But when you run a script as part of an automated process, for example a continuous integration build server, there’s no way to "answer" the questions. So you can pass the --non-interactive switch to the script command to tell Grails to accept the default answer for any questions, for example whether to install a missing plugin.
For example:
grails war --non-interactiveThe Grails Forge New Command-Line Interface (CLI) has undergone significant changes compared to its previous versions, primarily focusing on code generation. One notable alteration is the removal of APIs for invoking Gradle for tasks related to building using Gradle Tooling APIs. This shift in responsibility aligns with the framework’s evolution and its integration with the Gradle build system.
Accessing the Grails CLI
The Grails CLI (Command Line Interface) can be swiftly and effortlessly accessed by simply typing the following command into your terminal or command prompt:
grailsThis command allows developers to quickly initiate the Grails CLI and begin working with the framework, making it an easy entry point for those looking to start their Grails projects.
The New Grails CLI! is the preferred method for initiating new Grails projects. This command-line interface offers various options for creating projects, enabling you to select your preferred build tools, test frameworks, GORM implementation, and more. Additionally, the CLI provides commands for generating essential components like controllers and domain classes.
The Grails Forge Website
You can also begin your Grails application without the need to install the Grails CLI by visiting the Grails Forge website. This web-based platform allows you to initiate Grails projects conveniently, bypassing the installation of the CLI.
Understanding the New Grails Command-line Interface (CLI)
Once the Grails CLI has been successfully installed, you can activate it using the "grails" command. For example:
grails create-app myappA Grails framework CLI project is recognizable by the presence of the "grails-forge-cli.yml" file, which is automatically generated at the project’s root if it was created using the CLI. This file contains information about the project’s profile, default package, and other variables.
The file was previously "grails-cli.yml", and that filename is backwards compatible for Grails Forge CLI.
Here is an example of a "grails-forge-cli.yml" configuration for a default Grails web application:
applicationType: web
defaultPackage: com.example
reloading: devtools
sourceLanguage: groovy
buildTool: gradle
gormImpl: gorm-hibernate5
servletImpl: spring-boot-starter-tomcat
features:
- app-name
- asset-pipeline-grails
- base
- geb
- gorm-hibernate5
- gradle
- grails-application
- grails-console
- grails-dependencies
- grails-gorm-testing-support
- grails-gradle-plugin
- grails-gsp
- grails-url-mappings
- grails-web
- grails-web-testing-support
- h2
- logback
- readme
- scaffolding
- spock
- spring-boot-autoconfigure
- spring-boot-starter
- spring-boot-starter-tomcat
- yamlThis "grails-forge-cli.yml" configuration sets the default values for various aspects of the Grails web application, including the application type, default package, test framework, source language, build tool, GORM implementation, servlet implementation, and a list of enabled features.
Grails Default Package Configuration
The project’s default package is determined based on the project’s name. For instance, running the following command:
grails create-app myappWill set the default package to myapp.
If you wish to specify your own default package when creating the application, you can do so by prefixing the application name with the package like this:
grails create-app com.example.myappIn this case, "com.example" becomes the default package for your project.
Gradle Build Tool
Grails now utilizes the Gradle Build System for project management. The project’s build configuration is specified in the build.gradle file, where you define critical aspects of your project such as its version, required dependencies, and the repositories from which these dependencies should be sourced. Here’s an example of how this is done:
plugins {
id 'org.apache.grails.gradle.grails-web' version "{version}" // Grails Application Gradle Plugin
}
repositories {
mavenCentral()
}
dependencies {
implementation platform("org.apache.grails:grails-bom:{version}")
implementation 'org.springframework.boot:spring-boot-starter'
implementation 'org.apache.grails:grails-core'
// Add more dependencies as needed...
}Utilizing Gradle Build Tool
To interact with your Grails project and perform various tasks related to building and running it, you should employ Gradle commands. Here are a few examples:
-
Building the Grails application:
gradle build-
Running the Grails application:
gradle bootRun-
Listing available Gradle tasks:
gradle tasksBy invoking these Gradle commands, you can effectively manage your Grails application’s lifecycle.
It is important to remember that Grails leverages the power of Gradle for streamlined project management, including build automation and dependency resolution. This approach allows for greater flexibility and control over your Grails projects.
5.1 Interactive Mode
Interactive mode is a feature of the Grails command line which keeps the JVM running and allows for quicker execution of commands. To activate interactive mode type 'grails' at the command line and then use TAB completion to get a list of commands:
If you need to open a file whilst within interactive mode you can use the open command which will TAB complete file paths:
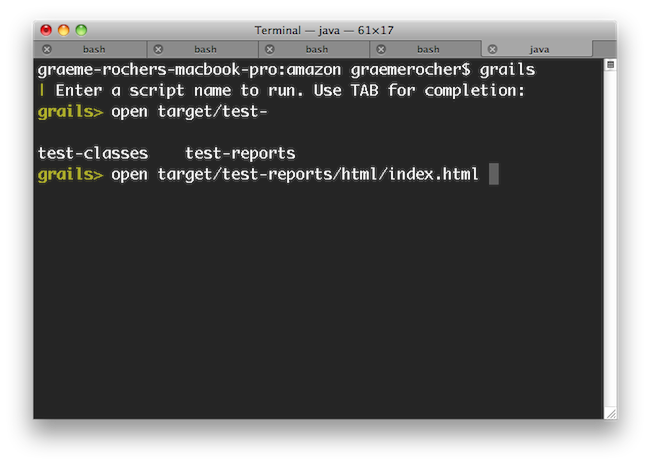
Even better, the open command understands the logical aliases 'test-report' and 'dep-report', which will open the most recent test and dependency reports respectively. In other words, to open the test report in a browser simply execute open test-report. You can even open multiple files at once: open test-report test/unit/MyTests.groovy will open the HTML test report in your browser and the MyTests.groovy source file in your text editor.
TAB completion also works for class names after the create-* commands:
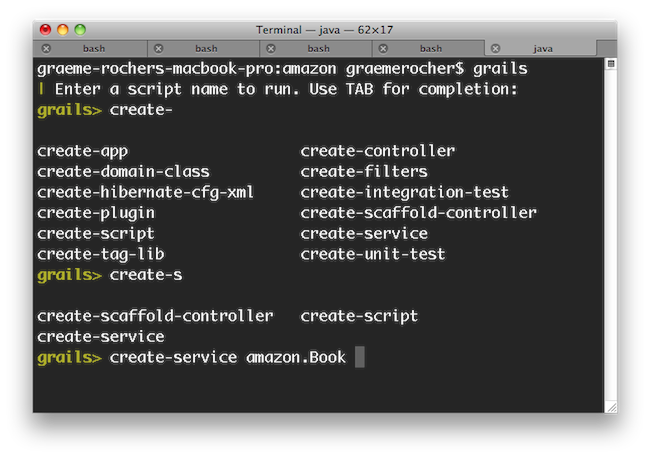
If you need to run an external process whilst interactive mode is running you can do so by starting the command with a !:
Note that with ! (bang) commands, you get file path auto completion - ideal for external commands that operate on the file system such as 'ls', 'cat', 'git', etc.
To exit interactive mode enter the exit command. Note that if the Grails application has been run with run-app normally it will terminate when the interactive mode console exits because the JVM will be terminated. An exception to this would be if the application were running in forked mode which means the application is running in a different JVM. In that case the application will be left running after the interactive mode console terminates. If you want to exit interactive mode and stop an application that is running in forked mode, use the quit command. The quit command will stop the running application and then close interactive mode.
With Grails Forge, when you execute the grails -t forge command, the Grails Command Line Interface (CLI) enters interactive mode. In this mode, it functions like a shell, allowing you to run multiple CLI commands without the need to re-initialize the CLI runtime. This mode is particularly useful when working with code-generation commands (such as create-controller), creating multiple projects, or exploring various CLI features.
One of the advantages of interactive mode is the availability of tab-completion. You can simply press the TAB key to view possible options for a given command or flag. Here’s an example of the available options in interactive mode:
The Grails Shell CLI (grails) supports interactive tab-completion and most developer commands. However, advanced configuration flags are only available via the Forge CLI (grails -t forge).
Here’s an example of the available options in interactive mode:
grails>
--help --verbose -V -v create-app create-domain-class create-restapi create-webapp
--stacktrace --version -h -x create-controller create-plugin create-web-pluginHelp and Information
You can access general usage information for Grails commands using the help flag associated with a specific command.
grails> create-app -h
Usage: grails create-app [-hivVx] [--list-features] [-d=Grails Data Implementation] [--jdk=<javaVersion>]
[-s=Servlet Implementation] [-t=TEST] [-f=FEATURE[,FEATURE...]]... [NAME]
Creates an application
[NAME] The name of the application to create.
-f, --features=FEATURE[,FEATURE...]
The features to use. Possible values: h2, scaffolding, gorm-hibernate5,
gorm-hibernate7, spring-boot-starter-jetty, spring-boot-starter-tomcat,
micronaut-http-client, cache-ehcache, hibernate-validator, postgres,
mysql, cache, database-migration, grails-gsp, hamcrest, gorm-mongodb,
assertj, mockito, grails-undertow,
github-workflow-java-ci, jrebel, testcontainers, sqlserver,
grails-console, views-markup, asset-pipeline-grails, views-json,
gorm-neo4j, asciidoctor, grails-web-console,
logbackGroovy, mongo-sync, shade, geb, properties
-d, --data, -g, --gorm=Grails Data Implementation
Which Grails Data implementation to configure (-g, --gorm are legacy
aliases). Possible values: hibernate5, hibernate7, mongodb.
-h, --help Show this help message and exit.
-i, --inplace Create a service using the current directory
--jdk, --java-version=<javaVersion>
The JDK version the project should target
--list-features Output the available features and their descriptions
-s, --servlet=Servlet Implementation
Which Servlet Implementation to configure. Possible values: none, tomcat,
jetty, undertow.
-t, --test=TEST Which test framework to use. Possible values: junit, spock.
-v, --verbose Create verbose output.
-V, --version Print version information and exit.
-x, --stacktrace Show full stack trace when exceptions occur.You can also obtain a list of available features by using the --list-features flag with any of the create commands.
grails> create-app --list-features
Available Features
(+) denotes the feature is included by default
Name Description
---------------------------------- ---------------
CI/CD
github-workflow-java-ci [PREVIEW] Adds a Github Actions Workflow to Build and Test Grails Application
Cache
cache The Grails Cache plugin provides powerful and easy to use caching functionality to Grails applications and plugins.
cache-ehcache The Grails Cache Ehcache plugin extends the Cache plugin and uses Ehcache as the storage provider for cached content.
Client
micronaut-http-client Adds support for the Micronaut HTTP client
Configuration
properties Creates a properties configuration file
Database
database-migration Adds support for Liquibase database migrations. The Database Migration plugin helps you manage database changes while developing Grails applications.
gorm-hibernate5 (+) Configure Grails Data for using Hibernate 5.
gorm-hibernate7 Configure Grails Data for using Hibernate 7.
gorm-mongodb Configure Grails Data for using MongoDB.
gorm-neo4j Configures GORM for Neo4j for Groovy applications
h2 (+) Adds the H2 driver and default config
mongo-sync Adds support for the MongoDB Synchronous Driver
mysql Adds the MySQL driver and default config
postgres Adds the PostgresSQL driver and default config
sqlserver Adds the SQL Server driver and default config
testcontainers Use Testcontainers to run a database or other software in a Docker container for tests
Development Tools
assertj AssertJ fluent assertions framework
hamcrest Hamcrest matchers for JUnit
jrebel Adds support for class reloading with JRebel (requires separate JRebel installation)
Documentation
asciidoctor Adds support for creating Asciidoctor documentation
Logging
logbackGroovy Gives you the ability to use groovy to configure logback instead of XML.
Management
grails-web-console A web-based Groovy console for interactive runtime application management and debugging
Other
geb (+) This plugins configure Geb for the Grails framework to write automation tests.
grails-console (+) Starts the Grails console, which is an extended version of the regular Groovy console.
scaffolding (+) The Grails® framework Scaffolding plugin replicates much of the functionality from Grails 2, but uses the fields plugin instead.
Packaging
shade Adds the ability to build a Fat/Shaded JAR
Server
spring-boot-starter-jetty spring-boot-starter-jetty
spring-boot-starter-tomcat (+) spring-boot-starter-tomcat
grails-undertow grails-undertow
Validation
hibernate-validator Adds support for the Hibernate Validator
mockito Mockito test mocking framework for JUnit
View Rendering
asset-pipeline-grails (+) The Asset-Pipeline is a plugin used for managing and processing static assets in JVM applications primarily via Gradle (however not mandatory). Read more at https://github.com/wondrify/asset-pipeline
grails-gsp (+) grails-gsp
views-json JSON views are written in Groovy, end with the file extension gson and reside in the grails-app/views directory. They provide a DSL for producing output in the JSON format.
views-markup Markup views are written in Groovy, end with the file extension gml and reside in the grails-app/views directory. They provide a DSL for producing output in the XML.5.2 Creating Custom Scripts
You can create your own Command scripts by running the create-script command from the root of your project. For example the following command will create a script called src/main/scripts/hello-world.groovy:
grails create-script hello-world| In general Grails scripts should be used for scripting the Gradle based build system and code generation. Scripts cannot load application classes and in fact should not since Gradle is required to construct the application classpath. |
See below for an example script that prints "Hello World":
description "Example description", "grails hello-world"
println "Hello World"The description method is used to define the output seen by grails help and to aid users of the script. The following is a more complete example of providing a description taken from the generate-all command:
description( "Generates a controller that performs CRUD operations and the associated views" ) {
usage "grails generate-all <<DOMAIN CLASS>>"
flag name:'force', description:"Whether to overwrite existing files"
argument name:'Domain Class', description:'The name of the domain class'
}As you can see this description profiles usage instructions, a flag and an argument. This allows the command to be used as follows:
grails generate-all MyClass --forceTemplate Generation
Plugins and applications that need to define template generation tasks can do so using scripts. A example of this is the Scaffolding plugin which defines the generate-all and generate-controllers commands.
Every Grails script implements the TemplateRenderer interface which makes it trivial to render templates to the users project workspace.
The following is an example of the create-script command written in Groovy:
description( "Creates a Grails script" ) {
usage "grails create-script <<SCRIPT NAME>>"
argument name:'Script Name', description:"The name of the script to create"
flag name:'force', description:"Whether to overwrite existing files"
}
def scriptName = args[0]
def model = model(scriptName)
def overwrite = flag('force') ? true : false
render template: template('artifacts/Script.groovy'),
destination: file("src/main/scripts/${model.lowerCaseName}.groovy"),
model: model,
overwrite: overwriteIf a script is defined in a plugin or profile, the template(String) method will search for the template in the application before using the template provided by your plugin or profile. This allows users of your plugin or profile to customize what gets generated.
It is common to provide an easy way to allow users to copy the templates from your plugin or profile. Here is one example on how the angular scaffolding copies templates.
templates("angular/**/*").each { Resource r ->
String path = r.URL.toString().replaceAll(/^.*?META-INF/, "src/main")
if (path.endsWith('/')) {
mkdir(path)
} else {
File to = new File(path)
SpringIOUtils.copy(r, to)
println("Copied ${r.filename} to location ${to.canonicalPath}")
}
}The "model"
Executing the model method with a Class/String/File/Resource will return an instance of Model. The model contains several properties that can help you generate code.
Example:
def domain = model(com.foo.Bar)
domain.className == "FooBar"
domain.fullName == "com.foo.FooBar"
domain.packageName == "com.foo"
domain.packagePath == "com/foo"
domain.propertyName == "fooBar"
domain.lowerCaseName == "foo-bar"In addition, an asMap method is available to turn all of the properties into a map to pass to the render method.
Working with files
All scripts have access to methods on the FileSystemInteraction class. It contains helpful methods to copy, delete, and create files.
5.3 Creating Custom Commands
You can create your own commands by running the create-command command from the root of your project. For example the following command will create a command called grails-app/commands/HelloWorldCommand:
grails create-command HelloWorld| Unlike scripts, commands cause the Grails environment to start and you have full access to the application context and the runtime. |
Since Grails 3.2.0, commands have similar abilities as scripts in regards to retrieving arguments, template generation, file access, and model building.
If you created a command in a previous version of grails, you can update your command to have those abilities by changing which trait you are implementing.
Commands created in Grails 3.1.x or lower implement the ApplicationCommand trait by default which requires your command to implement the following method:
boolean handle(ExecutionContext executionContext)Commands created in Grails 3.2.0 or higher implement the GrailsApplicationCommand trait by default which requires your command to implement the following method:
boolean handle()| Commands defined this way still have access to the execution context via a variable called "executionContext". |
Custom commands can be executed using grails run-command:
grails run-command my-exampleCommands can also be executed using the runCommand gradle task. Note that the gradle task uses camelCase:
gradle runCommand -Pargs="my-example"If the grails server is a subproject (e.g., in a project created with the angular profile), the subproject command can still be invoked from the gradle wrapper in the parent project:
./gradlew server:runCommand -Pargs="my-example"With Gradle, a custom command is a piece of functionality that you can add to your Grails application and execute via the command-line interface (CLI). These commands are not part of the core Grails framework but are extensions you can create to perform specific tasks or operations that are unique to your application’s requirements. Custom commands are a powerful way to automate various tasks, interact with your application, and perform administrative functions from the command line. When you run custom commands, they cause the Grails environment to start, giving you full access to the application context and the runtime, allowing you to work with the application’s resources, services, and configuration as needed within your custom command.
There are several reasons why you might want to write a custom command for your Grails application:
-
Automating Tasks: Custom commands allow you to automate routine tasks, such as data migration, database updates, or batch processing, by encapsulating the logic in a command that can be executed on-demand.
-
Administrative Operations: You can use custom commands for administrative tasks like user management, system maintenance, and configuration management, making it easier to manage your application in different environments.
-
Integration: Custom commands can be used to integrate your Grails application with other systems or services. For example, you can create a command to synchronize data with an external API.
-
Customized Workflows: If your application has unique workflows or processes, custom commands provide a way to execute these workflows from the command line.
In Grails, you can create custom commands by implementing the GrailsApplicationCommand trait. By default, this trait requires your command to implement the handle() method as following:
boolean handle()|
Commands defined this way still have access to the execution context via a variable called "executionContext." |
Here’s a step-by-step guide on how to create custom commands using the GrailsApplicationCommand trait with examples, and how to run these commands.
In Grails, you can create custom commands by implementing the GrailsApplicationCommand trait. Custom commands allow you to add functionality to your Grails application that can be executed via the command-line interface (CLI). Here’s a step-by-step guide on how to create custom commands using the GrailsApplicationCommand trait with examples, and how to run these commands.
Step 1: Create a Custom Command
To create a custom command, you need to create a Groovy class that implements the GrailsApplicationCommand trait. This trait provides methods for command execution. Let’s create a simple example command that greets the user:
// grails-app/commands/com/example/GreetCommand.groovy
package com.example
import org.apache.grails.core.cli.GrailsApplicationCommand
class GreetCommand implements GrailsApplicationCommand {
String getName() {
return "greet"
}
String getDescription() {
return "Greet the user"
}
boolean handle() {
println("Hello, user!")
return true // Return true to indicate successful execution
}
}In this example, we’ve created a GreetCommand class that implements the GrailsApplicationCommand trait. It provides a getName() method to define the command name (overriding the default derived from the class name), a getDescription() method for a brief description, and the handle() method to specify the code to execute when the command is run.
Step 2: Build Your Grails Application
Before you can use the runCommand task, ensure you have built your Grails application using the following command:
./gradlew assembleThis command will compile your application and make it ready for running custom commands.
Step 3: Run the Custom Command
To run the custom command, use Gradle’s runCommand task. Open your terminal and navigate to your Grails application’s root directory. Then, run the custom command with the following Gradle command:
./gradlew runCommand -Pargs="greet"In the command above, replace "greet" with the name of your custom command. This will execute the GreetCommand, and you will see the output.
Here’s the expected final output when you run the greet command:
Hello, user!Additional Features: Command Arguments and Options
Grails also supports command-line arguments and options for custom commands. You can define these in your command class by implementing the GrailsApplicationCommand interface. Here’s an example of a command that takes a name as an argument and an optional --loud option to make the greeting louder:
// grails-app/commands/com/example/GreetCommand.groovy
package com.example
import org.apache.grails.core.cli.GrailsApplicationCommand
class GreetCommand implements GrailsApplicationCommand {
String getName() {
return "greet"
}
String getDescription() {
return "Greet the user with options"
}
boolean handle() {
// `args` (from the GrailsApplicationCommand trait) holds the remaining arguments
// after the command name; `--`-prefixed flags are parsed as options instead
String name = args ? args[0] : "user"
boolean loud = executionContext.commandLine.hasOption("loud")
if (loud) {
println("HELLO, $name! (LOUD)")
} else {
println("Hello, $name!")
}
return true
}
}Now you can run the greet command with arguments and options:
# Greet the user with the default message
./gradlew runCommand -Pargs="greet"
# Greet a specific user
./gradlew runCommand -Pargs="greet Alice"
# Greet loudly
./gradlew runCommand -Pargs="greet --loud"
# Greet a specific user loudly
./gradlew runCommand -Pargs="greet Alice --loud"This allows you to create more versatile and interactive custom commands for your Grails application.
In summary, creating custom commands in Grails using the GrailsApplicationCommand trait is a powerful way to extend your application’s functionality beyond the web interface. You can define the command’s name, description, and logic, and then execute it from the command line, optionally passing arguments and options as needed.
Using the executionContext in the Grails Custom Commands
In Grails, the executionContext is a runtime context object that provides valuable information about the current execution environment of a Grails application. It includes details such as the application’s environment (e.g., development, production, test) and allows developers to access this context within custom commands.
Custom commands in Grails can use the executionContext to make informed decisions and perform specific tasks based on the current runtime environment. For example, developers can write conditional logic in custom commands that execute differently in production, development, or testing environments. This flexibility enables custom commands to adapt and behave differently depending on the context in which they are run, making them versatile tools for managing and extending Grails applications.
Suppose you have a Grails application that manages customer data, and you want to create a custom command to perform data backup. In this scenario, you may want the backup process to behave differently depending on whether you’re running it in a development, staging, or production environment.
Here’s an example of how you can create a custom command that uses the executionContext to determine the backup behavior:
// grails-app/commands/com/example/BackupCommand.groovy
package com.example
import org.apache.grails.core.cli.GrailsApplicationCommand
class BackupCommand implements GrailsApplicationCommand {
String getName() {
return "backup"
}
String getDescription() {
return "Backup customer data"
}
boolean handle() {
// Access the executionContext to determine the environment
def environment = executionContext.environment
if (environment == "production") {
// Perform a full backup in the production environment
println("Performing a full backup of customer data (Production)")
// Add production-specific backup logic here
} else {
// Perform a partial backup in other environments
println("Performing a partial backup of customer data (Non-production)")
// Add non-production backup logic here
}
return true // Return true to indicate successful execution
}
}In this example:
-
The custom command, named
BackupCommand, is created to back up customer data. -
It checks the
executionContextto determine the current environment. -
If the environment is "production," it performs a full backup with production-specific logic.
-
In all other environments, it performs a partial backup with non-production logic.
When you run this custom command using ./gradlew runCommand -Pargs="backup", it will adapt its behavior based on whether you’re in a production or non-production environment, demonstrating how the executionContext can be used to make environment-specific decisions in a realistic scenario.
How to Create a Custom Command from a Grails Plugin
Plugins publish their commands in a companion cli artifact (<plugin-artifactId>-cli) instead of
the plugin’s runtime jar, so command code and its CLI-only dependencies never reach an
application’s runtime classpath (bootRun, bootJar, bootWar). Here is the complete workflow:
-
Create a Grails Plugin: If you don’t already have a Grails plugin, create one:
grails create-plugin my-plugin -
Define the Command in a
clisource set: compiled plugin commands live insrc/cli/groovy(notgrails-app/commands, which is compiled into the runtime jar). Give them a package that is unique to the cli artifact. Code-generation scripts and multi-step YAML/JSON commands may stay insrc/main/scripts; whengrails-plugin-cliis applied they are copied into the companion jar asMETA-INF/commandsand excluded from the runtime plugin jar. You may also place them directly undersrc/cli/resources/META-INF/commands:// src/cli/groovy/com/example/myplugin/cli/AuditReportCommand.groovy package com.example.myplugin.cli import org.apache.grails.core.cli.GrailsApplicationCommand class AuditReportCommand implements GrailsApplicationCommand { String description = 'Prints an audit report' @Override boolean handle() { println 'Audit report...' return true } }When this source set compiles with
grails-core-clion its classpath, the command is registered automatically inMETA-INF/grails-cli.factoriesinside the cli jar — no manual registration file is needed. -
Apply the Grails cli-artifact plugin in
build.gradle: it wires everything — theclisource set as a feature variant, thegrails-core-clicontract and the plugin’s own runtime classes on the cli compile classpath, theGrails-Cli-Artifactmanifest advertisement on the runtime jar, and (when the Grails publish plugin is applied) the companion publication:plugins { id 'org.apache.grails.gradle.grails-plugin' id 'org.apache.grails.gradle.grails-plugin-cli' id 'org.apache.grails.gradle.grails-publish' } cliArtifact { // recommended: a unique, stable JPMS module name matching the cli package automaticModuleName = 'com.example.myplugin.cli' // optional: customize the companion coordinate (defaults to '<plugin-artifactId>-cli'); // the advertised coordinate is also carried as a capability of the cli variants, so // in-build consumers can require it either way // artifactId = 'my-plugin-tools' } dependencies { // additional CLI-only dependencies of the commands, if any: // cliImplementation 'org.example:some-cli-tool' } -
Publish both artifacts: publishing the plugin publishes the companion alongside it, as its own coordinate with its own pom, sources, and javadoc:
./gradlew publishToMavenLocal # com.example:my-plugin (runtime — no command code) # com.example:my-plugin-cli (the commands)Without the Grails publish plugin, the cli feature is still built and advertised, but the companion publication must be configured manually from the clisoftware component. -
Consume the plugin from an application: the application declares only the runtime plugin. The Grails Gradle plugin reads the
Grails-Cli-Artifactmanifest attribute from the plugin jar, addscom.example:my-plugin-clito the application’sgrailsCliconfiguration, and registers the per-command Gradle task automatically:dependencies { implementation 'com.example:my-plugin:1.0.0' // my-plugin-cli follows automatically } -
Run the Command:
./gradlew runCommand -Pargs="audit-report" # or, via the automatically registered per-command task: ./gradlew auditReport
If an application disables the automatic discovery (grails { cliAutoProvision = false }), it
declares the companion explicitly instead:
dependencies {
implementation 'com.example:my-plugin:1.0.0'
grailsCli 'com.example:my-plugin-cli:1.0.0'
}By packaging commands this way, the plugin’s runtime jar stays free of command code and CLI-only libraries, while applications get the commands with no additional build configuration.
Depending on Another Module’s CLI Tier
Within a multi-project build, one project’s cli tier may build on another project’s cli companion. Declare the dependency on the owning project with a capability naming the companion:
dependencies {
cliApi(project(':my-other-plugin')) {
capabilities {
requireCapability('com.example:my-other-plugin-cli')
}
}
}The cli-artifact plugin publishes such a dependency as a plain dependency on the companion
coordinate (com.example:my-other-plugin-cli) in both the pom and the module metadata, so
external consumers resolve the published artifacts directly. This works with a customized
cliArtifact { artifactId = … } as well: the customized coordinate is carried as a capability
of the cli variants, and the published metadata records the customized plain coordinate.
A library that consumes a cli tier in its main configurations (api/implementation) rather
than a cli source set — and therefore does not apply the cli-artifact plugin — applies the
org.apache.grails.gradle.grails-cli-library plugin to publish its cli dependencies the same way:
plugins {
id 'java-library'
id 'org.apache.grails.gradle.grails-cli-library'
}
dependencies {
api(project(':my-other-plugin')) {
capabilities {
requireCapability('com.example:my-other-plugin-cli')
}
}
}
Capability requests are a build-internal addressing scheme. Never declare
requireCapability on an external (binary) Grails dependency — published metadata cannot
satisfy it and resolution fails with a capability conflict. External consumers always depend on
the plain -cli coordinate, e.g. grailsCli 'com.example:my-plugin-cli:1.0.0'.
|
5.4 Creating a Grails Project
|
The
|
The primary command for creating a new project is create-app, which creates a standard Grails web application that communicates over HTTP. For other types of applications, see the documentation below.
Creating a project is the primary usage of the Grails Forge CLI. You can also generate an application with grails-shell, which uses profiles for generation.
The create-app and other commands support extended options in Forge, which must be run using the following format:
$ ./grails -t forge create-app myappAfter generating a project with Forge, switch to the created directory and use the default Grails shell CLI (./grails) to manage, run, test, and deploy your application.
| Command | Description | Options | Example |
|---|---|---|---|
create-app / create-webapp |
Creates a Grails web application |
|
|
create-restapi |
Creates a Grails REST API application |
|
|
create-plugin |
Creates a Grails Plugin application |
|
|
create-web-plugin |
Creates a Grails Web Plugin application |
|
|
The create- command flags
The "create-*" commands are used to produce a fundamental Grails project, allowing for the inclusion of optional flags to select additional features, to customize Grails Data settings, an embedded servlet, the test framework, and the Java version.
| Flag | Description | Example |
|---|---|---|
-jdk, --java-version |
The JDK version the project should target |
|
-s, --servlet |
Which Servlet Implementation to configure. Possible values: none, tomcat, jetty, undertow. |
|
-d, --data (-g, --gorm are legacy aliases) |
Which Grails Data implementation to configure. Possible values: hibernate5, hibernate7, mongodb. The value hibernate is accepted as a legacy alias for hibernate5. |
|
-t, --test |
Which test framework to use. Possible values: junit, spock. |
|
-f, --features |
The features to use. Possible values: h2, gorm-hibernate5, gorm-hibernate7, spring-boot-starter-jetty, micronaut-http-client, cache-ehcache, hibernate-validator, postgres, mysql, cache, database-migration, grails-gsp, hamcrest, gorm-mongodb, assertj, mockito, grails-undertow, github-workflow-java-ci, jrebel, testcontainers, sqlserver, grails-console, views-markup, views-json, gorm-neo4j, asciidoctor, grails-web-console, logbackGroovy, mongo-sync, shade, properties |
|
-i, --inplace |
Create a project using the current directory |
|
5.5 Re-using Grails scripts
Grails ships with a lot of command line functionality out of the box that you may find useful in your own scripts (See the command line reference in the reference guide for info on all the commands).
Any script you create can invoke another Grails script simply by invoking a method:
testApp()The above will invoke the test-app command. You can also pass arguments using the method arguments:
testApp('--debug-jvm')Invoking Gradle
Instead of invoking another Grails CLI command you can invoke Gradle directory using the gradle property.
gradle.compileGroovy()Invoking Ant
You can also invoke Ant tasks from scripts which can help if you need to writing code generation and automation tasks:
ant.mkdir(dir:"path")5.6 Building with Gradle
The Gradle Build System is used for build related tasks such as compilation, running tests and producing binary distributions of your Grails project. It is recommended to use Gradle 9.8.0 or above with Grails.
The build is defined by the build.gradle file which specifies the version of your project, the dependencies of the project and the repositories where to find those dependencies (amongst other things).
When you invoke the grails command the version of Gradle that ships with Grails (currently 9.8.0) is invoked by the grails process via the Gradle Tooling API:
# Equivalent to 'gradle classes'
$ grails compileYou can invoke Gradle directly using the gradle command and use your own local version of Gradle, however you will need Gradle 2.2 or above to work with Grails 3.0 (and higher):
$ gradle assemble5.6.1 Defining Dependencies with Gradle
Dependencies for your project are defined in the dependencies block. In general, you can follow the Gradle documentation on dependency management to understand how to configure additional dependencies.
The default dependencies for the Grails Web application can be seen below:
dependencies {
profile "org.apache.grails.profiles:web"
testAndDevelopmentOnly "org.webjars.npm:bootstrap"
testAndDevelopmentOnly "org.webjars.npm:bootstrap-icons"
testAndDevelopmentOnly "org.webjars.npm:jquery"
implementation platform("org.apache.grails:grails-bom:$grailsVersion")
implementation "org.apache.grails:grails-core"
implementation "org.apache.grails:grails-logging"
implementation "org.apache.grails:grails-databinding"
implementation "org.apache.grails:grails-interceptors"
implementation "org.apache.grails:grails-rest-transforms"
implementation "org.apache.grails:grails-services"
implementation "org.apache.grails:grails-url-mappings"
implementation "org.apache.grails:grails-web-boot"
implementation "org.apache.grails:grails-gsp"
implementation "org.apache.grails:grails-data-hibernate5"
implementation "org.apache.grails:grails-scaffolding"
implementation "org.springframework.boot:spring-boot-autoconfigure"
implementation "org.springframework.boot:spring-boot-starter"
implementation "org.springframework.boot:spring-boot-starter-actuator"
implementation "org.springframework.boot:spring-boot-starter-logging"
implementation "org.springframework.boot:spring-boot-starter-tomcat"
implementation "org.springframework.boot:spring-boot-starter-validation"
runtimeOnly "cloud.wondrify:asset-pipeline-grails"
runtimeOnly "com.h2database:h2"
runtimeOnly "com.zaxxer:HikariCP"
integrationTestImplementation testFixtures("org.apache.grails:grails-geb")
testImplementation "org.apache.grails:grails-testing-support-datamapping"
testImplementation "org.apache.grails:grails-testing-support-web"
testImplementation "org.spockframework:spock-core"
}Note that version numbers are not present in the majority of the dependencies. This is thanks to the Grails Gradle Plugin, which adds grails-bom as a managed dependency platform. The BOM defines the default versions for most commonly used Grails dependencies and plugins.
The platform is contributed lazily to eligible declarable configurations when their dependencies are observed, for example through resolution, publication, or incoming.dependencies. It therefore does not interfere with configurations populated on demand through defaultDependencies, such as the Grails profile configuration. Dedicated tool and annotation-processor classpaths, including the jacoco plugin’s jacocoAgent and jacocoAnt configurations, are excluded so the application BOM does not change their transitive dependency versions.
Overriding Managed Versions
To override a managed version, set the corresponding property in build.gradle:
ext['slf4j.version'] = '1.7.36'The same override can be set in gradle.properties (note: gradle.properties only supports the name=value form, not the ext[…] syntax):
slf4j.version=1.7.36The property override mechanism is a feature of the Grails BOM Property Overrides Gradle plugin (org.apache.grails.gradle.bom-property-overrides); standalone Gradle does not natively read <properties> from BOM POMs (see Gradle issue #9160). The plugin parses the BOM POM (following <scope>import</scope> BOMs), determines which managed versions change when your overrides are applied, and applies each change as a strict dependency constraint.
|
Each property override is applied as a strict dependency constraint, so it wins over the This strict behaviour applies to explicit overrides only. The BOM’s default (non-overridden) managed versions are contributed by a regular Overriding a property that selects an imported BOM’s version (for example Where |
Applying the BOM in Different Project Types
For a Grails App, applying org.apache.grails.gradle.grails-web will automatically configure the grails-bom and apply the bom-property-overrides plugin. No other steps required.
For Plugins and Projects which do not use org.apache.grails.gradle.grails-web, you can apply the grails-bom using Gradle Platforms:
dependencies {
implementation platform("org.apache.grails:grails-bom:{GrailsVersion}")
//...
}Using bom-property-overrides Outside a Grails App
The property-override mechanism is BOM-agnostic and can be applied to any project that consumes a BOM with <properties> references. Apply the plugin directly when you want the same gradle.properties / ext['…'] override workflow without applying the full Grails web plugin:
plugins {
id 'java-library'
id 'org.apache.grails.gradle.bom-property-overrides' version '{GrailsVersion}'
}
dependencies {
implementation platform('com.example:my-bom:1.0.0')
}
// In build.gradle
ext['slf4j.version'] = '2.0.13'The same override can also be set in gradle.properties (note: gradle.properties only supports the name=value form, not the ext[…] syntax):
slf4j.version=2.0.13By default, the plugin auto-detects every platform() and enforcedPlatform() dependency declared on the project’s configurations and registers each one for property-override processing. You can disable auto-detection or register additional BOMs explicitly via the bomPropertyOverrides extension:
bomPropertyOverrides {
// Disable scanning declared platforms (default: true)
autoDetect = false
// Register specific BOMs (e.g. ones referenced indirectly)
bom 'com.example:my-bom:1.0.0'
bom 'com.example:other-bom:2.0.0'
}In Grails applications, autoDetect = false also disables automatic property-override processing of the lazily contributed Grails BOM unless you register it explicitly with bom. It does not disable the platform itself; use grails { bom = null } to opt out of automatic platform application.
5.6.2 Working with Gradle Tasks
As mentioned previously the grails command uses an embedded version of Gradle and certain Grails commands that existed in previous versions of Grails map onto their Gradle equivalents. The following table shows which Grails command invoke which Gradle task:
| Grails Command | Gradle Task |
|---|---|
clean |
clean |
compile |
classes |
package |
assemble |
run-app |
bootRun |
test-app |
check |
test-app --unit |
test |
test-app --integration |
integrationTest |
war |
assemble |
You can invoke any of these Grails commands using their Gradle equivalents if you prefer:
$ gradle testNote however that you will need to use a version of Gradle compatible with Grails 3.1 (Gradle 2.2 or above). If you wish to invoke a Gradle task using the version of Gradle used by Grails you can do so with the grails command:
$ grails gradle compileGroovyHowever, it is recommended you do this via interactive mode, as it greatly speeds up execution and provides TAB completion for the available Gradle tasks:
$ grails
| Enter a command name to run. Use TAB for completion:
grails> gradle compileGroovy
...To find out what Gradle tasks are available without using interactive mode TAB completion you can use the Gradle tasks task:
gradle tasks5.6.3 Grails plugins for Gradle
The create-app command is available in both the Grails Shell CLI and the Forge CLI.
-
Use
grails create-app myappto generate a default project using the Grails Shell CLI. This is the most common usage. -
Use
grails -t forge create-app myappto access advanced application generation options such as--jdk,--data, and other Forge-only flags.
The example below assumes you are using the Forge CLI, which is solely intended for application generation. It does not support running, building, or managing a Grails application.
When you create a new project with the create-app command in the Forge CLI (grails -t forge create-app), a default build.gradle is generated for you.
plugins {
id "groovy"
id "war"
id "idea"
id "eclipse"
}
apply plugin: "cloud.wondrify.asset-pipeline"
apply plugin: "org.apache.grails.gradle.grails-web"
apply plugin: "org.apache.grails.gradle.grails-gsp"The default plugins are as follows:
-
groovy- The Groovy plugin adds support for Groovy projects. It can handle Groovy code mixed with Java. Read More: The Groovy Plugin -
war- The WAR plugin changes the packaging so that Gradle creates a WAR file. You can comment out this plugin to build a runnable JAR file for standalone deployment. -
idea- The IDEA plugin generates files used by IntelliJ IDEA, allowing the project to be opened from IDEA. Read More: The IDEA Plugin -
eclipse- The Eclipse plugins generate files for the Eclipse IDE, enabling project import (File - Import… - Existing Projects into Workspace). Read More: The Eclipse Plugin -
asset-pipeline- The Asset Pipeline plugin enables compilation of static assets (JavaScript, CSS, etc.)
Many of these are built-in plugins provided by Gradle or third-party plugins. The Gradle plugins that Grails provides are as follows:
-
org.apache.grails.gradle.grails-app- Marks the project as a Grails application -
org.apache.grails.gradle.grails-docs- Adds Grails doc publishing support -
org.apache.grails.gradle.grails-gsp- Adds support for compiling Groovy Server Pages (GSP) -
org.apache.grails.gradle.grails-gson- Adds support for compiling JSON Views (GSON) -
org.apache.grails.gradle.grails-markup- Adds support for compiling Markup Views (XML) -
org.apache.grails.gradle.grails-cli- Configures the Grails CLI tier (thegrailsCliconfigurations with automatic-clicompanion discovery, command tasks, and the console/shell tasks); applied automatically by the application and plugin plugins -
org.apache.grails.gradle.grails-plugin- Marks the project as a Grails plugin -
org.apache.grails.gradle.grails-plugin-cli- Publishes a Grails plugin’s CLI commands as a companion-cliartifact, keeping command code off application runtime classpaths -
org.apache.grails.gradle.grails-web- Adds the web URL mappings report to the Gradle project -
org.apache.grails.gradle.grails-publish- Assists in publishing to Maven or Nexus repositories -
org.apache.grails.gradle.grails-profile- Marks the project as a Grails profile -
org.apache.grails.gradle.grails-publish-profile- Adds support for publishing Grails Profiles
6 Application Profiles
When you create a Grails application with the create-app command by default the "web" profile is used:
$ grails create-app myappYou can specify a different profile with the --profile argument:
$ grails create-app myapp --profile=rest-apiProfiles encapsulate the project commands, templates, and plugins that are designed to work for a given profile. The source for the profiles can be found on GitHub, and the profiles themselves are published as JAR files to the Grails central repository.
To find out what profiles are available, use the list-profiles command:
$ grails list-profilesFor more information on a particular profile, use the profile-info command:
$ grails profile-info rest-api
Commands such as profile-info or list-profiles are not available when you invoke the Grails CLI inside a grails project.
|
Profile Repositories
By default, Grails will resolve profiles from Maven central repository. However, you can override what repositories will be searched by specifying repositories in the USER_HOME/.grails/settings.groovy file.
If you want profiles to be resolved with a custom repository in addition to the Maven central repository, you must specify Maven central in the file as well:
grails {
profiles {
repositories {
myRepo {
url = "https://foo.com/repo"
snapshotsEnabled = true
}
mavenCentral()
}
}
}
Grails uses Aether to resolve profiles, as a Gradle instance is not yet available when the create-app command is executed. This means that you can also define repositories and more advanced configuration (proxies, authentication etc.) in your USER_HOME/.m2/settings.xml file if you wish.
|
It is also possible to store simple credentials for profile repositories directly in the USER_HOME/.grails/settings.groovy file.
grails {
profiles {
repositories {
myRepo {
url = "https://foo.com/repo"
snapshotsEnabled = true
username = "user"
password = "pass"
}
...
}
}
}Profile Defaults
To create an application that uses a custom profile, you must specify the full artifact.
$ grails create-app myapp --profile=com.mycompany.grails.profiles:myprofile:1.0.0To simplify this process, you can define defaults for that profile in your USER_HOME/.grails/settings.groovy file:
grails {
profiles {
myprofile {
groupId = "com.mycompany.grails.profiles"
version = "1.0.0"
}
repositories {
...
}
}
}With the defaults set, the following command will use the defined group ID and version:
$ grails create-app myapp --profile=myprofile6.1 Standard Profiles
Grails provides a set of standard application profiles that serve as foundational templates for generating various types of projects. These profiles encapsulate specific commands, templates, plugins, and configurations tailored to different development needs, allowing developers to quickly generate applications or plugins with predefined structures. The standard profiles are resolved from Maven Central.
Standard profiles include base, web, rest-api, plugin, web-plugin, rest-api-plugin and profile. Most extend from other profiles to promote reusability and consistency.
Available profiles can be listed, when not inside a Grails' project directory:
$ grails list-profiles| Available Profiles
--------------------
* base - The base profile extended by other profiles
* plugin - Profile for plugins designed to work across all profiles
* profile - A profile for creating new Grails profiles
* rest-api - Profile for REST API applications
* rest-api-plugin - Profile for REST API plugins
* web - Profile for Web applications
* web-plugin - Profile for Plugins designed for Web applicationsThe base profile acts as the foundational layer extended by most other profiles, providing essential skeleton directories, core dependencies, and basic commands that form the backbone of any Grails project.
It ensures a standardized starting point without imposing specific application paradigms.
For application development, the web profile is the default when creating a new Grails app, optimized for full-stack web applications with features like GSP views, controllers, and the asset pipeline.
The rest-api profile, on the other hand, targets REST API-centric projects, emphasizing RESTful endpoints, JSON handling, and configurations suitable for backend services.
The plugin profile is designed for creating reusable plugins that can integrate across various Grails applications.
Similarly, the web-plugin profile focuses on plugins tailored specifically for web applications, inheriting from the web and plugin profiles.
The rest-api-plugin profile is specialized for developing plugins that provide REST API functionality, inheriting from the rest-api and plugin profiles, enabling the creation of modular, reusable components focused on API endpoints.
Lastly, the profile profile is intended for developers creating custom profiles.
These profiles collectively enable flexible project generation while maintaining Grails' convention-over-configuration philosophy.
6.1.1 Web Profile
To create an application using the web profile:
grails create-app myappweb is the default profile. The above statement is equivalent to:
grails create-app myapp --profile=webTo get information about the profile and available features, when not inside a Grails' project directory:
grails profile-info webYou will see an output similar to:
Profile: web
--------------------
Profile for Web applications
Provided Commands:
--------------------
* create-controller - Creates a controller
* create-integration-test - Creates an integration test
* create-interceptor - Creates an interceptor
* create-service - Creates a Service
* create-taglib - Creates a Tag Library
* help - Prints help information for a specific command
* url-mappings-report - Prints out a report of the project's URL mappings
* open - Opens a file in the project
* gradle - Allows running of Gradle tasks
* clean - Cleans a Grails application's compiled sources
* compile - Compiles a Grails application
* create-command - Creates an Application Command
* create-domain-class - Creates a Domain Class
* create-unit-test - Creates a unit test
* assemble - Creates a JAR or WAR archive for production deployment
* test-app - Runs the applications tests
* run-command - Executes Grails commands
* console - Runs the Grails interactive console
* run-script - Executes Groovy scripts in a Grails context
* stop-app - Stops the running Grails application
* stats - Prints statistics about the project
* plugin-info - Prints information about the given plugin
* create-script - Creates a Grails script
* bug-report - Creates a zip file that can be attached to issue reports for the current project
* run-app - Runs a Grails application
* dependency-report - Prints out the Grails application's dependencies
* list-plugins - Lists available plugins from the Plugin Repository
* shell - Runs the Grails interactive shell
Provided Features:
--------------------
* asset-pipeline - Adds Asset Pipeline to a Grails project
* events - Adds support for the Grails EventBus abstraction
* geb2 - Adds Geb dependencies to run functional tests
* gsp - Adds support for GSP to the project
* hibernate5 - Adds GORM for Hibernate 5 to the project
* json-views - Adds support for JSON Views to the project
* less-asset-pipeline - Adds LESS Transpiler Asset Pipeline to a Grails project
* markup-views - Adds support for Markup Views to the project
* mongodb - Adds GORM for MongoDB to the project
* neo4j - Adds GORM for Neo4j to the project
* rx-mongodb - Adds RxGORM for MongoDB to the project6.1.2 REST API Profile
To create an application using the rest-api profile:
grails create-app myapp --profile=rest-apiTo get information about the profile and available features, when not inside a Grails' project directory:
grails profile-info rest-apiYou will see an output similar to:
Profile: rest-api
--------------------
Profile for REST API applications
Provided Commands:
--------------------
* create-controller - Creates a controller
* create-domain-resource - Creates a domain class that represents a resource
* create-functional-test - Creates an functional test
* create-integration-test - Creates an integration test
* create-interceptor - Creates an interceptor
* create-restful-controller - Creates a REST controller
* create-service - Creates a Service
* help - Prints help information for a specific command
* url-mappings-report - Prints out a report of the project's URL mappings
* open - Opens a file in the project
* gradle - Allows running of Gradle tasks
* clean - Cleans a Grails application's compiled sources
* compile - Compiles a Grails application
* create-command - Creates an Application Command
* create-domain-class - Creates a Domain Class
* create-unit-test - Creates a unit test
* assemble - Creates a JAR or WAR archive for production deployment
* test-app - Runs the applications tests
* run-command - Executes Grails commands
* console - Runs the Grails interactive console
* run-script - Executes Groovy scripts in a Grails context
* stop-app - Stops the running Grails application
* stats - Prints statistics about the project
* plugin-info - Prints information about the given plugin
* create-script - Creates a Grails script
* bug-report - Creates a zip file that can be attached to issue reports for the current project
* run-app - Runs a Grails application
* dependency-report - Prints out the Grails application's dependencies
* list-plugins - Lists available plugins from the Plugin Repository
* shell - Runs the Grails interactive shell
* generate-all - Generates a controller that performs REST operations
* generate-functional-test - Generates a functional test for a controller that performs REST operations
* generate-views - Generates a controller that performs REST operations
* generate-unit-test - Generates a unit test for a controller that performs REST operations
* generate-controller - Generates a controller that performs REST operations
Provided Features:
--------------------
* security - Adds Spring Security REST to the project
* asset-pipeline - Adds Asset Pipeline to a Grails project
* events - Adds support for the Grails EventBus abstraction
* geb2 - Adds Geb dependencies to run functional tests
* gsp - Adds support for GSP to the project
* hibernate5 - Adds GORM for Hibernate 5 to the project
* json-views - Adds support for JSON Views to the project
* less-asset-pipeline - Adds LESS Transpiler Asset Pipeline to a Grails project
* markup-views - Adds support for Markup Views to the project
* mongodb - Adds GORM for MongoDB to the project
* neo4j - Adds GORM for Neo4j to the project
* rx-mongodb - Adds RxGORM for MongoDB to the project6.1.3 Plugin Profile
To create an application using the plugin profile:
grails create-plugin mypluginThe above statement is equivalent to:
grails create-app myplugin --profile=pluginTo get information about the profile and available features, when not inside a Grails' project directory:
grails profile-info pluginYou will see an output similar to:
Profile: plugin
--------------------
Profile for plugins designed to work across all profiles
Provided Commands:
--------------------
* install - Installs a plugin into the local Maven cache
* package-plugin - Packages the plugin into a JAR file
* publish-plugin - Publishes the plugin to the Grails central repository
* help - Prints help information for a specific command
* url-mappings-report - Prints out a report of the project's URL mappings
* open - Opens a file in the project
* gradle - Allows running of Gradle tasks
* clean - Cleans a Grails application's compiled sources
* compile - Compiles a Grails application
* create-command - Creates an Application Command
* create-domain-class - Creates a Domain Class
* create-unit-test - Creates a unit test
* assemble - Creates a JAR or WAR archive for production deployment
* test-app - Runs the applications tests
* run-command - Executes Grails commands
* console - Runs the Grails interactive console
* run-script - Executes Groovy scripts in a Grails context
* stop-app - Stops the running Grails application
* stats - Prints statistics about the project
* plugin-info - Prints information about the given plugin
* create-script - Creates a Grails script
* bug-report - Creates a zip file that can be attached to issue reports for the current project
* run-app - Runs a Grails application
* dependency-report - Prints out the Grails application's dependencies
* list-plugins - Lists available plugins from the Plugin Repository
* shell - Runs the Grails interactive shell
Provided Features:
--------------------
* asset-pipeline-plugin - Adds Asset Pipeline to a Grails Plugin for packaging
* maven-publish - Publish Artifacts to Maven Central
* asset-pipeline - Adds Asset Pipeline to a Grails project
* events - Adds support for the Grails EventBus abstraction
* geb2 - Adds Geb dependencies to run functional tests
* gsp - Adds support for GSP to the project
* hibernate5 - Adds GORM for Hibernate 5 to the project
* json-views - Adds support for JSON Views to the project
* less-asset-pipeline - Adds LESS Transpiler Asset Pipeline to a Grails project
* markup-views - Adds support for Markup Views to the project
* mongodb - Adds GORM for MongoDB to the project
* neo4j - Adds GORM for Neo4j to the project
* rx-mongodb - Adds RxGORM for MongoDB to the project6.1.4 Web Plugin Profile
To create an application using the web-plugin profile:
grails create-web-plugin mypluginThe above statement is equivalent to:
grails create-app myplugin --profile=web-pluginTo get information about the profile and available features, when not inside a Grails' project directory:
grails profile-info web-pluginYou will see an output similar to:
Profile: web-plugin
--------------------
Profile for Plugins designed for Web applications
Provided Commands:
--------------------
* help - Prints help information for a specific command
* url-mappings-report - Prints out a report of the project's URL mappings
* open - Opens a file in the project
* gradle - Allows running of Gradle tasks
* create-controller - Creates a controller
* create-integration-test - Creates an integration test
* create-interceptor - Creates an interceptor
* create-service - Creates a Service
* create-taglib - Creates a Tag Library
* clean - Cleans a Grails application's compiled sources
* compile - Compiles a Grails application
* create-command - Creates an Application Command
* create-domain-class - Creates a Domain Class
* create-unit-test - Creates a unit test
* assemble - Creates a JAR or WAR archive for production deployment
* test-app - Runs the applications tests
* run-command - Executes Grails commands
* console - Runs the Grails interactive console
* run-script - Executes Groovy scripts in a Grails context
* stop-app - Stops the running Grails application
* stats - Prints statistics about the project
* plugin-info - Prints information about the given plugin
* create-script - Creates a Grails script
* bug-report - Creates a zip file that can be attached to issue reports for the current project
* run-app - Runs a Grails application
* dependency-report - Prints out the Grails application's dependencies
* list-plugins - Lists available plugins from the Plugin Repository
* shell - Runs the Grails interactive shell
* install - Installs a plugin into the local Maven cache
* package-plugin - Packages the plugin into a JAR file
* publish-plugin - Publishes the plugin to the Grails central repository
Provided Features:
--------------------
* asset-pipeline - Adds Asset Pipeline to a Grails project
* events - Adds support for the Grails EventBus abstraction
* geb2 - Adds Geb dependencies to run functional tests
* gsp - Adds support for GSP to the project
* hibernate5 - Adds GORM for Hibernate 5 to the project
* json-views - Adds support for JSON Views to the project
* less-asset-pipeline - Adds LESS Transpiler Asset Pipeline to a Grails project
* markup-views - Adds support for Markup Views to the project
* mongodb - Adds GORM for MongoDB to the project
* neo4j - Adds GORM for Neo4j to the project
* rx-mongodb - Adds RxGORM for MongoDB to the project
* asset-pipeline-plugin - Adds Asset Pipeline to a Grails Plugin for packaging
* maven-publish - Publish Artifacts to Maven Central6.1.5 REST API Plugin Profile
To create an application using the rest-api-plugin profile:
grails create-app myplugin --profile=rest-api-pluginTo get information about the profile and available features, when not inside a Grails' project directory:
grails profile-info rest-api-pluginYou will see an output similar to:
Profile: rest-api-plugin
--------------------
Profile for REST API plugins
Provided Commands:
--------------------
* help - Prints help information for a specific command
* url-mappings-report - Prints out a report of the project's URL mappings
* open - Opens a file in the project
* gradle - Allows running of Gradle tasks
* install - Installs a plugin into the local Maven cache
* package-plugin - Packages the plugin into a JAR file
* publish-plugin - Publishes the plugin to the Grails central repository
* clean - Cleans a Grails application's compiled sources
* compile - Compiles a Grails application
* create-command - Creates an Application Command
* create-domain-class - Creates a Domain Class
* create-unit-test - Creates a unit test
* assemble - Creates a JAR or WAR archive for production deployment
* test-app - Runs the applications tests
* run-command - Executes Grails commands
* console - Runs the Grails interactive console
* run-script - Executes Groovy scripts in a Grails context
* stop-app - Stops the running Grails application
* stats - Prints statistics about the project
* plugin-info - Prints information about the given plugin
* create-script - Creates a Grails script
* bug-report - Creates a zip file that can be attached to issue reports for the current project
* run-app - Runs a Grails application
* dependency-report - Prints out the Grails application's dependencies
* list-plugins - Lists available plugins from the Plugin Repository
* shell - Runs the Grails interactive shell
* create-controller - Creates a controller
* create-domain-resource - Creates a domain class that represents a resource
* create-functional-test - Creates an functional test
* create-integration-test - Creates an integration test
* create-interceptor - Creates an interceptor
* create-restful-controller - Creates a REST controller
* create-service - Creates a Service
* generate-all - Generates a controller that performs REST operations
* generate-controller - Generates a controller that performs REST operations
* generate-functional-test - Generates a functional test for a controller that performs REST operations
* generate-views - Generates a controller that performs REST operations
* generate-unit-test - Generates a unit test for a controller that performs REST operations
Provided Features:
--------------------
* asset-pipeline-plugin - Adds Asset Pipeline to a Grails Plugin for packaging
* maven-publish - Publish Artifacts to Maven Central
* asset-pipeline - Adds Asset Pipeline to a Grails project
* events - Adds support for the Grails EventBus abstraction
* geb2 - Adds Geb dependencies to run functional tests
* gsp - Adds support for GSP to the project
* hibernate5 - Adds GORM for Hibernate 5 to the project
* json-views - Adds support for JSON Views to the project
* less-asset-pipeline - Adds LESS Transpiler Asset Pipeline to a Grails project
* markup-views - Adds support for Markup Views to the project
* mongodb - Adds GORM for MongoDB to the project
* neo4j - Adds GORM for Neo4j to the project
* rx-mongodb - Adds RxGORM for MongoDB to the project
* security - Adds Spring Security REST to the project6.1.6 Profile Profile
To create an application using the profile profile:
grails create-profile myprofileThe above statement is equivalent to:
grails create-app myprofile --profile=profileTo get information about the profile and available features, when not inside a Grails' project directory:
grails profile-info profileYou will see an output similar to:
Profile: profile
--------------------
A profile for creating new Grails profiles
Provided Commands:
--------------------
* install - Installs a profile into the local Maven cache
* help - Prints help information for a specific command
* url-mappings-report - Prints out a report of the project's URL mappings
* open - Opens a file in the project
* gradle - Allows running of Gradle tasks
* clean - Cleans a Grails application's compiled sources
* compile - Compiles a Grails application
* create-command - Creates a new command for the profile
* create-domain-class - Creates a Domain Class
* create-unit-test - Creates a unit test
* assemble - Creates a JAR or WAR archive for production deployment
* test-app - Runs the applications tests
* run-command - Executes Grails commands
* console - Runs the Grails interactive console
* run-script - Executes Groovy scripts in a Grails context
* stop-app - Stops the running Grails application
* stats - Prints statistics about the project
* plugin-info - Prints information about the given plugin
* create-script - Creates a Grails script
* bug-report - Creates a zip file that can be attached to issue reports for the current project
* run-app - Runs a Grails application
* dependency-report - Prints out the Grails application's dependencies
* list-plugins - Lists available plugins from the Plugin Repository
* shell - Runs the Grails interactive shell
* create-creator-command - Creates a new create-* command for the profile
* create-feature - Creates a new profile feature
* create-generator-command - Creates a new generate-* command for the profile
* create-template - Creates a new template for the profile
* create-gradle-command - Creates a new command that invokes Gradle for the profile
Provided Features:
--------------------
* asset-pipeline - Adds Asset Pipeline to a Grails project
* events - Adds support for the Grails EventBus abstraction
* geb2 - Adds Geb dependencies to run functional tests
* gsp - Adds support for GSP to the project
* hibernate5 - Adds GORM for Hibernate 5 to the project
* json-views - Adds support for JSON Views to the project
* less-asset-pipeline - Adds LESS Transpiler Asset Pipeline to a Grails project
* markup-views - Adds support for Markup Views to the project
* mongodb - Adds GORM for MongoDB to the project
* neo4j - Adds GORM for Neo4j to the project
* rx-mongodb - Adds RxGORM for MongoDB to the project6.2 Creating Profiles
The idea behind creating a new profile is that you can setup a default set of commands and plugins that are tailored to a particular technology or organisation.
To create a new profile you can use the create-profile command which will create a new empty profile that extends the base profile:
$ grails create-profile mycompanyThe above command will create a new profile in the "mycompany" directory where the command is executed. If you start interactive mode within the directory you will get a set of commands for creating profiles:
$ cd mycompany
$ grails
| Enter a command name to run. Use TAB for completion:
grails>
create-command create-creator-command create-feature create-generator-command create-gradle-command create-templateThe commands are as follows:
-
create-command- creates a new command that will be available from the Grails CLI when the profile is used -
create-creator-command- creates a command available to the CLI that renders a template (Example: create-controller) -
create-generator-command- creates a command available to the CLI that renders a template based on a domain class (Example: generate-controller) -
create-feature- creates a feature that can be used with this profile -
create-gradle-command- creates a CLI command that can invoke gradle -
create-template- creates a template that can be rendered by a command
To customize the dependencies for your profile you can specify additional dependencies in profile.yml.
Below is an example profile.yml file:
features:
defaults:
- hibernate
- asset-pipeline
build:
plugins:
- org.apache.grails.gradle.grails-web
excludes:
- org.grails.grails-core
dependencies:
- scope: compile
coords: "org.mycompany:myplugin:1.0.1"
- scope: testCompile
coords: org.spockframework:spock-core
excludes:
- group: org.codehaus.groovy
module: groovy-allWith the above configuration in place you can publish the profile to your local repository with gradle install:
$ gradle installYour profile is now usable with the create-app command:
$ grails create-app myapp --profile mycompanyWith the above command the application will be created with the "mycompany" profile which includes an additional dependency on the "myplugin" plugin and also includes the "hibernate" and "asset-pipeline" features (more on features later).
Note that if you customize the dependency coordinates of the profile (group, version etc.) then you may need to use the fully qualified coordinates to create an application:
$ grails create-app myapp --profile com.mycompany:mycompany:1.0.16.3 Profile Inheritance
One profile can extend one or many different parent profiles. To define profile inheritance you can modify the build.gradle of a profile and define the profile dependences. For example typically you want to extend the base profile:
dependencies {
profileRuntimeApi "org.apache.grails.profiles:base:{version}"
}By inheriting from a parent profile you get the following benefits:
-
When the create-app command is executed the parent profile’s skeleton is copied first
-
Dependencies and
build.gradleis merged from the parent(s) -
The
application.ymlfile is merged from the parent(s) -
CLI commands from the parent profile are inherited
-
Features from the parent profile are inherited
To define the order of inheritance ensure that your dependencies are declared in the correct order. For example:
dependencies {
profileRuntimeApi "org.apache.grails.profiles:plugin:$baseProfileVersion"
profileRuntimeApi "org.apache.grails.profiles:web:$baseProfileVersion"
}In the above snippet the skeleton from the "plugin" profile is copied first, followed by the "web" profile. In addition, the "web" profile overrides commands from the "plugin" profile, whilst if the dependency order was reversed the "plugin" profile would override the "web" profile.
6.4 Publishing Profiles
Publishing Profiles
To mark a profile project for publishing, you need to apply the grails-profile-publish plugin:
apply plugin: "org.apache.grails.gradle.grails-publish-profile"To publish a profile using this plugin to the Grails central repository first upload the source to Github (closed source profiles will not be accepted). Then register for an account on Maven Central and configure your keys as follows in the profile’s build.gradle file:
grailsPublish {
githubSlug = 'foo/bar'
license {
name = 'Apache-2.0'
}
title = 'My profile title'
desc = 'My profile description'
developers = [johndoe: 'John Doe']
}
The githubSlug argument should point to the path to your Github repository. For example if your repository is located at https://github.com/apache/grails-core then your githubSlug is apache/grails-core
|
Environment variables control where the profile is published. By default, this plugin will publish to the specified MAVEN_PUBLISH instance for snapshots, and NEXUS_PUBLISH for releases. To change the snapshot publish behavior, set snapshotRepoType to PublishType.NEXUS_PUBLISH. To change the release publish behavior, set releaseRepoType to PublishType.MAVEN_PUBLISH.
The credentials and connection url must be specified as a project property or an environment variable.
MAVEN_PUBLISH Environment Variables are:
MAVEN_PUBLISH_USERNAME MAVEN_PUBLISH_PASSWORD MAVEN_PUBLISH_URL
NEXUS_PUBLISH Environment Variables are:
NEXUS_PUBLISH_USERNAME NEXUS_PUBLISH_PASSWORD NEXUS_PUBLISH_URL NEXUS_PUBLISH_SNAPSHOT_URL NEXUS_PUBLISH_STAGING_PROFILE_ID
By default, the release or snapshot state is determined by the project.version or projectVersion gradle property. To override this behavior, use the environment variable GRAILS_PUBLISH_RELEASE to decide if it’s a release or snapshot.
With these environment variables in place you can run gradle publish to publish your profile:
$ gradle publishThe profile will be uploaded to the specified location based on whether the version is a snapshot or release.
6.5 Understanding Profiles
A profile is a simple directory that contains a profile.yml file and directories containing the "commands", "skeleton" and "templates" defined by the profile. Example:
/web
commands/
create-controller.yml
run-app.groovy
...
features/
asset-pipeline/
skeleton
feature.yml
skeleton/
grails-app/
controllers/
...
build.gradle
templates/
artifacts/
Controller.groovy
profile.ymlThe above example is a snippet of structure of the 'web' profile. The profile.yml file is used to describe the profile and control how the build is configured.
Understanding the profile.yml descriptor
The profile.yml can contain the following child elements.
1) repositories
A list of Maven repositories to include in the generated build. Example:
repositories:
- "https://repo1.maven.org/maven2"2) build.repositories
A list of Maven repositories to include in the buildscript section of the generated build. Example:
build:
repositories:
- "https://repo1.maven.org/maven2"3) build.plugins
A list of Gradle plugins to configure in the generated build. Example:
build:
plugins:
- eclipse
- idea
- org.grails.grails-core4) build.excludes
A list of Gradle plugins to exclude from being inherited from the parent profile:
build:
excludes:
- org.grails.grails-core5) dependencies
A map of scopes and dependencies to configure. The excludes scope can be used to exclude from the parent profile. Example:
dependencies:
- scope: excludes
coords: "org.apache.grails:grails-data-hibernate5:*"
- scope: build
coords: "org.apache.grails:grails-gradle-plugins:{GrailsVersion}"
- scope: compile
coords: "org.springframework.boot:spring-boot-starter-logging"
- scope: compile
coords: "org.springframework.boot:spring-boot-autoconfigure"Excluding Transitive Dependencies
To exclude transitive dependencies, define excludes key with a List of transitive dependencies Map of the dependency group, module, classifier, and extension as:
dependencies:
- scope: testCompile
coords: org.spockframework:spock-core
excludes:
- group: org.codehaus.groovy
module: groovy-all6) features.defaults
A default list of features to use if no explicit features are specified.
features:
defaults:
- hibernate
- asset-pipeline7) skeleton.excludes
A list of files to exclude from parent profile’s skeletons (supports wildcards).
skeleton:
excludes:
- gradlew
- gradlew.bat
- gradle/8) skeleton.parent.target
The target folder that parent profile’s skeleton should be copied into. This can be used to create multi-project builds.
skeleton:
parent:
target: app9) skeleton.binaryExtensions
Which file extensions should be copied from the profile as binary. Inherited and combined from parent profiles.
skeleton:
binaryExtensions: [exe, zip]10) skeleton.executable
File patterns that should be marked as executable in the resulting application. Inherited and combined from parent profiles. The patterns are parsed with Ant.
skeleton:
executable:
- "**/gradlew*"
- "**/grailsw*"11) instructions
Text to be displayed to the user after the application is created
instructions: Here are some instructionsWhat happens when a profile is used?
When the create-app command runs it takes the skeleton of the parent profiles and copies the skeletons into a new project structure.
The build.gradle file is generated by collecting all dependency information defined in the profile.yml files, resulting in a complete list of the required dependencies.
The command will also merge any build.gradle files defined within a profile and its parent profiles.
The grails-app/conf/application.yml file is also merged into a single YAML file taking into account the profile and all of the parent profiles.
6.6 Creating Profile Commands
A profile can define new commands that apply only to that profile using YAML or Groovy scripts. Below is an example of the create-controller command defined in YAML:
description:
- Creates a controller
- usage: 'create-controller <<controller name>>'
- completer: org.grails.cli.interactive.completers.DomainClassCompleter
- argument: "Controller Name"
description: "The name of the controller"
steps:
- command: render
template: templates/artifacts/Controller.groovy
destination: grails-app/controllers/`artifact.package.path`/`artifact.name`Controller.groovy
- command: render
template: templates/testing/Controller.groovy
destination: src/test/groovy/`artifact.package.path`/`artifact.name`ControllerSpec.groovy
- command: mkdir
location: grails-app/views/`artifact.propertyName`Commands defined in YAML must define one or many steps. Each step is a command in itself. The available step types are:
-
render- To render a template to a given destination (as seen in the previous example) -
mkdir- To make a directory specified by thelocationparameter -
execute- To execute a command specified by theclassparameter. Must be a class that implements the Command interface. -
gradle- To execute one or many Gradle tasks specified by thetasksparameter.
For example to invoke a Gradle task, you can define the following YAML:
description: Creates a WAR file for deployment to a container (like Tomcat)
minArguments: 0
usage: |
war
steps:
- command: gradle
tasks:
- warIf you need more flexibility than what the declarative YAML approach provides you can create Groovy script commands. Each Command script is extends from the GroovyScriptCommand class and hence has all of the methods of that class available to it.
The following is an example of the create-script command written in Groovy:
description( "Creates a Grails script" ) {
usage "grails create-script <<SCRIPT NAME>>"
argument name:'Script Name', description:"The name of the script to create"
flag name:'force', description:"Whether to overwrite existing files"
}
def scriptName = args[0]
def model = model(scriptName)
def overwrite = flag('force') ? true : false
render template: template('artifacts/Script.groovy'),
destination: file("src/main/scripts/${model.lowerCaseName}.groovy"),
model: model,
overwrite: overwriteFor more information on creating CLI commands see the section on creating custom scripts in the Command Line section of the user guide.
6.7 Creating Profile Features
A Profile feature is a shareable set of templates and dependencies that may span multiple profiles. Typically you create a base profile that has multiple features and child profiles that inherit from the parent and hence can use the features available from the parent.
To create a feature use the create-feature command from the root directory of your profile:
$ grails create-feature myfeatureThis will create a myfeature/feature.yml file that looks like the following:
description: Description of the feature
# customize versions here
# dependencies:
# - scope: compile
# coords: "org.grails.plugins:myplugin2:1.0"
#As a more concrete example. The following is the feature.yml file from the "asset-pipeline" feature:
description: Adds Asset Pipeline to a Grails project
build:
plugins:
- asset-pipeline
dependencies:
- scope: build
coords: 'cloud.wondrify:asset-pipeline-gradle'
- scope: runtime
coords: "org.grails.plugins:asset-pipeline"The structure of a feature is as follows:
FEATURE_DIR
feature.yml
skeleton/
grails-app/
conf/
application.yml
build.gradleThe contents of the skeleton get copied into the application tree, whilst the application.yml and build.gradle get merged with their respective counterparts in the profile by used.
With the feature.yml you can define additional dependencies. This allows users to create applications with optional features. For example:
$ grails create-app myapp --profile myprofile --features myfeature,hibernateThe above example will create a new application using your new feature and the "hibernate" feature.
7 Object Relational Mapping (GORM)
Domain classes are core to any business application. They hold state about business processes and hopefully also implement behavior. They are linked together through relationships; one-to-one, one-to-many, or many-to-many.
GORM is Grails' object relational mapping (ORM) implementation. Under the hood it uses Hibernate (a very popular and flexible open source ORM solution) and thanks to the dynamic nature of Groovy with its static and dynamic typing, along with the convention of Grails, there is far less configuration involved in creating Grails domain classes.
Hibernate Versions
GORM for Hibernate is available against two Hibernate ORM versions:
-
Hibernate 5.6 is the default. The standard
grails-bomandgrails-hibernate5dependencies provide the long-standing, battle-tested integration, and existing applications continue to work without changes. -
Hibernate 7.4 is the future. Hibernate 7 is the actively developed line of Hibernate ORM and the recommended target for new applications. Grails provides a drop-in
grails-hibernate7integration (withgrails-hibernate7-bom), so most applications can switch with only a build-file change.
| Hibernate 5.6 remains the default so that existing applications keep working out of the box. Hibernate 7.4 is the strategic direction: new applications are encouraged to adopt it, and existing applications should plan to migrate. |
To switch an application to Hibernate 7 - and for the full list of Hibernate 5 to Hibernate 7 breaking changes and their workarounds - see the Hibernate 5 to Hibernate 7 Migration guide.
You can also write Grails domain classes in Java. See the section on Hibernate Integration for how to write domain classes in Java but still use dynamic persistent methods. Below is a preview of GORM in action:
def book = Book.findByTitle("Groovy in Action")
book
.addToAuthors(name:"Dierk Koenig")
.addToAuthors(name:"Guillaume LaForge")
.save()7.1 Quick Start Guide
A domain class can be created with the create-domain-class command:
grails create-domain-class myapp.Person| If no package is specified with the create-domain-class script, Grails automatically uses the application name as the package name. |
This will create a class at the location grails-app/domain/myapp/Person.groovy such as the one below:
package myapp
class Person {
}
If you have the dbCreate property set to "update", "create" or "create-drop" on your DataSource, Grails will automatically generate/modify the database tables for you.
|
You can customize the class by adding properties:
class Person {
String name
Integer age
Date lastVisit
}grails consoleThis loads an interactive GUI where you can run Groovy commands with access to the Spring ApplicationContext, GORM, etc.
7.1.1 Basic CRUD
Try performing some basic CRUD (Create/Read/Update/Delete) operations.
Create
To create a domain class use Map constructor to set its properties and call save:
def p = new Person(
name: "Fred",
age: 40,
lastVisit: new Date(),
)
p.save()The save method will persist your class to the database using the underlying Hibernate ORM layer.
List
To retrieve multiple instances, use the list method:
def people = Person.list()This returns all Person records from the database.
You can also pass pagination and sorting parameters:
def fetchParams = [sort: 'name', order: 'asc', max: 10, offset: 0]
def people = Person.list(fetchParams)The list method supports:
-
max– maximum number of results -
offset– starting position -
sort– property to sort by -
order– sort direction (ascordesc)
In addition to these you can specify advanced parameters such as cache, fetch, lock, readOnly, fetchSize, timeout, flushMode, and ignoreCase.
See list for the complete list of supported parameters.
Read
Grails transparently adds an implicit id property to your domain class which you can use for retrieval:
def p = Person.get(1)
assert p.id == 1This uses the get method that expects a database identifier to read the Person object back from the database.
You can also load an object in a read-only state by using the read method:
def p = Person.read(1)In this case the underlying Hibernate engine will not do any dirty checking and the object will not be persisted. Note that if you explicitly call the save method then the object is placed back into a read-write state.
In addition, you can also load a proxy for an instance by using the load method:
def p = Person.load(1)This incurs no database access until a method other than getId() is called. Hibernate then initializes the proxied instance, or throws an exception if no record is found for the specified id.
Update
To update an instance, change some properties and then call save again:
def p = Person.get(1)
p.name = "Bob"
p.save()You can also update multiple properties at once using the properties assignment:
def p = Person.get(1)
p.properties = [name: "Bob", age: 45]
p.save()This will bind the given map to the domain instance, updating all matching properties in a single step.
Only properties defined in the domain class will be assigned, and any missing properties in the map will remain unchanged.
Delete
To delete an instance use the delete method:
def p = Person.get(1)
p.delete()If a delete operation fails (for example due to database constraints), an exception is thrown.
You can handle this using a try/catch block:
def p = Person.get(1)
try {
p.delete(flush: true)
} catch (Exception e) {
println "Delete failed: ${e.message}"
}Unlike the save method, the delete method does not support a failOnError parameter. Instead, errors are propagated as exceptions.
Using flush: true ensures the delete is executed immediately, so any errors are raised at that point.
Deleting Every Instance
deleteAll() deletes every persisted instance of a domain class and returns the number of rows removed:
Number removed = Person.deleteAll()An argument map may be supplied. It controls how the delete is executed — it does not narrow what is
deleted. The supported argument is flush:
Person.deleteAll(flush: true)
deleteAll() and deleteAll(Map) remove every row for the domain class. There is no argument that
turns them into a partial delete.
|
To delete a subset, build a query and delete through it:
Person.where { age < 18 }.deleteAll()The other deleteAll overloads delete only the instances you hand them:
def (fred, bob) = [Person.get(1), Person.get(2)]
Person.deleteAll(fred, bob) // varargs
Person.deleteAll([fred, bob]) // any Iterable
Person.deleteAll([flush: true], fred, bob)Querying
To dynamically build queries based on optional parameters a common pattern is to use DetachedCriteria and progressively compose filters depending on the provided inputs.
Properties
Consider the following example using the Person domain class:
import grails.gorm.DetachedCriteria
private DetachedCriteria<Person> buildQuery(Map filterParams) {
def query = Person.where {}
if (filterParams.containsKey('id')) {
query = query.where { id == filterParams.id }
}
if (filterParams.containsKey('name')) {
query = query.where { name == filterParams.name }
}
if (filterParams.containsKey('age')) {
query = query.where { age == filterParams.age }
}
return query
}Associations
You can filter by associated properties using dot notation or nested criteria. For example, if Person has a self-referencing relationship parent, you can filter by properties of the parent.
class Person {
String name
Integer age
Date lastVisit
Person parent
}Using dot notation:
if (filterParams.containsKey('parent.name')) {
query = query.where { parent.name == filterParams.'parent.name' }
}Using a nested criteria block, which is useful when filtering multiple properties of the association:
if (filterParams.containsKey('parent.name')) {
query = query.where {
parent {
name == filterParams.'parent.name'
}
}
}This approach allows you to:
-
Build queries incrementally
-
Apply only the filters that are actually provided
-
Keep query logic reusable and centralized
You can then use this query in different ways.
Find a Single Result
def filterParams = [id: 1]
def person = buildQuery(filterParams).get()
Note: DetachedCriteria.get() returns a single result from the criteria query, while Person.get(id) is a static lookup by primary key on the domain class.
|
List Results
def filterParams = [age: 40]
def fetchParams = [sort: 'name', order: 'asc']
def people = buildQuery(filterParams).list(fetchParams)Filters can be combined simply by passing multiple items:
def filterParams = [name: "Fred", age: 40]
def results = buildQuery(filterParams).list()Count Results
def filterParams = [age: 40]
def total = buildQuery(filterParams).count()Each condition is applied only if the corresponding parameter exists, making this pattern highly flexible for search forms and APIs.
Notes
-
Each call to
where {}returns a newDetachedCriteria, allowing safe chaining. -
This pattern avoids large, hardcoded query methods.
-
It works seamlessly with GORM and Hibernate in Grails.
This technique is especially useful in service layers where filtering logic must remain dynamic and maintainable.
7.2 Multi-Tenancy
A multi-tenant application serves several tenants from one deployment. GORM resolves the tenant for each operation from the tenant bound to the current thread, so the entry points below are how application code says "run this work as tenant X".
Running Work As a Tenant
grails.gorm.multitenancy.Tenants is the entry point.
withId
Tenants.withId(tenantId) { … } runs the closure as the given tenant and manages the session for it: a
session is opened for the scope of the call and closed on exit. In DATABASE mode that is also what selects
the tenant’s connection, so this is the method to reach for in almost all application code.
import grails.gorm.multitenancy.Tenants
Tenants.withId('acme') {
new Person(name: 'Fred').save()
Person.count()
}The closure may take up to two parameters — the tenant id and the session:
Tenants.withId('acme') { String tenantId -> Person.count() }
Tenants.withId('acme') { String tenantId, session -> Person.count() }An overload selects which datastore the tenant applies to by the domain class that maps to it, useful when an application has more than one datastore:
Tenants.withId(Person, 'acme') { Person.count() }withTenant
Tenants.withTenant(tenantId) { … } binds the tenant to the current thread and nothing more. It opens no
session and manages no connection — the closure runs in whatever session the caller has already established,
and the caller remains responsible for opening and closing it.
Person.withNewSession {
Tenants.withTenant('acme') {
Person.count()
}
}Reach for withTenant when a session already exists and you only need to change which tenant the enclosed
work resolves to; reach for withId when the work needs a session of its own. As with withId, a
withTenant(Class, tenantId, closure) overload picks the datastore by domain class.
Other Entry Points
| Method | Description |
|---|---|
|
The tenant id currently in effect, resolved from the bound tenant or, failing that, the configured tenant resolver. Throws if none can be found. |
|
Runs the closure under the tenant |
|
Runs the closure with no tenant. In |
|
Runs the closure once per tenant. |
Reading the Bound Tenant
grails.gorm.multitenancy.CurrentTenantHolder holds the tenant bound to the current thread. A thread can
hold a different tenant for each datastore in play, so lookups are scoped by datastore:
import grails.gorm.multitenancy.CurrentTenantHolder
Serializable tenantId = CurrentTenantHolder.get(datastore)get() without a datastore returns the bound tenant when the answer is unambiguous, null when no tenant is
bound, and throws TenantException when different datastores hold different tenants — returning an arbitrary
one of them is how cross-tenant reads and writes happen. Prefer get(Datastore).
The remaining methods bind and unbind:
CurrentTenantHolder.set(datastore, 'acme')
CurrentTenantHolder.remove(datastore)
CurrentTenantHolder.withTenant(datastore, 'acme') { /* bound for this closure only */ }
CurrentTenantHolder.withoutTenant(datastore) { /* no tenant for this closure only */ }Bindings may also be made against a datastore type rather than an instance; a binding for a specific instance wins over one for its type.
Prefer Tenants in application code. CurrentTenantHolder is the lower-level thread binding that
Tenants is built on, and is useful mainly when integrating with code that manages sessions itself.
|
7.3 Further Reading on GORM
For more information on using GORM see the dedicated documentation for the GORM project.
8 The Web Layer
8.1 Controllers
A controller handles requests and creates or prepares the response. A controller can generate the response directly or delegate to a view. To create a controller, simply create a class whose name ends with Controller in the grails-app/controllers directory (in a subdirectory if it’s in a package).
The default URL Mapping configuration ensures that the first part of your controller name is mapped to a URI and each action defined within your controller maps to URIs within the controller name URI.
8.1.1 Understanding Controllers and Actions
Creating a controller
Controllers can be created with the create-controller or generate-controller command. For example try running the following command from the root of a Grails project:
grails create-controller bookThe command will create a controller at the location grails-app/controllers/myapp/BookController.groovy:
package myapp
class BookController {
def index() { }
}where "myapp" will be the name of your application, the default package name if one isn’t specified.
BookController by default maps to the /book URI (relative to your application root).
The create-controller and generate-controller commands are just for convenience and you can just as easily create controllers using your favorite text editor or IDE
|
Creating Actions
A controller can have multiple public action methods; each one maps to a URI:
class BookController {
def list() {
// do controller logic
// create model
return model
}
}This example maps to the /book/list URI by default thanks to the property being named list.
The Default Action
A controller has the concept of a default URI that maps to the root URI of the controller, for example /book for BookController. The action that is called when the default URI is requested is dictated by the following rules:
-
If there is only one action, it’s the default
-
If you have an action named
index, it’s the default -
Alternatively you can set it explicitly with the
defaultActionproperty:
static defaultAction = "list"8.1.2 Controllers and Scopes
Available Scopes
Scopes are hash-like objects where you can store variables. The following scopes are available to controllers:
-
servletContext - Also known as application scope, this scope lets you share state across the entire web application. The servletContext is an instance of ServletContext
-
session - The session allows associating state with a given user and typically uses cookies to associate a session with a client. The session object is an instance of HttpSession
-
request - The request object allows the storage of objects for the current request only. The request object is an instance of HttpServletRequest
-
params - Mutable map of incoming request query string or POST parameters
-
flash - See below
Accessing Scopes
Scopes can be accessed using the variable names above in combination with Groovy’s array index operator, even on classes provided by the Servlet API such as the HttpServletRequest:
class BookController {
def find() {
def findBy = params["findBy"]
def appContext = request["foo"]
def loggedUser = session["logged_user"]
}
}You can also access values within scopes using the de-reference operator, making the syntax even more clear:
class BookController {
def find() {
def findBy = params.findBy
def appContext = request.foo
def loggedUser = session.logged_user
}
}This is one of the ways that Grails unifies access to the different scopes.
Using Flash Scope
Grails supports the concept of flash scope as a temporary store to make attributes available for this request and the next request only. Afterwards the attributes are cleared. This is useful for setting a message directly before redirecting, for example:
def delete() {
def b = Book.get(params.id)
if (!b) {
flash.message = "User not found for id ${params.id}"
redirect(action:list)
}
... // remaining code
}When the delete action is requested, the message value will be in scope and can be used to display an information message. It will be removed from the flash scope after this second request.
Note that the attribute name can be anything you want, and the values are often strings used to display messages, but can be any object type.
Scoped Controllers
Newly created applications have the grails.controllers.defaultScope property set to a value of "singleton" in application.yml. You may change this value to any
of the supported scopes listed below. If the property is not assigned a value at all, controllers will default to "prototype" scope.
Supported controller scopes are:
-
prototype(default) - A new controller will be created for each request (recommended for actions as Closure properties) -
session- One controller is created for the scope of a user session -
singleton- Only one instance of the controller ever exists (recommended for actions as methods)
To enable one of the scopes, add a static scope property to your class with one of the valid scope values listed above, for example
static scope = "singleton"You can define the default strategy in application.yml with the grails.controllers.defaultScope key, for example:
grails:
controllers:
defaultScope: singleton| Use scoped controllers wisely. For instance, we don’t recommend having any properties in a singleton-scoped controller since they will be shared for all requests. |
8.1.3 Models and Views
Returning the Model
A model is a Map that the view uses when rendering. The keys within that Map correspond to variable names accessible by the view. There are a couple of ways to return a model. First, you can explicitly return a Map instance:
def show() {
[book: Book.get(params.id)]
}| The above does not reflect what you should use with the scaffolding views - see the scaffolding section for more details. |
A more advanced approach is to return an instance of the Spring ModelAndView class:
import org.springframework.web.servlet.ModelAndView
def index() {
// get some books just for the index page, perhaps your favorites
def favoriteBooks = ...
// forward to the list view to show them
return new ModelAndView("/book/list", [ bookList : favoriteBooks ])
}One thing to bear in mind is that certain variable names can not be used in your model:
-
attributes -
application
Currently, no error will be reported if you do use them, but this will hopefully change in a future version of Grails.
Selecting the View
In both of the previous two examples there was no code that specified which view to render. So how does Grails know which one to pick? The answer lies in the conventions. Grails will look for a view at the location grails-app/views/book/show.gsp for this show action:
class BookController {
def show() {
[book: Book.get(params.id)]
}
}To render a different view, use the render method:
def show() {
def map = [book: Book.get(params.id)]
render(view: "display", model: map)
}In this case Grails will attempt to render a view at the location grails-app/views/book/display.gsp. Notice that Grails automatically qualifies the view location with the book directory of the grails-app/views directory. This is convenient, but to access shared views, you use an absolute path instead of a relative one:
def show() {
def map = [book: Book.get(params.id)]
render(view: "/shared/display", model: map)
}In this case Grails will attempt to render a view at the location grails-app/views/shared/display.gsp.
Grails also supports JSPs as views, so if a GSP isn’t found in the expected location but a JSP is, it will be used instead.
|
Unlike GSPs, JSPs must be located in the directory path Additionally, to ensure JSPs work as intended, don’t forget to include the required dependencies for JSP and JSTL implementations in your |
Selecting Views For Namespaced Controllers
If a controller defines a namespace for itself with the namespace property that will affect the root directory in which Grails will look for views which are specified with a relative path. The default root directory for views rendered by a namespaced controller is grails-app/views/<namespace name>/<controller name>/. If the view is not found in the namespaced directory then Grails will fallback to looking for the view in the non-namespaced directory.
See the example below.
class ReportingController {
static namespace = 'business'
def humanResources() {
// This will render grails-app/views/business/reporting/humanResources.gsp
// if it exists.
// If grails-app/views/business/reporting/humanResources.gsp does not
// exist the fallback will be grails-app/views/reporting/humanResources.gsp.
// The namespaced GSP will take precedence over the non-namespaced GSP.
[numberOfEmployees: 9]
}
def accountsReceivable() {
// This will render grails-app/views/business/reporting/numberCrunch.gsp
// if it exists.
// If grails-app/views/business/reporting/numberCrunch.gsp does not
// exist the fallback will be grails-app/views/reporting/numberCrunch.gsp.
// The namespaced GSP will take precedence over the non-namespaced GSP.
render view: 'numberCrunch', model: [numberOfEmployees: 13]
}
}Rendering a Response
Sometimes it’s easier (for example with Ajax applications) to render snippets of text or code to the response directly from the controller. For this, the highly flexible render method can be used:
render "Hello World!"The above code writes the text "Hello World!" to the response. Other examples include:
// write some markup
render {
for (b in books) {
div(id: b.id, b.title)
}
}// render a specific view
render(view: 'show')// render a template for each item in a collection
render(template: 'book_template', collection: Book.list())// render some text with encoding and content type
render(text: "<xml>some xml</xml>", contentType: "text/xml", encoding: "UTF-8")If you plan on using Groovy’s MarkupBuilder to generate HTML for use with the render method be careful of naming clashes between HTML elements and Grails tags, for example:
import groovy.xml.MarkupBuilder
...
def login() {
def writer = new StringWriter()
def builder = new MarkupBuilder(writer)
builder.html {
head {
title 'Log in'
}
body {
h1 'Hello'
form {
}
}
}
def html = writer.toString()
render html
}This will actually call the form tag (which will return some text that will be ignored by the MarkupBuilder). To correctly output a <form> element, use the following:
def login() {
// ...
body {
h1 'Hello'
builder.form {
}
}
// ...
}8.1.4 Redirects and Chaining
Redirects
Actions can be redirected using the redirect controller method:
class OverviewController {
def login() {}
def find() {
if (!session.user)
redirect(action: 'login')
return
}
...
}
}Internally the redirect method uses the HttpServletResponse object’s sendRedirect method.
The redirect method expects one of:
-
The name of an action (and controller name if the redirect isn’t to an action in the current controller):
// Also redirects to the index action in the home controller
redirect(controller: 'home', action: 'index')-
A URI for a resource relative the application context path:
// Redirect to an explicit URI
redirect(uri: "/login.html")-
Or a full URL:
// Redirect to a URL
redirect(url: "https://grails.apache.org")-
A domain class instance:
// Redirect to the domain instance
Book book = ... // obtain a domain instance
redirect bookIn the above example Grails will construct a link using the domain class id (if present).
Parameters can optionally be passed from one action to the next using the params argument of the method:
redirect(action: 'myaction', params: [myparam: "myvalue"])These parameters are made available through the params dynamic property that accesses request parameters. If a parameter is specified with the same name as a request parameter, the request parameter is overridden and the controller parameter is used.
Since the params object is a Map, you can use it to pass the current request parameters from one action to the next:
redirect(action: "next", params: params)Finally, you can also include a fragment in the target URI:
redirect(controller: "test", action: "show", fragment: "profile")which will (depending on the URL mappings) redirect to something like "/myapp/test/show#profile".
Chaining
Actions can also be chained. Chaining allows the model to be retained from one action to the next. For example calling the first action in this action:
class ExampleChainController {
def first() {
chain(action: second, model: [one: 1])
}
def second () {
chain(action: third, model: [two: 2])
}
def third() {
[three: 3])
}
}results in the model:
[one: 1, two: 2, three: 3]The model can be accessed in subsequent controller actions in the chain using the chainModel map. This dynamic property only exists in actions following the call to the chain method:
class ChainController {
def nextInChain() {
def model = chainModel.myModel
...
}
}Like the redirect method you can also pass parameters to the chain method:
chain(action: "action1", model: [one: 1], params: [myparam: "param1"])| The chain method uses the HTTP session and hence should only be used if your application is stateful. |
8.1.5 Data Binding
Data binding is the act of "binding" incoming request parameters onto the properties of an object or an entire graph of objects. Data binding should deal with all necessary type conversion since request parameters, which are typically delivered by a form submission, are always strings whilst the properties of a Groovy or Java object may well not be.
Map Based Binding
The data binder is capable of converting and assigning values in a Map to properties of an object. The binder will associate entries in the Map to properties of the object using the keys in the Map that have values which correspond to property names on the object. The following code demonstrates the basics:
grails-app/domain/Person.groovy
class Person {
String firstName
String lastName
Integer age
}def bindingMap = [firstName: 'Peter', lastName: 'Gabriel', age: 63]
def person = new Person(bindingMap)
assert person.firstName == 'Peter'
assert person.lastName == 'Gabriel'
assert person.age == 63To update properties of a domain object you may assign a Map to the properties property of the domain class:
def bindingMap = [firstName: 'Peter', lastName: 'Gabriel', age: 63]
def person = Person.get(someId)
person.properties = bindingMap
assert person.firstName == 'Peter'
assert person.lastName == 'Gabriel'
assert person.age == 63The binder can populate a full graph of objects using Maps of Maps.
class Person {
String firstName
String lastName
Integer age
Address homeAddress
}
class Address {
String county
String country
}def bindingMap = [firstName: 'Peter', lastName: 'Gabriel', age: 63, homeAddress: [county: 'Surrey', country: 'England'] ]
def person = new Person(bindingMap)
assert person.firstName == 'Peter'
assert person.lastName == 'Gabriel'
assert person.age == 63
assert person.homeAddress.county == 'Surrey'
assert person.homeAddress.country == 'England'Binding To Collections And Maps
The data binder can populate and update Collections and Maps. The following code shows a simple example of populating a List of objects in a domain class:
class Band {
String name
static hasMany = [albums: Album]
List albums
}
class Album {
String title
Integer numberOfTracks
}def bindingMap = [name: 'Genesis',
'albums[0]': [title: 'Foxtrot', numberOfTracks: 6],
'albums[1]': [title: 'Nursery Cryme', numberOfTracks: 7]]
def band = new Band(bindingMap)
assert band.name == 'Genesis'
assert band.albums.size() == 2
assert band.albums[0].title == 'Foxtrot'
assert band.albums[0].numberOfTracks == 6
assert band.albums[1].title == 'Nursery Cryme'
assert band.albums[1].numberOfTracks == 7That code would work in the same way if albums were an array instead of a List.
Note that when binding to a Set the structure of the Map being bound to the Set is the same as that of a Map being bound to a List but since a Set is unordered, the indexes don’t necessarily correspond to the order of elements in the Set. In the code example above, if albums were a Set instead of a List, the bindingMap could look exactly the same but 'Foxtrot' might be the first album in the Set or it might be the second. When updating existing elements in a Set the Map being assigned to the Set must have id elements in it which represent the element in the Set being updated, as in the following example:
/*
* The value of the indexes 0 and 1 in albums[0] and albums[1] are arbitrary
* values that can be anything as long as they are unique within the Map.
* They do not correspond to the order of elements in albums because albums
* is a Set.
*/
def bindingMap = ['albums[0]': [id: 9, title: 'The Lamb Lies Down On Broadway']
'albums[1]': [id: 4, title: 'Selling England By The Pound']]
def band = Band.get(someBandId)
/*
* This will find the Album in albums that has an id of 9 and will set its title
* to 'The Lamb Lies Down On Broadway' and will find the Album in albums that has
* an id of 4 and set its title to 'Selling England By The Pound'. In both
* cases if the Album cannot be found in albums then the album will be retrieved
* from the database by id, the Album will be added to albums and will be updated
* with the values described above. If a Album with the specified id cannot be
* found in the database, then a binding error will be created and associated
* with the band object. More on binding errors later.
*/
band.properties = bindingMapWhen binding to a Map the structure of the binding Map is the same as the structure of a Map used for binding to a List or a Set and the index inside of square brackets corresponds to the key in the Map being bound to. See the following code:
class Album {
String title
static hasMany = [players: Player]
Map players
}
class Player {
String name
}def bindingMap = [title: 'The Lamb Lies Down On Broadway',
'players[guitar]': [name: 'Steve Hackett'],
'players[vocals]': [name: 'Peter Gabriel'],
'players[keyboards]': [name: 'Tony Banks']]
def album = new Album(bindingMap)
assert album.title == 'The Lamb Lies Down On Broadway'
assert album.players.size() == 3
assert album.players.guitar.name == 'Steve Hackett'
assert album.players.vocals.name == 'Peter Gabriel'
assert album.players.keyboards.name == 'Tony Banks'When updating an existing Map, if the key specified in the binding Map does not exist in the Map being bound to then a new value will be created and added to the Map with the specified key as in the following example:
def bindingMap = [title: 'The Lamb Lies Down On Broadway',
'players[guitar]': [name: 'Steve Hackett'],
'players[vocals]': [name: 'Peter Gabriel'],
'players[keyboards]': [name: 'Tony Banks']]
def album = new Album(bindingMap)
assert album.title == 'The Lamb Lies Down On Broadway'
assert album.players.size() == 3
assert album.players.guitar.name == 'Steve Hackett'
assert album.players.vocals.name == 'Peter Gabriel'
assert album.players.keyboards.name == 'Tony Banks'
def updatedBindingMap = ['players[drums]': [name: 'Phil Collins'],
'players[keyboards]': [name: 'Anthony George Banks']]
album.properties = updatedBindingMap
assert album.title == 'The Lamb Lies Down On Broadway'
assert album.players.size() == 4
assert album.players.guitar.name == 'Steve Hackett'
assert album.players.vocals.name == 'Peter Gabriel'
assert album.players.keyboards.name == 'Anthony George Banks'
assert album.players.drums.name == 'Phil Collins'Binding Request Data to the Model
The params object that is available in a controller has special behavior that helps convert dotted request parameter names into nested Maps that the data binder can work with. For example, if a request includes request parameters named person.homeAddress.country and person.homeAddress.city with values 'USA' and 'St. Louis' respectively, params would include entries like these:
[person: [homeAddress: [country: 'USA', city: 'St. Louis']]]There are two ways to bind request parameters onto the properties of a domain class. The first involves using a domain classes' Map constructor:
def save() {
def b = new Book(params)
b.save()
}The data binding happens within the code new Book(params). By passing the params object to the domain class constructor Grails automatically recognizes that you are trying to bind from request parameters. So if we had an incoming request like:
/book/save?title=The%20Stand&author=Stephen%20KingThen the title and author request parameters would automatically be set on the domain class. You can use the properties property to perform data binding onto an existing instance:
def save() {
def b = Book.get(params.id)
b.properties = params
b.save()
}This has the same effect as using the implicit constructor.
When binding an empty String (a String with no characters in it, not even spaces), the data binder will convert the empty String to null. This simplifies the most common case where the intent is to treat an empty form field as having the value null since there isn’t a way to actually submit a null as a request parameter. When this behavior is not desirable the application may assign the value directly.
The mass property binding mechanism will by default automatically trim all Strings at binding time. To disable this behavior set the grails.databinding.trimStrings property to false in grails-app/conf/application.groovy.
// the default value is true
grails.databinding.trimStrings = false
// ...Or the equivalent in grails-app/conf/application.yml:
# the default value is true
grails:
databinding:
trimStrings: false
# ...The mass property binding mechanism will by default automatically convert all empty Strings to null at binding time. To disable this behavior set the grails.databinding.convertEmptyStringsToNull property to false in grails-app/conf/application.groovy.
// the default value is true
grails.databinding.convertEmptyStringsToNull = false
// ...Or the equivalent in grails-app/conf/application.yml:
# the default value is true
grails:
databinding:
convertEmptyStringsToNull: false
# ...The order of events is that the String trimming happens and then null conversion happens so if trimStrings is true and convertEmptyStringsToNull is true, not only will empty Strings be converted to null but also blank Strings. A blank String is any String such that the trim() method returns an empty String.
| These forms of data binding in Grails are very convenient, but also indiscriminate. In other words, they will bind all non-transient, typed instance properties of the target object, including ones that you may not want bound. Just because the form in your UI doesn’t submit all the properties, an attacker can still send malign data via a raw HTTP request. Fortunately, Grails also makes it easy to protect against such attacks - see the section titled "Data Binding and Security concerns" for more information. |
Data binding and Single-ended Associations
If you have a one-to-one or many-to-one association you can use Grails' data binding capability to update these relationships too. For example if you have an incoming request such as:
/book/save?author.id=20Grails will automatically detect the .id suffix on the request parameter and look up the Author instance for the given id when doing data binding such as:
def b = new Book(params)An association property can be set to null by passing the literal String "null". For example:
/book/save?author.id=nullData Binding and Many-ended Associations
If you have a one-to-many or many-to-many association there are different techniques for data binding depending of the association type.
If you have a Set based association (the default for a hasMany) then the simplest way to populate an association is to send a list of identifiers. For example consider the usage of <g:select> below:
<g:select name="books"
from="${Book.list()}"
size="5" multiple="yes" optionKey="id"
value="${author?.books}" />This produces a select box that lets you select multiple values. In this case if you submit the form Grails will automatically use the identifiers from the select box to populate the books association.
However, if you have a scenario where you want to update the properties of the associated objects the this technique won’t work. Instead you use the subscript operator:
<g:textField name="books[0].title" value="the Stand" />
<g:textField name="books[1].title" value="the Shining" />However, with Set based association it is critical that you render the mark-up in the same order that you plan to do the update in. This is because a Set has no concept of order, so although we’re referring to books[0] and books[1] it is not guaranteed that the order of the association will be correct on the server side unless you apply some explicit sorting yourself.
This is not a problem if you use List based associations, since a List has a defined order and an index you can refer to. This is also true of Map based associations.
Note also that if the association you are binding to has a size of two and you refer to an element that is outside the size of association:
<g:textField name="books[0].title" value="the Stand" />
<g:textField name="books[1].title" value="the Shining" />
<g:textField name="books[2].title" value="Red Madder" />Then Grails will automatically create a new instance for you at the defined position.
You can bind existing instances of the associated type to a List using the same .id syntax as you would use with a single-ended association. For example:
<g:select name="books[0].id" from="${bookList}"
value="${author?.books[0]?.id}" />
<g:select name="books[1].id" from="${bookList}"
value="${author?.books[1]?.id}" />
<g:select name="books[2].id" from="${bookList}"
value="${author?.books[2]?.id}" />Would allow individual entries in the books List to be selected separately.
Entries at particular indexes can be removed in the same way too. For example:
<g:select name="books[0].id"
from="${Book.list()}"
value="${author?.books[0]?.id}"
noSelection="['null': '']"/>Will render a select box that will remove the association at books[0] if the empty option is chosen.
Binding to a Map property works the same way except that the list index in the parameter name is replaced by the map key:
<g:select name="images[cover].id"
from="${Image.list()}"
value="${book?.images[cover]?.id}"
noSelection="['null': '']"/>This would bind the selected image into the Map property images under a key of "cover".
When binding to Maps, Arrays and Collections the data binder will automatically grow the size of the collections as necessary.
The default limit to how large the binder will grow a collection is 256. If the data binder encounters an entry that requires the collection be grown beyond that limit, the entry is ignored. The limit may be configured by assigning a value to the grails.databinding.autoGrowCollectionLimit property in application.groovy.
|
grails-app/conf/application.groovy
// the default value is 256
grails.databinding.autoGrowCollectionLimit = 128
// ...Or the equivalent in grails-app/conf/application.yml:
grails-app/conf/application.yml
# the default value is 256
grails:
databinding:
autoGrowCollectionLimit: 128
# ...Data binding with Multiple domain classes
It is possible to bind data to multiple domain objects from the params object.
For example so you have an incoming request to:
/book/save?book.title=The%20Stand&author.name=Stephen%20KingYou’ll notice the difference with the above request is that each parameter has a prefix such as author. or book. which is used to isolate which parameters belong to which type. Grails' params object is like a multi-dimensional hash and you can index into it to isolate only a subset of the parameters to bind.
def b = new Book(params.book)Notice how we use the prefix before the first dot of the book.title parameter to isolate only parameters below this level to bind. We could do the same with an Author domain class:
def a = new Author(params.author)Data Binding and Action Arguments
Controller action arguments are subject to request parameter data binding. There are 2 categories of controller action arguments. The first category is command objects. Complex types are treated as command objects. See the Command Objects section of the user guide for details. The other category is basic object types. Supported types are the 8 primitives, their corresponding type wrappers and java.lang.String. The default behavior is to map request parameters to action arguments by name:
class AccountingController {
// accountNumber will be initialized with the value of params.accountNumber
// accountType will be initialized with params.accountType
def displayInvoice(String accountNumber, int accountType) {
// ...
}
}For primitive arguments and arguments which are instances of any of the primitive type wrapper classes a type conversion has to be carried out before the request parameter value can be bound to the action argument. The type conversion happens automatically. In a case like the example shown above, the params.accountType request parameter has to be converted to an int. If type conversion fails for any reason, the argument will have its default value per normal Java behavior (null for type wrapper references, false for booleans and zero for numbers) and a corresponding error will be added to the errors property of the defining controller.
/accounting/displayInvoice?accountNumber=B59786&accountType=bogusValueSince "bogusValue" cannot be converted to type int, the value of accountType will be zero, the controller’s errors.hasErrors() will be true, the controller’s errors.errorCount will be equal to 1 and the controller’s errors.getFieldError('accountType') will contain the corresponding error.
If the argument name does not match the name of the request parameter then the @grails.web.RequestParameter annotation may be applied to an argument to express the name of the request parameter which should be bound to that argument:
import grails.web.RequestParameter
class AccountingController {
// mainAccountNumber will be initialized with the value of params.accountNumber
// accountType will be initialized with params.accountType
def displayInvoice(@RequestParameter('accountNumber') String mainAccountNumber, int accountType) {
// ...
}
}Data binding and type conversion errors
Sometimes when performing data binding it is not possible to convert a particular String into a particular target type. This results in a type conversion error. Grails will retain type conversion errors inside the errors property of a Grails domain class. For example:
class Book {
...
URL publisherURL
}Here we have a domain class Book that uses the java.net.URL class to represent URLs. Given an incoming request such as:
/book/save?publisherURL=a-bad-urlit is not possible to bind the string a-bad-url to the publisherURL property as a type mismatch error occurs. You can check for these like this:
def b = new Book(params)
if (b.hasErrors()) {
println "The value ${b.errors.getFieldError('publisherURL').rejectedValue}" +
" is not a valid URL!"
}Although we have not yet covered error codes (for more information see the section on validation), for type conversion errors you would want a message from the grails-app/i18n/messages.properties file to use for the error. You can use a generic error message handler such as:
typeMismatch.java.net.URL=The field {0} is not a valid URLOr a more specific one:
typeMismatch.Book.publisherURL=The publisher URL you specified is not a valid URLThe BindUsing Annotation
The BindUsing annotation may be used to define a custom binding mechanism for a particular field in a class. Any time data binding is being applied to the field the closure value of the annotation will be invoked with 2 arguments. The first argument is the object that data binding is being applied to and the second argument is DataBindingSource which is the data source for the data binding. The value returned from the closure will be bound to the property. The following example would result in the upper case version of the name value in the source being applied to the name field during data binding.
import grails.databinding.BindUsing
class SomeClass {
@BindUsing({obj, source ->
//source is DataSourceBinding which is similar to a Map
//and defines getAt operation but source.name cannot be used here.
//In order to get name from source use getAt instead as shown below.
source['name']?.toUpperCase()
})
String name
}
Note that data binding is only possible when the name of the request parameter matches with the field name in the class.
Here, name from request parameters matches with name from SomeClass.
|
The BindUsing annotation may be used to define a custom binding mechanism for all of the fields on a particular class. When the annotation is applied to a class, the value assigned to the annotation should be a class which implements the BindingHelper interface. An instance of that class will be used any time a value is bound to a property in the class that this annotation has been applied to.
@BindUsing(SomeClassWhichImplementsBindingHelper)
class SomeClass {
String someProperty
Integer someOtherProperty
}The BindInitializer Annotation
The BindInitializer annotation may be used to initialize an associated field in a class if it is undefined. Unlike the BindUsing annotation, databinding will continue binding all nested properties on this association.
import grails.databinding.BindInitializer
class Account{}
class User {
Account account
// BindInitializer expects you to return a instance of the type
// where it's declared on. You can use source as a parameter, in this case user.
@BindInitializer({user-> new Contact(account:user.account) })
Contact contact
}
class Contact{
Account account
String firstName
}| @BindInitializer only makes sense for associated entities, as per this use case. |
Custom Data Converters
The binder will do a lot of type conversion automatically. Some applications may want to define their own mechanism for converting values and a simple way to do this is to write a class which implements ValueConverter and register an instance of that class as a bean in the Spring application context.
package com.myapp.converters
import grails.databinding.converters.ValueConverter
/**
* A custom converter which will convert String of the
* form 'city:state' into an Address object.
*/
class AddressValueConverter implements ValueConverter {
boolean canConvert(value) {
value instanceof String
}
def convert(value) {
def pieces = value.split(':')
new com.myapp.Address(city: pieces[0], state: pieces[1])
}
Class<?> getTargetType() {
com.myapp.Address
}
}An instance of that class needs to be registered as a bean in the Spring application context. The bean name is not important. All beans that implemented ValueConverter will be automatically plugged in to the data binding process.
grails-app/conf/spring/resources.groovy
beans = {
addressConverter com.myapp.converters.AddressValueConverter
// ...
}class Person {
String firstName
Address homeAddress
}
class Address {
String city
String state
}
def person = new Person()
person.properties = [firstName: 'Jeff', homeAddress: "O'Fallon:Missouri"]
assert person.firstName == 'Jeff'
assert person.homeAddress.city = "O'Fallon"
assert person.homeAddress.state = 'Missouri'Date Formats For Data Binding
A custom date format may be specified to be used when binding a String to a Date value by applying the BindingFormat annotation to a Date field.
import grails.databinding.BindingFormat
class Person {
@BindingFormat('MMddyyyy')
Date birthDate
}A global setting may be configured in application.groovy or application.yml to define date formats which will be used application wide when binding to Date.
grails-app/conf/application.groovy
grails.databinding.dateFormats = ['MMddyyyy', 'yyyy-MM-dd HH:mm:ss.S', "yyyy-MM-dd'T'HH:mm:ss'Z'"]grails-app/conf/application.yml
grails:
databinding:
dateFormats: ['MMddyyyy', 'yyyy-MM-dd HH:mm:ss.S', "yyyy-MM-dd'T'HH:mm:ss'Z'"]The formats specified in grails.databinding.dateFormats will be attempted in the order in which they are included in the List. If a property is marked with @BindingFormat, the @BindingFormat will take precedence over the values specified in grails.databinding.dateFormats.
The formats configured by default are:
-
yyyy-MM-dd HH:mm:ss.S -
yyyy-MM-dd’T’HH:mm:ss’Z' -
yyyy-MM-dd HH:mm:ss.S z -
yyyy-MM-dd’T’HH:mm:ss.SSSX -
yyyy-MM-dd’T’HH:mm:ssZ -
HH:mm:ssZ -
yyyy-MM-dd’T’HH:mm:ss -
yyyy-MM-dd -
HH:mm:ss
A value in the ISO 8601 form of the target type, which is how Grails renders it in JSON, is bound
first, before any of those formats are tried. A Date given a date and time with an offset, such as
2024-05-01T10:00:00Z or 2024-05-01T10:00:00.5+02:00, is bound to the instant it names, whatever
the time zone of the server, and a java.time type is bound from its ISO 8601 form, such as
2024-05-01T10:00:00+02:00 for an OffsetDateTime or 2024-05-01T10:00:00.250 for a
LocalDateTime. A format that reads all of a value is used before an earlier format that reads only
the start of it, so the time of 2024-05-01 10:00 is kept where a format such as yyyy-MM-dd HH:mm is
listed. A value that no format reads all of is bound by the first format that reads the start of it,
as in earlier versions.
Custom Formatted Converters
You may supply your own handler for the BindingFormat annotation by writing a class which implements the FormattedValueConverter interface and registering an instance of that class as a bean in the Spring application context. Below is an example of a trivial custom String formatter that might convert the case of a String based on the value assigned to the BindingFormat annotation.
package com.myapp.converters
import grails.databinding.converters.FormattedValueConverter
class FormattedStringValueConverter implements FormattedValueConverter {
def convert(value, String format) {
if('UPPERCASE' == format) {
value = value.toUpperCase()
} else if('LOWERCASE' == format) {
value = value.toLowerCase()
}
value
}
Class getTargetType() {
// specifies the type to which this converter may be applied
String
}
}An instance of that class needs to be registered as a bean in the Spring application context. The bean name is not important. All beans that implemented FormattedValueConverter will be automatically plugged in to the data binding process.
grails-app/conf/spring/resources.groovy
beans = {
formattedStringConverter com.myapp.converters.FormattedStringValueConverter
// ...
}With that in place the BindingFormat annotation may be applied to String fields to inform the data binder to take advantage of the custom converter.
import grails.databinding.BindingFormat
class Person {
@BindingFormat('UPPERCASE')
String someUpperCaseString
@BindingFormat('LOWERCASE')
String someLowerCaseString
String someOtherString
}Localized Binding Formats
The BindingFormat annotation supports localized format strings by using the optional code attribute. If a value is assigned to the code attribute that value will be used as the message code to retrieve the binding format string from the messageSource bean in the Spring application context and that lookup will be localized.
import grails.databinding.BindingFormat
class Person {
@BindingFormat(code='date.formats.birthdays')
Date birthDate
}# grails-app/conf/i18n/messages.properties
date.formats.birthdays=MMddyyyy# grails-app/conf/i18n/messages_es.properties
date.formats.birthdays=ddMMyyyyStructured Data Binding Editors
A structured data binding editor is a helper class which can bind structured request parameters to a property. The common use case for structured binding is binding to a Date object which might be constructed from several smaller pieces of information contained in several request parameters with names like birthday_month, birthday_date and birthday_year. The structured editor would retrieve all of those individual pieces of information and use them to construct a Date.
The framework provides a structured editor for binding to Date objects. An application may register its own structured editors for whatever types are appropriate. Consider the following classes:
src/main/groovy/databinding/Gadget.groovy
package databinding
class Gadget {
Shape expandedShape
Shape compressedShape
}src/main/groovy/databinding/Shape.groovy
package databinding
class Shape {
int area
}A Gadget has 2 Shape fields. A Shape has an area property. It may be that the application wants to accept request parameters like width and height and use those to calculate the area of a Shape at binding time. A structured binding editor is well suited for that.
The way to register a structured editor with the data binding process is to add an instance of the grails.databinding.TypedStructuredBindingEditor interface to the Spring application context. The easiest way to implement the TypedStructuredBindingEditor interface is to extend the org.grails.databinding.converters.AbstractStructuredBindingEditor abstract class and override the getPropertyValue method as shown below:
src/main/groovy/databinding/converters/StructuredShapeEditor.groovy
package databinding.converters
import databinding.Shape
import org.grails.databinding.converters.AbstractStructuredBindingEditor
class StructuredShapeEditor extends AbstractStructuredBindingEditor<Shape> {
public Shape getPropertyValue(Map values) {
// retrieve the individual values from the Map
def width = values.width as int
def height = values.height as int
// use the values to calculate the area of the Shape
def area = width * height
// create and return a Shape with the appropriate area
new Shape(area: area)
}
}An instance of that class needs to be registered with the Spring application context:
grails-app/conf/spring/resources.groovy
beans = {
shapeEditor databinding.converters.StructuredShapeEditor
// ...
}When the data binder binds to an instance of the Gadget class it will check to see if there are request parameters with names compressedShape and expandedShape which have a value of "struct" and if they do exist, that will trigger the use of the StructuredShapeEditor. The individual components of the structure need to have parameter names of the form propertyName_structuredElementName. In the case of the Gadget class above that would mean that the compressedShape request parameter should have a value of "struct" and the compressedShape_width and compressedShape_height parameters should have values which represent the width and the height of the compressed Shape. Similarly, the expandedShape request parameter should have a value of "struct" and the expandedShape_width and expandedShape_height parameters should have values which represent the width and the height of the expanded Shape.
grails-app/controllers/demo/DemoController.groovy
class DemoController {
def createGadget(Gadget gadget) {
/*
/demo/createGadget?expandedShape=struct&expandedShape_width=80&expandedShape_height=30
&compressedShape=struct&compressedShape_width=10&compressedShape_height=3
*/
// with the request parameters shown above gadget.expandedShape.area would be 2400
// and gadget.compressedShape.area would be 30
// ...
}
}Typically the request parameters with "struct" as their value would be represented by hidden form fields.
Data Binding Event Listeners
The DataBindingListener interface provides a mechanism for listeners to be notified of data binding events. The interface looks like this:
package grails.databinding.events;
import grails.databinding.errors.BindingError;
/**
* A listener which will be notified of events generated during data binding.
*
* @author Jeff Brown
* @since 3.0
* @see DataBindingListenerAdapter
*/
public interface DataBindingListener {
/**
* @return true if the listener is interested in events for the specified type.
*/
boolean supports(Class<?> clazz);
/**
* Called when data binding is about to start.
*
* @param target The object data binding is being imposed upon
* @param errors the Spring Errors instance (a org.springframework.validation.BindingResult)
* @return true if data binding should continue
*/
Boolean beforeBinding(Object target, Object errors);
/**
* Called when data binding is about to imposed on a property
*
* @param target The object data binding is being imposed upon
* @param propertyName The name of the property being bound to
* @param value The value of the property being bound
* @param errors the Spring Errors instance (a org.springframework.validation.BindingResult)
* @return true if data binding should continue, otherwise return false
*/
Boolean beforeBinding(Object target, String propertyName, Object value, Object errors);
/**
* Called after data binding has been imposed on a property
*
* @param target The object data binding is being imposed upon
* @param propertyName The name of the property that was bound to
* @param errors the Spring Errors instance (a org.springframework.validation.BindingResult)
*/
void afterBinding(Object target, String propertyName, Object errors);
/**
* Called after data binding has finished.
*
* @param target The object data binding is being imposed upon
* @param errors the Spring Errors instance (a org.springframework.validation.BindingResult)
*/
void afterBinding(Object target, Object errors);
/**
* Called when an error occurs binding to a property
* @param error encapsulates information about the binding error
* @param errors the Spring Errors instance (a org.springframework.validation.BindingResult)
* @see BindingError
*/
void bindingError(BindingError error, Object errors);
}Any bean in the Spring application context which implements that interface will automatically be registered with the data binder. The DataBindingListenerAdapter class implements the DataBindingListener interface and provides default implementations for all of the methods in the interface so this class is well suited for subclassing so your listener class only needs to provide implementations for the methods your listener is interested in.
Using The Data Binder Directly
There are situations where an application may want to use the data binder directly. For example, to do binding in a Service on some arbitrary object which is not a domain class. The following will not work because the properties property is read only.
src/main/groovy/bindingdemo/Widget.groovy
package bindingdemo
class Widget {
String name
Integer size
}grails-app/services/bindingdemo/WidgetService.groovy
package bindingdemo
class WidgetService {
def updateWidget(Widget widget, Map data) {
// this will throw an exception because
// properties is read-only
widget.properties = data
}
}An instance of the data binder is in the Spring application context with a bean name of grailsWebDataBinder. That bean implements the DataBinder interface. The following code demonstrates using the data binder directly.
grails-app/services/bindingdmeo/WidgetService
package bindingdemo
import grails.databinding.SimpleMapDataBindingSource
class WidgetService {
// this bean will be autowired into the service
def grailsWebDataBinder
def updateWidget(Widget widget, Map data) {
grailsWebDataBinder.bind widget, data as SimpleMapDataBindingSource
}
}See the DataBinder documentation for more information about overloaded versions
of the bind method.
Data Binding and Security Concerns
When batch updating properties from request parameters you need to be careful not to allow clients to bind malicious data to domain classes and be persisted in the database. You can limit what properties are bound to a given domain class using the subscript operator:
def p = Person.get(1)
p.properties['firstName','lastName'] = paramsIn this case only the firstName and lastName properties will be bound.
Another way to do this is is to use Command Objects as the target of data binding instead of domain classes. Alternatively there is also the flexible bindData method.
The bindData method allows the same data binding capability, but to arbitrary objects:
def p = new Person()
bindData(p, params)The bindData method also lets you exclude certain parameters that you don’t want updated:
def p = new Person()
bindData(p, params, [exclude: 'dateOfBirth'])Or include only certain properties:
def p = new Person()
bindData(p, params, [include: ['firstName', 'lastName']])
If an empty List is provided as a value for the include parameter then no fields will be bound.
|
Grails 8 retains permissive request data binding by default for compatibility, so properties without a bindable constraint continue to bind. Properties marked bindable: false remain non-bindable in either mode. Applications can opt into deny-by-default binding allowlists by setting grails.databinding.denyByDefault=true. In secure mode, add bindable: true, an explicit include list, or @BindAllowed for each intended property; only in this mode does bindable: true act as a restrictive allowlist.
8.1.6 Responding with JSON
Using the respond method to output JSON
The respond method is the preferred way to return JSON and integrates with Content Negotiation and JSON Views.
The respond method provides content negotiation strategies to intelligently produce an appropriate response for the given client.
For example given the following controller and action:
grails-app/controllers/example/BookController.groovy
package example
class BookController {
def index() {
respond Book.list()
}
}The respond method will take the followings steps:
-
If the client
Acceptheader specifies a media type (for exampleapplication/json) use that -
If the file extension of the URI (for example
/books.json) includes a format defined in thegrails.mime.typesproperty ofgrails-app/conf/application.ymluse the media type defined in the configuration
The respond method will then look for an appriopriate Renderer for the object and the calculated media type from the RendererRegistry.
Grails includes a number of pre-configured Renderer implementations that will produce default representations of JSON responses for the argument passed to respond. For example going to the /book.json URI will produce JSON such as:
[
{id:1,"title":"The Stand"},
{id:2,"title":"Shining"}
]Controlling the Priority of Media Types
By default if you define a controller there is no priority in terms of which format is sent back to the client and Grails assumes you wish to serve HTML as a response type.
However if your application is primarily an API, then you can specify the priorty using the responseFormats property:
grails-app/controllers/example/BookController.groovy
package example
class BookController {
static responseFormats = ['json', 'html']
def index() {
respond Book.list()
}
}In the above example Grails will respond by default with json if the media type to respond with cannot be calculated from the Accept header or file extension.
Using Views to Output JSON Responses
If you define a view (either a GSP or a JSON View) then Grails will render the view when using the respond method by calculating a model from the argument passed to respond.
For example, in the previous listing, if you were to define grails-app/views/index.gson and grails-app/views/index.gsp views, these would be used if the client requested application/json or text/html media types respectively. Thus allowing you to define a single backend capable of serving responses to a web browser or representing your application’s API.
When rendering the view, Grails will calculate a model to pass to the view based on the type of the value passed to the respond method.
The following table summarizes this convention:
| Example | Argument Type | Calculated Model Variable |
|---|---|---|
|
|
|
|
|
|
|
|
|
|
|
|
|
|
|
|
|
|
Using this convention you can reference the argument passed to respond from within your view:
grails-app/views/book/index.gson
@Field List<Book> bookList = []
json bookList, { Book book ->
title book.title
}You will notice that if Book.list() returns an empty list then the model variable name is translated to emptyList. This is by design and you should provide a default value in the view if no model variable is specified, such as the List in the example above:
grails-app/views/book/index.gson
// defaults to an empty list
@Field List<Book> bookList = []
...There are cases where you may wish to be more explicit and control the name of the model variable. For example if you have a domain inheritance hierarchy where a call to list() my return different child classes relying on automatic calculation may not be reliable.
In this case you should pass the model directly using respond and a map argument:
respond bookList: Book.list()| When responding with any kind of mixed argument types in a collection, always use an explicit model name. |
If you simply wish to augment the calculated model then you can do so by passing a model argument:
respond Book.list(), [model: [bookCount: Book.count()]]The above example will produce a model like [bookList:books, bookCount:totalBooks], where the calculated model is combined with the model passed in the model argument.
Using the render method to output JSON
The render method can also be used to output JSON, but should only be used for simple cases that don’t warrant the creation of a JSON view:
def list() {
def results = Book.list()
render(contentType: "application/json") {
books(results) { Book b ->
title b.title
}
}
}In this case the result would be something along the lines of:
[
{"title":"The Stand"},
{"title":"Shining"}
]| This technique for rendering JSON may be ok for very simple responses, but in general you should favour the use of JSON Views and use the view layer rather than embedding logic in your application. |
The same dangers with naming conflicts described above for XML also apply to JSON building.
8.1.7 More on JSONBuilder
The previous section on XML and JSON responses covered simplistic examples of rendering XML and JSON responses. Whilst the XML builder used by Grails is the standard XmlSlurper found in Groovy.
For JSON, since Grails 3.1, Grails uses Groovy’s StreamingJsonBuilder by default and you can refer to the Groovy documentation and StreamingJsonBuilder API documentation on how to use it.
8.1.8 Responding with XML
8.1.9 Uploading Files
Programmatic File Uploads
Grails supports file uploads on top of Spring’s multipart handling, exposing the uploaded parts as MultipartFile instances. The first step for file uploading is to create a multipart form like this:
Upload Form: <br />
<g:uploadForm action="upload">
<input type="file" name="myFile" />
<input type="submit" />
</g:uploadForm>The uploadForm tag conveniently adds the enctype="multipart/form-data" attribute to the standard <g:form> tag.
There are then a number of ways to handle the file upload. One is to work with the Spring MultipartFile instance directly:
def upload() {
def f = request.getFile('myFile')
if (f.empty) {
flash.message = 'file cannot be empty'
render(view: 'uploadForm')
return
}
f.transferTo(new File('/some/local/dir/myfile.txt'))
response.sendError(200, 'Done')
}This is convenient for doing transfers to other destinations and manipulating the file directly as you can obtain an InputStream and so on with the MultipartFile interface.
File Uploads through Data Binding
File uploads can also be performed using data binding. Consider this Image domain class:
class Image {
byte[] myFile
static constraints = {
// Limit upload file size to 2MB
myFile maxSize: 1024 * 1024 * 2
}
}If you create an image using the params object in the constructor as in the example below, Grails will automatically bind the file’s contents as a byte[] to the myFile property:
def img = new Image(params)It’s important that you set the size or maxSize constraints, otherwise your database may be created with a small column size that can’t handle reasonably sized files. For example, both H2 and MySQL default to a blob size of 255 bytes for byte[] properties.
It is also possible to set the contents of the file as a string by changing the type of the myFile property on the image to a String type:
class Image {
String myFile
}Increase Upload Max File Size
Spring Boot’s default size for file uploads is 1MB and its default maximum multipart request size is 10MB. When a limit is exceeded you’ll see the following exception:
org.springframework.web.multipart.MultipartException: Could not parse multipart servlet request; nested exception is java.lang.IllegalStateException: org.apache.tomcat.util.http.fileupload.FileUploadBase$SizeLimitExceededExceptionYou can configure the limit in your application.yml as follows:
grails-app/conf/application.yml
spring:
servlet:
multipart:
maxFileSize: 200MB
maxRequestSize: 200MBmaxFileSize = The maximum size allowed for an uploaded file.
maxRequestSize = The maximum size allowed for a multipart/form-data request.
The spring.servlet.multipart namespace also supports Spring Boot’s location, fileSizeThreshold, enabled, resolveLazily, and strictServletCompliance properties. See the Spring Boot multipart application properties reference for the complete list.
The former grails.controllers.upload configuration is no longer supported. Applications using it fail at startup with a message explaining how to migrate to spring.servlet.multipart.
The exception is raised during dispatch, so it reaches HandlerExceptionResolver beans rather than
escaping to the servlet container. The response status is 413 and the body is rendered through the
application’s error dispatch rather than by the servlet container’s own error page. To render it
yourself, add a response code mapping to UrlMappings:
"413"(controller: 'errors', action: 'tooLarge')The mapped action runs on the container’s error dispatch, so params is empty and request.getFile(..)
is unavailable — the container never parsed the request. The action’s job is to render the response.
On Undertow the limit is applied while the request entity is read, so the request is refused at
the HTTP layer and no application code runs: the response is a bare 413 with an empty body, and a
"413" mapping is not consulted. Tomcat and Jetty dispatch the failure to the application as described
above.
|
You should keep in mind OWASP recommendations - Unrestricted File Upload
| Limit the file size to a maximum value in order to prevent denial of service attacks. |
These limits exist to prevent DoS attacks and to enforce overall application performance
8.1.10 Command Objects
Grails controllers support the concept of command objects. A command object is a class that is used in conjunction with data binding, usually to allow validation of data that may not fit into an existing domain class.
| A class is only considered to be a command object when it is used as a parameter of an action. |
Declaring Command Objects
Command object classes are defined just like any other class.
class LoginCommand implements grails.validation.Validateable {
String username
String password
static constraints = {
username(blank: false, minSize: 6)
password(blank: false, minSize: 6)
}
}In this example, the command object class implements the Validateable trait. The Validateable trait allows the definition of Constraints just like in domain classes. If the command object is defined in the same source file as the controller that is using it, Grails will automatically make it Validateable. It is not required that command object classes be validateable.
By default, all Validateable object properties which are not instances of java.util.Collection or java.util.Map are nullable: false. Instances of java.util.Collection and java.util.Map default to nullable: true. If you want a Validateable that has nullable: true properties by default, you can specify this by defining a defaultNullable method in the class:
class AuthorSearchCommand implements grails.validation.Validateable {
String name
Integer age
static boolean defaultNullable() {
true
}
}In this example, both name and age will allow null values during validation.
Using Command Objects
To use command objects, controller actions may optionally specify any number of command object parameters. The parameter types must be supplied so that Grails knows what objects to create and initialize.
Before the controller action is executed Grails will automatically create an instance of the command object class and populate its properties by binding the request parameters. If the command object class is marked with Validateable then the command object will be validated. For example:
class LoginController {
def login(LoginCommand cmd) {
if (cmd.hasErrors()) {
redirect(action: 'loginForm')
return
}
// work with the command object data
}
}If the command object’s type is that of a domain class and there is an id request parameter then instead of invoking the domain class constructor to create a new instance a call will be made to the static get method on the domain class and the value of the id parameter will be passed as an argument.
Whatever is returned from that call to get is what will be passed into the controller action. This means that if there is an id request parameter and no corresponding record is found in the database then the value of the command object will be null. If an error occurs retrieving the instance from the database then null will be passed as an argument to the controller action and an error will be added the controller’s errors property.
If the command object’s type is a domain class and there is no id request parameter or there is an id request parameter and its value is empty then null will be passed into the controller action unless the HTTP request method is "POST", in which case a new instance of the domain class will be created by invoking the domain class constructor. For all of the cases where the domain class instance is non-null, data binding is only performed if the HTTP request method is "POST", "PUT" or "PATCH".
Command Objects And Request Parameter Names
Normally request parameter names will be mapped directly to property names in the command object. Nested parameter names may be used to bind down the object graph in an intuitive way.
In the example below a request parameter named name will be bound to the name property of the Person instance and a request parameter named address.city will be bound to the city property of the address property in the Person.
class StoreController {
def buy(Person buyer) {
// ...
}
}
class Person {
String name
Address address
}
class Address {
String city
}A problem may arise if a controller action accepts multiple command objects which happen to contain the same property name. Consider the following example.
class StoreController {
def buy(Person buyer, Product product) {
// ...
}
}
class Person {
String name
Address address
}
class Address {
String city
}
class Product {
String name
}If there is a request parameter named name it isn’t clear if that should represent the name of the Product or the name of the Person. Another version of the problem can come up if a controller action accepts 2 command objects of the same type as shown below.
class StoreController {
def buy(Person buyer, Person seller, Product product) {
// ...
}
}
class Person {
String name
Address address
}
class Address {
String city
}
class Product {
String name
}To help deal with this the framework imposes special rules for mapping parameter names to command object types. The command object data binding will treat all parameters that begin with the controller action parameter name as belonging to the corresponding command object.
For example, the product.name request parameter will be bound to the name property in the product argument, the buyer.name request parameter will be bound to the name property in the buyer argument the seller.address.city request parameter will be bound to the city property of the address property of the seller argument, etc…
Command Objects and Dependency Injection
Command objects can participate in dependency injection. This is useful if your command object has some custom validation logic which uses a Grails service:
class LoginCommand implements grails.validation.Validateable {
def loginService
String username
String password
static constraints = {
username validator: { val, obj ->
obj.loginService.canLogin(obj.username, obj.password)
}
}
}In this example the command object interacts with the loginService bean which is injected by name from the Spring ApplicationContext.
Binding The Request Body To Command Objects
When a request is made to a controller action which accepts a command object and the request contains a body, Grails will attempt to parse the body of the request based on the request content type and use the body to do data binding on the command object. See the following example.
grails-app/controllers/bindingdemo/DemoController.groovy
package bindingdemo
class DemoController {
def createWidget(Widget w) {
render "Name: ${w?.name}, Size: ${w?.size}"
}
}
class Widget {
String name
Integer size
}$ curl -H "Content-Type: application/json" -d '{"name":"Some Widget","42"}'[size] localhost:8080/demo/createWidget
Name: Some Widget, Size: 42
$ curl -H "Content-Type: application/xml" -d '<widget><name>Some Other Widget</name><size>2112</size></widget>' localhost:8080/bodybind/demo/createWidget
Name: Some Other Widget, Size: 2112|
The request body will not be parsed under the following conditions:
|
Note that the body of the request is being parsed to make that work. Any attempt to read the body of the request after that will fail since the corresponding input stream will be empty. The controller action can either use a command object or it can parse the body of the request on its own (either directly, or by referring to something like request.JSON), but cannot do both.
grails-app/controllers/bindingdemo/DemoController.groovy
package bindingdemo
class DemoController {
def createWidget(Widget w) {
// this will fail because it requires reading the body,
// which has already been read.
def json = request.JSON
// ...
}
}Working with Lists of Command Objects
A common use case for command objects is a Command Object that contains a collection of another:
class DemoController {
def createAuthor(AuthorCommand command) {
// ...
}
class AuthorCommand {
String fullName
List<BookCommand> books
}
class BookCommand {
String title
String isbn
}
}On this example, we want to create an Author with multiple Books.
In order to make this work from the UI layer, you can do the following in your GSP:
<g:form name="submit-author-books" controller="demo" action="createAuthor">
<g:fieldValue name="fullName" value=""/>
<ul>
<li>
<g:fieldValue name="books[0].title" value=""/>
<g:fieldValue name="books[0].isbn" value=""/>
</li>
<li>
<g:fieldValue name="books[1].title" value=""/>
<g:fieldValue name="books[1].isbn" value=""/>
</li>
</ul>
</g:form>There is also support for JSON, so you can submit the following with correct databinding
{
"fullName": "Graeme Rocher",
"books": [{
"title": "The Definitive Guide to Grails",
"isbn": "1111-343455-1111"
}, {
"title": "The Definitive Guide to Grails 2",
"isbn": "1111-343455-1112"
}],
}8.1.11 Handling Duplicate Form Submissions
Grails has built-in support for handling duplicate form submissions using the "Synchronizer Token Pattern". To get started you define a token on the form tag:
<g:form useToken="true" ...>Then in your controller code you can use the withForm method to handle valid and invalid requests:
withForm {
// good request
}.invalidToken {
// bad request
}If you only provide the withForm method and not the chained invalidToken method then by default Grails will store the invalid token in a flash.invalidToken variable and redirect the request back to the original page. This can then be checked in the view:
<g:if test="${flash.invalidToken}">
Don't click the button twice!
</g:if>Tokens are single-use. When withForm validates a token, Grails consumes that token atomically, so duplicate concurrent submissions for the same token allow exactly one request to run the valid block and route the rest to invalidToken. Token state is stored in the session and bounded to 100 form URL buckets, with at most 100 tokens per URL. If either limit is exceeded, Grails drops the oldest URL bucket or oldest token for that URL. Applications that keep many unsubmitted forms open in one session can therefore expire the oldest tokens and receive invalidToken when those forms are submitted later.
| The withForm tag makes use of the session and hence requires session affinity or clustered sessions if used in a cluster. |
8.1.12 Simple Type Converters
Type Conversion Methods
If you prefer to avoid the overhead of data binding and simply want to convert incoming parameters (typically Strings) into another more appropriate type the params object has a number of convenience methods for each type:
def total = params.int('total')The above example uses the int method, and there are also methods for boolean, long, char, short and so on. Each of these methods is null-safe and safe from any parsing errors, so you don’t have to perform any additional checks on the parameters.
Each of the conversion methods allows a default value to be passed as an optional second argument. The default value will be returned if a corresponding entry cannot be found in the map or if an error occurs during the conversion. Example:
def total = params.int('total', 42)These same type conversion methods are also available on the attrs parameter of GSP tags.
Handling Multi Parameters
A common use case is dealing with multiple request parameters of the same name. For example you could get a query string such as ?name=Bob&name=Judy.
In this case dealing with one parameter and dealing with many has different semantics since Groovy’s iteration mechanics for String iterate over each character. To avoid this problem the params object provides a list method that always returns a list:
for (name in params.list('name')) {
println name
}Type Conversion of Attributes
The same convenience methods are also available on the session, request, flash and servletContext objects for converting attribute values. This is especially useful under static compilation (for example in a class annotated with @CompileStatic or @GrailsCompileStatic), where dynamic attribute access such as session.userTimeZoneId does not compile and the explicit alternative requires a cast:
// returns an Integer, or null if the attribute is absent or not convertible
def page = request.int('page')
// returns the attribute as an Integer, or the supplied default if absent
def page = request.int('page', 1)
// String, Boolean, Long, Date and the other converters are available too
String timeZoneId = session.string('userTimeZoneId', 'America/Los_Angeles')
Boolean active = session.boolean('active', false)
// flash and servletContext attributes work the same way
String notice = flash.string('notice')
int maxUploads = servletContext.int('maxUploads', 10)As with params, each method is null-safe and safe from parsing errors, and each accepts an optional default value as a second argument that is returned when the attribute is absent or cannot be converted.
The string method returns the first element when the underlying attribute is an array, mirroring the single-value semantics of the other converters. Use the list method to obtain every value.
|
Typed Reads of Attributes
Attributes often hold richer objects than the scalar types covered by the named converters — a security principal, a domain instance, a token. For these, session, request and servletContext offer a Class-typed overload of getAttribute that returns the attribute typed as requested, so no cast is needed under static compilation:
// returns the attribute typed as CsrfToken, or null when absent
CsrfToken token = session.getAttribute('_csrf', CsrfToken)
// with a default, returned when the attribute is absent
Theme theme = session.getAttribute('theme', Theme, Theme.DEFAULT)
UserDetails user = request.getAttribute('apiUser', UserDetails)Unlike the named converters, no coercion is attempted: the attribute is returned only when it is an instance of the requested type, and reads as absent otherwise (so the default also applies when the stored value has an unexpected type). Primitive class literals (int, boolean, …) are normalized to their wrapper types. Use the named converters when you want type conversion, and the Class-typed read when you want a type-safe retrieval.
8.1.13 Declarative Controller Exception Handling
Grails controllers support a simple mechanism for declarative exception handling. If a controller declares a method that accepts a single argument and the argument type is java.lang.Exception or some subclass of java.lang.Exception, that method will be invoked any time an action in that controller throws an exception of that type. See the following example.
grails-app/controllers/demo/DemoController.groovy
package demo
class DemoController {
def someAction() {
// do some work
}
def handleSQLException(SQLException e) {
render 'A SQLException Was Handled'
}
def handleBatchUpdateException(BatchUpdateException e) {
redirect controller: 'logging', action: 'batchProblem'
}
def handleNumberFormatException(NumberFormatException nfe) {
[problemDescription: 'A Number Was Invalid']
}
}That controller will behave as if it were written something like this…
grails-app/controllers/demo/DemoController.groovy
package demo
class DemoController {
def someAction() {
try {
// do some work
} catch (BatchUpdateException e) {
return handleBatchUpdateException(e)
} catch (SQLException e) {
return handleSQLException(e)
} catch (NumberFormatException e) {
return handleNumberFormatException(e)
}
}
def handleSQLException(SQLException e) {
render 'A SQLException Was Handled'
}
def handleBatchUpdateException(BatchUpdateException e) {
redirect controller: 'logging', action: 'batchProblem'
}
def handleNumberFormatException(NumberFormatException nfe) {
[problemDescription: 'A Number Was Invalid']
}
}The exception handler method names can be any valid method name. The name is not what makes the method an exception handler, the Exception argument type is the important part.
The exception handler methods can do anything that a controller action can do including invoking render, redirect, returning a model, etc.
One way to share exception handler methods across multiple controllers is to use inheritance. Exception handler methods are inherited into subclasses so an application could define the exception handlers in an abstract class that multiple controllers extend from. Another way to share exception handler methods across multiple controllers is to use a trait, as shown below…
src/main/groovy/com/demo/DatabaseExceptionHandler.groovy
package com.demo
trait DatabaseExceptionHandler {
def handleSQLException(SQLException e) {
// handle SQLException
}
def handleBatchUpdateException(BatchUpdateException e) {
// handle BatchUpdateException
}
}grails-app/controllers/com/demo/DemoController.groovy
package com.demo
class DemoController implements DatabaseExceptionHandler {
// all of the exception handler methods defined
// in DatabaseExceptionHandler will be added to
// this class at compile time
}Exception handler methods must be present at compile time. Specifically, exception handler methods which are runtime metaprogrammed onto a controller class are not supported.
8.2 Groovy Server Pages
Groovy Servers Pages (or GSP for short) is Grails' view technology. It is designed to be familiar for users of technologies such as ASP and JSP, but to be far more flexible and intuitive.
| Although GSP can render any format, not just HTML, it is more designed around rendering markup. If you are looking for a way to simplify JSON responses take a look at JSON Views. |
GSP was previously part of Grails core, but since version 3.3 it is an independent Grails plugin that can be used by defining the following dependency in your build.gradle:
build.gradle
dependencies {
//...
implementation "org.apache.grails:grails-gsp"
}In addition, for production compilation you should apply the grails-gsp Gradle plugin:
build.gradle
apply plugin: "org.apache.grails.gradle.grails-gsp"GSPs live in the grails-app/views directory and are typically rendered automatically (by convention) or with the render method such as:
render(view: "index")A GSP is typically a mix of mark-up and GSP tags which aid in view rendering.
| Although it is possible to have Groovy logic embedded in your GSP and doing this will be covered in this document, the practice is strongly discouraged. Mixing mark-up and code is a bad thing and most GSP pages contain no code and needn’t do so. |
A GSP typically has a "model" which is a set of variables that are used for view rendering. The model is passed to the GSP view from a controller. For example consider the following controller action:
def show() {
[book: Book.get(params.id)]
}This action will look up a Book instance and create a model that contains a key called book. This key can then be referenced within the GSP view using the name book:
${book.title}| Embedding data received from user input has the risk of making your application vulnerable to an Cross Site Scripting (XSS) attack. Please read the documentation on XSS prevention for information on how to prevent XSS attacks. |
8.2.1 GSP Basics
In the next view sections we’ll go through the basics of GSP and what is available to you. First off let’s cover some basic syntax that users of JSP and ASP should be familiar with.
GSP supports the usage of <% %> scriptlet blocks to embed Groovy code (again this is discouraged):
<html>
<body>
<% out << "Hello GSP!" %>
</body>
</html>You can also use the <%= %> syntax to output values:
<html>
<body>
<%="Hello GSP!" %>
</body>
</html>GSP also supports JSP-style server-side comments (which are not rendered in the HTML response) as the following example demonstrates:
<html>
<body>
<%-- This is my comment --%>
<%="Hello GSP!" %>
</body>
</html>| Embedding data received from user input has the risk of making your application vulnerable to an Cross Site Scripting (XSS) attack. Please read the documentation under XSS prevention for information on how to prevent XSS attacks. |
8.2.1.1 Variables and Scopes
Within the <% %> brackets you can declare variables:
<% now = new Date() %>
and then access those variables later in the page:
<%=now%>
Within the scope of a GSP there are a number of pre-defined variables, including:
-
application- The javax.servlet.ServletContext instance -
applicationContextThe Spring ApplicationContext instance -
flash- The flash object -
grailsApplication- The GrailsApplication instance -
out- The response writer for writing to the output stream -
params- The params object for retrieving request parameters -
request- The HttpServletRequest instance -
response- The HttpServletResponse instance -
session- The HttpSession instance -
webRequest- The GrailsWebRequest instance
8.2.1.2 Logic and Iteration
Using the <% %> syntax you can embed loops and so on using this syntax:
<html>
<body>
<% [1,2,3,4].each { num -> %>
<p><%="Hello ${num}!" %></p>
<%}%>
</body>
</html>As well as logical branching:
<html>
<body>
<% if (params.hello == 'true')%>
<%="Hello!"%>
<% else %>
<%="Goodbye!"%>
</body>
</html>8.2.1.3 Page Directives
GSP also supports a few JSP-style page directives.
The import directive lets you import classes into the page. However, it is rarely needed due to Groovy’s default imports and GSP Tags:
<%@ page import="java.awt.*" %>Separate imports with semicolons ;. As a convention, you should split larger number of imports into separate lines to improve readability, which requires adding backslash \ at the end of each line:
<%@ page import="java.awt.*; \
your.custom.ComponentA; \
your.custom.ComponentB;"
%>GSP also supports the contentType directive:
<%@ page contentType="application/json" %>The contentType directive allows using GSP to render other formats.
8.2.1.4 Expressions
In GSP the <%= %> syntax introduced earlier is rarely used due to the support for GSP expressions. A GSP expression is similar to a JSP EL expression or a Groovy GString and takes the form ${expr}:
<html>
<body>
Hello ${params.name}
</body>
</html>However, unlike JSP EL you can have any Groovy expression within the ${..} block.
A backslash immediately before an expression escapes it: the expression is not evaluated, and the page renders a literal ${..} without the backslash. This matters most for JavaScript template literals, whose interpolation placeholders share the ${..} syntax and would otherwise be evaluated on the server:
<script>
const name = 'Grails';
console.log(`Hello \${name}`);
</script>The browser receives the template literal with its ${name} placeholder intact, to be interpolated by JavaScript. Only the backslash performing the escape is removed, and each expression must be escaped individually. Expressions in the attributes of GSP tags cannot be escaped this way.
| Embedding data received from user input has the risk of making your application vulnerable to a Cross Site Scripting (XSS) attack. Please read the documentation under XSS prevention for information on how to prevent XSS attacks. |
8.2.2 GSP Tags
Now that the less attractive JSP heritage has been set aside, the following sections cover GSP’s built-in tags, which are the preferred way to define GSP pages.
| The section on Tag Libraries covers how to add your own custom tag libraries. |
All built-in GSP tags start with the prefix g:. Unlike JSP, you don’t specify any tag library imports. If a tag starts with g: it is automatically assumed to be a GSP tag. An example GSP tag would look like:
<g:example />GSP tags can also have a body such as:
<g:example>
Hello world
</g:example>Expressions can be passed into GSP tag attributes, if an expression is not used it will be assumed to be a String value:
<g:example attr="${new Date()}">
Hello world
</g:example>Maps can also be passed into GSP tag attributes, which are often used for a named parameter style syntax:
<g:example attr="${new Date()}" attr2="[one:1, two:2, three:3]">
Hello world
</g:example>Note that within the values of attributes you must use single quotes for Strings:
<g:example attr="${new Date()}" attr2="[one:'one', two:'two']">
Hello world
</g:example>With the basic syntax out the way, the next sections look at the tags that are built into Grails by default.
8.2.2.1 Variables and Scopes
Variables can be defined within a GSP using the set tag:
<g:set var="now" value="${new Date()}" />Here we assign a variable called now to the result of a GSP expression (which simply constructs a new java.util.Date instance). You can also use the body of the <g:set> tag to define a variable:
<g:set var="myHTML">
Some re-usable code on: ${new Date()}
</g:set>The assigned value can also be a bean from the applicationContext:
<g:set var="bookService" bean="bookService" />Variables can also be placed in one of the following scopes:
-
page- Scoped to the current page (default) -
request- Scoped to the current request -
flash- Placed within flash scope and hence available for the next request -
session- Scoped for the user session -
application- Application-wide scope.
To specify the scope, use the scope attribute:
<g:set var="now" value="${new Date()}" scope="request" />8.2.2.2 Logic and Iteration
GSP also supports logical and iterative tags out of the box. For logic there are if, else and elseif tags for use with branching:
<g:if test="${session.role == 'admin'}">
<%-- show administrative functions --%>
</g:if>
<g:else>
<%-- show basic functions --%>
</g:else><g:each in="${[1,2,3]}" var="num">
<p>Number ${num}</p>
</g:each>
<g:set var="num" value="${1}" />
<g:while test="${num < 5 }">
<p>Number ${num++}</p>
</g:while>8.2.2.3 Search and Filtering
If you have collections of objects you often need to sort and filter them. Use the findAll and grep tags for these tasks:
Stephen King's Books:
<g:findAll in="${books}" expr="it.author == 'Stephen King'">
<p>Title: ${it.title}</p>
</g:findAll>The expr attribute contains a Groovy expression that can be used as a filter. The grep tag does a similar job, for example filtering by class:
<g:grep in="${books}" filter="NonFictionBooks.class">
<p>Title: ${it.title}</p>
</g:grep>Or using a regular expression:
<g:grep in="${books.title}" filter="~/.*?Groovy.*?/">
<p>Title: ${it}</p>
</g:grep>The above example is also interesting due to its usage of GPath. GPath is an XPath-like language in Groovy. The books variable is a collection of Book instances. Since each Book has a title, you can obtain a list of Book titles using the expression books.title. Groovy will auto-magically iterate the collection, obtain each title, and return a new list!
8.2.2.4 Links and Resources
GSP also features tags to help you manage linking to controllers and actions. The link tag lets you specify controller and action name pairing and it will automatically work out the link based on the URL Mappings, even if you change them! For example:
<g:link action="show" id="1">Book 1</g:link>
<g:link action="show" id="${currentBook.id}">${currentBook.name}</g:link>
<g:link controller="book">Book Home</g:link>
<g:link controller="book" action="list">Book List</g:link>
<g:link url="[action: 'list', controller: 'book']">Book List</g:link>
<g:link params="[sort: 'title', order: 'asc', author: currentBook.author]"
action="list">Book List</g:link>8.2.2.5 Forms and Fields
Form Basics
GSP supports many different tags for working with HTML forms and fields, the most basic of which is the form tag. This is a controller/action aware version of the regular HTML form tag. The url attribute lets you specify which controller and action to map to:
<g:form name="myForm" url="[controller:'book',action:'list']">...</g:form>In this case we create a form called myForm that submits to the BookController's list action. Beyond that, all the usual HTML attributes apply.
Form Fields
In addition to easy construction of forms, GSP supports custom tags for dealing with different types of fields, including:
-
textField - For input fields of type 'text'
-
passwordField - For input fields of type 'password'
-
checkBox - For input fields of type 'checkbox'
-
radio - For input fields of type 'radio'
-
hiddenField - For input fields of type 'hidden'
-
select - For dealing with HTML select boxes
Each of these allows GSP expressions for the value:
<g:textField name="myField" value="${myValue}" />GSP also contains extended helper versions of the above tags such as radioGroup (for creating groups of radio tags), localeSelect, currencySelect and timeZoneSelect (for selecting locales, currencies and time zones respectively).
Multiple Submit Buttons
The age-old problem of dealing with multiple submit buttons is also handled elegantly with Grails using the formActionSubmit tag. It is just like a regular submit, but lets you specify an alternative controller & action to submit to:
<g:formActionSubmit value="Some update label" controller="mycontroller" action="update" />8.2.2.6 Tags as Method Calls
Tags as method calls from GSPs
Tags return their results as a String-like object (a StreamCharBuffer which has all of the same methods as String) instead of writing directly to the response when called as methods. For example:
Static Resource: ${createLinkTo(dir: "images", file: "logo.jpg")}This is particularly useful for using a tag within an attribute:
<img src="${createLinkTo(dir: 'images', file: 'logo.jpg')}" />In view technologies that don’t support this feature you have to nest tags within tags, which becomes messy quickly and often has an adverse effect of WYSIWYG tools that attempt to render the mark-up as it is not well-formed:
<img src="<g:createLinkTo dir='images' file='logo.jpg'/>" />Tags as method calls from Controllers and Tag Libraries
You can also invoke tags from controllers and tag libraries. Tags within the default g: namespace can be invoked without the prefix and a StreamCharBuffer result is returned:
def imageLocation = createLinkTo(dir:"images", file:"logo.jpg").toString()Prefix the namespace to avoid naming conflicts:
def imageLocation = g.createLinkTo(dir:"images", file:"logo.jpg").toString()For tags that use a custom namespace, use that prefix for the method call. For example (from the CK Editor plugin):
def editor = ckeditor.editor(name: "text", width: "100%", height: "400")8.2.3 Views and Templates
Grails also has the concept of templates. These are useful for partitioning your views into maintainable chunks, and combined with Layouts provide a highly re-usable mechanism for structured views.
Template Basics
Grails uses the convention of placing an underscore before the name of a view to identify it as a template. For example, you might have a template that renders Books located at grails-app/views/book/_bookTemplate.gsp:
<div class="book" id="${book?.id}">
<div>Title: ${book?.title}</div>
<div>Author: ${book?.author?.name}</div>
</div>Use the render tag to render this template from one of the views in grails-app/views/book:
<g:render template="bookTemplate" model="[book: myBook]" />Notice how we pass into a model to use using the model attribute of the render tag. If you have multiple Book instances you can also render the template for each Book using the render tag with a collection attribute:
<g:render template="bookTemplate" var="book" collection="${bookList}" />Shared Templates
In the previous example we had a template that was specific to the BookController and its views at grails-app/views/book. However, you may want to share templates across your application.
In this case you can place them in the root views directory at grails-app/views or any subdirectory below that location, and then with the template attribute use an absolute location starting with / instead of a relative location. For example if you had a template called grails-app/views/shared/_mySharedTemplate.gsp, you would reference it as:
<g:render template="/shared/mySharedTemplate" />You can also use this technique to reference templates in any directory from any view or controller:
<g:render template="/book/bookTemplate" model="[book: myBook]" />The Template Namespace
Since templates are used so frequently there is template namespace, called tmpl, available that makes using templates easier. Consider for example the following usage pattern:
<g:render template="bookTemplate" model="[book:myBook]" />This can be expressed with the tmpl namespace as follows:
<tmpl:bookTemplate book="${myBook}" />Templates in Controllers and Tag Libraries
You can also render templates from controllers using the render controller method. This is useful for JavaScript heavy applications where you generate small HTML or data responses to partially update the current page instead of performing new request:
def bookData() {
def b = Book.get(params.id)
render(template:"bookTemplate", model:[book:b])
}The render controller method writes directly to the response, which is the most common behaviour. To instead obtain the result of template as a String you can use the render tag:
def bookData() {
def b = Book.get(params.id)
String content = g.render(template:"bookTemplate", model:[book:b])
render content
}Notice the usage of the g namespace which tells Grails we want to use the tag as method call instead of the render method.
8.2.4 Static Compilation
GSP pages are compiled dynamically by default. A page can instead be statically compiled, so that expressions and scriptlets in the page are type checked at compile time and dispatched without dynamic lookup at render time.
Static compilation is enabled per page with the compileStatic page directive:
<%@ page compileStatic="true" %>Declaring the Model
A page can state what it is rendered with, using the model page directive, which names and types each variable:
<%@ page model="Book book" %>
<h1>${book.title}</h1>Separate multiple declarations with semicolons, or use a multi-line value:
<%@ page model="Book book; List<Review> reviews" %>Because a declared model is what makes a page type checkable, the model directive enables static compilation on its own — compileStatic="true" is implied and does not need to be given as well.
Declaring a model also states that the model is complete, so reading any name outside it is reported rather than left to the render:
The variable [publisher] is undeclared.
A page that declares no model has stated nothing, and reads what it is rendered with exactly as a dynamically compiled page does. This is what makes static compilation adoptable for views that were never written with it in mind: what the page does say is checked, and what it does not say still works.
A value the model supplies is converted to the declared type the way a Groovy assignment converts it, so a Long satisfies an Integer declaration and a GString satisfies a String one. A conversion that would change the value fails at render instead, naming the variable and both types: a Long too large for an Integer, or a BigDecimal with a fraction for a whole-number type. So does a value that cannot be converted at all, such as a Date for an Integer.
A BigDecimal and a Double or Float are compared through the decimal the floating-point value prints as, which is the decimal Groovy converts it to, so 19.99G satisfies a Double declaration and 19.99d a BigDecimal one, while a value with more digits than the type can carry, 9007199254740993G for a Double, is rejected. Widening a finite Float to Double is accepted; narrowing a Double to Float is rejected if it loses precision. Non-finite values (NaN and infinities) cannot populate BigDecimal or BigInteger fields and fail with the same field-specific diagnostic.
Precompiling the views does not catch these failures, because the value only exists once the page renders.
Names Supplied by the Framework
The names bound into every page do not need to be declared. Most carry their real types and are checked like anything else:
<%@ page compileStatic="true" %>
<g:if test="${params.id}">${request.contextPath} for ${controllerName}/${actionName}</g:if>| Name | Type |
|---|---|
|
TypeConvertingMap, so |
|
|
|
|
|
|
|
|
|
|
Being typed, they are checked: ${request.contextPathTypo} is a compilation error. The typed attribute converters described in Simple Type Converters resolve on them for the same reason.
grailsApplication and applicationContext are the exception and are resolved dynamically. What pages read from them is answered at runtime rather than declared — grailsApplication.controllerClasses is matched against the artefact types an application happens to have, which no type can enumerate — so they are read the way a dynamically compiled page reads them.
A page may still declare a model variable using one of these names, and the declared type then applies for that page — declaring Map params gives the page a Map, with no other type imposed on it.
Names a Page Introduces
A page introduces names of its own through the var and status attributes of the tags it calls, and those do not need declaring either:
<%@ page compileStatic="true" %>
<g:set var="total" value="${books.size()}"/>
<g:each in="${books}" var="book" status="i">${i}. ${book.title}</g:each>
Total: ${total}What such a name holds is decided by the tag when the page renders, so it is read dynamically rather than reported. Reading a member from it is fine; applying an operator to it is not, because nothing established what it holds:
Total: ${total + 1}The type of [total] is not known here, and an operator cannot be applied to it.
Giving the name a type answers that, and the value is converted to it:
<g:set type="int" var="total" value="${books.size()}"/>
Total: ${total + 1}type declares a local of that type and still writes the name into the page scope, so anything reading it afterwards is unaffected. It is only meaningful alongside value: a tag given a body or a bean produces its value as it runs, so there is nothing to declare from, and combining them is an error.
Where the name is only read by the page itself, <g:def> declares it without the scope write:
<g:def type="int" var="total" value="${books.size()}"/>Requiring Every Page to Declare What It Reads
Reporting a name a page never declared can be asked for everywhere, rather than only in the pages that declare a model:
grails-app/conf/application.yml
grails:
views:
gsp:
compileStatic: true
compileStaticConfig:
strict: trueor from the build:
build.gradle
grails {
compileStatic {
gsp = true
strictGsp = true
}
}With this on, every page is held to what it declares, which is the strongest guarantee available and the most work to adopt. Without it, only the pages that declare a model are.
Enabling Static Compilation for Every Page
Rather than adding the directive to each page, static compilation can be made the default for an entire application with the grails.views.gsp.compileStatic setting:
grails-app/conf/application.yml
grails:
views:
gsp:
compileStatic: trueThe setting applies both to pages precompiled by the build and to pages compiled on the fly while the application runs in development mode, so a page behaves the same way in both.
The same thing can be asked for from the build instead, which is useful where a project prefers to keep build options together:
build.gradle
grails {
compileStatic {
gsp = true
}
}This states the same grails.views.gsp.compileStatic setting, for both the pages the build compiles ahead of time and the application it runs, so a page compiles the same way in either. Where the build states it, it takes precedence over application.yml — the same order a system property takes over configuration in a running application. Set it in one place or the other rather than both.
gsp is not included in the compileStatic { all = true } shortcut described in GrailsCompileStatic. The artefact opt-ins there fail on code that is doubtful anyway, whereas this one reports an operator applied to a value whose type nothing established, which most applications that never declared a page model have somewhere, so it is never enabled as a side effect of asking for everything.
|
An individual page always wins over either, and can opt back out:
<%@ page compileStatic="false" %>|
Enabling this for an existing application is not entirely transparent. A page that reads a model variable it has not declared still compiles — it reads it the way a dynamically compiled page does — but two things are reported that were not before, and The first accounts for most of the work: an operator applied to a value whose type nothing established, such as A model variable sharing a name with one the framework supplies — |
Tag Libraries
Tags are dispatched dynamically even in a statically compiled page, but only for namespaces the page knows about. The g, tmpl, f, asset and plugin namespaces are allowed by default:
<%@ page compileStatic="true" %>
${g.message(code: 'book.list.title')}A tag library compiled ahead of the page needs no declaration either: the tag library index states which namespaces exist, and every namespace on the compile classpath is allowed from it. What still needs declaring is a namespace filled in while the application runs — one registered at runtime, or contributed by a plugin built before descriptors existed — since nothing describes it when the page is compiled.
Such a namespace is otherwise treated as an undeclared variable, which is reported in a page held to the names it declares and resolved dynamically in one that is not. Declare the extra namespaces for a single page with the taglibs page directive:
<%@ page compileStatic="true" taglibs="myns, othertags" %>
${myns.formatPrice(value: book.price)}or for every page with the grails.views.gsp.compileStaticConfig.taglibs setting, given either as a list or as a comma separated string:
grails-app/conf/application.yml
grails:
views:
gsp:
compileStaticConfig:
taglibs:
- myns
- othertagsThe declared namespaces are added to the defaults rather than replacing them.
The other opt-ins in the grails { compileStatic { } } block described in GrailsCompileStatic apply to controllers, services and tag library classes. gsp applies to pages, and is the one opt-in there that all = true does not include.
|
8.2.5 Layouts
Creating Layouts
Grails uses the SiteMesh 3 framework as its decorator engine to support view layouts. In Grails 7.2 and later, decoration is performed by a Spring MVC ViewResolver rather than a Servlet filter, which improves performance and enables correct support for async controller return types.
Layouts are located in the grails-app/views/layouts directory. A typical layout can be seen below:
<html>
<head>
<title><g:layoutTitle default="An example decorator" /></title>
<g:layoutHead />
</head>
<body onload="${pageProperty(name:'body.onload')}">
<div class="menu"><!--my common menu goes here--></div>
<div class="body">
<g:layoutBody />
</div>
</body>
</html>The key elements are the layoutHead, layoutTitle and layoutBody tag invocations:
-
layoutTitle- outputs the target page’s title -
layoutHead- outputs the target page’s head tag contents -
layoutBody- outputs the target page’s body tag contents
The previous example also demonstrates the pageProperty tag which can be used to inspect and return aspects of the target page.
Triggering Layouts
There are a few ways to trigger a layout. The simplest is to add a meta tag to the view:
<html>
<head>
<title>An Example Page</title>
<meta name="layout" content="main" />
</head>
<body>This is my content!</body>
</html>In this case a layout called grails-app/views/layouts/main.gsp will be used to lay out the page. If we were to use the layout from the previous section the output would resemble this:
<html>
<head>
<title>An Example Page</title>
</head>
<body onload="">
<div class="menu"><!--my common menu goes here--></div>
<div class="body">
This is my content!
</div>
</body>
</html>Specifying A Layout In A Controller
Another way to specify a layout is to specify the name of the layout by assigning a value to the "layout" property in a controller. For example, if you have a controller such as:
class BookController {
static layout = 'customer'
def list() { /*...*/ }
}You can create a layout called grails-app/views/layouts/customer.gsp which will be applied to all views that the BookController delegates to. The value of the layout property may contain a directory structure relative to the grails-app/views/layouts/ directory. For example:
class BookController {
static layout = 'custom/customer'
def list() { /*...*/ }
}Views rendered from that controller would be decorated with the grails-app/views/layouts/custom/customer.gsp template.
Layout by Convention
Another way to associate layouts is to use "layout by convention". For example, if you have this controller:
class BookController {
def list() { /*...*/ }
}You can create a layout called grails-app/views/layouts/book.gsp, which will be applied to all views that the BookController delegates to.
Alternatively, you can create a layout called grails-app/views/layouts/book/list.gsp which will only be applied to the list action within the BookController.
If you have both the above-mentioned layouts in place the layout specific to the action will take precedence when the list action is executed.
If a layout is not located using any of those conventions, the convention of last resort is to look for the application default layout which
is grails-app/views/layouts/application.gsp. The name of the application default layout may be changed by defining the property grails.sitemesh.default.layout
in the application configuration as follows:
grails-app/conf/application.yml
grails:
sitemesh:
default:
layout: myLayoutNameWith that property in place, the application default layout will be grails-app/views/layouts/myLayoutName.gsp.
In Grails 7.2+ the canonical property for the default layout is grails.sitemesh.default.layout. The SiteMesh 3 integration falls back to the older grails.views.layout.default key, and then to SiteMesh’s own sitemesh.decorator.default — the property a plain Spring Boot application rendering views with GSP configures — so the canonical key wins wherever more than one is set.
|
Inline Layouts
Grails also supports inline layouts with the applyLayout tag. This can be used to apply a layout to a template, URL or arbitrary section of content. This lets you even further modularize your view structure by "decorating" your template includes.
Some examples of usage can be seen below:
<g:applyLayout name="myLayout" template="bookTemplate" collection="${books}" />
<g:applyLayout name="myLayout" url="https://www.google.com" />
<g:applyLayout name="myLayout">
The content to apply a layout to
</g:applyLayout>Server-Side Includes
While the applyLayout tag is useful for applying layouts to external content, if you simply want to include external content in the current page you use the include tag:
<g:include controller="book" action="list" />You can even combine the include tag and the applyLayout tag for added flexibility:
<g:applyLayout name="myLayout">
<g:include controller="book" action="list" />
</g:applyLayout>Finally, you can also call the include tag from a controller or tag library as a method:
def content = include(controller:"book", action:"list")The resulting content will be provided via the return value of the include tag.
SiteMesh 2 Attribution (grails-layout)
The legacy grails-layout plugin remains available for applications that have not yet migrated to the SiteMesh 3 integration. When grails-layout is on the classpath, decoration is provided by SiteMesh 2 and the following attribution applies:
|
This product includes software developed by the OpenSymphony Group (https://github.com/sitemesh). The SiteMesh 2 framework is licensed under the OpenSymphony Software License, Version 1.1. |
This acknowledgment is required by the OpenSymphony Software License when redistributing SiteMesh 2 and applies only to applications that include the grails-layout plugin. Applications using only the SiteMesh 3 integration are not subject to this requirement.
8.2.5.1 Content Blocks
Although it is useful to decorate an entire page sometimes you may find the need to decorate independent sections of your site. To do this you can use content blocks. To get started, partition the page to be decorated using the <content> tag:
<content tag="navbar">
... draw the navbar here...
</content>
<content tag="header">
... draw the header here...
</content>
<content tag="footer">
... draw the footer here...
</content>
<content tag="body">
... draw the body here...
</content>Then within the layout you can reference these components and apply individual layouts to each:
<html>
<body>
<div id="header">
<g:applyLayout name="headerLayout">
<g:pageProperty name="page.header" />
</g:applyLayout>
</div>
<div id="nav">
<g:applyLayout name="navLayout">
<g:pageProperty name="page.navbar" />
</g:applyLayout>
</div>
<div id="body">
<g:applyLayout name="bodyLayout">
<g:pageProperty name="page.body" />
</g:applyLayout>
</div>
<div id="footer">
<g:applyLayout name="footerLayout">
<g:pageProperty name="page.footer" />
</g:applyLayout>
</div>
</body>
</html>8.2.6 Static Resources
Since version 3, Grails integrates with the Asset Pipeline plugin to provide sophisticated static asset management. This plugin is installed by default in new Grails applications.
The basic way to include a link to a static asset in your application is to use the resource tag. This simple approach creates a URI pointing to the file.
However, modern applications with dependencies on multiple JavaScript and CSS libraries and frameworks (as well as dependencies on multiple Grails plugins) require something more powerful.
The issues that the Asset-Pipeline plugin tackles are:
-
Reduced Dependence - The plugin has compression, minification, and cache-digests built in.
-
Easy Debugging - Makes for easy debugging by keeping files separate in development mode.
-
Asset Bundling using require directives.
-
Web application performance tuning is difficult.
-
The need for a standard way to expose static assets in plugins and applications.
-
The need for extensible processing to make languages like LESS or Coffee first class citizens.
The asset-pipeline allows you to define your javascript or css requirements right at the top of the file, and they get compiled on War creation.
Take a look at the documentation for the asset-pipeline to get started.
If you do not want to use the Asset-Pipeline plugin, you can serve the static assets from directories src/main/resources/public or src/main/webapp, but the latter one only gets included in WAR packaging but not in JAR packaging.
For example, if you had a file stored at /src/main/resources/public/images/example.jpg and your Grails application was running on port 8080, then you could access the file by navigating to http://localhost:8080/static/images/example.jpg.

Cache Configuration for Static Resources
By default, files under src/main/resources/public or src/main/webapp are served with an HTTP response header of Cache-Control: no-store.
To have them be cached by the browser, you can set the configuration setting grails.resources.cachePeriod: number in application.yml so that they are served with a response header of Cache-Control: max-age=number indicating to the browser how many seconds the file should be considered fresh.
8.2.7 Making Changes to a Deployed Application
One of the main issues with deploying a Grails application (or typically any servlet-based application) is that any change to the views requires that you redeploy your whole application. If all you want to do is fix a typo on a page, or change an image link, it can seem like a lot of unnecessary work. For such simple requirements, Grails does have a solution: the grails.gsp.view.dir configuration setting.
How does this work? The first step is to decide where the GSP files should go. Let’s say we want to keep them unpacked in a /var/www/grails/my-app directory. We add these two properties to the application configuration:
grails-app/conf/application.yml
grails.gsp.enable.reload: true
grails.gsp.view.dir: /var/www/grails/my-app/The first line tells Grails that modified GSP files should be reloaded at runtime. If you don’t have this setting, you can make as many changes as you like, but they won’t be reflected in the running application until you restart. The second line tells Grails where to load the views and layouts from.
The trailing slash on the grails.gsp.view.dir value is important! Without it, Grails will look for views in the parent directory.
|
Setting grails.gsp.view.dir is optional. If it’s not specified, you can update files directly to the application server’s deployed war directory. Depending on the application server, these files might get overwritten when the server is restarted. Most application servers support "exploded war deployment" which is recommended in this case.
With those settings in place, all you need to do is copy the views from your web application to the external directory. On a Unix-like system, this would look something like this:
mkdir -p /var/www/grails/my-app/grails-app/views cp -R grails-app/views/* /var/www/grails/my-app/grails-app/views
The key point here is that you must retain the view directory structure, including the grails-app/views bit. So you end up with the path /var/www/grails/my-app/grails-app/views/… .
One thing to bear in mind with this technique is that every time you modify a GSP, it uses up permgen space. So at some point you will eventually hit "out of permgen space" errors unless you restart the server. So this technique is not recommended for frequent or large changes to the views.
There are also some system properties to control GSP reloading:
| Name | Description | Default |
|---|---|---|
grails.gsp.enable.reload |
system property for enabling the GSP reload mode (alternative to adding it in the file-based application configuration |
|
grails.gsp.reload.interval |
interval between checks of the gsp source file, unit is milliseconds |
5000 |
GSP reloading is supported for precompiled GSPs since Grails 1.3.5.
A GSP records a checksum of the page it was compiled from, and is reloaded when the source no longer matches that checksum. Comparing content rather than modification times means a page that was copied or checked out afresh — and so carries a new modification time but the same content — is not needlessly recompiled, and an edit is detected however close together two writes fall. Precompiled and runtime-compiled pages are compared the same way.
8.2.8 GSP in a Spring Boot Application
GSP can render the views of a Spring Boot application that is not a Grails application. Such an application routes
and binds with Spring MVC and has no grails-app directory, no plugins and no UrlMappings; it gets GSP as a view
technology and nothing else of the Grails runtime.
Add the dependency and the Gradle plugin that compiles the pages:
build.gradle
plugins {
id 'org.springframework.boot'
id 'org.apache.grails.gradle.grails-gsp' version '8.0.0' (1)
}
dependencies {
implementation platform('org.apache.grails:grails-bom:8.0.0')
implementation 'org.apache.grails.views:grails-gsp-spring-boot' (2)
}| 1 | compiles the templates at build time. It provides no dependency management. |
| 2 | auto-configures the template engine, the view resolver, the tag libraries and SiteMesh. |
Templates live under src/main/resources/templates by default, and a view name returned by a controller resolves
to a template of that name — return "form" renders templates/form.gsp. Use spring.gsp.templateRoots to put
them somewhere else.
Pages Compiled at Build Time
The compileGroovyPages task compiles every template into a class and writes a registry naming them, which the
application reads from the class path at startup. Tell the task where the templates are and what path to register
them under:
build.gradle
compileGroovyPages {
source = project.file("${project.projectDir}/src/main/resources/templates")
serverpath = '/' (1)
}| 1 | the path a view is registered under. It has to match how the application asks for one: a Spring Boot
application asks for /form.gsp, so the registered path must have no prefix of its own. |
The compiled pages are added to the test runtime class path as well, so a test renders the same pages the
application ships. A Grails application gets none of this — it renders the views under grails-app/views.
A template root on the file system — spring.gsp.templateRoots=file:./src/main/resources/templates — means the
templates themselves are there to be rendered, so the compiled pages are left unused and an edit to a template
takes effect without a restart. Where every root is on the class path, as it is once the application is packaged,
the compiled pages answer.
Using a Tag Library
The tag libraries GSP contributes are available to every page. A tag library of your own is a class annotated
@grails.gsp.TagLib; declare it as a bean and its tags become usable in a page:
GreetingTagLib.groovy
@TagLib
class GreetingTagLib {
static String namespace = 'greet'
def hello(Map attrs) {
out << "Hello, ${attrs.name}"
}
}@Bean
public GreetingTagLib greetingTagLib() {
return new GreetingTagLib();
}A page then calls it as <greet:hello name="World"/>.
Both kinds are found: a class annotated @grails.gsp.TagLib, and one annotated @Artefact("TagLib") as a plugin’s
tag library is. A tag library written for a plugin may expect collaborators the plugin would have contributed, and
an application without the plugin has to declare those as beans too.
The asset pipeline does that for its own tags. Add its Spring Boot module, which serves what the pipeline compiled,
and asset-pipeline-gsp, which makes the <asset:…> tag libraries beans of the context:
build.gradle
dependencies {
implementation 'cloud.wondrify:asset-pipeline-spring-boot'
implementation 'cloud.wondrify:asset-pipeline-gsp'
}A page or layout then names each asset, and the tag writes the URL of the file the pipeline compiled for it:
<asset:stylesheet src="application.css"/>
<asset:javascript src="application.js"/>The asset pipeline builds those URLs with a Grails link generator, so keep grails-web-url-mappings on the class
path when excluding the parts of the Grails web tier an application does not use.
Generating Links
A library that builds URLs with a Grails link generator works here, with one limitation: a link to a controller and
action is generated from URL mappings, and an application routing with Spring MVC has none. A link to a resource or
to a path is unaffected, which is what the asset pipeline’s tags use. Declare a grailsUrlMappingsHolder bean of
your own if you want a link to a controller to resolve.
Configuration
| Property | Default | Description |
|---|---|---|
|
|
Where templates are loaded from. A |
|
|
Whether a changed template is picked up without a restart. |
|
|
Whether a view with no template of its name falls back to a JSP of that name. Only a JSP that exists in the
servlet context answers, so a name nothing renders - |
|
|
Whether the GSP view resolver becomes the application’s |
|
|
The layout a page is decorated with when it names none. |
An application rendering precompiled views with SiteMesh layouts, linking the stylesheets and scripts the asset
pipeline compiled through its <asset:…> tags, and rendering a JSP alongside GSP is in
grails-test-examples/gsp-spring-boot in the Grails source tree.
|
8.2.9 Tag Libraries
Like Java Server Pages (JSP), GSP supports the concept of custom tag libraries. Unlike JSP, Grails' tag library mechanism is simple, elegant and completely reloadable at runtime.
Quite simply, to create a tag library create a Groovy class that ends with the convention TagLib and place it within the grails-app/taglib directory:
class SimpleTagLib {
}Now create tags using methods. Methods with the conventional Map attrs, Closure body, and Map attrs, Closure body signatures are discovered as tags automatically:
class SimpleTagLib {
def simple(Map attrs) {
out << attrs.name
}
}Closure field-style tags are still supported for backward compatibility, but method-based tags are the recommended syntax.
The attrs parameter is a Map of the tag attributes, while the body parameter is the tag body closure:
class SimpleTagLib {
def emoticon(Map attrs, Closure body) {
out << body() << (attrs.happy == 'true' ? " :-)" : " :-(")
}
}For method-based tags, named attributes can also bind directly to method signature arguments when the method is explicitly marked with @Tag:
import grails.gsp.Tag
class SimpleTagLib {
@Tag
def greeting(String name) {
out << "Hello, ${name}!"
}
}Used as:
<g:greeting name="Graeme" />For tags with strict validation/error handling, keep a Map attrs handler and add typed overloads that delegate to it:
import grails.gsp.Tag
def field(Map attrs) {
// existing validation + rendering path
}
@Tag
def field(String type, Map attrs) {
attrs.type = type
field(attrs)
}Without @Tag, Grails discovers method tags only for the conventional tag signatures def tag(Map attrs), def tag(Closure body), and def tag(Map attrs, Closure body). Zero-argument method tags and typed-parameter method tags must use @Tag. This prevents ordinary helper methods from being exposed as tags accidentally.
If a conventional public method should not be exposed as a tag, annotate it with @NotATag:
import grails.gsp.NotATag
class SimpleTagLib {
@NotATag
def helper(Map attrs) {
// not a tag
}
}Grails applications generated with the Grails Gradle plugins preserve Java and Groovy method parameter names by default. If you compile tag libraries outside the Grails Gradle plugins, enable Java -parameters and Groovy groovyOptions.parameters = true so @Tag methods can bind attributes by parameter name.
As demonstrated above there is an implicit out variable that refers to the output Writer which you can use to append content to the response. Then you can reference the tag inside your GSP; no imports are necessary:
<g:emoticon happy="true">Hi John</g:emoticon>
To help IDEs autocomplete tag attributes, add Javadoc comments with @attr descriptions to your tag methods. Since taglibs use Groovy code it can be difficult to reliably detect all usable attributes.
|
For example:
class SimpleTagLib {
/**
* Renders the body with an emoticon.
*
* @attr happy whether to show a happy emoticon ('true') or
* a sad emoticon ('false')
*/
def emoticon(Map attrs, Closure body) {
out << body() << (attrs.happy == 'true' ? " :-)" : " :-(")
}
}and any mandatory attributes should include the REQUIRED keyword, e.g.
class SimpleTagLib {
/**
* Creates a new password field.
*
* @attr name REQUIRED the field name
* @attr value the field value
*/
def passwordField(Map attrs) {
attrs.type = "password"
attrs.tagName = "passwordField"
fieldImpl(out, attrs)
}
}8.2.9.1 Variables and Scopes
Within the scope of a tag library there are a number of pre-defined variables including:
-
actionName- The currently executing action name -
controllerName- The currently executing controller name -
flash- The flash object -
grailsApplication- The GrailsApplication instance -
out- The response writer for writing to the output stream -
pageScope- A reference to the pageScope object used for GSP rendering (i.e. the binding) -
params- The params object for retrieving request parameters -
pluginContextPath- The context path to the plugin that contains the tag library -
request- The HttpServletRequest instance -
response- The HttpServletResponse instance -
servletContext- The javax.servlet.ServletContext instance -
session- The HttpSession instance
8.2.9.2 Simple Tags
As demonstrated in the previous example it is easy to write simple tags that have no body and just output content. Another example is a dateFormat style tag:
def dateFormat(Map attrs) {
out << new java.text.SimpleDateFormat(attrs.format).format(attrs.date)
}The above uses Java’s SimpleDateFormat class to format a date and then write it to the response. The tag can then be used within a GSP as follows:
<g:dateFormat format="dd-MM-yyyy" date="${new Date()}" />With method-based tags, attributes may also bind directly to method parameters by name when the method is explicitly marked with @Tag:
import grails.gsp.Tag
@Tag
def dateFormat(String format, Date date) {
out << new java.text.SimpleDateFormat(format).format(date)
}With simple tags sometimes you need to write HTML mark-up to the response. One approach would be to embed the content directly:
def formatBook(Map attrs) {
out << "<div id=\"${attrs.book.id}\">"
out << "Title : ${attrs.book.title}"
out << "</div>"
}Although this approach may be tempting it is not very clean. A better approach would be to reuse the render tag:
def formatBook(Map attrs) {
out << render(template: "bookTemplate", model: [book: attrs.book])
}And then have a separate GSP template that does the actual rendering.
8.2.9.3 Logical Tags
You can also create logical tags where the body of the tag is only output once a set of conditions have been met. An example of this may be a set of security tags:
def isAdmin(Map attrs, Closure body) {
def user = attrs.user
if (user && checkUserPrivs(user)) {
out << body()
}
}The tag above checks if the user is an administrator and only outputs the body content if he/she has the correct set of access privileges:
<g:isAdmin user="${myUser}">
// some restricted content
</g:isAdmin>8.2.9.4 Iterative Tags
Iterative tags are easy too, since you can invoke the body multiple times:
def repeat(Map attrs, Closure body) {
attrs.times?.toInteger()?.times { num ->
out << body(num)
}
}In this example we check for a times attribute and if it exists convert it to a number, then use Groovy’s times method to iterate the specified number of times:
<g:repeat times="3">
<p>Repeat this 3 times! Current repeat = ${it}</p>
</g:repeat>Notice how in this example we use the implicit it variable to refer to the current number. This works because when we invoked the body we passed in the current value inside the iteration:
out << body(num)That value is then passed as the default variable it to the tag. However, if you have nested tags this can lead to conflicts, so you should instead name the variables that the body uses:
def repeat(Map attrs, Closure body) {
def var = attrs.var ?: "num"
attrs.times?.toInteger()?.times { num ->
out << body((var):num)
}
}Here we check if there is a var attribute and if there is use that as the name to pass into the body invocation on this line:
out << body((var):num)| Note the usage of the parenthesis around the variable name. If you omit these Groovy assumes you are using a String key and not referring to the variable itself. |
Now we can change the usage of the tag as follows:
<g:repeat times="3" var="j">
<p>Repeat this 3 times! Current repeat = ${j}</p>
</g:repeat>Notice how we use the var attribute to define the name of the variable j and then we are able to reference that variable within the body of the tag.
8.2.9.5 Tag Namespaces
By default, tags are added to the default Grails namespace and are used with the g: prefix in GSP pages. However, you can specify a different namespace by adding a static property to your TagLib class:
class SimpleTagLib {
static namespace = "my"
def example(Map attrs) {
out << attrs.name
}
}Here we have specified a namespace of my and hence the tags in this tag lib must then be referenced from GSP pages like this:
<my:example name="..." />where the prefix is the same as the value of the static namespace property. Namespaces are particularly useful for plugins.
Tags within namespaces can be invoked as methods using the namespace as a prefix to the method call:
out << my.example(name:"foo")This works from GSP, controllers or tag libraries
8.2.9.6 Compiled Tag Resolution
Tag libraries are described when they are compiled, and that description is used to resolve tag calls in pages, tag libraries and controllers compiled afterwards.
Defining tags as methods
Define a tag as a method:
class GreetingTagLib {
static namespace = 'greet'
def hello(Map attrs) {
out << "Hello ${attrs.name}"
}
def wrapped(Map attrs, Closure body) {
out << '<div>' << body() << '</div>'
}
}The attributes parameter must be a Map named attrs, and the body parameter a Closure named
body. A method taking anything else is an ordinary method of the tag library rather than a tag.
Where that convention does not suit, @Tag marks a method as a tag whatever its signature and
@NotATag excludes one that would otherwise match.
The older form, a Closure field, still works:
// Deprecated
Closure hello = { Map attrs ->
out << "Hello ${attrs.name}"
}A tag declared this way is described and called like any other — the tag is selected by name when the call runs, and a closure answers to a name as readily as a method does. The form remains deprecated because a closure carries no signature, so nothing about the call can be checked, and because a closure field is inherited where a tag method is not, which makes what a tag library declares harder to read. Compiling a tag library that declares one produces a warning naming the tag.
Calling tags
In a tag library or a controller, a call to a tag whose namespace and name are known is compiled into a direct invocation rather than being dispatched through the metaclass:
class BookController {
def index() {
String markup = g.createLink(controller: 'book') // compiled into a direct invocation
String other = greet.hello(name: 'Grails') // likewise
}
}The attributes and body are passed straight through where the call says what they are. Where it does not — attributes assembled at runtime, or a single value the tag reads under its own name — the arguments are forwarded as written and sorted out by the same rules dynamic dispatch applies:
Map attrs = buildAttributes()
g.createLink(attrs) // still compiled into an invocationThe tag is always selected by name when the call runs, through the same lookup dynamic dispatch uses. A tag library that overrides another, one registered while the application is running, and the order tag libraries are registered in all decide the outcome exactly as they did before. Nothing is bound to a particular tag library class, so a tag declared by more than one of them is compiled the same way.
A call into a namespace no compiled tag library declares is left alone, which is what allows a tag library registered while an application is running to keep working.
A controller declared by convention, under grails-app/controllers, has its tag calls compiled. One
declared by annotation outside that directory does not:
// src/main/groovy/demo/ReportController.groovy
@Artefact('Controller')
class ReportController {
def index() {
g.createLink(controller: 'book') // dispatched dynamically
}
}The ability to call tags reaches such a class from the @Artefact annotation, which is applied later
in the compilation than the rewriting runs, so the rewriting cannot see that the class calls tags. The
call behaves exactly as it did before this release; it simply does not take the faster path. Moving
the class under grails-app/controllers gets it compiled.
A name that something else in scope already answers to is not a namespace. A local variable, a
parameter or a property called g is that thing, and a call on it is left alone:
def index() {
def g = someClient
g.createLink(controller: 'book') // someClient.createLink, not the tag
}A call written without a namespace is not compiled unless the build asks for it. Whether a bare name is a tag depends on what else answers to it, and not all of that is visible when compiling: a method Groovy gives every object, a delegate an enclosing closure is handed when it runs, an overload the tag library also declares. Such a call is dispatched as it always was:
class BookController {
def index() {
String markup = createLink(controller: 'book') // dispatched dynamically
String other = g.createLink(controller: 'book') // compiled into an invocation
}
}A project whose tag names are known not to collide can compile those calls too:
build.gradle
grails {
compileStatic {
unqualifiedTagCalls = true
}
}Turning it on widens which calls are considered, not which names may be captured: a name that Groovy, a local, a field, a parameter or the calling class answers to is still left alone.
A call that names its namespace is compiled wherever it appears, including inside a closure. The
namespace itself is a name a closure’s delegate could in principle answer to, and that is not checked
— the guard above applies to the tag name, not to the namespace in front of it. No delegate in
ordinary use answers to a namespace name, so a call written as g.createLink(…) reaches the tag as
written; a DSL whose delegate did answer to g would be the exception.
Tags in pages
A page resolves a name against the model it was rendered with before it reaches a tag library, and
that model is not known when the page is compiled. A page therefore keeps resolving its tags as it
always has, unless it declares compileStatic:
<%@ page compileStatic="true" %>
${g.createLink(controller: 'book')} <%-- compiled into a direct invocation --%>Declaring compileStatic on a page reserves the namespace names for tag libraries: a model attribute
called g no longer shadows the g namespace there. Without it, an expression is dispatched exactly
as before. Set grails.views.gsp.compileStatic in configuration to apply it to every page.
Two things hold in a page either way. A call written without a namespace, as
${createLink(controller: 'book')} is, is always left to resolve against the binding. And a name the
page puts into its own binding is that variable rather than a namespace:
<g:set var="g" value="${someObject}"/>
${g.createLink(controller: 'book')} <%-- someObject.createLink, not the tag --%>A tag written as markup, as <g:createLink controller="book"/> is, already compiles into a direct
call naming the tag and needs no rewriting. It is unambiguously a tag whatever the page does, so under
strict checking it is checked in every page. An expression is checked only where it is resolved, in a
page declaring compileStatic, since elsewhere the receiver may be part of the model.
Reporting unknown tags
By default nothing is reported: a tag that no compiled tag library declares is left to resolve at
runtime, exactly as it did before. A namespace can hold tag libraries that were not compiled with a
description — a plugin built against an earlier version of Grails contributes tags to g without one,
and a tag library registered at runtime contributes more — so a tag missing from the description is
not necessarily a misspelling, and reporting one by default would mean complaining about correct code.
An application whose tag libraries are all described can ask for an error instead:
build.gradle
grails {
compileStatic {
strictTags = true
dynamicTagNamespaces = ['legacy'] (1)
}
}| 1 | namespaces genuinely filled in while the application runs |
Strict checking applies where the source says a call is a tag: one naming its namespace, as
g.message(code: 'x') does, and one written as markup, as <g:message/> is. A call written without a
namespace is never checked — such a name may equally be a method contributed while the application
runs, and in a page it may come from the model. A namespaced expression in a page is checked only when
that page declares compileStatic, for the same reason its calls are only rewritten there.
dynamicTagNamespaces names the namespaces whose tags are decided while the application runs rather
than described when it is compiled. It turns compile-time resolution off for them completely: a call
into such a namespace is never rewritten, never reported, and is dispatched exactly as it was before
this release, whether or not a compiled tag library also declares the namespace. Declare a namespace
here when a tag library is registered at runtime, or when the tags in it are contributed by
metaprogramming.
Both settings are read from the build, not from a system property, so changing either recompiles what depends on it.
What strict checking covers
Strict checking applies to the namespaces this project’s own tag libraries declare. Those are the only namespaces whose contents are knowable when compiling: a tag missing from one of them is a misspelling, because nothing else contributes to it.
Every other namespace is left alone, g included. A plugin built against an earlier version of Grails
contributes tags to g with no description, as does one that declares its tag libraries by convention
without applying the GSP Gradle plugin, and a tag library registered while the application runs
contributes more. A tag missing from such a namespace is as likely to be one of those as a mistake, so
reporting it would fail a build over correct code.
So strictTags catches a misspelling of your own tags, in your own namespaces, and never complains
about a plugin’s. Nothing has to be listed in dynamicTagNamespaces to get that — it remains for the
narrower case of a namespace this project declares but fills in while the application runs.
An index generated from source before compilation also records what it could not describe, and no tag in a namespace it failed to read completely is reported either.
Where the description lives
Each tag library contributes one file under META-INF/grails/taglibs in the artifact it is packaged
in. Descriptions from every jar on the classpath are combined, so a plugin’s tag libraries are
resolvable by an application that depends on it without any extra build configuration.
Under the Grails Gradle plugin the description is written twice, because the two things that read it need different guarantees.
generateTagLibraryIndex runs before compilation and reads the sources under grails-app/taglib, so
tags an application declares are resolvable in the same compilation that defines them. Being read from
source it cannot describe everything: a tag library referring to a type written in Java, or generated
by the build, is left out. What it missed is recorded, and nothing in a namespace it could not fully
describe is ever reported as an unknown tag, so strict checking cannot fail a build over a tag that
does exist. This index is used only to compile this project, and is never packaged.
packageTagLibraryIndex runs after compilation, with the project’s own classes on its classpath,
where every tag library resolves whatever language its collaborators were written in. That index is
the authoritative one: pages are compiled against it, it travels with the artifact, and a project
depending on this one reads it. Every run replaces the directory, so a tag library that is renamed or
deleted disappears from it.
A project keeping tag libraries elsewhere adds those directories once, by task type, so that both indexes describe the same set — configuring them separately would let the index this project compiles against differ from the one it publishes:
build.gradle
import org.grails.gradle.plugin.views.gsp.GenerateTagLibraryIndexTask
tasks.withType(GenerateTagLibraryIndexTask).configureEach {
sourceDirectories.from(file('src/main/groovy'))
}Before compilation, a tag library referring to something the same project declares — a service it injects, a base class it extends, a trait it carries — is described too, by reading that Groovy source alongside it, so an inherited namespace, a tag a trait contributes and an attributes parameter of a project-declared type are all read rather than guessed. A tag library naming a type that does not exist is left out, as it would be by the compiler.
Where no build writes the index — a plain Groovy compilation, or one that does not apply the Grails
Gradle plugin — a tag library annotated @TagLib describes itself as it is compiled instead, which
makes it resolvable to anything compiled after it.
That fallback reaches annotated tag libraries only. A tag library declared by convention, as an
unannotated class under grails-app/taglib, is recognised as an artefact too late in the compilation
for it to describe itself, so without the Gradle plugin it contributes no description. Nothing breaks:
a tag with no description is dispatched dynamically, exactly as it was before any of this existed. But
a plugin that declares its tag libraries by convention and does not apply the Grails GSP Gradle plugin
publishes no descriptors, and its tags are resolved at runtime in applications that depend on it.
Annotate those tag libraries with @TagLib, or apply the plugin, to have them described.
A descriptor written this way is also never removed. Renaming or deleting a tag library leaves its description behind until the build directory is cleaned, and a description naming a class that no longer exists puts tags into the index that nothing will answer to. Builds using the Gradle plugin do not have this problem: the task rewrites the index from the sources each time it runs.
8.2.9.7 Using JSP Tag Libraries
In addition to the simplified tag library mechanism provided by GSP, you can also use JSP tags from GSP.
In order to use JSP support you must ensure you have the grails-web-jsp dependency on your classpath by adding it to your build.gradle file:
build.gradle
dependencies {
//...
runtimeOnly "org.apache.grails.views:grails-web-jsp"
}Then you will need to declare the JSP taglib to use with the taglib directive at the top of your GSP file:
<%@ taglib prefix="fmt" uri="http://java.sun.com/jsp/jstl/fmt" %>Besides this you have to configure Grails to scan for the JSP tld files.
This is configured with the grails.gsp.tldScanPattern setting. It accepts a comma separated String value. Spring’s PathMatchingResourcePatternResolver is used to resolve the patterns.
For example, you could scan for all available tld files by adding this to application.yml:
grails-app/conf/application.yml
grails:
gsp:
tldScanPattern: 'classpath*:/META-INF/*.tld,/WEB-INF/tld/*.tld'Descriptors that declare a DOCTYPE, such as the JSP 1.2 descriptors in jakarta.servlet.jsp.jstl, are read without retrieving the DTD they reference.
JSTL standard library is no longer added as a dependency by default. In case you are using JSTL, you should also add these dependencies to build.gradle:
build.gradle
dependencies {
//...
runtimeOnly 'javax.servlet:jstl:1.1.2'
runtimeOnly 'taglibs:standard:1.1.2'
}Then you can use JSP tags like any other tag:
<fmt:formatNumber value="${10}" pattern=".00"/>With the added bonus that you can invoke JSP tags like methods:
${fmt.formatNumber(value:10, pattern:".00")}8.2.9.8 Tag return value
A taglib can be used in a GSP as an ordinary tag, or it might be used as a function in other taglibs or GSP expressions.
Internally Grails intercepts calls to tag handlers (method-based or closure-based).
The "out" that is available in a taglib is mapped to a java.io.Writer implementation that writes to a buffer
that "captures" the output of the taglib call. This buffer is the return value of a tag library call when it’s
used as a function.
If the tag is listed in the library’s static returnObjectForTags array, then its return value will be written to
the output when it’s used as a normal tag. The return value of the tag method/closure will be returned as-is
if it’s used as a function in GSP expressions or other taglibs.
If the tag is not included in the returnObjectForTags array, then its return value will be discarded. Using "out" to write output in returnObjectForTags is not supported.
Example:
class ObjectReturningTagLib {
static namespace = "cms"
static returnObjectForTags = ['content']
def content(Map attrs) {
CmsContent.findByCode(attrs.code)?.content
}
}Given this example cms.content(code: 'something') call in another taglib or GSP expression would return the value CmsContent.content directly to the caller without
wrapping the return value in a buffer. It might be worth doing so also because of performance optimization reasons. There is no need to wrap the
tag return value in an output buffer in such cases.
8.3 Fields Plugin
The Fields plugin allows you to customize the rendering of input fields for properties of domain objects, command beans and POGOs based on their type, name, etc. The plugin aims to:
-
Use good defaults for fields.
-
Make it very easy to override the field rendering for particular properties or property types without having to replace entire form templates.
-
Not require you to copy and paste markup for containers, labels and error messages just because you need a different input type.
-
Support inputs for property paths of arbitrary depth and with indexing.
-
Enable other plugins to provide field rendering for special property types that gets picked up automatically (e.g. the Joda Time plugin can provide templates for the various date/time types).
-
Support embedded properties of GORM domain classes.
8.3.1 Installation
The plugin is available on Maven Central and should be a dependency like this:
dependencies {
implementation 'org.apache.grails:grails-fields'
}8.3.2 Usage
The plugin provides a set of tags you can use to render the fields in a form.
In the simplest case you can use f:all to render a field for every property of a bean (the domain object or command the form will bind to):
<g:form…>
<f:all bean="person"/>
</g:form>To render individual fields you use the f:field tag:
<g:form…>
<f:field bean="person" property="name"/>
<f:field bean="person" property="address"/>
<f:field bean="person" property="dateOfBirth"/>
</g:form>The f:field tag will automatically handle embedded domain properties recursively:
<f:field bean="person" property="address"/>If there is no bean object backing a form but you still want to render the surrounding field markup you can give f:field a body:
<f:field property="password">
<g:password name="password"/>
</f:field>It should be an unusual case but to render just the widget without its surrounding container you can use the f:widget tag:
<f:widget bean="person" property="name"/>To make it more convenient when rendering lots of properties of the same bean you can use the f:with tag to avoid having to specify bean on any tags nested inside:
<g:form…>
<f:with bean="person">
<f:field property="name"/>
<f:field property="address"/>
<f:field property="dateOfBirth"/>
</f:with>
</g:form>If you need to render a property for display purposes you can use f:display. It will internally use g:fieldValue, g:formatBoolean or g:formatDate to format the value.
<f:display bean="person" property="name"/>If you need to render the value in a different way you can give f:display a body instead.
<f:display bean="person" property="dateOfBirth">
<g:formatDate format="dd MMM yyyy" date="${value}"/>
</f:display>By default f:display simply renders the property value but if you supply a \_display.gsp template you can render the value in some structured markup, e.g. a table cell or list item. See the Customizing Field Rendering section for how to override templates. For example to render values in a definition list you could use a template like this:
<dt>${label}</dt>
<dd>${value}</dd>Extra attributes (Since version 2.1.4)
You can pass any number of extra attributes to the f:with and f:all tags that will be propagated to the inner fields and displays.
See their individual tags sections for more information.
Breaking changes
Templates
The names of the templates were changed for more adequate ones:
-
_fieldto_wrapper -
_inputto_widget -
_displayto_displayWrapper -
_displayWidgetwas added
To use the old names (for backwards compatibility), configure the following in Config.groovy
grails.plugin.fields.wrapper = "field"
grails.plugin.fields.displayWrapper = "display"
grails.plugin.fields.widget = "input"Widget attributes
To pass additional attributes to widgets, prefix them with 'widget-'.
Example:
<f:field property="birthDate" widget-format="dd/MM/yyyy"/>To use the old prefix (for backwards compatibility), configure the following in Config.groovy:
grails.plugin.fields.widgetPrefix = "input-"Changes in tags
-
The
f:inputtag was deprecated because the name was confusing. Use the newf:widgettag instead. -
The
f:displayWidgettag was added. It outputs the widget for display purposes, without the wrapper (similar to thewidgettag).
Localized numbers
All numbers are now rendered localized. This means that when using Locale.ENGLISH the number 1000.50 is represented
as 1,000.50 but with Locale.GERMAN is represented as 1.000,50. To use the old behavior (for backwards compatibility)
without localizing the numbers, configure the following in Config.groovy:
grails.plugin.fields.localizeNumbers = false8.3.3 Customizing Field Rendering
The plugin resolves the GSP template used for each property according to conventions. You can override the rendering based
on the class and property name or the property type. The f:field tag looks for a template called _wrapper.gsp, the f:widget
tag looks for a template called _widget.gsp, the f:display tag looks for a template called _displayWrapper.gsp.
| Breaking changes in version 1.5 |
In version 1.5 a new template was introduced _displayWidget.gsp. This is the corollary of _widget.gsp for fields that
are read-only, i.e. it is responsible for rendering just the markup for the field itself. Furthermore, the default names
of all the templates were changed in this version, in the interest of clarity and consistency. The changes to the template
names are summarized below:
| Old Template Name (before v.1.5) | New Template Name (v.1.5 onwards) |
|---|---|
|
|
|
|
N/A |
|
Users upgrading to 1.5 from a previous version should either rename their templates (recommended) or add the following
to grails-app/conf/application.yml to change the default templates names to the old names
grails:
plugin:
fields:
wrapper: field
displayWrapper: display
widget: input
displayWidget: displayWidgetLocating Field Templates by Convention
The template for a field is chosen by a convention using the names of the controller, action, bean class, bean property, theme, etc. All the tags will look for templates in the following directories in decreasing order of preference:
-
grails-app/views/controllerNamespace/controllerName/actionName/propertyName/_themes/themeName/ -
grails-app/views/controllerNamespace/controllerName/actionName/_themes/themeName/propertyType/ -
grails-app/views/controllerNamespace/controllerName/actionName/_themes/themeName/ -
grails-app/views/controllerNamespace/controllerName/propertyName/_themes/themeName/ -
grails-app/views/controllerNamespace/controllerName/_themes/themeName/propertyType/ -
grails-app/views/controllerNamespace/controllerName/_themes/themeName/ -
grails-app/views/controllerName/actionName/propertyName/_themes/themeName/ -
grails-app/views/controllerName/actionName/_themes/themeName/propertyType/ -
grails-app/views/controllerName/actionName/_themes/themeName/ -
grails-app/views/controllerName/propertyName/_themes/themeName/ -
grails-app/views/controllerName/_themes/themeName/propertyType/ -
grails-app/views/controllerName/_themes/themeName/ -
grails-app/views/_fields/_themes/themeName/class/propertyName/ -
grails-app/views/_fields/_themes/themeName/superclass/propertyName/ -
grails-app/views/_fields/_themes/themeName/associationType/ -
grails-app/views/_fields/_themes/themeName/propertyType/ -
grails-app/views/_fields/_themes/themeName/propertySuperclass/ -
grails-app/views/_fields/_themes/themeName/default/ -
grails-app/views/controllerNamespace/controllerName/actionName/propertyName/ -
grails-app/views/controllerNamespace/controllerName/actionName/propertyType/ -
grails-app/views/controllerNamespace/controllerName/actionName/ -
grails-app/views/controllerNamespace/controllerName/propertyName/ -
grails-app/views/controllerNamespace/controllerName/propertyType/ -
grails-app/views/controllerNamespace/controllerName/ -
grails-app/views/controllerName/actionName/propertyName/ -
grails-app/views/controllerName/actionName/propertyType/ -
grails-app/views/controllerName/actionName/ -
grails-app/views/controllerName/propertyName/ -
grails-app/views/controllerName/propertyType/ -
grails-app/views/controllerName/ -
grails-app/views/_fields/class/propertyName/ -
grails-app/views/_fields/superclass/propertyName/ -
grails-app/views/_fields/associationType/ -
grails-app/views/_fields/propertyType/ -
grails-app/views/_fields/propertySuperclass/ -
grails-app/views/_fields/default/
The variables referenced in these paths are:
| Name | Description |
|---|---|
controllerName |
The name of the current controller (if any). |
actionName |
The name of the current action (if any). |
themeName |
Theme name specified as value of theme attribute (Optional). |
class |
The bean class. For simple properties this is the class of the object passed to the |
superclass |
Any superclass or interface of |
propertyName |
The property name at the end of the chain passed to the |
propertyType |
The type of the property at the end of the chain passed to the |
propertySuperclass |
Any superclass or interface of |
associationType |
One of |
All class names are camel-cased simple forms. For example java.lang.String becomes string, and com.project.HomeAddress becomes homeAddress.
Templates are resolved in this order so that you can override in the more specific circumstance and fall back to successively more general defaults. For example, you can define a field template for all java.lang.String properties but override a specific property of a particular class to use more specialized rendering.
Templates in plugins are resolved as well. This means plugins such as Joda Time can provide default rendering for special property types. A template in your application will take precedence over a template in a plugin at the same 'level'. For example if a plugin provides a grails-app/views/_fields/string/_widget.gsp the same template in your application will override it but if the plugin provides grails-app/views/_fields/person/name/_widget.gsp it would be used in preference to the more general template in your application.
For most properties the out-of-the-box defaults should provide a good starting point.
Locating Templates Conventionally Example
Imagine an object of class Employee that extends the class Person and has a String name property.
You can override the template f:field uses with any of these:
-
grails-app/views/controllerName/actionName/name/_themes/themeName/_wrapper.gsp -
grails-app/views/controllerName/actionName/name/_wrapper.gsp -
grails-app/views/controllerName/actionName/string/_wrapper.gsp -
grails-app/views/controllerName/actionName/_wrapper.gsp -
grails-app/views/controllerName/name/_wrapper.gsp -
grails-app/views/controllerName/string/_wrapper.gsp -
grails-app/views/controllerName/_wrapper.gsp -
grails-app/views/_fields/employee/name/_wrapper.gsp -
grails-app/views/_fields/person/name/_wrapper.gsp -
grails-app/views/_fields/string/_wrapper.gsp -
grails-app/views/_fields/default/_wrapper.gsp
override the template f:widget uses with any of these:
-
grails-app/views/controllerName/actionName/name/_themes/themeName/_widget.gsp -
grails-app/views/controllerName/actionName/name/_widget.gsp -
grails-app/views/controllerName/actionName/string/_widget.gsp -
grails-app/views/controllerName/actionName/_widget.gsp -
grails-app/views/controllerName/name/_widget.gsp -
grails-app/views/controllerName/string/_widget.gsp -
grails-app/views/controllerName/_widget.gsp -
grails-app/views/_fields/employee/name/_widget.gsp -
grails-app/views/_fields/person/name/_widget.gsp -
grails-app/views/_fields/string/_widget.gsp -
grails-app/views/_fields/default/_widget.gsp
And override the template f:display uses with any of these:
-
grails-app/views/controllerName/actionName/name/_themes/themeName/_displayWrapper.gsp -
grails-app/views/controllerName/actionName/name/_displayWrapper.gsp -
grails-app/views/controllerName/actionName/string/_displayWrapper.gsp -
grails-app/views/controllerName/actionName/_displayWrapper.gsp -
grails-app/views/controllerName/name/_displayWrapper.gsp -
grails-app/views/controllerName/string/_displayWrapper.gsp -
grails-app/views/controllerName/_displayWrapper.gsp -
grails-app/views/_fields/employee/name/_displayWrapper.gsp -
grails-app/views/_fields/person/name/_displayWrapper.gsp -
grails-app/views/_fields/string/_displayWrapper.gsp -
grails-app/views/_fields/default/_displayWrapper.gsp
During template development it is usually recommended to disable template caching in order to allow the plugin to recognize new/renamed/moved templates without restarting the application. See the "Performance" section of the guide for the exact settings.
See Template Seach Path
The plugin logs which locations it is checking for templates as debug log. You can enable this by defining a logger in logback.groovy
logger('grails.plugin.formfields.FormFieldsTemplateService', DEBUG,['STDOUT'])
The can disable the caching in application.yml using:
grails:
plugin:
fields:
disableLookupCache: true
Default Behaviour - Using Grails Widget Tags
If no template override is found the plugin will use the standard grails input tags (e.g. g:select, g:checkbox, g:field) for rendering input controls.
Using f:field you can pass extra arguments (e.g. optionKey, optionValue) through to these tags by prefixing them with widget-, e.g.
<f:field bean="person" property="gender" widget-optionValue="name"/>Template parameters
The f:field and f:widget tags will pass the following parameters to your templates or to the body of f:field if you use one:
| Name | Type | Description |
|---|---|---|
bean |
Object |
The |
property |
String |
The |
type |
Class |
The property type. |
label |
String |
The field label text. This is based on the |
value |
Object |
the property value. This can also be overridden or defaulted if the |
constraints |
ConstrainedProperty |
The constraints for the property if the bean is a domain or command object. |
persistentProperty |
The persistent property object if the bean is a domain object. |
|
errors |
List<String> |
The error messages for any field errors present on the property. If there are no errors this will be an empty List. |
required |
boolean |
|
invalid |
boolean |
|
prefix |
String |
A string (including the trailing period) that should be appended before the input name such as |
In addition f:field passes the following parameters:
Name |
Type |
Description |
widget |
String |
The output of |
If the bean attribute was not supplied to f:field then bean, type, value and persistentProperty will all be null.
|
Field labels
If the label attribute is not supplied to the f:field tag then the label string passed to the field template is resolved by convention. The plugin uses the following order of preference for the label:
-
An i18n message using the key 'beanClass.path.label'. For example when using
<f:field bean="authorInstance" property="book.title"/>the plugin will try the i18n keyauthor.book.title.label. If the property path contains any index it is removed so<f:field bean="authorInstance" property="books[0].title"/>would use the keyauthor.books.title.label. -
For classes using the same bean class as properties, it is possible to get a key without the class name prefixed. If the configuration value
grails.plugin.fields.i18n.addPathFromRootis set totrue(default:false). Example: a classPublisherhas twoAddresspropertiesauthorAddressandprintAddress. WithaddPathFromRoot=truethey will share the keyaddress.city.label. The same goes ifAuthorandPublisherhad aBook book, the key would bebook.title.label, and if they both had aList<Book> booksthe key would bebooks.title.label -
An i18n message using the key 'objectType.propertyName`.label’. For example when using
<f:field bean="personInstance" property="address.city"/>the plugin will try the i18n keyaddress.city.label. -
The natural property name. For example when using
<f:field bean="personInstance" property="dateOfBirth"/>the plugin will use the label"Date Of Birth".
Locating Field Templates Directly
Rather than relying on the convention described previously to locate the template(s) to be used for a particular field, it is instead possible to directly specify the directory containing the templates. This feature was introduced in version 1.5.
-
The
wrapperattribute can be used with the f:field or f:display tags to specify the directory containing the_wrapper.gspor_displayWrapper.gsptemplate to be used -
The
widgetattribute can be used with the f:field or f:display tags to specify the directory containing the_widget.gspor_displayWidget.gsptemplate to be used -
If the wrapper and widget templates both have the same value, the
templatesattribute can be used instead as a shorthand. For example:
<f:field property="startDate" templates="bootstrap3" />is equivalent to:
<f:field property="startDate" wrapper="bootstrap3" widget="bootstrap3" />if theme is specified, theme will be searched first to find the templates For example
<f:field property="startDate" templates="custom" theme="bs-horizontal"/>Will search the templates first in \_fields/_themes/bs-horizontal/custom and then \_fields/custom
If a direct location is specified, and the templates cannot be found therein, the plugin will fall back to locating templates by convention.
Locating Templates Directly Example
// renders _fields/\_themes/bs-horizontal/custom/_wrapper.gsp:
<f:field property="startDate" wrapper="custom" theme="bs-horizontal"/>
// renders _fields/bootstrap3/_wrapper.gsp:
<f:field property="startDate" wrapper="bootstrap3"/>
// renders _fields/time/_widget.gsp:
<f:field property="startDate" widget="time"/>
// renders _fields/time/_wrapper.gsp and _fields/time/_widget.gsp:
<f:field property="startDate" templates="time"/>
// renders _fields/\_themes/bs-horizontal/custom/_displayWrapper.gsp:
<f:display property="startDate" wrapper="custom" theme="bs-horizontal"/>
// renders _fields/bootstrap3/_displayWrapper.gsp:
<f:display property="startDate" wrapper="bootstrap3"/>
// renders _fields/time/_displayWidget.gsp:
<f:display property="startDate" widget="time"/>
// renders _fields/time/_displayWrapper.gsp and _fields/time/_displayWidget.gsp:
<f:display property="startDate" templates="time"/>8.3.4 Embedded Properties
Embedded properties are handled in a special way by the f:field and f:all tags. If the property attribute you pass to f:field is an embedded property then the tag recursively renders each individual property of the embedded class with a surrounding fieldset. For example if you have a Person class with a name property and an Address embedded class with street, city and country properties <f:field bean="person" property="address"> will effectively do this:
<fieldset class="embedded address">
<legend>Address</legend>
<f:field bean="person" property="address.street"/>
<f:field bean="person" property="address.city"/>
<f:field bean="person" property="address.country"/>
</fieldset>You can customize how embedded properties are surrounded by providing a layout at grails-app/views/layouts/_fields/embedded.gsp which will override the default layout provided by the plugin.
When you use the f:all tag it will automatically handle embedded properties in this way.
8.3.5 Themes
Since version 2.1.4 It is possible to create themes to provide set of templates for different css frameworks or form layouts. For example, a bootstrap-fields plugin can provide different themes (eg bs-horizontal, bs-vertical) to support horizontal and vertical form layouts. And another plugin can provide theme for purecss framework.
Themes are put under directory _fields/themes/themeName/.
All of the field tags supports theme attribute which accepts the name of the theme. When a theme name is specified, widget, wrapper, and display templates will be searched in theme directory first as described in Customizing Field Rendering.
8.3.6 Including Templates in Plugins
Plugins can include field and/or input level templates to support special UI rendering or non-standard property types. Just include the templates in the plugin’s grails-app/views directory as described in the Customizing Field Rendering section.
If you supply templates in a plugin you should consider declaring a <%@page defaultCodec="html" %> directive so that any HTML unsafe property values are escaped properly regardless of the default codec used by client apps.
|
In order to be performant, the Fields plugin caches field template lookup results by default. This makes it possible to perform the time-consuming template path resolutions only once during the runtime of the application.
When template caching is active, only the first page renderings are slow, subsequent ones are fast.
Due to the flexibility needed during template development, this feature can be disabled so it would be possible to recognize newly added field templates without restarting the application. As a result, with bigger webpages, containing a lot of fields, rendering may be fairly slow in development (depending on the number of fields on the page).
8.3.7 Performance
For template development, the following configuration attribute should be placed in the development environment section of your application’s Config.groovy:
application.groovy
grails.plugin.fields.disableLookupCache = trueor
application.yml
environments:
development:
grails:
plugin:
fields:
disableLookupCache: trueAfter the template development has finished, it is recommended to re-enable the template lookup cache in order to have a performant page rendering even during development.
8.3.8 Scaffolding
Scaffolding templates based on the Fields plugin are quite powerful as they will pick up field and input rendering templates from your application and any plugins that provide them. This means that the useful life of scaffolding templates should be much longer as you do not need to replace the entire create.gsp and/or edit.gsp template just because you want to do something different with a certain property of one particular class.
The plugin makes the renderEditor.template file used by standard Grails scaffolding redundant. This template was very limited because it could not be extended by plugins or applications (only replaced) and was unable to support embedded properties of domain classes.
The Fields plugin includes scaffolding templates you can use in your application by running:
grails install-form-fields-templatesThis will overwrite any create.gsp and edit.gsp files you have in src/templates/scaffolding.
Alternatively, it’s very easy to modify your existing scaffolding templates to use the f:all tag or multiple f:field tags.
8.4 JSON Views
JSON views are written in Groovy, end with the file extension gson and reside in the grails-app/views directory. They allow rendering of JSON responses using Groovy’s StreamingJsonBuilder by providing a DSL for producing output in the JSON format. A hello world example can be seen below:
grails-app/views/hello.gsonjson.message {
hello "world"
}The above JSON view results in the output:
{"message":{ "hello":"world"}}The json variable is an instance of StreamingJsonBuilder. See the documentation in the Groovy user guide for more information on StreamingJsonBuilder.
More example usages:
json(1,2,3) == "[1,2,3]"
json { name "Bob" } == '{"name":"Bob"}'
json([1,2,3]) { n it } == '[{"n":1},{"n":2},{"n":3}]'You can specify a model to view in one of two ways. Either with a model block:
grails-app/views/hello.gsonmodel {
String message
}
json.message {
hello message
}Or with the @Field transformation provided by Groovy:
grails-app/views/hello.gsonimport groovy.transform.Field
@Field String message
json.message {
hello message
}8.4.1 Installation
To activate JSON views, add the following dependency to the dependencies block of your build.gradle file.
If you use the Grails BOM:
implementation "org.apache.grails:grails-views-gson"otherwise, add the version explicitly:
implementation "org.apache.grails:grails-views-gson"To enable Gradle compilation of JSON views for production environment add the following to the buildscript dependencies block:
buildscript {
//...
dependencies {
//...
classpath platform("org.apache.grails:grails-gradle-bom:8.0.0")
classpath "org.apache.grails:grails-gradle-plugins"
}
}Then apply the org.apache.grails.gradle.grails-gson Gradle plugin after any Grails core gradle plugins:
...
apply plugin: "org.apache.grails.gradle.grails-web"
apply plugin: "org.apache.grails.gradle.grails-gson"This will add a compileGsonViews task to Gradle that is executed when producing a JAR or WAR file.
8.4.2 Templates
Template Basics
You can define templates starting with underscore _. For example given the following template called _person.gson:
grails-app/views/person/_person.gsonmodel {
Person person
}
json {
name person.name
age person.age
}You can render the template with the g.render method:
grails-app/views/person/show.gsonmodel {
Person person
}
json g.render(template:"person", model:[person:person])The above assumes the view is in the same directory as the template. If this is not the case you may need to use a relative URI to the template:
grails-app/views/family/show.gsonmodel {
Person person
}
json g.render(template:"/person/person", model:[person:person])Template Namespace
The previous example can be simplified using the template namespace:
grails-app/views/person/show.gsonmodel {
Person person
}
json tmpl.person(person)In this example, the name of the method call (person in this case) is used to dictate which template to render.
The argument to the template becomes the model. The name of the model variable is the same as the template name. If you wish to alter this you can pass a map instead:
grails-app/views/person/show.gsonmodel {
Person person
}
json tmpl.person(individual:person)In the above example the model variable passed to the _person.gson template is called individual.
This technique may also be used when you want to render a template using a relative path:
grails-app/views/person/show.gsonmodel {
Person person
}
json tmpl.'/person/person'(person:person)The template namespace even accepts a collection (or any Iterable object):
grails-app/views/person/show.gsonmodel {
List<Person> people = []
}
json tmpl.person(people)In this case the output is a JSON array. For example:
[{"name":"Fred",age:10},{"name":"Bob",age:12}]When rendering an Iterable, you can also specify the model name:
grails-app/views/person/show.gsonmodel {
List<Person> people = []
}
json tmpl.person("owner", people)The person template would have a field defined: Person owner
If you need additional data that will be static over each iteration of the template, you can also pass in a model:
grails-app/views/person/show.gsonmodel {
List<Person> people = []
}
json tmpl.person(people, [relationship: "Father"])The person template could have a field defined: String relationship
By passing in a collection the plugin will iterate over each element on the collection and render the template as a JSON array. If you do not want this to happen then use the variation of the method that takes a map instead:
grails-app/views/person/show.gsonmodel {
List<Person> people = []
}
json tmpl.person(people:people)More Ways to Render Templates
The g.render method is flexible, you can render templates in many forms:
model {
Family family
}
json {
name family.father.name
age family.father.age
oldestChild g.render(template:"person", model:[person: family.children.max { Person p -> p.age } ])
children g.render(template:"person", collection: family.children, var:'person')
}However, most of these use cases are more concise with the template namespace:
model {
Family family
}
json {
name family.father.name
age family.father.age
oldestChild tmpl.person( family.children.max { Person p -> p.age } ] )
children tmpl.person( family.children )
}Template Inheritance
JSON templates can inherit from a parent template. For example consider the following parent template:
grails-app/views/_parent.gsonmodel {
Object object
}
json {
hal.links(object)
version "1.0"
}A child template can inherit from the above template by using the inherits method:
grails-app/views/_person.gsoninherits template:"parent"
model {
Person person
}
json {
name person.name
}The JSON from the parent and the child template will be combined so that the output is:
{
"_links": {
"self": {
"href": "http://localhost:8080/person/1",
"hreflang": "en",
"type": "application/hal+json"
}
},
"version": "1.0",
"name": "Fred"
}The parent template’s model will be formulated from the child templates model and the super class name. For example if the model is Person person where Person extends from Object then the final model passed to the parent template will look like:
[person:person, object:person]If the Person class extended from a class called Mammal then the model passed to the parent would be:
[person:person, mammal:person]This allows you to design your templates around object inheritance.
You can customize the model passed to the parent template using the model argument:
inherits template:"parent", model:[person:person]8.4.3 Rendering Domain Classes
Basics of Domain Class Rendering
Typically your model may involve one or many domain instances. JSON views provide a render method for rendering these.
For example given the following domain class:
class Book {
String title
}And the following template:
model {
Book book
}
json g.render(book)The resulting output is:
{"id":1,"title":"The Stand"}You can customize the rendering by including or excluding properties:
json g.render(book, [includes:['title']])Or by providing a closure to provide additional JSON output:
json g.render(book) {
pages 1000
}Or combine the two approaches:
json g.render(book, [includes:['title']]) {
pages 1000
}Deep Rendering of Domain Classes
Typically the g.render(..) method will only render objects one level deep. In other words if you have a domain class such as:
class Book {
String title
Author author
}The resulting output will be something like:
{"id":1,"title":"The Stand","author":{id:1}}If you wish for the author to be included as part of the rendering, there are two requirements, first you must make sure the association is initialized.
If the render method encounters a proxy, it will not traverse into the relationship to avoid N+1 query performance problems.
The same applies to one-to-many collection associations. If the association has not been initialized the render method will not traverse through the collection!
|
So you must make sure your query uses a join:
Book.findByTitle("The Stand", [fetch:[author:"join"]])Secondly when calling the render method you should pass the deep argument:
json g.render(book, [deep:true])Alternatively, to only expand a single association you can use the expand argument:
json g.render(book, [expand:['author']])
request parameters can also be used to expand associations (eg. ?expand=author), if you do not want to allow this, then use includes or excludes to include only the properties you want.
|
Finally, if you prefer to handle the rendering yourself you can do by excluding the property:
json g.render(book, [excludes:['author']]) {
author {
name book.author.name
}
}Domain Class Rendering and Templates
An alternative to the default behaviour of the render method is to rely on templates.
In other words if you create a /author/_author.gson template and then use the g.render method on an instance of book:
json g.render(book)Whenever the author association is encountered the g.render method will automatically render the /author/_author.gson template instead.
8.4.4 JSON View API
All JSON views subclass the JsonViewTemplate class by default.
The JsonViewTemplate superclass implements the JsonView trait which in turn extends the the GrailsView trait.
Thanks to these traits several methods and properties are available to JSON views that can be used to accomplish different tasks.
Creating Links
Links can be generated using the g.link(..) method:
json.person {
name "bob"
homepage g.link(controller:"person", id:"bob")
}The g.link method is similar to the equivalent tag in GSP and allows you to easily create links to other controllers.
Altering the Response Headers
To customize content types and headers use the response object defined by the HttpView trait:
response.contentType "application/hal+json"
response.header "Token", "foo"
json.person {
name "bob"
}The HttpView trait defines a variety of methods for inspecting the request and altering the response.
The methods available are only a subset of the methods available via the HttpServletRequest and HttpServletResponse objects, this is by design as view logic should be limited and logic performed in the controller instead.
|
Accessing the Request
Various aspects of the request can be accessed by the request object defined by the HttpView trait:
json.person {
name "bob"
userAgent request.getHeader('User-Agent')
}Parameters can be accessed via the params object which is an instance of Parameters:
json.person {
name "bob"
first params.int('offset', 0)
sort params.get('sort', 'name')
}Default Static Imports
The following classes' static properties are imported by default:
-
org.springframework.http.HttpStatus -
org.springframework.http.HttpMethod -
grails.web.http.HttpHeaders
This means that you can use the response object to set the status using these constants, instead of hard coded numbers:
response.status NOT_FOUNDOr generate links using the appropriate HTTP method:
g.link(resource:"books", method:POST)I18n & Locale Integration
You can lookup i18n messages use the g.message method:
json.error {
description g.message(code:'default.error.message')
}You can also create locale specific views by appending the locale to view name. For example person_de.gson for German or person.gson for the default.
For more complex message lookups the messageSource property is an instance of the Spring MessageSource class.
|
Accessing Configuration
The application configuration is injected automatically into your json views. To access it, simply reference config.
json {
foo config.getProperty("bar", String, null)
}Miscellaneous Properties
Other properties are also available:
|
The name of the current controller |
|
The name of the current controller action |
|
The namespace of the current controller |
8.4.5 Model Naming
Grails Framework supports a convention for the model names in your JSON views. If the convention does not meet your needs, model variables can be explicitly defined.
Some model names are reserved since there are properties of the same name injected into the view:
locale, response, request, page, controllerNamespace, controllerName, actionName, config, generator, json
|
Explicit Model Naming
Given a view:
grails-app/views/hello/index.gson
model {
String message
}
json.message {
hello message
}Then the controller has to specify the name to be used in the view:
grails-app/controllers/HelloController.groovy
def index() {
respond(message: "Hello World")
//or [message: "Hello World"]
}When using a template:
grails-app/views/hello/_msg.gson
model {
String message
}
json.message {
hello message
}In the view you can use the tmpl namespace:
json {
message tmpl.msg([message: message])
// or g.render(template:'msg', model:[message: message])
// or g.render(template:'msg', model: message, var:'message')
}Using collections:
model {
List<String> messages
}
json {
messages tmpl.msg('message', messages)
// or g.render(template:'msg', collection: messages, var: 'message')
}Model By Convention
Property Type
When rendering a non iterable object, the property name of the type is used when a name is not specified.
grails-app/views/hello/index.gson
model {
String string
}
json.message {
hello string
}The variable can be passed in directly to respond.
grails-app/controllers/HelloController.groovy
def index() {
respond("Hello World")
}This also applies when rendering templates with tmpl.
grails-app/views/hello/_msg.gson
model {
String string
}
json.message {
hello string
}grails-app/views/hello/index.gson
model {
String someString
}
json tmpl.msg(someString)If a collection is rendered, the property name of the component type is appended with the property name of the collection type. The component type is based on the first item in the list.
List<String> → stringList
Set<String> → stringSet
Bag<String> → stringCollection
If the collection is empty, emptyCollection will be used as the default model name. This is due to not being able to inspect the first object’s type.
grails-app/views/hello/index.gson
model {
String stringList
}
json {
strings stringList
}The variable can be passed in directly to respond.
grails-app/controllers/HelloController.groovy
def index() {
respond(["Hello", "World"])
}
The component+collection convention does not apply when rendering collections with tmpl inside a view.
|
Template Name
When using a template, unless specified, the model name is based on the template name.
Given the following template:
grails-app/views/hello/_msg.gson
model {
String msg // or String string
}
json.message {
hello msg
}To render a single message from another view using the template:
grails-app/views/hello/index.gson
json.message tmpl.msg(message)To render a collection of messages from another view using the template:
grails-app/views/hello/index.gson
model {
List<String> stringList
}
json {
messages tmpl.msg(stringList)
}In both cases the convention of the variable name matching the template name is used.
8.4.6 Content Negotiation
GSON views integrate with Grails' content negotiation infrastructure. For example if you create two views called grails-app/views/book/show/show.gsp (for HTML) and grails-app/views/book/show/show.gson (for JSON), you can then define the following action:
grails-app/controllers/myapp/BookController.groovydef show() {
respond Book.get(params.id)
}The result is that if you send a request to /book/show it will render show.gsp but if you send a request to /book/show.json it will render show.gson.
In addition, if the client sends a request with the Accept header containing application/json the show.gson view will be rendered.
Content Negotiation and Domain Classes
Content negotiation also works nicely with domain classes, for example if you want to define a template to render any instance of the Book domain class you can create a gson file that matches the class name.
For example given a class called demo.Book you can create grails-app/views/book/_book.gson and whenever respond is called with an instance of Book Grails will render _book.gson.
def show() {
respond Book.get(params.id)
}If you define an index action that responds with a list of books:
def index() {
respond Book.list()
}Then you can create a corresponding grails-app/views/book/index.gson file that renders each book:
grails-app/views/book/index.gson
@Field List<Book> bookList
json tmpl.book(bookList)
When responding with a list of objects Grails automatically appends the suffix "List" to the model name, so in this case the model name is bookList
|
By calling the tmpl.book(..) method with the list of books the grails-app/views/book/_book.gson template will be rendered for each one and a JSON array returned.
Global Default Template
You can also define a /object/_object template that is rendered by default if no other template is found during content negotiation. To do this create a file called /grails-app/views/object/_object.gson where the name of the model is object, for example:
model {
Object object
}
json g.render(object)Content Negotiation and Versioned APIs
A typical use case when building REST APIs is the requirement to support different versions of the API. GSON views can be versioned by including the version in the name of the view.
Grails will then use the ACCEPT-VERSION header when resolving the view.
For example given a view called /book/show.gson if you wish to deprecate your previous API and create a version 2.0 API, you can rename the previous view /book/show_v1.0.gson and create a new /book/show.gson representing the new version of the API.
Then when the client sends a request with the ACCEPT-VERSION header containing v1.0 the /book/show_v1.0.gson view will be rendered instead of /book/show.gson.
Content Negotiation and View Resolving Strategy
Grails Framework takes into account a number of factors when attempting to resolve the view including the content type, version and locale.
The paths searched are following:
-
view_name[_LOCALE][_ACCEPT_CONTENT_TYPE][_ACCEPT-VERSION].gson (Example: show_de_hal_v1.0.gson)
-
view_name[_LOCALE][_ACCEPT_CONTENT_TYPE].gson (Example: show_de_hal.gson)
-
view_name[_LOCALE][_ACCEPT-VERSION].gson (Example: show_de_v1.0.gson)
-
view_name[_LOCALE].gson (Example: show_de.gson)
-
view_name[_ACCEPT_CONTENT_TYPE][_ACCEPT-VERSION].gson (Example: show_hal_v1.0.gson)
-
view_name[_ACCEPT-VERSION][_ACCEPT_CONTENT_TYPE].gson (Example: show_v1.0_hal.gson)
-
view_name[_ACCEPT_CONTENT_TYPE].gson (Example: show_hal.gson)
-
view_name[_ACCEPT-VERSION].gson (Example: show_v1.0.gson)
-
view_name.gson (Example: show.gson)
The content type (defined by either the ACCEPT header or file extension in the URI) is taken into account to allow different formats for the same view.
Content Negotiation and Custom Mime Types
Some REST APIs use the notion of custom mime types to represent resources. Within Grails you can for example define custom mime types in grails-app/conf/application.yml:
grails:
mime:
types:
all: "*/*"
book: "application/vnd.books.org.book+json"
bookList: "application/vnd.books.org.booklist+json"Once these custom mime types have been defined you can then define a view such as show.book.gson for that particular mime type.
8.4.7 HAL Support
HAL is a standard format for representing JSON that has gained traction for its ability to represent links between resources and provide navigable APIs.
The JSON views plugin for Grails provides HAL support out-of-the-box. All JSON views have access to the hal instance which implements HalViewHelper.
For example:
model {
Book book
}
json {
hal.links(book)
hal.embedded {
author( book.authors.first() ) { Author author ->
name author.name
}
}
title book.title
}
The call to hal.links() has to be the first element within the json{} closure.
|
This produces the HAL output:
{
"_links": {
"self": {
"href": "http://localhost:8080/book/show/1",
"hreflang": "en",
"type": "application/hal+json"
}
},
"_embedded": {
"author": {
"_links": {
"self": {
"href": "http://localhost:8080/author/show/1",
"hreflang": "en",
"type": "application/hal+json"
}
},
"name": "Stephen King"
}
},
"title": "The Stand"
}Generating HAL Links
The above example uses the hal.links(..) method to render links for a domain resource and the hal.embedded(..) method to define any embedded objects that form part of the HAL response.
The hal.links(..) method will by default create a link to the resource, but you can define additional links by annotating the domain class with either grails.rest.Linkable or grails.rest.Resource and using the link method on the object:
book.link(rel:"publisher", href:"http://foo.com/books")The link will then be included in the HAL output.
If you wish to be specific about which links to include you can do so by passing a map of objects to link to:
model {
Book book
}
json {
hal.links(self:book, author: book.author)
...
}Alternatively, if you prefer to define the HAL links yourself then you can do so by passing a closure to the hal.links method:
model {
Book book
}
json {
hal.links {
self {
href '...'
hreflang 'en'
type "application/hal+json"
}
}
...
}Rendering Domain Classes as HAL
If you prefer to let the plugin handle the rendering of your object you can use the hal.render(..) method:
model {
Book book
}
json hal.render(book)The hal.render method works the same as the g.render method, accepting the same arguments, the difference being it will output HAL links for the object via hal.links and also output associations fetched via a join query for hal.embedded.
For example you can also customize the content of the generated HAL with a closure:
model {
Book book
}
json hal.render(book) {
pages 1000
}Embedded Association and HAL
Generally, when using the hal.render(..) method, _embedded associations are only rendered for associations that have been initialized and eagerly fetched. This means that the following query will not render the book.authors association:
Book.get(params.id)However, this query will render the book.authors association:
Book.get(params.id, [fetch:[authors:'eager']])This is by design and to prevent unexpected performance degradation due to N+1 query loading. If you wish to force the render method to render _embedded associations for HAL you can do see using the deep argument:
json hal.render(book, [deep:true])You can prevent HAL _embedded associations from being rendering using the embedded:false parameter:
model {
Book book
}
json hal.render(book, [embedded:false])You can also render embedded associations without using the hal.render(..) method, by using the hal.embedded(..) method:
model {
Book book
}
json {
hal.embedded(book)
title book.title
}
Like the hal.links(..) method, the hal.embedded(..) method should come first, before any other attributes, in your JSON output
|
You can also control which associations should be embedded by using a map argument instead:
model {
Book book
}
json {
hal.embedded(authors: book.authors)
title book.title
}And you can inline the contents of the book without any associations using the hal.inline(..) method:
model {
Book book
}
json {
hal.embedded(authors: book.authors)
hal.inline(book)
}To customize the contents of the inlined JSON output use a closure:
model {
Book book
}
json {
hal.embedded(authors: book.authors)
hal.inline(book) {
pages 300
}
}
You cannot include additional content after the call to hal.inline(..) as this will produce invalid JSON
|
You can combine hal.embeddded(..) and hal.links(..) to obtain exactly the links and the embedded content you want:
model {
Book book
}
json {
hal.links(self: book )
hal.embedded(authors: book.authors)
hal.inline(book) {
pages 300
}
}Specifying the HAL Content Type
The default HAL response content type is application/hal+json, however as discussed in the section on custom MIME types you can define your own response content types to represent your resources.
For example given the following configuration in grails-app/conf/application.yml:
grails:
mime:
types:
all: "*/*"
book: "application/vnd.books.org.book+json"You can set the HAL content type to an explicit content type or one of the named content types defined in grails.mime.types in application.yml:
model {
Book book
}
hal.type("book")
json {
...
}HAL Pagination
The JSON views plugin for Grails provides navigable pagination support.
Like the GSP <g:paginate> tag, the parameters include: total, max, offset, sort and order.
For example:
model {
Iterable<Book> bookList
Long bookCount
Integer max // optional, defaults to 10
Integer offset // optional, defaults to 0
String sort // optional
String order // optional
}
json {
hal.paginate(Book, bookCount, offset, max, sort, order)
...
}
Similar to hal.links() the hal.paginate() has to be the first element within the json{} closure.
|
When accessing http://localhost:8080/book?offset=10 this produces the navigable output like:
{
"_links": {
"self": {
"href": "http://localhost:8080/book/index?offset=10&max=10",
"hreflang": "en_US",
"type": "application/hal+json"
},
"first": {
"href": "http://localhost:8080/book/index?offset=0&max=10",
"hreflang": "en_US"
},
"prev": {
"href": "http://localhost:8080/book/index?offset=0&max=10",
"hreflang": "en_US"
},
"next": {
"href": "http://localhost:8080/book/index?offset=20&max=10",
"hreflang": "en_US"
},
"last": {
"href": "http://localhost:8080/book/index?offset=40&max=10",
"hreflang": "en_US"
}
},
...
}
If there aren’t enough results to paginate the navigation links will not appear, Likewise, the prev and next links are only present when there is a previous or next page.
|
If you have other links that you want to include along with the pagination links then you can use the hal.links(..) method with pagination arguments:
model {
Author author
Iterable<Book> bookList
Long bookCount
}
json {
// the model, type to paginate, and the total count
hal.links([author:author], Book, bookCount)
...
}8.4.8 JSON API Support
JSON API is a standard format for representing JSON.
The JSON views plugin for Grails provides JSON API support out-of-the-box. All JSON views have access to the jsonapi instance which implements JsonApiViewHelper.
Grails views makes a best effort to conform to the JSON API standard, however that only applies to the format of the data. The specification makes many assertions about response codes, url conventions, and other server related concepts that are overreaching.
The JSON API support in Grails also only applies to domain classes. Because the specification relies on concepts of relationships and identifiers, there is no clear way to determine how those concepts would apply to conventional Groovy classes. As a result, normal Groovy classes are not supported.
The simplest example of using JSON API simply passes a domain class to the render method of the jsonapi object.
For example:
model {
Book book
}
json jsonapi.render(book)In the example where Book looks like the following:
class Book {
String title
Author author
}This is what an example Book instance rendered with JSON API might look like.
{
"data": {
"type": "book",
"id": "3",
"attributes": {
"title": "The Return of the King"
},
"relationships": {
"author": {
"links": {
"self": "/author/9"
},
"data": {
"type": "author",
"id": "9"
}
}
}
},
"links": {
"self": "http://localhost:8080/book/3"
}
}JSON API Object
To include the JSON API Object in the response, include a jsonApiObject argument to the render method.
model {
Book book
}
json jsonapi.render(book, [jsonApiObject: true])The response will contain "jsonapi":{"version":"1.0"} as the first key in the resulting object.
Meta Object
To add metadata to your response, the meta argument can be passed to render with the value being the object that should be rendered. If this functionality is used in addition to jsonApiObject: true, the metadata will be rendered as the "meta" property of the "jsonapi" object.
model {
Book book
}
json jsonapi.render(book, [meta: [name: "Metadata Information"]])The response will contain "meta":{"name":"Metadata Information"} as the first key in the resulting object.
Rendering Errors
The JSON API specification has instructions on how to render errors. In the case of the Grails implementation, this applies to both exceptions and validation errors.
Exceptions
If an exception is passed to the render method, it will be rendered within the specification.
In the example of an exception new RuntimeException("oops!"), the following will be rendered:
{
"errors": [
{
"status": 500,
"title": "java.lang.RuntimeException",
"detail": "oops!",
"source": {
"stacktrace": [
//An array of information relating to the stacktrace
]
}
}
]
}Validation Errors
In the case of validation errors, the response will look like the following when a name property fails the blank constraint:
{
"errors": [
{
"code": "blank",
"detail": "Property [name] of class [class com.foo.Bar] cannot be blank",
"source": {
"object": "com.foo.Bar",
"field": "name",
"rejectedValue": "",
"bindingError": false
}
}
]
}Links
In general, links for relationships will be provided when the relationship has a value.
Example output for a has one relationship where the value is null:
"captain": {
"data": null
}And when the value is not null:
"author": {
"links": {
"self": "/author/9"
},
"data": {
"type": "author",
"id": "9"
}
}Currently links are not supported in the case of to many relationships.
Pagination
The JSON API specification has a section which explains pagination. The Grails implementation follows that specification as it is written.
To enable pagination links in your output you must be rendering a collection and also include some arguments in addition to the collection being rendered. There are two required arguments: total and resource. The default offset is 0 and max is 10.
model {
List<Book> books
Integer bookTotal
}
json jsonapi.render(books, [pagination: [total: bookTotal, resource: Book]])Example links output if bookTotal == 20:
"links": {
"self": "/books",
"first": "http://localhost:8080/books?offset=0&max=10",
"next": "http://localhost:8080/books?offset=10&max=10",
"last": "http://localhost:8080/books?offset=10&max=10"
}By default the values for offset, sort, max, and order will come from the parameters with the same names. You can override their values by passing the corresponding argument in the pagination Map.
model {
List<Book> books
Integer bookTotal
}
json jsonapi.render(books, [pagination: [total: bookTotal, resource: Book, max: 20, sort: params.myCustomSortArgument]])Associations
The JSON API specification details how relationships should be rendered. The first way is through a relationships object described here. By default that is now relationships will be rendered in json views.
If you do not wish to render the relationships at all, the associations argument can be passed to render with the value of false.
model {
Book book
}
json jsonapi.render(book, [associations: false])The specification also has a section that describes compound documents. If you want one or more of your relationships to be rendered in that manner, you can include the expand argument.
model {
Book book
}
json jsonapi.render(book, [expand: "author"]) //can also be a list of stringsIncludes / Excludes
The JSON API implementation in Grails supports the same includes and excludes support as normal json views. Please see the section on rendering for details.
Identifier Rendering
Grails provides a way to customize the rendering of your domain class identifiers. To override the default behavior, register a bean that implements JsonApiIdRenderStrategy.
grails-app/conf/spring/resources.groovy
beans = {
jsonApiIdRenderStrategy(MyCustomImplementation)
}8.4.9 The JsonTemplateEngine
The JSON Views plugin registers a bean called jsonTemplateEngine of type JsonViewTemplateEngine.
This class is a regular Groovy TemplateEngine, and you can use the engine to render JSON views outside the scope of an HTTP request.
For example:
@Autowired
JsonViewTemplateEngine templateEngine
void myMethod() {
Template t = templateEngine.resolveTemplate('/book/show')
def writable = t.make(book: new Book(title:"The Stand"))
def sw = new StringWriter()
writable.writeTo( sw )
...
}8.4.10 Static Compilation
JSON views are statically compiled. You can disable static compilation if you prefer by setting grails.views.json.compileStatic:
grails:
views:
json:
compileStatic: false| If you disable static compilation rendering performance will suffer. |
For model variables you need to declare the types otherwise you will get a compilation error:
model {
Person person
}
json {
name person.name
age person.age
}8.4.11 Testing
Although generally testing can be done using functional tests via an HTTP client, the JSON views plugin also provides a trait which helps in writing either unit or integration tests. Add the org.apache.grails:grails-views-gson test-fixtures dependency to use this trait:
dependencies {
testImplementation testFixtures('org.apache.grails:grails-views-gson')
}To use the trait import the grails.plugin.json.view.test.JsonViewTest class and apply it to any Spock or JUnit test:
import grails.plugin.json.view.test.*
import spock.lang.Specification
class MySpec extends Specification implements JsonViewTest {
...
}The trait provides a number of different render method implementations that can either render a JSON view found in grails-app/views or render an inline String. For example to render an inline template:
void "Test render a raw GSON view"() {
when:"A gson view is rendered"
JsonRenderResult result = render '''
model {
String person
}
json.person {
name person
}
''', [person:"bob"] (1)
then:"The json is correct"
result.json.person.name == 'bob' (2)
}| 1 | Use the render method to return a JsonRenderResult passing in a String that is the inline template and a map that is the model |
| 2 | Assert the parsed JSON, represented by the json property, is correct |
To render an existing view or template use named arguments to specify an absolute path to either a template or a view:
when:"A gson view is rendered"
def result = render(template: "/path/to/template", model:[age:10])
then:"The json is correct"
result.json.name == 'Fred'
result.json.age == 10If you are writing a unit test, and the model involves a domain class, you may need to add the domain class to the mappingContext object in order for it to be rendered correctly:
when:"A gson view is rendered for a domain class"
mappingContext.addPersistentEntity(MyDomain)
def result = render(template: "/path/to/template", model:[myDomain:MyDomain])
then:"The json is correct"
result.json.name == 'Fred'
result.json.age == 10| Links generated by json views in a unit test may not match what they would normally generate in the standard environment. To fully test links, use a functional test. |
New Testing Framework
Since the release of json views, a new testing framework was released for Grails. A new trait has been developed that works with the new testing framework that is designed to replace the existing trait. The existing trait will be left as is for backwards compatibility.
The new trait works exactly the same way as the old one, however since the new trait is designed to work with the new framework, there are several benefits you can take advantage of. The first is configuration. In the old trait the application configuration was not included in the template engine, which had the potential to produce incorrect results. Other benefits include extensibility and features like @OnceBefore.
To get started, add the org.apache.grails:grails-testing-support-views-gson dependency to your project and implement the JsonViewUnitTest trait in your test instead of JsonViewTest.
| The new testing trait, like the testing framework, requires Spock. |
8.4.12 Plugin Support
Grails plugins as well as standard Gradle Java/Groovy projects can provide json views to your application.
Grails Plugins
Since JSON views are compiled all of a plugin’s views and templates are available for use in your applications.
The view resolution will look through all of the application’s configured plugins for views that match a particular name. By default, the views a plugin supplies should be stored in grails-app/views, just like applications.
Basic Libraries
The most common use case to provide views in a standard library is to provide global templates. Global templates are templates designed to render a given class as JSON. In order to provide views in a standard Gradle project, you should configure your own view compilation task.
Below is an example Gradle build that adds a compileViews task for templates located into src/main/gson:
buildscript {
repositories {
maven { url "https://repo.grails.org/grails/restricted" }
}
dependencies {
classpath platform('org.apache.grails:grails-bom:8.0.0')
classpath "org.apache.grails:grails-gradle-plugins"
}
}
import grails.views.gradle.json.*
apply plugin:"java"
repositories {
maven { url "https://repo.grails.org/grails/restricted" }
}
dependencies {
implementation "org.apache.grails:grails-views-gson"
implementation "org.apache.grails:grails-rest-transforms"
}
task( compileViews, type:JsonViewCompilerTask ) {
source = project.file('src/main/gson')
destinationDir = project.file('build/classes/main')
packageName = ""
classpath = configurations.compileClasspath + configurations.runtimeClasspath
}
classes.dependsOn compileViewsOnce this is in place any applications that includes this library will have access to the templates provided.
For example if you want to render all instances of type foo.bar.Birthday create a template called src/main/gson/foo/bar/_birthday.gson then compile the template and place the JAR on the classpath of your application.
Customizing the Compile Task
Unless otherwise configured, the project name of the plugin (the gradle project.name) is used as the packageName when compiling JSON views.
In Gradle project.name is generally calculated from the current directory. That means that if there is mismatch between the current directory and your plugin name view resolution from a plugin could fail.
For example consider a plugin named FooBarGrailsPlugin, in this case Grails will search for views that match the plugin name foo-bar. However, if the directory where the plugin is located is called fooBar instead of foo-bar then view resolution will fail and the view will not be found when the plugin is installed into an application.
To resolve this issue you can customize the compileGsonViews task in the plugin’s build.gradle
compileGsonViews {
packageName = "foo-bar"
}By setting the packageName property to correctly match the convention of the plugin named (FooBarGrailsPlugin maps to foo-bar) view resolution will succeed.
8.4.13 Configuration
JSON views configuration can be altered within grails-app/conf/application.yml. Any of the properties within the JsonViewConfiguration interface can be set. The json view configuration extends GenericViewConfiguration, therefore any properties in that interface can be set as well.
For example:
grails:
views:
json:
compileStatic: true
cache: true
...Alternatively you can register a new JsonViewConfiguration bean using the bean name jsonViewConfiguration in grails-app/conf/resources.groovy.
The same settings in grails-app/conf/application.yml will also be used by the Gradle plugin for production compilation.
The Gradle plugin compiles views using a forked compiler. You can configure the forked compilation task in Gradle as follows:
compileGsonViews {
compileOptions.forkOptions.memoryMaximumSize = '512mb'
}See the API for GroovyForkOptions for more information.
Changing the view base class
All JSON views subclass the JsonViewTemplate class by default.
You can however change the subclass (which should be a subclass of JsonViewTemplate) using configuration:
grails:
views:
json:
compileStatic: true
baseTemplateClass: com.example.MyCustomJsonViewTemplateAdding New Helper Methods via Traits
Alternatively, rather than modifying the base class, you can instead just add new methods via traits.
For example the HttpView uses the Enhances annotation to add the page object to all views:
import grails.artefact.Enhances
import grails.views.Views
@Enhances(Views.TYPE)
trait HttpView {
/**
* @return The response object
*/
Response response
...
}The result is all JSON views have a response object that can be used to control the HTTP response:
response.header "Token", "foo"| The trait cannot be defined in the same project as you are compilation as it needs to be on the classpath of the project you are compiling. You will need to create a Grails plugin and use a multi-project build in this scenario. |
Default Mime Types
The mime types that will be accepted by default for JSON view rendering is configurable.
grails:
views:
json:
mimeTypes:
- application/json
- application/hal+jsonUnicode Escaping
By default, unicode characters will not be escaped. If you would like unicode characters to be escaped in your output, set the following configuration.
grails:
views:
json:
generator:
escapeUnicode: trueDate and Time Rendering
JSON views render date and time values the same way as Spring Boot’s default Jackson JsonMapper:
| Type | Rendered as |
|---|---|
|
a UTC instant with millisecond precision, such as |
|
its wall-clock time in the JVM default time zone, such as |
|
ISO-8601, such as |
|
ISO-8601 without a time zone, such as |
|
ISO-8601 with the offset and without a zone ID, such as |
|
ISO-8601, such as |
|
a number, such as |
|
the ID, such as |
A Month renders by its name, such as "SEPTEMBER", as every enum does, where Spring Boot writes its number; a
JsonGenerator.Converter for Month that returns month.value renders its number. An OffsetTime keeps its seconds and
writes a fraction of a second with only the digits it needs, where Spring Boot writes "03:00-03:00". A map keyed by Date, Calendar or ZonedDateTime values renders its keys the same way as
those values; other map keys render with their toString(). Values rendered with g.render are written the same way.
Time Zone
The time zone that the date format writes java.util.Date and Calendar values in can be configured. The value here
will be passed to TimeZone.getTimeZone(…). As with Spring Boot’s spring.jackson.time-zone, the default date format
writes the date and time in that zone followed by its offset, such as "2025-10-08T03:48:46.407-04:00" for
America/New_York or "2025-10-08T13:18:46.407+05:30" for Asia/Kolkata, or followed by Z in a zone with no offset,
such as the default GMT.
grails:
views:
json:
generator:
timeZone: "America/New_York"Date Format
The java.text.SimpleDateFormat pattern for java.util.Date and Calendar values (and map keys) can be configured.
The pattern is applied in the configured time zone. The default, yyyy-MM-dd’T’HH:mm:ss.SSSXXX, writes dates as Spring
Boot does, a UTC instant with millisecond precision in the default GMT time zone. As with Spring Boot’s
spring.jackson.date-format, the pattern does not apply to java.sql.Time values, which are written as "01:48:46".
grails:
views:
json:
generator:
dateFormat: "yyyy-MM-dd'T'HH:mm:ss'Z'"In addition, the locale of the pattern can also be specified.
grails:
views:
json:
generator:
locale: "en/US"8.4.14 Custom Converters
It is possible to register custom converters to change how a given class is rendered with json views. To do so, create a class that implements Converter. Then you must register the class in src/main/resources/META-INF/services/groovy.json.JsonGenerator$Converter.
package foo
class MyConverter implements JsonGenerator.Converter {
@Override
boolean handles(Class<?> type) {
CustomClass.isAssignableFrom(type)
}
@Override
Object convert(Object value, String key) {
((CustomClass)value).name
}
}
class CustomClass {
String name
}Because plugins could potentially provide converters, you can also determine the order by implementing the Ordered interface in your converter.
src/main/resources/META-INF/services/groovy.json.JsonGenerator$Converter
foo.MyCustomConverter| If you have multiple classes to register, put each one on it’s own line |
8.4.15 IntelliJ Support
When opening .gson files in Intellij they should be opened with the regular Groovy editor.
The plugin includes an IntelliJ GDSL file that provides code completion when using IntelliJ IDEA.
Intellij GDSL is a way to describe the available methods and properties so that code completion is available to the developer when opening .gson files.
The GDSL file is generally kept up-to-date with the codebase, however if any variation is spotted please raise an issue.
8.4.16 Debugging Views
Generally views should be kept simple and if you arrive to the point where you need to debug a view you probably have too much logic in the view that would be better off handled by the controller prior to supplying the model.
Nevertheless here are a few view debugging tips to help identify problems in the view.
Introspecting the Model
Every JSON view is a Groovy script and like any Groovy script the model is defined in a binding variable. Therefore you can easily find out the model at any time by either logging or printing the binding variables:
model {
Book book
}
// use the log variable
log.debug "Model is $binding.variables"
// use system out
System.out.println "Model is $binding.variables"
json g.render(book)
If you using the log variable then you will need to enabling logging for the grails.views package in grails-app/conf/logback.groovy
|
Connecting a Debugger
Some IDEs like Intellij IDE allow you to set break points and step debug within the view itself. As mentioned previously you shouldn’t arrive to this point and if you do you have too much logic in your view, but if you do need it the feature is there.
8.5 Markup Views
Markup Views are written in Groovy, end with the file extension gml and reside in the grails-app/views directory.
The Markup Views plugin uses Groovy’s MarkupTemplateEngine and you can mostly use the Groovy user guide as a reference for the syntax.
Example Markup View:
model {
Iterable<Map> cars
}
xmlDeclaration()
cars {
cars.each {
car(make: it.make, model: it.model)
}
}This produces the following output given a model such as [cars:[[make:"Audi", model:"A5"]]]:
<?xml version='1.0'?>
<cars><car make='Audi' model='A5'/></cars>For further examples see Groovy’s MarkupTemplateEngine documentation.
All Markup views subclass the MarkupViewTemplate class by default.
The MarkupViewTemplate superclass implements the MarkupView trait which in turn extends the GrailsView trait.
8.5.1 Installation
To activate Markup views, add the following dependency to the dependencies block of your build.gradle:
compile "org.apache.grails:grails-views-markup"To enable Gradle compilation of Markup views for production environment add the following to the buildscript dependencies block:
buildscript {
...
dependencies {
...
classpath platform('org.apache.grails:grails-gradle-bom:8.0.0')
classpath 'org.apache.grails:grails-gradle-plugins'
}
}Then apply the org.apache.grails.gradle.grails-markup Gradle plugin after any Grails core gradle plugins:
...
apply plugin: "org.apache.grails.gradle.grails-web"
apply plugin: "org.apache.grails.gradle.grails-markup"This will add a compileMarkupViews task to Gradle that is executed when producing a JAR or WAR file.
8.5.2 Markup View API
All Markup views subclass the MarkupViewTemplate class by default.
The MarkupViewTemplate superclass implements the MarkupView trait which in turn extends the GrailsView trait.
Much of the API is shared between JSON and Markup views. However, one difference compared to JSON views is that you must use this as a prefix when refering to properties from the parent class. For example to generate links this will produce a compilation error:
cars {
cars.each {
car(make: it.make, href: g.link(controller:'car'))
}
}However, the following works fine:
cars {
cars.each {
car(make: it.make, href: this.g.link(controller:'car'))
}
}Notice the this prefix when refering to this.g.link(..).
8.5.3 Configuration
Markup views configuration can be altered with grails-app/conf/application.yml. Any of the properties within the MarkupViewConfiguration class and Groovy’s TemplateConfiguration class can be set.
For example:
grails:
views:
markup:
compileStatic: true
cacheTemplates: true
autoIndent: true
...Alternatively you can register a new MarkupViewConfiguration bean using the bean name markupViewConfiguration in grails-app/conf/spring/resources.groovy.
8.6 URL Mappings
Throughout the documentation so far the convention used for URLs has been the default of /controller/action/id. However, this convention is not hard wired into Grails and is in fact controlled by a URL Mappings class located at grails-app/controllers/mypackage/UrlMappings.groovy.
The UrlMappings class contains a single property called mappings that has been assigned a block of code:
package mypackage
class UrlMappings {
static mappings = {
}
}8.6.1 Mapping to Controllers and Actions
To create a simple mapping simply use a relative URL as the method name and specify named parameters for the controller and action to map to:
"/product"(controller: "product", action: "list")In this case we’ve mapped the URL /product to the list action of the ProductController. Omit the action definition to map to the default action of the controller:
"/product"(controller: "product")An alternative syntax is to assign the controller and action to use within a block passed to the method:
"/product" {
controller = "product"
action = "list"
}Which syntax you use is largely dependent on personal preference.
If you have mappings that all fall under a particular path you can group mappings with the group method:
group "/product", {
"/apple"(controller:"product", id:"apple")
"/htc"(controller:"product", id:"htc")
}You can also create nested group url mappings:
group "/store", {
group "/product", {
"/$id"(controller:"product")
}
}Group Defaults
Groups can specify default mapping parameters that are inherited by all child mappings. This avoids repeating the same controller, namespace, or plugin on every mapping within the group:
group "/internal/community", namespace: 'community', controller: 'communitySearch', {
"/search"(action: 'internalSearch')
"/find-user"(action: 'internalFindUser')
"/user-activity"(action: 'internalUserActivity')
}This is equivalent to specifying namespace and controller on each mapping individually. Child mappings can override any default by specifying the parameter explicitly:
group "/api", namespace: 'api', controller: 'defaultCtrl', {
"/special"(controller: 'specialCtrl', action: 'handle') // overrides controller
"/normal"(action: 'index') // inherits controller
}Nested groups merge defaults — inner groups inherit and can extend or override outer group defaults:
group "/community", namespace: 'community', {
group "/topics", controller: 'topic', {
"/gallery"(action: 'gallery') // inherits namespace and controller
"/create"(action: 'create')
}
group "/members", controller: 'member', {
"/index"(action: 'index') // inherits namespace, different controller
}
}The supported default parameters are: controller, action, namespace, plugin, view, and method.
To rewrite one URI onto another explicit URI (rather than a controller/action pair) do something like this:
"/hello"(uri: "/hello.dispatch")Rewriting specific URIs is often useful when integrating with other frameworks.
8.6.2 Mapping to REST resources
Since Grails 2.3, it possible to create RESTful URL mappings that map onto controllers by convention. The syntax to do so is as follows:
"/books"(resources:'book')You define a base URI and the name of the controller to map to using the resources parameter. The above mapping will result in the following URLs:
| HTTP Method | URI | Grails Action |
|---|---|---|
GET |
/books |
index |
GET |
/books/create |
create |
POST |
/books |
save |
GET |
/books/${id} |
show |
GET |
/books/${id}/edit |
edit |
PUT |
/books/${id} |
update |
PATCH |
/books/${id} |
patch |
DELETE |
/books/${id} |
delete |
If you are not sure which mapping will be generated for your case just run the command url-mappings-report in your grails console. It will give you a really neat report for all the url mappings.
If you wish to include or exclude any of the generated URL mappings you can do so with the includes or excludes parameter, which accepts the name of the Grails action to include or exclude:
"/books"(resources:'book', excludes:['delete', 'update'])
or
"/books"(resources:'book', includes:['index', 'show'])Explicit REST Mappings
As of Grails 3.1, if you prefer not to rely on a resources mapping to define your mappings then you can prefix any URL mapping with the HTTP method name (in lower case) to indicate the HTTP method it applies to. The following URL mapping:
"/books"(resources:'book')Is equivalent to:
get "/books"(controller:"book", action:"index")
get "/books/create"(controller:"book", action:"create")
post "/books"(controller:"book", action:"save")
get "/books/$id"(controller:"book", action:"show")
get "/books/$id/edit"(controller:"book", action:"edit")
put "/books/$id"(controller:"book", action:"update")
patch "/books/$id"(controller:"book", action:"patch")
delete "/books/$id"(controller:"book", action:"delete")Notice how the HTTP method name is prefixed prior to each URL mapping definition.
Mapping every controller as a resource
If every controller in an application follows the RESTful resource conventions, the mappings can be
applied to all of them at once by capturing the controller in the URL and passing * as the
resources argument:
"/$controller"(resources: '*')This generates the same mappings as a named resources mapping, but resolves the controller from the
request instead of from the mapping, so the number of mappings does not grow with the number of
controllers:
| HTTP Method | URI | Grails Action |
|---|---|---|
GET |
/${controller} |
index |
GET |
/${controller}/create |
create |
POST |
/${controller} |
save |
GET |
/${controller}/${id} |
show |
GET |
/${controller}/${id}/edit |
edit |
PUT |
/${controller}/${id} |
update |
PATCH |
/${controller}/${id} |
patch |
DELETE |
/${controller}/${id} |
delete |
Because the controller and action are captured from the URL, they are subject to the same validation as any other wildcard mapping, described in Embedded Variables: a URI whose captured values do not correspond to a registered controller and action does not match.
The includes and excludes parameters apply as they do for a named resource. An application that
serves only JSON, for example, has no use for the two actions that render HTML forms:
"/$controller"(resources: '*', excludes: ['create', 'edit'])The mapping can also be placed inside a group:
group "/api/v1", {
"/$controller"(resources: '*')
}A namespace can be captured from the URL in the same way, which maps every namespaced controller without naming the namespaces:
"/$namespace/$controller"(resources: '*')| HTTP Method | URI | Grails Action |
|---|---|---|
GET |
/${namespace}/${controller} |
index |
GET |
/${namespace}/${controller}/${id} |
show |
The URL must capture the controller, and child resources cannot be nested within a wildcard
resources mapping, because the controller is not known until a request is matched. Both are
rejected when the mappings are evaluated.
|
Single resources
A single resource is a resource for which there is only one (possibly per user) in the system. You can create a single resource using the single parameter (as opposed to resources):
"/book"(single:'book')This results in the following URL mappings:
| HTTP Method | URI | Grails Action |
|---|---|---|
GET |
/book/create |
create |
POST |
/book |
save |
GET |
/book |
show |
GET |
/book/edit |
edit |
PUT |
/book |
update |
PATCH |
/book |
patch |
DELETE |
/book |
delete |
The main difference is that the id is not included in the URL mapping.
Nested Resources
You can nest resource mappings to generate child resources. For example:
"/books"(resources:'book') {
"/authors"(resources:"author")
}The above will result in the following URL mappings:
| HTTP Method | URL | Grails Action |
|---|---|---|
GET |
/books/${bookId}/authors |
index |
GET |
/books/${bookId}/authors/create |
create |
POST |
/books/${bookId}/authors |
save |
GET |
/books/${bookId}/authors/${id} |
show |
GET |
/books/${bookId}/authors/${id}/edit |
edit |
PUT |
/books/${bookId}/authors/${id} |
update |
PATCH |
/books/${bookId}/authors/${id} |
patch |
DELETE |
/books/${bookId}/authors/${id} |
delete |
You can also nest regular URL mappings within a resource mapping:
"/books"(resources: "book") {
"/publisher"(controller:"publisher")
}This will result in the following URL being available:
| HTTP Method | URL | Grails Action |
|---|---|---|
GET |
/books/${bookId}/publisher |
index |
To map a URI directly below a resource then use a collection block:
"/books"(resources: "book") {
collection {
"/publisher"(controller:"publisher")
}
}This will result in the following URL being available (without the ID):
| HTTP Method | URL | Grails Action |
|---|---|---|
GET |
/books/publisher |
index |
Linking to RESTful Mappings
You can link to any URL mapping created with the g:link tag provided by Grails simply by referencing the controller and action to link to:
<g:link controller="book" action="index">My Link</g:link>As a convenience you can also pass a domain instance to the resource attribute of the link tag:
<g:link resource="${book}">My Link</g:link>This will automatically produce the correct link (in this case "/books/1" for an id of "1").
When the resource attribute is given a domain instance, the link targets the most specific controller
that serves its domain class. A controller serves a domain class when it is named after it, or when it
extends RestfulController parameterised on it, directly, through a base class such as
RestfulServiceController, or through @Scaffold:
class PeopleController extends RestfulController<Person> {
PeopleController() { super(Person) }
}<g:link resource="${person}">My Link</g:link> <%-- /people/1 --%>Either way the controller must also define the action the link targets: the action given, or else the
one its HTTP method maps to, a link naming neither being taken as a GET, so show for an instance, and a
controller is therefore not sent links to actions it does not have. A controller parameterised on the domain
class in any other way, such as a report controller built on a generic base class or trait, does not serve
it, even when it has an action of the same name. Nor does one extending RestfulController without a type
argument, passing the domain class only to its constructor; it is found only when it is named after the
domain class. A controller named after the domain class that extends RestfulController parameterised on
another class with the same simple name, such as a com.example.community.User beside a com.example.User,
serves that other class only.
Candidates are tried from the nearest scope to the furthest, the same rule that resolves a controller
name to a namespace (see Namespaced Controllers):
-
the controller handling the current request, if it serves the domain class and is in the namespace the link targets
-
the controller serving the domain class in that namespace
-
the controller serving it in the default namespace
-
the controller serving it in any namespace
Where one scope holds more than one controller serving the domain class, the one named after it is
chosen; otherwise the scope is ambiguous and the next one is tried. The namespace a link targets is its
namespace attribute when one is given, and otherwise the namespace of the current request; for a
redirect it is the namespace of the controller issuing it, and outside a request it is the default
namespace. When no scope settles on a single controller, or no controller serving the domain class defines
the action, the controller named after the domain class is assumed, and when controllers serving it tied, a
warning naming them is logged once, so pass the controller attribute to choose one.
A link, or the redirect after a save, therefore stays in the controller the user is working in. Given
an AssessmentController and a ManageAssessmentController in the manage namespace, both serving
Assessment:
| Link to an Assessment rendered by | Targets |
|---|---|
AssessmentController |
AssessmentController |
ManageAssessmentController |
ManageAssessmentController |
another controller in the |
ManageAssessmentController |
any other controller or no request |
AssessmentController |
Pass the controller attribute to link to a different controller explicitly, for example from an
administration page to the public one.
This applies when resource is given a domain instance or domain class and GORM is configured.
Passing a controller name, as in <g:link resource="book">, is unchanged.
|
The case of nested resources is a little different as they typically required two identifiers (the id of the resource and the one it is nested within). For example given the nested resources:
"/books"(resources:'book') {
"/authors"(resources:"author")
}If you wished to link to the show action of the author controller, you would write:
// Results in /books/1/authors/2
<g:link controller="author" action="show" method="GET" params="[bookId:1]" id="2">The Author</g:link>However, to make this more concise there is a resource attribute to the link tag which can be used instead:
// Results in /books/1/authors/2
<g:link resource="book/author" action="show" bookId="1" id="2">My Link</g:link>The resource attribute accepts a path to the resource separated by a slash (in this case "book/author"). The attributes of the tag can be used to specify the necessary bookId parameter.
8.6.3 Redirects In URL Mappings
Since Grails 2.3, it is possible to define URL mappings which specify a redirect. When a URL mapping specifies a redirect, any time that mapping matches an incoming request, a redirect is initiated with information provided by the mapping.
When a URL mapping specifies a redirect the mapping must either supply a String
representing a URI to redirect to or must provide a Map representing the target
of the redirect. That Map is structured just like the Map that may be passed
as an argument to the redirect method in a controller.
"/viewBooks"(redirect: [uri: '/books/list'])
"/viewAuthors"(redirect: [controller: 'author', action: 'list'])
"/viewPublishers"(redirect: [controller: 'publisher', action: 'list', permanent: true])Request parameters that were part of the original request will not be included in the redirect by default. To include
them it is necessary to add the parameter keepParamsWhenRedirect: true.
"/viewBooks"(redirect: [uri: '/books/list', keepParamsWhenRedirect: true])
"/viewAuthors"(redirect: [controller: 'author', action: 'list', keepParamsWhenRedirect: true])
"/viewPublishers"(redirect: [controller: 'publisher', action: 'list', permanent: true, keepParamsWhenRedirect: true])8.6.4 Embedded Variables
Simple Variables
The previous section demonstrated how to map simple URLs with concrete "tokens". In URL mapping speak tokens are the sequence of characters between each slash, '/'. A concrete token is one which is well defined such as as /product. However, in many circumstances you don’t know what the value of a particular token will be until runtime. In this case you can use variable placeholders within the URL for example:
static mappings = {
"/product/$id"(controller: "product")
}In this case by embedding a $id variable as the second token Grails will automatically map the second token into a parameter (available via the params object) called id. For example given the URL /product/MacBook, the following code will render "MacBook" to the response:
class ProductController {
def index() { render params.id }
}You can of course construct more complex examples of mappings. For example the traditional blog URL format could be mapped as follows:
static mappings = {
"/$blog/$year/$month/$day/$id"(controller: "blog", action: "show")
}The above mapping would let you do things like:
/graemerocher/2007/01/10/my_funky_blog_entryThe individual tokens in the URL would again be mapped into the params object with values available for year, month, day, id and so on.
Dynamic Controller and Action Names
Variables can also be used to dynamically construct the controller and action name. In fact the default Grails URL mappings use this technique:
static mappings = {
"/$controller/$action?/$id?"()
}Here the name of the controller, action and id are implicitly obtained from the variables controller, action and id embedded within the URL.
These names come from the URL and from nowhere else. A request parameter named controller, action or namespace does not stand in for a token the URL leaves out: given the mapping above, /product?action=delete routes to ProductController’s default action, not to `delete. The parameter is still bound, and is still readable as params.action; it just has no say in which action runs. To route on a request parameter, ask for it explicitly with a closure, as shown at the end of this section.
Wildcard Artefact Validation
By default, when URL mappings use wildcard variables like $controller, $action, or $namespace, Grails validates the captured values against registered controller artefacts. If a captured value does not correspond to a real controller, action, or namespace, the mapping is skipped and the next mapping is tried.
This enables patterns where a $action wildcard is followed by a fallback mapping:
group "/topics", {
"/$action"(controller: 'topic')
"/$id"(controller: 'topic', action: 'show')
}With this configuration:
-
/topics/gallery— "gallery" is validated as a real action onTopicController, so the$actionmapping is used. -
/topics/42— "42" is not a valid action, so the$actionmapping is skipped and the$idmapping handles the request, routing to theshowaction.
This validation applies to $controller, $action, and $namespace wildcards. Hardcoded values in mappings (e.g., controller: 'topic') are never filtered — only wildcard-captured values are validated.
When a wildcard-captured action matches a real action on the controller, it takes priority over less-specific fallback mappings where the action is hardcoded. This means a $action mapping that resolves to a valid action will be preferred over a catch-all mapping such as $id with a hardcoded action, even if the fallback mapping sorts ahead of it.
More-specific mappings still win. Literal paths such as /community and explicit method-specific mappings such as post "/invites" are not displaced by wildcard controller/action matches.
To disable this behavior, set in application.yml:
grails:
urlmapping:
validateWildcards: falseYou can also resolve the controller name and action name to execute dynamically using a closure:
static mappings = {
"/$controller" {
action = { params.goHere }
}
}Optional Variables
Another characteristic of the default mapping is the ability to append a ? at the end of a variable to make it an optional token. In a further example this technique could be applied to the blog URL mapping to have more flexible linking:
static mappings = {
"/$blog/$year?/$month?/$day?/$id?"(controller:"blog", action:"show")
}With this mapping all of these URLs would match with only the relevant parameters being populated in the params object:
/graemerocher/2007/01/10/my_funky_blog_entry /graemerocher/2007/01/10 /graemerocher/2007/01 /graemerocher/2007 /graemerocher
Optional File Extensions
If you wish to capture the extension of a particular path, then a special case mapping exists:
"/$controller/$action?/$id?(.$format)?"()By adding the (.$format)? mapping you can access the file extension using the response.format property in a controller:
def index() {
render "extension is ${response.format}"
}Arbitrary Variables
You can also pass arbitrary parameters from the URL mapping into the controller by just setting them in the block passed to the mapping:
"/holiday/win" {
id = "Marrakech"
year = 2007
}This variables will be available within the params object passed to the controller.
Dynamically Resolved Variables
The hard coded arbitrary variables are useful, but sometimes you need to calculate the name of the variable based on runtime factors. This is also possible by assigning a block to the variable name:
"/holiday/win" {
id = { params.id }
isEligible = { session.user != null } // must be logged in
}In the above case the code within the blocks is resolved when the URL is actually matched and hence can be used in combination with all sorts of logic.
8.6.5 Mapping to Views
You can resolve a URL to a view without a controller or action involved. For example to map the root URL / to a GSP at the location grails-app/views/index.gsp you could use:
static mappings = {
"/"(view: "/index") // map the root URL
}Alternatively if you need a view that is specific to a given controller you could use:
static mappings = {
"/help"(controller: "site", view: "help") // to a view for a controller
}8.6.6 Mapping to Response Codes
Grails also lets you map HTTP response codes to controllers, actions, views or URIs. Just use a method name that matches the response code you are interested in:
static mappings = {
"403"(controller: "errors", action: "forbidden")
"404"(controller: "errors", action: "notFound")
"500"(controller: "errors", action: "serverError")
}Or you can specify custom error pages:
static mappings = {
"403"(view: "/errors/forbidden")
"404"(view: "/errors/notFound")
"500"(view: "/errors/serverError")
}You can also specify custom URIs:
static mappings = {
"403"(uri: "/errors/forbidden")
"404"(uri: "/errors/notFound")
"500"(uri: "/errors/serverError")
}Declarative Error Handling
In addition you can configure handlers for individual exceptions:
static mappings = {
"403"(view: "/errors/forbidden")
"404"(view: "/errors/notFound")
"500"(controller: "errors", action: "illegalArgument",
exception: IllegalArgumentException)
"500"(controller: "errors", action: "nullPointer",
exception: NullPointerException)
"500"(controller: "errors", action: "customException",
exception: MyException)
"500"(view: "/errors/serverError")
}With this configuration, an IllegalArgumentException will be handled by the illegalArgument action in ErrorsController, a NullPointerException will be handled by the nullPointer action, and a MyException will be handled by the customException action. Other exceptions will be handled by the catch-all rule and use the /errors/serverError view.
You can access the exception from your custom error handling view or controller action using the request’s exception attribute like so:
class ErrorsController {
def handleError() {
def exception = request.exception
// perform desired processing to handle the exception
}
}
A problem reaching the error handler does not replace the exception being handled. If the mapping for a status code cannot be resolved for a request, or an error-handling controller cannot be forwarded to because the request did not pass through the Grails filters - a Spring MockMvc test that leaves out the application’s filters, for example - the problem is logged and the /error view renders the original exception instead.
|
If your error-handling controller action throws an exception as well, you’ll end up with a StackOverflowException.
|
8.6.7 Mapping to HTTP methods
URL mappings can also be configured to map based on the HTTP method (GET, POST, PUT or DELETE). This is very useful for RESTful APIs and for restricting mappings based on HTTP method.
As an example the following mappings provide a RESTful API URL mappings for the ProductController:
static mappings = {
"/product/$id"(controller:"product", action: "update", method: "PUT")
}Note that if you specify a HTTP method other than GET in your URL mapping, you also have to specify it when creating the corresponding link by passing the method argument to g:link or g:createLink to get a link of the desired format.
8.6.8 Mapping Wildcards
Grails' URL mappings mechanism also supports wildcard mappings. For example consider the following mapping:
static mappings = {
"/images/*.jpg"(controller: "image")
}This mapping will match all paths to images such as /image/logo.jpg. Of course you can achieve the same effect with a variable:
static mappings = {
"/images/$name.jpg"(controller: "image")
}However, you can also use double wildcards to match more than one level below:
static mappings = {
"/images/**.jpg"(controller: "image")
}In this cases the mapping will match /image/logo.jpg as well as /image/other/logo.jpg. Even better you can use a double wildcard variable:
static mappings = {
// will match /image/logo.jpg and /image/other/logo.jpg
"/images/$name**.jpg"(controller: "image")
}In this case it will store the path matched by the wildcard inside a name parameter obtainable from the params object:
def name = params.name
println name // prints "logo" or "other/logo"If you use wildcard URL mappings then you may want to exclude certain URIs from Grails' URL mapping process. To do this you can provide an excludes setting inside the UrlMappings.groovy class:
class UrlMappings {
static excludes = ["/images/*", "/css/*"]
static mappings = {
...
}
}In this case Grails won’t attempt to match any URIs that start with /images or /css.
8.6.9 Automatic Link Re-Writing
Another great feature of URL mappings is that they automatically customize the behaviour of the link tag so that changing the mappings don’t require you to go and change all of your links.
This is done through a URL re-writing technique that reverse engineers the links from the URL mappings. So given a mapping such as the blog one from an earlier section:
static mappings = {
"/$blog/$year?/$month?/$day?/$id?"(controller:"blog", action:"show")
}If you use the link tag as follows:
<g:link controller="blog" action="show"
params="[blog:'fred', year:2007]">
My Blog
</g:link>
<g:link controller="blog" action="show"
params="[blog:'fred', year:2007, month:10]">
My Blog - October 2007 Posts
</g:link>Grails will automatically re-write the URL in the correct format:
<a href="/fred/2007">My Blog</a>
<a href="/fred/2007/10">My Blog - October 2007 Posts</a>8.6.10 Applying Constraints
URL Mappings also support Grails' unified validation constraints mechanism, which lets you further "constrain" how a URL is matched. For example, if we revisit the blog sample code from earlier, the mapping currently looks like this:
static mappings = {
"/$blog/$year?/$month?/$day?/$id?"(controller:"blog", action:"show")
}This allows URLs such as:
/graemerocher/2007/01/10/my_funky_blog_entryHowever, it would also allow:
/graemerocher/not_a_year/not_a_month/not_a_day/my_funky_blog_entryThis is problematic as it forces you to do some clever parsing in the controller code. Luckily, URL Mappings can be constrained to further validate the URL tokens:
"/$blog/$year?/$month?/$day?/$id?" {
controller = "blog"
action = "show"
constraints {
year(matches:/\\\d{4}/)
month(matches:/\\\d{2}/)
day(matches:/\\\d{2}/)
}
}In this case the constraints ensure that the year, month and day parameters match a particular valid pattern thus relieving you of that burden later on.
8.6.11 Named URL Mappings
URL Mappings also support named mappings, that is mappings which have a name associated with them. The name may be used to refer to a specific mapping when links are generated.
The syntax for defining a named mapping is as follows:
static mappings = {
name <mapping name>: <url pattern> {
// ...
}
}For example:
static mappings = {
name personList: "/showPeople" {
controller = 'person'
action = 'list'
}
name accountDetails: "/details/$acctNumber" {
controller = 'product'
action = 'accountDetails'
}
}The mapping may be referenced in a link tag in a GSP.
<g:link mapping="personList">List People</g:link>That would result in:
<a href="/showPeople">List People</a>Parameters may be specified using the params attribute.
<g:link mapping="accountDetails" params="[acctNumber:'8675309']">
Show Account
</g:link>That would result in:
<a href="/details/8675309">Show Account</a>Alternatively you may reference a named mapping using the link namespace.
<link:personList>List People</link:personList>That would result in:
<a href="/showPeople">List People</a>The link namespace approach allows parameters to be specified as attributes.
<link:accountDetails acctNumber="8675309">Show Account</link:accountDetails>That would result in:
<a href="/details/8675309">Show Account</a>To specify attributes that should be applied to the generated href, specify a Map value to the attrs attribute. These attributes will be applied directly to the href, not passed through to be used as request parameters.
<link:accountDetails attrs="[class: 'fancy']" acctNumber="8675309">
Show Account
</link:accountDetails>That would result in:
<a href="/details/8675309" class="fancy">Show Account</a>8.6.12 Customizing URL Formats
The default URL Mapping mechanism supports camel case names in the URLs. The default URL for accessing an action named addNumbers in a controller named MathHelperController would be something like /mathHelper/addNumbers. Grails allows for the customization of this pattern and provides an implementation which replaces the camel case convention with a hyphenated convention that would support URLs like /math-helper/add-numbers. To enable hyphenated URLs assign a value of "hyphenated" to the grails.web.url.converter property in grails-app/conf/application.groovy.
grails-app/conf/application.groovy
grails.web.url.converter = 'hyphenated'Or the equivalent in grails-app/conf/application.yml:
grails-app/conf/application.yml
grails:
web:
url:
converter: 'hyphenated'Arbitrary strategies may be plugged in by providing a class which implements the UrlConverter interface and adding an instance of that class to the Spring application context with the bean name of grails.web.UrlConverter.BEAN_NAME. If Grails finds a bean in the context with that name, it will be used as the default converter and there is no need to assign a value to the grails.web.url.converter config property.
src/main/groovy/com/myapplication/MyUrlConverterImpl.groovy
package com.myapplication
class MyUrlConverterImpl implements grails.web.UrlConverter {
String toUrlElement(String propertyOrClassName) {
// return some representation of a property or class name that should be used in URLs...
}
}grails-app/conf/spring/resources.groovy
beans = {
"${grails.web.UrlConverter.BEAN_NAME}"(com.myapplication.MyUrlConverterImpl)
}8.6.13 Namespaced Controllers
If an application defines multiple controllers with the same name
in different packages, the controllers must be defined in a
namespace. The way to define a namespace for a controller is to
define a static property named namespace in the controller and
assign a String to the property that represents the namespace.
grails-app/controllers/com/app/reporting/AdminController.groovy
package com.app.reporting
class AdminController {
static namespace = 'reports'
// ...
}grails-app/controllers/com/app/security/AdminController.groovy
package com.app.security
class AdminController {
static namespace = 'users'
// ...
}When defining url mappings which should be associated with a namespaced
controller, the namespace variable needs to be part of the URL mapping.
grails-app/controllers/UrlMappings.groovy
class UrlMappings {
static mappings = {
'/userAdmin' {
controller = 'admin'
namespace = 'users'
}
'/reportAdmin' {
controller = 'admin'
namespace = 'reports'
}
"/$namespace/$controller/$action?"()
}
}Reverse URL mappings may specify the namespace explicitly.
<g:link controller="admin" namespace="reports">Click For Report Admin</g:link>
<g:link controller="admin" namespace="users">Click For User Admin</g:link>Most links do not need a namespace attribute. When a link, redirect, chain, form action, pagination link, sortable column link, or include targets a controller and omits namespace, Grails resolves the namespace for the target controller automatically.
If the target is the controller currently handling the request, Grails uses the current request namespace. Otherwise it resolves the controller name the way code resolves a name, nearest scope first, the same rule that resolves a resource link to a controller (see Mapping to REST resources):
-
the current request namespace, if it defines a controller with that name
-
the default, non-namespaced controller, if there is one
-
the namespace of the only controller with that name
So controller and action are enough to generate the correct URL. When the same controller name is defined in several namespaces, as it is for an administration area or for versioned APIs, a link stays in the namespace it is rendered from. From the admin namespace, <g:link controller="user"> targets the admin UserController; from anywhere else, it targets the non-namespaced one.
A name defined only in namespaces other than the default one and the current request’s, such as v1 and v2 from a page outside both, is ambiguous. Grails infers no namespace, logs a warning the first time, and the link must specify namespace explicitly.
A name no registered controller has stays in the namespace the link is made from, as a relative reference resolves against where it is made.
A redirect naming no namespace is resolved exactly as a link is, starting from the namespace of the controller issuing it, so it reaches a controller defined in another namespace rather than being forced into its own.
An explicit namespace always wins. Use namespace="reports" in GSP markup, or namespace: 'reports' in Groovy code, to target a specific namespace. Use namespace="" in GSP markup, or namespace: null in Groovy code, to target a non-namespaced controller.
When resolving a URL mapping to a namespaced controller, the selected namespace
must identify one target controller. If the application provides several controllers with the same name in different
packages, at most 1 of them may be defined without a namespace property. If
there are multiple controllers with the same name that do not define a
namespace property, the framework will not know how to distinguish between
them for forward or reverse mapping resolutions.
It is allowed for an application to use a plugin which provides a controller
with the same name as a controller provided by the application and for neither
of the controllers to define a namespace property as long as the
controllers are in separate packages. For example, an application
may include a controller named com.accounting.ReportingController
and the application may use a plugin which provides a controller
named com.humanresources.ReportingController. The only issue
with that is the URL mapping for the controller provided by the
plugin needs to be explicit in specifying that the mapping applies
to the ReportingController which is provided by the plugin.
See the following example.
static mappings = {
"/accountingReports" {
controller = "reporting"
}
"/humanResourceReports" {
controller = "reporting"
plugin = "humanResources"
}
}With that mapping in place, a request to /accountingReports will
be handled by the ReportingController which is defined in the
application. A request to /humanResourceReports will be handled
by the ReportingController which is provided by the humanResources
plugin.
There could be any number of ReportingController controllers provided
by any number of plugins but no plugin may provide more than one
ReportingController even if they are defined in separate packages.
Assigning a value to the plugin variable in the mapping is only
required if there are multiple controllers with the same name
available at runtime provided by the application and/or plugins.
If the humanResources plugin provides a ReportingController and
there is no other ReportingController available at runtime, the
following mapping would work.
static mappings = {
"/humanResourceReports" {
controller = "reporting"
}
}It is best practice to be explicit about the fact that the controller is being provided by a plugin.
8.7 CORS
Spring Boot provides CORS support out of the box, but it is difficult to configure in a Grails application due to the way UrlMappings are used instead of annotations that define URLs. Starting with Grails 3.2.1, we have added a way to configure CORS that makes sense in a Grails application.
Once enabled, the default setting is "wide open".
application.yml
grails:
cors:
enabled: trueThat will produce a mapping to all urls /** with:
allowedOrigins |
|
allowedMethods |
|
allowedHeaders |
|
exposedHeaders |
|
maxAge |
|
allowCredentials |
false |
Some of these settings come directly from Spring Boot and can change in future versions. See Spring CORS Configuration Documentation
All of those settings can be easily overridden.
application.yml
grails:
cors:
enabled: true
allowedOrigins:
- http://localhost:5000In the example above, the allowedOrigins setting will replace [*].
You can also configure different URLs.
application.yml
grails:
cors:
enabled: true
allowedHeaders:
- Content-Type
mappings:
'[/api/**]':
allowedOrigins:
- http://localhost:5000
# Other configurations not specified default to the global configNote that the mapping key must be made with bracket notation (see https://github.com/spring-projects/spring-boot/wiki/Spring-Boot-Configuration-Binding#map-based-binding), which is a breaking change between Spring Boot 1.5 (Grails 3) and Spring Boot 2 (Grails 4).
Specifying at least one mapping will disable the creation of the global mapping (/**). If you wish to keep that setting, you should specify it along with your other mappings.
|
The settings above will produce a single mapping of /api/** with the following settings:
allowedOrigins |
|
allowedMethods |
|
allowedHeaders |
|
exposedHeaders |
|
maxAge |
|
allowCredentials |
false |
If you don’t wish to override any of the default settings, but only want to specify URLs, you can do so like this example:
application.yml
grails:
cors:
enabled: true
mappings:
'[/api/**]': inherit8.8 Interceptors
Grails provides standalone Interceptors using the create-interceptor command:
$ grails create-interceptor MyInterceptorThe above command will create an Interceptor in the grails-app/controllers directory with the following default contents:
class MyInterceptor {
boolean before() { true }
boolean after() { true }
void afterView() {
// no-op
}
}Interceptors vs Filters
In versions of Grails prior to Grails 3.0, Grails supported the notion of filters. These are still supported for backwards compatibility but are considered deprecated.
The new interceptors concept in Grails 3.0 is superior in a number of ways, most significantly interceptors can use Groovy’s CompileStatic annotation to optimize performance (something which is often critical as interceptors can be executed for every request.)
8.8.1 Defining Interceptors
By default interceptors will match the controllers with the same name. For example if you have an interceptor called BookInterceptor then all requests to the actions of the BookController will trigger the interceptor.
An Interceptor implements the Interceptor trait and provides 3 methods that can be used to intercept requests:
/**
* Executed before a matched action
*
* @return Whether the action should continue and execute
*/
boolean before() { true }
/**
* Executed after the action executes but prior to view rendering
*
* @return True if view rendering should continue, false otherwise
*/
boolean after() { true }
/**
* Executed after view rendering completes
*/
void afterView() {}As described above the before method is executed prior to an action and can cancel the execution of the action by returning false.
The after method is executed after an action executes and can halt view rendering if it returns false. The after method can also modify the view or model using the view and model properties respectively:
boolean after() {
model.foo = "bar" // add a new model attribute called 'foo'
view = 'alternate' // render a different view called 'alternate'
true
}When an action renders a view, for example with render(view: …), respond, or by returning a model, the view is rendered after after() returns, so changes to model and view take effect.
When an action calls render(template: …, model: …), the template is rendered during that call, before after() runs. The model property returns the map passed as model, so after() can inspect what was rendered, but it cannot change the response: changes to model or view have no effect, and returning false does not stop the response. The map is the instance the action passed, so modifying it changes the action’s map, and modifying an immutable map throws an UnsupportedOperationException.
// BookController.groovy
def show() {
render template: 'bookDetail', model: [book: Book.get(params.id)]
}
// BookInterceptor.groovy
boolean after() {
log.debug "Rendered book: ${model?.book?.title}"
true
}Only the model argument is available. An object passed with bean or collection is not part of model:
| Action code | model in after() |
|---|---|
|
|
|
|
|
|
|
|
|
|
The afterView method is executed after view rendering completes. If an exception occurs, it is available using the throwable property of the Interceptor trait. The property has type Throwable, so it can hold an Error as well as an Exception:
-
An
Errorthrown by an action arrives wrapped in an exception. UsegetCause()to reach it. -
An
Errorthrown outside the action, for example by a servlet filter, is handed to the servlet container’s error page, and interceptors that match the error page’s action run for that dispatch. If the error page passes the error to its model asexception,throwableholds it as the container provided it: Undertow passes theErroritself, while Tomcat wraps it in aServletException.
8.8.2 Matching Requests with Interceptors
As mention in the previous section, by default an interceptor will match only requests to the associated controller by convention. However you can configure the interceptor to match any request using the match or matchAll methods defined in the Interceptor API.
The matching methods return a Matcher instance which can be used to configure how the interceptor matches the request.
For example the following interceptor will match all requests except those to the login controller:
class AuthInterceptor {
AuthInterceptor() {
matchAll()
.excludes(controller:"login")
}
boolean before() {
// perform authentication
}
}You can also perform matching using named argument:
class LoggingInterceptor {
LoggingInterceptor() {
match(controller:"book", action:"show") // using strings
match(controller: ~/(author|publisher)/) // using regex
}
boolean before() {
...
}
}You can use any number of matchers defined in your interceptor. They will be executed in the order in which they have been defined. For example the above interceptor will match for all of the following:
-
when the
showaction ofBookControlleris called -
when
AuthorControllerorPublisherControlleris called
All named arguments except for uri accept either a String or a Regex expression. The uri argument supports a String path that is compatible with Spring’s AntPathMatcher. The possible named arguments are:
-
namespace- The namespace of the controller -
controller- The name of the controller -
action- The name of the action -
method- The HTTP method -
uri- The path of the request within the application. If this argument is used then all other arguments will be ignored and only this will be used.
The uri argument is matched against the same path that URL mappings use to select the controller: percent-encoded characters are decoded, matrix parameters (;name=value) are removed, and the context path is not included. When an application is deployed under the context path /app, a request for /app/%61dmin;x=1/users is matched as /admin/users, so the following interceptor applies to it:
class AdminInterceptor {
AdminInterceptor() {
match(uri: '/admin/**')
.excludes(uri: '/admin/health')
}
boolean before() {
...
}
}This is the canonical form defined by RFC 3986 and the Jakarta Servlet specification: path parameters are removed from each segment before percent-decoding, so an encoded semicolon (%3B) is a literal character rather than a parameter delimiter, and the path is decoded exactly once.
A pattern that starts with the context path, such as match(uri: '/app/admin/**'), is also accepted for backwards compatibility. Requests dispatched through <g:include> are matched against the included path, which is the path the include is dispatched to.
8.8.3 Ordering Interceptor Execution
Interceptors can be ordered by defining an order property that defines a priority.
For example:
class AuthInterceptor {
int order = HIGHEST_PRECEDENCE
...
}The default value of the order property is 0. Interceptor execution order is determined by sorting the order property in an ascending direction and executing the lowest numerically ordered interceptor first.
The values HIGHEST_PRECEDENCE and LOWEST_PRECEDENCE can be used to define filters that should should run first or last respectively.
Note that if you write an interceptor that is to be used by others it is better increment or decrement the HIGHEST_PRECEDENCE and LOWEST_PRECEDENCE to allow other interceptors to be inserted before or after the interceptor you are authoring:
int order = HIGHEST_PRECEDENCE + 50
// or
int order = LOWEST_PRECEDENCE - 50To find out the computed order of interceptors you can add a debug logger to logback-spring.xml as follows:
<logger name="grails.artefact.Interceptor" level="DEBUG" />You can override any interceptors default order by using bean override configuration in grails-app/conf/application.yml:
beans:
authInterceptor:
order: 50Or in grails-app/conf/application.groovy:
beans {
authInterceptor {
order = 50
}
}Or the equivalent in grails-app/conf/application.yml:
beans:
authInterceptor:
order: 50Thus giving you complete control over interceptor execution order.
8.9 Content Negotiation
Grails has built in support for Content negotiation using either the HTTP Accept header, an explicit format request parameter or the extension of a mapped URI.
Configuring Mime Types
Content negotiation works against a set of supported content types. As of Grails 8 these are provided by the framework as built-in defaults, so a newly generated application does not need to declare them in grails-app/conf/application.yml. The built-in defaults are equivalent to the following grails.mime.types setting:
grails:
mime:
types:
all: '*/*' # 'all' maps to '*' or the first available format in withFormat
atom: application/atom+xml
css: text/css
csv: text/csv
form: application/x-www-form-urlencoded
html:
- text/html
- application/xhtml+xml
js: text/javascript
json:
- application/json
- text/json
multipartForm: multipart/form-data
pdf: application/pdf
rss: application/rss+xml
text: text/plain
hal:
- application/hal+json
- application/hal+xml
xml:
- text/xml
- application/xmlThis is what allows Grails to detect the format of a request containing either the 'text/xml' or 'application/xml' media types as simply 'xml'. The first entry is the default format.
You only need to add the grails.mime.types setting when you want a different set of content types from the defaults. As in earlier Grails versions, a declared grails.mime.types replaces the built-in defaults, so the map you declare is the complete, authoritative set (and the first entry is the default format). This is also how you restrict the negotiable types — declare only the ones you want and the rest are not recognised:
grails:
mime:
types:
json:
- application/json
- text/json
xml:
- text/xml
- application/xmlIf instead you want to add to the built-in defaults without re-declaring them, enable merging with grails.mime.mergeDefaults. Your declared entries are then merged over the defaults: an entry replaces the default for the matching extension, any extension you do not declare keeps its default, and your declared entries are ordered first (so your first declared type remains the default format):
grails:
mime:
mergeDefaults: true
types:
custom: application/vnd.example+json
To restrict what an individual endpoint serves (rather than the application-wide set of recognised types), use the responseFormats property on a controller or the formats: argument of respond, which is the recommended, scoped way to limit content negotiation for a given action.
|
Content Negotiation using the format Request Parameter
Let’s say a controller action can return a resource in a variety of formats: HTML, XML, and JSON. What format will the client get? The easiest and most reliable way for the client to control this is through a format URL parameter.
So if you, as a browser or some other client, want a resource as XML, you can use a URL like this:
https://my.domain.org/books.xml
The request parameters format is allowed as well https://my.domain.org/books?format=xml, but the default Grails URL Mapping get "/$controller(.$format)?"(action:"index") will override the format parameter with null. So the default mapping should be updated to get "/$controller"(action:"index").
|
The result of this on the server side is a format property on the response object with the value xml .
You can also define this parameter in the URL Mappings definition:
"/book/list"(controller:"book", action:"list") {
format = "xml"
}You could code your controller action to return XML based on this property, but you can also make use of the controller-specific withFormat() method:
This example requires the addition of the org.apache.grails:grails-converters plugin
|
import grails.converters.JSON
import grails.converters.XML
class BookController {
def list() {
def books = Book.list()
withFormat {
html bookList: books
json { render books as JSON }
xml { render books as XML }
'*' { render books as JSON }
}
}
}In this example, Grails will only execute the block inside withFormat() that matches the requested content type. So if the preferred format is html then Grails will execute the html() call only. Each 'block' can either be a map model for the corresponding view (as we are doing for 'html' in the above example) or a closure. The closure can contain any standard action code, for example it can return a model or render content directly.
When no format matches explicitly, a * (wildcard) block can be used to handle all other formats.
There is a special format, "all", that is handled differently from the explicit formats. If "all" is specified (normally this happens through the Accept header - see below), then the first block of withFormat() is executed when there isn’t a * (wildcard) block available.
You should not add an explicit "all" block. In this example, a format of "all" will trigger the html handler (html is the first block and there is no * block).
withFormat {
html bookList: books
json { render books as JSON }
xml { render books as XML }
}
When using withFormat make sure it is the last call in your controller action as the return value of the withFormat method is used by the action to dictate what happens next.
|
Using the Accept header
Every incoming HTTP request has a special Accept header that defines what media types (or mime types) a client can "accept". A non-browser client such as a JavaScript fetch call or a REST client is typically specific about what it wants:
application/jsonand Grails honors that: it sets format to json as you’d expect, and this works with the withFormat() method in just the same way as when the format URL parameter is set (although the URL parameter takes precedence).
By default Grails honors the Accept header for every client, including browsers. Modern browsers send a well-formed header that already prioritizes HTML, for example:
text/html, application/xhtml+xml, application/xml;q=0.9, */*;q=0.8Here text/html has the highest quality (q=1.0 implicitly) and application/xml is explicitly lower at q=0.9, so content negotiation correctly resolves a browser navigation to HTML without any special handling.
|
This is a change from Grails 7 and earlier, which ignored the |
If you need the legacy behavior — ignoring the Accept header for specific user agents — configure grails.mime.disable.accept.header.userAgents with the user-agent tokens to match (it is unset by default):
grails.mime.disable.accept.header.userAgents = ['Gecko', 'WebKit', 'Presto', 'Trident']Or the equivalent in application.yml:
grails:
mime:
disable:
accept:
header:
userAgents: ['Gecko', 'WebKit', 'Presto', 'Trident']When this setting is active, XMLHttpRequest-style requests (those sending an X-Requested-With: XMLHttpRequest header) still honor the Accept header; set grails.mime.disable.accept.header.userAgentsXhr to true to subject those requests to the user-agent filter as well.
An accept header of '*/\*' results in a value of all for the format property.
| If the accept header is used but contains no registered content types, Grails will assume a broken browser is making the request and will set the HTML format - note that this is different from how the other content negotiation modes work as those would activate the "all" format! |
Request format vs. Response format
As of Grails 2.0, there is a separate notion of the request format and the response format. The request format is dictated by the CONTENT_TYPE header and is typically used to detect if the incoming request can be parsed into XML or JSON, whilst the response format uses the file extension, format parameter or ACCEPT header to attempt to deliver an appropriate response to the client.
The withFormat available on controllers deals specifically with the response format. If you wish to add logic that deals with the request format then you can do so using a separate withFormat method available on the request:
request.withFormat {
xml {
// read XML
}
json {
// read JSON
}
}Content Negotiation with URI Extensions
Grails also supports content negotiation using URI extensions. For example given the following URI:
/book/list.xmlThis works as a result of the default URL Mapping definition which is:
"/$controller/$action?/$id?(.$format)?"{Note the inclusion of the format variable in the path. If you do not wish to use content negotiation via the file extension then simply remove this part of the URL mapping:
"/$controller/$action?/$id?"{Testing Content Negotiation
To test content negotiation in a unit or integration test (see the section on Testing) you can either manipulate the incoming request headers:
void testJavascriptOutput() {
def controller = new TestController()
controller.request.addHeader "Accept",
"text/javascript, text/html, application/xml, text/xml, */*"
controller.testAction()
assertEquals "alert('hello')", controller.response.contentAsString
}Or you can set the format parameter to achieve a similar effect:
void testJavascriptOutput() {
def controller = new TestController()
controller.params.format = 'js'
controller.testAction()
assertEquals "alert('hello')", controller.response.contentAsString
}9 Traits
Overview
Grails provides a number of traits which provide access to properties and behavior that may be accessed from various Grails artefacts as well as arbitrary Groovy classes which are part of a Grails project. Many of these traits are automatically added to Grails artefact classes (like controllers and taglibs, for example) and are easy to add to other classes.
9.1 Traits Provided by Grails
Grails artefacts are automatically augmented with certain traits at compile time.
Domain Class Traits
Controller Traits
-
grails.async.web.AsyncController (deprecated for removal; return a
Promisefrom the action instead of usingstartAsync())
Interceptor Trait
Tag Library Trait
Below is a list of other traits provided by the framework. The javadocs provide more detail about methods and properties related to each trait.
| Trait | Brief Description |
|---|---|
Common Web Attributes |
|
Servlet API Attributes |
|
Data Binding API |
|
Request Forwarding API |
|
Response Redirecting API |
|
Response Rendering API |
|
Validation API |
9.1.1 WebAttributes Trait Example
WebAttributes is one of the traits provided by the framework. Any Groovy class may implement this trait to inherit all of the properties and behaviors provided by the trait.
src/main/groovy/demo/Helper.groovy
package demo
import grails.web.api.WebAttributes
class Helper implements WebAttributes {
List<String> getControllerNames() {
// There is no need to pass grailsApplication as an argument
// or otherwise inject the grailsApplication property. The
// WebAttributes trait provides access to grailsApplication.
grailsApplication.getArtefacts('Controller')*.name
}
}The traits are compatible with static compilation…
src/main/groovy/demo/Helper.groovy
package demo
import grails.web.api.WebAttributes
import groovy.transform.CompileStatic
@CompileStatic
class Helper implements WebAttributes {
List<String> getControllerNames() {
// There is no need to pass grailsApplication as an argument
// or otherwise inject the grailsApplication property. The
// WebAttributes trait provides access to grailsApplication.
grailsApplication.getArtefacts('Controller')*.name
}
}10 REST
REST is not really a technology in itself, but more an architectural pattern. REST is very simple and just involves using plain XML or JSON as a communication medium, combined with URL patterns that are "representational" of the underlying system, and HTTP methods such as GET, PUT, POST and DELETE.
Each HTTP method maps to an action type. For example GET for retrieving data, POST for creating data, PUT for updating and so on.
Grails includes flexible features that make it easy to create RESTful APIs. Creating a RESTful resource can be as simple as one line of code, as demonstrated in the next section.
10.1 Domain classes as REST resources
The easiest way to create a RESTful API in Grails is to expose a domain class as a REST resource. This can be done by adding the grails.rest.Resource transformation to any domain class:
import grails.rest.*
@Resource(uri='/books')
class Book {
String title
static constraints = {
title blank:false
}
}Simply by adding the Resource transformation and specifying a URI, your domain class will automatically be available as a REST resource in either XML or JSON formats. The transformation will automatically register the necessary RESTful URL mapping and create a controller called BookController.
You can try it out by adding some test data to BootStrap.groovy:
def init = {
new Book(title:"The Stand").save()
new Book(title:"The Shining").save()
}And then hitting the URL http://localhost:8080/books/1, which will render the response like:
<?xml version="1.0" encoding="UTF-8"?>
<book id="1">
<title>The Stand</title>
</book>If you change the URL to http://localhost:8080/books/1.json you will get a JSON response such as:
{"id":1,"title":"The Stand"}If you wish to change the default to return JSON instead of XML, you can do this by setting the formats attribute of the Resource transformation:
import grails.rest.*
@Resource(uri='/books', formats=['json', 'xml'])
class Book {
...
}With the above example JSON will be prioritized. The list that is passed should contain the names of the formats that the resource should expose. The names of formats are defined in the grails.mime.types setting of application.groovy:
grails.mime.types = [
...
json: ['application/json', 'text/json'],
...
xml: ['text/xml', 'application/xml']
]Or the equivalent in application.yml:
grails:
mime:
types:
json:
- 'application/json'
- 'text/json'
xml:
- 'text/xml'
- 'application/xml'See the section on Configuring Mime Types in the user guide for more information.
Instead of using the file extension in the URI, you can also obtain a JSON response using the ACCEPT header. Here’s an example using the Unix curl tool:
$ curl -i -H "Accept: application/json" localhost:8080/books/1
{"id":1,"title":"The Stand"}This works thanks to Grails' Content Negotiation features.
You can create a new resource by issuing a POST request:
$ curl -i -X POST -H "Content-Type: application/json" -d '{"title":"Along Came A Spider"}' localhost:8080/books
HTTP/1.1 201 Created
Server: Apache-Coyote/1.1
...Updating can be done with a PUT request:
$ curl -i -X PUT -H "Content-Type: application/json" -d '{"title":"Along Came A Spider"}' localhost:8080/books/1
HTTP/1.1 200 OK
Server: Apache-Coyote/1.1
...Finally a resource can be deleted with DELETE request:
$ curl -i -X DELETE localhost:8080/books/1
HTTP/1.1 204 No Content
Server: Apache-Coyote/1.1
...As you can see, the Resource transformation enables all of the HTTP method verbs on the resource. You can enable only read-only capabilities by setting the readOnly attribute to true:
import grails.rest.*
@Resource(uri='/books', readOnly=true)
class Book {
...
}In this case POST, PUT and DELETE requests will be forbidden.
10.2 Mapping to REST resources
If you prefer to keep the declaration of the URL mapping in your UrlMappings.groovy file then simply removing the uri attribute of the Resource transformation and adding the following line to UrlMappings.groovy will suffice:
"/books"(resources:"book")Extending your API to include more end points then becomes trivial:
"/books"(resources:"book") {
"/publisher"(controller:"publisher", method:"GET")
}The above example will expose the URI /books/1/publisher.
A more detailed explanation on creating RESTful URL mappings can be found in the URL Mappings section of the user guide.
10.3 Linking to REST resources from GSP pages
The link tag offers an easy way to link to any domain class resource:
<g:link resource="${book}">My Link</g:link>However, currently you cannot use g:link to link to the DELETE action and most browsers do not support sending the DELETE method directly.
The best way to accomplish this is to use a form submit:
<form action="/book/2" method="post">
<input type="hidden" name="_method" value="DELETE"/>
</form>Grails supports overriding the request method via the hidden _method parameter. This is for browser compatibility purposes. This is useful when using restful resource mappings to create powerful web interfaces.
To make a link fire this type of event, perhaps capture all click events for links with a data-method attribute and issue a form submit via JavaScript.
The same override can be requested with an X-HTTP-Method-Override header only while the hidden HTTP method
filter is enabled; it is disabled by default as of Grails 8.
By default the _method parameter is resolved inside the dispatcher, after multipart handling and after the
servlet filter chain. <g:form> emits the parameter as it always has. A resources mapping additionally routes
a POST to the member URL at the update action, so a client that cannot send the parameter — an AngularJS
$resource and the clients modelled on it POST to save an existing object — reaches update without it.
The previous behaviour — a servlet filter rewriting the request method ahead of the dispatcher — can be restored:
grails-app/conf/application.yml
grails:
web:
hiddenmethod:
filter:
enabled: true
With the filter disabled, servlet filters and the Spring Security filter chain see the request’s real
POST method, and the URL does not distinguish update from delete. Authorization rules keyed on the HTTP
method must be reviewed.
|
10.4 Versioning REST resources
A common requirement with a REST API is to expose different versions at the same time. There are a few ways this can be achieved in Grails.
Versioning using the URI
A common approach is to use the URI to version APIs (although this approach is discouraged in favour of Hypermedia). For example, you can define the following URL mappings:
"/books/v1"(resources:"book", namespace:'v1')
"/books/v2"(resources:"book", namespace:'v2')That will match the following controllers:
package myapp.v1
class BookController {
static namespace = 'v1'
}
package myapp.v2
class BookController {
static namespace = 'v2'
}This approach has the disadvantage of requiring two different URI namespaces for your API.
Versioning with the Accept-Version header
As an alternative Grails supports the passing of an Accept-Version header from clients. For example you can define the following URL mappings:
"/books"(version:'1.0', resources:"book", namespace:'v1')
"/books"(version:'2.0', resources:"book", namespace:'v2')Then in the client simply pass which version you need using the Accept-Version header:
$ curl -i -H "Accept-Version: 1.0" -X GET http://localhost:8080/booksVersioning using Hypermedia / Mime Types
Another approach to versioning is to use Mime Type definitions to declare the version of your custom media types (see the section on "Hypermedia as the Engine of Application State" for more information about Hypermedia concepts). For example, in application.groovy you can declare a custom Mime Type for your resource that includes a version parameter (the 'v' parameter):
grails.mime.types = [
all: '*/*',
book: "application/vnd.books.org.book+json;v=1.0",
bookv2: "application/vnd.books.org.book+json;v=2.0",
...
}Or the equivalent in application.yml:
grails:
mime:
types:
all: '*/*'
book: "application/vnd.books.org.book+json;v=1.0"
bookv2: "application/vnd.books.org.book+json;v=2.0"
...| It is critical that place your new mime types after the 'all' Mime Type because if the Content Type of the request cannot be established then the first entry in the map is used for the response. If you have your new Mime Type at the top then Grails will always try and send back your new Mime Type if the requested Mime Type cannot be established. |
Then override the renderer (see the section on "Customizing Response Rendering" for more information on custom renderers) to send back the custom Mime Type in grails-app/conf/spring/resourses.groovy:
import grails.rest.render.json.*
import grails.web.mime.*
beans = {
bookRendererV1(JsonRenderer, myapp.v1.Book, new MimeType("application/vnd.books.org.book+json", [v:"1.0"]))
bookRendererV2(JsonRenderer, myapp.v2.Book, new MimeType("application/vnd.books.org.book+json", [v:"2.0"]))
}Then update the list of acceptable response formats in your controller:
class BookController extends RestfulController<Book> {
static responseFormats = ['json', 'xml', 'book', 'bookv2']
// ...
}Then using the Accept header you can specify which version you need using the Mime Type:
$ curl -i -H "Accept: application/vnd.books.org.book+json;v=1.0" -X GET http://localhost:8080/books10.5 Implementing REST controllers
The Resource transformation is a quick way to get started, but typically you’ll want to customize the controller logic, the rendering of the response or extend the API to include additional actions.
10.5.1 Extending the RestfulController super class
The easiest way to get started doing so is to create a new controller for your resource that extends the grails.rest.RestfulController super class. For example:
class BookController extends RestfulController<Book> {
static responseFormats = ['json', 'xml']
BookController() {
super(Book)
}
}To customize any logic you can just override the appropriate action. The following table provides the names of the action names and the URIs they map to:
| HTTP Method | URI | Controller Action |
|---|---|---|
GET |
/books |
index |
GET |
/books/create |
create |
POST |
/books |
save |
GET |
/books/${id} |
show |
GET |
/books/${id}/edit |
edit |
PUT |
/books/${id} |
update |
PATCH |
/books/${id} |
patch |
DELETE |
/books/${id} |
delete |
The create and edit actions are only needed if the controller exposes an HTML interface.
|
As an example, if you have a nested resource then you would typically want to query both the parent and the child identifiers. For example, given the following URL mapping:
"/authors"(resources:'author') {
"/books"(resources:'book')
}You could implement the nested controller as follows:
class BookController extends RestfulController<Book> {
static responseFormats = ['json', 'xml']
BookController() {
super(Book)
}
@Override
protected Book queryForResource(Serializable id) {
Book.where {
id == id && author.id == params.authorId
}.find()
}
}The example above subclasses RestfulController and overrides the protected queryForResource method to customize the query for the resource to take into account the parent resource.
Customizing Data Binding In A RestfulController Subclass
The RestfulController class contains code which does data binding for actions like save and update. The class defines a getObjectToBind() method which returns a value which will be used as the source for data binding. For example, the update action does something like this…
class RestfulController<T> {
def update() {
T instance = // retrieve instance from the database...
instance.properties = getObjectToBind()
// ...
}
// ...
}By default the getObjectToBind() method returns the request object. When the request object is used as the binding source, if the request has a body then the body will be parsed and its contents will be used to do the data binding, otherwise the request parameters will be used to do the data binding. Subclasses of RestfulController may override the getObjectToBind() method and return anything that is a valid binding source, including a Map or a DataBindingSource. For most use cases binding the request is appropriate but the getObjectToBind() method allows for changing that behavior where desired.
Using custom subclass of RestfulController with Resource annotation
You can also customize the behaviour of the controller that backs the Resource annotation.
The class must provide a constructor that takes a domain class as its argument. The second constructor is required for supporting Resource annotation with readOnly=true.
This is a template that can be used for subclassed RestfulController classes used in Resource annotations:
class SubclassRestfulController<T> extends RestfulController<T> {
SubclassRestfulController(Class<T> domainClass) {
this(domainClass, false)
}
SubclassRestfulController(Class<T> domainClass, boolean readOnly) {
super(domainClass, readOnly)
}
}You can specify the super class of the controller that backs the Resource annotation with the superClass attribute.
import grails.rest.*
@Resource(uri='/books', superClass=SubclassRestfulController)
class Book {
String title
static constraints = {
title blank:false
}
}10.5.2 Implementing REST Controllers Step by Step
If you don’t want to take advantage of the features provided by the RestfulController super class, then you can implement each HTTP verb yourself manually. The first step is to create a controller:
$ grails create-controller bookThen add some useful imports and enable readOnly by default:
import grails.gorm.transactions.*
import static org.springframework.http.HttpStatus.*
import static org.springframework.http.HttpMethod.*
@Transactional(readOnly = true)
class BookController {
...
}Recall that each HTTP verb matches a particular Grails action according to the following conventions:
| HTTP Method | URI | Controller Action |
|---|---|---|
GET |
/books |
index |
GET |
/books/${id} |
show |
GET |
/books/create |
create |
GET |
/books/${id}/edit |
edit |
POST |
/books |
save |
PUT |
/books/${id} |
update |
PATCH |
/books/${id} |
patch |
DELETE |
/books/${id} |
delete |
The create and edit actions are already required if you plan to implement an HTML interface for the REST resource. They are there in order to render appropriate HTML forms to create and edit a resource. They can be discarded if that is not a requirement.
|
The key to implementing REST actions is the respond method introduced in Grails 2.3. The respond method tries to produce the most appropriate response for the requested content type (JSON, XML, HTML etc.)
Implementing the 'index' action
For example, to implement the index action, simply call the respond method passing the list of objects to respond with:
def index(Integer max) {
params.max = Math.min(max ?: 10, 100)
respond Book.list(params), model:[bookCount: Book.count()]
}Note that in the above example we also use the model argument of the respond method to supply the total count. This is only required if you plan to support pagination via some user interface.
The respond method will, using Content Negotiation, attempt to reply with the most appropriate response given the content type requested by the client (via the ACCEPT header or file extension).
If the content type is established to be HTML then a model will be produced such that the action above would be the equivalent of writing:
def index(Integer max) {
params.max = Math.min(max ?: 10, 100)
[bookList: Book.list(params), bookCount: Book.count()]
}By providing an index.gsp file you can render an appropriate view for the given model. If the content type is something other than HTML then the respond method will attempt to lookup an appropriate grails.rest.render.Renderer instance that is capable of rendering the passed object. This is done by inspecting the grails.rest.render.RendererRegistry.
By default there are already renderers configured for JSON and XML, to find out how to register a custom renderer see the section on "Customizing Response Rendering".
Implementing the 'show' action
The show action, which is used to display and individual resource by id, can be implemented in one line of Groovy code (excluding the method signature):
def show(Book book) {
respond book
}By specifying the domain instance as a parameter to the action Grails will automatically attempt to lookup the domain instance using the id parameter of the request. If the domain instance doesn’t exist, then null will be passed into the action. The respond method will return a 404 error if null is passed otherwise once again it will attempt to render an appropriate response. If the format is HTML then an appropriate model will produced. The following action is functionally equivalent to the above action:
def show(Book book) {
if(book == null) {
render status:404
}
else {
return [book: book]
}
}Implementing the 'save' action
The save action creates new resource representations. To start off, simply define an action that accepts a resource as the first argument and mark it as Transactional with the grails.gorm.transactions.Transactional transform:
@Transactional
def save(Book book) {
...
}Then the first thing to do is check whether the resource has any validation errors and if so respond with the errors:
if(book.hasErrors()) {
respond book.errors, view:'create'
}
else {
...
}In the case of HTML the 'create' view will be rendered again so the user can correct the invalid input. In the case of other formats (JSON, XML etc.), the errors object itself will be rendered in the appropriate format and a status code of 422 (UNPROCESSABLE_ENTITY) returned.
If there are no errors then the resource can be saved and an appropriate response sent:
book.save flush:true
withFormat {
html {
flash.message = message(code: 'default.created.message', args: [message(code: 'book.label', default: 'Book'), book.id])
redirect book
}
'*' { render status: CREATED }
}In the case of HTML a redirect is issued to the originating resource and for other formats a status code of 201 (CREATED) is returned.
Implementing the 'update' action
The update action updates an existing resource representation and is largely similar to the save action. First define the method signature:
@Transactional
def update(Book book) {
...
}If the resource exists then Grails will load the resource, otherwise null is passed. In the case of null, you should return a 404:
if(book == null) {
render status: NOT_FOUND
}
else {
...
}Then once again check for errors validation errors and if so respond with the errors:
if(book.hasErrors()) {
respond book.errors, view:'edit'
}
else {
...
}In the case of HTML the 'edit' view will be rendered again so the user can correct the invalid input. In the case of other formats (JSON, XML etc.) the errors object itself will be rendered in the appropriate format and a status code of 422 (UNPROCESSABLE_ENTITY) returned.
If there are no errors then the resource can be saved and an appropriate response sent:
book.save flush:true
withFormat {
html {
flash.message = message(code: 'default.updated.message', args: [message(code: 'book.label', default: 'Book'), book.id])
redirect book
}
'*' { render status: OK }
}In the case of HTML a redirect is issued to the originating resource and for other formats a status code of 200 (OK) is returned.
Implementing the 'delete' action
The delete action deletes an existing resource. The implementation is largely similar to the update action, except the delete() method is called instead:
book.delete flush:true
withFormat {
html {
flash.message = message(code: 'default.deleted.message', args: [message(code: 'Book.label', default: 'Book'), book.id])
redirect action:"index", method:"GET"
}
'*'{ render status: NO_CONTENT }
}Notice that for an HTML response a redirect is issued back to the index action, whilst for other content types a response code 204 (NO_CONTENT) is returned.
10.5.3 Generating a REST controller using scaffolding
To see some of these concepts in action and help you get going, the Scaffolding plugin, version 2.0 and above, can generate a REST ready controller for you, simply run the command:
$ grails generate-controller <<Domain Class Name>>10.6 Calling REST Services with HttpClient
Calling Grails REST services - as well as third-party services - is very straightforward using the Micronaut HTTP Client. This HTTP client has both a low-level API and a higher level AOP-driven API, making it useful for both simple requests as well as building declarative, type-safe API layers.
To use the Micronaut HTTP client you must have the micronaut-http-client and micronaut-serde-jackson dependencies on your classpath. Add the following dependency to your build.gradle file.
build.gradle
implementation "io.micronaut:micronaut-http-client:4.6.6"
implementation "io.micronaut.serde:micronaut-serde-jackson:2.11.0"Low-level API
The HttpClient interface forms the basis for the low-level API. This interfaces declares methods to help ease executing HTTP requests and receive responses.
The majority of the methods in the HttpClient interface returns Reactive Streams Publisher instances, and a sub-interface called RxHttpClient is included that provides a variation of the HttpClient interface that returns RxJava Flowable types. When using HttpClient in a blocking flow, you may wish to call toBlocking() to return an instance of BlockingHttpClient.
There are a few ways by which you can obtain a reference to a HttpClient. The most simple way is using the create method
Creating an HTTP client
List<Album> searchWithApi(String searchTerm) {
String baseUrl = "https://itunes.apple.com/"
BlockingHttpClient client = HttpClient.create(baseUrl.toURL()).toBlocking() (1)
HttpRequest request = HttpRequest.GET("/search?limit=25&media=music&entity=album&term=${searchTerm}")
HttpResponse<String> resp = client.exchange(request, String)
client.close() (2)
String json = resp.body()
ObjectMapper objectMapper = new ObjectMapper() (3)
objectMapper.configure(DeserializationFeature.FAIL_ON_UNKNOWN_PROPERTIES, false)
SearchResult searchResult = objectMapper.readValue(json, SearchResult)
searchResult.results
}| 1 | Create a new instance of HttpClient with the create method, and convert to an instance of BlockingHttpClient with toBlocking(), |
| 2 | The client should be closed using the close method to prevent thread leaking. |
| 3 | Jackson’s ObjectMapper API can be used to map the raw JSON to POGOs, in this case SearchResult |
Consult the Http Client section of the Micronaut user guide for more information on using the HttpClient low-level API.
Declarative API
A declarative HTTP client can be written by adding the @Client annotation to any interface or abstract class. Using Micronaut’s AOP support (see the Micronaut user guide section on Introduction Advice), the abstract or interface methods will be implemented for you at compilation time as HTTP calls. Declarative clients can return data-bound POGOs (or POJOs) without requiring special handling from the calling code.
package example.grails
import io.micronaut.http.annotation.Get
import io.micronaut.http.client.annotation.Client
@Client("https://start.grails.org")
interface GrailsAppForgeClient {
@Get("/{version}/profiles")
List<Map> profiles(String version)
}Note that HTTP client methods are annotated with the appropriate HTTP method, such as @Get or @Post.
To use a client like the one in the above example, simply inject an instance of the client into any bean using the @Autowired annotation.
@Autowired GrailsAppForgeClient appForgeClient
List<Map> profiles(String grailsVersion) {
respond appForgeClient.profiles(grailsVersion)
}For more details on writing and using declarative clients, consult the Http Client section of the Micronaut user guide.
Spring HTTP Interface Client
Spring Framework 7 can create an HTTP client from an interface annotated with @HttpExchange and @GetExchange. This is a Spring API, not a Grails DSL or a controller contract.
import org.springframework.web.bind.annotation.PathVariable;
import org.springframework.web.service.annotation.GetExchange;
import org.springframework.web.service.annotation.HttpExchange;
@HttpExchange("/books")
public interface BookClient {
@GetExchange("/{id}")
Book findById(@PathVariable Long id);
}For a synchronous client, create a proxy with RestClient:
import org.springframework.web.client.RestClient;
import org.springframework.web.client.support.RestClientAdapter;
import org.springframework.web.service.invoker.HttpServiceProxyFactory;
RestClient restClient = RestClient.builder()
.baseUrl("https://example.com")
.build();
BookClient bookClient = HttpServiceProxyFactory
.builderFor(RestClientAdapter.create(restClient))
.build()
.createClient(BookClient.class);Spring 7 can also register the proxy as a bean. Group related interfaces and configure their shared RestClient builder:
import org.springframework.context.annotation.Bean;
import org.springframework.context.annotation.Configuration;
import org.springframework.web.client.support.RestClientHttpServiceGroupConfigurer;
import org.springframework.web.service.registry.HttpServiceGroup.ClientType;
import org.springframework.web.service.registry.ImportHttpServices;
@Configuration
@ImportHttpServices(group = "books", types = BookClient.class,
clientType = ClientType.REST_CLIENT)
class BookClientConfiguration {
@Bean
RestClientHttpServiceGroupConfigurer bookClientConfigurer() {
return groups -> groups.filterByName("books")
.forEachClient((group, builder) -> builder.baseUrl("https://example.com"));
}
}The registered BookClient can then be constructor-injected into an application bean and called like any other interface. Synchronous methods can return a decoded body, HttpHeaders, or ResponseEntity.
For Mono or Flux return values, add Spring WebFlux to the classpath and use WebClient instead. Register the group with clientType = ClientType.WEB_CLIENT and configure it through WebClientHttpServiceGroupConfigurer; reactive applications also need Reactor types on the classpath.
HTTP interface parameters cannot be null unless the parameter is optional. By default, 4xx and 5xx responses raise an exception. Configure status handling on the underlying RestClient or WebClient when an API requires different behavior.
10.7 The REST Profile
Grails supports a tailored profile for creating REST applications that provides a more focused set of dependencies and commands.
To get started with the REST profile using the Grails Shell CLI, create an application specifying rest-api as the name of the profile:
$ grails create-app my-api --profile rest-apiThis will create a new REST application that provides the following features:
-
Default set of commands for creating and generating REST endpoints
-
Defaults to using JSON views for rendering responses (see the next section)
-
Fewer plugins than the default Grails web profile (no GSP, no Asset Pipeline, nothing HTML related)
You will notice for example in the grails-app/views directory that there are *.gson files for rendering the default index page and as well as any 404 and 500 errors.
If you issue the following set of commands:
$ grails create-domain-class my.api.Book
$ grails generate-all my.api.BookInstead of CRUD HTML interface a REST endpoint is generated that produces JSON responses. In addition, the generated functional and unit tests by default test the REST endpoint.
To generate a REST application using the Forge CLI, use the following:
$ grails -t forge create-restapi my-apiThis will create a new REST application with the same focused setup as above:
-
Default set of commands for creating and generating REST endpoints
-
Defaults to using JSON views for rendering responses (see the next section)
-
Fewer plugins than a default Grails Web-style application (no GSP, no Asset Pipeline, nothing HTML related)
You will notice for example in the grails-app/views directory that there are *.gson files for rendering the default index page and as well as any 404 and 500 errors.
If you issue the following set of commands:
$ grails create-domain-class my.api.Book
$ ./gradlew runCommand -Pargs="generate-all my.api.Book"
The generate-* commands are only available after adding the org.apache.grails:grails-scaffolding dependency to your project. They are not available by default in a REST application. Also, they will no longer produce *.gson files as that was a feature of the REST API-profile.
|
Instead of CRUD HTML interface a REST endpoint is generated that produces JSON responses. In addition, the generated functional and unit tests by default test the REST endpoint.
10.8 OpenAPI Descriptions
Grails applications can publish an OpenAPI description of their REST
endpoints. The optional grails-openapi module derives it from the application itself - its URL
mappings, its controllers, its domain classes and command objects, and their constraints - and
lets the standard OpenAPI annotations correct or enrich what is derived.
The description can be produced two ways, from the same configuration:
-
At build time, by the
generate-open-apicommand, which writes it to a file. The file can be packaged and served as a static resource, reviewed in a change, or handed to a client code generator, and the running application exposes nothing it does not choose to serve. -
At runtime, by springdoc-openapi, which serves it at
/v3/api-docsand can serve Swagger UI beside it. springdoc builds its document from Spring MVC handler methods, which Grails does not use, so the module contributes the Grails endpoints to it.
Getting Started
dependencies {
implementation 'org.apache.grails:grails-openapi'
}That is all the build-time command needs. To serve the description at runtime as well, add springdoc, and optionally Swagger UI:
dependencies {
// the document, served at /v3/api-docs
implementation 'org.springdoc:springdoc-openapi-starter-webmvc-api'
// or the document and Swagger UI, served at /swagger-ui/index.html
implementation 'org.springdoc:springdoc-openapi-starter-webmvc-ui'
}Generating the Description at Build Time
./gradlew generateOpenApiThe command starts the application context, without a web server, and writes the default document
to build/openapi/openapi.yaml and each group to build/openapi/openapi-<group>.yaml.
A character of the group’s name a file name cannot hold, such as the / of admin/v1, is written
as -, so that group is written to openapi-admin-v1.yaml; where two groups would then be written
to one file, the command writes nothing and names them.
The --output-directory and --format options, or the grails.openapi.output-directory and
grails.openapi.output-format settings, choose where and whether YAML or JSON is written:
./gradlew runCommand -Pargs="generate-open-api --format=json --output-directory=build/api"Because the command starts the application, it needs whatever the application needs to start in the environment it runs in, such as a datasource.
Where springdoc is configured, the command applies the method filters, operation customizers and
OpenAPI customizers springdoc applies to the documents it serves, so each file describes what
springdoc serves. That holds only in an environment where springdoc is enabled: with
springdoc.api-docs.enabled: false, as an application generated with the openapi feature has in
production, springdoc configures nothing, so the command writes no springdoc.group-configs group and
applies none of springdoc’s filters and customizers, and says so; grails.openapi.groups are
written as ever. A filter or customizer that fails there, such as one that reads the current
request, is skipped and logged, rather than the operations it was applied to.
To package the description and serve it as a static file, include it in the application’s static resources when the application is assembled:
def openApi = layout.buildDirectory.dir('openapi')
tasks.named('bootJar') {
dependsOn 'generateOpenApi'
from(openApi) { into 'BOOT-INF/classes/static/api' }
}It is then served at /static/api/openapi.yaml, and any viewer can render it. For example,
Redoc needs only a page that points at the file:
<redoc spec-url="/static/api/openapi.yaml"></redoc>
<script src="https://cdn.redoc.ly/redoc/latest/bundles/redoc.standalone.js"></script>Serving the Description at Runtime
With springdoc on the classpath no further configuration is required. springdoc registers its own resource handlers, so Swagger UI is served even though Grails leaves Spring Boot’s catch-all resource handler disabled, and the springdoc paths fall through the Grails URL mappings because they resolve to no controller.
The Grails operations are added to each document before any other springdoc customizer runs, so an
OpenApiCustomizer bean, a GlobalOpenApiCustomizer bean, or a customizer a GroupedOpenApi adds
sees them and can change them. springdoc runs an OpenApiLocaleCustomizer before all of those,
though, so one does not see the Grails operations, and the generate-open-api command, which
answers no request in a locale, does not run one.
springdoc describes the application’s own Spring MVC endpoints as it does without Grails, since Jackson rather than Grails renders what they return: a domain class one of them returns is described with everything Jackson writes of it, such as a getter with nothing persisted behind it, and with the whole of what it is associated with. Where a Grails endpoint in the same document uses the class too, it is described once, as Grails renders it, and the Spring MVC endpoint refers to that schema as well. A class springdoc describes under the same name as another the Grails endpoints use is named apart from it, as below, in each document on its own.
An application whose URL mappings include a catch-all that resolves to a view or a controller - a
single page application forwarding unmatched paths to an index view, or an API answering unmatched
paths with a 404 of its own - needs nothing more either: the paths springdoc serves are excluded
from the URL mappings, at springdoc.api-docs.path and springdoc.swagger-ui.path where they are
configured, while springdoc serves them.
The runtime description is served to anyone who can reach the application, and describes
every endpoint, resource and constraint it documents. Secure /v3/api-docs/ and
/swagger-ui/ the way the application secures anything else, or disable them where they should
not be served, for example in production with springdoc.api-docs.enabled: false and
springdoc.swagger-ui.enabled: false, which an application generated with the openapi feature
sets for production. An application that only needs the description as a file
can generate it at build time and leave springdoc out altogether. With the Spring Security plugin,
whose default is to reject a request no rule matches, the paths need a rule of their own, such as
an entry in grails.plugin.springsecurity.controllerAnnotations.staticRules.
|
Configuration
| Setting | Default | Meaning |
|---|---|---|
|
|
Whether the description is generated at all |
|
A YAML or JSON document the description starts from, see The Base Document |
|
|
|
The title of the default document |
|
|
Whether only annotated actions are described, see Choosing What Is Described |
|
|
Whether the |
|
Ant patterns of the paths the default document describes, or leaves out |
|
|
The packages of the controllers the default document describes, or leaves out |
|
|
The media types an operation the default document describes must produce, or consume |
|
|
The header conditions an operation must declare, such as |
|
|
A group and what it selects, see Groups |
|
|
|
Where |
|
|
Whether |
Where springdoc is used, its own springdoc.paths-to-match, springdoc.paths-to-exclude,
springdoc.packages-to-scan, springdoc.packages-to-exclude, springdoc.produces-to-match,
springdoc.consumes-to-match and springdoc.headers-to-match apply to the Grails endpoints of the
default document too, and springdoc.api-docs.version chooses between OpenAPI 3.1, the default,
and 3.0 for both the build-time and the runtime description.
Choosing What Is Described
By default every action a URL mapping reaches is described. An application whose published API is only part of what it serves can narrow that down:
-
@Hiddenon a controller or an action, or@Operation(hidden = true), withholds it. -
grails.openapi.annotated-only: truedescribes only an action that declares@Operation, or whose controller declares@Tag, so the published API is exactly what the application annotated. -
The path and package settings above select by where an endpoint is served and which controller serves it:
grails:
openapi:
paths-to-match: /api/**
packages-to-exclude: com.example.internalThe media type settings select the way springdoc selects a Spring MVC handler method: an operation
is described only where it produces, or consumes, exactly the media types a setting lists. An
operation produces the media types of its controller’s responseFormats, application/json where
it declares none, and consumes the same media types where it binds a body. A mapping declared for a
version declares the Accept-Version header it is matched on, so headers-to-match:
Accept-Version=1.0 selects the operations of version 1.0. Any other header criterion leaves every
Grails endpoint out, as it leaves out a Spring handler method that declares no header condition:
grails:
openapi:
produces-to-match: application/jsonWhere springdoc is used, its method filters decide for the Grails actions too. Each filter is
called with the method the action is declared as, and an action a filter excludes is left out, at
runtime and by the generate-open-api command. An OpenApiMethodFilter bean applies to the default
document, a GlobalOpenApiMethodFilter bean to every document, and a filter a GroupedOpenApi adds
to that group:
@Bean
OpenApiMethodFilter internalActionFilter() {
{ Method action -> !action.isAnnotationPresent(Internal) } as OpenApiMethodFilter
}The create and edit actions of a RestfulController answer the forms an HTML client renders,
so they are left out unless grails.openapi.include-form-actions is set.
Groups
A group is a document of its own, describing part of the application for one audience:
grails:
openapi:
groups:
sales:
display-name: Sales API
paths-to-match: /api/v1/**
depots:
display-name: Depot Lifecycle API
paths-to-match: /api/v2/**Each group takes the same paths-to-match, paths-to-exclude, packages-to-scan,
packages-to-exclude, produces-to-match, consumes-to-match and headers-to-match settings as
the default document, and display-name titles it. The
generate-open-api command writes each group to a file of its own, and at runtime springdoc serves
each at /v3/api-docs/<name>, applying the same criteria to any Spring MVC endpoints the
application also has. A group declared to springdoc, in springdoc.group-configs or as a
GroupedOpenApi bean, is honored the same way, both at runtime and by the command. Where springdoc
is used, its own top-level criteria, such as springdoc.paths-to-match, apply to every group ahead
of the group’s own, criterion by criterion, as springdoc applies them to its Spring MVC endpoints. A
group name declared more than once is described by its first declaration, and logged, since
springdoc may select the group’s Spring MVC endpoints by another:
springdoc:
group-configs:
- group: sales
paths-to-match: /api/v1/**The Base Document
What describes the API as a whole - its title and description, its servers, how it is secured, the descriptions of its tags, vendor extensions for a viewer, and endpoints the application does not map itself, such as a login endpoint a security plugin provides - is written once, in a base document the description starts from:
grails:
openapi:
base-document: classpath:openapi-base.ymlsrc/main/resources/openapi-base.yml
openapi: 3.1.0
info:
title: Sales API
description: |
Inventory, orders and invoices for sales customers.
servers:
- url: https://api.example.com
security:
- Bearer: []
tags:
- name: orders
description: Retrieving and creating orders
components:
securitySchemes:
Bearer:
type: http
scheme: bearer
bearerFormat: JWTThe information, servers, security and external documentation of the base document are used as they
are. Its tags, extensions and components are kept beside what is derived, and so are its paths, in
each document whose path settings select them. Where the base
document declares no version, the application’s info.app.version is used, and without a base
document the description is titled with info.app.name.
What Is Documented
Every URL mapping that names a controller statically becomes a path. A resources mapping
contributes each of its generated HTTP methods:
class UrlMappings {
static mappings = {
"/books"(resources: 'book')
}
}produces GET and POST on /books, and GET, PUT, PATCH and DELETE on /books/{id}, with
POST, which Grails maps to update as well, where the controller’s allowedMethods allows it.
A RestfulController constructed read only answers 405 from its write actions, so only what it
serves is described:
class PublisherController extends RestfulController<Publisher> {
PublisherController() {
super(Publisher, true)
}
}mapped with "/publishers"(resources: 'publisher'), produces only GET on /publishers and
/publishers/{id}. A write action the controller overrides
is described, because it does whatever the override does.
URL variables become OpenAPI path parameters, so "/books/$id" is documented as /books/{id}. The
optional .format extension Grails appends to REST mappings is omitted, because OpenAPI describes
response formats through content types rather than the path. An OpenAPI path parameter is always
required, so a mapping with an optional variable, such as "/photos/$id?", is documented at both
/photos/{id} and /photos. A mapping with a wildcard that captures nothing, such as a catch-all
"/**", cannot be written as an OpenAPI path and is not documented.
A mapping that names a controller but no action is documented as the controller’s default action.
One that takes the action from the path, such as "/topics/$action"(controller: 'topic'), is
documented for each action the controller declares, and, where the action is optional, as
"/topics/$action?" makes it, at the path without it as the controller’s default action. One that
chooses the action by the method of the request, such as action: [GET: 'show', DELETE: 'delete'],
is documented for each method. A mapping whose action is decided by a closure as each request is
made is skipped, and logged.
A mapping declared for an HTTP method is documented for that method, unless the controller’s
allowedMethods refuses it for the action, which Grails answers with 405. A mapping that accepts
any method is documented for the methods allowedMethods declares for the action, or, where it
declares none, for the method a RestfulController action of that name answers, and GET for any
other action.
A mapping that names a namespace is documented with that namespace’s controller, so versioned
controllers of the same name are each described at their own routes.
Versions
A mapping declared for a version is matched on the Accept-Version header a request sends:
"/books"(version: '1.0', resources: 'book', namespace: 'v1')
"/books"(version: '2.0', resources: 'book', namespace: 'v2')A request asking for no version is answered by the highest version, so that is the one the default
document describes, with an optional Accept-Version parameter naming it. Grails also takes the
version from a v parameter of the Accept media type, which is not described. A group describes another
version by selecting its header, and there the parameter is required:
grails:
openapi:
groups:
v1:
headers-to-match: Accept-Version=1.0Resource Schemas
A RestfulController is described as serving the type it declares: BookController extends
RestfulController<Book> responds with, and accepts, a Book, whatever the controller is named.
The type may be a domain class or any other class, such as a command object the controller renders
in place of the domain class. A controller that is not a RestfulController declares no response
type, so its responses are described without a body unless an annotation declares one.
A type is described in components/schemas through swagger-core, so a @Schema or Jackson
annotation on the class or on one of its properties is honored. The metaClass every Groovy object
has and the errors a validateable object has are not part of it.
A property of a class the Grails operations are described with - a domain class, a command object,
or any other class, such as one an @ApiResponse names - is described by the name Grails'
converters, JSON views and data binding render and bind it by: its own. So neither a
@JsonProperty rename, which Grails ignores, nor the name Jackson would otherwise write, such as
isbn for ISBN, changes it, and a command object’s request parameters are described by the names
Grails binds them by. Where the description should name a property otherwise, @Schema(name)
renames it, and its constraints, and whether it is required or read only, follow the rename. A
class only springdoc’s own Spring MVC endpoints use keeps the names Jackson writes, since Jackson
renders it there.
A schema is named after its class, or after the name a @Schema annotation on the class declares.
Classes sharing a name in different packages are each named by their package as well, such as
com.example.v1.Book and com.example.v2.Book, so neither stands in for the other and the names do
not depend on which is described first. A class sharing the name of a schema the base document
declares, or one the document derives, such as ValidationErrors or a Patch schema, is named by
its package in the same way. Only a class described as a schema of its own takes a name: an enum is
described where it is used unless @Schema(enumAsRef = true) describes it as a schema of its own,
and a class described in the place of another - the implementation a @Schema annotation names, or
the value a @JsonValue accessor returns - leaves the name to the class described.
import io.swagger.v3.oas.annotations.media.Schema
@Schema(description = 'A book in the catalog')
class Book {
@Schema(description = 'Full title as printed', example = 'Dune')
String title
static constraints = {
title blank: false, nullable: false, maxSize: 255
}
}The declared constraints of a domain class or a Validateable class are applied over that result,
because swagger-core cannot see them. The two combine, so the annotation above supplies the prose
and the constraints block the validation:
"title": {
"type": "string",
"description": "Full title as printed",
"example": "Dune",
"maxLength": 255
}The constraints are carried across as follows:
| Constraint | OpenAPI |
|---|---|
|
listed in |
|
|
|
|
|
|
|
|
|
|
|
|
|
|
|
|
Where the annotation and the constraints both say whether a property must be sent, the property’s
@Schema wins: a property it declares nullable = true or
requiredMode = NOT_REQUIRED is not listed in required, and one it declares
requiredMode = REQUIRED is, whatever it is constrained to. So a Validateable class that declares
no constraints, whose every property Grails constrains nullable: false by default, still describes
the properties it annotates as optional that way.
A domain class is described as Grails renders it: its identifier and its persistent properties. A
transient, or a getter with nothing persisted behind it, is not rendered and is not described. The
version is not rendered either unless it is configured to be, and is described only then: in JSON
with grails.converters.json.domain.include.version, or grails.converters.domain.include.version
for every format. The document describes the version where JSON renders it, so a version rendered in
XML alone, with grails.converters.xml.domain.include.version, is not described.
A property data binding does not bind is marked readOnly: the identifier and the version, which the
server assigns, dateCreated and lastUpdated, a property constrained bindable: false, and a
property a command object can only read. Tools that understand OpenAPI leave a read-only property
out of a request body, so one schema describes both directions.
A property described by a reference to another schema, such as an embedded class, keeps what is said
of it, being nullable, whether its constraint or its @Schema says so, or read only, or the
description, deprecation or access mode @Schema gives it. OpenAPI 3.1 says so beside the $ref, and a nullable one is oneOf the reference and a null
type. OpenAPI 3.0 ignores anything beside a $ref, so there the property is allOf the reference,
and says it on that.
An association to another domain class is described by the associated identifier, which is what Grails renders for it and what it binds it from:
"author": {
"type": "object",
"properties": { "id": { "type": "integer", "format": "int64" } },
"required": ["id"]
}A to-many association is an array of those references, and an embedded association is described in full.
A class that cannot be introspected is left out of the document and logged, rather than failing the document, and an operation that referred to it is described without a shape rather than with a reference that does not resolve. A class whose constraints cannot be evaluated is described without them, and logged.
Request Bodies
An operation that accepts a body describes the type the action binds. Where the action takes a command object that is the command, in preference to the resource the controller serves:
class OrdersController {
def submit(OrderCommand cmd) { }
}Where one of the actions RestfulController declares takes no command object, the body is the
resource the controller serves, whether the controller inherits the action or overrides it. Any other
action binds a body only where it takes a command object or declares one. A patch binds only what it is sent, so its body is a copy of the resource’s
schema, named for it with a Patch suffix, that requires nothing. A body with a property a file is
bound to, a MultipartFile or a Part, is described as multipart/form-data, with the file as a
binary string. An action that binds something
else declares it with @RequestBody, which replaces what is derived.
Responses
The actions RestfulController declares are described by the part each plays in the resource, so
the statuses are the ones it answers with rather than a uniform 200. That holds for an action the
controller overrides as much as for one it inherits: an override is how an action is annotated, and
it still lists, shows, creates, updates or deletes the resource:
| Action | Status | Body |
|---|---|---|
|
200 |
a collection of the resource |
|
200, 404 |
the resource |
|
200 |
the resource |
|
201, 422 |
the resource |
|
200, 404, 422 |
the resource |
|
204, 404 |
none |
Any other action of the controller, such as a search, is described as any controller’s action is:
a 200, a 404 where its path has a variable, and whatever its annotations declare.
A 422 answers with the validation errors Grails renders for a request that cannot be bound,
described once as the ValidationErrors schema, or as grails.validation.ValidationErrors, after
the class Grails renders them from, where the document already describes something else as
ValidationErrors, such as a class of the application a Spring MVC endpoint returns. The
converters render them, in JSON as an object
listing them and in XML as an errors element holding an error element for each. Where a JSON
view renders them, as the errors view of an application generated with JSON views does, they are
described in JSON as that view renders them: one error with its message, path and link, or several
embedded with their total. The status is the one the view sets, which is 422 for the errors view
an application is generated with. So:
-
A controller with an errors view of its own, such as
grails-app/views/book/_errors.gson, is described answering422in JSON without a shape, since only the application knows it; the view answers with the status it sets, as the errors view it is usually copied from sets422. -
An application with JSON views but no errors view renders the errors with the view for any object, which answers with success rather than
422, so its422is described in XML alone. -
An application rendering its errors another way declares
ValidationErrorsin the base document, which then describes them in every media type, or describes an action’s errors with@ApiResponse.
A response and a request body are described in the media types of the formats the controller
declares in responseFormats, for the action or for every action, and in application/json where
it declares none. A format is described as the first media type the application configures for it
in grails.mime.types:
class BookController extends RestfulController<Book> {
static responseFormats = ['json', 'xml']
}describes each body as application/json and as text/xml, the first media type Grails configures
for xml by default. Only a data format, json or xml, carries the shape described; a format that
renders a view, a form or a HAL document, such as html or hal, is listed without one. A request
body is described in the data formats alone.
The XML is described as the converters render it, with the OpenAPI xml object: a domain class or a
command object as an element named for its class, such as book, its identifier as the id
attribute and its version as an attribute, an association as an element carrying the associated
identifier as the id attribute, a collection of values as an element holding one named for the
class of each, such as <lines><string>a</string></lines>, and a listing as a list element
holding one for each. The xml object cannot describe a map, which Grails renders as entry
elements keyed by an attribute, and the document describes the XML Grails renders by default, not
that of grails.converters.xml.default.deep or grails.converters.xml.domain.include.class.
RestfulController answers its own save and update with a Location header naming the
resource, which the 201 and 200 responses describe, and its patch too, which update serves.
The header is something only RestfulController’s code sends, rather than part of what the action
answers by its role, since a controller generated for a REST application does not send it. So an
action the controller overrides is described without it, and one that sends it declares it with
`@ApiResponse(headers).
Parameters
A listing accepts the paging and sorting RestfulController passes to GORM, so those are described
on it:
| Parameter | Meaning |
|---|---|
|
the most results to return, capped at 100, defaulting to 10 |
|
the result to start from |
|
the property to sort by |
|
|
An index the controller overrides is described with them too. One that does not page withdraws
them, as it would any parameter derived for it:
@Parameter(name = 'max', hidden = true)
@Parameter(name = 'offset', hidden = true)
@Parameter(name = 'sort', hidden = true)
@Parameter(name = 'order', hidden = true)
@Override
Object index(Integer max) {
respond bookService.featured()
}The identifier an operation of a RestfulController addresses is described with the type the
domain class declares for it:
| Identifier | OpenAPI |
|---|---|
|
|
|
|
|
|
|
|
An association to the domain class is described with the same type. A @Parameter declared for the
identifier refines it, and keeps that type unless its schema names another.
An action parameter of a simple type is bound from the request by name, so it is described as a query parameter of that type:
def lookup(String query, Integer limit) { }This needs the parameter names, which Grails keeps by default through the preserveParameterNames
setting of the Grails Gradle plugin. A parameter renamed with @RequestParameter is described by the
name a request sends. A parameter an action reads from params rather than declaring is described
with @Parameter. A parameter Grails does not bind - one declared as Object, an interface or an
abstract class - is not described.
A command object an action binds on a request without a body, such as a GET, is bound from the
request parameters, so each property it binds that a request parameter can carry is described as a
query parameter, with its constraints:
def search(BookSearch search) { }A path variable is described with the type of what it is bound to: the identifier of the resource
an operation addresses, the identifier of the resource a nested mapping names it by, such as
bookId in /books/{bookId}/chapters, or else the action parameter of the same name. A pattern or
a list of values the mapping constrains it to is described too:
"/isbn/$code"(controller: 'book', action: 'byIsbn') {
constraints {
code(matches: /\d{13}/)
}
}Correcting What Is Derived
What is derived can be corrected or enriched with the standard OpenAPI annotations. They are read by swagger-core, so they mean what they mean on any other endpoint:
| Annotation | Effect |
|---|---|
|
the summary, description, operation id, tags, deprecation, external documentation, parameters, responses, request body and security of an action |
|
a response of an action, or, on the controller, of each of its actions; one declared for a status the operation already describes replaces it, and a success status an action declares replaces the success statuses derived for it |
|
a parameter of an action, declared on the action or on one of its parameters; one the operation already describes, such as a path variable, is refined |
|
the body an action binds |
|
the security of an action, or, on the controller, of each of its actions |
|
the groups a controller’s operations appear under, and their descriptions |
|
withholds a controller or an action |
An action answers success with the statuses it declares, so a success status declared on the action,
or in its @Operation, replaces any other success status derived for it, with what that said, such
as a Location header. A save that queues what it is sent, rather than creating it, and declares
@ApiResponse(responseCode = '200', description = 'Queued') is described answering 200, not
201. An error status an action declares is added to those derived, and a status its controller
declares is added to each of its actions, and kept beside the success status an action declares.
import io.swagger.v3.oas.annotations.Operation
import io.swagger.v3.oas.annotations.Parameter
import io.swagger.v3.oas.annotations.enums.ParameterIn
import io.swagger.v3.oas.annotations.media.Content
import io.swagger.v3.oas.annotations.media.Schema
import io.swagger.v3.oas.annotations.responses.ApiResponse
import io.swagger.v3.oas.annotations.tags.Tag
@Tag(name = 'orders', description = 'Retrieving and creating orders')
@ApiResponse(responseCode = '401', description = 'Invalid API token')
@ApiResponse(responseCode = '403', description = 'Permission denied')
class OrderController extends RestfulController<OrderCommand> {
OrderController() {
super(OrderCommand)
}
@Operation(summary = 'Fetch all orders')
@Parameter(name = 'profile', in = ParameterIn.QUERY,
description = 'The customer profile to act for',
schema = @Schema(implementation = Long))
@Override
Object index(Integer max) {
// ...
}
@ApiResponse(responseCode = '200', description = 'The CSC letter',
content = @Content(mediaType = 'application/pdf',
schema = @Schema(type = 'string', format = 'binary')))
def cscLetter() {
// ...
}
}Where springdoc is used, its operation customizers are given each Grails operation too, once the
annotations are applied, with a HandlerMethod of the controller and the method the action is
declared as: an OperationCustomizer bean for the default document, a GlobalOperationCustomizer
bean for every document, and a customizer a GroupedOpenApi adds for that group. A customizer that
returns null leaves the operation out. A schema a customizer adds to the components is kept under
the name it gives it, and is not named apart from the classes the Grails operations are described
with. The generate-open-api command applies them the same way:
@Bean
GlobalOperationCustomizer actionNameCustomizer() {
{ Operation operation, HandlerMethod handlerMethod ->
operation.addExtension('x-action', "${handlerMethod.beanType.simpleName}.${handlerMethod.method.name}")
operation
} as GlobalOperationCustomizer
}Controllers a Mapping Reaches Without Naming
A REST application maps its controllers without naming them, either by naming the action and leaving the controller to the request, as a generated REST API does:
get "/$controller(.$format)?"(action: 'index')
post "/$controller(.$format)?"(action: 'save')
get "/$controller/$id(.$format)?"(action: 'show')or by leaving both, as the default mapping does:
"/$controller/$action?/$id?(.$format)?" {}Either way the REST controllers those mappings reach are described, at the URLs the mapping serves:
RestfulController subclasses, and controllers declaring the formats they respond in with
responseFormats, none of them html. The first form above produces GET /book, POST /book and GET /book/{id}; the
second produces GET /book/index, POST /book/save and GET /book/show/{id}, and, because its
action is optional, GET /book for the controller’s default action. An application whose
mappings name every controller gets neither, because expansion follows the mappings rather than the
controllers.
A mapping that captures the namespace, such as "/$namespace/$controller/$action?/$id?", reaches
each controller at its own namespace, and does not reach a controller without one. A mapping that
leaves the namespace out reaches the controller Grails resolves for the name alone, so of two
controllers sharing a name only a namespaced mapping reaches either.
A controller a resources mapping names and a mapping that does not name it are described at both,
because both answer. Where that gives two operations the same identifier the second is qualified by
the path it is reached at, so no two operations in the document share one. An application wanting
only the first form removes the default mapping from its UrlMappings.
A controller rendering views for a browser declares no responseFormats, or declares html among
them, such as a login controller responding in html and json, so it does not appear in the
document. Where responseFormats is a map by action, each action is decided by its own entry: with
[index: ['json'], page: ['html', 'json']], index is described and page, like an action the map
leaves out, is not. responseFormats is read as respond reads it, a list, or a list for each action;
an array is not one, so respond answers in any configured format, html too. Controllers @Scaffold generates extend RestfulController, and those generate-controller
generates for a REST application declare responseFormats, so both are described; those it
generates for a web application render views and are not.
A controller that is not a RestfulController but whose save and update actions bind the same
domain class, as the controllers generated for a REST application do, answers the actions
RestfulController declares as a RestfulController of that class does, so they are described the
same way: with its statuses, the domain class as its responses and bodies, and the paging of its
listing. Its other actions are described as any controller’s are.
Limitations
-
A mapping that accepts any HTTP method for an action
allowedMethodsdoes not restrict is documented asGET, because OpenAPI requires a concrete operation. -
A mapping declared for an HTTP method OpenAPI has no operation for is skipped, and logged.
-
A
RestfulControlleris known to be read only, and the resource it serves where it declares no type argument, from the controller the application serves requests with, which is not created to be described. So one in a scope other than singleton is described with its write actions, and one that also passes its resource only to the constructor, asextends RestfulControllerwithsuper(Book)does, is described without a schema for its requests and responses. This applies to every controller wheregrails.controllers.defaultScopeisprototype, rather than only to one declaring its own scope. Declaring the type argument, asextends RestfulController<Book>, describes the resource in any scope. -
A resource is described as Grails renders a domain class or an object by default. A JSON view, other than the errors view, or a custom renderer that renders another shape is described with
@ApiResponse. -
A date is described as a
date-time. Grails binds it with the formatsgrails.databinding.dateFormatslists, which by default read the offset orZof a time only when it has three digits of milliseconds, such as2024-05-01T10:00:00.000+02:00, or an offset written without a colon, such as2024-05-01T10:00:00+0200. Otherwise, as in2024-05-01T10:00:00Zor2024-05-01T10:00:00+02:00, the time is read in the zone of the server, and fewer digits of milliseconds are misread:2024-05-01T10:00:00.5Zis read as 5 milliseconds. -
A variable capturing several segments, such as
$path**, is described as a path parameter, which OpenAPI allows only one segment; a client must not encode the/it holds.
10.9 JSON Views
As mentioned in the previous section the REST profile by default uses JSON views to render JSON responses. These play a similar role to GSP, but instead are optimized for outputing JSON responses instead of HTML.
You can continue to separate your application in terms of MVC, with the logic of your application residing in controllers and services, whilst view related matters are handled by JSON views.
JSON views also provide the flexibility to easily customize the JSON presented to clients without having to resort to relatively complex marshalling libraries like Jackson or Grails' marshaller API.
| Since Grails 3.1, JSON views are considered by the Grails team the best way to present JSON output for the client, the section on writing custom marshallers has been removed from the user guide. If you are looking for information on that topic, see the Grails 3.0.x guide. |
10.9.1 Getting Started
If you are using the REST application or REST or AngularJS profiles, then the JSON views plugin will already be included and you can skip the remainder of this section. Otherwise you will need to modify your build.gradle to include the necessary plugin to activate JSON views:
implementation 'org.apache.grails:grails-views-gson:7.0.0' // or whatever is the latest version| The source code repository for JSON views can be found on Github if you are looking for more documentation and contributions |
In order to compile JSON views for production deployment you should also activate the Gradle plugin by first modifying the buildscript block:
buildscript {
...
dependencies {
...
classpath platform("org.apache.grails:grails-gradle-bom:{version}")
classpath "org.apache.grails:grails-gradle-plugins"
}
}Then apply the org.apache.grails.views-json Gradle plugin after any Grails core gradle plugins:
...
apply plugin: "org.apache.grails.gradle.grails-web"
apply plugin: "org.apache.grails.views-json"This will add a compileGsonViews task to Gradle, which is invoked prior to creating the production JAR or WAR file.
10.9.2 Creating JSON Views
JSON views go into the grails-app/views directory and end with the .gson suffix. They are regular Groovy scripts and can be opened in any Groovy editor.
Example JSON view:
json.person {
name "bob"
}| To open them in the Groovy editor in Intellij IDEA, double click on the file and when asked which file to associate it with, choose "Groovy" |
The above JSON view produces:
{"person":{"name":"bob"}}There is an implicit json variable which is an instance of StreamingJsonBuilder.
Example usages:
json(1,2,3) == "[1,2,3]"
json { name "Bob" } == '{"name":"Bob"}'
json([1,2,3]) { n it } == '[{"n":1},{"n":2},{"n":3}]'Refer to the API documentation on StreamingJsonBuilder for more information about what is possible.
10.9.3 JSON View Templates
You can define templates starting with underscore _. For example given the following template called _person.gson:
model {
Person person
}
json {
name person.name
age person.age
}You can render it with a view as follows:
model {
Family family
}
json {
name family.father.name
age family.father.age
oldestChild g.render(template:"person", model:[person: family.children.max { Person p -> p.age } ])
children g.render(template:"person", collection: family.children, var:'person')
}Alternatively for a more concise way to invoke templates, using the tmpl variable:
model {
Family family
}
json {
name family.father.name
age family.father.age
oldestChild tmpl.person( family.children.max { Person p -> p.age } ] )
children tmpl.person( family.children )
}10.9.4 Rendering Domain Classes with JSON Views
Typically your model may involve one or many domain instances. JSON views provide a render method for rendering these.
For example given the following domain class:
class Book {
String title
}And the following template:
model {
Book book
}
json g.render(book)The resulting output is:
{id:1, title:"The Stand"}You can customize the rendering by including or excluding properties:
json g.render(book, [includes:['title']])Or by providing a closure to add additional JSON output:
json g.render(book) {
pages 1000
}10.9.5 JSON Views by Convention
There are a few useful conventions you can follow when creating JSON views. For example if you have a domain class called Book, then creating a template located at grails-app/views/book/_book.gson and using the respond method will result in rendering the template:
def show(Long id) {
respond Book.get(id)
}In addition if an error occurs during validation by default Grails will try to render a template called grails-app/views/book/_errors.gson, otherwise it will try to render grails-app/views/errors/_errors.gson if the former doesn’t exist.
This is useful because when persisting objects you can respond with validation errors to render these aforementioned templates:
@Transactional
def save(Book book) {
if (book.hasErrors()) {
transactionStatus.setRollbackOnly()
respond book.errors
}
else {
// valid object
}
}If a validation error occurs in the above example the grails-app/views/book/_errors.gson template will be rendered.
For more information on JSON views (and Markup views), see the JSON Views user guide.
10.10 Customizing Response Rendering
If you are looking for a more low-level API and JSON or Markup views don’t suite your needs then you may want to consider implementing a custom renderer.
10.10.1 Customizing the Default Renderers
The default renderers for XML and JSON can be found in the grails.rest.render.xml and grails.rest.render.json packages respectively. These use the Grails converters (grails.converters.XML and grails.converters.JSON) by default for response rendering.
You can easily customize response rendering using these default renderers. A common change you may want to make is to include or exclude certain properties from rendering.
Including or Excluding Properties from Rendering
As mentioned previously, Grails maintains a registry of grails.rest.render.Renderer instances. There are some default configured renderers and the ability to register or override renderers for a given domain class or even for a collection of domain classes. To include a particular property from rendering you need to register a custom renderer by defining a bean in grails-app/conf/spring/resources.groovy:
import grails.rest.render.xml.*
beans = {
bookRenderer(XmlRenderer, Book) {
includes = ['title']
}
}| The bean name is not important (Grails will scan the application context for all registered renderer beans), but for organizational and readability purposes it is recommended you name it something meaningful. |
To exclude a property, the excludes property of the XmlRenderer class can be used:
import grails.rest.render.xml.*
beans = {
bookRenderer(XmlRenderer, Book) {
excludes = ['isbn']
}
}Customizing the Converters
As mentioned previously, the default renders use the grails.converters package under the covers. In other words, under the covers they essentially do the following:
import grails.converters.*
...
render book as XML
// or render book as JSONWhy the separation between converters and renderers? Well a renderer has more flexibility to use whatever rendering technology you chose. When implementing a custom renderer you could use Jackson, Google Gson or any Java library to implement the renderer. Converters on the other hand are very much tied to Grails' own marshalling implementation.
Date and Time Rendering
The JSON converter renders date and time values the same way as Spring Boot’s default Jackson JsonMapper, so a Grails
application and a Spring Boot application return the same JSON for the same values:
| Type | Rendered as |
|---|---|
|
a UTC instant with millisecond precision, such as |
|
its wall-clock time in the JVM default time zone, such as |
|
ISO-8601, such as |
|
ISO-8601 without a time zone, such as |
|
ISO-8601 with the offset and without a zone ID, such as |
|
ISO-8601, such as |
|
a number, such as |
|
the ID, such as |
An OffsetTime keeps its seconds and writes a fraction of a second with only the digits it needs, as JSON views render
it, where Spring Boot writes "03:00-03:00". A map keyed by Date, Calendar or ZonedDateTime values renders its
keys as those values render by default, such as
"2025-10-08T07:48:46.407Z", also where grails.converters.json.date or a registered marshaller changes how the values
render; other map keys render with their toString(). JSON views render dates and times the same way.
A Month renders by its name, such as "SEPTEMBER", as every enum does, where Spring Boot writes its number. Data binding
binds a Month from either.
Setting grails.converters.json.date to javascript renders java.util.Date values as JavaScript new Date(…)
constructors instead. To render a type differently, register an object marshaller for it, for example in BootStrap.init.
This one renders a Month as its number, as Spring Boot does:
JSON.registerObjectMarshaller(Month) { Month month ->
month.value
}10.10.2 Implementing a Custom Renderer
If you want even more control of the rendering or prefer to use your own marshalling techniques then you can implement your own Renderer instance. For example below is a simple implementation that customizes the rendering of the Book class:
package myapp
import grails.rest.render.*
import grails.web.mime.MimeType
class BookXmlRenderer extends AbstractRenderer<Book> {
BookXmlRenderer() {
super(Book, [MimeType.XML,MimeType.TEXT_XML] as MimeType[])
}
void render(Book object, RenderContext context) {
context.contentType = MimeType.XML.name
def xml = new groovy.xml.MarkupBuilder(context.writer)
xml.book(id: object.id, title:object.title)
}
}The AbstractRenderer super class has a constructor that takes the class that it renders and the MimeType(s) that are accepted (via the ACCEPT header or file extension) for the renderer.
To configure this renderer, simply add it is a bean to grails-app/conf/spring/resources.groovy:
beans = {
bookRenderer(myapp.BookXmlRenderer)
}The result will be that all Book instances will be rendered in the following format:
<book id="1" title="The Stand"/>| If you change the rendering to a completely different format like the above, then you also need to change the binding if you plan to support POST and PUT requests. Grails will not automatically know how to bind data from a custom XML format to a domain class otherwise. See the section on "Customizing Binding of Resources" for further information. |
Container Renderers
A grails.rest.render.ContainerRenderer is a renderer that renders responses for containers of objects (lists, maps, collections etc.). The interface is largely the same as the Renderer interface except for the addition of the getComponentType() method, which should return the "contained" type. For example:
class BookListRenderer implements ContainerRenderer<List, Book> {
Class<List> getTargetType() { List }
Class<Book> getComponentType() { Book }
MimeType[] getMimeTypes() { [ MimeType.XML] as MimeType[] }
void render(List object, RenderContext context) {
....
}
}10.10.3 Using GSP to Customize Rendering
You can also customize rendering on a per action basis using Groovy Server Pages (GSP). For example given the show action mentioned previously:
def show(Book book) {
respond book
}You could supply a show.xml.gsp file to customize the rendering of the XML:
<%@page contentType="application/xml"%>
<book id="${book.id}" title="${book.title}"/>10.11 Hypermedia as the Engine of Application State
HATEOAS, an abbreviation for Hypermedia as the Engine of Application State, is a common pattern applied to REST architectures that uses hypermedia and linking to define the REST API.
Hypermedia (also called Mime or Media Types) are used to describe the state of a REST resource, and links tell clients how to transition to the next state. The format of the response is typically JSON or XML, although standard formats such as Atom and/or HAL are frequently used.
10.11.1 HAL Support
HAL is a standard exchange format commonly used when developing REST APIs that follow HATEOAS principals. An example HAL document representing a list of orders can be seen below:
{
"_links": {
"self": { "href": "/orders" },
"next": { "href": "/orders?page=2" },
"find": {
"href": "/orders{?id}",
"templated": true
},
"admin": [{
"href": "/admins/2",
"title": "Fred"
}, {
"href": "/admins/5",
"title": "Kate"
}]
},
"currentlyProcessing": 14,
"shippedToday": 20,
"_embedded": {
"order": [{
"_links": {
"self": { "href": "/orders/123" },
"basket": { "href": "/baskets/98712" },
"customer": { "href": "/customers/7809" }
},
"total": 30.00,
"currency": "USD",
"status": "shipped"
}, {
"_links": {
"self": { "href": "/orders/124" },
"basket": { "href": "/baskets/97213" },
"customer": { "href": "/customers/12369" }
},
"total": 20.00,
"currency": "USD",
"status": "processing"
}]
}
}Exposing Resources Using HAL
To return HAL instead of regular JSON for a resource you can simply override the renderer in grails-app/conf/spring/resources.groovy with an instance of grails.rest.render.hal.HalJsonRenderer (or HalXmlRenderer for the XML variation):
import grails.rest.render.hal.*
beans = {
halBookRenderer(HalJsonRenderer, rest.test.Book)
}You will also need to update the acceptable response formats for the resource so that the HAL format is included. Not doing so will result in a 406 - Not Acceptable response being returned from the server.
This can be done by setting the formats attribute of the Resource transformation:
import grails.rest.*
@Resource(uri='/books', formats=['json', 'xml', 'hal'])
class Book {
...
}Or by updating the responseFormats in the controller:
class BookController extends RestfulController<Book> {
static responseFormats = ['json', 'xml', 'hal']
// ...
}With the bean in place requesting the HAL content type will return HAL:
$ curl -i -H "Accept: application/hal+json" http://localhost:8080/books/1
HTTP/1.1 200 OK
Server: Apache-Coyote/1.1
Content-Type: application/hal+json;charset=ISO-8859-1
{
"_links": {
"self": {
"href": "http://localhost:8080/books/1",
"hreflang": "en",
"type": "application/hal+json"
}
},
"title": "\"The Stand\""
}To use HAL XML format simply change the renderer:
import grails.rest.render.hal.*
beans = {
halBookRenderer(HalXmlRenderer, rest.test.Book)
}Rendering Collections Using HAL
To return HAL instead of regular JSON for a list of resources you can simply override the renderer in grails-app/conf/spring/resources.groovy with an instance of grails.rest.render.hal.HalJsonCollectionRenderer:
import grails.rest.render.hal.*
beans = {
halBookCollectionRenderer(HalJsonCollectionRenderer, rest.test.Book)
}With the bean in place requesting the HAL content type will return HAL:
$ curl -i -H "Accept: application/hal+json" http://localhost:8080/books
HTTP/1.1 200 OK
Server: Apache-Coyote/1.1
Content-Type: application/hal+json;charset=UTF-8
Transfer-Encoding: chunked
Date: Thu, 17 Oct 2013 02:34:14 GMT
{
"_links": {
"self": {
"href": "http://localhost:8080/books",
"hreflang": "en",
"type": "application/hal+json"
}
},
"_embedded": {
"book": [
{
"_links": {
"self": {
"href": "http://localhost:8080/books/1",
"hreflang": "en",
"type": "application/hal+json"
}
},
"title": "The Stand"
},
{
"_links": {
"self": {
"href": "http://localhost:8080/books/2",
"hreflang": "en",
"type": "application/hal+json"
}
},
"title": "Infinite Jest"
},
{
"_links": {
"self": {
"href": "http://localhost:8080/books/3",
"hreflang": "en",
"type": "application/hal+json"
}
},
"title": "Walden"
}
]
}
}Notice that the key associated with the list of Book objects in the rendered JSON is book which is derived from the type of objects in the collection, namely Book. In order to customize the value of this key assign a value to the collectionName property on the HalJsonCollectionRenderer bean as shown below:
import grails.rest.render.hal.*
beans = {
halBookCollectionRenderer(HalCollectionJsonRenderer, rest.test.Book) {
collectionName = 'publications'
}
}With that in place the rendered HAL will look like the following:
$ curl -i -H "Accept: application/hal+json" http://localhost:8080/books
HTTP/1.1 200 OK
Server: Apache-Coyote/1.1
Content-Type: application/hal+json;charset=UTF-8
Transfer-Encoding: chunked
Date: Thu, 17 Oct 2013 02:34:14 GMT
{
"_links": {
"self": {
"href": "http://localhost:8080/books",
"hreflang": "en",
"type": "application/hal+json"
}
},
"_embedded": {
"publications": [
{
"_links": {
"self": {
"href": "http://localhost:8080/books/1",
"hreflang": "en",
"type": "application/hal+json"
}
},
"title": "The Stand"
},
{
"_links": {
"self": {
"href": "http://localhost:8080/books/2",
"hreflang": "en",
"type": "application/hal+json"
}
},
"title": "Infinite Jest"
},
{
"_links": {
"self": {
"href": "http://localhost:8080/books/3",
"hreflang": "en",
"type": "application/hal+json"
}
},
"title": "Walden"
}
]
}
}Using Custom Media / Mime Types
If you wish to use a custom Mime Type then you first need to declare the Mime Types in grails-app/conf/application.groovy:
grails.mime.types = [
all: "*/*",
book: "application/vnd.books.org.book+json",
bookList: "application/vnd.books.org.booklist+json",
...
]Or the equivalent in grails-app/conf/application.yml:
grails:
mime:
types:
all: "*/*"
book: "application/vnd.books.org.book+json"
bookList: "application/vnd.books.org.booklist+json"
...:| It is critical that place your new mime types after the 'all' Mime Type because if the Content Type of the request cannot be established then the first entry in the map is used for the response. If you have your new Mime Type at the top then Grails will always try and send back your new Mime Type if the requested Mime Type cannot be established. |
Then override the renderer to return HAL using the custom Mime Types:
import grails.rest.render.hal.*
import grails.web.mime.*
beans = {
halBookRenderer(HalJsonRenderer, rest.test.Book, new MimeType("application/vnd.books.org.book+json", [v:"1.0"]))
halBookListRenderer(HalJsonCollectionRenderer, rest.test.Book, new MimeType("application/vnd.books.org.booklist+json", [v:"1.0"]))
}In the above example the first bean defines a HAL renderer for a single book instance that returns a Mime Type of application/vnd.books.org.book+json. The second bean defines the Mime Type used to render a collection of books (in this case application/vnd.books.org.booklist+json).
application/vnd.books.org.booklist+json is an example of a media-range (https://www.w3.org/Protocols/rfc2616/rfc2616.html - Header Field Definitions). This example uses entity (book) and operation (list) to form the media-range values but in reality, it may not be necessary to create a separate Mime type for each operation. Further, it may not be necessary to create Mime types at the entity level. See the section on "Versioning REST resources" for further information about how to define your own Mime types.
|
With this in place issuing a request for the new Mime Type returns the necessary HAL:
$ curl -i -H "Accept: application/vnd.books.org.book+json" http://localhost:8080/books/1
HTTP/1.1 200 OK
Server: Apache-Coyote/1.1
Content-Type: application/vnd.books.org.book+json;charset=ISO-8859-1
{
"_links": {
"self": {
"href": "http://localhost:8080/books/1",
"hreflang": "en",
"type": "application/vnd.books.org.book+json"
}
},
"title": "\"The Stand\""
}Customizing Link Rendering
An important aspect of HATEOAS is the usage of links that describe the transitions the client can use to interact with the REST API. By default the HalJsonRenderer will automatically create links for you for associations and to the resource itself (using the "self" relationship).
However you can customize link rendering using the link method that is added to all domain classes annotated with grails.rest.Resource or any class annotated with grails.rest.Linkable. For example, the show action can be modified as follows to provide a new link in the resulting output:
def show(Book book) {
book.link rel:'publisher', href: g.createLink(absolute: true, resource:"publisher", params:[bookId: book.id])
respond book
}Which will result in output such as:
{
"_links": {
"self": {
"href": "http://localhost:8080/books/1",
"hreflang": "en",
"type": "application/vnd.books.org.book+json"
}
"publisher": {
"href": "http://localhost:8080/books/1/publisher",
"hreflang": "en"
}
},
"title": "\"The Stand\""
}The link method can be passed named arguments that match the properties of the grails.rest.Link class.
10.11.2 Atom Support
Atom is another standard interchange format used to implement REST APIs. An example of Atom output can be seen below:
<?xml version="1.0" encoding="utf-8"?>
<feed xmlns="https://www.w3.org/2005/Atom">
<title>Example Feed</title>
<link href="https://example.org/"/>
<updated>2003-12-13T18:30:02Z</updated>
<author>
<name>John Doe</name>
</author>
<id>urn:uuid:60a76c80-d399-11d9-b93C-0003939e0af6</id>
<entry>
<title>Atom-Powered Robots Run Amok</title>
<link href="https://example.org/2003/12/13/atom03"/>
<id>urn:uuid:1225c695-cfb8-4ebb-aaaa-80da344efa6a</id>
<updated>2003-12-13T18:30:02Z</updated>
<summary>Some text.</summary>
</entry>
</feed>To use Atom rendering again simply define a custom renderer:
import grails.rest.render.atom.*
beans = {
halBookRenderer(AtomRenderer, rest.test.Book)
halBookListRenderer(AtomCollectionRenderer, rest.test.Book)
}10.11.3 Vnd.Error Support
Vnd.Error is a standardised way of expressing an error response.
By default when a validation error occurs when attempting to POST new resources then the errors object will be sent back allow with a 422 respond code:
$ curl -i -H "Accept: application/json" -H "Content-Type: application/json" -X POST -d "" http://localhost:8080/books
HTTP/1.1 422 Unprocessable Entity
Server: Apache-Coyote/1.1
Content-Type: application/json;charset=ISO-8859-1
{
"errors": [
{
"object": "rest.test.Book",
"field": "title",
"rejected-value": null,
"message": "Property [title] of class [class rest.test.Book] cannot be null"
}
]
}If you wish to change the format to Vnd.Error then simply register grails.rest.render.errors.VndErrorJsonRenderer bean in grails-app/conf/spring/resources.groovy:
beans = {
vndJsonErrorRenderer(grails.rest.render.errors.VndErrorJsonRenderer)
// for Vnd.Error XML format
vndXmlErrorRenderer(grails.rest.render.errors.VndErrorXmlRenderer)
}Then if you alter the client request to accept Vnd.Error you get an appropriate response:
$ curl -i -H "Accept: application/vnd.error+json,application/json" -H "Content-Type: application/json" -X POST -d "" http://localhost:8080/books
HTTP/1.1 200 OK
Server: Apache-Coyote/1.1
Content-Type: application/vnd.error+json;charset=ISO-8859-1
[
{
"logref": "book.nullable,
"message": "Property [title] of class [class rest.test.Book] cannot be null",
"_links": {
"resource": {
"href": "http://localhost:8080/rest-test/books"
}
}
}
]10.12 Customizing Binding of Resources
The framework provides a sophisticated but simple mechanism for binding REST requests to domain objects and command objects. One way to take advantage of this is to bind the request property in a controller the properties of a domain class. Given the following XML as the body of the request, the createBook action will create a new Book and assign "The Stand" to the title property and "Stephen King" to the authorName property.
<?xml version="1.0" encoding="UTF-8"?>
<book>
<title>The Stand</title>
<authorName>Stephen King</authorName>
</book>class BookController {
def createBook() {
def book = new Book()
book.properties = request
// ...
}
}Command objects will automatically be bound with the body of the request:
class BookController {
def createBook(BookCommand book) {
// ...
}
}
class BookCommand {
String title
String authorName
}If the command object type is a domain class and the root element of the XML document contains an id attribute, the id value will be used to retrieve the corresponding persistent instance from the database and then the rest of the document will be bound to the instance. If no corresponding record is found in the database, the command object reference will be null.
<?xml version="1.0" encoding="UTF-8"?>
<book id="42">
<title>Walden</title>
<authorName>Henry David Thoreau</authorName>
</book>class BookController {
def updateBook(Book book) {
// The book will have been retrieved from the database and updated
// by doing something like this:
//
// book == Book.get('42')
// if(book != null) {
// book.properties = request
// }
//
// the code above represents what the framework will
// have done. There is no need to write that code.
// ...
}
}The data binding depends on an instance of the DataBindingSource interface created by an instance of the DataBindingSourceCreator interface. The specific implementation of DataBindingSourceCreator will be selected based on the contentType of the request. Several implementations are provided to handle common content types. The default implementations will be fine for most use cases. The following table lists the content types which are supported by the core framework and which DataBindingSourceCreator implementations are used for each. All of the implementation classes are in the org.grails.databinding.bindingsource package.
| Content Type(s) | Bean Name | DataBindingSourceCreator Impl. |
|---|---|---|
application/xml, text/xml |
xmlDataBindingSourceCreator |
XmlDataBindingSourceCreator |
application/json, text/json |
jsonDataBindingSourceCreator |
JsonDataBindingSourceCreator |
application/hal+json |
halJsonDataBindingSourceCreator |
HalJsonDataBindingSourceCreator |
application/hal+xml |
halXmlDataBindingSourceCreator |
HalXmlDataBindingSourceCreator |
In order to provide your own DataBindingSourceCreator for any of those content types, write a class which implements
DataBindingSourceCreator and register an instance of that class in the Spring application context. If you
are replacing one of the existing helpers, use the corresponding bean name from above. If you are providing a
helper for a content type other than those accounted for by the core framework, the bean name may be anything that
you like but you should take care not to conflict with one of the bean names above.
The DataBindingSourceCreator interface defines just 2 methods:
package org.grails.databinding.bindingsource
import grails.web.mime.MimeType
import grails.databinding.DataBindingSource
/**
* A factory for DataBindingSource instances
*
* @since 2.3
* @see DataBindingSourceRegistry
* @see DataBindingSource
*
*/
interface DataBindingSourceCreator {
/**
* `return All of the {`link MimeType} supported by this helper
*/
MimeType[] getMimeTypes()
/**
* Creates a DataBindingSource suitable for binding bindingSource to bindingTarget
*
* @param mimeType a mime type
* @param bindingTarget the target of the data binding
* @param bindingSource the value being bound
* @return a DataBindingSource
*/
DataBindingSource createDataBindingSource(MimeType mimeType, Object bindingTarget, Object bindingSource)
}AbstractRequestBodyDataBindingSourceCreator
is an abstract class designed to be extended to simplify writing custom DataBindingSourceCreator classes. Classes which
extend AbstractRequestbodyDatabindingSourceCreator need to implement a method named createBindingSource
which accepts an InputStream as an argument and returns a DataBindingSource as well as implementing the getMimeTypes
method described in the DataBindingSourceCreator interface above. The InputStream argument to createBindingSource
provides access to the body of the request.
The code below shows a simple implementation.
src/main/groovy/com/demo/myapp/databinding/MyCustomDataBindingSourceCreator.groovy
package com.demo.myapp.databinding
import grails.web.mime.MimeType
import grails.databinding.DataBindingSource
import org...databinding.SimpleMapDataBindingSource
import org...databinding.bindingsource.AbstractRequestBodyDataBindingSourceCreator
/**
* A custom DataBindingSourceCreator capable of parsing key value pairs out of
* a request body containing a comma separated list of key:value pairs like:
*
* name:Herman,age:99,town:STL
*
*/
class MyCustomDataBindingSourceCreator extends AbstractRequestBodyDataBindingSourceCreator {
@Override
public MimeType[] getMimeTypes() {
[new MimeType('text/custom+demo+csv')] as MimeType[]
}
@Override
protected DataBindingSource createBindingSource(InputStream inputStream) {
def map = [:]
def reader = new InputStreamReader(inputStream)
// this is an obviously naive parser and is intended
// for demonstration purposes only.
reader.eachLine { line ->
def keyValuePairs = line.split(',')
keyValuePairs.each { keyValuePair ->
if(keyValuePair?.trim()) {
def keyValuePieces = keyValuePair.split(':')
def key = keyValuePieces[0].trim()
def value = keyValuePieces[1].trim()
map<<key>> = value
}
}
}
// create and return a DataBindingSource which contains the parsed data
new SimpleMapDataBindingSource(map)
}
}An instance of MyCustomDataSourceCreator needs to be registered in the spring application context.
grails-app/conf/spring/resources.groovy
beans = {
myCustomCreator com.demo.myapp.databinding.MyCustomDataBindingSourceCreator
// ...
}With that in place the framework will use the myCustomCreator bean any time a DataBindingSourceCreator is needed
to deal with a request which has a contentType of "text/custom+demo+csv".
10.13 RSS and Atom
No direct support is provided for RSS or Atom within Grails. You could construct RSS or ATOM feeds with the render method’s XML capability.
11 Asynchronous Programming
With modern hardware featuring multiple cores, many programming languages have been adding asynchronous, parallel programming APIs, Groovy being no exception.
Popular asynchronous libraries include:
-
RxJava - https://reactivex.io
-
GPars - https://gpars.org/
-
Reactor - https://projectreactor.io
By building on top of these various libraries the Async features of Grails aim to simplify concurrent programming within the framework, include the concept of Promises, and a unified event model.
In general, since the Reactive programming model is an evolving space, Grails tries to provide generic support for integrating a range of asynchronous libraries and doesn’t recommend any single library as they all have various advantages and disadvantages.
11.1 Promises
A Promise is a concept being embraced by many concurrency frameworks. They are similar to java.util.concurrent.Future instances, but include a more user friendly exception handling model, useful features like chaining and the ability to attach listeners.
To use the Grails Promise abstraction you should add a dependency on the async plugin to your build.gradle file:
build.gradle
implementation "org.apache.grails:grails-async"Promise Basics
In Grails the grails.async.Promises class provides the entry point to the Promise API:
import static grails.async.Promises.*To create promises you can use the task method, which returns an instance of the grails.async.Promise interface:
def p1 = task { 2 * 2 }
def p2 = task { 4 * 4 }
def p3 = task { 8 * 8 }
assert [4,16,64] == waitAll(p1, p2, p3)The waitAll method waits synchronously, blocking the current thread, for all of the concurrent tasks to complete and returns the results.
If you prefer not to block the current thread you can use the onComplete method:
onComplete([p1,p2,p3]) { List results ->
assert [4,16,64] == results
}The waitAll method will throw an exception if an error occurs executing one of the promises. The originating exception will be thrown. The onComplete method, however, will simply not execute the passed closure if an exception occurs. You can register an onError listener if you wish to handle exceptions without blocking:
onError([p1,p2,p3]) { Throwable t ->
println "An error occured ${t.message}"
}If you have just a single long running promise then the grails.async.Promise interface provides a similar API on the promise itself. For example:
import static java.util.concurrent.TimeUnit.*
import static grails.async.Promises.*
Promise p = task {
// Long running task
}
p.onError { Throwable err ->
println "An error occured ${err.message}"
}
p.onComplete { result ->
println "Promise returned $result"
}
// block until result is called
def result = p.get()
// block for the specified time
def result = p.get(1,MINUTES)The PromiseFactory Interface
By default, the Promises static methods use an instance of PromiseFactory. This PromiseFactory interface has various implementations. The default implementation is CompletableFuturePromiseFactory, which uses JDK CompletableFuture for execution and composition.
In a Grails application, the async plugin uses Spring Boot’s applicationTaskExecutor. This means promise execution shares Boot’s lifecycle management, graceful shutdown, and spring.task.execution configuration. For example:
application.yml
spring:
task:
execution:
pool:
max-size: 16
queue-capacity: 100On Java 21 or later, virtual threads can be enabled for the application task executor without changing promise code:
application.yml
spring:
threads:
virtual:
enabled: trueSpring Boot also composes any org.springframework.core.task.TaskDecorator beans with the executor. Grails contributes a decorator that makes the current GrailsWebRequest available inside task { }. When Micrometer context propagation is on the classpath, setting spring.task.execution.propagate-context to true additionally propagates observation and logging context.
The Grails decorator also applies to other Boot-managed executors that consume TaskDecorator beans, including @Async execution and scheduling initiated during a web request. Avoid retaining request state in long-lived background work.
If Boot does not provide a bean named applicationTaskExecutor, Grails uses its managed grailsPromiseExecutor, with eight core threads and an unbounded queue. Other executor and scheduler beans do not change that selection. Tune the Boot executor using spring.task.execution for application workloads; blocking on tasks queued to the same saturated pool can deadlock. A standalone factory continues to use a cached pool, and standalone WebPromises propagate request context without requiring the plugin.
With the default and virtual-thread factories, direct and chained get() calls (including timed calls) report failures as ExecutionException, with the original failure as the cause, including checked exceptions such as IOException. Error callbacks, including list callbacks, receive the original failure, preserving its own cause chain. A single-promise onError can recover with its callback result; aggregate onError observes the failure and leaves the returned promise failed. Third-party factories retain their own contracts.
The default promise is also a JDK CompletionStage. Asynchronous stage operations such as thenApplyAsync continue to use Boot’s applicationTaskExecutor, so they retain the same lifecycle, virtual-thread, and context-propagation configuration as Groovy then callbacks.
However, the design of the Grails promises framework is such that you can swap out the underlying implementation for your own or one of the pre-supported implementations. For example to use RxJava 3 simply add the RxJava dependency to build.gradle:
build.gradle
runtimeOnly 'org.apache.grails.async:grails-async-rxjava3'With the above in place RxJava 3 will be used to create Promise instances.
Since Grails 8, an opt-in Java 21 virtual-thread promise factory is also available.
To use it, set the JVM system property grails.async.promiseFactory=virtual-thread.
This implementation is selected only when no service-loaded PromiseFactory is available.
It uses its own executor instead of the supplied application executor. For virtual threads on the default Spring-managed path, prefer spring.threads.virtual.enabled=true instead.
|
The opt-in factory uses the same CompletableFuture implementation and failure semantics as the default factory. Its executor also serves the default event bus and, when registered by the async plugin, receives the application’s composed TaskDecorator beans. It owns and closes that executor; Boot pool-size and shutdown settings do not configure it. Standalone WebPromises decorate the entire executor task, preserving request context through chained then { } callbacks as well as the initial task.
The following table summarizes the available implementation and the dependency that should be added to activate them:
| Framework | Dependency | Implementation Class |
|---|---|---|
GPars 1.2.x |
|
|
RxJava 1.2.x |
|
|
RxJava 2.x |
|
|
RxJava 3.x |
|
|
You can also override the grails.async.PromiseFactory class used by Promises by setting the promiseFactory static field.
One common use case for this is unit testing, typically you do not want promises to execute asynchronously during unit tests, as this makes tests harder to write. For this purpose Grails ships with a org.grails.async.factory.SynchronousPromiseFactory instance that makes it easier to test promises:
import org.grails.async.factory.*
import grails.async.*
Promises.promiseFactory = new SynchronousPromiseFactory()Using the PromiseFactory mechanism it is theoretically possible to plug in other concurrency libraries into the Grails framework. For this you need to override the two interfaces grails.async.Promise and grails.async.PromiseFactory.
Migrating Legacy Promise Configuration
The FutureTask-based promise classes and the Spring PromiseFactoryBean are deprecated for removal. Applications should use the normal async plugin registration and configure spring.task.execution instead of constructing CachedThreadPoolPromiseFactory or PromiseFactoryBean beans.
Code that needs a standalone factory can construct CompletableFuturePromiseFactory with a JDK Executor. Grails applications should normally inject PromiseFactory and allow Spring Boot to supply and manage the executor.
Promise Chaining
It is possible to chain several promises and wait for the chain to complete using the then method:
final polish = { ... }
final transform = { ... }
final save = { ... }
final notify = { ... }
Promise promise = task {
// long running task
}
promise.then polish then transform then save then {
// notify end result
}If an exception occurs at any point in the chain it will be propagated back to the caller and the next step in the chain will not be called.
Promise Lists and Maps
Grails' async API also features the concept of a promise lists and maps. These are represented by the grails.async.PromiseList and grails.async.PromiseMap classes respectively.
The easiest way to create a promise list or map is via the tasks method of the Promises class:
import static grails.async.Promises.*
def promiseList = tasks([{ 2 * 2 }, { 4 * 4}, { 8 * 8 }])
assert [4,16,64] == promiseList.get()The tasks method, when passed a list of closures, returns a PromiseList. You can also construct a PromiseList manually:
import grails.async.*
def list = new PromiseList()
list << { 2 * 2 }
list << { 4 * 4 }
list << { 8 * 8 }
list.onComplete { List results ->
assert [4,16,64] == results
}
The PromiseList class does not implement the java.util.List interface, but instead returns a java.util.List from the get() method
|
Working with PromiseMap instances is largely similar. Again you can either use the tasks method:
import static grails.async.Promises.*
def promiseMap = tasks one:{ 2 * 2 },
two:{ 4 * 4},
three:{ 8 * 8 }
assert [one:4,two:16,three:64] == promiseMap.get()Or construct a PromiseMap manually:
import grails.async.*
def map = new PromiseMap()
map['one'] = { 2 * 2 }
map['two'] = { 4 * 4 }
map['three'] = { 8 * 8 }
map.onComplete { Map results ->
assert [one:4,two:16,three:64] == results
}DelegateAsync Transformation
It is quite common to require both synchronous and asynchronous versions of the same API. Developing both can result in a maintenance problem as typically the asynchronous API would simply delegate to the synchronous version.
The DelegateAsync transformation is designed to mitigate this problem by transforming any synchronous API into an asynchronous one.
For example, consider the following service:
class BookService {
List<Book> findBooks(String title) {
// implementation
}
}The findBooks method executes synchronously in the same thread as the caller. To make an asynchronous version of this API you can define another class as follows:
import grails.async.*
class AsyncBookService {
@DelegateAsync BookService bookService
}The DelegateAsync transformation will automatically add a new method that looks like the following to the AsyncBookService class:
Promise<List<Book>> findBooks(String title) {
Promises.task {
bookService.findBooks(title)
}
}As you see the transform adds equivalent methods that return a Promise and execute asynchronously.
The AsyncBookService can then be injected into other controllers and services and used as follows:
AsyncBookService asyncBookService
def findBooks(String title) {
asyncBookService.findBooks(title)
.onComplete { List results ->
println "Books = ${results}"
}
}11.2 Events
Grails 3.3 introduces a new Events API that replaces the previous implementation that was based on Reactor 2.x (which is no longer maintained and deprecated).
In Grails 3.3 and above a new EventBus abstraction has been introduced. Like the PromiseFactory notion, there are implementations of the EventBus interface for common asynchronous frameworks like GPars and RxJava.
To use the Grails Events abstraction you should add a dependency on the events plugin to your build.gradle file:
build.gradle
implementation 'org.apache.grails:grails-events'If no asynchronous framework is present on the classpath then Grails creates an EventBus based on the currently active PromiseFactory. The default is CompletableFuturePromiseFactory. In a Grails application it executes work on Spring Boot’s applicationTaskExecutor.
When grails.async.promiseFactory=virtual-thread selects the opt-in factory, the event bus instead shares that factory’s decorated virtual-thread executor and remains asynchronous.
If you wish to use a popular async framework such as RxJava as the EventBus implementation then you will need to add the appropriate dependency. For example for RxJava 1.x:
build.gradle
runtimeOnly 'org.apache.grails.events:grails-events-rxjava3'The following table summarizes async framework support and the necessary dependency:
| Framework | Dependency | Implementation Class |
|---|---|---|
GPars 1.2.x |
|
|
RxJava 1.2.x |
|
|
RxJava 2.x |
|
|
RxJava 3.x |
|
|
11.2.1 Event Publishing
The simplest way to trigger event notification is via the Publisher annotation.
For example:
SumService.groovy
import grails.events.annotation.*
...
class SumService {
@Publisher
int sum(int a, int b) { a + b }
}What the above does is take the return value of the method and publish an event using an event id that is the same as the method name.
If you wish to change the event id you can provide a value to @Publisher:
@Publisher('myEvent')If you want more flexiblity then you could simulate the behaviour of annotation by writing the following code:
SumService.groovy
import grails.events.*
...
class SumService implements EventPublisher {
int sum(int a, int b) {
int result = a + b
notify('sum', result)
return result
}
}Notice in the above example, the EventPublisher trait is explicitly implemented.
Although generally the annotation approach is recommended because it is simpler and more concise, the EventPublisher trait does provide more flexibility in terms of being able to publish multiple events in a single method and so on.
11.2.2 Subscribing to Events
There are several ways to consume an event. The recommended way is to use the Subscriber annotation. Note that the class using this annotation needs to be a Spring bean.
For example:
TotalService.groovy
import grails.events.annotation.*
...
class TotalService {
AtomicInteger total = new AtomicInteger(0)
@Subscriber
void onSum(int num) { total.addAndGet(num) }
}In this example, every time a sum event occurs the subscriber will be invoked.
Once again the method name is used by default for the event id, although it can start with the word "on". In other words either a method name of sum or onSum would work for the above example. Or alternatively you can provide the event id to subscribe to:
@Subscriber('myEvent')If you wish to subscribe to events dynamically or need more flexibility, then another option is to interact with the EventBus directly. For example:
TotalService.groovy
import grails.events.bus.EventBusAware
import jakarta.annotation.PostConstruct
...
class TotalService implements EventBusAware {
AtomicInteger total = new AtomicInteger(0)
@PostConstruct
void init() {
eventBus.subscribe('sum') { int num ->
total.addAndGet(num)
}
}
}In this example the TotalService calls subscribe and passes a closure within a method called init. The init method is annotated with the annotation @PostConstruct so that is called after the EventBus has been injected by Spring, ensuring it is only called once and the events are correctly subscribed to.
11.2.3 Reactor Spring Annotations
In Grails versions earlier than 3.3, Grails used Reactor 2.x which provided @Consumer and @Selector annotations to listen for events. For example:
import reactor.spring.context.annotation.*
@Consumer
class MyService {
@Selector('myEvent')
void myEventListener(Object data) {
println "GOT EVENT $data"
}
}Within the grails-events-compat dependency Grails 3.3 and above ship versions of these annotations that bridge and provide compatibility for applications upgrading to Grails 3.3, however these annotations are considered deprecated and the Subscriber annotation should be used instead which provides equivalent functionality.
11.2.4 Events from GORM
GORM defines a number of useful events that you can listen for.
To subscribe for an event just define a Subscriber that receives the event type as an argument:
import grails.events.annotation.*
...
Collection<PreInsertEvent> insertEvents = new ConcurrentLinkedDeque<>()
@Subscriber
@SuppressWarnings('unused')
void beforeInsert(PreInsertEvent event) {
insertEvents.add(event)
}| These events are triggered asynchronously, and so cannot cancel or manipulate the persistence operations. |
If you wish to a define a synchronous listener then you should instead use the Listener annotation:
import grails.events.annotation.gorm.*
...
@Listener
void tagFunnyBooks(PreInsertEvent event) {
String title = event.getEntityAccess().getPropertyValue("title")
if(title?.contains("funny")) {
event.getEntityAccess().setProperty("title", "Humor - ${title}".toString())
}
}
If you plan to modify properties of an entity being inserted, use the EntityAccess object as shown above. If you set properties directly on the the entity it will be marked as dirty which will cause another update to be issued.
|
11.2.5 Events from Spring
Spring also fires a number of useful events. All events in the org.springframework use the spring namespace. However, these events are disabled by default as they add a performance overhead.
To enable Spring Event translation set grails.events.spring to true in application.yml prior to defining subscribers.
For example:
import grails.events.annotation.*
import org.springframework.web.context.support.*
import org.springframework.boot.context.event.*
...
@Events(namespace="spring")
class MyService {
@Subscriber
void applicationStarted(ApplicationStartedEvent event) {
// fired when the application starts
}
@Subscriber
void servletRequestHandled(RequestHandledEvent event) {
// fired each time a request is handled
}
}11.2.6 Configure the Default Event Bus
If you include one of the aforementioned concrete EventBus implementations for RxJava or GPars then it is a matter of configuring the appropriate implementation.
| With RxJava 1.x this is done with RxJavaHooks, with RxJava 2.x with RxJavaPlugins and with GPars with GParsConfig |
If you use the default implementation then you can override the thread pool used by the EventBus by registering the appropriate bean in grails-app/conf/spring/resources.groovy:
grails-app/conf/spring/resources.groovy
import org.grails.events.bus.*
import java.util.concurrent.*
beans = {
eventBus(ExecutorEventBus, Executors.newFixedThreadPool(5))
}11.3 Asynchronous GORM
Since Grails 2.3, GORM features an asynchronous programming model that works across all supported datastores (Hibernate, MongoDB etc.).
| Although GORM executes persistence operations asynchronously, these operations still block as the underlying database drivers are not asynchronous. Asynchronous GORM is designed to allow you to isolate these blocking operations onto a separate thread you can scale and control allowing your controller layer to remain non-blocking. |
The AsyncEntity Trait
Since Grails 3.3, the asynchronous part of GORM is optional. To enable it you first need to add the grails-datamapping-async dependency to build.gradle:
build.gradle
implementation "org.apache.grails:grails-datamapping-async"Then in your domain classes you wish to allow asynchronous processing you should use the AsyncEntity trait:
import grails.gorm.async.*
class MyEntity implements AsyncEntity<MyEntity> {
//...
}Async Namespace
The AsyncEntity entity trait provides an async namespace that exposes all of the GORM methods in an asynchronous manner.
For example, the following code listing reads 3 objects from the database asynchronously:
import static grails.async.Promises.*
def p1 = Person.async.get(1L)
def p2 = Person.async.get(2L)
def p3 = Person.async.get(3L)
def results = waitAll(p1, p2, p3)Using the async namespace, all the regular GORM methods are available (even dynamic finders), but instead of executing synchronously, the query is run in the background and a Promise instance is returned.
The following code listing shows a few common examples of GORM queries executed asynchronously:
import static grails.async.Promises.*
Person.async.list().onComplete { List results ->
println "Got people = ${results}"
}
def p = Person.async.getAll(1L, 2L, 3L)
List results = p.get()
def p1 = Person.async.findByFirstName("Homer")
def p2 = Person.async.findByFirstName("Bart")
def p3 = Person.async.findByFirstName("Barney")
results = waitAll(p1, p2, p3)Async and the Session
When using GORM async each promise is executed in a different thread. Since the Hibernate session is not concurrency safe, a new session is bound per thread.
This is an important consideration when using GORM async (particularly with Hibernate as the persistence engine). The objects returned from asynchronous queries will be detached entities.
This means you cannot save objects returned from asynchronous queries without first merging them back into session. For example the following will not work:
def promise = Person.async.findByFirstName("Homer")
def person = promise.get()
person.firstName = "Bart"
person.save()Instead you need to merge the object with the session bound to the calling thread. The above code needs to be written as:
def promise = Person.async.findByFirstName("Homer")
def person = promise.get()
person.merge()
person.firstName = "Bart"Note that merge() is called first because it may refresh the object from the cache or database, which would result in the change being lost. In general it is not recommended to read and write objects in different threads and you should avoid this technique unless absolutely necessary.
Finally, another issue with detached objects is that association lazy loading will not work and you will encounter LazyInitializationException errors if you do so. If you plan to access the associated objects of those returned from asynchronous queries you should use eager queries (which is recommended anyway to avoid N+1 problems).
Multiple Asynchronous GORM calls
As discussed in the previous section you should avoid reading and writing objects in different threads as merging tends to be inefficient.
However, if you wish to do more complex GORM work asynchronously then the GORM async namespace provides a task method that makes this possible. For example:
def promise = Person.async.task {
withTransaction {
def person = findByFirstName("Homer")
person.firstName = "Bart"
person.save(flush:true)
}
}
Person updatedPerson = promise.get()Note that the GORM task method differs from the static Promises.task method in that it deals with binding a new session to the asynchronous thread for you. If you do not use the GORM version and do asynchronous work with GORM then you need to do this manually. Example:
import static grails.async.Promises.*
def promise = task {
Person.withNewSession {
// your logic here
}
}Async DetachedCriteria
The DetachedCriteria class also supports the async namespace. For example you can do the following:
DetachedCriteria query = Person.where {
lastName == "Simpson"
}
def promise = query.async.list()11.4 RxJava Support
Since Grails 3.2, you can use RxJava to write reactive logic in your Grails controllers that leverages the underlying containers asynchronous processing capabilities.
To get started simply declare a dependency on the plugin in build.gradle:
build.gradle
dependencies {
//...
implementation 'org.apache.grails:grails-rxjava3'
}You can then return rx.Observable as a return value from any controller and Grails will automatically apply the following steps:
-
Create a new asynchronous request
-
Spawn a new thread that subscribes to the observable
-
When the observable emits a result, process the result using the respond method.
For more detailed instructions on how to use the RxJava plugin see the user guide documentation for the plugin.
11.4.1 Server Sent Events
Server-sent events (SSE) is a technology where a browser receives automatic updates from a server via HTTP connection. The Server-Sent Events EventSource API is standardized as part of HTML5 by the W3C.
The RxJava plugin adds support for SSE to Grails making it simple to write controllers that maintain continuous non-blocking communication with a JavaScript client.
For example:
def index() {
rx.stream { Observer observer -> (1)
for(i in (0..5)) {
if(i % 2 == 0) {
observer.onNext(
rx.render("Tick") (2)
)
}
else {
observer.onNext(
rx.render("Tock")
)
}
sleep 1000 (3)
}
observer.onCompleted() (4)
}
}| 1 | Call the stream method passing a closure that accepts an rx.Subscriber to start sending events |
| 2 | Emit a one or many items using onNext |
| 3 | Call sleep to simulate a slow request |
| 4 | Call onCompleted to complete the request |
For more detailed instructions on how to use SSE and the RxJava plugin see the user guide documentation for the plugin.
11.4.2 RxGORM
RxGORM is new implementation of GORM that has the following goals:
-
Reactive
-
Non-blocking
-
Stateless
-
Simple
RxGORM, unlike the Asynchronous GORM implementation, aims to be truly non-blocking, down to the driver level.
The following in an example of RxGORM in action:
Book.get(id)
.subscribe { Book it ->
println "Title = ${it.title}"
}You can combine RxGORM with the RxJava plugin to implement reactive responses from Grails controllers. For example:
def show() {
// returns an rx.Observable
Book.get(params.id?.toString())
}For more information on how to use RxGORM, see the RxGORM user guide.
11.5 Asynchronous Request Handling
When running a Servlet application, Grails controller actions can produce responses asynchronously.
In general for controller actions that execute quickly there is little benefit in handling requests asynchronously. However, for long running controller actions it is extremely beneficial.
The reason being that with an asynchronous / non-blocking response, the one thread == one request == one response relationship is broken. The container can keep a client response open and active, and at the same time return the thread back to the container to deal with another request, improving scalability.
For example, if you have 70 available container threads and an action takes a minute to complete, if the actions are not executed in a non-blocking fashion the likelihood of all 70 threads being occupied and the container not being able to respond is quite high and you should consider asynchronous request processing.
Grails provides a simplified API for creating asynchronous responses built on the Promise mechanism discussed previously. Promise results are integrated with Spring MVC’s asynchronous request lifecycle. Spring MVC manages the Servlet async dispatch, timeout callbacks, and normal exception resolution when a promise fails.
The raw AsyncController.startAsync() API and its Grails-specific Servlet wrappers are deprecated for removal. Return a Promise from the action instead; this allows Spring MVC to manage the request lifecycle and Spring Boot to manage execution and context propagation.
Both WebPromises.task { } and promises returned from actions honor spring.mvc.async.request-timeout (for example, 30s). When unset, the Servlet container’s default applies (normally 30 seconds on Tomcat). This replaces the previous infinite timeout for WebPromises. A timeout produces HTTP 503 (Service Unavailable), without logging an application-error stack trace. An application can customize its response with a 503 URL mapping, optionally restricted to org.springframework.web.context.request.async.AsyncRequestTimeoutException. The timeout ends the response lifecycle; it does not cancel the underlying task. Tasks must not continue writing to the response after timeout.
Async Models
A typical activity in a Grails controller is to produce a model (a map of key/value pairs) that can be rendered by a view.
If the model takes a while to produce then the server could arrive at a blocking state, impacting scalability. You tell Grails to build the model asynchronously by returning a grails.async.PromiseMap via the Promises.tasks method:
import static grails.async.web.WebPromises.*
...
def index() {
tasks books: Book.async.list(),
totalBooks: Book.async.count(),
otherValue: {
// do hard work
}
}Grails will handle the response asynchronously, waiting for the promises to complete before rendering the view. The equivalent synchronous action of the above is:
def index() {
def otherValue = ...
[ books: Book.list() ,
totalBooks: Book.count(),
otherValue: otherValue ]
}You can even render different view by passing the PromiseMap to the model attribute of the render method:
import static grails.async.web.WebPromises.*
//...
def index() {
render view:"myView", model: tasks( one:{ 2 * 2 },
two:{ 3 * 3 } )
}Async Response Rendering
You can also write to the response asynchronously using promises in Grails 2.3 and above:
import static grails.async.web.WebPromises.*
class StockController {
def stock(String ticker) {
task {
ticker = ticker ?: 'GOOG'
def url = new URL("https://download.finance.yahoo.com/d/quotes.csv?s=${ticker}&f=nsl1op&e=.csv")
Double price = url.text.split(',')[-1] as Double
render "ticker: $ticker, price: \$price"
}
}
}The above example using Yahoo Finance to query stock prices, executing asynchronously and only rendering the response once the result has been obtained. This is done by returning a Promise instance from the controller action.
If the Yahoo URL is unresponsive the original request thread will not be blocked and the container will not become unresponsive.
11.6 Servlet 3.0 Async
In addition to the higher level async features discussed earlier in the section, you can access the raw Servlet 3.0 asynchronous API from a Grails application.
Servlet 3.0 Asynchronous Rendering
AsyncController and its startAsync() API are deprecated for removal in Grails 8. Prefer returning a Promise from an action so Spring MVC manages completion, dispatch, timeouts, and errors. The examples below are retained for migrating existing applications.
|
To do so your should first implement the grails.async.web.AsyncController trait in your controller:
import grails.async.web.*
...
class BookController implements AsyncController {
...
}You can render content (templates, binary data etc.) in an asynchronous manner by calling the startAsync method which returns an instance of the Servlet 3.0 AsyncContext. Once you have a reference to the AsyncContext you can use Grails' regular render method to render content:
def index() {
def ctx = startAsync()
ctx.start {
new Book(title:"The Stand").save()
render template:"books", model:[books:Book.list()]
ctx.complete()
}
}Note that you must call the complete() method to terminate the connection.
Resuming an Async Request
You resume processing of an async request (for example to delegate to view rendering) by using the dispatch method of the AsyncContext class:
def index() {
def ctx = startAsync()
ctx.start {
// do working
...
// render view
ctx.dispatch()
}
}12 Validation
Grails validation capability is built on Spring’s Validator API and data binding capabilities. However Grails takes this further and provides a unified way to define validation "constraints" with its constraints mechanism.
Constraints in Grails are a way to declaratively specify validation rules. Most commonly they are applied to domain classes, however URL Mappings and Command Objects also support constraints.
12.1 Declaring Constraints
Within a domain class constraints are defined with the constraints property that is assigned a code block:
class User {
String login
String password
String email
Integer age
static constraints = {
...
}
}You then use method calls that match the property name for which the constraint applies in combination with named parameters to specify constraints:
class User {
...
static constraints = {
login size: 5..15, blank: false, unique: true
password size: 5..15, blank: false
email email: true, blank: false
age min: 18
}
}In this example we’ve declared that the login property must be between 5 and 15 characters long, it cannot be blank and must be unique. We’ve also applied other constraints to the password, email and age properties.
As of Grails 8, domain class properties are nullable by default: an unconstrained property is optional unless you declare nullable: false (prior to Grails 8 the default was the opposite — an implicit nullable: false was applied to every property). To restore the legacy required-by-default behaviour application-wide, set grails.gorm.default.nullable = false.
|
A complete reference for the available constraints can be found in the Quick Reference section under the Constraints heading.
Note that constraints are only evaluated once which may be relevant for a constraint that relies on a value like an instance of java.util.Date.
class User {
...
static constraints = {
// this Date object is created when the constraints are evaluated, not
// each time an instance of the User class is validated.
birthDate max: new Date()
}
}A word of warning - referencing domain class properties from constraints
It’s very easy to attempt to reference instance variables from the static constraints block, but this isn’t legal in Groovy (or Java). If you do so, you will get a MissingPropertyException for your trouble. For example, you may try
class Response {
Survey survey
Answer answer
static constraints = {
survey blank: false
answer blank: false, inList: survey.answers
}
}See how the inList constraint references the instance property survey? That won’t work. Instead, use a custom validator:
class Response {
...
static constraints = {
survey blank: false
answer blank: false, validator: { val, obj -> val in obj.survey.answers }
}
}In this example, the obj argument to the custom validator is the domain instance that is being validated, so we can access its survey property and return a boolean to indicate whether the new value for the answer property, val, is valid.
12.2 Validating Constraints
Validation Basics
Call the validate method to validate a domain class instance:
def user = new User(params)
if (user.validate()) {
// do something with user
}
else {
user.errors.allErrors.each {
println it
}
}The errors property on domain classes is an instance of the Spring Errors interface. The Errors interface provides methods to navigate the validation errors and also retrieve the original values.
Validation Phases
Within Grails there are two phases of validation, the first one being data binding which occurs when you bind request parameters onto an instance such as:
def user = new User(params)At this point you may already have errors in the errors property due to type conversion (such as converting Strings to Dates). You can check these and obtain the original input value using the Errors API:
if (user.hasErrors()) {
if (user.errors.hasFieldErrors("login")) {
println user.errors.getFieldError("login").rejectedValue
}
}The second phase of validation happens when you call validate or save. This is when Grails will validate the bound values against the constraints you defined. For example, by default the save method calls validate before executing, allowing you to write code like:
if (user.save()) {
return user
}
else {
user.errors.allErrors.each {
println it
}
}12.3 Sharing Constraints Between Classes
A common pattern in Grails is to use Command Objects for validating user-submitted data and then copy the properties of the command object to the relevant domain classes. This often means that your command objects and domain classes share properties and their constraints. You could manually copy and paste the constraints between the two, but that’s a very error-prone approach. Instead, make use of Grails' global constraints and import mechanism.
Global Constraints
In addition to defining constraints in domain classes, command objects and other validateable classes, you can also define them in grails-app/conf/runtime.groovy:
grails.gorm.default.constraints = {
'*'(nullable: true, size: 1..20)
myShared(nullable: false, blank: false)
}These constraints are not attached to any particular classes, but they can be easily referenced from any validateable class:
class User {
...
static constraints = {
login shared: "myShared"
}
}Note the use of the shared argument, whose value is the name of one of the constraints defined in grails.gorm.default.constraints. Despite the name of the configuration setting, you can reference these shared constraints from any validateable class, such as command objects.
The '*' constraint is a special case: it means that the associated constraints ('nullable' and 'size' in the above example) will be applied to all properties in all validateable classes. These defaults can be overridden by the constraints declared in a validateable class.
Importing Constraints
Grails 2 introduced an alternative approach to sharing constraints that allows you to import a set of constraints from one class into another.
Let’s say you have a domain class like so:
class User {
String firstName
String lastName
String passwordHash
static constraints = {
firstName blank: false, nullable: false
lastName blank: false, nullable: false
passwordHash blank: false, nullable: false
}
}You then want to create a command object, UserCommand, that shares some of the properties of the domain class and the corresponding constraints. You do this with the importFrom() method:
class UserCommand {
String firstName
String lastName
String password
String confirmPassword
static constraints = {
importFrom User
password blank: false, nullable: false
confirmPassword blank: false, nullable: false
}
}This will import all the constraints from the User domain class and apply them to UserCommand. The import will ignore any constraints in the source class (User) that don’t have corresponding properties in the importing class (UserCommand). In the above example, only the 'firstName' and 'lastName' constraints will be imported into UserCommand because those are the only properties shared by the two classes.
A property for which the source domain class declares no nullable constraint is imported with the domain class’s nullable default.
It is nullable, unless grails.gorm.default.nullable is set to false or a '*'(nullable: false) global constraint is defined, in which case it is required.
If you want more control over which constraints are imported, use the include and exclude arguments. Both of these accept a list of simple or regular expression strings that are matched against the property names in the source constraints. So for example, if you only wanted to import the 'lastName' constraint you would use:
...
static constraints = {
importFrom User, include: ["lastName"]
...
}or if you wanted all constraints that ended with 'Name':
...
static constraints = {
importFrom User, include: [/.*Name/]
...
}Of course, exclude does the reverse, specifying which constraints should not be imported.
12.4 Validation on the Client
Displaying Errors
Typically if you get a validation error you redirect back to the view for rendering. Once there you need some way of displaying errors. Grails supports a rich set of tags for dealing with errors. To render the errors as a list you can use renderErrors:
<g:renderErrors bean="${user}" /><g:hasErrors bean="${user}">
<ul>
<g:eachError var="err" bean="${user}">
<li>${err}</li>
</g:eachError>
</ul>
</g:hasErrors>Highlighting Errors
It is often useful to highlight using a red box or some indicator when a field has been incorrectly input. This can also be done with the hasErrors by invoking it as a method. For example:
<div class='value ${hasErrors(bean:user,field:'login','errors')}'>
<input type="text" name="login" value="${fieldValue(bean:user,field:'login')}"/>
</div>This code checks if the login field of the user bean has any errors and if so it adds an errors CSS class to the div, allowing you to use CSS rules to highlight the div.
Retrieving Input Values
Each error is actually an instance of the FieldError class in Spring, which retains the original input value within it. This is useful as you can use the error object to restore the value input by the user using the fieldValue tag:
<input type="text" name="login" value="${fieldValue(bean:user,field:'login')}"/>This code will check for an existing FieldError in the User bean and if there is obtain the originally input value for the login field.
12.5 Validation and Internationalization
Another important thing to note about errors in Grails is that error messages are not hard coded anywhere. The FieldError class in Spring resolves messages from message bundles using Grails' i18n support.
Constraints and Message Codes
The codes themselves are dictated by a convention. For example consider the constraints we looked at earlier:
package com.mycompany.myapp
class User {
...
static constraints = {
login size: 5..15, blank: false, unique: true
password size: 5..15, blank: false
email email: true, blank: false
age min: 18
}
}If a constraint is violated, Grails looks by convention for a message code:
| Constraint | Error Code |
|---|---|
|
|
|
|
|
|
|
|
|
|
|
|
|
|
|
|
|
|
|
|
|
|
|
|
|
|
|
|
|
|
|
In the case of the blank constraint this would be user.login.blank so you would need a message such as the following in your grails-app/i18n/messages.properties file:
user.login.blank=Your login name must be specified!The class name is looked for both with and without a package, with the packaged version taking precedence. So for example, com.mycompany.myapp.User.login.blank will be used before user.login.blank. This allows for cases where your domain class message codes clash with a plugin’s.
For a reference on what codes are for which constraints refer to the reference guide for each constraint (e.g. blank).
Displaying Messages
The renderErrors tag will automatically look up messages for you using the message tag. If you need more control of rendering you can handle this yourself:
<g:hasErrors bean="${user}">
<ul>
<g:eachError var="err" bean="${user}">
<li><g:message error="${err}" /></li>
</g:eachError>
</ul>
</g:hasErrors>12.6 Applying Validation to Other Classes
Domain classes and Command Objects support validation by default. Other classes may be made validateable by defining the static constraints property in the class (as described above) and then telling the framework about them. It is important that the application register the validateable classes with the framework. Simply defining the constraints property is not sufficient.
The Validateable Trait
Classes which define the static constraints property and implement the Validateable trait will be validateable. Consider this example:
src/main/groovy/com/mycompany/myapp/User.groovy
package com.mycompany.myapp
import grails.validation.Validateable
class User implements Validateable {
...
static constraints = {
login size: 5..15, blank: false, unique: true
password size: 5..15, blank: false
email email: true, blank: false
age min: 18
}
}Programmatic access
Accessing the constraints on a validateable object is slightly different. You can access a command object’s constraints programmatically in another context by accessing the constraintsMap static property of the class. That property is an instance of Map<String, ConstrainedProperty>
In the example above, accessing User.constraintsMap.login.blank would yield false, while
User.constraintsMap.login.unique would yield true.
13 The Service Layer
Grails defines the notion of a service layer. The Grails team discourages the embedding of core application logic inside controllers, as it does not promote reuse and a clean separation of concerns.
Services in Grails are the place to put the majority of the logic in your application, leaving controllers responsible for handling request flow with redirects and so on.
Creating a Service
You can create a Grails service by running the create-service command from the root of your project in a terminal window:
grails create-service helloworld.simple
If no package is specified with the create-service script, Grails automatically uses the grails.defaultPackage defined in grails-app/conf/application.yml as the package name.
|
The above example will create a service at the location grails-app/services/helloworld/SimpleService.groovy. A service’s name ends with the convention Service, other than that a service is a plain Groovy class:
package helloworld
class SimpleService {
}13.1 Declarative Transactions
Declarative Transactions
Services are typically involved with coordinating logic between domain classes, and hence often involved with persistence that spans large operations. Given the nature of services, they frequently require transactional behaviour. You can use programmatic transactions with the withTransaction method, however this is repetitive and doesn’t fully leverage the power of Spring’s underlying transaction abstraction.
Services enable transaction demarcation, which is a declarative way of defining which methods are to be made transactional. To enable transactions on a service use the Transactional transform:
import grails.gorm.transactions.*
@Transactional
class CountryService {
}The result is that all methods are wrapped in a transaction and automatic rollback occurs if a method throws an exception (both Checked or Runtime exceptions) or an Error. The propagation level of the transaction is by default set to PROPAGATION_REQUIRED.
| Version Grails 3.2.0 was the first version to use GORM 6 by default. Checked exceptions did not roll back transactions before GORM 6. Only a method which threw a runtime exception (i.e. one that extends RuntimeException) rollbacked a transaction. |
Warning: dependency injection is the only way that declarative transactions work. You will not get a transactional service if you use the new operator such as new BookService()
|
The Transactional annotation vs the transactional property
In versions of Grails prior to Grails 3.1, Grails created Spring proxies and used the transactional property to enable and disable proxy creation. These proxies are disabled by default in applications created with Grails 3.1 and above in favor of the @Transactional transformation.
For versions of Grails 3.1.x and 3.2.x, if you wish to renable this feature (not recommended) then you must set grails.spring.transactionManagement to true or remove the configuration in grails-app/conf/application.yml or grails-app/conf/application.groovy.
In Grails 3.3.x Spring proxies for transaction management has been dropped completely, and you must use Grails' AST transforms. In Grails 3.3.x, if you wish to continue to use Spring proxies for transaction management you will have to configure them manually, using the appropriate Spring configuration.
In addition, prior to Grails 3.1 services were transactional by default, as of Grails 3.1 they are only transactional if the @Transactional transformation is applied.
|
Custom Transaction Configuration
Grails also provides @Transactional and @NotTransactional annotations for cases where you need more fine-grained control over transactions at a per-method level or need to specify an alternative propagation level. For example, the @NotTransactional annotation can be used to mark a particular method to be skipped when a class is annotated with @Transactional.
Annotating a service method with Transactional disables the default Grails transactional behavior for that service (in the same way that adding transactional=false does) so if you use any annotations you must annotate all methods that require transactions.
|
In this example listBooks uses a read-only transaction, updateBook uses a default read-write transaction, and deleteBook is not transactional (probably not a good idea given its name).
import grails.gorm.transactions.Transactional
class BookService {
@Transactional(readOnly = true)
def listBooks() {
Book.list()
}
@Transactional
def updateBook() {
// ...
}
def deleteBook() {
// ...
}
}You can also annotate the class to define the default transaction behavior for the whole service, and then override that default per-method:
import grails.gorm.transactions.Transactional
@Transactional
class BookService {
def listBooks() {
Book.list()
}
def updateBook() {
// ...
}
def deleteBook() {
// ...
}
}This version defaults to all methods being read-write transactional (due to the class-level annotation), but the listBooks method overrides this to use a read-only transaction:
import grails.gorm.transactions.Transactional
@Transactional
class BookService {
@Transactional(readOnly = true)
def listBooks() {
Book.list()
}
def updateBook() {
// ...
}
def deleteBook() {
// ...
}
}Although updateBook and deleteBook aren’t annotated in this example, they inherit the configuration from the class-level annotation.
For more information refer to the section of the Spring user guide on Using @Transactional.
Unlike Spring you do not need any prior configuration to use Transactional; just specify the annotation as needed and Grails will detect them up automatically.
Transaction status
An instance of TransactionStatus is available by default in Grails transactional service methods.
Example:
import grails.gorm.transactions.Transactional
@Transactional
class BookService {
def deleteBook() {
transactionStatus.setRollbackOnly()
}
}13.1.1 Transactions and Multi-DataSources
Given two domain classes such as:
class Movie {
String title
}class Book {
String title
static mapping = {
datasource 'books'
}
}You can supply the desired data source to @Transactional or @ReadOnly annotations.
import grails.gorm.transactions.ReadOnly
import grails.gorm.transactions.Transactional
import groovy.transform.CompileStatic
@CompileStatic
class BookService {
@ReadOnly('books')
List<Book> findAll() {
Book.where {}.findAll()
}
@Transactional('books')
Book save(String title) {
Book book = new Book(title: title)
book.save()
book
}
}
GORM Data Services offer a simpler approach. Annotate the @Service abstract class with @Transactional(connection = 'books') and all auto-implemented methods - get(), save(), delete(), findBy*(), countBy*() - route to the correct datasource automatically. See the Data Services and Multiple Datasources section for the full pattern.
|
@CompileStatic
class MovieService {
@ReadOnly
List<Movie> findAll() {
Movie.where {}.findAll()
}
}
If you are using GORM Data Services (the @Service annotation), the datasource is automatically inherited from the domain class’s mapping block, so you do not need to repeat @Transactional(connection = '…') on the service. An explicit annotation on the service still takes precedence. See the "GORM Data Service Datasource Inheritance" section under "Multiple Datasources" in the Data Sources configuration guide for details.
|
13.1.2 Transactions Rollback and the Session
Understanding Transactions and the Hibernate Session
When using transactions there are important considerations you must take into account with regards to how the underlying persistence session is handled by Hibernate. When a transaction is rolled back the Hibernate session used by GORM is cleared. This means any objects within the session become detached and accessing uninitialized lazy-loaded collections will lead to a LazyInitializationException.
To understand why it is important that the Hibernate session is cleared. Consider the following example:
class Author {
String name
Integer age
static hasMany = [books: Book]
}If you were to save two authors using consecutive transactions as follows:
Author.withTransaction { status ->
new Author(name: "Stephen King", age: 40).save()
status.setRollbackOnly()
}
Author.withTransaction { status ->
new Author(name: "Stephen King", age: 40).save()
}Only the second author would be saved since the first transaction rolls back the author save() by clearing the Hibernate session. If the Hibernate session were not cleared then both author instances would be persisted and it would lead to very unexpected results.
It can, however, be frustrating to get a LazyInitializationException due to the session being cleared.
For example, consider the following example:
class AuthorService {
void updateAge(id, int age) {
def author = Author.get(id)
author.age = age
if (author.isTooOld()) {
throw new AuthorException("too old", author)
}
}
}class AuthorController {
AuthorService authorService
def updateAge() {
try {
authorService.updateAge(params.id, params.int("age"))
}
catch(e) {
render "Author books ${e.author.books}"
}
}
}In the above example the transaction will be rolled back if the age of the Author age exceeds the maximum value defined in the isTooOld() method by throwing an AuthorException. The AuthorException references the author but when the books association is accessed a LazyInitializationException will be thrown because the underlying Hibernate session has been cleared.
To solve this problem you have a number of options. One is to ensure you query eagerly to get the data you will need:
class AuthorService {
...
void updateAge(id, int age) {
def author = Author.findById(id, [fetch:[books:"eager"]])
...In this example the books association will be queried when retrieving the Author.
| This is the optimal solution as it requires fewer queries than the following suggested solutions. |
Another solution is to redirect the request after a transaction rollback:
class AuthorController {
AuthorService authorService
def updateAge() {
try {
authorService.updateAge(params.id, params.int("age"))
}
catch(e) {
flash.message = "Can't update age"
redirect action:"show", id:params.id
}
}
}In this case a new request will deal with retrieving the Author again. And, finally a third solution is to retrieve the data for the Author again to make sure the session remains in the correct state:
class AuthorController {
AuthorService authorService
def updateAge() {
try {
authorService.updateAge(params.id, params.int("age"))
}
catch(e) {
def author = Author.read(params.id)
render "Author books ${author.books}"
}
}
}Validation Errors and Rollback
A common use case is to rollback a transaction if there are validation errors. For example consider this service:
import grails.validation.ValidationException
class AuthorService {
void updateAge(id, int age) {
def author = Author.get(id)
author.age = age
if (!author.validate()) {
throw new ValidationException("Author is not valid", author.errors)
}
}
}To re-render the same view that a transaction was rolled back in you can re-associate the errors with a refreshed instance before rendering:
import grails.validation.ValidationException
class AuthorController {
AuthorService authorService
def updateAge() {
try {
authorService.updateAge(params.id, params.int("age"))
}
catch (ValidationException e) {
def author = Author.read(params.id)
author.errors = e.errors
render view: "edit", model: [author:author]
}
}
}13.2 Scoped Services
By default, access to service methods is not synchronised, so nothing prevents concurrent execution of those methods. In fact, because the service is a singleton and may be used concurrently, you should be very careful about storing state in a service. Or take the easy (and better) road and never store state in a service.
You can change this behaviour by placing a service in a particular scope. The supported scopes are:
-
prototype- A new service is created every time it is injected into another class -
request- A new service will be created per request -
flash- A new service will be created for the current and next request only -
flow- In web flows the service will exist for the scope of the flow -
conversation- In web flows the service will exist for the scope of the conversation. ie a root flow and its sub flows -
session- A service is created for the scope of a user session -
singleton(default) - Only one instance of the service ever exists
If your service is flash, flow or conversation scoped it must implement java.io.Serializable and can only be used in the context of a Web Flow.
|
To enable one of the scopes, add a static scope property to your class whose value is one of the above, for example
static scope = "flow"|
Upgrading
Starting with Grails 2.3, new applications are generated with configuration that defaults the scope of controllers to See Controllers and Scopes in the user guide for more information. |
Lazy initialization
You can also configure whether the service is lazily initialized. By default, this is set to true, but you can disable this and make initialization eager with the lazyInit property:
static lazyInit = false13.3 Dependency Injection and Services
Dependency Injection Basics
A key aspect of Grails services is the ability to use Spring Framework's dependency injection features. Grails supports "dependency injection by convention". In other words, you can use the property name representation of the class name of a service to automatically inject them into controllers, tag libraries, and so on.
As an example, given a service called BookService, you can define a property called bookService in a controller as follows:
class BookController {
BookService bookService
...
}In this case, the Spring container will automatically inject an instance of that service based on its configured scope. Since all dependency injection is done by name you can also specify the type as follows:
class AuthorService {
BookService bookService
}
NOTE: Normally the property name is generated by lower casing the first letter of the type. For example, an instance of the BookService class would map to a property named bookService.
|
To be consistent with standard JavaBean conventions, if the first 2 letters of the class name are upper case, the property name is the same as the class name. For example, the property name of the JDBCHelperService class would be JDBCHelperService, not jDBCHelperService or jdbcHelperService.
See section 8.8 of the JavaBean specification for more information on de-capitalization rules.
| Only the top level object is subjected to injection as traversing all nested objects to perform injection would be a performance issue. |
Be careful when injecting the non-default datasources. For example, using this config:
dataSources:
dataSource:
pooled: true
jmxExport: true
...
secondary:
pooled: true
jmxExport: true
...You can inject the primary dataSource like you would expect:
class BookSqlService {
DataSource dataSource
}But to inject the secondary datasource, you have to use Spring’s Autowired injection or resources.groovy.
class BookSqlSecondaryService {
@Autowired
@Qualifier('dataSource_secondary')
DataSource dataSource2
}Dependency Injection and Services
You can inject services in other services with the same technique. If you had an AuthorService that needed to use the BookService, declaring the AuthorService as follows would allow that:
class AuthorService {
BookService bookService
}Dependency Injection and Domain Classes / Tag Libraries
You can even inject services into domain classes and tag libraries, which can aid in the development of rich domain models and views:
class Book {
...
BookService bookService
def buyBook() {
bookService.buyBook(this)
}
}| Since Grails 3.2.8 this is not enabled by default. If you want to enable it again, take a look at Spring Autowiring of Domain Instance |
Service Bean Names
The default bean name which is associated with a service can be problematic if there are multiple services with the same name defined in different packages. For example consider the situation where an application defines a service class named com.demo.ReportingService and the application uses a plugin named ReportingUtilities and that plugin provides a service class named com.reporting.util.ReportingService.
The default bean name for each of those would be reportingService so they would conflict with each other. Grails manages this by changing the default bean name for services provided by plugins by prefixing the bean name with the plugin name.
In the scenario described above the reportingService bean would be an instance of the com.demo.ReportingService class defined in the application and the reportingUtilitiesReportingService bean would be an instance of the com.reporting.util.ReportingService class provided by the ReportingUtilities plugin.
For all service beans provided by plugins, if there are no other services with the same name within the application or other plugins in the application then a bean alias will be created which does not include the plugin name and that alias points to the bean referred to by the name that does include the plugin name prefix.
For example, if the ReportingUtilities plugin provides a service named com.reporting.util.AuthorService and there is no other AuthorService in the application or in any of the plugins that the application is using then there will be a bean named reportingUtilitiesAuthorService which is an instance of this com.reporting.util.AuthorService class and there will be a bean alias defined in the context named authorService which points to that same bean.
14 Static Type Checking And Compilation
Groovy is a dynamic language and by default Groovy uses a dynamic dispatch mechanism to carry out method calls and property access. This dynamic dispatch mechanism provides a lot of flexibility and power to the language. For example, it is possible to dynamically add methods to classes at runtime and it is possible to dynamically replace existing methods at runtime. Features like these are important and provide a lot of power to the language. However, there are times when you may want to disable this dynamic dispatch in favor of a more static dispatch mechanism and Groovy provides a way to do that. The way to tell the Groovy compiler that a particular class should compiled statically is to mark the class with the groovy.transform.CompileStatic annotation as shown below.
import groovy.transform.CompileStatic
@CompileStatic
class MyClass {
// this class will be statically compiled...
}See these notes on Groovy static compilation for more details on how CompileStatic works and why you might want to use it.
One limitation of using CompileStatic is that when you use it you give up access to the power and flexibility offered by dynamic dispatch. For example, in Grails you would not be able to invoke a GORM dynamic finder from a class that is marked with CompileStatic because the compiler cannot verify that the dynamic finder method exists, because it doesn’t exist at compile time. It may be that you want to take advantage of Groovy’s static compilation benefits without giving up access to dynamic dispatch for Grails specific things like dynamic finders and this is where grails.compiler.GrailsCompileStatic comes in. GrailsCompileStatic behaves just like CompileStatic but is aware of certain Grails features and allows access to those specific features to be accessed dynamically.
14.1 The GrailsCompileStatic Annotation
GrailsCompileStatic
The GrailsCompileStatic annotation may be applied to a class or methods within a class.
import grails.compiler.GrailsCompileStatic
@GrailsCompileStatic
class SomeClass {
// all of the code in this class will be statically compiled
def methodOne() {
// ...
}
def methodTwo() {
// ...
}
def methodThree() {
// ...
}
}import grails.compiler.GrailsCompileStatic
class SomeClass {
// methodOne and methodThree will be statically compiled
// methodTwo will be dynamically compiled
@GrailsCompileStatic
def methodOne() {
// ...
}
def methodTwo() {
// ...
}
@GrailsCompileStatic
def methodThree() {
// ...
}
}It is possible to mark a class with GrailsCompileStatic and exclude specific methods by marking them with GrailsCompileStatic and specifying that the type checking should be skipped for that particular method as shown below.
import grails.compiler.GrailsCompileStatic
import groovy.transform.TypeCheckingMode
@GrailsCompileStatic
class SomeClass {
// methodOne and methodThree will be statically compiled
// methodTwo will be dynamically compiled
def methodOne() {
// ...
}
@GrailsCompileStatic(TypeCheckingMode.SKIP)
def methodTwo() {
// ...
}
def methodThree() {
// ...
}
}Code that is marked with GrailsCompileStatic will all be statically compiled except for Grails specific interactions that cannot be statically compiled but that GrailsCompileStatic can identify as permissible for dynamic dispatch. These include things like invoking dynamic finders and DSL code in configuration blocks like constraints and mapping closures in domain classes.
Care must be taken when deciding to statically compile code. There are benefits associated with static compilation but in order to take advantage of those benefits you are giving up the power and flexibility of dynamic dispatch. For example if code is statically compiled it cannot take advantage of runtime metaprogramming enhancements which may be provided by plugins.
Tag Library Calls in Controllers
Controllers annotated with @GrailsCompileStatic can invoke tag library methods without compile errors.
Tag dispatch is handled at runtime through TagLibraryInvoker, and @GrailsCompileStatic includes a built-in type-checking extension that recognises these call sites and allows them to compile.
Both calling patterns work:
import grails.compiler.GrailsCompileStatic
@GrailsCompileStatic
class BookController {
def index() {
// Direct call — tag in the default namespace invoked on `this`
response.writer << link(controller: 'book', action: 'list')
// Namespaced call — namespace dispatcher property, then tag method
response.writer << g.message(code: 'book.list.title')
}
}Only controller classes (those whose name ends with Controller) receive this treatment.
All other code in the controller remains fully type-checked.
If you need to opt a single method out of static compilation, use @GrailsCompileStatic(TypeCheckingMode.SKIP) on that method.
Applying GrailsCompileStatic Across All Controllers, Services and Tag Libraries
Rather than annotating each class individually, static compilation can be enabled for every controller, service and tag library in an application. The Grails Gradle plugin exposes these opt-ins in the nested compileStatic block of the grails build configuration:
build.gradle
grails {
compileStatic {
controllers = true // compile every grails-app/controllers class with @GrailsCompileStatic
services = true // compile every grails-app/services class with @GrailsCompileStatic
tagLibs = true // compile every grails-app/taglib class with @GrailsCompileStatic
}
}The options are lazy properties that are read when the Groovy compile task runs, so they may be configured from anywhere in the build regardless of ordering. All three are disabled by default and are independent, so each artefact type can be enabled on its own. To turn them all on at once, use the all shortcut instead:
build.gradle
grails {
compileStatic {
all = true // shortcut for controllers + services + tag libraries
}
}all is what an artefact type falls back to where it states nothing of its own. An artefact type that states a value keeps it, so a single type can be held back from the shortcut:
build.gradle
grails {
compileStatic {
all = true
services = false // every artefact type except services
}
}GSP pages have an opt-in in the same block, gsp, documented under Static Compilation for Groovy Server Pages. It is deliberately not covered by all and has to be asked for on its own:
build.gradle
grails {
compileStatic {
all = true // controllers, services and tag libraries
gsp = true // and pages, which `all` does not include
}
}Grails Forge generates the same opt-ins for a new application with the grails-compile-static feature. It sets controllers, services and tagLibs individually rather than through all, so an artefact type a later release adds to all is not opted in without being asked for, and adds gsp = true when the application uses GSP:
grails -t forge create-app --features=grails-compile-static com.example.demoWhen an opt-in is enabled, every matching artefact is compiled exactly as if it were annotated with @GrailsCompileStatic, including the Grails-specific dispatch that the annotation already permits — dynamic finders, constraints and mapping DSLs, and tag library calls in both controllers and tag libraries.
|
For tag libraries, define tags as methods (for example |
An individual class always wins over the build-wide default by declaring its own compilation annotation. A class annotated with @CompileDynamic (or @GrailsCompileStatic, @CompileStatic, @GrailsTypeChecked or @TypeChecked) keeps its own setting and is never overridden by the opt-in:
import groovy.transform.CompileDynamic
@CompileDynamic
class LegacyController {
// compiled dynamically even when compileStatic { controllers = true } is enabled
}As with any move to static compilation, enabling these options trades the flexibility of dynamic dispatch (such as runtime metaprogramming contributed by plugins) for the benefits of static compilation. Introduce them incrementally and rely on the per-class opt-out for code that still needs dynamic behaviour.
14.2 The GrailsTypeChecked Annotation
GrailsTypeChecked
The grails.compiler.GrailsTypeChecked annotation works a lot like the GrailsCompileStatic annotation except that it only enables static type checking, not static compilation. This affords compile time feedback for expressions which cannot be validated statically at compile time while still leaving dynamic dispatch in place for the class.
import grails.compiler.GrailsTypeChecked
@GrailsTypeChecked
class SomeClass {
// all of the code in this class will be statically type
// checked and will be dynamically dispatched at runtime
def methodOne() {
// ...
}
def methodTwo() {
// ...
}
def methodThree() {
// ...
}
}15 Testing
Automated testing is a critical aspect of Grails development. Grails provides a rich set of testing capabilities, ranging from low-level unit testing to high-level functional tests. This comprehensive guide explores these diverse testing features in detail.
15.1 Generating Tests
When you use the create- and generate- commands, Grails automatically generates unit or integration tests. For example, running the create-controller command as follows:
grails create-controller com.acme.app.simpleGrails generates a controller at grails-app/controllers/com/acme/app/SimpleController.groovy, and a corresponding unit test at src/test/groovy/com/acme/app/SimpleControllerSpec.groovy. It’s important to note that Grails only creates the test structure; you need to implement the test logic.
The default class name suffix is Spec as of Grails 3.x.
|
15.2 Running Tests
Automated testing is a key part of Grails. Hence, Grails provides many ways to making testing easier from low level unit testing to high level functional tests. This section details the different ways to run tests for Grails.
15.2.1 With Grails CLI
The grails test-app command is one way to run Grails tests. This section documents how to use grails test-app.
Running All Tests
Tests are run with the test-app command:
grails test-appThe command will produce output such as:
-------------------------------------------------------
Running Unit Tests...
Running test FooSpec...FAILURE
Unit Tests Completed in 464ms ...
-------------------------------------------------------
Tests failed: 0 errors, 1 failureswhilst showing the reason for each test failure.
You can force a clean before running tests by passing -clean to the test-app command.
|
Grails writes HTML test reports to the build/reports/tests directory and JUnit XML test reports to the build/test-results directory. The HTML reports are generally the best ones to look at.
Using Grails' interactive mode confers some distinct advantages when executing tests. First, the tests will execute significantly faster on the second and subsequent runs. Second, a shortcut is available to open the HTML reports in your browser:
open test-reportYou can also run your unit tests from within most IDEs.
Running Tests Continuously
For a local edit-and-test loop in the Grails interactive CLI, start continuous testing:
grails
grails> test-app -continuousGrails starts its DirectoryWatcher and reruns the selected tests after a .groovy or .java file is created or changed in grails-app, src/main/groovy, src/test/groovy, or src/integration-test/groovy. It does not run tests immediately. Combine -continuous with test name patterns or -unit and -integration to keep the same test selection for each rerun.
The watcher is part of Grails, not Gradle --continuous, and Grails doesn’t pass Gradle’s continuous option to the build. It doesn’t watch files outside those directories, including src/main/java, and --watch isn’t an alias. Keep the interactive CLI open while using this mode, then exit the CLI or press Ctrl+C to stop it. A one-off grails test-app -continuous invocation exits immediately because DirectoryWatcher runs on a daemon thread.
Targeting Tests
You can selectively target the test(s) to be run in different ways. To run all tests for a controller named SimpleController you would run:
grails test-app SimpleControllerThis will run any tests for the class named SimpleController. Wildcards can be used…
grails test-app *ControllerThis will test all classes ending in Controller. Package names can optionally be specified…
grails test-app some.org.*Controlleror to run all tests in a package…
grails test-app some.org.*or to run all tests in a package including subpackages…
grails test-app some.org.**.*You can also target particular test methods…
grails test-app SimpleController.testLoginThis will run the testLogin test in the SimpleController tests. You can specify as many patterns in combination as you like…
grails test-app some.org.* SimpleController.testLogin BookController
In Grails 2.x, adding -rerun as an argument would only run those tests which failed in the previous test-app run. This argument is no longer supported.
|
In Grails 3.x, you might need to specify the package name before the class name, as well as append "Spec" to the end. For example, if you want to run the test for the ProductController, you should use grails test-app *.ProductControllerSpec. Note that the star can be used if you don’t want to type the whole package hierarchy.
|
Debugging
In order to debug your tests via a remote debugger, you can add --debug-jvm after grails in any commands, like so:
grails --debug-jvm test-appThis will open the default Java remote debugging port, 5005, for you to attach a remote debugger from your editor / IDE of choice.
This differs from Grails 2.3 and previous, where the grails-debug command existed.
|
Targeting Test Phases
In addition to targeting certain tests, you can also target test phases. By default Grails has two testing phases unit and integration.
Grails 2.x uses phase:type syntax. In Grails 3.0 it was removed, because it made no sense in Gradle context.
|
To execute unit tests you can run:
grails test-app -unitTo run integration tests you would run…
grails test-app -integrationTargeting Tests When Using Phases
Test and phase targeting can be applied at the same time:
grails test-app some.org.**.* -unitThis would run all tests in the unit phase that are in the package some.org or a subpackage.
15.2.2 With Gradle
Running Tests
To execute tests, you can use the Gradle check task:
./gradlew checkThis command will execute all the Unit tests in src/main/groovy/com/example/ directory.
Targeting Tests
To selectively target tests for execution, you have several options:
-
To run all tests for a controller named SimpleController, use this command:
./gradlew check --tests SimpleController -
To test all classes ending in Controller, you can employ wildcards:
./gradlew check --tests *Controller -
To specify package names:
./gradlew check --tests some.org.*Controller -
To run all tests in a package:
./gradlew check --tests some.org.* -
To run all tests in a package, including subpackages:
./gradlew check --tests some.org.**.* -
To target specific test methods:
./gradlew check --tests SimpleController.testLogin
You can combine multiple patterns as needed:
./gradlew check --tests some.org.* SimpleController.testLogin BookController| You might need to specify the package name before the class name and append "Spec" to it. For instance, to run the test for the ProductController, use ./gradlew test *.ProductControllerSpec. You can also use the star wildcard if you want to avoid typing the entire package hierarchy. |
Debugging
To debug your tests using a remote debugger, you can add --debug-jvm after ./gradlew in any commands, like so:
./gradlew check --debug-jvmThis will open the default Java remote debugging port, 5005, allowing you to attach a remote debugger from your code editor or integrated development environment.
Targeting Test Phases / Running Unit & Integration Separately
To execute "unit" tests, use this command:
./gradlew testFor "integration" tests, you would run:
./gradlew integrationTestIf you have defined additional test phases using the testPhases extension (see [testPhases]), run them by their phase name:
./gradlew functionalTestTargeting Tests When Using Phases
You can combine test and phase targeting:
./gradlew test some.org.**.*This command will run all tests in the unit phase within the some.org package or its subpackages. For more detailed information, it’s recommended to consult the Gradle documentation on Testing in Java & JVM projects.
15.3 Unit Testing
Unit testing are tests at the "unit" level. In other words you are testing individual methods or blocks of code without consideration for surrounding infrastructure or interactions with other classes. Unit tests are typically run without the presence of physical resources that involve I/O such as databases, socket connections or files. This is to ensure they run as quick as possible since quick feedback is important.
The Grails Unit Testing Support provides support for writing concise expressive units tests for Grails artifacts with simple, easy to use traits and supporting classes. The use of Traits makes functionality woven into the unit test class at compile time, which allows developers to explicitly view and explore the code. In addition, the Grails Unit Testing Support makes testing more IDE-friendly so developers can take advantage of auto-completion and click through navigation.
15.3.1 Installation
To install the unit testing support library add the following dependency to the
dependencies block of your build.gradle in a Grails application or plugin:
testCompile "org.apache.grails:grails-testing-support-datamapping"
testCompile "org.apache.grails:grails-testing-support-web"| The dependencies are only required to implement unit tests for Grails Artifacts. Also, if you are not unit testing domain activity, you may not need the GORM testing support library. |
15.3.2 Upgrading From The Mixin Framework
In prior Grails versions mixins were used to implement unit tests. The new unit tests libraries were designed to be compatible with this old mixin approach. There are some slight differences that you may encounter, however any required changes should be minimal.
FreshRuntime Removed
The @FreshRuntime annotation was removed due to the design of the new framework. The annotation allowed any metaclass changes to be sandboxed either at the method or class level. Spock provides a similar annotation to do the same thing, @ConfineMetaClassChanges.
In addition, the annotation caused the application context to be refreshed. Because the application context is refreshed between test classes automatically, the annotation is no longer necessary.
Integration Tests
The @Integration annotation was copied to the unit testing library so a dependency on the old framework is no longer necessary. The package has changed from grails.test.mixin.integration.Integration to grails.testing.mixin.integration.Integration. Everything about integration tests should work the same as before.
Example Converted Test
Here is an example test that may look like something in your project.
@TestFor(AuthorController)
@Mock(Author)
class AuthorControllerTests {
@Test
void testIndex() {
controller.index()
assert response.text == 'Hello'
}
}To convert this test to the new framework, we must update it to use Spock as well as change the annotation usages to trait usages.
import spock.lang.Specification
import grails.testing.gorm.DomainUnitTest
import grails.testing.web.controllers.ControllerUnitTest
class AuthorControllerTests extends Specification implements ControllerUnitTest<AuthorController>, DomainUnitTest<Author> {
void testIndex() {
when:
controller.index()
then:
response.text == 'Hello'
}
}Obviously there are many use cases you may want to convert and it would be impossible to cover them all in this documentation. As a part of the testing of this new framework, all of the usages of the old framework were replaced in Grails core. You can view those changes by looking at this commit to see the vast majority of examples you will need.
15.3.3 Unit Testing Controllers
Use the grails.testing.web.controllers.ControllerUnitTest trait to unit
test controllers.
src/test/groovy/demo/DemoControllerSpec.groovy
package demo
import grails.testing.web.controllers.ControllerUnitTest
import spock.lang.Specification
class DemoControllerSpec extends Specification implements ControllerUnitTest<DemoController> {
// ...
}To test the simplest "Hello World"-style example you can do the following:
grails-app/controllers/demo/DemoController.groovy
package demo
class DemoController {
def hello() {
render 'Hello, World!'
}
}src/test/groovy/demo/DemoControllerSpec.groovy
package demo
import grails.testing.web.controllers.ControllerUnitTest
import spock.lang.Specification
class DemoControllerSpec extends Specification implements ControllerUnitTest<DemoController> {
// ...
void "test action which renders text"() {
when:
controller.hello() (1)
then:
status == 200 (2)
response.text == 'Hello, World!' (3)
}
}| 1 | The controller property will be an instance of DemoController |
| 2 | The status property will contain the value of the response status |
| 3 | The response property will be a reference to the HTTP response object |
See the ControllerUnitTest
docs for information on all of the available properties.
| In an effort to make testing controllers that render JSON views easy, a change was made that required the controller variable used in the test code to be a proxy that delegates to the real controller instance. If for some reason that causes an issue with your test, it is possible to disable the creation of a proxy by overriding a method. |
class DemoControllerSpec implements ControllerUnitTest<DemoController> {
boolean disableControllerProxy() {
true
}
}By doing so, JSON views will not be rendered by default. To enable JSON views to render automatically as before, it is necessary to inform the webRequest object which action you are invoking.
class DemoControllerSpec implements ControllerUnitTest<DemoController> {
void "test index"() {
when:
webRequest.actionName = 'index'
controller.index()
then:
...
}
boolean disableControllerProxy() {
true
}
}15.3.4 Unit Testing Domain Classes
Use the grails.testing.gorm.DomainUnitTest
trait to unit test single domain class.
grails-app/domain/demo/Person.groovy
package demo
class Person {
String firstName
String lastName
}src/test/groovy/demo/PersonSpec.groovy
package demo
import grails.testing.gorm.DomainUnitTest
import spock.lang.Shared
import spock.lang.Specification
import spock.lang.Stepwise
@Stepwise
class PersonSpec extends Specification implements DomainUnitTest<Person> {
@Shared int id
void "test basic persistence mocking"() {
setup:
new Person(firstName: 'Robert', lastName: 'Fripp').save()
new Person(firstName: 'Adrian', lastName: 'Belew').save()
expect:
Person.count() == 2
}
void "test domain instance"() {
setup:
id = System.identityHashCode(domain)
expect:
domain != null
domain.hashCode() == id
when:
domain.firstName = 'Robert'
then:
domain.firstName == 'Robert'
}
void "test we get a new domain"() {
expect:
domain != null
domain.firstName == null
System.identityHashCode(domain) != id
}
}Alternatively, the grails.testing.gorm.DataTest
trait may be used. When using DataTest, an explicit call to the
mockDomain or
mockDomains
method may be used to specify which domain class(es) should be mocked for this
test. This is useful when mocking more than one Domain class at a time to test persistence.
src/test/groovy/demo/DataTestTraitSpec.groovy
package demo
import grails.testing.gorm.DataTest
import spock.lang.Specification
class DataTestTraitSpec extends Specification implements DataTest {
void setupSpec() {
mockDomain Person
// for multiple domains, call mockDomains...
// mockDomains Person, Address, Company
}
void "test basic persistence mocking"() {
setup:
new Person(firstName: 'Robert', lastName: 'Fripp').save()
new Person(firstName: 'Adrian', lastName: 'Belew').save()
expect:
Person.count() == 2
}
}Another way to express which domain classes should be mocked for this test is
to provide a Class[] getDomainClassesToMock() method in the test.
src/test/groovy/demo/GetDomainClassesToMockMethodSpec.groovy
package demo
import grails.testing.gorm.DataTest
import spock.lang.Specification
class GetDomainClassesToMockMethodSpec extends Specification implements DataTest {
Class[] getDomainClassesToMock() {
Person
}
void "test basic persistence mocking"() {
setup:
new Person(firstName: 'Robert', lastName: 'Fripp').save()
new Person(firstName: 'Adrian', lastName: 'Belew').save()
expect:
Person.count() == 2
}
}When mocking domain classes in a test for another artifact type (like a
ControllerUnitTest test, for example), the test must implement the DataTest
trait in order to mock the related domain classes.
src/test/groovy/demo/PersonControllerSpec.groovy
package demo
import grails.testing.gorm.DataTest
import grails.testing.web.controllers.ControllerUnitTest
import spock.lang.Specification
class PersonControllerSpec extends Specification implements ControllerUnitTest<PersonController>, DataTest {
void setupSpec() {
mockDomain Person
}
void "test action which invokes GORM method"() {
setup:
new Person(firstName: 'Robert', lastName: 'Fripp').save()
new Person(firstName: 'Adrian', lastName: 'Belew').save()
when:
def model = controller.index()
then:
model.people.size() == 2
model.keySet().contains('people')
}
}
A domain class may be mocked whatever its identifier generator is, including a generator class
name such as id generator: 'com.example.CustomIdGenerator'. The mocked datastore generates identifiers
itself and never runs or validates that generator, so a misspelled generator name still passes a unit
test. Verify the generator itself with an integration test against the real datastore.
|
15.3.5 Unit Testing Services
Use the grails.testing.services.ServiceUnitTest trait to unit
test services.
grails-app/services/demo/HelperService.groovy
package demo
class HelperService {
def getMagicNumber() {
42
}
}src/test/groovy/demo/HelperServiceSpec.groovy
package demo
import grails.testing.services.ServiceUnitTest
import spock.lang.Specification
class HelperServiceSpec extends Specification implements ServiceUnitTest<HelperService> {
void "test retrieving a property"() {
expect:
service.magicNumber == 42
}
}Adding the ServiceUnitTest trait to a test causes a new service property to
be automatically created for the Service class under test.
15.3.6 Unit Testing Tag Libraries
The Basics
Tag libraries and GSP pages can be tested with the
grails.testing.web.taglib.TagLibUnitTest trait.
grails-app/taglib/demo/SampleTagLib.groovy
package demo
import grails.gsp.Tag
class SampleTagLib {
static defaultEncodeAs = [taglib:'html']
static namespace = 'demo'
@Tag
def helloWorld() {
out << 'Hello, World!'
}
}src/test/groovy/demo/SampleTagLibSpec.groovy
package demo
import grails.testing.web.taglib.TagLibUnitTest
import spock.lang.Specification
class SampleTagLibSpec extends Specification implements TagLibUnitTest<SampleTagLib> {
void "test simple tag as method"() {
expect:
tagLib.helloWorld() == 'Hello, World!'
}
}Adding the TagLibUnitTest trait to a test causes a new tagLib field to be
automatically created for the TagLib class under test. The tagLib property can
be used to test calling tags as function calls. The return value of a function
call is either a org.grails.buffer,StreamCharBuffer
instance or the object returned from the tag handler when
returnObjectForTags feature is used.
To test a tag which accepts parameters, specify the parameter values as named arguments to the method call.
grails-app/taglib/demo/SampleTagLib.groovy
package demo
import grails.gsp.Tag
class SampleTagLib {
static defaultEncodeAs = [taglib:'html']
static namespace = 'demo'
@Tag
def sayHello() {
out << "Hello, ${attrs.name}!"
}
}src/test/groovy/demo/SampleTagLibSpec.groovy
package demo
import grails.testing.web.taglib.TagLibUnitTest
import spock.lang.Specification
class SampleTagLibSpec extends Specification implements TagLibUnitTest<SampleTagLib> {
void "test tag as method with parameters"() {
expect:
tagLib.sayHello(name: 'Robert') == 'Hello, Robert!'
}
}Alternatively, tags may be tested with the applyTemplate method which accepts
a String parameter that will be evaluated as if it were source code in a GSP.
src/test/groovy/demo/SampleTagLibSpec.groovy
package demo
import grails.testing.web.taglib.TagLibUnitTest
import spock.lang.Specification
class SampleTagLibSpec extends Specification implements TagLibUnitTest<SampleTagLib> {
void "test tags with applyTemplate"() {
expect:
applyTemplate('<demo:helloWorld/>') == 'Hello, World!'
applyTemplate('<demo:sayHello name="Adrian"/>') == 'Hello, Adrian!'
}
}The applyTemplate method accepts an optional second argument which is a Map
containing model variables which may be accessed in the GSP snippet that is
past as the first argument to applyTemplate as shown below.
grails-app/taglib/demo/SampleTagLib.groovy
package demo
import grails.gsp.Tag
class SampleTagLib {
static defaultEncodeAs = [taglib:'html']
static namespace = 'demo'
@Tag
def renderSomeNumber() {
int number = attrs.int('value', -1)
out << "The Number Is ${number}"
}
}src/test/groovy/demo/SampleTagLibSpec.groovy
package demo
import grails.testing.web.taglib.TagLibUnitTest
import spock.lang.Specification
class SampleTagLibSpec extends Specification implements TagLibUnitTest<SampleTagLib> {
void "test a tag that access the model"() {
expect: 'the value attribute is used in the output'
applyTemplate('<demo:renderSomeNumber value="${x + y}"/>',
[x: 23, y: 19]) == 'The Number Is 42'
}
}
The String being passed as the first argument to applyTemplate includes
a Groovy String expression ("${x + y}") that needs to be evaluated when the GSP snippet is
evaluated, not when the code in the test is evaluated. Because of that it is
important that the containing String be surrounded by single quotes, not double
quotes. '<demo:renderSomeNumber value="${x + y}"/>' works.
"<demo:renderSomeNumber value='${x + y}'/>" would not.
|
Mocking Tag Libraries
In order to test a tag library which invokes tags from another tag library,
the second tag library needs to be explicitly mocked by invoking the
mockTagLib method.
Mocked tag libraries are cleared after each feature method as part of the
web test cleanup lifecycle. Call mockTagLib in setup() rather than
setupSpec() to ensure the mock is active for every feature. Tests that
implement TagLibUnitTest handle this automatically, but tests that use
GrailsWebUnitTest directly must re-mock in each feature or in setup().
|
grails-app/taglib/demo/FirstTagLib.groovy
package demo
import grails.gsp.Tag
class FirstTagLib {
static defaultEncodeAs = [taglib:'html']
static namespace = 'one'
@Tag
def sayHello() {
out << 'BEFORE '
// this is invoking a tag from another tag library
out << two.sayHello()
out << ' AFTER'
}
}grails-app/taglib/demo/SecondTagLib.groovy
package demo
import grails.gsp.Tag
class SecondTagLib {
static defaultEncodeAs = [taglib:'html']
static namespace = 'two'
@Tag
def sayHello() {
out << 'Hello From SecondTagLib'
}
}src/test/groovy/demo/FirstTagLibSpec.groovy
package demo
import grails.testing.web.taglib.TagLibUnitTest
import spock.lang.Specification
class FirstTagLibSpec extends Specification implements TagLibUnitTest<FirstTagLib> {
void setup() {
mockTagLib SecondTagLib
}
void "test invoking a tag which invokes a tag in another taglib"() {
expect:
tagLib.sayHello() == 'BEFORE Hello From SecondTagLib AFTER'
}
}15.3.7 Unit Testing Interceptors
Use the InterceptorUnitTest trait to unit test interceptors.
The interceptor unit test trait provides methods to make testing interceptors easy.
class TestInterceptor {
TestInterceptor() {
match(controller: "test")
}
boolean before() {
request.setAttribute('foo', 'Foo is Bar')
true
}
}withRequest
You can use the withRequest method in combination with interceptor.doesMatch() to verify whether or not your interceptor matches the request.
void "Test test interceptor matching"() {
when:
withRequest(controller: "test")
then:
interceptor.doesMatch()
when:
withRequest(controller: "person")
then:
!interceptor.doesMatch()
}withInterceptors
You can use the withInterceptors method to execute code within the context of interceptor execution. This is typically done to call controller actions that rely on behavior from interceptors.
Given this controller action:
grails-app/controllers/demo/TestController.groovy
def renderAttribute() {
render request.getAttribute('foo')
}Here is how the action might be tested with withInterceptors:
void "Test controller execution with interceptors"() {
given:
def controller = mockController(TestController)
when:
withInterceptors([controller: "test"]) {
controller.renderAttribute()
}
then:
response.text == "Foo is Bar"
}Adding the InterceptorUnitTest trait to a test causes a new interceptor property to
be automatically created for the Interceptor class under test.
15.3.8 Unit Testing Url Mappings
Use the UrlMappingsUnitTest trait to unit test url mappings. Testing url mappings also requires controllers to be mocked to match the mappings to.
Controllers can not be mocked in setupSpec due to the nature of the request being created and reset for each test. The request is not available until the setup method, therefore controllers can not be mocked until then.
|
All of the methods that check the url mappings come in 2 forms, assert and verify. The assert versions will throw AssertionFailed exceptions, similar to the assert keyword in Groovy. The verify methods will simply return true or false depending on whether the url mapping was found and is valid for the expectations.
The examples assume the following mappings are being used.
package demo
class UrlMappings {
static mappings = {
"/foo"(controller: "test", action: "fooGet", method: "GET")
"/foo"(controller: "test", action: "fooPost", method: "POST")
"/bar"(controller: "test", action: "bar")
"/$controller/$action?/$id?(.$format)?"{
constraints {
// apply constraints here
}
}
"/"(view:"/index")
"500"(view:'/error')
"404"(view:'/notFound')
}
}Getting Started
To get started, implement the UrlMappingsUnitTest in your test class and mock controllers you would like to test against.
import grails.testing.web.UrlMappingsUnitTest
import spock.lang.Specification
class UrlMappingsSpec extends Specification implements UrlMappingsUnitTest<UrlMappings> {
void setup() {
mockController(TestController)
}It is also possible call the mockController method in the given blocks of your feature methods if different controllers need to be tested in different test methods.
Forward Url Mapping Test
Tests whether a URL mapping is forwarded for the given controller class
void "test forward mappings"() {
expect:
verifyForwardUrlMapping("/test/renderText", controller: 'test', action: 'renderText')
verifyForwardUrlMapping("/test/renderView", controller: 'test', action: 'renderView')
verifyForwardUrlMapping("/test/renderState/123", controller: 'test', action: 'renderState') {
id = '123'
}
verifyForwardUrlMapping("/", view: 'index')
verifyForwardUrlMapping(500, view: 'error')
verifyForwardUrlMapping(404, view: 'notFound')
when: "Using the assert syntax"
assertForwardUrlMapping("/test/renderText", controller: 'test', action: 'renderText')
assertForwardUrlMapping("/test/renderView", controller: 'test', action: 'renderView')
assertForwardUrlMapping("/test/renderState/123", controller: 'test', action: 'renderState') {
id = 123
}
assertForwardUrlMapping("/", view: 'index')
assertForwardUrlMapping(500, view: 'error')
assertForwardUrlMapping(404, view: 'notFound')
then:
noExceptionThrown()
}Reverse Url Mapping Test
Test whether the given URL is produced when reverse mapping a link to a given controller and action
void "test reverse mappings"() {
expect:
verifyReverseUrlMapping("/test/renderText", controller: 'test', action: 'renderText')
verifyReverseUrlMapping("/test/renderView", controller: 'test', action: 'renderView')
verifyReverseUrlMapping("/test/renderState/123?foo=bar", controller: 'test', action: 'renderState') {
id = 123
foo = 'bar'
}
verifyReverseUrlMapping("/", view: 'index')
when: "Using the assert syntax"
assertReverseUrlMapping("/test/renderText", controller: 'test', action: 'renderText')
assertReverseUrlMapping("/test/renderView", controller: 'test', action: 'renderView')
assertReverseUrlMapping("/test/renderState/123?foo=bar", controller: 'test', action: 'renderState') {
id = 123
foo = 'bar'
}
assertReverseUrlMapping("/", view: 'index')
then:
noExceptionThrown()
}| Url mappings for HTTP status codes can not be reversed because it doesn’t make sense to "link" to a status code. |
Combined
Tests whether a URL mapping is valid for the given URL. This combines the forward and reverse methods.
void "test forward and reverse mappings"() {
expect:
verifyUrlMapping("/test/renderText", controller: 'test', action: 'renderText')
verifyUrlMapping("/test/renderView", controller: 'test', action: 'renderView')
verifyUrlMapping("/test/renderState/123", controller: 'test', action: 'renderState') {
id = 123
}
verifyUrlMapping("/", view: 'index')
when: "Using the assert syntax"
assertUrlMapping("/test/renderText", controller: 'test', action: 'renderText')
assertUrlMapping("/test/renderView", controller: 'test', action: 'renderView')
assertUrlMapping("/test/renderState/123", controller: 'test', action: 'renderState') {
id = 123
}
assertUrlMapping("/", view: 'index')
then:
noExceptionThrown()
}
When calling verifyUrlMapping, then reverse mapping will only be checked if a controller is supplied and the first parameter is not an HTTP status code.
|
HTTP Methods
When testing HTTP methods on reverse URL mapping it is necessary to specify the HTTP method in the test.
void "test reverse mappings with http methods"() {
expect:
!verifyReverseUrlMapping('/foo', controller: 'test', action: 'fooGet')
verifyReverseUrlMapping('/foo', controller: 'test', action: 'fooGet', method: 'GET')
verifyReverseUrlMapping('/foo', controller: 'test', action: 'fooPost', method: 'POST')
verifyReverseUrlMapping('/bar', controller: 'test', action: 'bar')
when: "Using the assert syntax"
assertReverseUrlMapping('/foo', controller: 'test', action: 'fooGet', method: 'GET')
assertReverseUrlMapping('/foo', controller: 'test', action: 'fooPost', method: 'POST')
assertReverseUrlMapping('/bar', controller: 'test', action: 'bar')
then:
noExceptionThrown()
}When testing HTTP methods on forward URL mapping it is necessary to specify the HTTP method in the request.
void "test forward mappings with http methods"() {
when: "the http method is GET, /foo should map to TestController.fooGet()"
request.method = "GET"
assertForwardUrlMapping('/foo', controller: 'test', action: 'fooGet')
then:
noExceptionThrown()
when: "the http method is POST, /foo should map to TestController.fooPost()"
request.method = "POST"
assertForwardUrlMapping('/foo', controller: 'test', action: 'fooPost')
then:
noExceptionThrown()
}When testing HTTP methods on both forward and reverse URL mapping combined it is necessary to specify the HTTP method in both the request and in the test.
void "test forward and reverse mappings with http methods"() {
when: "the http method is GET, /foo should map to TestController.fooGet()"
request.method = "GET"
assertUrlMapping('/foo', controller: 'test', action: 'fooGet', method: 'GET')
then:
noExceptionThrown()
when: "the http method is POST, /foo should map to TestController.fooPost()"
request.method = "POST"
assertUrlMapping('/foo', controller: 'test', action: 'fooPost', method: 'POST')
then:
noExceptionThrown()
}Other Helpful Methods
Controller Check
Use the verifyController method to check whether or not the given controller name exists.
void "test controller"() {
expect:
verifyController("test")
when: "Using the assert syntax"
assertController("test")
then:
noExceptionThrown()
}Action Check
Use the verifyAction method to verify if an action exists for a controller.
void "test action"() {
expect:
verifyAction("test", "renderText")
when: "Using the assert syntax"
assertAction("test", "renderText")
then:
noExceptionThrown()
}View Check
User the verifyView method to check if a GSP exists for a controller.
void "test view"() {
expect:
verifyView("test", "foo")
when: "Using the assert syntax"
assertView("test", "foo")
then:
noExceptionThrown()
}15.3.9 Annotations
@RunOnce
The grails.testing.spock.RunOnce annotation may be applied to any Spock test
fixture method that you wish to be executed only once. This is useful when
applied in conjunction with a fixture annnotation like @Before as shown below.
src/test/groovy/grails/testing/spock/RunOnceSpec.groovy
package grails.testing.spock
import org.junit.jupiter.api.BeforeEach
import spock.lang.Shared
import spock.lang.Specification
import spock.lang.Stepwise
@Stepwise
class RunOnceSpec extends Specification {
@Shared
int setupSpecCounter = 0
@Shared
int setupCounter = 0
@Shared
int onceBeforeCounter = 0
@Shared
int anotherOnceBeforeCounter = 0
void setupSpec() {
setupSpecCounter++
}
void setup() {
setupCounter++
}
@BeforeEach
@RunOnce
void someOnceBeforeMethod() {
onceBeforeCounter++
}
@BeforeEach
@RunOnce
void someOtherOnceBeforeMethod() {
anotherOnceBeforeCounter++
}
void 'first test'() {
expect:
setupSpecCounter == 1
setupCounter == 1
onceBeforeCounter == 1
anotherOnceBeforeCounter == 1
}
void 'second test'() {
expect:
setupSpecCounter == 1
setupCounter == 2
onceBeforeCounter == 1
anotherOnceBeforeCounter == 1
}
void 'third test'() {
expect:
setupSpecCounter == 1
setupCounter == 3
onceBeforeCounter == 1
anotherOnceBeforeCounter == 1
}
}Applying both the @RunOnce and @Before annotations to a method will yield
behavior similar to the behavior associated with Spock’s setupSpec method but
an important difference is that setupSpec is run before the test instance is
subjected to dependency injection while @Before methods are run after the
test instance is subjected to dependency injection. This means that the
setupSpec method will not have access to injected variables but methods marked
with @Before will have access to injected variables. If a test has some one
time setup logic that needs to be executed after dependency injection happens,
the RunOnce annotation can help accomplish that.
@OnceBefore
The grails.testing.spock.OnceBefore annotation is a shorthand way of
accomplishing the same behavior that would be accomplished by applying both the
@RunOnce and @Before annotations to a fixture method.
src/test/groovy/grails/testing/spock/OnceBeforeSpec.groovy
package grails.testing.spock
import spock.lang.Shared
import spock.lang.Specification
import spock.lang.Stepwise
@Stepwise
class OnceBeforeSpec extends Specification {
@Shared
int setupSpecCounter = 0
@Shared
int setupCounter = 0
@Shared
int onceBeforeCounter = 0
@Shared
int anotherOnceBeforeCounter = 0
void setupSpec() {
setupSpecCounter++
}
void setup() {
setupCounter++
}
@OnceBefore
void someOnceBeforeMethod() {
onceBeforeCounter++
}
@OnceBefore
void someOtherOnceBeforeMethod() {
anotherOnceBeforeCounter++
}
void 'first test'() {
expect:
setupSpecCounter == 1
setupCounter == 1
onceBeforeCounter == 1
anotherOnceBeforeCounter == 1
}
void 'second test'() {
expect:
setupSpecCounter == 1
setupCounter == 2
onceBeforeCounter == 1
anotherOnceBeforeCounter == 1
}
void 'third test'() {
expect:
setupSpecCounter == 1
setupCounter == 3
onceBeforeCounter == 1
anotherOnceBeforeCounter == 1
}
}This is useful in the context of an integration test which wants to reference dependency injected values during setup as shown below.
src/integration-test/groovy/demo/DependencyInjectionSpec.groovy
package demo
import grails.testing.mixin.integration.Integration
import spock.lang.Specification
@Integration
class DependencyInjectionSpec extends Specification {
HelperService helperService
def setup() {
assert helperService != null
}
void 'some test method'() {
expect:
helperService != null
}
}15.3.10 Useful Properties
The testing framework provides and initializes a number of properties that are directly accessible unit tests. The javadocs for the various traits describe those properties. Some particular properties of interest:
Properties Available In All Unit Tests
Properties Available In All Web Unit Tests (Controller, Interceptor, Taglib, UrlMappings)
Controller Unit Test Properties
Interceptor Unit Test Properties
Service Unit Test Properties
Tag Library Unit Test Properties
Domain Class Unit Test Properties
15.4 Integration Testing
Integration tests differ from unit tests in that you have full access to the Grails environment within the test. You can create an integration test using the create-integration-test command:
$ grails create-integration-test ExampleThe above command will create a new integration test at the location src/integration-test/groovy/<PACKAGE>/ExampleSpec.groovy.
Grails uses the test environment for integration tests and loads the application prior to the first test run. All tests use the same application state.
Transactions
Integration test methods run inside their own database transaction by default, which is rolled back at the end of each test method. This means that data saved during a test is not persisted to the database (which is shared across all tests). The default generated integration test template includes the Rollback annotation:
import grails.testing.mixin.integration.Integration
import grails.gorm.transactions.*
import spock.lang.*
@Integration
@Rollback
class ExampleSpec extends Specification {
...
void "test something"() {
expect:"fix me"
true == false
}
}The Rollback annotation ensures that each test method runs in a transaction that is rolled back. Generally this is desirable because you do not want your tests depending on order or application state.
In Grails 3.0 tests rely on grails.gorm.transactions.Rollback annotation to bind the session in integration tests. Though each test method transaction is rolled back, the setup() method uses a separate transaction that is not rolled back.
Data will persist to the database and will need to be cleaned up manually if setup() sets up data and persists them as shown in the below sample:
import grails.testing.mixin.integration.Integration
import grails.gorm.transactions.*
import spock.lang.*
@Integration
@Rollback
class BookSpec extends Specification {
void setup() {
// Below line would persist and not roll back
new Book(name: 'Grails in Action').save(flush: true)
}
void "test something"() {
expect:
Book.count() == 1
}
}To preload the database and automatically roll back setup logic, any persistence operations need to be called from the test method itself so that they can run within the test method’s rolled back transaction. Similar to usage of the setupData() method shown below which creates a record in database and after running other test will be rolled back:
import grails.testing.mixin.integration.Integration
import grails.gorm.transactions.*
import spock.lang.*
@Integration
@Rollback
class BookSpec extends Specification {
void setupData() {
// Below line would roll back
new Book(name: 'Grails in Action').save(flush: true)
}
void "test something"() {
given:
setupData()
expect:
Book.count() == 1
}
}Using Spring’s Rollback annotation
Another transactional approach could be to use Spring’s @Rollback instead.
import grails.testing.mixin.integration.Integration
import org.springframework.test.annotation.Rollback
import spock.lang.*
@Integration
@Rollback
class BookSpec extends Specification {
void setup() {
new Book(name: 'Grails in Action').save(flush: true)
}
void "test something"() {
expect:
Book.count() == 1
}
}
It isn’t possible to make grails.gorm.transactions.Rollback behave the same way as Spring’s Rollback annotation because grails.gorm.transactions.Rollback transforms the byte code of the class, eliminating the need for a proxy (which Spring’s version requires).
This has the downside that you cannot implement it differently for different cases (as Spring does for testing).
|
DirtiesContext
If you do have a series of tests that will share state you can remove the Rollback and the last test in the suite should feature the DirtiesContext annotation which will shutdown the environment and restart it fresh (note that this will have an impact on test run times).
DatabaseCleanup
As an alternative to @Rollback, the @DatabaseCleanup annotation truncates all database tables after each test method, rather than rolling back the transaction. This is useful when your tests need data to actually be committed to the database (for example, to test behavior that depends on committed data or to verify transactional boundaries).
Supported Databases
Database cleanup is automatically discovered and applied based on your datasource configuration. The following database implementations are available:
H2 Database
To use @DatabaseCleanup with H2 databases, add the grails-testing-support-dbcleanup-h2 dependency:
dependencies {
integrationTestImplementation 'org.apache.grails:grails-testing-support-dbcleanup-h2'
}This module will clean up schema the specified schema by default, otherwise it will purge from all schemas.
PostgreSQL
To use @DatabaseCleanup with PostgreSQL databases, add the grails-testing-support-dbcleanup-postgresql dependency:
dependencies {
integrationTestImplementation 'org.apache.grails:grails-testing-support-dbcleanup-postgresql'
}This module will clean up the schema specified by currentSchema in the jdbc url, or it will clean up all non-system schemas.
Using DatabaseCleanup
To use @DatabaseCleanup, add the appropriate cleanup module for your database to your integration test configuration. The annotation can be applied at the class level to clean up after every test:
import grails.gorm.transactions.Transactional
import grails.testing.mixin.integration.Integration
import org.apache.grails.testing.cleanup.core.DatabaseCleanup
import spock.lang.Specification
import spock.lang.Stepwise
@Integration
@DatabaseCleanup
@Stepwise
class BookCleanupSpec extends Specification {
@Transactional
void "test 1 - create data"() {
when:
new Book(title: 'Grails in Action').save(flush: true, failOnError: true)
then:
Book.count() == 1
}
@Transactional
void "test 2 - data was cleaned up"() {
expect: 'no data from the previous test'
Book.count() == 0
}
}It can also be applied at the method level, so only annotated test methods trigger cleanup:
@Integration
class SelectiveCleanupSpec extends Specification {
@DatabaseCleanup
@Transactional
void "this test triggers cleanup"() {
// data will be truncated after this test
}
@Transactional
void "this test does not trigger cleanup"() {
// data persists for the next test
}
}You can optionally specify which datasource beans to clean by passing their names:
@DatabaseCleanup(['dataSource', 'dataSource_secondary'])You can also explicitly map each datasource to a database type, ensuring the correct DatabaseCleaner implementation is used without relying on auto-discovery:
@DatabaseCleanup(['dataSource:h2', 'dataSource_pg:postgresql'])These formats can be mixed. Entries without a : separator will auto-discover the appropriate cleaner:
@DatabaseCleanup(['dataSource:h2', 'dataSource_other'])If no names are specified, all datasources in the application context are cleaned.
Deferred Cleanup (cleanupAfterSpec)
By default, @DatabaseCleanup truncates tables after each individual test method. If you prefer to defer cleanup until after the entire spec finishes, set cleanupAfterSpec = true:
@Integration
@DatabaseCleanup(cleanupAfterSpec = true)
@Stepwise
class SharedDataSpec extends Specification {
@Transactional
void "test 1 - create data"() {
when:
new Book(title: 'Grails in Action').save(flush: true, failOnError: true)
then:
Book.count() == 1
}
@Transactional
void "test 2 - data from test 1 is still available"() {
expect: 'data persists across tests'
Book.count() == 1
}
// Database is cleaned once after both tests complete
}This is useful when test methods build on each other’s data, or when per-test cleanup is too expensive and a single cleanup at the end of the spec is sufficient.
cleanupAfterSpec is only valid on class-level @DatabaseCleanup annotations. Using it on a method-level annotation will throw an IllegalStateException.
|
If individual methods within a cleanupAfterSpec = true spec also have their own @DatabaseCleanup annotation, those methods will still be cleaned up immediately after execution.
|
@DatabaseCleanup truncates all tables, including any data inserted by BootStrap. Tests using this annotation should create their own test data and not rely on bootstrap seed data.
|
@DatabaseCleanup requires @Integration. Using @DatabaseCleanup on a spec without @Integration will throw an IllegalStateException, since the database cleanup framework depends on the Spring application context provided by the integration test infrastructure.
|
@DatabaseCleanup should not be placed on non-feature methods such as setup(), cleanup(), setupSpec(), or cleanupSpec(). To catch misplaced annotations, enable the validation property described below.
|
System Properties
The @DatabaseCleanup process supports two system properties that can be passed via -D flags:
| Property | Description | Default |
|---|---|---|
|
When set to |
|
|
When set to |
|
Example usage:
./gradlew integrationTest -Dgrails.testing.cleanup.debug=true -Dgrails.testing.cleanup.validate=trueHTTP Client Testing Support
For integration and functional tests that need to interact with live HTTP endpoints, Grails provides the
grails-testing-support-http-client module.
Add the dependency to your integration test configuration:
dependencies {
integrationTestImplementation 'org.apache.grails:grails-testing-support-http-client'
}You can then implement the HttpClientSupport trait in your Spock specification and use helper methods for
request building and response assertions:
import java.net.http.HttpClient
import java.net.http.HttpTimeoutException
import java.time.Duration
import spock.lang.Specification
import grails.testing.mixin.integration.Integration
import org.apache.grails.testing.http.client.HttpClientSupport
import org.apache.grails.testing.http.client.MultipartBody
@Integration
class DemoSpec extends Specification implements HttpClientSupport {
void 'simple GET with status and body assertions'() {
when: 'invoking a GET request to the /health endpoint'
def response = http('/health')
then: 'verifies status, headers and body contents via fluent API'
response.assertStatus(200)
.assertHeaders('Content-Type': 'application/json')
.assertContains('UP')
and: 'can also verify all these under the hood in one go'
response.assertContains(200, 'Content-Type': 'application/json', 'UP')
}
void 'GET with headers and header assertions'() {
when:
def response = http('/api/info', 'Accept': 'application/json')
then:
response.assertHeadersIgnoreCase(200, 'content-type': 'application/json;charset=UTF-8')
}
void 'Posting and verifying JSON'() {
when: 'you post a map it is turned into a JSON payload'
def response = httpPostJson('/api/books', [title: 'Grails in Action', pages: 500])
then: 'you can also verify JSON response bodies with maps'
response.assertJson(201, [id: 1, title: 'Grails in Action', pages: 500])
and: 'you can also verify against a JSON string'
response.assertJson('''
{
"id": 1,
"title": "Grails in Action",
"pages": 500
}
''')
and: 'the canonicalized JSON tree structure is compared, not strings'
response.assertJson('{ "pages": 500, "id": 1, "title": "Grails in Action" }')
and: 'if you want to compare strings, use assertContains/assertNotContains'
response.assertNotContains('{ "id": 1, "title": "Grails in Action", "pages": 500 }')
and: 'you can also use assertJsonContains to verify sub trees in the response json'
response.assertJsonContains([title: 'Grails in Action'])
}
void 'Posting form data'() {
when: 'you post a map it is turned into an application/x-www-form-urlencoded payload'
def response = httpPostForm('/api/search', [query: 'grails core', tag: ['web', 'testing']])
then:
response.assertStatus(200)
}
void 'Posting and verifying XML'() {
when: 'you can post XML using a builder'
def response = httpPostXml('/api/books') {
book {
title('Grails in Action')
pages(500)
}
}
then: 'and you can verify XML responses with assertions on GPathResult'
with(response.xml()) {
title.text() == 'Grails in Action'
pages.text().toInteger() == 500
}
}
void 'custom request and custom client configuration'() {
when: 'you need a custom configured client'
def noRedirectClient = newHttpClientWith {
followRedirects(HttpClient.Redirect.NEVER)
}
and: 'or a custom configured request'
def request = newHttpRequestWith('/api/slow') {
timeout(Duration.ofSeconds(1))
}
when:
sendHttpRequest(request, noRedirectClient)
then:
thrown(HttpTimeoutException)
}
void 'multipart upload'() {
given:
def body = MultipartBody.builder()
.addPart('description', 'test file')
.addPart('file', 'hello.txt', 'text/plain', 'hello world')
.build()
when:
def response = httpPostMultipart('/api/upload', body)
then:
response.assertStatus(200)
}
}HttpClientSupport uses the JDK HttpClient under the hood and applies default request and connect timeouts of
60 seconds and a redirect policy of always following redirects. You can use helpers newHttpRequestWith(Closure configurer)
and newHttpClientWith(Closure configurer) to customize your own client and requests starting from the defaults.
httpPostForm(…) sends application/x-www-form-urlencoded request bodies. Pass a Map of form fields, and the
helper will URL-encode each entry using UTF-8. Scalar values are encoded once, while Collection and array values are
encoded as repeated keys in insertion order:
httpPostForm('/search', [query: 'grails core', tag: ['web', 'testing']])Additional request helper methods available include httpDelete(), httpHead(), httpOptions(), httpPatch(),
httpPut(), httpTrace(), and many assertion methods on responses.
Custom JSON Parsing
When response JSON needs non-default JsonSlurper behavior, configure it fluently on the response wrapper:
import groovy.json.JsonParserType
given:
def response = http('/config')
expect:
response
.withJsonSlurper(parserType: JsonParserType.LAX, checkDates: true)
.assertJsonContains('{featureFlag:true}')Supported named options mirror the JsonSlurper settings exposed by JsonUtils.SlurperConfig, including
parserType, checkDates, chop, lazyChop, and maxSizeForInMemory.
Custom XML Parsing
Response XML parsing uses a secure default XmlSlurper configuration. It is namespace-aware, non-validating,
rejects DOCTYPE declarations, and disables external entity expansion plus external DTD loading.
When a test needs different XML parsing behavior, override it fluently on the response wrapper:
import groovy.xml.XmlSlurper
given:
def response = http('/feed')
when:
def xml = response.withXmlSlurper(factory: { new XmlSlurper(false, false) }).xml()
then:
xml.channel.item.size() == 10withXmlSlurper(…) accepts an XmlUtils.SlurperConfig. The default configuration is secure; the
factory hook is available for tests that need a fully custom parser instance.
JSON payload formatting
JSON request bodies can be sent in three ways depending on how much formatting control you need.
For exact control over the payload text, pass a pre-rendered JSON string to the request helper:
httpPostJson('/products', '{"name":"Widget","tags":["new","sale"]}')For the common case, use the http[Post|Put|Patch]Json helpers with a Map. They serialize the payload with
Groovy’s default JsonOutput.toJson(…) behavior:
httpPostJson('/products', [name: 'Widget', qty: 2])When you want custom JSON formatting, pass a JsonGenerator alongside the Map payload. This lets you control
rendering details such as null handling, field exclusions, converters, and date formatting:
import groovy.json.JsonGenerator
def jsonGenerator = new JsonGenerator.Options()
.excludeNulls()
.dateFormat('yyyy-MM-dd')
.build()
httpPutJson('/products/1', jsonGenerator, [
name: 'Widget',
discontinuedAt: null,
releaseDate: new Date()
])The same JsonGenerator overload pattern is available on httpPostJson(…), httpPutJson(…), and
httpPatchJson(…), including the variants that accept request headers and an explicit HttpClient.
XML formatting
XML request bodies can be generated with Groovy MarkupBuilder DSL. For the http[Post|Patch|Put]Xml methods,
HttpClientSupport accepts an optional XmlUtils.Format instance, which constructor takes named params to
configure the format:
import org.apache.grails.testing.http.client.utils.XmlUtils
when:
def response = httpPostXml('/products', new XmlUtils.Format(
omitDeclaration: false,
prettyPrint: true,
indent: ' ',
lineSeparator: '\n',
doctype: '<!DOCTYPE product SYSTEM "product.dtd">',
omitNullAttributes: true,
omitEmptyAttributes: true,
spaceInEmptyElements: false,
escapeAttributes: true
)) {
product(id: '1', description: null, sku: '') {
name('Widget')
empty()
}
}
then:
response.assertStatus(201)When you need the same formatting control for other request helpers, render the XML first and then pass the
result to httpPost, httpPut, or httpPatch with application/xml:
import org.apache.grails.testing.http.client.utils.XmlUtils
def payload = XmlUtils.toXml(
omitDeclaration: false,
prettyPrint: true,
indent: ' ',
lineSeparator: '\n',
doctype: '<!DOCTYPE product SYSTEM "product.dtd">',
omitNullAttributes: true,
omitEmptyAttributes: true,
spaceInEmptyElements: false,
escapeAttributes: true
) {
product(id: '1', description: null, sku: '') {
name('Widget')
empty()
}
}
httpPut('/products/1', payload, 'application/xml')Supported XmlUtils.Format options include:
-
Declaration and document metadata:
omitDeclaration,xmlVersion,charset,doubleQuotes,doctype -
Pretty-printing layout:
prettyPrint,indent,lineSeparator -
Empty elements and attribute handling:
expandEmptyElements,spaceInEmptyElements,omitEmptyAttributes,omitNullAttributes -
Attribute escaping:
escapeAttributes
XmlUtils.toXml(…) also supports inline named options, so shorter cases can be written as:
def payload = XmlUtils.toXml(omitNullAttributes: true, spaceInEmptyElements: false) {
product(name: 'Widget', description: null) {
empty()
}
}
httpPost('/products', payload, 'application/xml')Autowiring
To obtain a reference to a bean you can use the Autowired annotation. For example:
...
import org.springframework.beans.factory.annotation.*
@Integration
@Rollback
class ExampleServiceSpec extends Specification {
@Autowired
ExampleService exampleService
...
void "Test example service"() {
expect:
exampleService.countExamples() == 0
}
}Testing Controllers
To integration test controllers it is recommended you use create-functional-test command to create a Geb functional test. See the following section on functional testing for more information.
15.5 Functional Testing
Functional tests involve making HTTP requests against the running application and verifying the resultant behaviour. This is useful for end-to-end testing scenarios, such as making REST calls against a JSON API.
Grails by default ships with support for writing functional tests using the Geb framework. To create a functional test you can use the create-functional-test command which will create a new functional test:
$ grails create-functional-test MyFunctionalThe above command will create a new Spock spec called MyFunctionalSpec.groovy in the src/integration-test/groovy directory. The test is annotated with the Integration annotation to indicate it is an integration test and extends the GebSpec super class:
@Integration
class HomeSpec extends GebSpec {
def setup() {
}
def cleanup() {
}
void "Test the home page renders correctly"() {
when:"The home page is visited"
go('/')
then:"The title is correct"
$('title').text() == "Welcome to Grails"
}
}When the test is run the application container will be loaded up in the background and you can send requests to the running application using the Geb API.
Web applications generated with Grails Forge include the geb-with-testcontainers feature by default. Its functional spec extends ContainerGebSpec, which runs the browser in a container and therefore needs Docker or a compatible container runtime. See the Grails Geb plugin README for details.
To run functional tests against browsers installed on your machine instead, select the geb-with-local-browsers feature. Before Grails 7.0.18 this feature was named geb-with-webdriver-binaries. It replaces geb-with-testcontainers, and the two features cannot be selected together. The generated project then contains:
-
a functional spec that extends
GebSpec -
a
src/integration-test/resources/GebConfig.groovywith one Geb environment per browser, such aschrome,chromeHeadless,firefoxandfirefoxHeadless -
a
build.gradlethat passes thegeb.envsystem property to the test JVM
Select a browser by passing the Geb environment to Gradle:
$ ./gradlew integrationTest -Dgeb.env=firefoxHeadlessSelenium Manager, which is part of Selenium, downloads the WebDriver binary that matches the installed browser version.
Note that the application is only loaded once for the entire test run, so functional tests share the state of the application across the whole suite.
In addition the application is loaded in the JVM as the test, this means that the test has full access to the application state and can interact directly with data services such as GORM to setup and cleanup test data.
The Integration annotation supports an optional applicationClass attribute which may be used to specify the application class to use for the functional test. The class must extend GrailsAutoConfiguration.
@Integration(applicationClass=com.demo.Application)
class HomeSpec extends GebSpec {
// ...
}If the applicationClass is not specified then the test runtime environment will attempt to locate the application class dynamically which can be problematic in multiproject builds where multiple application classes may be present.
When running the server port by default will be randomly assigned. The Integration annotation adds a property of serverPort to the test class that you can use if you want to know what port the application is running on this isn’t needed if you are extending the GebSpec as shown above but can be useful information.
If you want to run the tests on a fixed port (defined by the server.port configuration property), you need to manually annotate your test with @SpringBootTest:
import grails.testing.mixin.integration.Integration
import org.springframework.boot.test.context.SpringBootTest
import spock.lang.Specification
@Integration
@SpringBootTest(webEnvironment = SpringBootTest.WebEnvironment.DEFINED_PORT)
class MySpec extends Specification {
// ...
}Simulating Latency
Functional tests are prone to timing bugs: an assertion that races a page navigation, a missing
wait, or an assumption about response ordering may pass reliably on a fast local machine and fail
intermittently on slower CI infrastructure. The grails-testing-support-latency module makes such
bugs reproducible by injecting artificial latency into the application under test, so that requests
randomly take longer.
Add the dependency to your integration test configuration:
dependencies {
integrationTestRuntimeOnly 'org.apache.grails:grails-testing-support-latency'
}The module is inert until enabled. To activate it, set grails.testing.latency.enabled to true,
for example in application.yml under a test environment, or as a system property on the test JVM:
tasks.named('integrationTest', Test) {
systemProperty('grails.testing.latency.enabled', 'true')
}When enabled, a servlet filter is registered with the highest precedence that delays each matched request by a random amount of time before it is processed, mirroring what a slow network or an overloaded server looks like to the browser or HTTP client driving the test.
The following configuration properties are supported under the grails.testing.latency prefix:
| Property | Default Value | Description |
|---|---|---|
enabled |
|
Whether to inject artificial latency |
min-delay |
|
Lower bound (inclusive) of the random delay per request |
max-delay |
|
Upper bound (inclusive) of the random delay per request |
probability |
|
Fraction of requests to delay between |
url-patterns |
|
Servlet url patterns the filter applies to |
seed |
none |
Optional fixed random seed for reproducible delay sequences |
The random generator is shared by all requests, so a fixed seed produces a reproducible
sequence of delays, but with concurrent requests which request receives which delay depends on
arrival order. Delays are only fully reproducible per request when requests are serialized.
|
Durations without a unit suffix are interpreted as milliseconds; suffixes such as 500ms, 2s are
also supported. For example, to delay half of all requests by between a quarter and two seconds:
grails:
testing:
latency:
enabled: true
min-delay: 250ms
max-delay: 2s
probability: 0.5A useful pattern is a dedicated CI job (or an occasional local run) that executes the functional
test suite with latency enabled and a generous max-delay. Tests that only pass on a fast server —
for example a Geb assertion that reads the page before a click-triggered navigation completes —
will fail deterministically under latency instead of flaking rarely in CI. Keep in mind that each
delay blocks a container thread for its duration, so a large max-delay combined with highly
parallel tests can exhaust the servlet thread pool and distort results — size delays and test
parallelism accordingly.
| This module is a testing aid. Never enable it in production configuration. |
15.6 Custom Test Phases
A Grails application has two test phases by default: unit (the standard test source set) and integration (added automatically by the Grails Gradle plugin). You can define additional test phases – such as functional, smoke, or performance – by using the testPhases extension in your build.gradle.
How Test Phases Work
Each test phase is a self-contained Gradle source set with its own:
-
Source directory - e.g.
src/functional-test/groovy -
Dependency configurations - e.g.
functionalTestImplementation,functionalTestRuntimeOnly(extending the test configurations) -
Gradle
Testtask - e.g../gradlew functionalTest -
System property - e.g.
is.grails.functional.test(set totrueat runtime)
The integrationTest phase that Grails has always provided is now implemented on top of the same mechanism, so all customization options described here apply to it as well.
Adding a Custom Test Phase
To add a new test phase, declare it in the testPhases block in your build.gradle:
testPhases {
functionalTest { }
}This single declaration creates:
-
A
functionalTestsource set reading fromsrc/functional-test/groovy(andsrc/functional-test/java) -
functionalTestImplementationandfunctionalTestRuntimeOnlyconfigurations that extend from the test configurations -
A
functionalTestGradle task wired into thechecklifecycle -
IntelliJ IDEA integration marking the source folder as test sources
You can then add dependencies specific to that phase:
dependencies {
functionalTestImplementation testFixtures('org.apache.grails:grails-geb')
functionalTestImplementation 'org.apache.grails:grails-testing-support-http-client'
}And place your test classes under src/functional-test/groovy:
// src/functional-test/groovy/com/example/HomeFunctionalSpec.groovy
package com.example
import grails.plugin.geb.ContainerGebSpec
import grails.testing.mixin.integration.Integration
@Integration
class HomeFunctionalSpec extends ContainerGebSpec {
void "test home page renders"() {
when:
go('/')
then:
pageSource.contains('Welcome')
}
}Customizing a Test Phase
Each phase supports the following configurable properties:
| Property | Description | Default |
|---|---|---|
|
Path to the source directory |
|
|
System property set to |
|
|
Whether to register source dirs with IntelliJ IDEA |
|
Example with overrides:
testPhases {
smokeTest {
sourceFolderName = 'src/smoke-tests'
systemPropertyName = 'is.smoke.test'
}
}Detecting the Current Test Phase
Each test phase sets a system property that your test code (or application code running under test) can read to determine which phase is active:
| Phase | System Property |
|---|---|
|
|
|
|
Custom phase |
Configurable via |
You can check these properties in your tests or in application code:
if (System.getProperty('is.grails.functional.test')) {
// running inside the functionalTest phase
}This is useful when shared code needs to behave differently depending on the test phase — for example, configuring different data sources, disabling certain interceptors, or adjusting timeouts.
Running Custom Test Phases
Custom test phases are run the same way as the built-in phases:
# Run only functional tests
./gradlew functionalTest
# Run only integration tests
./gradlew integrationTest
# Run all test phases (unit + integration + functional + any others)
./gradlew check
# Target specific tests within a phase
./gradlew functionalTest --tests "com.example.HomeFunctionalSpec"Multiple Test Phases Example
A build.gradle that defines both integration and functional test phases:
plugins {
id 'org.apache.grails.gradle.grails-web'
}
// integrationTest is already registered by grails-web.
// Add a functionalTest phase:
testPhases {
functionalTest { }
}
dependencies {
// Unit test dependencies
testImplementation 'org.apache.grails:grails-testing-support-web'
// Integration test dependencies
integrationTestImplementation testFixtures('org.apache.grails:grails-geb')
// Functional test dependencies
functionalTestImplementation testFixtures('org.apache.grails:grails-geb')
functionalTestImplementation 'org.apache.grails:grails-testing-support-http-client'
}With this setup, ./gradlew check will execute the test, integrationTest, and functionalTest tasks in order, and the merged test report will include results from all phases.
15.7 Testing GORM for MongoDB
The grails-testing-support-mongodb library provides Testcontainers-based MongoDB support for both unit and integration tests.
When creating an application with Grails Forge, select the mongodb-testing-support feature together with gorm-mongodb or mongo-sync to include this dependency automatically.
Installation
Add the following dependency to your build.gradle:
testImplementation "org.apache.grails.testing:grails-testing-support-mongodb"| Docker must be available for Testcontainers to start a MongoDB container. |
Unit Testing
Extend org.apache.grails.testing.mongo.AutoStartedMongoSpec in unit tests. A MongoDB Testcontainers instance is started automatically and injected into the specification.
import org.apache.grails.testing.mongo.AutoStartedMongoSpec
import org.grails.datastore.mapping.mongo.MongoDatastore
import spock.lang.Shared
class BookSpec extends AutoStartedMongoSpec {
@Shared
MongoDatastore mongoDatastore
void "test mongo connection"() {
expect:
mongoHost
mongoPort
dbContainer.running
}
}If a shared MongoDatastore field is declared and shouldInitializeDatastore() returns true (the default), the datastore is bootstrapped against domain classes in the packages returned by getMongoPackages() (defaults to the package of the specification).
Integration Testing
For integration tests, Spock global extensions start a single MongoDB container for the test run when MongoDB is not already listening on port 27017. Connection details are exposed via system properties such as grails.mongodb.url, grails.mongodb.host, and grails.mongodb.port.
MongoDB Container Version
The MongoDB image version defaults to 7.0.19. Override it with the mongodbContainerVersion system property:
tasks.withType(Test).configureEach {
systemProperty "mongodbContainerVersion", "7.0.25"
}16 Building a Successful Application
Building a successful Grails application goes beyond writing features. Code analysis, consistent styling, continuous integration, and reliable release processes help maintain quality as your project grows. This section covers tools and practices that support long-term project health.
16.1 Code Analysis and Styling for Groovy
CodeNarc is a static analysis tool for Groovy that finds defects, poor coding practices, inconsistencies, style issues, and more. Grails projects can integrate CodeNarc via the Gradle CodeNarc plugin.
Adding Code Analysis to Your Build
Apply the CodeNarc plugin and configure it using extensions.configure():
import org.gradle.api.plugins.quality.CodeNarcExtension
plugins {
id 'codenarc'
}
dependencies {
codenarc 'org.codenarc:CodeNarc:3.6.0-groovy-4.0'
}
extensions.configure(CodeNarcExtension) {
it.configFile = file('config/codenarc/codenarc.groovy')
it.maxPriority1Violations = 0
it.maxPriority2Violations = 0
it.maxPriority3Violations = 0
}
Use the -groovy-4.0 variant of CodeNarc for Grails 8 projects (which use Groovy 4.x). The plain artifact without a -groovy-4.0 suffix is built for Groovy 3.x and will not work correctly.
|
You can then run CodeNarc with:
$ ./gradlew codenarcMainThe HTML report is written to build/reports/codenarc/main.html.
GORM AST Compatibility
CodeNarc provides pre-built rulesets that can be imported as a group using the ruleset() syntax:
// config/codenarc/codenarc.groovy - DO NOT use this approach in Grails projects
ruleset {
ruleset('rulesets/basic.xml')
ruleset('rulesets/formatting.xml')
ruleset('rulesets/unused.xml')
}
Importing entire rulesets with ruleset('rulesets/xxx.xml') in a Grails project causes compilation failures. This is because some CodeNarc rules (known as "enhanced" rules) perform semantic analysis at Groovy compiler phase 4. These enhanced rules attempt to resolve AST-transformed classes such as OrderedGormTransformation and ServiceTransformation, but CodeNarc compiles each source file independently without GORM’s AST transformation processors on its classpath. The result is ClassNotFoundException or NoClassDefFoundError during analysis.
|
Adding compilationClasspath to the CodeNarc Gradle task helps with basic class resolution but does not make GORM’s transformation processors available, so enhanced rules still fail.
Recommended Configuration
The solution is to list individual rules explicitly rather than importing entire rulesets. This avoids pulling in enhanced rules that require GORM’s AST infrastructure. The Grails framework’s own build uses this approach:
// config/codenarc/codenarc.groovy
ruleset {
description 'A Codenarc ruleset for the Grails codebase'
BracesForClass
ClassStartsWithBlankLine {
ignoreInnerClasses = true
}
ClosureStatementOnOpeningLineOfMultipleLineClosure
ConsecutiveBlankLines
FileEndsWithoutNewline
NoTabCharacter
DuplicateImport
ImportFromSamePackage
Indentation
MisorderedStaticImports {
comesBefore = false // static imports should come last
}
MissingBlankLineAfterImports
MissingBlankLineAfterPackage
MissingBlankLineBeforeAnnotatedField
NoWildcardImports
SpaceAfterCatch
SpaceAfterClosingBrace
SpaceAfterComma
SpaceAfterFor
SpaceAfterIf
SpaceAfterMethodCallName
SpaceAfterMethodDeclarationName
SpaceAfterNotOperator
SpaceAfterOpeningBrace {
ignoreEmptyBlock = true
}
SpaceAfterSemicolon
SpaceAfterSwitch
SpaceAfterWhile
SpaceAroundClosureArrow
SpaceAroundMapEntryColon {
characterAfterColonRegex = ' '
}
SpaceAroundOperator {
ignoreParameterDefaultValueAssignments = false
}
SpaceBeforeClosingBrace {
ignoreEmptyBlock = true
}
SpaceBeforeOpeningBrace
SpaceInsideParentheses
UnnecessaryConstructor
UnnecessaryDotClass
UnnecessaryGroovyImport
UnnecessaryGString
UnnecessaryOverridingMethod
UnnecessaryPublicModifier
UnnecessarySafeNavigationOperator
UnnecessarySemicolon
UnusedImport
}This is the exact ruleset used by the Grails framework’s own build. It covers formatting, imports, spacing, and unnecessary code - all without triggering GORM AST compatibility issues. You can add additional individual rules as needed.
| You can find the full list of available CodeNarc rules at codenarc.org. Add individual rules as needed, testing that each one compiles cleanly against your Grails source files. |
Separate Ruleset for Tests
Spock specifications often use patterns that trigger style rules (method names with spaces, loose typing, mock syntax). You can configure a separate, more lenient ruleset for test sources:
tasks.named('codenarcTest', CodeNarc) {
configFile = file('config/codenarc/codenarc-test.groovy')
}Reference
The grails-server-timing plugin provides a complete working example of CodeNarc and Checkstyle configuration using Gradle convention plugins in its build-logic/ directory. The Grails framework’s own CodeNarc ruleset can be found in the grails-core repository under build-logic/plugins/src/main/resources/META-INF/org.apache.grails.buildsrc.codestyle/codenarc/codenarc.groovy. Both are reliable starting points for any Grails project.
17 Internationalization
Grails supports Internationalization (i18n) out of the box by leveraging the underlying Spring MVC internationalization support. With Grails you are able to customize the text that appears in a view based on the user’s Locale. To quote the javadoc for the Locale class:
A Locale object represents a specific geographical, political, or cultural region. An operation that requires a Locale to perform its task is called locale-sensitive and uses the Locale to tailor information for the user. For example, displaying a number is a locale-sensitive operation—the number should be formatted according to the customs/conventions of the user’s native country, region, or culture.
A Locale is made up of a language code and a country code. For example "en_US" is the code for US English, whilst "en_GB" is the code for British English.
17.1 Understanding Message Bundles
Now that you have an idea of locales, to use them in Grails you create message bundle file containing the different languages that you wish to render. Message bundles in Grails are located inside the grails-app/i18n directory and are simple Java properties files.
Each bundle starts with the name messages by convention and ends with the locale. Grails ships with several message bundles for a whole range of languages within the grails-app/i18n directory. For example:
-
messages.properties
-
messages_da.properties
-
messages_de.properties
-
messages_es.properties
-
messages_fr.properties
-
…
By default Grails looks in messages.properties for messages unless the user has specified a locale. You can create your own message bundle by simply creating a new properties file that ends with the locale you are interested in. For example messages_en_GB.properties for British English.
Configuration
Message resolution is Spring Boot’s, so the standard spring.messages.* properties apply:
spring:
messages:
encoding: UTF-8
cache-duration: 5s
fallback-to-system-locale: false
use-code-as-default-message: falseGrails sets fallback-to-system-locale to false and carries grails.views.gsp.encoding over to
spring.messages.encoding, but an application may override either.
You do not normally need to set spring.messages.basename. Grails records the bundles an application
and each of its plugins ship at build time and composes the list for you. Setting it yourself is still
supported and is the way to reach a bundle outside grails-app/i18n — anything you declare is kept and
takes precedence over the discovered base names.
Base names
Every bundle needs a locale-independent file. messages_de.properties without messages.properties
means Spring Boot’s message-source auto-configuration never activates and the application has no
message source at all, so the build rejects it.
An application may use any base name, with one reservation: a base name ending in a valid locale
identifier is ambiguous, because api_fr.properties reads as base name api in French. Declare the
base name when you mean something else:
grails {
i18n {
basenames = ['api', 'api_errors']
}
}Plugin bundles
A plugin’s base names must be its plugin name, or that name followed by a hyphen and a suffix — so the
spring-security-core plugin may ship spring-security-core.properties and
spring-security-core-validation.properties, but not messages.properties. Spring resolves a base name
to the first matching resource on the classpath, so a shared base name would silently shadow another
bundle rather than merge with it. The plugin build enforces this.
Precedence runs application first, then plugins. Where several plugins define the same code, the
reverse of Grails' plugin topological order wins, which is the behaviour applications had before Spring
Boot owned the message source. An application’s own bundle always overrides every plugin’s, so
redefining a plugin’s code in messages.properties is the supported way to change it.
Set grails.i18n.include-plugin-bundles to false to leave plugin bundles out entirely.
Reloading during development
Editing a value in an existing bundle is picked up without a restart. Grails contributes a short
spring.messages.cache-duration automatically when reload is enabled; without one Spring caches every
bundle for the lifetime of the application. Set the property yourself to override the duration.
Adding a locale file for a base name that already exists resolves without a restart too, though the language selector described in [changingLocales] only lists it once the build has regenerated its metadata. Adding or removing a base name needs a restart: Spring Boot reads the configured base names once, when it builds the message source.
17.2 Changing Locales
By default, the user locale is detected from the incoming Accept-Language header. You can provide users the capability to switch locales by simply passing a parameter called lang to Grails as a request parameter:
/book/list?lang=esGrails will automatically switch the user’s locale and subsequent requests will use the switched locale.
To offer a language selector, the i18n plugin discovers the locales your application is actually translated into by scanning the classpath for messages_*.properties bundles (plus the default locale, configurable via grails.i18n.default.locale). This list is exposed as the AvailableLocaleResolver bean, ordered by each locale’s own name (autonym), and published to the servlet context under the availableLocales attribute.
The <g:localeSelect available="true"/> tag renders a <select> limited to those locales. To build a custom switcher, use the tag’s body form: it resolves and orders the locales and flags the active (loc.active) and configured-default (loc.default) entries, while your markup decides how each is rendered:
<g:localeSelect available="true" pinDefault="true" var="loc">
<a href="?lang=${loc.tag}"${loc.active ? ' aria-current="page"' : ''}>${loc.autonym}</a>
</g:localeSelect>Alternatively, iterate the published availableLocales list directly.
The list is drawn from the message bundles your application and its plugins actually ship, recorded at build time, so it offers only real translations. It follows exactly the same set of plugins that message resolution uses: a plugin that was evicted, excluded, or failed to load contributes neither messages nor a language entry, so the selector can never offer a language whose messages will not resolve. To list only your application’s own translations, set grails.i18n.include-plugin-bundles=false:
grails-app/conf/application.yml
grails:
i18n:
include-plugin-bundles: false # list only the application's own translationsApplications created with grails create-app include a ready-made Bootstrap language dropdown in the default layout, built with the g:localeSelect body form shown above.
By default, Grails uses SessionLocaleResolver as the localeResolver bean.
You can select a different resolver strategy with the grails.i18n.localeResolver configuration property, without declaring a bean:
grails-app/conf/application.yml
grails:
i18n:
localeResolver: acceptHeader # session (default), cookie, acceptHeader or fixedsession and cookie are mutable, so the ?lang= switch works with them: the incoming Accept-Language header sets the initial locale, and a ?lang= request parameter then overrides it and is remembered for subsequent requests (in the session or a cookie). acceptHeader (the locale follows the incoming Accept-Language header on every request) and fixed are read-only, so the ?lang= switch has no effect and is silently ignored — the header, or for fixed the grails.i18n.default.locale value (falling back to the JVM default locale), always wins.
You can change the default locale easily:
grails-app/conf/spring/resources.groovy
import org.springframework.web.servlet.i18n.SessionLocaleResolver
beans = {
localeResolver(SessionLocaleResolver) {
defaultLocale= new Locale('es')
}
}Other localeResolver are available. For example, you could use save the switched locale in a Cookie:
grails-app/conf/spring/resources.groovy
import org.springframework.web.servlet.i18n.CookieLocaleResolver
beans = {
localeResolver(CookieLocaleResolver) {
defaultLocale= new Locale('es')
}
}Or fix the locale:
grails-app/conf/spring/resources.groovy
import org.springframework.web.servlet.i18n.FixedLocaleResolver
beans = {
localeResolver(FixedLocaleResolver, new Locale('de'))
}17.3 Reading Messages
Reading Messages in the View
The most common place that you need messages is inside the view. Use the message tag for this:
<g:message code="my.localized.content" />As long as you have a key in your messages.properties (with appropriate locale suffix) such as the one below then Grails will look up the message:
my.localized.content=Hola, me llamo John. Hoy es domingo.Messages can also include arguments, for example:
<g:message code="my.localized.content" args="${ ['Juan', 'lunes'] }" />The message declaration specifies positional parameters which are dynamically specified:
my.localized.content=Hola, me llamo {0}. Hoy es {1}.Reading Messages in Grails Artifacts with MessageSource
In a Grails artifact, you can inject messageSource and use the method getMessage with the arguments: message code, message arguments, default message and locale to retrieve a message.
import org.springframework.context.MessageSource
import org.springframework.context.i18n.LocaleContextHolder
class MyappController {
MessageSource messageSource
def show() {
def msg = messageSource.getMessage('my.localized.content', ['Juan', 'lunes'] as Object[], 'Default Message', LocaleContextHolder.locale)
}Reading Messages in Controllers and Tag Libraries with the Message Tag
Additionally, you can read a message inside Controllers and Tag Libraries with the Message Tag. However, using the message tag relies on GSP support which a Grails application may not necessarily have; e.g. a rest application.
In a controller, you can invoke tags as methods.
def show() {
def msg = message(code: "my.localized.content", args: ['Juan', 'lunes'])
}The same technique can be used in tag libraries, but if your tag library uses a custom namespace then you must prefix the call with g.:
def myTag = { attrs, body ->
def msg = g.message(code: "my.localized.content", args: ['Juan', 'lunes'])
}17.4 Scaffolding and i18n
Grails scaffolding templates for controllers and views are fully i18n-aware. The GSPs use the message tag for labels, buttons etc. and controller flash messages use i18n to resolve locale-specific messages.
The scaffolding includes locale specific labels for domain classes and domain fields. For example, if you have a Book domain class with a title field:
class Book {
String title
}The scaffolding will use labels with the following keys:
book.label = Libro
book.title.label = Título del libroYou can use this property pattern if you’d like or come up with one of your own. There is nothing special about the use of the word label as part of the key other than it’s the convention used by the scaffolding.
18 Security
Grails is no more or less secure than Java Servlets. However, Java servlets (and hence Grails) are extremely secure and largely immune to common buffer overrun and malformed URL exploits due to the nature of the Java Virtual Machine underpinning the code.
Web security problems typically occur due to developer naivety or mistakes, and there is a little Grails can do to avoid common mistakes and make writing secure applications easier to write.
What Grails Automatically Does
Grails has a few built in safety mechanisms by default.
-
All standard database access via GORM domain objects is automatically SQL escaped to prevent SQL injection attacks
-
The default scaffolding templates HTML escape all data fields when displayed
-
Grails link creating tags (link, form, createLink, createLinkTo and others) all use appropriate escaping mechanisms to prevent code injection
-
Grails provides codecs to let you trivially escape data when rendered as HTML, JavaScript and URLs to prevent injection attacks here.
HTTP Security Headers
Grails servlet web applications send a small set of browser hardening headers by default:
| Header | Default value |
|---|---|
|
|
|
|
|
|
|
|
HSTS and Content Security Policy are not enabled by default because their correct values depend on deployment topology and application assets.
The headers are written immediately before the response is committed, and only when nothing else has already set them.
A controller, an interceptor, another servlet filter, or Spring Security’s own header writers can therefore set any of these headers and that value is what the browser receives; Grails only fills in the headers that are still missing.
This also applies to responses committed by a redirect, an error page, a streamed body, or a body large enough to fill the container’s response buffer.
If a response is reset() after the headers were written, for example by an error handler that starts over, the replacement response receives them again.
The filter is registered at GrailsFilters.FIRST, ahead of every other Grails-registered filter, so it also covers responses that those filters serve themselves without continuing the chain, such as the static assets the asset-pipeline plugin streams.
Filters ordered ahead of GrailsFilters.FIRST run outside it: Spring Boot’s forwarded-header filter (registered when server.forward-headers-strategy is framework), Spring Boot’s ErrorPageFilter in a WAR deployment, and any application filter you order below that value.
The character-encoding filter Grails registers runs inside the Grails filter.
A response a filter outside it serves itself, without continuing the chain, does not pass through the Grails filter and receives no default headers.
Ordering relative to Spring Security
At Spring Boot’s default spring.security.filter.order the Spring Security filter chain runs inside the Grails filter, and its header writers run first at commit time, so whatever Spring Security is configured to send is what the browser receives.
If you order the Spring Security chain ahead of GrailsFilters.FIRST, the Grails defaults are written before Spring Security’s writers run.
All of Spring Security’s header writers except the X-Frame-Options writer leave a header alone once it is present, so in that arrangement they find the Grails value already in place and do not replace it.
Disable the corresponding grails.security.headers.<header> to let Spring Security own that header, or leave the Spring Security chain at its default order.
The same can happen at the default order for a large body written through the response writer in a multi-byte character encoding such as UTF-8.
Grails measures the body in bytes, as the container’s response buffer is sized, while Spring Security measures writer output in characters, so once such a body fills the buffer Grails can write its defaults before Spring Security’s writers run.
Disable the corresponding grails.security.headers.<header> if Spring Security must own a header on such responses.
HSTS behind a reverse proxy
When HSTS is enabled, Grails sends Strict-Transport-Security only for requests the client made over HTTPS.
Behind a TLS-terminating reverse proxy (the typical nginx or HAProxy topology) the connection between the proxy and the application is plain HTTP, so Grails also honors the scheme the proxy forwards in X-Forwarded-Proto or the RFC 7239 Forwarded header.
If your proxy sets neither, configure the Spring Boot server.forward-headers-strategy property (framework or native) so the container itself sees the original scheme, or set HSTS at the proxy where TLS actually terminates.
Reverse proxies that already send these headers
The application cannot see headers a reverse proxy adds to the response on its way to the client.
If your edge proxy already sends one of these headers (for example nginx’s add_header, which appends to upstream headers rather than replacing them), the client receives the header twice.
For the four default headers that is harmless or, at worst, stricter: nosniff twice is still nosniff, conflicting X-Frame-Options values make the browser block framing, Referrer-Policy resolves to the last valid token (the proxy’s, since it is appended after the application’s), and no current browser implements X-XSS-Protection.
Duplicate Content-Security-Policy headers do matter, because browsers enforce the intersection of all the policies they receive, but CSP is never sent unless you configure it.
If you would rather the application not send its defaults through a proxy that owns these headers, set grails.security.headers.defaults to auto.
Grails then detects requests that arrived through a reverse proxy and, for those requests, sends only the headers you configured explicitly under grails.security.headers.*; the built-in default values are not applied.
A request is treated as proxied when any of the following holds:
-
it carries a
Forwarded,X-Forwarded-For,X-Forwarded-Proto,X-Forwarded-Host,Via, orX-Real-IPrequest header; -
server.forward-headers-strategyis set toframeworkornative(the forwarding filter or valve strips the forwarded request headers before Grails could see them, so the configuration itself is taken as the signal); -
Spring Boot detects that the application is running on a cloud platform such as Kubernetes or Cloud Foundry, where traffic normally enters through an ingress proxy.
The first time a proxied request is seen in auto mode, Grails logs a message at INFO level explaining that the defaults are being withheld.
Setting either the enabled or the value key of a header marks it as explicitly configured, and defaults does not apply to explicitly configured headers.
An explicitly configured header that is enabled and has a value is sent whether or not a proxy is detected, so setting enabled: true on its own sends the built-in value through a proxy as well; one set to enabled: false is never sent.
Content-Security-Policy and Strict-Transport-Security are disabled by default, so setting their value alone sends nothing: set enabled: true as well.
Note that most load balancers, ingress controllers and platform routers add X-Forwarded-For to every request without adding any security headers of their own, and every Kubernetes pod is detected as a cloud platform.
In auto mode such deployments send none of the defaults, which is why always is the default; choose auto only when the proxy really does own these headers.
The grails.security.headers.defaults setting accepts these values:
| Value | Behavior |
|---|---|
|
Apply the default values on every response, including behind a reverse proxy. |
|
Apply the default values unless the request came through a reverse proxy. Use this when the proxy already sends these headers. |
|
Never apply the default values; send only the headers you configured explicitly. Use this when the proxy owns the headers but detection cannot see it, for example because the proxy strips its own forwarding headers. |
In auto mode a client can add a forwarding header to its own direct request and thereby suppress the defaults for that one response.
This does not weaken the protection these headers provide, because an attacker does not control the request headers a victim’s browser sends.
You can disable the whole filter, disable individual headers, or override values from application.yml:
grails-app/conf/application.yml
grails:
security:
headers:
enabled: true
defaults: always
frame-options:
value: DENY
referrer-policy:
value: no-referrer-when-downgrade
hsts:
enabled: true
value: max-age=31536000; includeSubDomains
content-security-policy:
enabled: true
value: default-src 'self'Set grails.security.headers.<header>.enabled to false to omit a single header.
For example, grails.security.headers.xss-protection.enabled: false omits X-XSS-Protection.
A header that is enabled but has a blank value is not sent; Grails logs a warning naming the property the first time that happens, since it usually means content-security-policy.enabled was set without a policy.
If an application, another filter, or Spring Security has already set one of these headers on the response by the time it commits, Grails leaves that value unchanged.
18.1 Securing Against Attacks
SQL injection
Hibernate, which is the technology underlying GORM domain classes, automatically escapes data when committing to database so this is not an issue. However it is still possible to write bad dynamic HQL code that uses unchecked request parameters. For example doing the following is vulnerable to HQL injection attacks:
def vulnerable() {
def books = Book.find("from Book as b where b.title ='" + params.title + "'")
}or the analogous call using a GString:
def vulnerable() {
def books = Book.find("from Book as b where b.title ='${params.title}'")
}Do not do this. Use named or positional parameters instead to pass in parameters:
def safe() {
def books = Book.find("from Book as b where b.title = ?",
[params.title])
}or
def safe() {
def books = Book.find("from Book as b where b.title = :title",
[title: params.title])
}Compile-time detection of flattened GString queries
Passing a GString directly to a GORM query method such as find, findAll, executeQuery, or executeUpdate is safe: GORM converts each interpolated value into a bound query parameter rather than embedding it as text. The risk is a subtler pattern that looks harmless:
def vulnerable() {
String query = "from Book as b where b.title = ${params.title}" (1)
def books = Book.executeQuery(query) (2)
}| 1 | Groovy coerces the GString to a plain String right here, because query is declared as String. |
| 2 | By the time executeQuery receives it, it is an ordinary String with no trace of ever having been a GString — the interpolated value is now raw, unescaped text, and this call is genuinely vulnerable to HQL injection. |
This is dangerous precisely because it can’t be caught at runtime: once a GString is flattened to a String, there is nothing left to distinguish it from HQL text that was always safe. Grails detects this pattern at compile time instead, and fails the build with an error identifying the call site. To fix it, keep the value as a GString (recommended) or pass named/positional parameters explicitly, as shown above. Both fixes apply when the interpolated expressions are values; query text assembled from HQL fragments is a different case, covered in Building query text from fragments below.
If a flagged call site has been reviewed and is genuinely safe, suppress the check on the declaration of the variable that holds the query text, or on the enclosing method:
def reviewedAndSafe() {
@SuppressWarnings("GormUnsafeQueryString")
String query = "from Book as b where b.title = ${params.title}" (1)
def books = Book.executeQuery(query)
}
@SuppressWarnings("GormUnsafeQueryString") (2)
def reviewedAndSafeToo() {
String query = "from Book as b where b.title = ${params.title}"
def books = Book.executeQuery(query)
}| 1 | The declaration-level form marks this one variable (or, on a field declaration, that field) as reviewed for the rest of the method, whatever it is later assigned, and leaves every other variable checked. Prefer it. |
| 2 | The method-level form silences the check for every query in the method, including those in closures and anonymous inner classes inside it. |
This check runs automatically against every Grails application that has grails-datamapping-core on its compile classpath — no configuration is required, and it covers every GORM implementation whose query methods follow this convention (Hibernate and Neo4j today). It checks query methods called on a domain class, and those called on this, or with no receiver, anywhere inside a domain class, including the classes nested in it, since Groovy passes those calls on to the domain class.
Because the check is intraprocedural, it cannot follow every possible way query text can be assembled. If a build hits a false positive with no reasonable per-call-site fix, disable the check for the whole compilation unit by setting the protectSqlInjectionAttacks system property to false (it defaults to true), for example via gradle.properties:
systemProp.protectSqlInjectionAttacks=falseThis is a global kill switch of last resort, not a substitute for @SuppressWarnings("GormUnsafeQueryString") on the specific declaration or method that needs it.
Building query text from fragments
A GString is the right tool for values, not for query text. GORM turns every interpolation into a bound parameter, so interpolating an HQL fragment into a GString that is passed directly to a query method produces a broken query rather than an unsafe one:
String restriction = " and b.title = :title"
Book.executeQuery("from Book b where 1 = 1 ${restriction}", [title: params.title])
// runs as: from Book b where 1 = 1 :p0 -- the fragment is bound as a valueThe check tells query text and values apart. An interpolation that is constant text cannot carry user input, so it is not flagged even when the GString is coerced to a String. Constant text is a string literal, a static final field initialized from constant text, a ternary, Elvis or switch expression choosing between constant text, a + concatenation or GString made only of constant text, and a local variable that only ever held constant text on every path leading to the query, whichever if/else, switch, try/catch or loop those paths run through. A closure, or a method of an anonymous inner class, can run at any point after it is defined, and an assignment inside another expression — a ternary or Elvis branch, an && or || operand, a method argument or a loop condition — or a multiple assignment may or may not run. So a local declared outside a closure or an anonymous inner class that its code reads or assigns, and a local assigned in one of those ways, is judged by every assignment to it in the method: it counts as constant text only if every assignment is constant text, and as a flattened query if any assignment flattens a GString into it. This is what lets restrictions be chosen at runtime while the values stay bound:
def search() {
Map queryParams = [:]
String restriction = ""
if (params.title) {
restriction = " and b.title = :title" (1)
queryParams.title = params.title (2)
}
String query = "from Book b where 1 = 1 ${restriction}" (3)
Book.executeQuery(query, queryParams)
}| 1 | Constant text chosen at runtime. Assigning restriction from a request parameter, a method call, or any other non-constant expression on any path would make the interpolation a build error again. |
| 2 | The value is bound through the parameter map, never interpolated. |
| 3 | Allowed: every interpolation is constant text. |
Appending with += is tracked the same way, so the more common idiom compiles without errors or warnings too:
String query = "from Book b where 1 = 1"
if (params.title) {
query += " and b.title = :title"
queryParams.title = params.title
}
Book.executeQuery(query, queryParams)The check cannot follow query text assembled in other ways — fragments collected in a List and joined, built with a StringBuilder, or returned from a helper method — so it treats that text as data. Interpolated into a GString that is coerced to a String, it is the build-breaking error; concatenated with +, it is the lower-confidence warning described below. Assigned on its own and passed straight to a query method, it is not reported at all, so review such code by hand. After review, suppress a reported call site on the declaration of the variable that holds the trusted text rather than on the whole method. The annotation may go on the assembled query or on the fragment it is built from; an annotated variable is treated as constant text wherever it is interpolated or concatenated:
def search() {
@SuppressWarnings("GormUnsafeQueryString")
String restriction = restrictionsFor(params) // reviewed: trusted query text
String query = "from Book b where 1 = 1 ${restriction}" // no longer flagged
Book.executeQuery(query, queryParams)
}Compile-time warnings for lower-confidence patterns
Two related patterns are detected by the same check but reported as compile-time warnings rather than build failures, because the detection is less certain than the local-variable case above:
class Book {
String title
String cachedQuery = "from Book where title = ${title}" (1)
def loadCached() {
executeQuery(this.cachedQuery) (2)
}
def vulnerable(String title) {
String query = "from Book where title = " + title (3)
executeQuery(query)
}
}| 1 | A field initialized from an interpolated GString — unlike a local variable, a field can be reassigned from a constructor, another method, or a subclass that this check never sees, so this is flagged rather than failed. |
| 2 | Reading that field later through this.cachedQuery in a query call. |
| 3 | Query text built with + from a non-constant value and no GString involved at all. This is a real injection shape, but string concatenation is common enough for benign, non-query purposes that a hard build failure would be too blunt an instrument. Concatenating only constant text, as defined above, is not flagged at all. |
Both warnings identify the call site and suppress the same way as the error above, with @SuppressWarnings("GormUnsafeQueryString") on the declaration or on the enclosing method. Concatenating a GString with additional text (e.g. "…${title}…" + " order by title"), or appending to a GString or to an already-flattened String with ` or `=, is not one of these warnings — Groovy’s GString.plus returns a plain String, so this flattens the interpolation immediately and is reported as the build-breaking error instead.
Phishing
This really a public relations issue in terms of avoiding hijacking of your branding and a declared communication policy with your customers. Customers need to know how to identify valid emails.
XSS - cross-site scripting injection
It is important that your application verifies as much as possible that incoming requests were originated from your application and not from another site. It is also important to ensure that all data values rendered into views are escaped correctly. For example when rendering to HTML or XHTML you must ensure that people cannot maliciously inject JavaScript or other HTML into data or tags viewed by others.
Grails 2.3 and above include special support for automatically encoded data placed into GSP pages. See the documentation on Cross Site Scripting (XSS) prevention for further information.
You must also avoid the use of request parameters or data fields for determining the next URL to redirect the user to. If you use a successURL parameter for example to determine where to redirect a user to after a successful login, attackers can imitate your login procedure using your own site, and then redirect the user back to their own site once logged in, potentially allowing JavaScript code to then exploit the logged-in account on the site.
Cross-site request forgery
CSRF involves unauthorized commands being transmitted from a user that a website trusts. A typical example would be another website embedding a link to perform an action on your website if the user is still authenticated.
The best way to decrease risk against these types of attacks is to use the useToken attribute on your forms. See Handling Duplicate Form Submissions for more information on how to use it. An additional measure would be to not use remember-me cookies.
HTML/URL injection
This is where bad data is supplied such that when it is later used to create a link in a page, clicking it will not cause the expected behaviour, and may redirect to another site or alter request parameters.
HTML/URL injection is easily handled with the codecs supplied by Grails, and the tag libraries supplied by Grails all use encodeAsURL where appropriate. If you create your own tags that generate URLs you will need to be mindful of doing this too.
Denial of service
Load balancers and other appliances are more likely to be useful here, but there are also issues relating to excessive queries for example where a link is created by an attacker to set the maximum value of a result set so that a query could exceed the memory limits of the server or slow the system down. The solution here is to always sanitize request parameters before passing them to dynamic finders or other GORM query methods:
int limit = 100
def safeMax = Math.min(params.max?.toInteger() ?: limit, limit) // limit to 100 results
return Book.list(max:safeMax)Guessable IDs
Many applications use the last part of the URL as an "id" of some object to retrieve from GORM or elsewhere. Especially in the case of GORM these are easily guessable as they are typically sequential integers.
Therefore you must assert that the requesting user is allowed to view the object with the requested id before returning the response to the user.
Not doing this is "security through obscurity" which is inevitably breached, just like having a default password of "letmein" and so on.
You must assume that every unprotected URL is publicly accessible one way or another.
18.2 Cross Site Scripting (XSS) Prevention
Cross Site Scripting (XSS) attacks are a common attack vector for web applications. They typically involve submitting HTML or Javascript code in a form such that when that code is displayed, the browser does something nasty. It could be as simple as popping up an alert box, or it could be much worse like for example one could access other users session cookies.
The solution is to escape all untrusted user input when it is displayed in a page. For example,
<script>alert('Got ya!');</script>will become
<script>alert('Got ya!');</script>when rendered, nullifying the effects of the malicious input.
By default, Grails plays it safe and escapes all content in ${} expressions in GSPs. All the standard GSP tags are also safe by default, escaping any relevant attribute values.
So what happens when you want to stop Grails from escaping some content? There are valid use cases for putting HTML into the database and rendering it as-is, as long as that content is trusted. In such cases, you can tell Grails that the content is safe as should be rendered raw, i.e. without any escaping:
<section>${raw(page.content)}</section>The raw() method you see here is available from controllers, tag libraries and GSP pages.
XSS prevention is hard and requires a lot of developer attention
| Although Grails plays it safe by default, that is no guarantee that your application will be invulnerable to an XSS-style attack. Such an attack is less likely to succeed than would otherwise be the case, but developers should always be conscious of potential attack vectors and attempt to uncover vulnerabilities in the application during testing. It’s also easy to switch to an unsafe default, thereby increasing the risk of a vulnerability being introduced. |
There are more details about the XSS in OWASP - XSS prevention rules and OWASP - Types of Cross-Site Scripting. Types of XSS are: Stored XSS, Reflected XSS and DOM based XSS. DOM based XSS prevention is coming more important because of the popularity of Javascript client side templating and Single Page Apps.
Grails codecs are mainly for preventing stored and reflected XSS type of attacks. Grails 2.4 includes HTMLJS codec that assists in preventing some DOM based XSS attacks.
It’s difficult to make a solution that works for everyone, and so Grails provides a lot of flexibility with regard to fine-tuning how escaping works, allowing you to keep most of your application safe while switching off default escaping or changing the codec used for pages, tags, page fragments, and more.
Configuration
It is recommended that you review the configuration of a newly created Grails application to garner an understanding of XSS prevention works in Grails.
When you tag a cookie with the HttpOnly flag, it tells the browser that this particular cookie should only be accessed by the server. Any attempt to access the cookie from client script is strictly forbidden. This can be configured in the application.yml configuration file as seen below:
server:
session:
cookie:
domain: example.org
http-only: true
path: /
secure: trueGSP features the ability to automatically HTML encode GSP expressions, and as of Grails 2.3 this is the default configuration. The default configuration (found in application.yml) for a newly created Grails application can be seen below:
grails:
views:
gsp:
encoding: UTF-8
codecs:
expression: html # escapes values inside ${}
scriptlets: html # escapes output from scriptlets in GSPs
taglib: none # escapes output from taglibs
staticparts: none # escapes output from static template partsGSP features several codecs that it uses when writing the page to the response. The codecs are configured in the codecs block and are described below:
-
expression- The expression codec is used to encode any code found within ${..} expressions. The default for newly created application ishtmlencoding. -
scriptlet- Used for output from GSP scriplets (<% %>, <%= %> blocks). The default for newly created applications ishtmlencoding -
taglib- Used to encode output from GSP tag libraries. The default isnonefor new applications, as typically it is the responsibility of the tag author to define the encoding of a given tag and by specifyingnoneGrails remains backwards compatible with older tag libraries. -
staticparts- Used to encode the raw markup output by a GSP page. The default isnone.
Double Encoding Prevention
Versions of Grails prior to 2.3, included the ability to set the default codec to html, however enabling this setting sometimes proved problematic when using existing plugins due to encoding being applied twice (once by the html codec and then again if the plugin manually called encodeAsHTML).
Grails 2.3 includes double encoding prevention so that when an expression is evaluated, it will not encode if the data has already been encoded (Example ${foo.encodeAsHTML()}).
Raw Output
If you are 100% sure that the value you wish to present on the page has not been received from user input, and you do not wish the value to be encoded then you can use the raw method:
${raw(book.title)}The 'raw' method is available in tag libraries, controllers and GSP pages.
Per Plugin Encoding
Grails also features the ability to control the codecs used on a per plugin basis. For example if you have a plugin named foo installed, then placing the following configuration in your application.groovy will disable encoding for only the foo plugin
foo.grails.views.gsp.codecs.expression = "none"Or the equivalent in application.yml:
foo:
grails:
views:
gsp:
codecs:
expression: "none"Per Page Encoding
You can also control the various codecs used to render a GSP page on a per page basis, using a page directive:
<%@page expressionCodec="none" %>Per Tag Library Encoding
Each tag library created has the opportunity to specify a default codec used to encode output from the tag library using the "defaultEncodeAs" property:
static defaultEncodeAs = 'html'Encoding can also be specified on a per tag basis using "encodeAsForTags":
static encodeAsForTags = [tagName: 'raw']Context Sensitive Encoding Switching
Certain tags require certain encodings and Grails features the ability to enable a codec only a certain part of a tag’s execution using the "withCodec" method. Consider for example the "<g:javascript>"" tag which allows you to embed JavaScript code in the page. This tag requires JavaScript encoding, not HTML coding for the execution of the body of the tag (but not for the markup that is output):
out.println '<script type="text/javascript">'
withCodec("JavaScript") {
out << body()
}
out.println()
out.println '</script>'Forced Encoding for Tags
If a tag specifies a default encoding that differs from your requirements you can force the encoding for any tag by passing the optional 'encodeAs' attribute:
<g:message code="foo.bar" encodeAs="JavaScript" />Default Encoding for All Output
The default configuration for new applications is fine for most use cases, and backwards compatible with existing plugins and tag libraries. However, you can also make your application even more secure by configuring Grails to always encode all output at the end of a response. This is done using the filteringCodecForContentType configuration in application.groovy:
grails.views.gsp.filteringCodecForContentType.'text/html' = 'html'Or the equivalent in application.yml:
grails:
views:
gsp:
filteringCodecForContentType:
text/html: 'html'Note that, if activated, the staticparts codec typically needs to be set to raw so that static markup is not encoded:
codecs {
expression = 'html' // escapes values inside ${}
scriptlet = 'html' // escapes output from scriptlets in GSPs
taglib = 'none' // escapes output from taglibs
staticparts = 'raw' // escapes output from static template parts
}Or the equivalent in application.yml:
codecs:
expression: 'html' # escapes values inside ${}
scriptlet: 'html' # escapes output from scriptlets in GSPs
taglib: 'none' # escapes output from taglibs
staticparts: 'raw' # escapes output from static template parts18.3 Encoding and Decoding Objects
Grails supports the concept of dynamic encode/decode methods. A set of standard codecs are bundled with Grails. Grails also supports a simple mechanism for developers to contribute their own codecs that will be recognized at runtime.
Codec Classes
A Grails codec class is one that may contain an encode closure, a decode closure or both. When a Grails application starts up the Grails framework dynamically loads codecs from the grails-app/utils/ directory.
The framework looks under grails-app/utils/ for class names that end with the convention Codec. For example one of the standard codecs that ships with Grails is HTMLCodec.
If a codec contains an encode closure Grails will create a dynamic encode method and add that method to the Object class with a name representing the codec that defined the encode closure. For example, the HTMLCodec class defines an encode closure, so Grails attaches it with the name encodeAsHTML.
The HTMLCodec and URLCodec classes also define a decode closure, so Grails attaches those with the names decodeHTML and decodeURL respectively. Dynamic codec methods may be invoked from anywhere in a Grails application. For example, consider a case where a report contains a property called 'description' which may contain special characters that must be escaped to be presented in an HTML document. One way to deal with that in a GSP is to encode the description property using the dynamic encode method as shown below:
${report.description.encodeAsHTML()}Decoding is performed using value.decodeHTML() syntax.
Encoder and Decoder interfaces for staticly compiled code
A preferred way to use codecs is to use the codecLookup bean to get hold of Encoder and Decoder instances .
package org.grails.encoder;
public interface CodecLookup {
public Encoder lookupEncoder(String codecName);
public Decoder lookupDecoder(String codecName);
}example of using CodecLookup and Encoder interface
import org.grails.encoder.CodecLookup
class CustomTagLib {
CodecLookup codecLookup
def myTag = { Map attrs, body ->
out << codecLookup.lookupEncoder('HTML').encode(attrs.something)
}
}Standard Codecs
HTMLCodec
This codec performs HTML escaping and unescaping, so that values can be rendered safely in an HTML page without creating any HTML tags or damaging the page layout. For example, given a value "Don’t you know that 2 > 1?" you wouldn’t be able to show this safely within an HTML page because the > will look like it closes a tag, which is especially bad if you render this data within an attribute, such as the value attribute of an input field.
Example of usage:
<input name="comment.message" value="${comment.message.encodeAsHTML()}"/>HTMLCodec escapes &, <, >, " and ', so values are safe in both double- and single-quoted attribute values. It also escapes @, the backslash, the backtick, the non breaking space (U+00A0), the line separator (U+2028) and the paragraph separator (U+2029), and drops control characters other than tab, line feed and carriage return. Other characters, such as non-ASCII letters, are written as they are, so the page must be served in a character set that can represent them. GSP pages use UTF-8 by default (grails.views.gsp.encoding).
Before Grails 8, HTMLCodec defaulted to HTML4 style escaping (the HTMLCodec implementation in Grails versions before 2.3.0), which converts non-ASCII characters to named entities such as é and leaves @, the backslash, the backtick and the line and paragraph separators unescaped. To keep using it, for example in an application that serves pages in a character set such as ISO-8859-1 and relies on the entities for characters outside it, set this config property in application.groovy:
grails.views.gsp.htmlcodec = 'html4'Or the equivalent in application.yml:
grails:
views:
gsp:
htmlcodec: html4The value html also selects HTML4 style escaping. Any other value, such as xml, which applications generated by earlier Grails versions set, selects the default escaping. Use encodeAsHTML4() to apply HTML4 style escaping to a single value.
XMLCodec
This codec performs XML escaping and unescaping. It escapes & , < , > , " , ' , \\\\ , @ , ` , non breaking space (\\\\u00a0), line separator (\\\\u2028) and paragraph separator (\\\\u2029).
HTMLJSCodec
This codec performs HTML and JS encoding. It is used for preventing some DOM-XSS vulnerabilities. See OWASP - DOM based XSS Prevention Cheat Sheet for guidelines of preventing DOM based XSS attacks.
URLCodec
URL encoding is required when creating URLs in links or form actions, or any time data is used to create a URL. It prevents illegal characters from getting into the URL and changing its meaning, for example "Apple & Blackberry" is not going to work well as a parameter in a GET request as the ampersand will break parameter parsing.
Example of usage:
<a href="/mycontroller/find?searchKey=${lastSearch.encodeAsURL()}">
Repeat last search
</a>Base64Codec
Performs Base64 encode/decode functions. Example of usage:
Your registration code is: ${user.registrationCode.encodeAsBase64()}String values can be encoded with a specific source character set by passing a java.nio.charset.Charset to encodeAsBase64. The Base64 text itself is returned as UTF-8/ASCII-compatible text. decodeBase64 takes no character set, because Base64 text is always ASCII; it returns the decoded bytes for the caller to interpret.
JavaScriptCodec
Escapes Strings so they can be used as valid JavaScript strings. For example:
Element.update('${elementId}',
'${render(template: "/common/message").encodeAsJavaScript()}')HexCodec
Encodes byte arrays or lists of integers to lowercase hexadecimal strings, and can decode hexadecimal strings into byte arrays. For example:
Selected colour: #${[255,127,255].encodeAsHex()}decodeHex decodes an empty string to an empty byte array. For any other value that is false by Groovy truth, such as null, 0 or an empty collection, it returns null.
MD5Codec
Uses the MD5 algorithm to digest byte arrays or lists of integers, or the bytes of a string (in default system encoding), as a lowercase hexadecimal string. Example of usage:
Your API Key: ${user.uniqueID.encodeAsMD5()}MD5BytesCodec
Uses the MD5 algorithm to digest byte arrays or lists of integers, or the bytes of a string (in default system encoding), as a byte array. Example of usage:
byte[] passwordHash = params.password.encodeAsMD5Bytes()SHA1Codec
Uses the SHA1 algorithm to digest byte arrays or lists of integers, or the bytes of a string (in default system encoding), as a lowercase hexadecimal string. Example of usage:
Your API Key: ${user.uniqueID.encodeAsSHA1()}SHA1BytesCodec
Uses the SHA1 algorithm to digest byte arrays or lists of integers, or the bytes of a string (in default system encoding), as a byte array. Example of usage:
byte[] passwordHash = params.password.encodeAsSHA1Bytes()SHA256Codec
Uses the SHA256 algorithm to digest byte arrays or lists of integers, or the bytes of a string (in default system encoding), as a lowercase hexadecimal string. Example of usage:
Your API Key: ${user.uniqueID.encodeAsSHA256()}SHA256BytesCodec
Uses the SHA256 algorithm to digest byte arrays or lists of integers, or the bytes of a string (in default system encoding), as a byte array. Example of usage:
byte[] passwordHash = params.password.encodeAsSHA256Bytes()The hexadecimal digest codecs (encodeAsMD5, encodeAsSHA1 and encodeAsSHA256) compute their byte digest directly rather than calling the matching Bytes codec through the metaclass. Replacing encodeAsMD5Bytes, encodeAsSHA1Bytes or encodeAsSHA256Bytes at runtime therefore no longer changes what the hexadecimal codecs return.
Custom Codecs
Applications may define their own codecs and Grails will load them along with the standard codecs. A custom codec class must be defined in the grails-app/utils/ directory and the class name must end with Codec. The codec may contain a static encode closure, a static decode closure or both. The closure must accept a single argument which will be the object that the dynamic method was invoked on. For Example:
class PigLatinCodec {
static encode = { str ->
// convert the string to pig latin and return the result
}
}With the above codec in place an application could do something like this:
${lastName.encodeAsPigLatin()}18.4 Authentication
Grails has no default mechanism for authentication as it is possible to implement authentication in many different ways. It is however, easy to implement a simple authentication mechanism using interceptors. This is sufficient for simple use cases but it’s highly preferable to use an established security framework, for example by using the Spring Security plugin.
Interceptors let you apply authentication across all controllers or across a URI space. For example you can create a new set of filters in a class called grails-app/controllers/SecurityInterceptor.groovy by running:
grails create-interceptor securityand implement your interception logic there:
class SecurityInterceptor {
SecurityInterceptor() {
matchAll()
.except(controller:'user', action:'login')
}
boolean before() {
if (!session.user && actionName != "login") {
redirect(controller: "user", action: "login")
return false
}
return true
}
}Here the interceptor intercepts execution before all actions except login are executed, and if there is no user in the session then redirect to the login action.
The login action itself is simple too:
def login() {
if (request.get) {
return // render the login view
}
def u = User.findByLogin(params.login)
if (u) {
if (u.password == params.password) {
session.user = u
redirect(action: "home")
}
else {
render(view: "login", model: [message: "Password incorrect"])
}
}
else {
render(view: "login", model: [message: "User not found"])
}
}18.5 Security Plugins
If you need more advanced functionality beyond simple authentication such as authorization, roles etc. then you should consider using the spring security core plugin.
18.5.1 Spring Security
The Spring Security plugins are built on the Spring Security project which provides a flexible, extensible framework for building all sorts of authentication and authorization schemes. The plugins are modular so you can install just the functionality that you need for your application. The Spring Security plugins are the official security plugins for Grails and are actively maintained and supported.
The Core plugin supports form-based authentication, encrypted/salted passwords, HTTP Basic authentication, etc. and secondary dependent plugins provide alternate functionality such as ACL support, single sign-on with Apereo CAS, LDAP authentication, OAuth2 client support, REST token authentication, and a plugin providing user interface extensions and security workflows.
The reference documentation for each plugin is included in the following sections:
-
Core Plugin — the foundational authentication and authorization plugin.
-
ACL Plugin — domain-instance-level access control lists.
-
CAS Plugin — single sign-on with Apereo CAS.
-
LDAP Plugin — authentication against an LDAP server.
-
OAuth2 Plugin — authentication using external OAuth2 providers.
-
REST Plugin — token-based authentication for stateless REST APIs.
-
UI Plugin — CRUD screens and workflows for managing users, roles and request maps.
| These plugins were previously developed and released independently from the grails-spring-security repository. As of Grails 7 their source has been merged into Grails core and they are documented here. For documentation of earlier, independently versioned releases, see the legacy Spring Security plugin documentation. |
18.5.1.1 Core Plugin
Introduction to the Spring Security Plugin
The Spring Security plugin simplifies the integration of Spring Security into Grails applications. The plugin provides sensible defaults with many configuration options for customization. Nearly everything is configurable or replaceable in the plugin and in Spring Security itself, which makes extensive use of interfaces.
This guide documents configuration defaults and describes how to configure and extend the Spring Security plugin for Grails applications.
Installation
Prerequisites
Ensure you have the following set up:
-
A Grails project
-
A working internet connection
Installation Steps
-
Open your Grails project.
-
Locate your
build.gradlefile in the root directory of your project. -
Add the Spring Security Core Plugin dependency to the
dependenciessection in yourbuild.gradle:dependencies { // ... other dependencies implementation 'org.apache.grails:grails-spring-security' } -
Save the
build.gradlefile. -
Open a terminal or command prompt.
-
Navigate to your project’s root directory using the
cdcommand. -
Run the following Gradle command to update your project’s dependencies:
./gradlew clean build -
The Spring Security Core Plugin 8.0.0 is now installed and integrated into your Grails project.
-
You can start using the plugin’s features and commands in your application.
-
Run the s2-quickstart script to generate domain classes and add the initial configuration settings in
application.groovy:./grailsw s2-quickstart com.yourapp User Role
Spring Boot Auto-Configuration
The plugin automatically excludes Spring Boot’s servlet security auto-configuration classes (such as SecurityAutoConfiguration, SecurityFilterAutoConfiguration, UserDetailsServiceAutoConfiguration, the OAuth2 client/resource-server/authorization-server starters, and the SAML2 relying-party starter) that conflict with the plugin’s own security setup. This means you do not need to manually add spring.autoconfigure.exclude entries to your application.yml.
While the plugin is active, grails.plugin.springsecurity. is the authoritative configuration namespace for security. Spring Boot’s spring.security. properties are not merged into the plugin configuration. Use the plugin’s keys to configure security; do not mix them with Boot’s spring.security.* keys.
|
Coexistence with the component-based Spring Security configuration model
Spring Security 5.7 deprecated and Spring Security 6 removed WebSecurityConfigurerAdapter, replacing it with a component-based configuration model that registers individual @Bean components (see Spring Security without the WebSecurityConfigurerAdapter). This plugin pre-dates that model and provides equivalent functionality through the grails.plugin.springsecurity. configuration namespace, but it now *blends the most common component-based patterns automatically. You can configure security from either side (or both) and the effective configuration is the union of both sources.
| Spring component-based pattern | Blending behaviour with this plugin active | Disable via |
|---|---|---|
|
Auto-merged into the plugin’s |
|
|
Auto-merged into the plugin’s |
|
|
For each additional |
|
|
If |
|
|
Still a no-op. The plugin does not use Spring’s |
n/a |
|
Conflicts with the plugin’s |
n/a |
LDAP factory beans ( |
Coexist but are not wired into the plugin’s authentication providers. |
Use the |
To delegate the entire servlet security stack to Spring Boot’s component-based model (and stop using the plugin’s grails.plugin.springsecurity.* configuration), disable the excluder via the property below.
If you need to disable this automatic exclusion - for example, to delegate the entire servlet security stack to Spring Boot instead of the plugin - set the following property in application.yml:
grails:
plugin:
springsecurity:
excludeSpringSecurityAutoConfiguration: false
Disabling the exclusion is intentionally a footgun. The plugin can no longer guarantee that its filter chain is the only servlet security stack in the application context, and a startup WARN will be logged.
|
Verifying Installation
To verify that the plugin has been successfully installed, you can run a simple test:
-
In your Grails project, create a new controller or use an existing one.
-
Add a secure annotation, such as
@Secured(['ROLE_USER']), to a method in your controller. -
Run your Grails application using the command:
./gradlew bootRun -
Access the URL associated with the method you secured. If the plugin is correctly installed, it should enforce the security constraint you defined.
Configuration and Customization
The Spring Security plugin’s configuration is primarily managed within the grails-app/conf/application.groovy file, although an alternative is to house plugin configuration within application.yml. Default values are stored in the grails-app/conf/DefaultSecurityConfig.groovy file, with additional application-specific settings appended to application.groovy (or application.yml). This configuration structure involves merging default and custom values, giving precedence to application-specific settings.
Environment-Specific Configuration
This configuration approach accommodates environment-specific needs. For instance, during development, you might require less restrictive security rules compared to a production environment. To handle environment-specific parameters, utilize the environments block.
Property Prefix and Overrides
To distinguish these configuration properties from others in Grails or from different plugins, all the plugin-specific configuration properties begin with grails.plugin.springsecurity. When overriding these properties, ensure to use the grails.plugin.springsecurity prefix. For example:
grails.plugin.springsecurity.password.algorithm = 'bcrypt'Integration with CXF Grails Plugin
If your application incorporates the CXF Grails plugin, it’s crucial to arrange the dependencies correctly. Place the CXF dependency above the Spring Security plugin within the dependencies block, as shown below:
dependencies {
implementation 'org.grails.plugins:cxf:3.1.1'
// CXF above security.
implementation 'org.apache.grails:grails-spring-security'
}Quick Start Guide
Getting started with the plugin is simple and efficient. Follow these steps to enhance the security of your Grails application:
Step 1: Install the Plugin
Begin by installing the Spring Security plugin into your Grails project. Add the following dependency to your build.gradle:
implementation 'org.apache.grails:grails-spring-security'Step 2: Run the Initialization Script
After installation, execute the s2-quickstart initialization script. This sets up essential classes and configurations required for the plugin’s functionality. In your terminal, run:
./gradlew runCommand -Pargs="s2-quickstart com.yourapp User Role"If you are installing into a Grails plugin instead of an application, you must make sure you are using the web-plugin profile. Otherwise dependencies will not be met.
Running the same command will inject the spring beans into your GrailsPlugin classes doWithSpring method.
Plugin Configuration and Setup
The Spring Security plugin streamlines configuration and setup through a combination of steps:
-
Programmatic Servlet API Configuration:
Unlike earlier versions that utilized `web.xml`, the plugin now registers its servlet API configuration, including the Spring Security filter chain, programmatically.
-
Configure Spring Beans:
The plugin configures Spring beans within the application context to implement various functionality components. Dependency management automatically handles the selection of appropriate jar files.
By following these steps, your Grails application will be ready to leverage the Spring Security plugin for enhanced security. While in-depth knowledge of Spring Security isn’t mandatory, having a basic understanding of its underlying implementation can be helpful. For more details, refer to the [Spring Security documentation](https://https://docs.spring.io/spring-security/reference/current/).
What’s New in Grails Spring Security Core Plugin 6.0.0
This release is more than just an upgrade; it’s a transformative step towards elevating your application’s security, compatibility, and development experience. Get ready to embark on a journey of enhancements that will empower you to build robust, modern web applications. Let’s dive into the exciting changes that version 6.0.0 brings.
Elevated Security and Compatibility
Version 6.0.0 of the Grails Spring Security Core Plugin brings enhanced security features and improved compatibility with Grails 6. With a revamped underlying Spring Security framework powered by version 5.8.6, your application gains access to the latest security enhancements and bug fixes, safeguarding it against evolving threats and vulnerabilities.
Streamlined Commands for Grails 6
One of the notable improvements is the seamless transition to Grails 6. The plugin now offers upgraded commands that are fully compatible with Grails 6. This is a vital enhancement as it ensures your existing scripts remain functional without compatibility issues. The familiar commands like s2-quickstart have been refined, enabling you to trigger them using Gradle tasks. For example, you can now execute:
./grailsw s2-quickstart com.yourapp User RoleThis aligns perfectly with Grails 6’s development landscape, making your application’s migration smoother than ever before.
Effortless Documentation Navigation
We understand the importance of hassle-free documentation navigation. With the Internal Docs task now enhanced, generating documentation becomes a breeze. But that’s not all – we’ve introduced a slick select drop-down feature. This feature allows you to effortlessly switch between documentation for different releases. Whether you’re exploring the latest version or revisiting older ones, finding the information you need has never been easier.
Embracing the Grails 6 Framework
In the ever-evolving world of web development, the Grails Spring Security Core Plugin is keeping pace. Version 6.0.0 ensures seamless integration with Grails 6, enabling you to harness the cutting-edge features and improvements of the Grails framework. This integration ensures that your application can leverage both the power of Grails and the robust security features of the plugin.
Domain Classes
By default the plugin uses regular Grails domain classes to access its required data. It’s easy to create your own user lookup code though, which can access a database or any other source to retrieve user and authority data. See Custom UserDetailsService for how to implement this.
To use the standard user lookup you’ll need at a minimum a “person” and an “authority” domain class. In addition, if you want to store URL <==> Role mappings in the database (this is one of multiple approaches for defining the mappings) you need a “requestmap” domain class. If you use the recommended approach for mapping the many-to-many relationship between “person” and “authority”, you also need a domain class to map the join table.
To use the user/group lookup you’ll also need a “group” domain class. If you are using the recommended approach for mapping many-to-many relationship between “person” and “group” and between “group” and “authority” you’ll need a domain class for each to map the join tables. You can still additionally use “requestmap” with this approach.
The s2-quickstart script creates initial domain classes for you. You specify the package and class names, and it creates the corresponding domain classes. After that you can customize them as you like. You can add additional properties, methods, and so on, as long as the core security-related functionality remains.
Person Class
Spring Security uses an Authentication object to determine whether the current user is allowed to perform a secured action, such as accessing a URL, manipulating a secured domain object, invoking a secured method, and so on. This object is created during login. Typically overlap occurs between the need for authentication data and the need to represent a user in the application in ways that are unrelated to security. The mechanism for populating the authentication is completely pluggable in Spring Security; you only need to provide an implementation of UserDetailsService and implement its one method, loadUserByUsername(String username).
By default the plugin uses a Grails “person” domain class to manage this data. username, enabled, and password are the default names of the core required properties. You can easily plug in your own implementation (Custom UserDetailsService), and rename the class, package, and properties. In addition, you should define an authorities property to retrieve roles; this can be a property or a getAuthorities() method, and it can be defined through a traditional GORM many-to-many or a custom mapping.
Assuming you choose com.mycompany.myapp as your package, and User as your class name, you’ll generate this class:
User.groovypackage com.mycompany.myapp
import groovy.transform.EqualsAndHashCode
import groovy.transform.ToString
import grails.compiler.GrailsCompileStatic
@GrailsCompileStatic
@EqualsAndHashCode(includes = 'username')
@ToString(includes = 'username', includeNames = true, includePackage = false)
class User implements Serializable {
private static final long serialVersionUID = 1
String username
String password
boolean enabled = true
boolean accountExpired
boolean accountLocked
boolean passwordExpired
Set<Role> getAuthorities() {
(UserRole.findAllByUser(this) as List<UserRole>)*.role as Set<Role>
}
static constraints = {
password blank: false, password: true
username blank: false, unique: true
}
static mapping = {
password column: '`password`'
}
}Optionally, you can add other properties such as email, firstName, and lastName, convenience methods, and so on:
User.groovypackage com.mycompany.myapp
import groovy.transform.EqualsAndHashCode
import groovy.transform.ToString
import grails.compiler.GrailsCompileStatic
@GrailsCompileStatic
@EqualsAndHashCode(includes='username')
@ToString(includes='username', includeNames=true, includePackage=false)
class User implements Serializable {
private static final long serialVersionUID = 1
String username
String password
boolean enabled = true
String email (1)
String firstName (1)
String lastName (1)
boolean accountExpired
boolean accountLocked
boolean passwordExpired
def someMethod() { (2)
...
}
Set<Role> getAuthorities() {
(UserRole.findAllByUser(this) as List<UserRole>)*.role as Set<Role>
}
static constraints = {
password blank: false, password: true
username blank: false, unique: true
}
static mapping = {
password column: '`password`'
}
}| 1 | Other properties |
| 2 | Convenience methods |
The getAuthorities() method is analagous to defining static hasMany = [authorities: Authority] in a traditional many-to-many mapping. This way GormUserDetailsService can call user.authorities during login to retrieve the roles without the overhead of a bidirectional many-to-many mapping.
The class and property names are configurable using these configuration attributes:
| Property | Default Value | Meaning |
|---|---|---|
userLookup.userDomainClassName |
none |
User class name |
userLookup.usernamePropertyName |
“username” |
User class username property |
userLookup.passwordPropertyName |
“password” |
User class password property |
userLookup.authoritiesPropertyName |
“authorities” |
User class role collection property |
userLookup.enabledPropertyName |
“enabled” |
User class enabled property |
userLookup.accountExpiredPropertyName |
“accountExpired” |
User class account expired property |
userLookup.accountLockedPropertyName |
“accountLocked” |
User class account locked property |
userLookup.passwordExpiredPropertyName |
“passwordExpired” |
User class password expired property |
userLookup.authorityJoinClassName |
none |
User/Role many-many join class name |
Authority Class
The Spring Security plugin uses an “authority” class to represent a user’s roles in the application. In general this class restricts URLs to users who have been assigned the required access rights. A user can be granted multiple roles to indicate various access rights in the application, and should have at least one. A basic user who can access only non-restricted resources but can still authenticate is a bit unusual. Spring Security usually functions fine if a user has no granted authorities, but fails in a few places that assume one or more. So if a user authenticates successfully but has no granted roles, the plugin grants the user a “virtual” role, ROLE_NO_ROLES. Thus the user satisfies Spring Security’s requirements but cannot access secure resources, as you would not associate any secure resources with this role.
|
Note that you aren’t required to use roles at all; an application with simple security requirements could use the |
Like the “person” class, the “authority” class has a default name, Authority, and a default name for its one required property, authority.
If you want to use another existing domain class, it simply has to have a property for name. As with the name of the class, the names of the properties can be whatever you want - they’re specified in grails-app/conf/application.groovy.
Assuming you choose com.mycompany.myapp as your package, and Role as your class name, you’ll generate this class:
Role.groovypackage com.mycompany.myapp
import groovy.transform.EqualsAndHashCode
import groovy.transform.ToString
import grails.compiler.GrailsCompileStatic
@GrailsCompileStatic
@EqualsAndHashCode(includes='authority')
@ToString(includes='authority', includeNames=true, includePackage=false)
class Role implements Serializable {
private static final long serialVersionUID = 1
String authority
static constraints = {
authority blank: false, unique: true
}
static mapping = {
cache true
}
}The class and property names are configurable using these configuration attributes:
| Property | Default Value | Meaning |
|---|---|---|
authority.className |
none |
Role class name |
authority.nameField |
“authority” |
Role class role name property |
|
Role names must start with “ROLE_”. This is configurable in Spring Security, but not in the plugin. It would be possible to allow different prefixes, but it’s important that the prefix not be blank as the prefix is used to differentiate between role names and tokens such as IS_AUTHENTICATED_FULLY/IS_AUTHENTICATED_ANONYMOUSLY/etc., and SpEL expressions. The role names should be primarily an internal implementation detail; if you want to display friendlier names in a UI, it’s simple to remove the prefix first. |
PersonAuthority Class
The typical approach to mapping the relationship between “person” and “authority” is a many-to-many. Users have multiple roles, and roles are shared by multiple users. This approach can be problematic in Grails, because a popular role, for example, ROLE_USER, will be granted to many users in your application. GORM uses collections to manage adding and removing related instances and maps many-to-many relationships bidirectionally. Granting a role to a user requires loading all existing users who have that role because the collection is a Set. So even though no uniqueness concerns may exist, Hibernate loads them all to enforce uniqueness. The recommended approach in the plugin is to map a domain class to the join table that manages the many-to-many, and using that to grant and revoke roles to users.
Like the other domain classes, this class is generated for you, so you don’t need to deal with the details of mapping it. Assuming you choose com.mycompany.myapp as your package, and User and Role as your class names, you’ll generate this class:
UserRole.groovypackage com.mycompany.myapp
import grails.gorm.DetachedCriteria
import groovy.transform.ToString
import org.codehaus.groovy.util.HashCodeHelper
import grails.compiler.GrailsCompileStatic
@GrailsCompileStatic
@ToString(cache=true, includeNames=true, includePackage=false)
class UserRole implements Serializable {
private static final long serialVersionUID = 1
User user
Role role
@Override
boolean equals(other) {
if (other instanceof UserRole) {
other.userId == user?.id && other.roleId == role?.id
}
}
@Override
int hashCode() {
int hashCode = HashCodeHelper.initHash()
if (user) {
hashCode = HashCodeHelper.updateHash(hashCode, user.id)
}
if (role) {
hashCode = HashCodeHelper.updateHash(hashCode, role.id)
}
hashCode
}
static UserRole get(long userId, long roleId) {
criteriaFor(userId, roleId).get()
}
static boolean exists(long userId, long roleId) {
criteriaFor(userId, roleId).count()
}
private static DetachedCriteria criteriaFor(long userId, long roleId) {
UserRole.where {
user == User.load(userId) &&
role == Role.load(roleId)
}
}
static UserRole create(User user, Role role, boolean flush = false) {
def instance = new UserRole(user: user, role: role)
instance.save(flush: flush)
instance
}
static boolean remove(User u, Role r) {
if (u != null && r != null) {
UserRole.where { user == u && role == r }.deleteAll()
}
}
static int removeAll(User u) {
u == null ? 0 : UserRole.where { user == u }.deleteAll() as int
}
static int removeAll(Role r) {
r == null ? 0 : UserRole.where { role == r }.deleteAll() as int
}
static constraints = {
role validator: { Role r, UserRole ur ->
if (ur.user?.id) {
UserRole.withNewSession {
if (UserRole.exists(ur.user.id, r.id)) {
return ['userRole.exists']
}
}
}
}
}
static mapping = {
id composite: ['user', 'role']
version false
}
}The helper methods make it easy to grant or revoke roles. Assuming you have already loaded a user and a role, you grant the role to the user as follows:
Listing 1. Granting a role
User user = ...
Role role = ...
UserRole.create user, roleRevoking a role is similar:
Listing 2. Revoking a role
User user = ...
Role role = ...
UserRole.remove user, roleThe class name is the only configurable attribute:
| Property | Default Value | Meaning |
|---|---|---|
userLookup.authorityJoinClassName |
none |
User/Role many-many join class name |
Group Class
The plugin provides you the option of creating an access inheritance level between “person” and “authority”: the “group”. The next three classes you will read about (including this one) are only used in a “person”/“group”/“authority” implementation. Rather than granting authorities directly to a “person”, you can create a “group”, map authorities to it, and then map a “person” to that “group”. For applications that have a one or more groups of users who need the same level of access, having one or more “group” instances makes managing changes to access levels easier because the authorities that make up that access level are encapsulated in the “group”, and a single change will affect all of the users.
If you run the s2-quickstart script with the group name specified and use com.mycompany.myapp as your package and RoleGroup and Role as your class names, you’ll generate this class:
RoleGroup.groovypackage com.mycompany.myapp
import grails.gorm.DetachedCriteria
import groovy.transform.ToString
import org.codehaus.groovy.util.HashCodeHelper
import grails.compiler.GrailsCompileStatic
@GrailsCompileStatic
@ToString(cache=true, includeNames=true, includePackage=false)
class RoleGroupRole implements Serializable {
private static final long serialVersionUID = 1
RoleGroup roleGroup
Role role
@Override
boolean equals(other) {
if (other instanceof RoleGroupRole) {
other.roleId == role?.id && other.roleGroupId == roleGroup?.id
}
}
@Override
int hashCode() {
int hashCode = HashCodeHelper.initHash()
if (roleGroup) {
hashCode = HashCodeHelper.updateHash(hashCode, roleGroup.id)
}
if (role) {
hashCode = HashCodeHelper.updateHash(hashCode, role.id)
}
hashCode
}
static RoleGroupRole get(long roleGroupId, long roleId) {
criteriaFor(roleGroupId, roleId).get()
}
static boolean exists(long roleGroupId, long roleId) {
criteriaFor(roleGroupId, roleId).count()
}
private static DetachedCriteria criteriaFor(long roleGroupId, long roleId) {
RoleGroupRole.where {
roleGroup == RoleGroup.load(roleGroupId) &&
role == Role.load(roleId)
}
}
static RoleGroupRole create(RoleGroup roleGroup, Role role, boolean flush = false) {
def instance = new RoleGroupRole(roleGroup: roleGroup, role: role)
instance.save(flush: flush)
instance
}
static boolean remove(RoleGroup rg, Role r) {
if (rg != null && r != null) {
RoleGroupRole.where { roleGroup == rg && role == r }.deleteAll()
}
}
static int removeAll(Role r) {
r == null ? 0 : RoleGroupRole.where { role == r }.deleteAll() as int
}
static int removeAll(RoleGroup rg) {
rg == null ? 0 : RoleGroupRole.where { roleGroup == rg }.deleteAll() as int
}
static constraints = {
role validator: { Role r, RoleGroupRole rg ->
if (rg.roleGroup?.id) {
RoleGroupRole.withNewSession {
if (RoleGroupRole.exists(rg.roleGroup.id, r.id)) {
return ['roleGroup.exists']
}
}
}
}
}
static mapping = {
id composite: ['roleGroup', 'role']
version false
}
}When running the s2-quickstart script with the group name specified, the “person” class will be generated differently to accommodate the use of groups. Assuming you use com.mycompany.myapp as your package and User and RoleGroup as your class names, the getAuthorities() method will be generated like so:
Listing 3. The generated
getAuthorities() method when using role groupsSet<RoleGroup> getAuthorities() {
(UserRoleGroup.findAllByUser(this) as List<UserRoleGroup>)*.roleGroup as Set<RoleGroup>
}The plugin assumes the attribute authorities will provide the “authority” collection for each class, but you can change the property names in grails-app/conf/application.groovy. You also must ensure that the property useRoleGroups is set to true in order for GormUserDetailsService to properly retrieve the authorities.
| Property | Default Value | Meaning |
|---|---|---|
useRoleGroups |
|
Whether to use “authority group” implementation when loading user authorities |
authority.groupAuthorityNameField |
none (the s2-quickstart script uses the name “authorities”) |
RoleGroup class role collection property |
PersonGroup Class
The typical approach to mapping the relationship between “person” and “group” is a many-to-many. In a standard implementation, users have multiple roles, and roles are shared by multiple users. In a group implementation, users have multiple groups, and groups are shared by multiple users. For the same reason we would use a join class between “person” and “authority”, we should use one between “person” and “group”. Please note that when using groups, there should not be a join class between “person” and “authority”, since “group” resides between the two.
If you run the s2-quickstart script with the group name specified, this class will be generated for you, so you don’t need to deal with the details of mapping it. Assuming you choose com.mycompany.myapp as your package, and User and RoleGroup as your class names, you’ll generate this class:
UserRoleGroup.groovypackage com.mycompany.myapp
import grails.gorm.DetachedCriteria
import groovy.transform.ToString
import org.codehaus.groovy.util.HashCodeHelper
import grails.compiler.GrailsCompileStatic
@GrailsCompileStatic
@ToString(cache = true, includeNames = true, includePackage = false)
class UserRoleGroup implements Serializable {
private static final long serialVersionUID = 1
User user
RoleGroup roleGroup
@Override
boolean equals(other) {
if (other instanceof UserRoleGroup) {
other.userId == user?.id && other.roleGroupId == roleGroup?.id
}
false
}
@Override
int hashCode() {
int hashCode = HashCodeHelper.initHash()
if (user) {
hashCode = HashCodeHelper.updateHash(hashCode, user.id)
}
if (roleGroup) {
hashCode = HashCodeHelper.updateHash(hashCode, roleGroup.id)
}
hashCode
}
static UserRoleGroup get(long userId, long roleGroupId) {
criteriaFor(userId, roleGroupId).get()
}
static boolean exists(long userId, long roleGroupId) {
criteriaFor(userId, roleGroupId).count()
}
private static DetachedCriteria criteriaFor(long userId, long roleGroupId) {
UserRoleGroup.where {
user == User.load(userId) &&
roleGroup == RoleGroup.load(roleGroupId)
}
}
static UserRoleGroup create(User user, RoleGroup roleGroup, boolean flush = false) {
def instance = new UserRoleGroup(user: user, roleGroup: roleGroup)
instance.save(flush: flush)
instance
}
static boolean remove(User u, RoleGroup rg) {
if (u != null && rg != null) {
UserRoleGroup.where { user == u && roleGroup == rg }.deleteAll()
}
}
static int removeAll(User u) {
u == null ? 0 : UserRoleGroup.where { user == u }.deleteAll() as int
}
static int removeAll(RoleGroup rg) {
rg == null ? 0 : UserRoleGroup.where { roleGroup == rg }.deleteAll() as int
}
static constraints = {
user validator: { User u, UserRoleGroup ug ->
if (ug.roleGroup?.id) {
UserRoleGroup.withNewSession {
if (UserRoleGroup.exists(u.id, ug.roleGroup.id)) {
return ['userGroup.exists']
}
}
}
}
}
static mapping = {
id composite: ['roleGroup', 'user']
version false
}
}GroupAuthority Class
The typical approach to mapping the relationship between “group” and “authority” is a many-to-many. In a standard implementation, users have multiple roles, and roles are shared by multiple users. In a group implementation, groups have multiple roles and roles are shared by multiple groups. For the same reason we would use a join class between “person” and “authority”, we should use one between “group” and “authority”.
If you run the s2-quickstart script with the group name specified, this class will be generated for you, so you don’t need to deal with the details of mapping it. Assuming you choose com.mycompany.myapp as your package, and RoleGroup and Role as your class names, you’ll generate this class:
RoleGroupRole.groovypackage com.mycompany.myapp
import grails.gorm.DetachedCriteria
import groovy.transform.ToString
import org.codehaus.groovy.util.HashCodeHelper
import grails.compiler.GrailsCompileStatic
@GrailsCompileStatic
@ToString(cache=true, includeNames=true, includePackage=false)
class RoleGroupRole implements Serializable {
private static final long serialVersionUID = 1
RoleGroup roleGroup
Role role
@Override
boolean equals(other) {
if (other instanceof RoleGroupRole) {
other.roleId == role?.id && other.roleGroupId == roleGroup?.id
}
}
@Override
int hashCode() {
int hashCode = HashCodeHelper.initHash()
if (roleGroup) {
hashCode = HashCodeHelper.updateHash(hashCode, roleGroup.id)
}
if (role) {
hashCode = HashCodeHelper.updateHash(hashCode, role.id)
}
hashCode
}
static RoleGroupRole get(long roleGroupId, long roleId) {
criteriaFor(roleGroupId, roleId).get()
}
static boolean exists(long roleGroupId, long roleId) {
criteriaFor(roleGroupId, roleId).count()
}
private static DetachedCriteria criteriaFor(long roleGroupId, long roleId) {
RoleGroupRole.where {
roleGroup == RoleGroup.load(roleGroupId) &&
role == Role.load(roleId)
}
}
static RoleGroupRole create(RoleGroup roleGroup, Role role, boolean flush = false) {
def instance = new RoleGroupRole(roleGroup: roleGroup, role: role)
instance.save(flush: flush)
instance
}
static boolean remove(RoleGroup rg, Role r) {
if (rg != null && r != null) {
RoleGroupRole.where { roleGroup == rg && role == r }.deleteAll()
}
}
static int removeAll(Role r) {
r == null ? 0 : RoleGroupRole.where { role == r }.deleteAll() as int
}
static int removeAll(RoleGroup rg) {
rg == null ? 0 : RoleGroupRole.where { roleGroup == rg }.deleteAll() as int
}
static constraints = {
role validator: { Role r, RoleGroupRole rg ->
if (rg.roleGroup?.id) {
RoleGroupRole.withNewSession {
if (RoleGroupRole.exists(rg.roleGroup.id, r.id)) {
return ['roleGroup.exists']
}
}
}
}
}
static mapping = {
id composite: ['roleGroup', 'role']
version false
}
}Requestmap Domain Class
Create and use a domain class to store request mapping entries in the database instead of defining them with annotations
or in application.groovy. This option makes the rules configurable at runtime; you can add, remove and edit rules
without restarting your application.
| Property | Default Value | Meaning |
|---|---|---|
requestMap.className |
none - set to your implementation |
requestmap domain class |
requestMap.urlField |
"url" |
URL pattern property name |
requestMap.configAttributeField |
"configAttribute" |
authority pattern property name |
requestMap.httpMethodField |
"httpMethod" |
HTTP method property name (optional, does not have to exist in the class if you don’t require URL/method security) |
Assuming you choose com.mycompany.myapp as your package, and SecurityMapping as your class name, you’ll generate this class:
package com.mycompany.myapp
import org.springframework.http.HttpMethod
import groovy.transform.EqualsAndHashCode
import groovy.transform.ToString
import grails.compiler.GrailsCompileStatic
@GrailsCompileStatic
@EqualsAndHashCode(includes=['configAttribute', 'httpMethod', 'url'])
@ToString(includes=['configAttribute', 'httpMethod', 'url'], cache=true, includeNames=true, includePackage=false)
class SecurityMapping implements Serializable {
private static final long serialVersionUID = 1
String configAttribute
HttpMethod httpMethod
String url
static constraints = {
configAttribute(blank: false)
httpMethod(nullable: true)
url(blank: false, unique: 'httpMethod')
}
static mapping = {
cache(true)
}
}To use database entries to guard URLs, see Request Mappings Stored in the Database.
Configuring Request Mappings to Secure URLs
You can choose among the following approaches to configuring request mappings for secure application URLs. The goal is to map URL patterns to the roles required to access those URLs.
-
@Securedannotations (default approach) - Defining Secured Annotations -
A simple Map in
application.groovy- Static Map -
Requestmapdomain class instances stored in the database - Request Mappings Stored in the Database
You can only use one method at a time. You configure it with the securityConfigType attribute; the value has to be an SecurityConfigType enum value or the name of the enum as a String.
Pessimistic Lockdown
Many applications are mostly public, with some pages only accessible to authenticated users with various roles. In this case, it might make sense to leave URLs open by default and restrict access on a case-by-case basis. However, if your application is primarily secure, you can use a pessimistic lockdown approach to deny access to all URLs that do not have an applicable URL <==> Role request mapping. But the pessimistic approach is safer; if you forget to restrict access to a URL using the optimistic approach, it might take a while to discover that unauthorized users can access the URL, but if you forget to allow access when using the pessimistic approach, no user can access it and the error should be quickly discovered.
The pessimistic approach is the default, and there are two configuration options that apply. If rejectIfNoRule is true (the default) then any URL that has no request mappings (an annotation, entry in controllerAnnotations.staticRules or interceptUrlMap, or a Requestmap instance) will be denied to all users. The other option is fii.rejectPublicInvocations and if it is true (the default) then un-mapped URLs will trigger an IllegalArgumentException and will show the error page. This is uglier, but more useful because it’s very clear that there is a misconfiguration. When fii.rejectPublicInvocations is false but rejectIfNoRule is true you just see the “Sorry, you’re not authorized to view this page.” error 403 message.
Note that the two settings are mutually exclusive. If rejectIfNoRule is true then fii.rejectPublicInvocations is ignored because the request will transition to the login page or the error 403 page. If you want the more obvious error page, set fii.rejectPublicInvocations to true and rejectIfNoRule to false to allow that check to occur.
To reject un-mapped URLs with a 403 error code, use these settings (or none since rejectIfNoRule defaults to true)
Listing 4. Enabling
rejectIfNoRulegrails.plugin.springsecurity.rejectIfNoRule = true
grails.plugin.springsecurity.fii.rejectPublicInvocations = falseand to reject with the error 500 page, use these (optionally omit rejectPublicInvocations since it defaults to true):
Listing 5. Enabling
fii.rejectPublicInvocationsgrails.plugin.springsecurity.rejectIfNoRule = false
grails.plugin.springsecurity.fii.rejectPublicInvocations = trueNote that if you set rejectIfNoRule or rejectPublicInvocations to true you’ll need to configure the staticRules map to include URLs that can’t otherwise be guarded:
Listing 6. Example
controllerAnnotations.staticRules configuration when using rejectIfNoRule or fii.rejectPublicInvocationsgrails.plugin.springsecurity.controllerAnnotations.staticRules = [
[pattern: '/', access: ['permitAll']],
[pattern: '/error', access: ['permitAll']],
[pattern: '/index', access: ['permitAll']],
[pattern: '/index.gsp', access: ['permitAll']],
[pattern: '/shutdown', access: ['permitAll']],
[pattern: '/assets/**', access: ['permitAll']],
[pattern: '/**/js/**', access: ['permitAll']],
[pattern: '/**/css/**', access: ['permitAll']],
[pattern: '/**/images/**', access: ['permitAll']],
[pattern: '/**/favicon.ico', access: ['permitAll']]
]|
Note that the syntax of the The preceding Now in addition to the default mappings, we require an authentication with |
This is needed when using annotations; if you use the grails.plugin.springsecurity.interceptUrlMap map in application.groovy you’ll need to add these URLs too, and likewise when using Requestmap instances. If you don’t use annotations, you must add rules for the login and logout controllers also. You can add Requestmaps manually, or in BootStrap.groovy, for example:
Listing 7. Creating default requestmap instances when using
rejectIfNoRule or fii.rejectPublicInvocationsfor (String url in [
'/', '/error', '/index', '/index.gsp', '/**/favicon.ico', '/shutdown',
'/**/js/**', '/**/css/**', '/**/images/**',
'/login', '/login.*', '/login/*',
'/logout', '/logout.*', '/logout/*']) {
new Requestmap(url: url, configAttribute: 'permitAll').save()
}
springSecurityService.clearCachedRequestmaps()The analogous interceptUrlMap settings would be:
Listing 8. Example
interceptUrlMap configuration when using rejectIfNoRule or fii.rejectPublicInvocationsgrails.plugin.springsecurity.interceptUrlMap = [
[pattern: '/', access: ['permitAll']],
[pattern: '/error', access: ['permitAll']],
[pattern: '/index', access: ['permitAll']],
[pattern: '/index.gsp', access: ['permitAll']],
[pattern: '/shutdown', access: ['permitAll']],
[pattern: '/assets/**', access: ['permitAll']],
[pattern: '/**/js/**', access: ['permitAll']],
[pattern: '/**/css/**', access: ['permitAll']],
[pattern: '/**/images/**', access: ['permitAll']],
[pattern: '/**/favicon.ico', access: ['permitAll']],
[pattern: '/login/**', access: ['permitAll']],
[pattern: '/logout/**', access: ['permitAll']]
]In addition, when you enable the switch-user feature, you’ll have to specify access rules for the associated URLs, e.g.
[pattern: '/login/impersonate', access: ['ROLE_ADMIN']],
[pattern: '/logout/impersonate', access: ['permitAll']]URLs and Authorities
In each approach you configure a mapping for a URL pattern to the role(s) that are required to access those URLs, for example, /admin/user/** requires ROLE_ADMIN. In addition, you can combine the role(s) with SpEL expressions and/or tokens such as IS_AUTHENTICATED_ANONYMOUSLY, IS_AUTHENTICATED_REMEMBERED, and IS_AUTHENTICATED_FULLY. One or more voters (Voters) will process any tokens and enforce a rule based on them:
-
IS_AUTHENTICATED_ANONYMOUSLY
-
signifies that anyone can access this URL. By default the
AnonymousAuthenticationFilterensures an “anonymous”Authenticationwith no roles so that every user has an authentication. The token accepts any authentication, even anonymous. -
The SpEL expression
permitAllis equivalent toIS_AUTHENTICATED_ANONYMOUSLYand is typically more intuitive to use
-
-
IS_AUTHENTICATED_REMEMBERED
-
requires the user to be authenticated through a remember-me cookie or an explicit login.
-
The SpEL expression
isAuthenticated() or isRememberMe()is equivalent toIS_AUTHENTICATED_REMEMBEREDand is typically more intuitive to use
-
-
IS_AUTHENTICATED_FULLY
-
requires the user to be fully authenticated with an explicit login.
-
The SpEL expression
isFullyAuthenticated()is equivalent toIS_AUTHENTICATED_FULLYand is typically more intuitive to use
-
With IS_AUTHENTICATED_FULLY you can implement a security scheme whereby users can check a remember-me checkbox during login and be auto-authenticated each time they return to your site, but must still log in with a password for some parts of the site. For example, allow regular browsing and adding items to a shopping cart with only a cookie, but require an explicit login to check out or view purchase history.
For more information on IS_AUTHENTICATED_FULLY, IS_AUTHENTICATED_REMEMBERED, and IS_AUTHENTICATED_ANONYMOUSLY, see the Javadoc for AuthenticatedVoter
|
The plugin isn’t compatible with Grails both actions will be allowed if the user has permission to access the The workaround is to create separate forms without using |
Comparing the Approaches
Each approach has its advantages and disadvantages. Annotations and the application.groovy Map are less flexible because they are configured once in the code and you can update them only by restarting the application (in prod mode anyway). In practice this limitation is minor, because security mappings for most applications are unlikely to change at runtime.
On the other hand, storing Requestmap entries enables runtime-configurability. This approach gives you a core set of rules populated at application startup that you can edit, add to, and delete as needed. However, it separates the security rules from the application code, which is less convenient than having the rules defined in grails-app/conf/application.groovy or in the applicable controllers using annotations.
URLs must be mapped in lowercase if you use the Requestmap or grails-app/conf/application.groovy map approaches. For example, if you have a FooBarController, its urls will be of the form /fooBar/list, /fooBar/create, and so on, but these must be mapped as /foobar/, /foobar/list, /foobar/create. This mapping is handled automatically for you if you use annotations.
Defining Secured Annotations
You can use an @Secured annotation (either the standard org.springframework.security.access.annotation.Secured or the plugin’s grails.plugin.springsecurity.annotation.Secured which has the same attributes and features but also supports defining a closure as the config attribute to make authorization decisions) in your controllers to configure which roles are required for which actions. To use annotations, specify securityConfigType="Annotation", or leave it unspecified because it’s the default:
Listing 9. Specifying
securityConfigType as “Annotation”grails.plugin.springsecurity.securityConfigType = "Annotation"You can define the annotation at the class level, meaning that the specified roles are required for all actions, or at the action level, or both. If the class and an action are annotated then the action annotation values will be used since they’re more specific.
For example, given this controller:
Listing 10. An annotated controller
package com.mycompany.myapp
import grails.plugin.springsecurity.annotation.Secured
class SecureAnnotatedController {
@Secured('ROLE_ADMIN')
def index() {
render 'you have ROLE_ADMIN'
}
@Secured(['ROLE_ADMIN', 'ROLE_SUPERUSER'])
def adminEither() {
render 'you have ROLE_ADMIN or SUPERUSER'
}
def anybody() {
render 'anyone can see this' // assuming you're not using "strict" mode,
// otherwise the action is not viewable by anyone
}
}you must be authenticated and have ROLE_ADMIN to see /myapp/secureAnnotated (or /myapp/secureAnnotated/index) and be authenticated and have ROLE_ADMIN or ROLE_SUPERUSER to see /myapp/secureAnnotated/adminEither. Any user can access /myapp/secureAnnotated/anybody if you have disabled “strict” mode (using rejectIfNoRule), and nobody can access the action by default since it has no access rule configured.
In addition, you can define a closure in the annotation which will be called during access checking. The closure must return true or false and has all of the methods and properties that are available when using SpEL expressions, since the closure’s delegate is set to a subclass of WebSecurityExpressionRoot, and also the Spring ApplicationContext as the ctx property:
Listing 11. An example of using a Closure in with
@Secured@Secured(closure = {
assert request
assert ctx
authentication.name == 'admin1'
})
def someMethod() {
...
}Often most actions in a controller require similar access rules, so you can also define annotations at the class level:
package com.mycompany.myapp
import grails.plugin.springsecurity.annotation.Secured
@Secured('ROLE_ADMIN')
class SecureClassAnnotatedController {
def index() {
render 'index: you have ROLE_ADMIN'
}
def otherAction() {
render 'otherAction: you have ROLE_ADMIN'
}
@Secured('ROLE_SUPERUSER')
def super() {
render 'super: you have ROLE_SUPERUSER'
}
}Here you need to be authenticated and have ROLE_ADMIN to see /myapp/secureClassAnnotated (or /myapp/secureClassAnnotated/index) or /myapp/secureClassAnnotated/otherAction. However, you must have ROLE_SUPERUSER to access /myapp/secureClassAnnotated/super. The action-scope annotation overrides the class-scope annotation. Note that “strict” mode isn’t applicable here since all actions have an access rule defined (either explicitly or inherited from the class-level annotation).
Additionally, you can specify the HTTP method that is required in each annotation for the access rule, e.g.
package com.mycompany.myapp
import grails.plugin.springsecurity.annotation.Secured
class SecureAnnotatedController {
@Secured(value = ['ROLE_ADMIN'], httpMethod = 'GET')
def create() {
...
}
@Secured(value = ['ROLE_ADMIN'], httpMethod = 'POST')
def save() {
...
}
}Here you must have ROLE_ADMIN for both the create and save actions but create requires a GET request (since it renders the form to create a new instance) and save requires POST (since it’s the action that the form posts to).
Securing RESTful domain classes
Since Grails 2.3, domain classes can be annotated with the grails.rest.Resource AST transformation, which will generate internally a controller with the default CRUD operations.
You can also use the @Secured annotation on such domain classes:
@Resource
@Secured('ROLE_ADMIN')
class Thing {
String name
}controllerAnnotations.staticRules
You can also define “static” mappings that cannot be expressed in the controllers, such as '/**' or for JavaScript, CSS, or image URLs. Use the controllerAnnotations.staticRules property.
In application.groovy:
Listing 12. Static rules in
application.groovygrails.plugin.springsecurity.controllerAnnotations.staticRules = [
[pattern: '/js/admin/**', access: ['ROLE_ADMIN']],
[pattern: '/someplugin/**', access: ['ROLE_ADMIN']]
]Or equivalently in application.yml:
Listing 13. Static rules in
application.yml (flow mapping)grails:
plugin:
springsecurity:
controllerAnnotations:
staticRules:
- { pattern: '/js/admin/**', access: ['ROLE_ADMIN'] }
- { pattern: '/someplugin/**', access: ['ROLE_ADMIN'] }Block mapping syntax also works:
Listing 14. Static rules in
application.yml (block mapping)grails:
plugin:
springsecurity:
controllerAnnotations:
staticRules:
- pattern: '/js/admin/**'
access:
- ROLE_ADMIN
- pattern: '/someplugin/**'
access:
- ROLE_ADMINThis example maps all URLs associated with SomePluginController, which has URLs of the form /someplugin/…, to ROLE_ADMIN; annotations are not an option here because you would not edit plugin code for a change like this.
|
The Listing 15. Incorrect - single Map instead of List of Maps
This will fail with: “Static rules defined as a Map are not supported; must be specified as a List of Maps”. Each rule must be prefixed with |
|
When mapping URLs for controllers that are mapped in |
Static Map
To use a static map to secure URLs, first specify securityConfigType="InterceptUrlMap":
Listing 16. Specifying
securityConfigType as “InterceptUrlMap” in application.groovygrails.plugin.springsecurity.securityConfigType = "InterceptUrlMap"Or in application.yml:
Listing 17. Specifying
securityConfigType as “InterceptUrlMap” in application.ymlgrails:
plugin:
springsecurity:
securityConfigType: InterceptUrlMapThen define the URL mappings. In application.groovy:
Listing 18. Example
interceptUrlMap in application.groovygrails.plugin.springsecurity.interceptUrlMap = [
[pattern: '/', access: ['permitAll']],
[pattern: '/error', access: ['permitAll']],
[pattern: '/index', access: ['permitAll']],
[pattern: '/index.gsp', access: ['permitAll']],
[pattern: '/shutdown', access: ['permitAll']],
[pattern: '/assets/**', access: ['permitAll']],
[pattern: '/**/js/**', access: ['permitAll']],
[pattern: '/**/css/**', access: ['permitAll']],
[pattern: '/**/images/**', access: ['permitAll']],
[pattern: '/**/favicon.ico', access: ['permitAll']],
[pattern: '/login', access: ['permitAll']],
[pattern: '/login/**', access: ['permitAll']],
[pattern: '/logout', access: ['permitAll']],
[pattern: '/logout/**', access: ['permitAll']]
]Or equivalently in application.yml:
Listing 19. Example
interceptUrlMap in application.ymlgrails:
plugin:
springsecurity:
interceptUrlMap:
- { pattern: '/', access: ['permitAll'] }
- { pattern: '/error', access: ['permitAll'] }
- { pattern: '/index', access: ['permitAll'] }
- { pattern: '/index.gsp', access: ['permitAll'] }
- { pattern: '/shutdown', access: ['permitAll'] }
- { pattern: '/assets/**', access: ['permitAll'] }
- { pattern: '/**/js/**', access: ['permitAll'] }
- { pattern: '/**/css/**', access: ['permitAll'] }
- { pattern: '/**/images/**', access: ['permitAll'] }
- { pattern: '/**/favicon.ico', access: ['permitAll'] }
- { pattern: '/login', access: ['permitAll'] }
- { pattern: '/login/**', access: ['permitAll'] }
- { pattern: '/logout', access: ['permitAll'] }
- { pattern: '/logout/**', access: ['permitAll'] }Add any custom mappings as needed, e.g.
Listing 20. Custom
interceptUrlMap mappings in application.groovygrails.plugin.springsecurity.interceptUrlMap = [
...
[pattern: '/secure/**', access: ['ROLE_ADMIN']],
[pattern: '/finance/**', access: ['ROLE_FINANCE', 'IS_AUTHENTICATED_FULLY']]
]Listing 21. Custom
interceptUrlMap mappings in application.ymlgrails:
plugin:
springsecurity:
interceptUrlMap:
- { pattern: '/secure/**', access: ['ROLE_ADMIN'] }
- { pattern: '/finance/**', access: ['ROLE_FINANCE', 'IS_AUTHENTICATED_FULLY'] }When using this approach, make sure that you order the rules correctly. The first applicable rule is used, so for example if you have a controller that has one set of rules but an action that has stricter access rules, e.g.
Listing 22. Incorrect
interceptUrlMap order[pattern: '/secure/**', access: ['ROLE_ADMIN', 'ROLE_SUPERUSER']],
[pattern: '/secure/reallysecure/**', access: ['ROLE_SUPERUSER']]then this would fail - it wouldn’t restrict access to /secure/reallysecure/list to a user with ROLE_SUPERUSER since the first URL pattern matches, so the second would be ignored. The correct mapping would be
Listing 23. Correct
interceptUrlMap order[pattern: '/secure/reallysecure/**', access: ['ROLE_SUPERUSER']],
[pattern: '/secure/**', access: ['ROLE_ADMIN', 'ROLE_SUPERUSER']]Request Mappings Stored in the Database
With this approach you create and use a domain class to store security mapping entries in the database.
The domain class must have the following properties:
-
url- the secured URL pattern -
httpMethod- the http method for which the rule applies (or null for all methods) -
configAttribute- containing a comma-delimited list of required roles, SpEL expressions, and/or tokens such asIS_AUTHENTICATED_FULLY,IS_AUTHENTICATED_REMEMBERED, andIS_AUTHENTICATED_ANONYMOUSLY
To use database-backed url security mappings, use the following configuration:
Listing 24. Configuring database-backed url security rules
grails.plugin.springsecurity.securityConfigType = 'Requestmap'
grails.plugin.springsecurity.requestMap.className = 'com.mycompany.myapp.SecurityMapping'See Requestmap Domain Class for an example request map domain class.
You create request map entries as you create entries in any Grails domain class:
Listing 25. Creating request map entries
for (String url in [
'/', '/error', '/index', '/index.gsp', '/**/favicon.ico', '/shutdown',
'/assets/**', '/**/js/**', '/**/css/**', '/**/images/**',
'/login', '/login.*', '/login/*',
'/logout', '/logout.*', '/logout/*']) {
new SecurityMapping(url: url, configAttribute: 'permitAll').save()
}
new SecurityMapping(url: '/profile/**', configAttribute: 'ROLE_USER').save()
new SecurityMapping(url: '/admin/**', configAttribute: 'ROLE_ADMIN').save()
new SecurityMapping(url: '/admin/role/**', configAttribute: 'ROLE_SUPERVISOR').save()
new SecurityMapping(url: '/admin/user/**',
configAttribute: 'ROLE_ADMIN,ROLE_SUPERVISOR').save()
new SecurityMapping(url: '/login/impersonate',
configAttribute: 'ROLE_SWITCH_USER,IS_AUTHENTICATED_FULLY').save()
springSecurityService.clearCachedRequestmaps()The configAttribute value can have a single value or have multiple comma-delimited values. In this example only users with ROLE_ADMIN or ROLE_SUPERVISOR can access /admin/user/** urls, and only users with ROLE_SWITCH_USER can access the switch-user url (/login/impersonate) and in addition must be authenticated fully, i.e. not using a remember-me cookie. Note that when specifying multiple roles, the user must have at least one of them, but when combining IS_AUTHENTICATED_FULLY, IS_AUTHENTICATED_REMEMBERED, or IS_AUTHENTICATED_ANONYMOUSLY with one or more roles means the user must have one of the roles and satisfy the IS_AUTHENTICATED rule.
Unlike the application.groovy map approach (Static Map), you do not need to revise the request map entry order because the plugin calculates the most specific rule that applies to the current request.
Request Map Cache
Request map entries are cached for performance, but caching affects runtime configurability. If you create, edit, or delete an instance, the cache must be flushed and repopulated to be consistent with the database. You can call springSecurityService.clearCachedRequestmaps() to do this. For example, if you create a RequestSecurityRuleController the save action should look like this (and the update and delete actions should similarly call clearCachedRequestmaps()):
Listing 26. Calling
clearCachedRequestmaps()class SecurityMappingController {
def springSecurityService
//...
def save(SecurityMapping mapping) {
if (!mapping.save(flush: true)) {
render(view: 'create', model: [instance: mapping])
return
}
springSecurityService.clearCachedRequestmaps()
flash.message = 'Mapping saved'
redirect(action: 'show', id: mapping.id)
}
}Using Expressions to Create Descriptive, Fine-Grained Rules
Spring Security uses the Spring Expression Language (SpEL), which allows you to declare the rules for guarding URLs more descriptively than does the traditional approach, and also allows much more fine-grained rules. Where you traditionally would specify a list of role names and/or special tokens (for example, IS_AUTHENTICATED_FULLY), with Spring Security’s expression support, you can instead use the embedded scripting language to define simple or complex access rules.
You can use expressions with any of the previously described approaches to securing application URLs. For example, consider this annotated controller:
Listing 27. An annotated controller
package com.yourcompany.yourapp
import grails.plugin.springsecurity.annotation.Secured
class SecureController {
@Secured("hasRole('ROLE_ADMIN')")
def someAction() {
...
}
@Secured("authentication.name == 'ralph'")
def someOtherAction() {
...
}
}In this example, someAction requires ROLE_ADMIN, and someOtherAction requires that the user be logged in with username “ralph”.
The corresponding Requestmap URLs would be
Listing 28. Creating Requestmap instances
new Requestmap(url: "/secure/someAction",
configAttribute: "hasRole('ROLE_ADMIN')").save()
new Requestmap(url: "/secure/someOtherAction",
configAttribute: "authentication.name == 'ralph'").save()and the corresponding static mappings would be
Listing 29. Adding mappings in
grails.plugin.springsecurity.controllerAnnotations.staticRulesgrails.plugin.springsecurity.controllerAnnotations.staticRules = [
[pattern: '/secure/someAction', access: ["hasRole('ROLE_ADMIN')"]],
[pattern: '/secure/someOtherAction', access: ["authentication.name == 'ralph'"]]
]The Spring Security docs have a table listing the standard expressions, which is copied here for reference:
| Expression | Description |
|---|---|
|
Returns |
|
Returns |
|
Allows direct access to the principal object representing the current user |
|
Allows direct access to the current |
|
Always evaluates to |
|
Always evaluates to |
|
Returns |
|
Returns |
|
Returns |
|
Returns |
|
the HTTP request, allowing expressions such as “isFullyAuthenticated() or request.getMethod().equals('OPTIONS')” |
In addition, you can use a web-specific expression hasIpAddress. However, you may find it more convenient to separate IP restrictions from role restrictions by using the IP address filter (IP Address Restrictions).
To help you migrate traditional configurations to expressions, this table compares various configurations and their corresponding expressions:
| Traditional Config | Expression |
|---|---|
|
|
|
|
|
|
|
|
|
|
|
|
Helper Classes
Use the plugin helper classes in your application to avoid dealing with some lower-level details of Spring Security.
SecurityTagLib
The plugin includes GSP tags to support conditional display based on whether the user is authenticated, and/or has the required role to perform a particular action. These tags are in the sec namespace and are implemented in grails.plugin.springsecurity.SecurityTagLib.
ifLoggedIn
Displays the inner body content if the user is authenticated.
Example:
Listing 30. Example using
<sec:ifLoggedIn><sec:ifLoggedIn>
Welcome Back!
</sec:ifLoggedIn>ifNotLoggedIn
Displays the inner body content if the user is not authenticated.
Example:
Listing 31. Example using
<sec:ifNotLoggedIn><sec:ifNotLoggedIn>
<g:link controller='login' action='auth'>Login</g:link>
</sec:ifNotLoggedIn>ifAllGranted
Displays the inner body content only if all of the listed roles are granted.
Example:
Listing 32. Example using
<sec:ifAllGranted><sec:ifAllGranted roles='ROLE_ADMIN,ROLE_SUPERVISOR'>
...
secure stuff here
...
</sec:ifAllGranted>ifAnyGranted
Displays the inner body content if at least one of the listed roles are granted.
Example:
Listing 33. Example using
<sec:ifAnyGranted><sec:ifAnyGranted roles='ROLE_ADMIN,ROLE_SUPERVISOR'>
...
secure stuff here
...
</sec:ifAnyGranted>ifNotGranted
Displays the inner body content if none of the listed roles are granted.
Example:
Listing 34. Example using
<sec:ifNotGranted><sec:ifNotGranted roles='ROLE_USER'>
...
non-user stuff here
...
</sec:ifNotGranted>loggedInUserInfo
Displays the value of the specified UserDetails property if logged in. For example, to show the username property:
Listing 35. Example using
<sec:loggedInUserInfo><sec:loggedInUserInfo field='username'/>If you have customized the UserDetails (e.g. with a custom UserDetailsService) to add a fullName property, you access it as follows:
Listing 36. Example using
<sec:loggedInUserInfo> for a nonstandard propertyWelcome Back <sec:loggedInUserInfo field='fullName'/>username
Displays the value of the UserDetails username property if logged in.
Listing 37. Example using
<sec:username><sec:ifLoggedIn>
Welcome Back <sec:username/>!
</sec:ifLoggedIn>
<sec:ifNotLoggedIn>
<g:link controller='login' action='auth'>Login</g:link>
</sec:ifNotLoggedIn>ifSwitched
Displays the inner body content only if the current user switched from another user. (See also Switch User.)
Listing 38. Example using
<sec:ifSwitched> and <sec:ifNotSwitched><sec:ifLoggedIn>
Logged in as <sec:username/>
</sec:ifLoggedIn>
<sec:ifSwitched>
<form action='${request.contextPath}/logout/impersonate' method='POST'>
<input type='submit' value="Resume as ${grails.plugin.springsecurity.SpringSecurityUtils.switchedUserOriginalUsername}"/>
</form>
</sec:ifSwitched>
<sec:ifNotSwitched>
<sec:ifAllGranted roles='ROLE_SWITCH_USER'>
<form action='${request.contextPath}/login/impersonate'
method='POST'>
Switch to user: <input type='text' name='username'/><br/>
<input type='submit' value='Switch'/> </form>
</sec:ifAllGranted>
</sec:ifNotSwitched>ifNotSwitched
Displays the inner body content only if the current user has not switched from another user.
switchedUserOriginalUsername
Renders the original user’s username if the current user switched from another user.
Listing 39. Example using
<sec:switchedUserOriginalUsername><sec:ifSwitched>
<form action='${request.contextPath}/logout/impersonate' method='POST'>
<input type='submit' value="Resume as ${grails.plugin.springsecurity.SpringSecurityUtils.switchedUserOriginalUsername}"/>
</form>
</sec:ifSwitched>access
Renders the body if the specified expression evaluates to true or specified URL is allowed.
Listing 40. Example using
<sec:access> with an expression<sec:access expression="hasRole('ROLE_USER')">
You're a user
</sec:access>Listing 41. Example using
<sec:access> with a URL<sec:access url='/admin/user'>
<g:link controller='admin' action='user'>Manage Users</g:link>
</sec:access>You can also guard access to links generated from controller and action names or named URL mappings instead of hard-coding the values, for example
Listing 42. Example using
<sec:access> with a controller and action<sec:access controller='admin' action='user'>
<g:link controller='admin' action='user'>Manage Users</g:link>
</sec:access>or if you have a named URL mapping you can refer to that:
Listing 43. Example using
<sec:access> with a URL mapping<sec:access mapping='manageUsers'>
<g:link mapping='manageUsers'>Manage Users</g:link>
</sec:access>For even more control of the generated URL (still avoiding hard-coding) you can use createLink to build the URL, for example
Listing 44. Example using
<sec:access> with <g:createLink><sec:access url='${createLink(controller: 'admin', action: 'user', base: '/')}'>
<g:link controller='admin' action='user'>Manage Users</g:link>
</sec:access>Be sure to include the base: '/' attribute in this case to avoid appending the context name to the URL.
noAccess
Renders the body if the specified expression evaluates to false or URL isn’t allowed.
Listing 45. Example using
<sec:noAccess><sec:noAccess expression="hasRole('ROLE_USER')">
You're not a user
</sec:noAccess>link
A wrapper around the standard Grails link tag that renders if the specified expression evaluates to true or URL is allowed.
To define the expression to evaluate within the tag itself:
Listing 46. Example using
<sec:link> with an expression<sec:link controller='myController' action='myAction' expression="hasRole('ROLE_USER')">My link text</sec:link>To use access controls defined, for example, in the interceptUrlMap:
Listing 47. Example using
<sec:link> without an expression<sec:link controller='myController' action='myAction'>My link text</sec:link>By default, nothing will be rendered if the specified expression evaluates to false or URL is not allowed. To render only the text that would have been linked, set the fallback attribute:
Listing 48. Example using
<sec:link fallback='true'> without an expression<sec:link controller='myController' action='myAction' fallback='true'>This text will display but won't be linked if the user doesn't have access</sec:link>SpringSecurityService
grails.plugin.springsecurity.SpringSecurityService provides security utility functions. It is a regular Grails service, so you use dependency injection to inject it into a controller, service, taglib, and so on:
def springSecurityServicegetCurrentUser()
Retrieves a domain class instance for the currently authenticated user. During authentication a user/person domain class instance is retrieved to get the user’s password, roles, etc. and the id of the instance is saved. This method uses the id and the domain class to re-load the instance, or the username if the UserDetails instance is not a GrailsUser.
If you do not need domain class data other than the id, you should use the loadCurrentUser method instead.
Example:
Listing 49. Example using
getCurrentUser()class SomeController {
def springSecurityService
def someAction() {
def user = springSecurityService.currentUser
...
}
}loadCurrentUser()
Often it is not necessary to retrieve the entire domain class instance, for example when using it in a query where only the id is needed as a foreign key. This method uses the GORM load method to create a proxy instance. This will never be null, but can be invalid if the id doesn’t correspond to a row in the database, although this is very unlikely in this scenario because the instance would have been there during authentication.
If you need other data than just the id, use the getCurrentUser method instead.
Example:
Listing 50. Example using
loadCurrentUser()class SomeController {
def springSecurityService
def someAction(Long id) {
def user = springSecurityService.isLoggedIn() ?
springSecurityService.loadCurrentUser() :
null
if (user) {
CreditCard card = CreditCard.findByIdAndUser(id, user)
...
}
...
}
}isLoggedIn()
Checks whether there is a currently logged-in user.
Example:
Listing 51. Example using
isLoggedIn()class SomeController {
def springSecurityService
def someAction() {
if (springSecurityService.isLoggedIn()) {
...
}
else {
...
}
}
}getAuthentication()
Retrieves the current user’s Authentication. If authenticated, this will typically be a UsernamePasswordAuthenticationToken.
If not authenticated and the AnonymousAuthenticationFilter is active (true by default) then the anonymous user’s authentication will be returned. This will be an instance of grails.plugin.springsecurity.authentication.GrailsAnonymousAuthenticationToken with a standard org.springframework.security.core.userdetails.User instance as its Principal. The authentication will have a single granted role, ROLE_ANONYMOUS.
Example:
Listing 52. Example using
getAuthentication()class SomeController {
def springSecurityService
def someAction() {
def auth = springSecurityService.authentication
String username = auth.username
def authorities = auth.authorities // a Collection of GrantedAuthority
boolean authenticated = auth.authenticated
...
}
}getPrincipal()
Retrieves the currently logged in user’s Principal. If authenticated, the principal will be a grails.plugin.springsecurity.userdetails.GrailsUser, unless you have created a custom UserDetailsService, in which case it will be whatever implementation of UserDetails you use there.
If not authenticated and the AnonymousAuthenticationFilter is active (true by default) then a standard org.springframework.security.core.userdetails.User is used.
Example:
Listing 53. Example using
getPrincipal()class SomeController {
def springSecurityService
def someAction() {
def principal = springSecurityService.principal
String username = principal.username
def authorities = principal.authorities // a Collection of GrantedAuthority
boolean enabled = principal.enabled
...
}
}encodePassword()
Hashes a password with the configured hashing scheme. By default the plugin uses bcrypt, but you can configure the scheme with the grails.plugin.springsecurity.password.algorithm attribute in application.groovy. The supported values are ‘bcrypt’ to use bcrypt, ‘pbkdf2’ to use PBKDF2, or any message digest algorithm that is supported in your JDK; see this Java page for the available algorithms.
|
You are strongly discouraged from using MD5 or SHA-1 algorithms because of their well-known vulnerabilities. You should also use a salt for your passwords, which greatly increases the computational complexity of computing passwords if your database gets compromised. See Salted Passwords. |
Example:
Listing 54. Example using
encodePassword()class PersonController {
def springSecurityService
def updateAction(Person person) {
params.salt = person.salt
if (person.password != params.password) {
params.password = springSecurityService.encodePassword(password, salt)
def salt = ... // e.g. randomly generated using some utility method
params.salt = salt
}
person.properties = params
if (!person.save(flush: true)) {
render view: 'edit', model: [person: person]
return
}
redirect action: 'show', id: person.id
}
}|
If you are hashing the password in an PersistenceEventListener or in the User domain class (using |
updateRole()
Updates a role and, if you use Requestmap instances to secure URLs, updates the role name in all affected Requestmap definitions if the name was changed.
Example:
Listing 55. Example using
updateRole()class RoleController {
def springSecurityService
def update(Role role) {
if (!springSecurityService.updateRole(role, params)) {
render view: 'edit', model: [roleInstance: role]
return
}
flash.message = "The role was updated"
redirect action: show, id: role.id
}
}deleteRole()
Deletes a role and, if you use Requestmap instances to secure URLs, removes the role from all affected Requestmap definitions. If a Requestmap's config attribute is only the role name (for example, [pattern: '/foo/bar', access: 'ROLE_FOO']), it is deleted.
Example:
Listing 56. Example using
deleteRole()class RoleController {
def springSecurityService
def delete(Role role) {
try {
springSecurityService.deleteRole role
flash.message = "The role was deleted"
redirect action: list
}
catch (DataIntegrityViolationException e) {
flash.message = "Unable to delete the role"
redirect action: show, id: params.id
}
}
}clearCachedRequestmaps()
Flushes the Requestmaps cache and triggers a complete reload. If you use Requestmap instances to secure URLs, the plugin loads and caches all Requestmap instances as a performance optimization. This action saves database activity because the requestmaps are checked for each request. Do not allow the cache to become stale. When you create, edit or delete a Requestmap, flush the cache. Both updateRole() and deleteRole() call clearCachedRequestmaps()for you. Call this method when you create a new Requestmap or do other Requestmap work that affects the cache.
Example:
Listing 57. Example using
clearCachedRequestmaps()class RequestmapController {
def springSecurityService
def save(Requestmap requestmap) {
if (!requestmap.save(flush: true)) {
render view: 'create', model: [requestmapInstance: requestmap]
return
}
springSecurityService.clearCachedRequestmaps()
flash.message = "Requestmap created"
redirect action: show, id: requestmap.id
}
}reauthenticate()
Rebuilds an Authentication for the given username and registers it in the security context. You typically use this method after updating a user’s authorities or other data that is cached in the Authentication or Principal. It also removes the user from the user cache to force a refresh at next login.
Example:
Listing 58. Example using
reauthenticate()class UserController {
def springSecurityService
def update(User user) {
params.salt = user.salt
if (params.password) {
params.password = springSecurityService.encodePassword(params.password, salt)
def salt = ... // e.g. randomly generated using some utility method
params.salt = salt
}
user.properties = params
if (!user.save(flush: true)) {
render view: 'edit', model: [userInstance: user]
return
}
if (springSecurityService.loggedIn &&
springSecurityService.principal.username == user.username) {
springSecurityService.reauthenticate user.username
}
flash.message = "The user was updated"
redirect action: show, id: user.id
}
}SpringSecurityUtils
grails.plugin.springsecurity.SpringSecurityUtils is a utility class with static methods that you can call directly without using dependency injection. It is primarily an internal class but can be called from application code.
authoritiesToRoles()
Extracts role names from an array or Collection of GrantedAuthority.
getPrincipalAuthorities()
Retrieves the currently logged-in user’s authorities. It is empty (but never null) if the user is not logged in.
parseAuthoritiesString()
Splits a comma-delimited String containing role names into a List of GrantedAuthority.
ifAllGranted()
Checks whether the current user has all specified roles (a comma-delimited String of role names). Primarily used by SecurityTagLib.ifAllGranted.
ifNotGranted()
Checks whether the current user has none of the specified roles (a comma-delimited String of role names). Primarily used by SecurityTagLib.ifNotGranted.
ifAnyGranted()
Checks whether the current user has any of the specified roles (a comma-delimited String of role names). Primarily used by SecurityTagLib.ifAnyGranted.
getSecurityConfig()
Retrieves the security part of the Configuration (from grails-app/conf/application.groovy merged with the plugin’s default configuration).
loadSecondaryConfig()
Used by dependent plugins to add configuration attributes.
reloadSecurityConfig()
Forces a reload of the security configuration.
isAjax()
Checks whether the request was triggered by an Ajax call. The standard way is to determine whether X-Requested-With request header is set and has the value XMLHttpRequest. In addition, you can configure the name of the header with the grails.plugin.springsecurity.ajaxHeader configuration attribute, but this is not recommended because all major JavaScript toolkits use the standard name. Further, you can register a closure in application.groovy with the name ajaxCheckClosure that will be used to check if a request is an Ajax request. It is passed the request as its single argument, e.g.
Listing 59. Customizing Ajax detection with
grails.plugin.springsecurity.ajaxCheckClosuregrails.plugin.springsecurity.ajaxCheckClosure = { request ->
// return true or false
}You can also force the request to be treated as Ajax by appending &ajax=true to your request query string.
registerProvider()
Used by dependent plugins to register an AuthenticationProvider bean name.
registerFilter()
Used by dependent plugins to register a filter bean name in a specified position in the filter chain.
isSwitched()
Checks whether the current user switched from another user.
getSwitchedUserOriginalUsername()
Gets the original user’s username if the current user switched from another user.
doWithAuth()
Executes a Closure with the current authentication. The one-parameter version which takes just a Closure assumes that there’s an authentication in the HTTP Session and that the Closure is running in a separate thread from the web request, so the SecurityContext and Authentication aren’t available to the standard ThreadLocal. This is primarily of use when you explicitly launch a new thread from a controller action or service called in request scope, not from a Quartz job which isn’t associated with an authentication in any thread.
The two-parameter version takes a username and a Closure to authenticate as. This is will authenticate as the specified user and execute the closure with that authentication. It restores the authentication to the one that was active if it exists, or clears the context otherwise. This is similar to run-as and switch-user but is only local to the Closure.
Events
Spring Security fires application events after various security-related actions such as successful login, unsuccessful login, and so on. Spring Security uses two main event classes, AbstractAuthenticationEvent and AbstractAuthorizationEvent.
Event Notification
You can set up event notifications in two ways. The sections that follow describe each approach in more detail.
-
Register an event listener, ignoring events that do not interest you. Spring allows only partial event subscription; you use generics to register the class of events that interest you, and you are notified of that class and all subclasses.
-
Register one or more callback closures in
grails-app/conf/application.groovythat take advantage of the plugin’sgrails.plugin.springsecurity.SecurityEventListener. The listener does the filtering for you.
AuthenticationEventPublisher
Spring Security publishes events using an AuthenticationEventPublisher which in turn fire events using the ApplicationEventPublisher. By default no events are fired since the AuthenticationEventPublisher instance registered is a grails.plugin.springsecurity.authentication.NullAuthenticationEventPublisher. But you can enable event publishing by setting grails.plugin.springsecurity.useSecurityEventListener = true in grails-app/conf/application.groovy.
You can use the useSecurityEventListener setting to temporarily disable and enable the callbacks, or enable them per-environment.
UsernameNotFoundException
Most authentication exceptions trigger an event with a similar name as described in this table:
| Exception | Event |
|---|---|
|
|
|
|
|
|
|
|
|
|
|
|
|
|
|
|
This holds for all exceptions except UsernameNotFoundException which triggers an AuthenticationFailureBadCredentialsEvent just like a BadCredentialsException. This is a good idea since it doesn’t expose extra information - there’s no differentiation between a bad password and a missing user. In addition, by default a missing user will trigger a BadCredentialsException for the same reasons. You can configure Spring Security to re-throw the original UsernameNotFoundException instead of converting it to a BadCredentialsException by setting grails.plugin.springsecurity.dao.hideUserNotFoundExceptions = false in grails-app/conf/application.groovy.
Fortunately all subclasses of AbstractAuthenticationFailureEvent have a getException() method that gives you access to the exception that triggered the event, so you can use that to differentiate between a bad password and a missing user (if hideUserNotFoundExceptions=false).
Registering an Event Listener
Enable events with grails.plugin.springsecurity.useSecurityEventListener = true and create one or more Groovy or Java classes, for example:
MySecurityEventListener.groovypackage com.foo.bar
import org.springframework.context.ApplicationListener
import org.springframework.security.authentication.event.AuthenticationSuccessEvent
class MySecurityEventListener
implements ApplicationListener<AuthenticationSuccessEvent> {
void onApplicationEvent(AuthenticationSuccessEvent event) {
// handle the event
}
}Register the class in grails-app/conf/spring/resources.groovy:
Listing 60. Registration of the event listener bean in
resources.groovyimport com.foo.bar.MySecurityEventListener
beans = {
mySecurityEventListener(MySecurityEventListener)
}Registering Callback Closures
Alternatively, enable events with grails.plugin.springsecurity.useSecurityEventListener = true and register one or more callback closure(s) in grails-app/conf/application.groovy and let SecurityEventListener do the filtering.
Implement the event handlers that you need, for example:
Listing 61. Adding event handling closures in
application.groovygrails.plugin.springsecurity.useSecurityEventListener = true
grails.plugin.springsecurity.onInteractiveAuthenticationSuccessEvent = { e, appCtx ->
// handle InteractiveAuthenticationSuccessEvent
}
grails.plugin.springsecurity.onAbstractAuthenticationFailureEvent = { e, appCtx ->
// handle AbstractAuthenticationFailureEvent
}
grails.plugin.springsecurity.onAuthenticationSuccessEvent = { e, appCtx ->
// handle AuthenticationSuccessEvent
}
grails.plugin.springsecurity.onAuthenticationSwitchUserEvent = { e, appCtx ->
// handle AuthenticationSwitchUserEvent
}
grails.plugin.springsecurity.onAuthorizationEvent = { e, appCtx ->
// handle AuthorizationEvent
}None of these closures are required; if none are configured, nothing will be called. Just implement the event handlers that you need.
|
When a user authenticates, Spring Security initially fires an |
User, Authority (Role), and Requestmap Properties
Properties you are most likely to override are the User and Authority (and Requestmap if you use the database to store mappings) class and property names.
| Property | Default Value | Meaning |
|---|---|---|
userLookup.userDomainClassName |
none |
User class name |
userLookup.usernamePropertyName |
“username” |
User class username property |
userLookup.usernameIgnoreCase |
“false” |
Ignore case when searching for usernamePropertyName |
userLookup.passwordPropertyName |
“password” |
User class password property |
userLookup.authoritiesPropertyName |
“authorities” |
User class role collection property |
userLookup.enabledPropertyName |
“enabled” |
User class enabled property |
userLookup.accountExpiredPropertyName |
“accountExpired” |
User class account expired property |
userLookup.accountLockedPropertyName |
“accountLocked” |
User class account locked property |
userLookup.passwordExpiredPropertyName |
“passwordExpired” |
User class password expired property |
userLookup.authorityJoinClassName |
none |
User/Role many-many join class name |
authority.className |
none |
Role class name |
authority.nameField |
“authority” |
Role class role name property |
requestMap.className |
none |
Requestmap class name |
requestMap.urlField |
“url” |
Requestmap class URL pattern property |
requestMap.configAttributeField |
“configAttribute” |
Requestmap class role/token property |
Authentication
The Spring Security plugin supports several approaches to authentication.
The default approach stores users and roles in your database, and uses an HTML login form which prompts the user for a username and password. The plugin also supports other approaches as described in the sections below, as well as add-on plugins that provide external authentication providers such as LDAP, and single sign-on using CAS
Basic and Digest Authentication
To use HTTP Basic Authentication in your application, set the useBasicAuth attribute to true. Also change the basic.realmName default value to one that suits your application, for example:
Listing 62. Basic Authentication example settings
grails.plugin.springsecurity.useBasicAuth = true
grails.plugin.springsecurity.basic.realmName = "Ralph's Bait and Tackle"| Property | Default | Description |
|---|---|---|
useBasicAuth |
|
Whether to use Basic authentication |
basic.realmName |
“Grails Realm” |
Realm name displayed in the browser authentication popup |
basic.credentialsCharset |
“UTF-8” |
The character set used to decode Base64-encoded data |
With this authentication in place, users are prompted with the standard browser login dialog instead of being redirected to a login page.
If you don’t want all of your URLs guarded by Basic authentication, you can partition the URL patterns and apply Basic authentication to some, but regular form login to others. For example, if you have a web service that uses Basic authentication for /webservice/** URLs, you would configure that using the chainMap config attribute:
Listing 63. Example filter chain mappings for Basic authentication
grails.plugin.springsecurity.filterChain.chainMap = [
[pattern: '/webservice/**', filters: 'JOINED_FILTERS,-exceptionTranslationFilter'],
[pattern: '/**', filters: 'JOINED_FILTERS,-basicAuthenticationFilter,-basicExceptionTranslationFilter']
]In this example we’re using the JOINED_FILTERS keyword instead of explicitly listing the filter names. Specifying JOINED_FILTERS means to use all of the filters that were configured using the various config options. In each case we also specify that we want to exclude one or more filters by prefixing their names with -.
For the /webservice/** URLs, we want all filters except for the standard ExceptionTranslationFilter since we want to use just the one configured for Basic Auth. And for the /** URLs (everything else) we want everything except for the Basic authentication filter and its configured ExceptionTranslationFilter.
Digest Authentication is similar to Basic but is more secure because it does not send your password in obfuscated cleartext. Digest resembles Basic in practice - you get the same browser popup dialog when you authenticate. But because the credential transfer is genuinely hashed (instead of just Base64-encoded as with Basic authentication) you do not need SSL to guard your logins.
| Property | Default Value | Meaning |
|---|---|---|
useDigestAuth |
|
Whether to use Digest authentication |
digest.realmName |
“Grails Realm” |
Realm name displayed in the browser popup |
digest.key |
“changeme” |
Key used to build the nonce for authentication; it should be changed but that’s not required |
digest.nonceValiditySeconds |
|
How long a nonce stays valid |
digest.passwordAlreadyEncoded |
|
Whether you are managing the password hashing yourself |
digest.createAuthenticatedToken |
|
If |
digest.useCleartextPasswords |
|
If |
Digest authentication has a problem in that by default you store cleartext passwords in your database. This is because the browser hashes your password along with the username and Realm name, and this is compared to the password hashed using the same algorithm during authentication. The browser does not know about your MessageDigest algorithm or salt source, so to hash them the same way you need to load a cleartext password from the database.
The plugin does provide an alternative, although it has no configuration options (in particular the digest algorithm cannot be changed). If digest.useCleartextPasswords is false (the default), then the passwordEncoder bean is replaced with an instance of grails.plugin.springsecurity.authentication.encoding.DigestAuthPasswordEncoder. This encoder uses the same approach as the browser, that is, it combines your password along with your username and Realm name essentially as a salt, and hashes with MD5. MD5 is not recommended in general, but given the typical size of the salt it is reasonably safe to use.
The only required attribute is useDigestAuth, which you must set to true, but you probably also want to change the realm name:
grails.plugin.springsecurity.useDigestAuth = true
grails.plugin.springsecurity.digest.realmName = "Ralph's Bait and Tackle"Digest authentication cannot be applied to a subset of URLs like Basic authentication can. This is due to the password encoding issues. So you cannot use the chainMap attribute here - all URLs will be guarded.
|
Note that since the Digest authentication password encoder is different from the typical encoders you must pass the username as the “salt” value. The code in the generated User class assumes you’re not using a salt value, so you’ll need to change the code in to |
Certificate (X.509) Login Authentication
Another authentication mechanism supported by Spring Security is certificate-based, or “mutual authentication”. It requires HTTPS, and you must configure the server to require a client certificate (ordinarily only the server provides a certificate). Your username is extracted from the client certificate if it is valid, and you are “pre-authenticated”. As long as a corresponding username exists in the database, your authentication succeeds and you are not asked for a password. Your Authentication contains the authorities associated with your username.
The table describes available configuration options.
| Property | Default Value | Meaning |
|---|---|---|
useX509 |
|
Whether to support certificate-based logins |
x509.continueFilterChainOnUnsuccessfulAuthentication |
|
Whether to proceed when an authentication attempt fails to allow other authentication mechanisms to process the request |
x509.subjectDnRegex |
“CN=(.*?)(?:,|$)” |
Regular expression for extracting the username from the certificate’s subject name |
x509.checkForPrincipalChanges |
|
Whether to re-extract the username from the certificate and check that it’s still the current user when a valid |
x509.invalidateSessionOnPrincipalChange |
|
Whether to invalidate the session if the principal changed (based on a |
x509.subjectDnClosure |
none |
If set, the plugin’s |
x509.throwExceptionWhenTokenRejected |
|
If |
The details of configuring your server for SSL and configuring browser certificates are beyond the scope of this document. If you use Tomcat, see its SSL documentation. To get a test environment working, see the instructions in this discussion at Stack Overflow.
Remember-Me Cookie
Spring Security supports creating a remember-me cookie so that users are not required to log in with a username and password for each session. This is optional and is usually implemented as a checkbox on the login form; the default auth.gsp supplied by the plugin has this feature.
| Property | Default Value | Meaning |
|---|---|---|
rememberMe.cookieName |
|
remember-me cookie name; should be unique per application |
rememberMe.cookieDomain |
none |
remember-me cookie domain |
rememberMe.alwaysRemember |
|
If |
rememberMe.tokenValiditySeconds |
|
Max age of the cookie in seconds |
rememberMe.parameter |
|
Login form remember-me checkbox name |
rememberMe.key |
|
Value used to encode cookies; should be unique per application |
rememberMe.useSecureCookie |
none |
Whether to use a secure cookie or not; if |
rememberMe.createSessionOnSuccess |
|
Whether to create a session of one doesn’t exist to ensure that the |
rememberMe.persistent |
|
If |
rememberMe.persistentToken.domainClassName |
none |
Domain class used to manage persistent logins |
rememberMe.persistentToken.seriesLength |
16 |
Number of characters in the cookie’s |
rememberMe.persistentToken.tokenLength |
16 |
Number of characters in the cookie’s |
atr.rememberMeClass |
remember-me authentication class |
You are most likely to change these attributes:
-
rememberMe.cookieName. Purely aesthetic as most users will not look at their cookies, but you probably want the display name to be application-specific rather than “grails_remember_me”. -
rememberMe.key. Part of a salt when the cookie is hashed. Changing the default makes it harder to execute brute-force attacks. -
rememberMe.tokenValiditySeconds. Default is two weeks; set it to what makes sense for your application.
Persistent Logins
The remember-me cookie is very secure, but for an even stronger solution you can use persistent logins that store the username in the database. See the Spring Security docs for a description of the implementation.
Persistent login is also useful for authentication schemes like Facebook, where you do not manage passwords in your database, but most of the other user information is stored locally. Without a password you cannot use the standard cookie format, so persistent logins enable remember-me cookies in these scenarios.
To use this feature, run the s2-create-persistent-token script. This will create the domain class, and register its name in grails-app/conf/application.groovy. It will also enable persistent logins by setting rememberMe.persistent to true.
Ajax Authentication
The typical pattern of using web site authentication to access restricted pages involves intercepting access requests for secure pages, redirecting to a login page (possibly off-site, for example when using a Single Sign-on implementation such as CAS), and redirecting back to the originally-requested page after a successful login. Each page can also have a login link to allow explicit logins at any time.
Another option is to also have a login link on each page and to use JavaScript to present a login form within the current page in a popup. The JavaScript code submits the authentication request and displays success or error messages as appropriate.
The plugin supports Ajax logins, but you need to create your own client-side code. There are only a few necessary changes, and of course the sample code here is pretty basic so you should enhance it for your needs.
The approach here involves editing your template page(s) to show “You’re logged in as …” text if logged in and a login link if not, along with a hidden login form that is shown using JavaScript.
This example uses jQuery and jqModal, a jQuery plugin that creates and manages dialogs and popups. Download jqModal.js and copy it to grails-app/assets/javascripts, and download jqModal.css and copy it to grails-app/assets/stylesheets.
Create grails-app/assets/javascripts/ajaxLogin.js and add this JavaScript code:
ajaxLogin.jsvar onLogin;
$.ajaxSetup({
beforeSend: function(jqXHR, event) {
if (event.url != $("#ajaxLoginForm").attr("action")) {
// save the 'success' function for later use if
// it wasn't triggered by an explicit login click
onLogin = event.success;
}
},
statusCode: {
// Set up a global Ajax error handler to handle 401
// unauthorized responses. If a 401 status code is
// returned the user is no longer logged in (e.g. when
// the session times out), so re-display the login form.
401: function() {
showLogin();
}
}
});
function showLogin() {
var ajaxLogin = $("#ajaxLogin");
ajaxLogin.css("text-align", "center");
ajaxLogin.jqmShow();
}
function logout(event) {
event.preventDefault();
$.ajax({
url: $("#_logout").attr("href"),
method: "POST",
success: function(data, textStatus, jqXHR) {
window.location = "/";
},
error: function(jqXHR, textStatus, errorThrown) {
console.log("Logout error, textStatus: " + textStatus +
", errorThrown: " + errorThrown);
}
});
}
function authAjax() {
$("#loginMessage").html("Sending request ...").show();
var form = $("#ajaxLoginForm");
$.ajax({
url: form.attr("action"),
method: "POST",
data: form.serialize(),
dataType: "JSON",
success: function(json, textStatus, jqXHR) {
if (json.success) {
form[0].reset();
$("#loginMessage").empty();
$("#ajaxLogin").jqmHide();
$("#loginLink").html(
'Logged in as ' + json.username +
' (<a href="' + $("#_logout").attr("href") +
'" id="logout">Logout</a>)');
$("#logout").click(logout);
if (onLogin) {
// execute the saved event.success function
onLogin(json, textStatus, jqXHR);
}
}
else if (json.error) {
$("#loginMessage").html('<span class="errorMessage">' +
json.error + "</error>");
}
else {
$("#loginMessage").html(jqXHR.responseText);
}
},
error: function(jqXHR, textStatus, errorThrown) {
if (jqXHR.status == 401 && jqXHR.getResponseHeader("Location")) {
// the login request itself wasn't allowed, possibly because the
// post url is incorrect and access was denied to it
$("#loginMessage").html('<span class="errorMessage">' +
'Sorry, there was a problem with the login request</error>');
}
else {
var responseText = jqXHR.responseText;
if (responseText) {
var json = $.parseJSON(responseText);
if (json.error) {
$("#loginMessage").html('<span class="errorMessage">' +
json.error + "</error>");
return;
}
}
else {
responseText = "Sorry, an error occurred (status: " +
textStatus + ", error: " + errorThrown + ")";
}
$("#loginMessage").html('<span class="errorMessage">' +
responseText + "</error>");
}
}
});
}
$(function() {
$("#ajaxLogin").jqm({ closeOnEsc: true });
$("#ajaxLogin").jqmAddClose("#cancelLogin");
$("#ajaxLoginForm").submit(function(event) {
event.preventDefault();
authAjax();
});
$("#authAjax").click(authAjax);
$("#logout").click(logout);
});and create grails-app/assets/stylesheets/ajaxLogin.css and add this CSS:
ajaxLogin.css#ajaxLogin {
padding: 0px;
text-align: center;
display: none;
}
#ajaxLogin .inner {
width: 400px;
padding-bottom: 6px;
margin: 60px auto;
text-align: left;
border: 1px solid #aab;
background-color: #f0f0fa;
-moz-box-shadow: 2px 2px 2px #eee;
-webkit-box-shadow: 2px 2px 2px #eee;
-khtml-box-shadow: 2px 2px 2px #eee;
box-shadow: 2px 2px 2px #eee;
}
#ajaxLogin .inner .fheader {
padding: 18px 26px 14px 26px;
background-color: #f7f7ff;
margin: 0px 0 14px 0;
color: #2e3741;
font-size: 18px;
font-weight: bold;
}
#ajaxLogin .inner .cssform p {
clear: left;
margin: 0;
padding: 4px 0 3px 0;
padding-left: 105px;
margin-bottom: 20px;
height: 1%;
}
#ajaxLogin .inner .cssform input[type="text"],
#ajaxLogin .inner .cssform input[type="password"] {
width: 150px;
}
#ajaxLogin .inner .cssform label {
font-weight: bold;
float: left;
text-align: right;
margin-left: -105px;
width: 150px;
padding-top: 3px;
padding-right: 10px;
}
.ajaxLoginButton {
background-color: #efefef;
font-weight: bold;
padding: 0.5em 1em;
display: -moz-inline-stack;
display: inline-block;
vertical-align: middle;
white-space: nowrap;
overflow: visible;
text-decoration: none;
-moz-border-radius: 0.3em;
-webkit-border-radius: 0.3em;
border-radius: 0.3em;
}
.ajaxLoginButton:hover, .ajaxLoginButton:focus {
background-color: #999999;
color: #ffffff;
}
#ajaxLogin .inner .login_message {
padding: 6px 25px 20px 25px;
color: #c33;
}
#ajaxLogin .inner .text_ {
width: 120px;
}
#ajaxLogin .inner .chk {
height: 12px;
}
.errorMessage {
color: red;
}There’s no need to register the JavaScript files in grails-app/assets/javascripts/application.js if you have this require_tree directive:
application.js//= require_tree .but you can explicitly include them if you want. Register the two CSS files in /grails-app/assets/stylesheets/application.css:
application.css/*
...
*= require ajaxLogin
*= require jqModal
...
*/We’ll need some GSP code to define the HTML, so create grails-app/views/includes/_ajaxLogin.gsp and add this:
_ajaxLogin.gsp<span id="logoutLink" style="display: none;">
<g:link elementId='_logout' controller='logout'>Logout</g:link>
</span>
<span id="loginLink" style="position: relative; margin-right: 30px; float: right">
<sec:ifLoggedIn>
Logged in as <sec:username/> (<g:link elementId='logout' controller='logout'>Logout</g:link>)
</sec:ifLoggedIn>
<sec:ifNotLoggedIn>
<a href="#" onclick="showLogin(); return false;">Login</a>
</sec:ifNotLoggedIn>
</span>
<div id="ajaxLogin" class="jqmWindow" style="z-index: 3000;">
<div class="inner">
<div class="fheader">Please Login..</div>
<form action="${request.contextPath}/login/authenticate" method="POST"
id="ajaxLoginForm" name="ajaxLoginForm" class="cssform" autocomplete="off">
<p>
<label for="username">Username:</label>
<input type="text" class="text_" name="username" id="username" />
</p>
<p>
<label for="password">Password</label>
<input type="password" class="text_" name="password" id="password" />
</p>
<p>
<label for="remember_me">Remember me</label>
<input type="checkbox" class="chk" id="remember_me" name="remember-me"/>
</p>
<p>
<input type="submit" id="authAjax" name="authAjax"
value="Login" class="ajaxLoginButton" />
<input type="button" id="cancelLogin" value="Cancel"
class="ajaxLoginButton" />
</p>
</form>
<div style="display: none; text-align: left;" id="loginMessage"></div>
</div>
</div>And finally, update the grails-app/views/layouts/main.gsp layout to include _ajaxLogin.gsp, adding it after the <body> tag:
main.gsp<html lang="en" class="no-js">
<head>
...
<g:layoutHead/>
</head>
<body>
<g:render template='/includes/ajaxLogin'/>
...
<g:layoutBody/>
</body>
</html>The important aspects of this code are:
-
There is a <span> positioned in the top-right that shows the username and a logout link when logged in, and a login link otherwise.
-
The form posts to the same URL as the regular form,
/login/authenticate, and is mostly the same except for the addition of a “Cancel” button (you can also dismiss the dialog by clicking outside of it or with the escape key). -
Error messages are displayed within the popup <div>.
-
Because there is no page redirect after successful login, the Javascript replaces the login link to give a visual indication that the user is logged in.
-
The Logout link also uses Ajax to submit a POST request to the standard logout url and redirect you to the index page after the request finishes.
-
Note that in the JavaScript
logoutfunction, you’ll need to change the url in thesuccesscallback to the correct post-logout value, e.g.window.location = "/appname";if you have configured the contextPath to be "/appname"
-
How Does Ajax login Work?
Most Ajax libraries include an X-Requested-With header that indicates that the request was made by XMLHttpRequest instead of being triggered by clicking a regular hyperlink or form submit button. The plugin uses this header to detect Ajax login requests, and uses subclasses of some of Spring Security’s classes to use different redirect urls for Ajax requests than regular requests. Instead of showing full pages, LoginController has JSON-generating methods ajaxSuccess(), ajaxDenied(), and authfail() that generate JSON that the login Javascript code can use to appropriately display success or error messages.
To summarize, the typical flow would be
-
click the link to display the login form
-
enter authentication details and click Login
-
the form is submitted using an Ajax request
-
if the authentication succeeds:
-
a redirect to
/login/ajaxSuccessoccurs (this URL is configurable) -
the rendered response is JSON and it contains two values, a boolean value
successwith the valuetrueand a string valueusernamewith the authenticated user’s login name -
the client determines that the login was successful and updates the page to indicate the the user is logged in; this is necessary since there’s no page redirect like there would be for a non-Ajax login
-
-
if the authentication fails:
-
a redirect to
/login/authfail?ajax=trueoccurs (this URL is configurable) -
the rendered response is JSON and it contains one value, a string value
errorwith the displayable error message; this will be different depending on why the login was unsuccessful (bad username or password, account locked, etc.) -
the client determines that the login was not successful and displays the error message
-
-
note that both a successful and an unsuccessful login will trigger the
onSuccessAjax callback; theonErrorcallback will only be triggered if there’s an exception or network issue
Authentication Providers
The plugin registers authentication providers that perform authentication by implementing the AuthenticationProvider interface.
| Property | Default Value | Meaning |
|---|---|---|
providerNames |
|
Bean names of authentication providers |
Use daoAuthenticationProvider to authenticate using the User and Role database tables, rememberMeAuthenticationProvider to log in with a rememberMe cookie, and anonymousAuthenticationProvider to create an “anonymous” authentication if no other provider authenticates.
To customize this list, you define a providerNames attribute with a list of bean names. The beans must be declared either by the plugin, or yourself in resources.groovy. Suppose you have a custom MyAuthenticationProvider in resources.groovy:
Listing 64. Registering a custom authentication provider bean in
resources.groovyimport com.foo.MyAuthenticationProvider
beans = {
myAuthenticationProvider(MyAuthenticationProvider) {
// attributes
}
}You register the provider in grails-app/conf/application.groovy as:
Listing 65. Registering a custom authentication provider name in
grails.plugin.springsecurity.providerNamesgrails.plugin.springsecurity.providerNames = [
'myAuthenticationProvider',
'anonymousAuthenticationProvider',
'rememberMeAuthenticationProvider']Custom UserDetailsService
When you authenticate users from a database using DaoAuthenticationProvider (the default mode in the plugin if you have not enabled OpenID, LDAP, and so on), an implementation of UserDetailsService is required. This class is responsible for returning a concrete implementation of UserDetails. The plugin provides grails.plugin.springsecurity.userdetails.GormUserDetailsService as its UserDetailsService implementation and grails.plugin.springsecurity.userdetails.GrailsUser (which extends Spring Security’s User) as its UserDetails implementation.
You can extend or replace GormUserDetailsService with your own implementation by defining a bean in grails-app/conf/spring/resources.groovy with the same bean name, userDetailsService. This works because application beans are configured after plugin beans and there can only be one bean for each name. The plugin uses an extension of UserDetailsService, grails.plugin.springsecurity.userdetails.GrailsUserDetailsService, which adds the method UserDetails loadUserByUsername(String username, boolean loadRoles) to support use cases like in LDAP where you often infer all roles from LDAP but might keep application-specific user details in the database. Create the class in src/groovy and not in grails-app/services - although the interface name includes “Service”, this is just a coincidence and the bean wouldn’t benefit from being a Grails service.
In the following example, the UserDetails and GrailsUserDetailsService implementation adds the full name of the user domain class in addition to the standard information. If you extract extra data from your domain class, you are less likely to need to reload the user from the database. Most of your common data can be kept along with your security credentials.
This example adds in a fullName property. Keeping the full name cached avoids hitting the database just for that lookup. GrailsUser already adds the id value from the domain class to so we can do a more efficient database load of the user. If all you have is the username, then you need to call User.findByUsername(principal.username), but if you have the id you can call User.get(principal.id). Even if you have a unique index on the username database column, loading by primary key is usually more efficient because it takes advantage of Hibernate’s first-level and second-level caches.
There is not much to implement other than your application-specific lookup code:
MyUserDetails.groovypackage com.mycompany.myapp
import grails.plugin.springsecurity.userdetails.GrailsUser
import org.springframework.security.core.GrantedAuthority
class MyUserDetails extends GrailsUser {
final String fullName
MyUserDetails(String username, String password, boolean enabled,
boolean accountNonExpired, boolean credentialsNonExpired,
boolean accountNonLocked,
Collection<GrantedAuthority> authorities,
long id, String fullName) {
super(username, password, enabled, accountNonExpired,
credentialsNonExpired, accountNonLocked, authorities, id)
this.fullName = fullName
}
}MyUserDetailsService.groovypackage com.mycompany.myapp
import grails.plugin.springsecurity.SpringSecurityUtils
import grails.plugin.springsecurity.userdetails.GrailsUserDetailsService
import grails.plugin.springsecurity.userdetails.NoStackUsernameNotFoundException
import grails.gorm.transactions.Transactional
import org.springframework.security.core.authority.SimpleGrantedAuthority
import org.springframework.security.core.userdetails.UserDetails
import org.springframework.security.core.userdetails.UsernameNotFoundException
class MyUserDetailsService implements GrailsUserDetailsService {
/**
* Some Spring Security classes (e.g. RoleHierarchyVoter) expect at least
* one role, so we give a user with no granted roles this one which gets
* past that restriction but doesn't grant anything.
*/
static final List NO_ROLES = [new SimpleGrantedAuthority(SpringSecurityUtils.NO_ROLE)]
UserDetails loadUserByUsername(String username, boolean loadRoles)
throws UsernameNotFoundException {
return loadUserByUsername(username)
}
@Transactional(readOnly=true, noRollbackFor=[IllegalArgumentException, UsernameNotFoundException])
UserDetails loadUserByUsername(String username) throws UsernameNotFoundException {
User user = User.findByUsername(username)
if (!user) throw new NoStackUsernameNotFoundException()
def roles = user.authorities
// or if you are using role groups:
// def roles = user.authorities.collect { it.authorities }.flatten().unique()
def authorities = roles.collect {
new SimpleGrantedAuthority(it.authority)
}
return new MyUserDetails(user.username, user.password, user.enabled,
!user.accountExpired, !user.passwordExpired,
!user.accountLocked, authorities ?: NO_ROLES, user.id,
user.firstName + " " + user.lastName)
}
}The loadUserByUsername method is transactional, but read-only, to avoid lazy loading exceptions when accessing the authorities collection. There are obviously no database updates here but this is a convenient way to keep the Hibernate Session open to enable accessing the roles.
To use your implementation, register it in grails-app/conf/spring/resources.groovy like this:
Listing 66. Registering a custom
UserDetailsService in resources.groovyimport com.mycompany.myapp.MyUserDetailsService
beans = {
userDetailsService(MyUserDetailsService)
}Another option for loading users and roles from the database is to subclass grails.plugin.springsecurity.userdetails.GormUserDetailsService - the methods are all protected so you can override as needed.
This approach works with all beans defined in SpringSecurityCoreGrailsPlugin.doWithSpring() - you can replace or subclass any of the Spring beans to provide your own functionality when the standard extension mechanisms are insufficient.
Flushing the Cached Authentication
If you store mutable data in your custom UserDetails implementation (such as full name in the preceding example), be sure to rebuild the Authentication if it changes. springSecurityService has a reauthenticate method that does this for you:
Listing 67. Calling
reauthenticate() after making a change that affects the cached authenticationclass MyController {
def springSecurityService
def someAction() {
def user = ...
// update user data
user.save()
springSecurityService.reauthenticate user.username
...
}
}Password and Account Protection
The sections that follow discuss approaches to protecting passwords and user accounts.
Password Hashing
By default the plugin uses the bcrypt algorithm to hash passwords. You can customize this with the grails.plugin.springsecurity.password.algorithm attribute as described below. In addition you can increase the security of your passwords by adding a salt, which can be a property of the UserDetails instance, a global static value, or any custom value you want.
bcrypt is a much more secure alternative to the message digest approaches since it supports a customizable work level which when increased takes more computation time to hash the users' passwords, but also dramatically increases the cost of brute force attacks. Given how easy it is to use GPUs to crack passwords, you should definitely consider using bcrypt for new projects and switching to it for existing projects. Note that due to the approach used by bcrypt, you cannot add an additional salt like you can with the message digest algorithms.
Enable bcrypt by using the 'bcrypt' value for the algorithm config attribute:
grails.plugin.springsecurity.password.algorithm = 'bcrypt'and optionally changing the number of rekeying rounds (which will affect the time it takes to hash passwords), e.g.
grails.plugin.springsecurity.password.bcrypt.logrounds = 15Note that the number of rounds must be between 4 and 31.
PBKDF2 is also supported.
The table shows configurable password hashing attributes.
If you want to use a message digest hashing algorithm, see this Java page for the available algorithms.
| Property | Default | Description |
|---|---|---|
password.algorithm |
“bcrypt” |
passwordEncoder algorithm; “bcrypt” to use bcrypt, “pbkdf2” to use PBKDF2, or any message digest algorithm that is supported in your JDK |
password.encodeHashAsBase64 |
|
If |
password.bcrypt.logrounds |
|
the number of rekeying rounds to use when using bcrypt |
password.hash.iterations |
|
the number of iterations which will be executed on the hashed password/salt when using a message digest algorithm |
The bcrypt logrounds and iterations are set to a lower number to improve speed while testing.
If you rely on them to be higher, set them manually when testing.
|
Salted Passwords
The Spring Security plugin uses hashed passwords and a digest algorithm that you specify. For enhanced protection against dictionary attacks, you should use a salt in addition to digest hashing.
|
Note that if you use bcrypt (the default setting) or pbkdf2, do not configure a salt (e.g. the |
There are two approaches to using salted passwords in the plugin - defining a property in the UserDetails class to access by reflection, or by directly implementing SaltSource yourself.
dao.reflectionSaltSourceProperty
Set the dao.reflectionSaltSourceProperty configuration property:
grails.plugin.springsecurity.dao.reflectionSaltSourceProperty = 'username'This property belongs to the UserDetails class. By default it is an instance of grails.plugin.springsecurity.userdetails.GrailsUser, which extends the standard Spring Security User class and not your “person” domain class. This limits the available properties unless you use a custom UserDetailsService (Custom UserDetailsService).
As long as the username does not change, this approach works well for the salt. If you choose a property that the user can change, the user cannot log in again after changing it unless you re-hash the password with the new value. So it’s best to use a property that doesn’t change.
Another option is to generate a random salt when creating users and store this in the database by adding a new property to the “person” class. This approach requires a custom UserDetailsService because you need a custom UserDetails implementation that also has a “salt” property, but this is more flexible and works in cases where users can change their username.
SystemWideSaltSource and Custom SaltSource
Spring Security supplies a simple SaltSource implementation, SystemWideSaltSource, which uses the same salt for each user. It’s less robust than using a different value for each user but still better than no salt at all.
An example override of the salt source bean using SystemWideSaltSource would look like this:
Listing 68. Configuring
SystemWideSaltSource as the saltSource bean in application.groovyimport org.springframework.security.authentication.dao.SystemWideSaltSource
beans = {
saltSource(SystemWideSaltSource) {
systemWideSalt = 'the_salt_value'
}
}To have full control over the process, you can implement the SaltSource interface and replace the plugin’s implementation with your own by defining a bean in grails-app/conf/spring/resources.groovy with the name saltSource:
Listing 69. Configuring a custom implementation of the
saltSource bean in application.groovyimport com.foo.bar.MySaltSource
beans = {
saltSource(MySaltSource) {
// set properties
}
}Hashing Passwords
Regardless of the implementation, you need to be aware of what value to use for a salt when creating or updating users, for example, in a save or update action in a UserController. When hashing the password, use the two-parameter version of springSecurityService.encodePassword():
Listing 70. Explicitly hashing passwords
class UserController {
def springSecurityService
def save(User user) {
user.password = springSecurityService.encodePassword(
params.password, user.username)
if (!user.save(flush: true)) {
render view: 'create', model: [userInstance: user]
return
}
flash.message = "The user was created"
redirect action: show, id: user.id
}
def update(User user) {
if (params.password) {
params.password = springSecurityService.encodePassword(
params.password, user.username)
}
if (!user.save(flush: true)) {
render view: 'edit', model: [userInstance: user]
return
}
if (springSecurityService.loggedIn &&
springSecurityService.principal.username == user.username) {
springSecurityService.reauthenticate user.username
}
flash.message = "The user was updated"
redirect action: show, id: user.id
}
}|
If you are encoding the password in the User domain class (using |
Account Locking and Forcing Password Change
Spring Security supports four ways of disabling a user account. When you attempt to log in, the UserDetailsService implementation creates an instance of UserDetails that uses these accessor methods:
-
isAccountNonExpired() -
isAccountNonLocked() -
isCredentialsNonExpired() -
isEnabled()
If you use the s2-quickstart script to create a user domain class, it creates a class with corresponding properties to manage this state.
When an accessor returns true for accountExpired, accountLocked, or passwordExpired or returns false for enabled, a corresponding exception is thrown:
| Accessor | Property | Exception |
|---|---|---|
|
|
|
|
|
|
|
|
|
|
|
You can configure exception mappings in application.groovy to associate a URL to any or all of these exceptions to determine where to redirect after a failure, for example:
Listing 71. Example
grails.plugin.springsecurity.failureHandler.exceptionMappings configurationimport org.springframework.security.authentication.LockedException
import org.springframework.security.authentication.DisabledException
import org.springframework.security.authentication.AccountExpiredException
import org.springframework.security.authentication.CredentialsExpiredException
grails.plugin.springsecurity.failureHandler.exceptionMappings = [
[exception: LockedException.name, url: '/user/accountLocked'],
[exception: DisabledException.name, url: '/user/accountDisabled'],
[exception: AccountExpiredException.name, url: '/user/accountExpired'],
[exception: CredentialsExpiredException.name, url: '/user/passwordExpired']
]Without a mapping for a particular exception, the user is redirected to the standard login fail page (by default /login/authfail), which displays an error message from this table:
| Property | Default |
|---|---|
errors.login.disabled |
“Sorry, your account is disabled.” |
errors.login.expired |
“Sorry, your account has expired.” |
errors.login.passwordExpired |
“Sorry, your password has expired.” |
errors.login.locked |
“Sorry, your account is locked.” |
errors.login.fail |
“Sorry, we were not able to find a user with that username and password.” |
You can customize these messages by setting the corresponding property in application.groovy, for example:
grails.plugin.springsecurity.errors.login.locked = "None shall pass."You can use this functionality to manually lock a user’s account or expire the password, but you can automate the process. For example, use the Quartz plugin to periodically expire everyone’s password and force them to go to a page where they update it. Keep track of the date when users change their passwords and use a Quartz job to expire their passwords once the password is older than a fixed max age.
Here’s an example for a password expired workflow. You’d need a simple action to display a password reset form (similar to the login form):
Listing 72. Adding a
passwordExpired() controller actiondef passwordExpired() {
[username: session['SPRING_SECURITY_LAST_USERNAME']]
}and the form would look something like this:
Listing 73. Sample GSP code for a password reset page
<div id='login'>
<div class='inner'>
<g:if test='${flash.message}'>
<div class='login_message'>${flash.message}</div>
</g:if>
<div class='fheader'>Please update your password..</div>
<g:form action='updatePassword' id='passwordResetForm' class='cssform' autocomplete='off'>
<p>
<label for='username'>Username</label>
<span class='text_'>${username}</span>
</p>
<p>
<label for='password'>Current Password</label>
<g:passwordField name='password' class='text_' />
</p>
<p>
<label for='password'>New Password</label>
<g:passwordField name='password_new' class='text_' />
</p>
<p>
<label for='password'>New Password (again)</label>
<g:passwordField name='password_new_2' class='text_' />
</p>
<p>
<input type='submit' value='Reset' />
</p>
</g:form>
</div>
</div>It’s important that you not allow the user to specify the username (it’s available in the HTTP session) but that you require the current password, otherwise it would be simple to forge a password reset.
The GSP form would submit to an action like this one:
Listing 74. Adding an
updatePassword() controller actiondef updatePassword(String password, String password_new, String password_new_2) {
String username = session['SPRING_SECURITY_LAST_USERNAME']
if (!username) {
flash.message = 'Sorry, an error has occurred'
redirect controller: 'login', action: 'auth'
return
}
if (!password || !password_new || !password_new_2 || password_new != password_new_2) {
flash.message = 'Please enter your current password and a valid new password'
render view: 'passwordExpired', model: [username: session['SPRING_SECURITY_LAST_USERNAME']]
return
}
User user = User.findByUsername(username)
if (!passwordEncoder.matches(password, user.password)) {
flash.message = 'Current password is incorrect'
render view: 'passwordExpired', model: [username: session['SPRING_SECURITY_LAST_USERNAME']]
return
}
if (passwordEncoder.matches(password_new, user.password)) {
flash.message = 'Please choose a different password from your current one'
render view: 'passwordExpired', model: [username: session['SPRING_SECURITY_LAST_USERNAME']]
return
}
user.password = password_new
user.passwordExpired = false
user.save() // if you have password constraints check them here
redirect controller: 'login', action: 'auth'
}User Cache
If the cacheUsers configuration property is set to true, Spring Security caches UserDetails instances to save trips to the database (the default is false). This optimization is minor, because typically only two small queries occur during login — one to load the user, and one to load the authorities.
If you enable this feature, you must remove any cached instances after making a change that affects login. If you do not remove cached instances, even though a user’s account is locked or disabled, logins succeed because the database is bypassed. By removing the cached data, you force at trip to the database to retrieve the latest updates.
Here is a sample Quartz job that demonstrates how to find and disable users with passwords that are too old:
ExpirePasswordsJob.groovypackage com.mycompany.myapp
class ExpirePasswordsJob {
static triggers = {
cron name: 'myTrigger', cronExpression: '0 0 0 * * ?' // midnight daily
}
def userCache
void execute() {
def users = User.executeQuery(
'from User u where u.passwordChangeDate <= :cutoffDate',
[cutoffDate: new Date() - 180])
for (user in users) {
// flush each separately so one failure doesn't rollback all of the others
try {
user.passwordExpired = true
user.save(flush: true)
userCache.removeUserFromCache user.username
}
catch (e) {
log.error "problem expiring password for user $user.username : $e.message", e
}
}
}
}|
If your application includes a dependency for |
URL Properties
The table shows configurable URL-related properties.
| Property | Default Value | Meaning |
|---|---|---|
apf.filterProcessesUrl |
“/login/authenticate” |
Login form post URL, intercepted by Spring Security filter |
apf.usernameParameter |
“username” |
Login form username parameter |
apf.passwordParameter |
“password” |
Login form password parameter |
apf.allowSessionCreation |
|
Whether to allow authentication to create an HTTP session |
apf.postOnly |
|
Whether to allow only POST login requests |
apf.continueChainBefore SuccessfulAuthentication |
|
whether to continue calling subsequent filters in the filter chain |
apf.storeLastUsername |
|
Whether to store the login username in the HTTP session |
failureHandler.defaultFailureUrl |
“/login/authfail?login_error=1” |
Redirect URL for failed logins |
failureHandler.ajaxAuthFailUrl |
“/login/authfail?ajax=true” |
Redirect URL for failed Ajax logins |
failureHandler.exceptionMappings |
none |
Map of exception class name (subclass of AuthenticationException) to which the URL will redirect for that exception type after authentication failure |
failureHandler.useForward |
|
Whether to render the error page ( |
failureHandler.allowSessionCreation |
|
Whether to enable session creation to store the authentication failure exception |
successHandler.defaultTargetUrl |
“/” |
Default post-login URL if there is no saved request that triggered the login |
successHandler.alwaysUseDefault |
|
If |
successHandler.targetUrlParameter |
“spring-security-redirect” |
Name of optional login form parameter that specifies destination after successful login |
successHandler.useReferer |
|
Whether to use the HTTP |
successHandler.ajaxSuccessUrl |
“/login/ajaxSuccess” |
URL for redirect after successful Ajax login |
auth.loginFormUrl |
“/login/auth” |
URL of login page |
auth.forceHttps |
|
If |
auth.ajaxLoginFormUrl |
“/login/authAjax” |
URL of Ajax login page |
auth.useForward |
|
Whether to render the login page ( |
logout.afterLogoutUrl |
“/” |
URL for redirect after logout |
logout.filterProcessesUrl |
“/logoff” |
Logout URL, intercepted by Spring Security filter |
logout.handlerNames |
|
Logout handler bean names. See Logout Handlers |
logout.clearAuthentication |
|
If |
logout.invalidateHttpSession |
|
Whether to invalidate the HTTP session when logging out |
logout.targetUrlParameter |
none |
the querystring parameter name for the post-logout URL |
logout.alwaysUseDefaultTargetUrl |
|
whether to always use the |
logout.redirectToReferer |
|
whether to use the |
logout.postOnly |
|
If |
adh.errorPage |
“/login/denied” |
Location of the 403 error page (or set to |
adh.ajaxErrorPage |
“/login/ajaxDenied” |
Location of the 403 error page for Ajax requests |
adh.useForward |
|
If |
ajaxHeader |
“X-Requested-With” |
Header name sent by Ajax library, used to detect Ajax |
ajaxCheckClosure |
none |
An optional closure that can determine if a request is Ajax |
redirectStrategy.contextRelative |
|
If |
switchUser URLs |
See Switch User, under Customizing URLs |
|
fii.alwaysReauthenticate |
|
If |
fii.rejectPublicInvocations |
|
Disallow URL access when there is no request mapping |
fii.validateConfigAttributes |
|
Whether to check that all |
fii.publishAuthorizationSuccess |
|
Whether to publish an |
fii.observeOncePerRequest |
|
If |
Hierarchical Roles
Hierarchical roles are a convenient way to reduce clutter in your request mappings.
| Property | Default Value | Meaning |
|---|---|---|
roleHierarchy |
none |
Hierarchical role definition |
roleHierarchyEntryClassName |
none |
Domain class used to manage persistent role hierarchy entries |
For example, if you have several types of “admin” roles that can be used to access a URL pattern and you do not use hierarchical roles, you need to specify all the admin roles:
package com.mycompany.myapp
import grails.plugin.springsecurity.annotation.Secured
class SomeController {
@Secured(['ROLE_ADMIN', 'ROLE_FINANCE_ADMIN', 'ROLE_SUPERADMIN'])
def someAction() {
...
}
}However, if you have a business rule that says ROLE_FINANCE_ADMIN implies being granted ROLE_ADMIN, and that ROLE_SUPERADMIN implies being granted ROLE_FINANCE_ADMIN, you can express that hierarchy as:
grails.plugin.springsecurity.roleHierarchy = '''
ROLE_SUPERADMIN > ROLE_FINANCE_ADMIN
ROLE_FINANCE_ADMIN > ROLE_ADMIN
'''Then you can simplify your mappings by specifying only the roles that are required:
package com.mycompany.myapp
import grails.plugin.springsecurity.annotation.Secured
class SomeController {
@Secured('ROLE_ADMIN')
def someAction() {
...
}
}You can also reduce the number of granted roles in the database. Where previously you had to grant ROLE_SUPERADMIN, ROLE_FINANCE_ADMIN, and ROLE_ADMIN, now you only need to grant ROLE_SUPERADMIN.
Persistent role hierarchy
Specifying a static string in the roleHierarchy property will be sufficient for most applications, but you can also store the information in your database. This is particularly useful if you’re also storing requestmaps in the database. To use persistant storage, run the s2-create-role-hierarchy-entry script. This will create the domain class and enable persistent storage by registering its name as the roleHierarchyEntryClassName setting in grails-app/conf/application.groovy.
For example, running
./grailsw s2-create-role-hierarchy-entry com.yourapp.RoleHierarchyEntrywill generate this class in grails-app/domain/com/yourapp/RoleHierarchyEntry.groovy:
RoleHierarchyEntry.groovypackage com.yourapp
import groovy.transform.EqualsAndHashCode
import groovy.transform.ToString
@EqualsAndHashCode(includes='entry')
@ToString(includes='entry', includeNames=true, includePackage=false)
class RoleHierarchyEntry implements Serializable {
private static final long serialVersionUID = 1
String entry
static constraints = {
entry blank: false, unique: true
}
static mapping = {
cache true
}
}To store the equivalent entries for the ROLE_SUPERADMIN / ROLE_FINANCE_ADMIN / ROLE_ADMIN hierarchy, add code like this to a method in a transactional service:
Listing 75. Persisting
RoleHierarchyEntry instancesif (!RoleHierarchyEntry.count()) {
new RoleHierarchyEntry(entry: 'ROLE_SUPERADMIN > ROLE_FINANCE_ADMIN').save()
new RoleHierarchyEntry(entry: 'ROLE_FINANCE_ADMIN > ROLE_ADMIN').save()
}Remember to update the roleHierarchy beans hierarchy definition by calling SpringSecurityService#reloadDBRoleHierarchy, or your model changes are not reflected in the running application.
Switch User
To enable a user to switch from the current Authentication to another user’s, set the useSwitchUserFilter attribute to true. This feature is similar to the “su” command in Unix. It enables, for example, an admin to act as a regular user to perform some actions, and then switch back.
|
This feature is very powerful; it allows full access to everything the switched-to user can access without requiring the user’s password. Limit who can use this feature by guarding the user switch URL with a role, for example, |
Switching to Another User
To switch to another user, typically you create a form that submits to /login/impersonate:
Listing 76. An HTML form for switching to another user
<sec:ifAllGranted roles='ROLE_SWITCH_USER'>
<form action='/login/impersonate' method='POST'>
Switch to user: <input type='text' name='username'/> <br/>
<input type='submit' value='Switch'/>
</form>
</sec:ifAllGranted>Here the form is guarded by a check that the logged-in user has ROLE_SWITCH_USER and is not shown otherwise. You also need to guard the user switch URL, and the approach depends on your mapping scheme. If you use annotations, add a rule to the controllerAnnotations.staticRules attribute:
Listing 77. Guarding the switch user url with
controllerAnnotations.staticRulesgrails.plugin.springsecurity.controllerAnnotations.staticRules = [
...
[pattern: '/login/impersonate', access: ['ROLE_SWITCH_USER', 'IS_AUTHENTICATED_FULLY']]
]If you use Requestmaps, create a rule like this (for example, in BootStrap):
Listing 78. Guarding the switch user url with a database requestmap
new Requestmap(url: '/login/impersonate',
configAttribute: 'ROLE_SWITCH_USER,IS_AUTHENTICATED_FULLY').save(flush: true)If you use the static application.groovy map, add the rule there:
Listing 79. Guarding the switch user url with
interceptUrlMapgrails.plugin.springsecurity.interceptUrlMap = [
...
[pattern: '/login/impersonate', access: ['ROLE_SWITCH_USER', 'IS_AUTHENTICATED_FULLY']]
]Switching Back to Original User
To resume as the original user, POST to /logout/impersonate.
Listing 80. A link to switch back to the real user
<sec:ifSwitched>
<form action='${request.contextPath}/logout/impersonate' method='POST'>
<input type='submit' value="Resume as ${grails.plugin.springsecurity.SpringSecurityUtils.switchedUserOriginalUsername}"/>
</form>
</sec:ifSwitched>Customizing URLs
You can customize the URLs that are used for this feature, although it is rarely necessary:
grails.plugin.springsecurity.switchUser.switchUserUrl = ...
grails.plugin.springsecurity.switchUser.exitUserUrl = ...
grails.plugin.springsecurity.switchUser.targetUrl = ...
grails.plugin.springsecurity.switchUser.switchFailureUrl = ...| Property | Default | Meaning |
|---|---|---|
useSwitchUserFilter |
|
Whether to use the switch user filter |
switchUser.switchUserUrl |
“/login/impersonate” |
URL to access (via POST) to switch to another user |
switchUser.exitUserUrl |
“/logout/impersonate” |
URL to access (via POST) to switch to another user |
switchUser.switchUserMatcher |
|
An alternative to |
switchUser.exitUserMatcher |
|
An alternative to |
switchUser.targetUrl |
Same as |
URL for redirect after switching |
switchUser.switchFailureUrl |
Same as |
URL for redirect after an error during an attempt to switch |
switchUser.usernameParameter |
|
The username request parameter name |
GSP Code
One approach to supporting the switch user feature is to add code to one or more of your GSP templates. In this example the current username is displayed, and if the user has switched from another (using the sec:ifSwitched tag) then a “resume” button is displayed. If not, and the user has the required role, a form is displayed to allow input of the username to switch to:
Listing 81. Example GSP code to conditionally display a switch user form and resume form
<sec:ifLoggedIn>
Logged in as <sec:username/>
</sec:ifLoggedIn>
<sec:ifSwitched>
<form action='${request.contextPath}/logout/impersonate' method='POST'>
<input type='submit' value="Resume as ${grails.plugin.springsecurity.SpringSecurityUtils.switchedUserOriginalUsername}"/>
</form>
</sec:ifSwitched>
<sec:ifNotSwitched>
<sec:ifAllGranted roles='ROLE_SWITCH_USER'>
<form action='${request.contextPath}/login/impersonate' method='POST'>
Switch to user: <input type='text' name='username'/><br/>
<input type='submit' value='Switch'/>
</form>
</sec:ifAllGranted>
</sec:ifNotSwitched>Filters
There are a few different approaches to configuring filter chains.
Default Approach to Configuring Filter Chains
The default is to use configuration attributes to determine which extra filters to use (for example, Basic Auth, Switch User, etc.) and add these to the “core” filters. For example, setting grails.plugin.springsecurity.useSwitchUserFilter = true adds switchUserProcessingFilter to the filter chain (and in the correct order). The filter chain built here is applied to all URLs. If you need more flexibility, you can use filterChain.chainMap as discussed in chainMap below.
filterNames
To define custom filters, to remove a core filter from the Spring Security filter chain (not recommended), or to otherwise have control over the Spring Security filter chain, you can specify the filterNames property as a list of strings. As with the default approach, the Spring Security filter chain built here is applied to all URLs.
For example:
Listing 82. Sample
grails.plugin.springsecurity.filterChain.filterNames configurationgrails.plugin.springsecurity.filterChain.filterNames = [
'securityContextPersistenceFilter', 'logoutFilter',
'authenticationProcessingFilter', 'myCustomProcessingFilter',
'rememberMeAuthenticationFilter', 'anonymousAuthenticationFilter',
'exceptionTranslationFilter', 'filterInvocationInterceptor'
]This example creates a Spring Security filter chain corresponding to the Spring beans with the specified names.
chainMap
Use the filterChain.chainMap attribute to define which filters are applied to different URL patterns. You define a Map that specifies one or more lists of filter bean names, each with a corresponding URL pattern.
Listing 83. Sample
grails.plugin.springsecurity.filterChain.chainMap configurationgrails.plugin.springsecurity.filterChain.chainMap = [
[pattern: '/urlpattern1/**', filters: 'filter1,filter2,filter3,filter4'],
[pattern: '/urlpattern2/**', filters: 'filter1,filter3,filter5'],
[pattern: '/**', filters: 'JOINED_FILTERS']
]|
The format of |
In this example, four filters are applied to URLs matching /urlpattern1/** and three different filters are applied to URLs matching /urlpattern2/**. In addition the special token JOINED_FILTERS is applied to all URLs. This is a conventient way to specify that all defined filters (configured either with configuration rules like useSwitchUserFilter or explicitly using filterNames) should apply to this pattern.
The order of the mappings is important. Each URL will be tested in order from top to bottom to find the first matching one. So you need a /** catch-all rule at the end for URLs that do not match one of the earlier rules.
There’s also a filter negation syntax that can be very convenient. Rather than specifying all of the filter names (and risking forgetting one or putting them in the wrong order), you can use the JOINED_FILTERS keyword and one or more filter names prefixed with a - . This means to use all configured filters except for the excluded ones. For example, if you had a web service that uses Basic Auth for /webservice/** URLs, you would configure that using:
Listing 84. Using
JOINED_FILTERS in a filterChain.chainMap configurationgrails.plugin.springsecurity.filterChain.chainMap = [
[pattern: '/webservice/**', filters: 'JOINED_FILTERS,-exceptionTranslationFilter'],
[pattern: '/**', filters: 'JOINED_FILTERS,-basicAuthenticationFilter,-basicExceptionTranslationFilter']
]For the /webservice/** URLs, we want all filters except for the standard ExceptionTranslationFilter since we want to use just the one configured for Basic Auth. And for the /** URLs (everything else) we want everything except for the Basic Auth filter and its configured ExceptionTranslationFilter.
Additionally, you can use a chainMap configuration to declare one or more URL patterns which should have no filters applied. Use the name 'none' for these patterns, e.g.
Listing 85. Using
none in a filterChain.chainMap configurationgrails.plugin.springsecurity.filterChain.chainMap = [
[pattern: '/someurlpattern/**', filters: 'none'],
[pattern: '/**', filters: 'JOINED_FILTERS']
]clientRegisterFilter
An alternative to setting the filterNames property is grails.plugin.springsecurity.SpringSecurityUtils.clientRegisterFilter(). This property allows you to add a custom filter to the chain at a specified position. Each standard filter has a corresponding position in the chain (see grails.plugin.springsecurity.SecurityFilterPosition for details). So if you have created an application-specific filter, register it in grails-app/conf/spring/resources.groovy:
import com.mycompany.myapp.MyFilter
import org.springframework.boot.context.embedded.FilterRegistrationBean
beans = {
myFilter(MyFilter) {
// properties
}
myFilterDeregistrationBean(FilterRegistrationBean) {
filter = ref('myFilter')
enabled = false
}
}Note that in addition to the filter bean, there is also a disabled FilterRegistrationBean registered. This is needed because Spring Boot automatically registers filter beans in the ApplicationContext, so you must register your own FilterRegistrationBean and set its enabled property to false to prevent this.
Then register the filter in grails-app/init/BootStrap.groovy:
import grails.plugin.springsecurity.SecurityFilterPosition
import grails.plugin.springsecurity.SpringSecurityUtils
class BootStrap {
def init = {
SpringSecurityUtils.clientRegisterFilter(
'myFilter', SecurityFilterPosition.OPENID_FILTER.order + 10)
}
}This bootstrap code registers your filter just after the Open ID filter (if it’s configured). You cannot register a filter in the same position as another, so it’s a good idea to add a small delta to its position to put it after or before a filter that it should be next to in the chain. The Open ID filter position is just an example - add your filter in the position that makes sense.
Channel Security
Use channel security to configure which URLs require HTTP and which require HTTPS.
| Property | Default Value | Meaning |
|---|---|---|
portMapper.httpPort |
|
HTTP port your application uses |
portMapper.httpsPort |
|
HTTPS port your application uses |
secureChannel.definition |
none |
Map of URL pattern to channel rule |
secureChannel.secureHeaderName |
|
The name of the header to check for HTTPS |
secureChannel.secureHeaderValue |
|
The header value for |
secureChannel.secureConfigAttributeKeyword |
|
The config attribute token to use for marking a pattern as requiring HTTPS. |
secureChannel.insecureHeaderName |
|
The name of the header to check for HTTP |
secureChannel.insecureHeaderValue |
|
The header value for |
secureChannel.insecureConfigAttributeKeyword |
|
The config attribute token to use for marking a pattern as requiring HTTP. |
Build a List of single-entry Maps under the secureChannel.definition key, where URL patterns are stored under the key “pattern”, and the values are stored under the key “access” and are one of the access keywords REQUIRES_SECURE_CHANNEL, REQUIRES_INSECURE_CHANNEL, or ANY_CHANNEL:
Listing 86. Sample
grails.plugin.springsecurity.secureChannel.definitiongrails.plugin.springsecurity.secureChannel.definition = [
[pattern: '/login/**', access: 'REQUIRES_SECURE_CHANNEL'],
[pattern: '/maps/**', access: 'REQUIRES_INSECURE_CHANNEL'],
[pattern: '/images/login/**', access: 'REQUIRES_SECURE_CHANNEL'],
[pattern: '/images/**', access: 'ANY_CHANNEL']
]|
The format of |
URLs are checked in order, so be sure to put more specific rules before less specific. In the preceding example, /images/login/** is more specific than /images/**, so it appears first in the configuration.
Header checking
The default implementation of channel security is fairly simple; if you’re using HTTP but HTTPS is required, you get redirected to the corresponding SSL URL and vice versa. But when using a load balancer such as an F5 BIG-IP it’s not possible to just check secure/insecure. In that case you can configure the load balancer to set a request header indicating the current state. To use this approach, set the useHeaderCheckChannelSecurity configuration property to true and optionally change the header names or values:
grails.plugin.springsecurity.secureChannel.useHeaderCheckChannelSecurity = trueBy default the header name is “X-Forwarded-Proto” and the secure header value is “http” (i.e. if you’re not secure, redirect to secure) and the insecure header value is “https” (i.e. if you’re secure, redirect to insecure). You can change any or all of these default values though:
grails.plugin.springsecurity.secureChannel.secureHeaderName = '...'
grails.plugin.springsecurity.secureChannel.secureHeaderValue = '...'
grails.plugin.springsecurity.secureChannel.insecureHeaderName = '...'
grails.plugin.springsecurity.secureChannel.insecureHeaderValue = '...'IP Address Restrictions
Ordinarily you can guard URLs sufficiently with roles, but the plugin provides an extra layer of security with its ability to restrict by IP address.
| Property | Default Value | Meaning |
|---|---|---|
ipRestrictions |
none |
Map of URL patterns to IP address patterns. |
For example, make an admin-only part of your site accessible only from IP addresses of the local LAN or VPN, such as 192.168.1.xxx or 10.xxx.xxx.xxx. You can also set this up at your firewall and/or routers, but it is convenient to encapsulate it within your application.
To use this feature, specify an ipRestrictions configuration as a List of Maps, one for each combination of URL pattern to IP address patterns that can access those URLs. The IP patterns can be single-value strings, or multi-value lists of strings. They can use CIDR masks, and can specify either IPv4 or IPv6 patterns. For example, given this configuration:
Listing 87. Sample
grails.plugin.springsecurity.ipRestrictions configurationgrails.plugin.springsecurity.ipRestrictions = [
[pattern: '/pattern1/**', access: '123.234.345.456'],
[pattern: '/pattern2/**', access: '10.0.0.0/8'],
[pattern: '/pattern3/**', access: ['10.10.200.42', '10.10.200.63']]
]pattern1 URLs can be accessed only from the external address 123.234.345.456, pattern2 URLs can be accessed only from a 10.xxx.xxx.xxx intranet address, and pattern3 URLs can be accessed only from 10.10.200.42 or 10.10.200.63. All other URL patterns are accessible from any IP address.
Patterns are matched against the request path within the application, in the form the request is dispatched: the context path is not included, percent-encoded characters are decoded and matrix parameters (;name=value) are removed, so an encoded or matrix-parameter variant of a restricted URL is subject to the same restriction. For a forwarded request the path of the original request is checked.
|
The format of |
All addresses can always be accessed from localhost regardless of IP pattern, primarily to support local development mode.
|
You cannot compare IPv4 and IPv6 addresses, so if your server supports both, you need to specify the IP patterns using the address format that is actually being used. Otherwise the filter throws exceptions. One option is to set the |
Session Fixation Prevention
To guard against session-fixation attacks set the useSessionFixationPrevention attribute to true:
grails.plugin.springsecurity.useSessionFixationPrevention = trueUpon successful authentication a new HTTP session is created and the previous session’s attributes are copied into it. If you start your session by clicking a link that was generated by someone trying to hack your account, which contained an active session id, you are no longer sharing the previous session after login. You have your own session.
Session fixation is less of a problem now that Grails by default does not include jsessionid in URLs (see this JIRA issue), but it’s still a good idea to use this feature.
Note that there is an issue when using the cookie-session plugin; see this issue for more details.
The table shows configuration options for session fixation.
| Property | Default Value | Meaning |
|---|---|---|
useSessionFixationPrevention |
|
Whether to use session fixation prevention |
sessionFixationPrevention.migrate |
|
Whether to copy the session attributes of the existing session to the new session after login |
sessionFixationPrevention.alwaysCreateSession |
|
Whether to always create a session even if one did not exist at the start of the request |
Logout Handlers
You register a list of logout handlers by implementing the LogoutHandler interface. The list is called when a user explicitly logs out.
By default, a securityContextLogoutHandler bean is registered to clear the SecurityContextHolder. Also, unless you are using Facebook or OpenID, rememberMeServices bean is registered to reset your cookie. (Facebook and OpenID authenticate externally so we don’t have access to the password to create a remember-me cookie.) If you are using Facebook, a facebookLogoutHandler is registered to reset its session cookies.
To customize this list, you define a logout.handlerNames attribute with a list of bean names.
| Property | Default Value | Meaning |
|---|---|---|
logout.handlerNames |
|
Logout handler bean names |
The beans must be declared either by the plugin or by you in resources.groovy. For example, suppose you have a custom MyLogoutHandler in resources.groovy:
Listing 88. Registering a custom logout handler in
resources.groovyimport com.foo.MyLogoutHandler
beans = {
myLogoutHandler(MyLogoutHandler) {
// attributes
}
}You register it in grails-app/conf/application.groovy as:
Listing 89. Adding a custom logout handler in
grails.plugin.springsecurity.logout.handlerNamesgrails.plugin.springsecurity.logout.handlerNames = [
'rememberMeServices', 'securityContextLogoutHandler', 'myLogoutHandler'
]Voters
Voters are classes that implement the Spring Security AccessDecisionVoter interface and are used to confirm whether a successful authentication is authorized for the current request.
You can register the voters to use with the voterNames setting; each element in the collection is the name of an existing Spring bean.
| Property | Default Value | Meaning |
|---|---|---|
voterNames |
|
Bean names of voters |
The default voters include a RoleHierarchyVoter to ensure users have the required roles for the request, an AuthenticatedVoter to support IS_AUTHENTICATED_FULLY, IS_AUTHENTICATED_REMEMBERED, and IS_AUTHENTICATED_ANONYMOUSLY tokens, a WebExpressionVoter to evaluate SpEL expressions, and a grails.plugin.springsecurity.access.vote.ClosureVoter to invoke annotation closures.
To customize this list, you define a voterNames attribute with a list of bean names. Any existing bean that implements the interface can be used, whether it is declared by this plugin, in your application’s resources.groovy, another plugin, or any other source.
Suppose you have registered a bean for a custom MyAccessDecisionVoter in resources.groovy:
import com.foo.MyAccessDecisionVoter
beans = {
myAccessDecisionVoter(MyAccessDecisionVoter) {
// attributes
}
}You register it in grails-app/conf/application.groovy as:
grails.plugin.springsecurity.voterNames = [
'authenticatedVoter', 'roleVoter', 'webExpressionVoter',
'closureVoter', 'myAccessDecisionVoter'
]Miscellaneous Properties
| Property | Default Value | Meaning |
|---|---|---|
active |
|
Whether the plugin is enabled |
printStatusMessages |
|
Whether to print status messages such as “Configuring Spring Security Core …” |
rejectIfNoRule |
|
“strict” mode where a request mapping is required for all resources; if |
anon.key |
“foo” |
anonymousProcessingFilter key |
atr.anonymousClass |
|
Anonymous token class |
useHttpSession EventPublisher |
|
If |
cacheUsers |
|
If |
useSecurity EventListener |
|
If |
dao.reflectionSaltSourceProperty |
none |
Which property to use for the reflection-based salt source. See Salted Passwords |
dao.hideUserNotFoundExceptions |
|
if |
requestCache.createSession |
|
Whether caching |
roleHierarchy |
none |
Hierarchical role definition. See Hierarchical Roles |
voterNames |
|
Bean names of voters. See Voters |
providerNames |
|
Bean names of authentication providers. See Authentication Providers |
securityConfigType |
“Annotation” |
Type of request mapping to use, one of “Annotation”, “Requestmap”, or “InterceptUrlMap” (or the corresponding enum value from |
controllerAnnotations.lowercase |
|
Whether to do URL comparisons using lowercase |
controllerAnnotations.staticRules |
none |
Extra rules that cannot be mapped using annotations |
interceptUrlMap |
none |
Request mapping definition when using “InterceptUrlMap”. See Static Map |
registerLoggerListener |
|
If |
scr.allowSessionCreation |
|
Whether to allow creating a session in the |
scr.disableUrlRewriting |
|
Whether to disable URL rewriting (and the jsessionid attribute) |
scr.springSecurityContextKey |
|
The HTTP session key to store the |
scpf.forceEagerSessionCreation |
|
Whether to eagerly create a session in the |
sch.strategyName |
|
The strategy to use for storing the |
debug.useFilter |
|
Whether to use the |
providerManager.eraseCredentialsAfterAuthentication |
|
Whether to remove the password from the |
excludeSpringSecurityAutoConfiguration |
|
Whether to automatically exclude Spring Boot security auto-configuration classes that conflict with the plugin. Set to |
Tutorials
Using Controller Annotations to Secure URLs
1. Create your Grails application.
$ grails create-app bookstore $ cd bookstore
2. “Install” the plugin by adding it to build.gradle
dependencies {
...
implementation 'org.apache.grails:grails-spring-security:{project-version}'
...
}Run the compile command to resolve dependencies and ensure everything is correct:
$ grails compile
3. Create the User and Role domain classes.
./grailsw s2-quickstart com.mycompany.myapp User RoleYou can choose your names for your domain classes and package; these are just examples.
|
Depending on your database, some domain class names might not be valid, especially those relating to security. Before you create names like “User” or “Group”, make sure they are not reserved keywords in your database, or escape the name with backticks in the |
If you are using Spring Core version 3.1.2 or later and GORM 6.0.10 or later, the script creates this User class:
grails-app/domain/com/mycompany/myapp/User.groovypackage com.mycompany.myapp
import groovy.transform.EqualsAndHashCode
import groovy.transform.ToString
import grails.compiler.GrailsCompileStatic
@GrailsCompileStatic
@EqualsAndHashCode(includes='username')
@ToString(includes='username', includeNames=true, includePackage=false)
class User implements Serializable {
private static final long serialVersionUID = 1
String username
String password
boolean enabled = true
boolean accountExpired
boolean accountLocked
boolean passwordExpired
Set<Role> getAuthorities() {
(UserRole.findAllByUser(this) as List<UserRole>)*.role as Set<Role>
}
static constraints = {
password blank: false, password: true
username blank: false, unique: true
}
static mapping = {
password column: '`password`'
}
}and a password encoder listener to manage password encoding:
grails-app/conf/spring/resources.groovyimport com.mycompany.myapp.UserPasswordEncoderListener
// Place your Spring DSL code here
beans = {
userPasswordEncoderListener(UserPasswordEncoderListener)
}src/main/groovy/com/mycompany/myapp/UserPasswordEncoderListener.groovypackage com.mycompany.myapp
import grails.plugin.springsecurity.SpringSecurityService
import org.grails.datastore.mapping.engine.event.AbstractPersistenceEvent
import org.grails.datastore.mapping.engine.event.PreInsertEvent
import org.grails.datastore.mapping.engine.event.PreUpdateEvent
import org.springframework.beans.factory.annotation.Autowired
import grails.events.annotation.gorm.Listener
import groovy.transform.CompileStatic
@CompileStatic
class UserPasswordEncoderListener {
@Autowired
SpringSecurityService springSecurityService
@Listener(User)
void onPreInsertEvent(PreInsertEvent event) {
encodePasswordForEvent(event)
}
@Listener(User)
void onPreUpdateEvent(PreUpdateEvent event) {
encodePasswordForEvent(event)
}
private void encodePasswordForEvent(AbstractPersistenceEvent event) {
if (event.entityObject instanceof User) {
User u = event.entityObject as User
if (u.password && ((event instanceof PreInsertEvent) || (event instanceof PreUpdateEvent && u.isDirty('password')))) {
event.getEntityAccess().setProperty('password', encodePassword(u.password))
}
}
}
private String encodePassword(String password) {
springSecurityService?.passwordEncoder ? springSecurityService.encodePassword(password) : password
}
}Previous versions of the plugin’s script manage the password encoding directly in domain class:
grails-app/domain/com/mycompany/myapp/User.groovypackage com.mycompany.myapp
import grails.plugin.springsecurity.SpringSecurityService
import groovy.transform.EqualsAndHashCode
import groovy.transform.ToString
import grails.compiler.GrailsCompileStatic
@GrailsCompileStatic
@EqualsAndHashCode(includes='username')
@ToString(includes='username', includeNames=true, includePackage=false)
class User implements Serializable {
private static final long serialVersionUID = 1
SpringSecurityService springSecurityService
String username
String password
boolean enabled = true
boolean accountExpired
boolean accountLocked
boolean passwordExpired
Set<Role> getAuthorities() {
(UserRole.findAllByUser(this) as List<UserRole>)*.role as Set<Role>
}
def beforeInsert() {
encodePassword()
}
def beforeUpdate() {
if (isDirty('password')) {
encodePassword()
}
}
protected void encodePassword() {
password = springSecurityService?.passwordEncoder ? springSecurityService.encodePassword(password) : password
}
static transients = ['springSecurityService']
static constraints = {
password blank: false, password: true
username blank: false, unique: true
}
static mapping = {
password column: '`password`'
}
}
If you use this older pattern, be aware that springSecurityService will be null when creating User instances in BootStrap.groovy. Domain class instances are plain Groovy objects, not Spring-managed beans, so their transient service references are not autowired at construction time. The beforeInsert() callback will silently skip password encoding because of the ?. safe-navigation operator, resulting in plaintext passwords stored in the database. See Password Encoding in BootStrap below for the recommended approach to seeding users in BootStrap.
|
| Service injection in GORM entities is disabled by default since Grails 3.2.8. Read documentation about Spring Autowiring of Domain Instances to learn how to turn autowire on. |
Even with autowiring enabled, transient service references (such as springSecurityService) are only injected into domain instances that are loaded by GORM from the database. Freshly constructed instances (e.g., new User(…)) are plain Groovy objects and will have null for all transient service fields. This is particularly important in BootStrap.groovy, where newly created domain instances will not have springSecurityService available during beforeInsert(). See Password Encoding in BootStrap for the recommended approach to password encoding when seeding data.
s2-quickstart script generates this Role too:
Role.groovypackage com.mycompany.myapp
import groovy.transform.EqualsAndHashCode
import groovy.transform.ToString
import grails.compiler.GrailsCompileStatic
@GrailsCompileStatic
@EqualsAndHashCode(includes='authority')
@ToString(includes='authority', includeNames=true, includePackage=false)
class Role implements Serializable {
private static final long serialVersionUID = 1
String authority
static constraints = {
authority blank: false, unique: true
}
static mapping = {
cache true
}
}and a domain class that maps the many-to-many join class, UserRole:
UserRole.groovypackage com.mycompany.myapp
import grails.gorm.DetachedCriteria
import groovy.transform.ToString
import org.codehaus.groovy.util.HashCodeHelper
import grails.compiler.GrailsCompileStatic
@GrailsCompileStatic
@ToString(cache=true, includeNames=true, includePackage=false)
class UserRole implements Serializable {
private static final long serialVersionUID = 1
User user
Role role
@Override
boolean equals(other) {
if (other instanceof UserRole) {
other.userId == user?.id && other.roleId == role?.id
}
}
@Override
int hashCode() {
int hashCode = HashCodeHelper.initHash()
if (user) {
hashCode = HashCodeHelper.updateHash(hashCode, user.id)
}
if (role) {
hashCode = HashCodeHelper.updateHash(hashCode, role.id)
}
hashCode
}
static UserRole get(long userId, long roleId) {
criteriaFor(userId, roleId).get()
}
static boolean exists(long userId, long roleId) {
criteriaFor(userId, roleId).count()
}
private static DetachedCriteria criteriaFor(long userId, long roleId) {
UserRole.where {
user == User.load(userId) &&
role == Role.load(roleId)
}
}
static UserRole create(User user, Role role, boolean flush = false) {
def instance = new UserRole(user: user, role: role)
instance.save(flush: flush)
instance
}
static boolean remove(User u, Role r) {
if (u != null && r != null) {
UserRole.where { user == u && role == r }.deleteAll()
}
}
static int removeAll(User u) {
u == null ? 0 : UserRole.where { user == u }.deleteAll() as int
}
static int removeAll(Role r) {
r == null ? 0 : UserRole.where { role == r }.deleteAll() as int
}
static constraints = {
role validator: { Role r, UserRole ur ->
if (ur.user?.id) {
UserRole.withNewSession {
if (UserRole.exists(ur.user.id, r.id)) {
return ['userRole.exists']
}
}
}
}
}
static mapping = {
id composite: ['user', 'role']
version false
}
}|
These generated files are not part of the plugin - these are your application files.
They are examples to get you started, so you can edit them as you please.
They contain the minimum needed for the plugin’s default implementation of the Spring Security |
The script has edited (or created) grails-app/conf/application.groovy and added the configuration for your domain classes. Make sure that the changes are correct.
While you’re looking at application.groovy, add this config override to make the sample app easier to work with:
grails.plugin.springsecurity.logout.postOnly = false|
By default only POST requests can be used to logout; this is a very sensible default and shouldn’t be changed in most cases. However to keep things simple for this tutorial we’ll change it (using the |
The plugin has no support for CRUD actions or GSPs for your domain classes; the spring-security-ui plugin supplies a UI for those. So for now you will create roles and users in grails-app/init/BootStrap.groovy. (See step 7.)
4. Create a controller that will be restricted by role.
$ grails create-controller com.mycompany.myapp.Secure
This command creates grails-app/controllers/com/mycompany/myapp/SecureController.groovy. Add some output so you can verify that things are working:
SecureController.groovypackage com.mycompany.myapp
class SecureController {
def index() {
render 'Secure access only'
}
}5. Edit grails-app/init/BootStrap.groovy to add a test user.
BootStrap.groovypackage com.mycompany.myapp
import grails.gorm.transactions.Transactional
class BootStrap {
def init = {
addTestUser()
}
@Transactional
void addTestUser() {
def adminRole = new Role(authority: 'ROLE_ADMIN').save()
def testUser = new User(username: 'me', password: 'password').save()
UserRole.create testUser, adminRole
UserRole.withSession {
it.flush()
it.clear()
}
assert User.count() == 1
assert Role.count() == 1
assert UserRole.count() == 1
}
}Some things to note about the preceding BootStrap.groovy:
-
The example does not use a traditional GORM many-to-many mapping for the User <==> Role relationship; instead you are mapping the join table with the
UserRoleclass. This performance optimization helps significantly when many users have one or more common roles. -
We explicitly flush (using
withSession) becauseBootStrapdoes not run in a transaction or OpenSessionInView. -
This example works correctly because the
UserPasswordEncoderListener(a Spring-managed bean) handles password encoding during the GORMPreInsertEvent. If you are using the older domain class pattern withbeforeInsert()instead, see the note below.
Password Encoding in BootStrap
If you are using the older User domain class pattern where springSecurityService is declared as a transient field and password encoding happens in beforeInsert(), passwords will not be encoded when creating users in BootStrap.groovy. This is because domain class instances are plain Groovy objects - their transient service references are not autowired by Spring at construction time. The springSecurityService field will be null, and the safe-navigation operator (?.) in encodePassword() will silently skip encoding.
To work around this, inject the passwordEncoder bean directly in BootStrap and pre-encode passwords before saving:
BootStrap.groovyimport grails.gorm.transactions.Transactional
import org.springframework.security.crypto.password.PasswordEncoder
class BootStrap {
PasswordEncoder passwordEncoder (1)
def init = {
addTestUser()
}
@Transactional
void addTestUser() {
def adminRole = new Role(authority: 'ROLE_ADMIN').save()
String encodedPassword = passwordEncoder.encode('password') (2)
def testUser = new User(username: 'me', password: encodedPassword).save()
UserRole.create testUser, adminRole
UserRole.withSession {
it.flush()
it.clear()
}
}
}| 1 | The PasswordEncoder bean is auto-configured by the plugin and can be injected into BootStrap by name. |
| 2 | Pre-encode the password before constructing the User instance so that password encoding is handled explicitly here, rather than relying on a beforeInsert() hook or an injected springSecurityService in the domain class. |
Be careful not to double-encode passwords if you also use a beforeInsert()-style encoding hook or a Spring-managed listener (for example, a User domain class with an injected springSecurityService, or a UserPasswordEncoderListener that encodes on insert/update). In those cases, the callback or listener would see the already-encoded value produced in BootStrap and attempt to encode it again. Ensure that only one mechanism is responsible for encoding - for example, rely solely on a listener such as UserPasswordEncoderListener, or disable automatic encoding for users created in BootStrap. The recommended approach is to use the UserPasswordEncoderListener pattern shown above, which avoids this issue entirely.
|
6. Start the server.
$ grails run-app
7. Verify that you cannot access the page yet.
Before you secure the page, navigate to http://localhost:8080/secure to verify that you cannot access the page yet. You will be redirected to the login page, but after a successful authentication (log in with the username and password you used for the test user in BootStrap.groovy) you will see an error page:
Sorry, you're not authorized to view this page.
This is because with the default configuration, all URLs are denied unless there is an access rule specified.
8. Apply the annotation.
Edit grails-app/controllers/com/mycompany/myapp/SecureController.groovy to import the annotation class and apply the annotation to restrict (and grant) access.
SecureController.groovypackage com.mycompany.myapp
import grails.plugin.springsecurity.annotation.Secured
class SecureController {
@Secured('ROLE_ADMIN')
def index() {
render 'Secure access only'
}
}or
SecureController.groovypackage com.mycompany.myapp
import grails.plugin.springsecurity.annotation.Secured
@Secured('ROLE_ADMIN')
class SecureController {
def index() {
render 'Secure access only'
}
}You can annotate the entire controller or individual actions. In this case you have only one action, so you can do either.
9. Restart.
Shut down the app and run grails run-app again, and navigate again to http://localhost:8080/secure.
This time you should again be able to see the secure page after successfully authenticating.
10. Test the Remember Me functionality.
Check the checkbox, and once you’ve tested the secure page, close your browser and reopen it. Navigate again the the secure page. Because a cookie is stored, you should not need to log in again. Logout at any time by navigating to http://localhost:8080/logout.
11. Create a CRUD UI.
Optionally, create a CRUD UI to work with users and roles.
Run grails generate-all for the domain classes:
$ grails generate-all com.mycompany.myapp.User
$ grails generate-all com.mycompany.myapp.Role
Since the User domain class handles password hashing, there are no changes required in the generated controllers.
Be sure to add an @Secured annotation to both of the generated controllers to make them accessible.
Example Applications
Sometimes the best way to learn is by example. We have an ever-expanding list of example apps created to do just that… help you learn how to utilize the grails-spring-security plugin in your current application.
The Repos
A comprehensive list of example spring security apps may be found at:
The Example Apps
spring-security-ui
A sample Grails App which uses the Grails Spring Security UI and Spring Security Core Plugins.
The Spring Security UI plugin provides CRUD screens and other user management workflows.
grails-spring-security-spring-boot-actuators
A sample Grails App which secures a Spring Boot Actuator endpoint using the Spring Security Core Plugin.
Spring Boot Actuators provide ways to monitor the health and performance of your application along with other metadata information.
grails-ssc-mongodb
A sample Grails App which uses the Spring Security Core Plugin and MongoDB.
MongoDB is an open source, document-oriented database.
grails-spring-security-params
A sample Grails App which uses the Spring Security Core Plugin to demonstrate how to use a closure with the @Secured annotation.
grails-spring-security-group
A sample Grails App which uses the Spring Security Core Plugin and Group Authentication as described in the documentation.
Rather than granting authorities directly to a “person”, you can create a “group”, map authorities to it, and then map a “person” to that “group”. For applications that have a one or more groups of users who need the same level of access, having one or more “group” instances makes managing changes to access levels easier.
grails-spring-security-hierarchical-roles
A sample Grails App which uses the Spring Security Core Plugin and Hierarchical Roles as described in the documentation.
Hierarchical roles are a convenient way to reduce clutter in your request mappings.
grails-spring-security-ajax
A sample Grails App which uses the Spring Security Core Plugin and Ajax Authentication as described in the documentation.
The Spring Security Core Plugin supports Ajax logins, but you need to create your own client-side code.
Controller Methods
The plugin registers some convenience methods into all controllers in your application. As of version 3.1.0 this is implemented by a trait that is applied to all controllers but was implemented in earlier versions by adding methods to each controller’s MetaClass. All are accessor methods, so they can be called as methods or properties. They include:
isLoggedIn
Returns true if there is an authenticated user.
Listing 90. Example use of
isLoggedIn()class MyController {
def someAction() {
if (isLoggedIn()) {
...
}
...
if (!isLoggedIn()) {
...
}
// or
if (loggedIn) {
...
}
if (!loggedIn) {
...
}
}
}getPrincipal
Retrieves the current authenticated user’s Principal (a GrailsUser instance unless you’ve customized this) or null if not authenticated.
Listing 91. Example use of
getPrincipal()class MyController {
def someAction() {
if (isLoggedIn()) {
String username = getPrincipal().username
...
}
// or
if (isLoggedIn()) {
String username = principal.username
...
}
}
}getAuthenticatedUser
Loads the user domain class instance from the database that corresponds to the currently authenticated user, or null if not authenticated. This is the equivalent of adding a dependency injection for springSecurityService and calling PersonDomainClassName.get(springSecurityService.principal.id) (the typical way that this is often done).
Listing 92. Example use of
getAuthenticatedUser()class MyController {
def someAction() {
if (isLoggedIn()) {
String email = getAuthenticatedUser().email
...
}
// or
if (isLoggedIn()) {
String email = authenticatedUser.email
...
}
}
}Internationalization
The plugin includes i18n messages in several languages. To customize or translate these, add messages for the following keys to your i18n resource bundle(s) for each exception:
| Message | Default Value | Exception |
|---|---|---|
springSecurity.errors.login.expired |
“Sorry, your account has expired.” |
|
springSecurity.errors.login.passwordExpired |
“Sorry, your password has expired.” |
|
springSecurity.errors.login.disabled |
“Sorry, your account is disabled.” |
|
springSecurity.errors.login.locked |
“Sorry, your account is locked.” |
|
springSecurity.errors.login.fail |
“Sorry, we were not able to find a user with that username and password.” |
Other exceptions |
You can customize all messages in auth.gsp and denied.gsp:
| Message | Default Value |
|---|---|
springSecurity.login.title |
“Login” |
springSecurity.login.header |
“Please Login” |
springSecurity.login.button |
“Login” |
springSecurity.login.username.label |
“Username” |
springSecurity.login.password.label |
“Password” |
springSecurity.login.remember.me.label |
“Remember me” |
springSecurity.denied.title |
“Denied” |
springSecurity.denied.message |
“Sorry, you’re not authorized to view this page.” |
Scripts
s2-quickstart
Purpose
Creates a user and role class (and optionally a requestmap class) in the specified package. If you specify a role-group name with the groupClassName argument, role/group classes will also be generated. If you specify the uiOnly flag, no domain classes are created but the plugin settings are initialized (useful with LDAP, Mock, Shibboleth, etc.)
The general format is:
./grailsw s2-quickstart DOMAIN_CLASS_PACKAGE USER_CLASS_NAME ROLE_CLASS_NAME [REQUESTMAP_CLASS_NAME] [--groupClassName=GROUP_CLASS_NAME]Examples
./grailsw s2-quickstart com.yourapp User Role./grailsw s2-quickstart com.yourapp User Role --groupClassName=RoleGroup./grailsw s2-quickstart com.yourapp Person Authority Requestmap./grailsw s2-quickstart --uiOnlyDescription
-
Updates
grails-app/conf/application.groovywith security configuration settings and creates domain classes ingrails-app/domainunless the uiOnly flag is specified
s2-create-persistent-token
Purpose
Creates a persistent token domain class for storing remember-me cookie information in the database. The general format is:
./grailsw s2-create-persistent-token <classname>Example
./grailsw s2-create-persistent-token com.yourapp.PersistentLoginDescription
This creates the domain class in the specified package, and also registers the name in grails-app/conf/application.groovy, along with enabling persistent remember-me.
s2-create-role-hierarchy-entry
Purpose
Creates a persistent role hierarchy entry domain class for storing role hierarchy information in the database. The general format is:
./grailsw s2-create-role-hierarchy-entry <classname>Example
./grailsw s2-create-role-hierarchy-entry com.yourapp.RoleHierarchyEntryDescription
This creates the domain class in the specified package, and also registers the name in grails-app/conf/application.groovy, along with enabling persistent role hierarchy storage and lookup.
Debugging
If you need debug information, you can specify the following entries in logback.groovy:
grails-app/conf/logback.groovy
logger 'org.springframework.security', DEBUG, ['STDOUT'], false
logger 'grails.plugin.springsecurity', DEBUG, ['STDOUT'], falseAPI Reference
The Core plugin Groovydoc API documentation for historical (pre-merge) releases is available at the legacy Spring Security Core plugin API reference.
18.5.1.2 ACL Plugin
Introduction to the Spring Security ACL Plugin
The ACL plugin adds Domain Object Security support to a Grails application that uses Spring Security. It depends on the Spring Security Core plugin.
The core plugin and other extension plugins support restricting access to URLs via rules that include checking a user’s authentication status, roles, etc. and the ACL plugin extends this by adding support for restricting access to individual domain class instances. The access can be very fine-grained and can define which actions can be taken on an object - these typically include Read, Create, Write, Delete, and Administer but you’re free to define whatever actions you like.
To learn about using ACLs in Grails, you can follow the Tutorial and in addition you can download and run a complete Grails application that uses the plugin. Installing and running the application are described in Sample Application.
In addition to this document, you should read the Spring Security documentation.
Installing
Add an entry in the dependencies block of your `build.gradle file, changing the version as needed:
build.gradle
dependencies {
...
implementation 'org.apache.grails:grails-spring-security-acl'
...Different Branches are built for different versions of Grails
-
5.0.x: Grails 7
-
4.0: Grails 4 through Grails 6
-
3.3.x: Grails 3.3
-
grails_32: Grails 3.2
-
2.x: Grails 2
Current version (5.0.x) is for Grails 7 only.
For Grails 3.3.x use:
build.gradle
dependencies {
...
implementation 'org.grails.plugins:spring-security-acl:3.2.1'
...For previous Grails 3 versions ( 3.0.x, 3.1.x and 3.2.x ) use:
build.gradle
dependencies {
...
implementation 'org.grails.plugins:spring-security-acl:3.1.1'
...Distribution
Grails Spring Security ACL plugin is distributed in repo.grails.org.
Snapshots
Snapshots are published automatically to repo.grails.org on every successful build.
You can use them by defining this Maven repository inside
the repositories block in your build.gradle:
maven { url "https://repo.grails.org/grails/core" }Usage
Securing Service Methods
There are two primary use cases for ACL security: determining whether a user is allowed to perform an action on an instance before the action is invoked, and restricting access to single or multiple instances after methods are invoked (this is typically implemented by collection filtering). You can call aclUtilService.hasPermission() explicitly, but this tends to clutter your code with security logic that often has little to do with business logic. Instead, Spring Security provides some convenient annotations that are used to wrap your method calls in access checks.
There are four annotations:
The annotations use security-specific Spring expression language (SpEL) expressions - see the documentation for the available standard and method expressions.
Here’s an example service that manages a Report domain class and uses these annotations and expressions:
import org.springframework.security.access.prepost.PostFilter
import org.springframework.security.access.prepost.PreAuthorize
import org.springframework.security.core.parameters.P
import grails.gorm.transactions.Transactional
import com.yourapp.Report
class ReportService {
@PreAuthorize("hasPermission(#id, 'com.yourapp.Report', read) or " +
"hasPermission(#id, 'com.yourapp.Report', admin)")
Report getReport(@P("id") long id) {
Report.get(id)
}
@Transactional
@PreAuthorize("hasRole('ROLE_USER')")
Report createReport(params) {
Report report = new Report(params)
report.save()
report
}
@PreAuthorize("hasRole('ROLE_USER')")
@PostFilter("hasPermission(filterObject, read) or " +
"hasPermission(filterObject, admin)")
List getAllReports(params = [:]) {
Report.list(params)
}
@Secured(['ROLE_USER', 'ROLE_ADMIN'])
String getReportName(long id) {
Report.get(id).name
}
@Transactional
@PreAuthorize("hasPermission(#report, write) or " +
"hasPermission(#report, admin)")
Report updateReport(@P("report") Report report, params) {
report.properties = params
report.save()
report
}
@Transactional
@PreAuthorize("hasPermission(#report, delete) or " +
"hasPermission(#report, admin)")
void deleteReport(@P("report") Report report) {
report.delete()
}
}The configuration specifies these rules:
-
getReportrequires that the authenticated user haveBasePermission.READorBasePermission.ADMINfor the instance -
createReportrequiresROLE_USER -
getAllReportsrequiresROLE_USERand will have elements removed from the returnedListthat the user doesn’t have an ACL grant for; the user must haveBasePermission.READorBasePermission.ADMINfor each element in the list; elements that don’t have access granted will be removed -
getReportNamerequires that the authenticated user have eitherROLE_USERorROLE_ADMIN(but no ACL rules) -
updateReporthas no role restrictions but must satisfy the requirements of theaclReportWriteVotervoter (which has theACL_REPORT_WRITEconfig attribute), i.e.BasePermission.ADMINISTRATIONorBasePermission.WRITE -
deleteReporthas no role restrictions but must satisfy the requirements of theaclReportDeleteVotervoter (which has theACL_REPORT_DELETEconfig attribute), i.e.BasePermission.ADMINISTRATIONorBasePermission.DELETE
Working with ACLs
Suggested application changes
To properly display access denied exceptions (e.g. when a user tries to perform an action but doesn’t have a grant authorizing it), you should create a mapping in grails-app/controllers/UrlMappings.groovy for error code 403. In addition, it’s possible to trigger a NotFoundException which will create an error 500, but should be treated like a 403 error, so you should add mappings for these conditions:
import org.springframework.security.access.AccessDeniedException
import org.springframework.security.acls.model.NotFoundException
class UrlMappings {
static mappings = {
...
"403"(controller: "errors", action: "error403")
"500"(controller: "errors", action: "error500")
"500"(controller: "errors", action: "error403",
exception: AccessDeniedException)
"500"(controller: "errors", action: "error403",
exception: NotFoundException)
}
}These depend on an ErrorsController:
package com.yourcompany.yourapp
import grails.plugin.springsecurity.annotation.Secured
@Secured('permitAll')
class ErrorsController {
def error403() {}
def error500() {
render view: '/error'
}
}and a grails-app/views/errors/error403.gsp similar to this:
<html>
<head>
<title>Access denied!</title>
<meta name='layout' content='main' />
</head>
<body>
<h1>Access Denied</h1>
<p>We're sorry, but you are not authorized to
perform the requested operation.</p>
</body>
</html>actionSubmit
Grails has a convenient feature where it supports multiple submit actions per form via the <g:actionSubmit> tag. This is done by posting to the index action but with a special parameter that indicates which action to invoke. This is a problem in general for security since any URL rules for edit, delete, save, etc. will be bypassed. It’s an even more significant issue with ACLs because of the way that the access denied exception interacts with the actionSubmit processing. If you don’t make any adjustments for this, your users will see a blank page when they attempt to submit a form and the action is disallowed. The solution is to remove actionSubmit buttons and replace them with regular submit buttons. This requires one form per button, and without adjusting the CSS the buttons will look differently than if they were in-line actionSubmit buttons, but that is fixable with the appropriate CSS changes.
|
Note that this is not an issue when using the generated GSPs in Grails 3 because they’ve been reworked to use the fields plugin, but if you have an older application that you’ve upgraded or if you have GSPs that don’t use the newer approach, you will need to avoid using |
It’s simple to adjust the actionSubmit buttons and you’ll need to change them in show.gsp and edit.gsp; list.gsp (or index.gsp) and show.gsp don’t need any changes. In show.gsp, replace the two actionSubmit buttons with these two forms (maintain the g:message tags; the strings are hard-coded here to reduce clutter):
<div class="buttons">
<g:form action='edit'>
<g:hiddenField name="id" value="${reportInstance?.id}" />
<span class="button">
<g:submitButton class="edit" name="Edit" />
</span>
</g:form>
<g:form action='delete'>
<g:hiddenField name="id" value="${reportInstance?.id}" />
<span class="button">
<g:submitButton class="delete" name="Delete"
onclick="return confirm('Are you sure?');" />
</span>
</g:form>
</div>In edit.gsp, change the <form> tag to
<g:form action='update'>and convert the update button to a regular submit button:
<div class="buttons">
<span class="button">
<g:submitButton class="save" name="Update" />
</span>
</div>and move the delete button out of the form into its own form just below the main form:
<g:form action='delete'>
<g:hiddenField name="id" value="${reportInstance?.id}" />
<div class="buttons">
<span class="button">
<g:submitButton class="delete" name="Delete"
onclick="return confirm('Are you sure?');" />
</span>
</div>
</g:form>Domain Classes
The plugin uses domain classes to manage database state. Ordinarily the database structure isn’t all that important, but to be compatible with the traditional JDBC-based Spring Security code, the domain classes are configured to generate the table and column names that are used there.
The plugin classes related to persistence use these classes, so they’re included in the plugin but can be overridden by running the s2-create-acl-domains script.
As you can see, the database structure is highly normalized.
AclClass
The AclClass domain class contains entries for the names of each application domain class that has associated permissions:
package grails.plugin.springsecurity.acl
class AclClass {
String className
@Override
String toString() {
"AclClass id $id, className $className"
}
static mapping = {
className column: 'class'
version false
}
static constraints = {
className unique: true, blank: false
}
}AclSid
The AclSid domain class contains entries for the names of grant recipients (a principal or authority - SID is an acronym for “security identity”). These are typically usernames (where principal is true) but can also be a GrantedAuthority (role name, where principal is false). When granting permissions to a role, any user with that role receives that permission:
package grails.plugin.springsecurity.acl
class AclSid {
String sid
boolean principal
@Override
String toString() {
"AclSid id $id, sid $sid, principal $principal"
}
static mapping = {
version false
}
static constraints = {
principal unique: 'sid'
sid blank: false, size: 1..255
}
}AclObjectIdentity
The AclObjectIdentity domain class contains entries representing individual domain class instances (OIDs). It has a field for the instance id (objectId) and domain class (aclClass) that uniquely identify the instance. In addition there are optional nullable fields for the parent OID (parent) and owner (owner). There’s also a flag (entriesInheriting) to indicate whether ACL entries can inherit from a parent ACL.
package grails.plugin.springsecurity.acl
class AclObjectIdentity extends AbstractAclObjectIdentity {
Long objectId
@Override
String toString() {
"AclObjectIdentity id $id, aclClass $aclClass.className, " +
"objectId $objectId, entriesInheriting $entriesInheriting"
}
static mapping = {
version false
aclClass column: 'object_id_class'
owner column: 'owner_sid'
parent column: 'parent_object'
objectId column: 'object_id_identity'
}
static constraints = {
objectId unique: 'aclClass'
}
}AclObjectIdentity actually extends a base class, AbstractAclObjectIdentity:
abstract class AbstractAclObjectIdentity {
AclClass aclClass
AclObjectIdentity parent
AclSid owner
boolean entriesInheriting
static constraints = {
parent nullable: true
owner nullable: true
}
}By default it’s assumed that domain classes have a numeric primary key, but that’s not required. So the default implementation has a Long objectId field, but if you want to support other types of ids you can change that field and retain the other standard functionality from the base class.
AclEntry
Finally, the AclEntry domain class contains entries representing grants (or denials) of a permission on an object instance to a recipient. The aclObjectIdentity field references the domain class instance (since an instance can have many granted permissions). The sid field references the recipient. The granting field determines whether the entry grants the permission (true) or denies it (false). The aceOrder field specifies the position of the entry, which is important because the entries are evaluated in order and the first matching entry determines whether access is allowed. auditSuccess and auditFailure determine whether to log success and/or failure events (these both default to false).
The mask field holds the permission. This can be a source of confusion because the name (and the Spring Security documentation) indicates that it’s a bit mask. A value of 1 indicates permission A, a value of 2 indicates permission B, a value of 4 indicates permission C, a value of 8 indicates permission D, etc. So you would think that a value of 5 would indicate a grant of both permission A and C. Unfortunately this is not the case. There is a CumulativePermission class that supports this, but the standard classes don’t support it (AclImpl.isGranted() checks for == rather than using | (bitwise or) so a combined entry would never match). So rather than grouping all permissions for one recipient on one instances into a bit mask, you must create individual records for each.
package grails.plugin.springsecurity.acl
class AclEntry {
AclObjectIdentity aclObjectIdentity
int aceOrder
AclSid sid
int mask
boolean granting
boolean auditSuccess
boolean auditFailure
@Override
String toString() {
"AclEntry id $id, aceOrder $aceOrder, mask $mask, granting $granting, " +
"aclObjectIdentity $aclObjectIdentity"
}
static mapping = {
version false
sid column: 'sid'
aclObjectIdentity column: 'acl_object_identity'
}
static constraints = {
aceOrder unique: 'aclObjectIdentity'
}
}Configuration
Creating, editing, or deleting permissions requires an authenticated user. In most cases if the authenticated user is the owner of the ACL then access is allowed, but granted roles also affect whether access is allowed. The default required role is ROLE_ADMIN for all actions, but this can be configured in grails-app/conf/application.groovy. This table summarizes the attribute names and the corresponding actions that are allowed for it:
| Attribute | Affected methods |
|---|---|
|
|
|
|
|
|
You can leave the attributes set to ROLE_ADMIN or change them to have separate values, e.g.
grails.plugin.springsecurity.acl.authority.
modifyAuditingDetails = 'ROLE_ACL_MODIFY_AUDITING'
grails.plugin.springsecurity.acl.authority.
changeOwnership = 'ROLE_ACL_CHANGE_OWNERSHIP'
grails.plugin.springsecurity.acl.authority.
changeAclDetails = 'ROLE_ACL_CHANGE_DETAILS'Run-As Authentication Replacement
There are also two options to configure Run-As Authentication Replacement:
| Attribute | Meaning |
|---|---|
|
change to |
|
a shared key between the two standard implementation classes, used to verify that a third party hasn’t created a token for the user; should be changed from its default value |
Example:
grails.plugin.springsecurity.useRunAs = true
grails.plugin.springsecurity.runAs.key = 'your run-as key'Run-As Authentication Replacement
Although not strictly related to ACLs, the plugin implements Run-As Authentication Replacement since it’s related to method security in general. This feature is similar to the Switch User feature of the Spring Security Core plugin, but instead of running as another user until you choose to revert to your original Authentication, the temporary authentication switch only lasts for one method invocation.
For example, in this service someMethod() requires that the authenticated user have ROLE_ADMIN and will also be granted ROLE_RUN_AS_SUPERUSER for the duration of the method only:
class SecureService {
@Secured(['ROLE_ADMIN', 'RUN_AS_SUPERUSER'])
def someMethod() {
...
}
}Custom Permissions
By default there are 5 permissions available from the org.springframework.security.acls.domain. BasePermission class: READ, WRITE, CREATE, DELETE, and ADMINISTRATION. You can also add your own permissions if these aren’t sufficient.
The easiest approach is to create a subclass of BasePermission and add your new permissions there. This way you retain the default permissions and can use them if you need. For example, here’s a subclass that adds a new APPROVE permission:
package com.mycompany.myapp;
import org.springframework.security.acls.domain.BasePermission;
import org.springframework.security.acls.model.Permission;
public class MyPermission extends BasePermission {
public static final Permission APPROVE = new MyPermission(1 << 5, 'V');
protected MyPermission(int mask) {
super(mask);
}
protected MyPermission(int mask, char code) {
super(mask, code);
}
}It sets the mask value to 32 (1 << 5) since the values up to 16 are defined in the base class.
To use your class instead of the default, specify it in with the grails.plugin.springsecurity.acl.permissionClass attribute either as a Class or a String, for example
import com.mycompany.myapp.MyPermissions
...
grails.plugin.springsecurity.acl. permissionClass = MyPermissionsor
grails.plugin.springsecurity.acl.permissionClass = 'com.mycompany.myapp.MyPermissions'You can also override the aclPermissionFactory bean in grails-app/conf/spring/resources.groovy, keeping the org.springframework.security.acls.domain. DefaultPermissionFactory class but passing your class as the constructor argument to keep it from defaulting to BasePermission, or do a more complex override to more fully reconfigure the behavior:
import org.springframework.security.acls.domain.DefaultPermissionFactory
import com.mycompany.myapp.MyPermission
beans = {
aclPermissionFactory(DefaultPermissionFactory, MyPermission)
}Once this is done you can use the permission like any other, specifying its quoted lowercase name in an expression, e.g.
@PreAuthorize("hasPermission(#id, 'com.testacl.Report', 'approve')")
Report get(@P("id") long id) {
Report.get id
}Tutorial
First create a test application:
$ grails create-app acltest $ cd acltest
Add a dependency for the plugin by adding it to the dependencies block in build.gradle:
dependencies {
...
implementation 'org.grails.plugins:spring-security-acl:{project-version}'
...
}and run the compile command to resolve the dependencies:
$ grails compile
This will transitively install the Spring Security Core plugin, so you’ll need to configure that by running the s2-quickstart script:
$ grails s2-quickstart com.testacl User Role
The ACL support uses domain classes and includes them in the JAR file, but to allow customizing them (e.g. to enable Hibernate 2nd-level caching) there’s a script that copies the domain classes into your application, s2-create-acl-domains. There’s no need to run this script if the default configuration is sufficient.
Note that you cannot change the domain class names or packages since the plugin references them by name. Grails allows you to override plugin artifacts by creating (or copying and modifying existing) classes with the same name and package in your application.
For portability, the domain class mappings are configured to generate the same DDL as is required by the standard Spring Security JDBC implementation.
We’ll need a domain class to test with, so create a Report domain class:
$ grails create-domain-class com.testacl.Report
and add a name property for testing:
package com.testacl
class Report {
String name
}Next we’ll create a service to test ACLs:
$ grails create-service com.testacl.Report
and add some methods that work with Reports:
package com.testacl
import static org.springframework.security.acls.domain.BasePermission.ADMINISTRATION
import org.springframework.security.access.prepost.PostFilter
import org.springframework.security.access.prepost.PreAuthorize
import org.springframework.security.acls.domain.DefaultPermissionFactory
import org.springframework.security.acls.model.AccessControlEntry
import org.springframework.security.acls.model.MutableAcl
import org.springframework.security.acls.model.Permission
import org.springframework.security.acls.model.Sid
import org.springframework.security.core.parameters.P
import grails.compiler.GrailsCompileStatic
import grails.plugin.springsecurity.SpringSecurityService
import grails.plugin.springsecurity.acl.AclService
import grails.plugin.springsecurity.acl.AclUtilService
import grails.gorm.transactions.Transactional
@GrailsCompileStatic
class ReportService {
DefaultPermissionFactory aclPermissionFactory
AclService aclService
AclUtilService aclUtilService
SpringSecurityService springSecurityService
void addPermission(Report report, String username, int permission) {
addPermission report, username, aclPermissionFactory.buildFromMask(permission)
}
@PreAuthorize('hasPermission(#report, admin)')
@Transactional
void addPermission(@P("report") Report report, String username, Permission permission) {
aclUtilService.addPermission report, username, permission
}
@Transactional
@PreAuthorize('hasRole("ROLE_USER")')
Report create(String name) {
Report report = new Report(name: name).save(failOnError: true)
// Grant the current principal administrative permission
addPermission report, springSecurityService.authentication.name, ADMINISTRATION
report
}
@PreAuthorize('hasPermission(#id, "com.testacl.Report", read) or hasPermission(#id, "com.testacl.Report", admin)')
Report get(@P("id") long id) {
Report.get id
}
@PreAuthorize('hasRole("ROLE_USER")')
@PostFilter('hasPermission(filterObject, read) or hasPermission(filterObject, admin)')
List<Report> list(Map params) {
Report.list params
}
int count() {
Report.count()
}
@Transactional
@PreAuthorize('hasPermission(#report, write) or hasPermission(#report, admin)')
void update(@P("report") Report report, String name) {
report.name = name
}
@Transactional
@PreAuthorize('hasPermission(#report, delete) or hasPermission(#report, admin)')
void delete(@P("report") Report report) {
report.delete()
// Delete the ACL information as well
aclUtilService.deleteAcl report
}
@Transactional
@PreAuthorize('hasPermission(#report, admin)')
void deletePermission(@P("report") Report report, Sid recipient, Permission permission) {
MutableAcl acl = (MutableAcl)aclUtilService.readAcl(report)
// Remove all permissions associated with this particular
// recipient (string equality to KISS)
acl.entries.eachWithIndex { AccessControlEntry entry, int i ->
if (entry.sid == recipient && entry.permission == permission) {
acl.deleteAce i
}
}
aclService.updateAcl acl
}
}The configuration specifies these rules:
-
addPermissionrequires that the authenticated user have admin permission on the report instance to grant a permission to someone else -
createrequires that the authenticated user haveROLE_USER -
getrequires that the authenticated user have read or admin permission on the specified Report -
listrequires that the authenticated user have ROLE_USER and read or admin permission on each returned Report; instances that don’t have granted permissions will be removed from the returned List -
counthas no restrictions -
updaterequires that the authenticated user have write or admin permission on the report instance to edit it -
deleterequires that the authenticated user have delete or admin permission on the report instance to edit it -
deletePermissionrequires that the authenticated user have admin permission on the report instance to delete a grant
To test this out we’ll need some users; create a service to create users and their grants:
$ grails create-service com.testacl.SampleData
and add this code:
package com.testacl
import static org.springframework.security.acls.domain.BasePermission.ADMINISTRATION
import static org.springframework.security.acls.domain.BasePermission.READ
import static org.springframework.security.acls.domain.BasePermission.WRITE
import org.springframework.security.authentication.UsernamePasswordAuthenticationToken
import org.springframework.security.core.authority.AuthorityUtils
import org.springframework.security.core.context.SecurityContextHolder as SCH
import grails.gorm.transactions.Transactional
@Transactional
class SampleDataService {
def aclService
def aclUtilService
def objectIdentityRetrievalStrategy
void createSampleData() {
createUsers()
loginAsAdmin()
grantPermissions()
// logout
SCH.clearContext()
}
private void loginAsAdmin() {
// have to be authenticated as an admin to create ACLs
SCH.context.authentication = new UsernamePasswordAuthenticationToken(
'admin', 'admin123',
AuthorityUtils.createAuthorityList('ROLE_ADMIN'))
}
private void createUsers() {
def roleAdmin = new Role(authority: 'ROLE_ADMIN').save()
def roleUser = new Role(authority: 'ROLE_USER').save()
3.times {
long id = it + 1
def user = new User("user$id", "password$id").save()
UserRole.create user, roleUser
}
def admin = new User('admin', 'admin123').save()
UserRole.create admin, roleUser
UserRole.create admin, roleAdmin
}
private void grantPermissions() {
def reports = []
100.times {
long id = it + 1
def report = new Report(name: "report$id").save()
reports << report
aclService.createAcl(
objectIdentityRetrievalStrategy.getObjectIdentity(report))
}
// grant user 1 admin on 11,12 and read on 1-67
aclUtilService.addPermission reports[10], 'user1', ADMINISTRATION
aclUtilService.addPermission reports[11], 'user1', ADMINISTRATION
67.times {
aclUtilService.addPermission reports[it], 'user1', READ
}
// grant user 2 read on 1-5, write on 5
5.times {
aclUtilService.addPermission reports[it], 'user2', READ
}
aclUtilService.addPermission reports[4], 'user2', WRITE
// user 3 has no grants
// grant admin admin on all
for (report in reports) {
aclUtilService.addPermission report, 'admin', ADMINISTRATION
}
// grant user 1 ownership on 1,2 to allow the user to grant
aclUtilService.changeOwner reports[0], 'user1'
aclUtilService.changeOwner reports[1], 'user1'
}
}and configure BootStrap.groovy to call the service at startup:
class BootStrap {
def sampleDataService
def init = {
sampleDataService.createSampleData()
}
}To have a UI to test with, let’s create a Report controller and GSPs:
$ grails generate-all com.testacl.Report
But to use the controller, it will have to be reworked to use ReportService. It’s a good idea to put all create/edit/delete code in a transactional service, but in this case we need to move all database access to the service to ensure that appropriate access checks are made:
package com.testacl
import org.springframework.dao.DataIntegrityViolationException
import grails.plugin.springsecurity.annotation.Secured
@Secured('ROLE_USER')
class ReportController {
def reportService
def index() {
params.max = Math.min(params.max ? params.int('max') : 10, 100)
[reportList: reportService.list(params),
reportCount: reportService.count()]
}
def create() {
[report: new Report(params)]
}
def save() {
def report = reportService.create(params.name)
if (!renderWithErrors('create', report)) {
redirectShow "Report $report.id created", report.id
}
}
def show() {
def report = findInstance()
if (!report) return
[report: report]
}
def edit() {
def report = findInstance()
if (!report) return
[report: report]
}
def update() {
def report = findInstance()
if (!report) return
reportService.update report, params.name
if (!renderWithErrors('edit', report)) {
redirectShow "Report $report.id updated", report.id
}
}
def delete() {
def report = findInstance()
if (!report) return
try {
reportService.delete report
flash.message = "Report $params.id deleted"
redirect action: 'list'
}
catch (DataIntegrityViolationException e) {
redirectShow "Report $params.id could not be deleted", params.id
}
}
def grant() {
def report = findInstance()
if (!report) return
if (!request.post) {
return [report: report]
}
reportService.addPermission(report, params.recipient,
params.int('permission'))
redirectShow "Permission $params.permission granted on Report $report.id " +
"to $params.recipient", report.id
}
private Report findInstance() {
def report = reportService.get(params.long('id'))
if (!report) {
flash.message = "Report not found with id $params.id"
redirect action: 'list'
}
report
}
private void redirectShow(message, id) {
flash.message = message
redirect action: 'show', id: id
}
private boolean renderWithErrors(String view, Report report) {
if (report.hasErrors()) {
render view: view, model: [report: report]
return true
}
false
}
}Note that the controller is annotated to require either ROLE_USER or ROLE_ADMIN. Since services have nothing to do with HTTP, when access is blocked you cannot be redirected to the login page as when you try to access a URL that requires an authentication. So you need to configure URLs with similar role requirements to give the user a chance to attempt a login before calling secured service methods.
Finally, we’ll make a few adjustments so errors are handled gracefully.
First, edit grails-app/controllers/UrlMappings.groovy and add some error code mappings:
import org.springframework.security.access.AccessDeniedException
import org.springframework.security.acls.model.NotFoundException
class UrlMappings {
static mappings = {
...
"403"(controller: 'errors', action: 'error403')
"404"(controller: 'errors', action: 'error404')
"500"(controller: 'errors', action: 'error500')
"500"(controller: 'errors', action: 'error403',
exception: AccessDeniedException)
"500"(controller: 'errors', action: 'error403',
exception: NotFoundException)
}
}Then create the ErrorsController that these reference:
$ grails create-controller com.testacl.Errors
and add this code:
package com.testacl
import grails.plugin.springsecurity.annotation.Secured
@Secured('permitAll')
class ErrorsController {
def error403() {}
def error404() {
render view: '/notFound'
}
def error500() {
render view: '/error'
}
}and we’ll need to create the GSP for the error403 action in grails-app/views/errors/error403.gsp:
<html>
<head>
<title>Access denied!</title>
<meta name='layout' content='main' />
</head>
<body>
<h1>Access Denied</h1>
<p>We're sorry, but you are not authorized
to perform the requested operation.</p>
</body>
</html>actionSubmit issues
Grails has a convenient feature where it supports multiple submit actions per form via the <g:actionSubmit> tag. This is done by posting to the index action but with a special parameter that indicates which action to invoke. This is a problem in general for security since any URL rules for edit, delete, save, etc. will be bypassed. It’s an even more significant issue with ACLs because of the way that the access denied exception interacts with the actionSubmit processing. If you don’t make any adjustments for this, your users will see a blank page when they attempt to submit a form and the action is disallowed. The solution is to remove actionSubmit buttons and replace them with regular submit buttons. This requires one form per button, and without adjusting the CSS the buttons will look differently than if they were in-line actionSubmit buttons, but that is fixable with the appropriate CSS changes.
|
Note that this is not an issue when using the generated GSPs in Grails 3 because they’ve been reworked to use the fields plugin, but if you have an older application that you’ve upgraded or if you have GSPs that don’t use the newer approach, you will need to avoid using |
It’s simple to adjust the actionSubmit buttons and you’ll need to change them in show.gsp and edit.gsp; list.gsp (or index.gsp) and show.gsp don’t need any changes. In show.gsp, replace the two actionSubmit buttons with these two forms (maintain the g:message tags; the strings are hard-coded here to reduce clutter):
<div class="buttons">
<g:form action='edit'>
<g:hiddenField name="id" value="${reportInstance?.id}" />
<span class="button">
<g:submitButton class="edit" name="Edit" />
</span>
</g:form>
<g:form action='delete'>
<g:hiddenField name="id" value="${reportInstance?.id}" />
<span class="button">
<g:submitButton class="delete" name="Delete"
onclick="return confirm('Are you sure?');" />
</span>
</g:form>
</div>In grails-app/views/report/edit.gsp, change the <form> tag to
<g:form action='update'>and convert the update button to a regular submit button:
<div class="buttons">
<span class="button"><g:submitButton class="save" name="Update" /></span>
</div>and move the delete button out of the form into its own form just below the main form:
<g:form action='delete'>
<g:hiddenField name="id" value="${reportInstance?.id}" />
<div class="buttons">
<span class="button">
<g:submitButton class="delete" name="Delete"
onclick="return confirm('Are you sure?');" />
</span>
</div>
</g:form>list.gsp (or index.gsp) and show.gsp are fine as they are.
Finally, to make it easier to log out (by default POST is required, so typical link that uses GET won’t work), add this to grails-app/views/layouts/main.gsp before the <g:layoutBody/> tag:
<sec:ifLoggedIn>
<g:form controller='logout'>
Logged in as <sec:username/> - <g:submitButton name='logout' value='Logout'/>
</g:form>
</sec:ifLoggedIn>
<sec:ifNotLoggedIn>
<g:link controller='login' action='auth'>Login</g:link>
</sec:ifNotLoggedIn>and you’ll see a link to login if not authenticated, and a button to click to logout if you are.
Testing
Now start the app:
$ grails run-app
and open http://localhost:8080/report.
|
If you see the error |
Login as user1/password1 and you should see the first page of results. But if you click on page 7 or higher, you’ll see that you can only see a subset of the Reports. This illustrates one issue with using ACLs to restrict view access to instances; you would have to add joins in your query to the ACL database tables to get an accurate count of the total number of visible instances.
Click on any of the report instance links (e.g. http://localhost:8080/report/show/63) to verify that you can view the instance. You can test that you have no view access to the filtered instances by navigating to http://localhost:8080/report/show/83.
Verify that user1 has admin permission on report #11 by editing it and deleting it.
Verify that user1 doesn’t have admin permission on report #13 by trying to editing or delete it and you should see the error page when you submit the form.
Logout (by navigating to http://localhost:8080/logout) and login as user2/password2. You should only see the first five reports. Verify that you can edit #5 but not any of the others, and that you can’t delete any.
Finally. logout and login as admin/admin123. You should be able to view, edit, and delete all instances.
Sample Application
Working with ACLs in Spring Security is complex but it will be easier to understand with a sample application. To help get you started, there’s a Grails application that uses the plugin to test with. It’s based on the Spring Security Contacts sample application. But where the Spring Security application uses SpringMVC, JDBC, etc., this application is 100% Grails. The application is available at GitHub.
Clone or fork the repo and start the app:
$ ./gradlew bootRun
Open http://localhost:8080/ in a browser to get started. The main functionality is at http://localhost:8080/secure. The login page lists the various configured users and their passwords; the "rod" user is an admin and has full access and the other users have various grants and ownership.
AclUtilService
addPermission
Purpose
Grant a permission on a domain object instance to a recipient.
Examples
aclUtilService.addPermission Report, 1124, 'user123', BasePermission.WRITE
aclUtilService.addPermission reportInstance, 'user123', BasePermission.WRITEDescription
addPermission has three signatures:
void addPermission(Class<?> domainClass, long id, recipient, Permission permission)
void addPermission(domainObject, recipient, Permission permission)
void addPermission(ObjectIdentity oid, recipient, Permission permission)Parameters
-
domainClass- the domain class, used when specifying the class and id -
id- the instance id, used when specifying the class and id -
domainObject- the domain class instance, used when the instance is available -
recipient- the grantee; can be a String (username or role name), or aSid, or anAuthentication -
permission- the permission to grant
changeOwner
Purpose
Change the ACL owner for a domain class instance.
Examples
aclUtilService.changeOwner reportInstance, 'user123'Description
void changeOwner(domainObject, String newUsername)Parameters
-
domainObject- the domain class instance -
newUsername- the username of the new owner
deleteAcl
Purpose
Deletes the ACL for a domain class instance.
Examples
aclUtilService.deleteAcl reportInstanceDescription
void deleteAcl(domainObject)Parameters
-
domainObject- the domain class instance
deletePermission
Purpose
Removes a granted permission.
Examples
aclUtilService.deletePermission Report, 42, 'user123', BasePermission.WRITE
aclUtilService.deletePermission reportInstance, 'user123', BasePermission.WRITEDescription
void deletePermission(domainObject, recipient, Permission permission)
void deletePermission(Class<?> domainClass, long id, recipient, Permission permission)Parameters
-
domainClass- the domain class, used when specifying the class and id -
id- the instance id, used when specifying the class and id -
domainObject- the domain class instance, used when the instance is available -
recipient- the grantee; can be a String (username or role name), or aSid, or anAuthentication -
permission- the permission to remove
hasPermission
Purpose
Check if the authentication has grants for the specified permission(s) on the domain class instance.
Examples
if (aclUtilService.hasPermission(auth, reportInstance, BasePermission.WRITE)) {
...
}Description
boolean hasPermission(Authentication authentication, domainObject, Permission... permissions)
boolean hasPermission(Authentication authentication, domainObject, List<Permission> permissions)Parameters
-
authentication- an authentication representing a user and associated roles -
domainObject- the domain class instance -
permissions- one or more permissions to check
readAcl
Purpose
Retrieves the ACL for a domain class instance.
Examples
def acl = aclUtilService.readAcl(reportInstance)
def acl = aclUtilService.readAcl(Report, 42)Description
Acl readAcl(domainObject)
Acl readAcl(Class<?> domainClass, id)Parameters
-
domainClass- the domain class, used when specifying the class and id -
id- the instance id, used when specifying the class and id -
domainObject- the domain class instance, used when the instance is available
Scripts
s2-create-acl-domains
Purpose
Creates the domain classes that manage ACL data.
Example
grails s2-create-acl-domains
Description
The plugin includes the required ACL domain classes, but if you want to customize them (for example to configure 2nd-level caching) you can use this script to generate the same domain classes in your application’s grails-app/domain folder to allow minor customization.
Tag Libraries
permitted
Purpose
Renders the body if the user is granted the specified permission(s)
Examples
Single String:
<sec:permitted className='com.foo.Report' id='${reportId}' permission='read'>
the body content
</sec:permitted>Multiple String:
<sec:permitted className='com.foo.Report' id='${reportId}' permission='write,read'>
the body content
</sec:permitted>Single Permission:
<%@ page import="org.springframework.security.acls.domain.BasePermission" %>
<sec:permitted className='com.foo.Report' id='${reportId}' permission='${BasePermission.READ}'>
the body content
</sec:permitted>List of Permission:
<%@ page import="org.springframework.security.acls.domain.BasePermission" %>
<sec:permitted className='com.foo.Report' id='${reportId}' permission='${[BasePermission.WRITE,BasePermission.READ]}'>
the body content
</sec:permitted>Single mask int:
<sec:permitted className='com.foo.Report' id='${reportId}' permission='${1}'>
the body content
</sec:permitted>Multiple mask int:
<sec:permitted className='com.foo.Report' id='${reportId}' permission='2,1'>
the body content
</sec:permitted>Description
Renders the body if the user has grants for the specified permissions. Permissions are specified in the “permission” attribute and can be a single Permission, an array of Permission, an int/Integer (which is assumed to be a mask), a String (which can be a single name, or a comma-delimited list of names, or a comma-delimited list of masks), or a List of any of these.
notPermitted
Purpose
Renders the body if the user is not granted the specified permission(s)
Examples
Single String:
<sec:notPermitted className='com.foo.Report' id='${reportId}' permission='read'>
the body content
</sec:notPermitted>Multiple String:
<sec:notPermitted className='com.foo.Report' id='${reportId}' permission='read,write'>
the body content
</sec:notPermitted>Single Permission:
<%@ page import="org.springframework.security.acls.domain.BasePermission" %>
<sec:notPermitted className='com.foo.Report' id='${reportId}' permission='${BasePermission.READ}'>
the body content
</sec:notPermitted>List of Permission:
<%@ page import="org.springframework.security.acls.domain.BasePermission" %>
<sec:notPermitted className='com.foo.Report' id='${reportId}' permission='${[BasePermission.WRITE,BasePermission.READ]}'>
the body content
</sec:notPermitted>Single mask int:
<sec:notPermitted className='com.foo.Report' id='${reportId}' permission='${1}'>
the body content
</sec:notPermitted>Multiple mask int:
<sec:notPermitted className='com.foo.Report' id='${reportId}' permission='2,1'>
the body content
</sec:notPermitted>Description
Renders the body if the user does not have grants for the specified permissions. Permissions are specified in the “permission” attribute and can be a single Permission, an array of Permission, an int/Integer (which is assumed to be a mask), a String (which can be a single name, or a comma-delimited list of names, or a comma-delimited list of masks), or a List of any of these.
API Reference
The ACL plugin Groovydoc API documentation for historical (pre-merge) releases is available at the legacy Spring Security ACL plugin API reference.
18.5.1.3 CAS Plugin
Introduction to the Spring Security CAS Plugin
The CAS plugin adds CAS single sign-on support to a Grails application that uses Spring Security. It depends on the Spring Security Core plugin.
Once you have configured a CAS server and have configured your Grails application(s) as clients, you can authenticate to any application that is a client of the CAS server and be automatically authenticated to all other clients.
Usage
|
Configuring your CAS server is beyond the scope of this document. There are many different approaches and this will most likely be done by IT staff. It’s assumed here that you already have a running CAS server. |
CAS is a popular single sign-on implementation. It’s open source and has an Apache-like license, and is easy to get started with but is also highly configurable. In addition it has clients written in Java, .Net, PHP, Perl, and other languages.
Installation
There isn’t much that you need to do in your application to be a CAS client. Add a dependency in build.gradle for this plugin:
build.gradle
dependencies {
...
implementation 'org.apache.grails:grails-spring-security-cas'
...then configure any required parameters and whatever optional parameters you want in application.yml or application.groovy. These are described in detail in the Configuration section but typically you only need to set these properties:
grails-app/conf/application.yml
grails:
plugin:
springsecurity:
cas:
loginUri: /login
serviceUrl: http://localhost:8080/login/cas
serverUrlPrefix: https://your-cas-server/cas
proxyCallbackUrl: http://localhost:8080/secure/receptor
proxyReceptorUrl: /secure/receptorSingle Signout
Single signout enables signing out of all CAS-managed applications with one logout. It is opt-in, because enabling it disables session fixation prevention - CAS maps the service ticket to the HTTP session id, so a logout request cannot be matched to a session that was replaced when the user authenticated:
grails:
plugin:
springsecurity:
cas:
useSingleSignout: trueThe plugin prints and logs a warning at startup when it is enabled, so the trade-off is visible.
It works best when combined with the afterLogoutUrl parameter, for example:
grails:
plugin:
springsecurity:
logout:
afterLogoutUrl: https://your-cas-server/cas/logout?url=http://localhost:8080/With this configuration, when a user logs out locally by navigating to /logout/ they’ll then be redirected to the CAS server’s logout URL. This request includes a local URL to redirect back afterwards. When the whole process is finished they’ll be logged out locally and at the CAS server, so subsequent secure URLs at the local server or other CAS-managed servers will require a new login.
To go back to the default and leave the single signout filter unregistered, keeping session fixation
prevention in place, set it to false or remove the setting:
grails:
plugin:
springsecurity:
cas:
useSingleSignout: falseConfiguration
There are a few configuration options for the CAS plugin.
|
All of these property overrides must be specified in |
| Name | Default | Meaning |
|---|---|---|
cas.active |
|
whether the plugin is enabled (e.g. to disable per-environment) |
cas.serverUrlPrefix |
|
the 'root' of all CAS server URLs, e.g. |
cas.serverUrlEncoding |
'UTF-8' |
encoding for the server URL |
cas.loginUri |
|
the login URI, relative to |
cas.sendRenew |
|
if true, ticket validation will only succeed if it was issued from a login form, but will fail if it was issued from a single sign-on session. Analogous to |
cas.serviceUrl |
|
the local application login URL, e.g. |
cas.key |
'grails-spring-security-cas', should be changed |
used by |
cas.artifactParameter |
|
the ticket login url parameter |
cas.serviceParameter |
|
the service login url parameter |
cas.filterProcessesUrl |
'/login/cas' |
the URL that the filter intercepts for login |
cas.proxyCallbackUrl |
|
proxy callback url, e.g. 'http://localhost:8080/secure/receptor'. Only needed for proxy tickets, and only meaningful together with |
cas.proxyReceptorUrl |
|
proxy receptor url, e.g. '/secure/receptor'. Only needed for proxy tickets, and only meaningful together with |
cas.useSingleSignout |
|
if |
|
Single sign-out and session fixation prevention cannot both be active. CAS maps the service ticket to the HTTP session id, so if the session is replaced when the user authenticates, the session CAS later asks the application to invalidate no longer exists and the logout request has no effect.
grails-app/conf/application.groovy
Leave it off to keep session fixation prevention and handle logout in the application instead. |
API Reference
The CAS plugin Groovydoc API documentation for historical (pre-merge) releases is available at the legacy Spring Security CAS plugin API reference.
18.5.1.4 LDAP Plugin
Introduction to the Spring Security LDAP Plugin
The LDAP plugin adds support for LDAP and Active Directory authentication to a Grails application that uses Spring Security. It depends on the Spring Security Core plugin.
Once you have configured your Grails application as an LDAP client you can delegate authentication to LDAP and not have to manage users' authentication information in your application. By default, roles are inferred from LDAP group membership and you can store additional application-specific roles in your database.
Please refer to the Spring Security LDAP documentation for details of the underlying implementation.
Usage
|
Configuring your LDAP server is beyond the scope of this document. There are many different approaches and this will most likely be done by IT staff. It’s assumed here that you already have a running LDAP or Active Directory server. |
Installation
Declare dependency
There isn’t much that you need to do in your application to use LDAP. Add a dependency in build.gradle for this plugin:
dependencies {
...
implementation 'org.apache.grails:grails-spring-security-ldap:8.0.0'
}Grails Spring Security LDAP plugin has a transitive dependency to Grails Spring Security Core. If you want to control which version is being used for Grails Spring Security Core you can do:
dependencies {
...
implementation "org.apache.grails:grails-spring-security:8.0.0"
implementation "org.apache.grails:grails-spring-security-ldap:8.0.0"
}Configure parameters
Configure any required parameters and any optional parameters you want in application.yml or application.groovy. These are described in detail in the Configuration section, but typically you only need to set these properties:
grails:
plugin:
springsecurity:
ldap:
context:
managerDn: 'uid=admin,ou=system'
managerPassword: secret
server: 'ldap://localhost:10389'
authorities:
groupSearchBase: 'ou=groups,dc=yourcompany,dc=com'
search:
base: 'dc=yourcompany,dc=com'Often all role information will be stored in LDAP, but if you want to also assign application-specific roles to users in the database, then add this
grails:
plugin:
springsecurity:
ldap:
authorities:
retrieveDatabaseRoles: trueto do an extra database lookup after the LDAP lookup.
Depending on how passwords are hashed in LDAP you may also need to configure the hash algorithm, e.g.
grails:
plugin:
springsecurity:
password:
algorithm: 'SHA-256'Sample config settings for Active Directory
Active directory is somewhat different although still relatively painless if you know what you are doing. Use these example configuration options to get started (tested in Windows Server 2008):
|
Replace the placeholders inside [] brackets with appropriate values and remove the [] chars |
grails:
plugin:
springsecurity:
# LDAP config
providerNames: ['ldapAuthProvider', 'anonymousAuthenticationProvider'] # specify this when you want to skip attempting to load from db and only use LDAP
ldap:
context:
managerDn: '[distinguishedName]'
managerPassword: '[password]'
server: 'ldap://[ip]:[port]/'
search:
base: '[the base directory to start the search. usually something like dc=mycompany,dc=com]'
filter: 'sAMAccountName={0}' # for Active Directory you need this
searchSubtree: true
attributesToReturn: ['mail', 'displayName'] # extra attributes you want returned; see below for custom classes that access this data
auth:
hideUserNotFoundExceptions: false
# role-specific LDAP config
useRememberMe: false
authorities:
ignorePartialResultException: true # typically needed for Active Directory
retrieveGroupRoles: true
groupSearchBase: '[the base directory to start the search. usually something like dc=mycompany,dc=com]'
# If you don't want to support group membership recursion (groups in groups),
# then use the following setting
# grails.plugin.springsecurity.ldap.authorities.groupSearchFilter = 'member={0}'
# If you wish to support groups with group as members (recursive groups), use
# the following:
# groupSearchFilter: '(member:1.2.840.113556.1.4.1941:={0})'Custom UserDetailsContextMapper
There are three options for mapping LDAP attributes to UserDetails data (as specified by the grails.plugin.springsecurity.ldap.mapper.userDetailsClass config attribute) and hopefully one of those will be sufficient for your needs. If not, it’s easy to implement UserDetailsContextMapper yourself.
Create a Groovy or Java class in src/main/groovy that implements UserDetailsContextMapper and register it in grails-app/conf/spring/resources.groovy:
/*
* Licensed to the Apache Software Foundation (ASF) under one
* or more contributor license agreements. See the NOTICE file
* distributed with this work for additional information
* regarding copyright ownership. The ASF licenses this file
* to you under the Apache License, Version 2.0 (the
* "License"); you may not use this file except in compliance
* with the License. You may obtain a copy of the License at
*
* https://www.apache.org/licenses/LICENSE-2.0
*
* Unless required by applicable law or agreed to in writing,
* software distributed under the License is distributed on an
* "AS IS" BASIS, WITHOUT WARRANTIES OR CONDITIONS OF ANY
* KIND, either express or implied. See the License for the
* specific language governing permissions and limitations
* under the License.
*/
package spring
import com.mycompany.myapp.MyUserDetailsContextMapper
beans = {
ldapUserDetailsMapper(MyUserDetailsContextMapper) {
// bean attributes
}
}For example, here’s a custom UserDetailsContextMapper that extracts three additional fields from LDAP (fullname, email, and title)
/*
* Licensed to the Apache Software Foundation (ASF) under one
* or more contributor license agreements. See the NOTICE file
* distributed with this work for additional information
* regarding copyright ownership. The ASF licenses this file
* to you under the Apache License, Version 2.0 (the
* "License"); you may not use this file except in compliance
* with the License. You may obtain a copy of the License at
*
* https://www.apache.org/licenses/LICENSE-2.0
*
* Unless required by applicable law or agreed to in writing,
* software distributed under the License is distributed on an
* "AS IS" BASIS, WITHOUT WARRANTIES OR CONDITIONS OF ANY
* KIND, either express or implied. See the License for the
* specific language governing permissions and limitations
* under the License.
*/
package com.mycompany.myapp
import groovy.transform.CompileStatic
import org.springframework.ldap.core.DirContextAdapter
import org.springframework.ldap.core.DirContextOperations
import org.springframework.security.core.GrantedAuthority
import org.springframework.security.core.userdetails.UserDetails
import org.springframework.security.ldap.userdetails.UserDetailsContextMapper
@CompileStatic
class MyUserDetailsContextMapper implements UserDetailsContextMapper {
@Override
UserDetails mapUserFromContext(DirContextOperations ctx, String username, Collection<? extends GrantedAuthority> authorities) {
String email = ctx.attributes.get('mail')?.get() as String
String phone = ctx.attributes.get('telephoneNumber')?.get() as String
new MyUserDetails(username,
'',
true,
true,
true,
true,
authorities,
email,
phone)
}
@Override
void mapUserToContext(UserDetails user, DirContextAdapter ctx) {
throw new IllegalStateException("Only retrieving data from AD is currently supported")
}
}and a custom UserDetails class to hold the extra fields:
/*
* Licensed to the Apache Software Foundation (ASF) under one
* or more contributor license agreements. See the NOTICE file
* distributed with this work for additional information
* regarding copyright ownership. The ASF licenses this file
* to you under the Apache License, Version 2.0 (the
* "License"); you may not use this file except in compliance
* with the License. You may obtain a copy of the License at
*
* https://www.apache.org/licenses/LICENSE-2.0
*
* Unless required by applicable law or agreed to in writing,
* software distributed under the License is distributed on an
* "AS IS" BASIS, WITHOUT WARRANTIES OR CONDITIONS OF ANY
* KIND, either express or implied. See the License for the
* specific language governing permissions and limitations
* under the License.
*/
package com.mycompany.myapp
import groovy.transform.CompileStatic
import org.springframework.security.core.GrantedAuthority
import org.springframework.security.core.userdetails.User
@CompileStatic
class MyUserDetails extends User {
// extra instance variables
final String email
final String telephone
MyUserDetails(String username, String password, boolean enabled, boolean accountNonExpired,
boolean credentialsNonExpired, boolean accountNonLocked,
Collection<GrantedAuthority> authorities, String email, String telephone) {
super(username, password, enabled, accountNonExpired, credentialsNonExpired,
accountNonLocked, authorities)
this.email = email
this.telephone = telephone
}
}Here we extend the standard Spring Security User class for convenience, but you could also directly implement the interface or use a different base class.
Configuration
|
Any property overrides must be specified in |
There are several configuration options for the LDAP plugin. In practice the defaults are fine and only a few will need to be overridden.
| Name | Default | Meaning |
|---|---|---|
ldap.search.searchSubtree |
|
If |
ldap.search.base |
'' |
Context name to search in, relative to the base of the configured ContextSource, e.g. 'dc=example,dc=com', 'ou=users,dc=example,dc=com' |
ldap.search.filter |
|
The filter expression used in the user search |
ldap.search.derefLink |
|
Enables/disables link dereferencing during the search |
ldap.search.timeLimit |
|
The time to wait before the search fails |
ldap.search. attributesToReturn |
|
The attributes to return as part of the search |
ldap.authenticator.useBind |
|
if |
ldap.authenticator. attributesToReturn |
|
names of attribute ids to return; use |
ldap.authenticator. dnPatterns |
|
optional pattern(s) used to create DN search patterns, e.g. \["cn={0},ou=people"\] |
ldap.authenticator. passwordAttributeName |
|
the name of the password attribute to use when |
ldap.mapper. convertToUpperCase |
|
whether to uppercase retrieved role names (will also be prefixed with "ROLE_" or the overridden role prefix) |
ldap.mapper. passwordAttributeName |
|
password attribute name to use when building the |
ldap.mapper. userDetailsClass |
|
use |
ldap.mapper.roleAttributes |
|
optional names of role attributes |
ldap.auth. hideUserNotFound Exceptions |
|
if |
ldap.auth.useAuthPassword |
|
If |
ldap.context.managerDn |
|
DN to authenticate with |
ldap.context. managerPassword |
|
username to authenticate with |
ldap.context.server |
|
address of the LDAP server |
ldap.context. contextFactoryClassName |
|
class name of the |
ldap.context. dirObjectFactoryClassName |
class name of the |
|
ldap.context. baseEnvironmentProperties |
none |
extra context properties |
ldap.context. cacheEnvironmentProperties |
|
whether environment properties should be cached between requsts |
ldap.context. anonymousReadOnly |
|
whether an anonymous environment should be used for read-only operations |
ldap.context.referral |
|
the method to handle referrals. Can be |
ldap.authorities. retrieveGroupRoles |
|
whether to infer roles based on group membership |
ldap.authorities. retrieveDatabaseRoles |
|
whether to retrieve additional roles from the database using GORM |
ldap.authorities. groupRoleAttribute |
|
The ID of the attribute which contains the role name for a group |
ldap.authorities. groupSearchFilter |
|
The pattern to be used for the user search. {0} is the user’s DN |
ldap.authorities. searchSubtree |
|
If |
ldap.authorities. groupSearchBase |
|
The base DN from which the search for group membership should be performed |
ldap.authorities. ignorePartialResult Exception |
|
Whether `PartialResultException`s should be ignored in searches, typically used with Active Directory since AD servers often have a problem with referrals. |
ldap.authorities.defaultRole |
none |
An optional default role to be assigned to all users |
ldap.authorities.prefix |
|
The prefix prepended to group names in order to make them Spring Security Roles. |
ldap.authorities.clean.prefix |
none |
An optional string prefix to strip from the beginning of LDAP group names. For example, |
ldap.authorities.clean.suffix |
none |
An optional string suffix to strip from the end of LDAP group names. For example, |
ldap.authorities.clean.dashes |
|
Set this to true to replace all dashes with underscores in LDAP group names. For example, |
ldap.authorities.clean.uppercase |
|
Set this to true to uppercase all LDAP group names. For example, |
Persistent Logins
To use cookies for persistent logins, configure these properties:
|
Just like with non-LDAP persistent tokens, you need to run the |
| Name | Default | Meaning |
|---|---|---|
ldap.useRememberMe |
|
Whether to use persistent logins |
ldap.rememberMe.detailsManager. attributesToRetrieve |
|
The attributes to return as part of the search |
ldap.rememberMe.detailsManager. groupMemberAttributeName |
'uniquemember' |
The attribute which contains members of a group |
ldap.rememberMe.detailsManager. groupRoleAttributeName |
'cn' |
The attribute which corresponds to the role name of a group |
ldap.rememberMe.detailsManager. groupSearchBase |
'ou=groups,dc=example,dc=com' |
The DN under which groups are stored |
ldap.rememberMe.detailsManager. passwordAttributeName |
'userPassword' |
Password attribute name |
ldap.rememberMe.usernameMapper. userDnBase |
none, must be set, e.g. 'dc=example,dc=com', 'ou=users,dc=example,dc=com' |
The base name of the DN |
ldap.rememberMe.usernameMapper. usernameAttribute |
none, must be set, e.g. 'cn' |
the attribute to append for the username component |
API Reference
The LDAP plugin Groovydoc API documentation for historical (pre-merge) releases is available at the legacy Spring Security LDAP plugin API reference.
18.5.1.5 OAuth2 Plugin
Introduction to the Spring Security OAuth2 Plugin
The OAuth2 Plugin adds oAuth v2 sign-on support to Grails applications that use Spring Security. It depends on the Spring Security Core plugin.
It comes with a number of preconfigured OAuth2 providers, but you can implement any provider you like, that is extending the Scribejava DefaultApi20
Installation
Add the following dependencies in build.gradle:
build.gradle
dependencies {
implementation 'org.apache.grails:grails-spring-security-oauth2'
}You will also need at least one provider extension, i.e the grails-spring-security-oauth2-google plugin.
Configuration
You can configure the following parameters in your application.yml.
| Key | Default | Optional | Description |
|---|---|---|---|
grails.plugin.springsecurity.oauth2.active |
true |
true |
Whether the plugin is active or not |
grails.plugin.springsecurity.oauth2.registration.askToLinkOrCreateAccountUri |
/oauth2/ask |
true |
The URI is called to ask the user to either create a new account or link an existing |
grails.plugin.springsecurity.oauth2.registration.roleNames |
['ROLE_USER'] |
true |
A list of role names that should be automatically granted to OAuth User. There roles will be created if they do not exists |
Here is an example configuration file:
application.yml
grails:
plugin:
springsecurity:
oauth2:
active: true
registration:
askToLinkOrCreateAccountUri: /oauth2/ask
roleNames: ['ROLE_USER']Initializing
Once you have a User domain class, initialize this plugin by using the init script
./gradlew runCommand "-Pargs=init-oauth2 [DOMAIN-CLASS-PACKAGE] [USER-CLASS-NAME] [OAUTH-ID-CLASS-NAME]"The above command will create the domain class with the provided name and package. For example, the command ./gradlew runCommand "-Pargs=init-oauth2 com.yourapp User OAuthID will create a domain class OAuthID.groovy.
Finally, you also need to add the following domain class relationship mapping to
the User.groovy domain class:
grails-app/domain/com/yourapp/User.groovy
package com.yourapp
class User {
// ...
static hasMany = [oAuthIDs: OAuthID]
}Extensions
List of known extensions
How to create a new provider plugin?
-
Create a new plugin with command
grails create-plugin spring-security-oauth2-myProvider. -
Add the following plugins as dependency in the build:
build.gradle
dependencies {
// ...
api 'org.apache.grails:grails-spring-security:{version}'
api 'org.apache.grails:grails-spring-security-oauth2:{version}'
}-
Create a Groovy class that extends
OAuth2SpringTokenand implement the abstract methods.
getProviderName // gets the provider name getSocialId // is usually used for the username getScreenName // is usually used for the email address
-
You may want to check if the scribe library has a default API built-in for your provider or create a Groovy class that extends
DefaultApi20and implement the abstract methods.
getAccessTokenEndpoint // I would get this from config which is <providers domain>/oauth2/token getAuthorizationBaseUrl // I would get this from get this from config which is <providers domain>/oauth2/authorize getAccessTokenExtractor // In some implementations the `OpenIdJsonTokenExtractor` is used.
-
Create a service in your plugin that extends
OAuth2AbstractProviderServiceand implement the abstract methods. You can override the other methods for fine-tuning if needed.
getProviderID // whatever you want to call your provider.
getApiClass // points to your API implementation
getProfileScope // comes from config <domain>/oauth2/userInfo
getScopeSeparator // from the implementation that I've see usually: " " is used.
createSpringAuthToken // parses the OAuth2AccessToken to get the email and id that could be used
// to look up the user and puts them in a OAuth2SpringToken.
// This is also a good place to validate the token either inline or calling a separate method *
-
There maybe some variability between providers based on what is in the claims, but should be similar to this:
@Value('${grails.plugin.springsecurity.oauth2.providers.your_provider.api_key}')
String appId
def rawResponse = new JsonSlurper().parseText(accessToken.rawResponse)
String encodedIdToken = rawResponse.id_token
List<String> encodedIdTokenSegments = encodedIdToken.split('\\.')
String payloadClaimsStr = new String(Base64Utils.decodeFromUrlSafeString(encodedIdTokenSegments[1]))
Map payloadClaims = new JsonSlurper().parseText(payloadClaimsStr) as Map
if (payloadClaims.aud != appId) {
throw new IllegalStateException("ID Token rejected: token specified incorrect recipient ID ${payloadClaims.aud}")
}
Integer now = new Date().time / 1000 as Integer // UNIX timestamp
if (now < payloadClaims.nbf) {
throw new IllegalStateException("ID Token rejected: token cannot be processed before ${payloadClaims.nbf}; current time is $now")
}
if (now >= payloadClaims.exp) {
throw new IllegalStateException("ID Token rejected: token has expired")
}
if (now < payloadClaims.iat) {
throw new IllegalStateException("ID Token rejected: token cannot be from the future!")
}
Validating the token is important to security to make sure that the application client id is the same as what you sent to, because it prevents people from using tokens from other providers to try to grain access to your system.
-
You can register your implementation of
OAuth2AbstractProviderServicein the plugin groovy file or if you can inline in the registration in BootStrap.groovy
try {
springSecurityOauth2BaseService.registerProvider(yourAuth2Service)
} catch (OAuth2Exception exception) {
log.error("There was an oAuth2Exception Your provider has not been loaded", exception)
}
-
In the app that uses any of the extensions you’ll want to set up a URL mapping like:
"/oauth2/$provider/success"(controller: 'login', action: 'oauth2Success')
Then at that endpoint you can handle the user lookup, setting the authentication and redirecting, something like:
def oauth2Success(String provider) {
log.info "In oauth2Success with $provider"
if (!provider) {
log.warn "The Spring Security OAuth callback URL must include the 'provider' URL parameter"
throw new OAuth2Exception("The Spring Security OAuth callback URL must include the 'provider' URL parameter")
}
def sessionKey = springSecurityOauth2BaseService.sessionKeyForAccessToken(provider)
if (!session[sessionKey]) {
log.warn "No OAuth token in the session for provider '${provider}' your provider might require MFA before logging in to this server."
throw new OAuth2Exception("Authentication error for provider '${provider}' your provider might require MFA before logging in to this server.")
}
// Create the relevant authentication token and attempt to log in.
OAuth2SpringToken oAuthToken = createAuthToken(provider, session[sessionKey])
if (oAuthToken.principal instanceof GrailsUser) {
//provide you're own getDefaultTargetUrl method to replace with a string.
authenticateAndRedirect(oAuthToken, getDefaultTargetUrl())
} else {
// This OAuth account hasn't been registered against an internal
// account yet. Give the oAuthID the opportunity to create a new
// internal account or link to an existing one.
session[SpringSecurityOAuth2Controller.SPRING_SECURITY_OAUTH_TOKEN] = oAuthToken
def redirectUrl = springSecurityOauth2BaseService.getAskToLinkOrCreateAccountUri()
if (!redirectUrl) {
log.warn "grails.plugin.springsecurity.oauth.registration.askToLinkOrCreateAccountUri configuration option must be set"
throw new OAuth2Exception('Internal error')
}
log.debug "Redirecting to askToLinkOrCreateAccountUri: ${redirectUrl}"
redirect(redirectUrl instanceof Map ? redirectUrl : [uri: redirectUrl])
}
}
private OAuth2SpringToken createAuthToken(String providerName, OAuth2AccessToken scribeToken) {
def providerService = springSecurityOauth2BaseService.getProviderService(providerName)
OAuth2SpringToken oAuthToken = providerService.createSpringAuthToken(scribeToken)
def user
if(loadByUserName){
//provide your own security service or do a lookup manually.
user = securityService.loadUserByUsername(oAuthToken.getSocialId())
}
if(loadByEmail) {
//provide your own security service or do a lookup manually.
user = securityService.loadUserByEmailAddress(oAuthToken.getScreenName())
}
if (user) {
updateOAuthToken(oAuthToken, user)
}
return oAuthToken
}
private OAuth2SpringToken updateOAuthToken(OAuth2SpringToken oAuthToken, user) {
oAuthToken.principal = user
oAuthToken.authorities = user.authorities
oAuthToken.authenticated = true
return oAuthToken
}
protected void authenticateAndRedirect(OAuth2SpringToken oAuthToken, redirectUrl) {
session.removeAttribute SpringSecurityOAuth2Controller.SPRING_SECURITY_OAUTH_TOKEN
SecurityContextHolder.context.authentication = oAuthToken
redirect(redirectUrl instanceof Map ? redirectUrl : [uri: redirectUrl])
}API Reference
The OAuth2 plugin Groovydoc API documentation for historical (pre-merge) releases is available at the legacy Spring Security OAuth2 plugin API reference.
18.5.1.6 REST Plugin
The Spring Security REST Grails plugin allows you to use Spring Security for a stateless, token-based, RESTful authentication.
Versions 1.x. of the plugin are compatible with Grails 2, whereas versions 2.x are to be used with Grails 3.
Motivation
The default behaviour of Spring Security is to store the authenticated principal in the HTTP session. However, in a RESTful scenario, we need to make sure our server is stateless.
The typical flow could be the following:
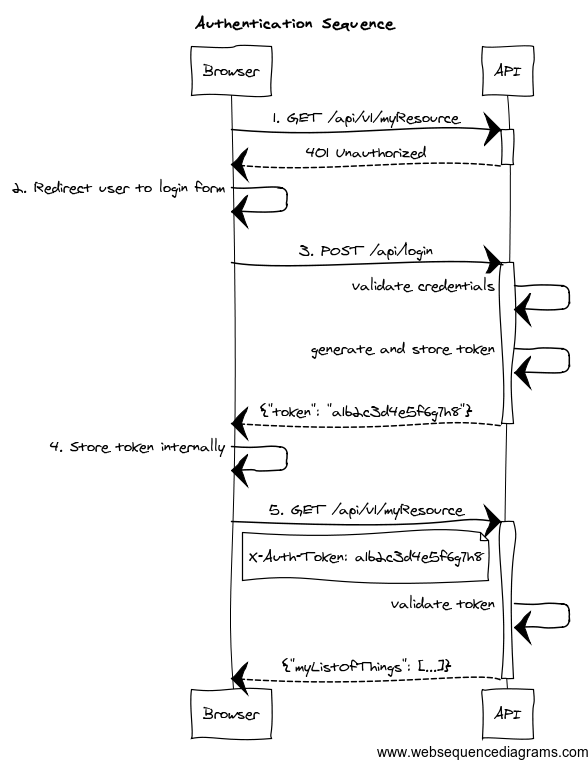
Figure 1. Sequence diagram overview of the plugin behavior
-
The client application requests and endpoint that requires authentication, so the server responds with a 401 response.
-
The client redirects the user to the login form.
-
The user enter credentials, and the client sends a request to the authentication endpoint. The server validates credentials, and if valid, generates, stores and sends back a token to the client.
-
The client then stores the token internally. It will be sent on every API method request.
-
The client sends again a request to the protected resource, passing the token as an HTTP header.
-
The server validates the token, and if valid, executes the actual operation requested.
As per the REST definition, the client is transferring its state on every request so the server is truly stateless.
This plugin helps you to wire your existing Spring Security authentication mechanism, provides you with ready-to-use token generation strategies and comes prepackaged with JWT, Memcached, GORM, Redis and Grails Cache support for token storage.
Grails 7 support
This major release is working with Grails 7. It’s based on the newer versions of Spring Security Core plugin, which in turn uses newer Spring Security versions, so make sure you read carefully what the new versions have changed:
| Grails Version | spring-security-rest version |
Spring Security Core docs |
|---|---|---|
6.x |
|
https://apache.github.io/grails-spring-security/7.0.x/index.html#whatsNew |
Only allow refresh tokens to be used on refresh token endpoint
See issue #515
Minimum Java Version
The minimum java version is now 17.
Dependency updates
Dependencies are updated as of Grails 7.0.0 release date.
Grails 6 support
This major release is working with Grails 6. It’s based on the newer versions of Spring Security Core plugin, which in turn uses newer Spring Security versions, so make sure you read carefully what the new versions have changed:
| Grails Version | spring-security-rest version |
Spring Security Core docs |
|---|---|---|
6.x |
|
https://apache.github.io/grails-spring-security/6.0.x/index.html#whatsNew |
Provide AccessToken object to storeToken and removeToken Methods
See issue #437
Minimum Java Version
The minimum java version is now 11.
Dependency updates
Dependencies are updated as of Grails 6.1.1 release date.
Grails 3 and 4 support
This major release is working with Grails 3 and 4. It’s based on the newer versions of Spring Security Core plugin, which in turn uses newer Spring Security versions, so make sure you read carefully what the new versions have changed:
| Grails Version | spring-security-rest version |
Spring Security Core docs |
|---|---|---|
3.x |
|
https://apache.github.io/grails-spring-security/3.2.x/index.html#newInV3 |
4.x |
|
https://apache.github.io/grails-spring-security/4.0.x/index.html#newInV3 |
Special thanks to James Kleeh and Ryan Vanderwerf for their help in the upgrade steps.
Plugin broken down into multiple modules
Starting from this version, org.grails.plugins:spring-security-rest just contains support for JWT. Artifact size has
been reduced from 429 KB in version 1.5.3 to 194K in 2.0.x!
For those using a different token storage system, the following artifacts are also published:
-
org.grails.plugins:spring-security-rest-gorm. -
org.grails.plugins:spring-security-rest-grailscache. -
org.grails.plugins:spring-security-rest-memcached. -
org.grails.plugins:spring-security-rest-redis.
The version is the same in all modules. For more details, check the configuration section.
As a consequence, configuration properties like grails.plugin.springsecurity.rest.token.storage.useMemcached are no
longer used.
CORS is now supported in Grails core
As of Grails 3.2.1, Grails natively supports CORS. Refer to the Grails documentation for more information about how to configure it.
JWT improvements
As of this version, there is no longer a default value for the configuration property
grails.plugin.springsecurity.rest.token.storage.jwt.secret. Furthermore, if you are using JWT and no value has
been provided for that configuration property, an exception will be thrown during application startup.
It is also possible to influence the JWT generation by providing additional claims. Finally, the signing / encryption algorithms used are configurable. Check the JWT section for more information.
Other minor updates
-
Classes have been annotated with
@CompileStatic, for performance reasons. -
Documentation has been migrated to Asciidoctor.
-
All libraries used have been upgraded to their latest versions.
-
Snapshots are now published automatically to Artifactory OSS on every successful build. You can use them by defining this Maven repository inside the
repositoriesblock in yourbuild.gradle:maven { url "https://oss.jfrog.org/artifactory/oss-snapshot-local" }
JWT support
JWT is fully supported and is now the default token "storage" mechanism. If you still want to use your previous storage
(such as Memcached or GORM), make sure you explicitly set to true one of the following properties:
| Config key | Default value |
|---|---|
|
|
|
|
|
|
If switching over JWT, the logout behavior is not available anymore. Read the documentation on how to implement your own logout strategy if you want to.
Redis support
Redis can now be used as token storage service. Thanks to Philipp Eschenbach for his initial contribution.
New package base
Packages com.odobo.grails.plugin.springsecurity.rest. have been refactored to simply grails.plugin.springsecurity.rest..
Make sure to double-check your imports when upgrading to 1.5.
Other minor changes
-
The plugin now uses Grails 2.4.4, and the build and tests are executed with Java 8.
-
Documentation for older versions is now published at http://alvarosanchez.github.io/grails-spring-security-rest
Full compatibility with Spring Security core.
Up to previous releases, this plugin was overriding "stateful" Spring Security core beans, to ensure a stateless behaviour. After some users reported issues integrating this plugin with existing installations, version 1.4 now follows a more friendly approach.
A new chapter has been created explaining how to configure the filter chains appropriately.
RFC 6750 Bearer Token support by default
Now, the token validation and rendering aligns with the RFC 6750 Bearer Token spec.
If you want to keep the old behaviour, simply disable it by setting
grails.plugin.springsecurity.rest.token.validation.useBearerToken = false
Credentials are extracted from JSON by default
It makes more sense in a REST application. The old behaviour can still be used by using the corresponding configuration property.
Anonymous access is allowed
In case you want to enable anonymous access (read: not authenticated) to certain URL patterns, you can do so. Take a look at the [new chapter in the documentation|guide:tokenValidation].
Other minor changes
-
Upgraded dependencies:
-
spring-security-core:2.0-RC3. -
cors:1.1.6.
-
Installing the plugin
Just proceed as with any other Grails 3 plugin:
build.gradledependencies {
//Other dependencies
implementation "org.apache.grails:grails-spring-security-rest:8.0.0"
}Note that the default token storage system is JWT. If you want a different one, you need to install an additional artifact. For instance, for Memcached:
build.gradleext.springSecurityRestVersion = '8.0.0'
dependencies {
//Other dependencies
implementation "org.apache.grails:grails-spring-security-rest:${springSecurityRestVersion}"
implementation "org.apache.grails:grails-spring-security-rest-memcached:${springSecurityRestVersion}"
}The Maven coordinates are the following:
-
Grails Cache:
org.apache.grails:grails-spring-security-rest-grailscache. -
Memcached:
org.apache.grails:grails-spring-security-rest-memcached. -
GORM:
org.apache.grails:grails-spring-security-rest-gorm. -
Redis:
org.apache.grails:grails-spring-security-rest-redis.
Note that configuration properties such as grails.plugin.springsecurity.rest.token.storage.useMemcached are no longer
used. Every submodule of the above list will automatically configure the token store appropriately
If you want your own token storage system, you need to implement
TokenStorageService
and register it in resources.groovy as tokenStorageService.
Plugin configuration
This plugin is compatible by default with Spring Security core traditional, form-based authentication. The important thing to remember is: you have to separate the filter chains, so different filters are applied on each case.
The stateless, token-based approach of this plugin is incompatible with the HTTP session-based approach of Spring Security, core, so the trick is to identify what URL patterns have to be stateless, and what others have to be stateful (if any).
To configure the chains properly, you can use the grails.plugin.springsecurity.filterChain.chainMap property:
Listing 1.
grails.plugin.springsecurity.filterChain.chainMapgrails.plugin.springsecurity.filterChain.chainMap = [
//Stateless chain
[
pattern: '/**',
filters: 'JOINED_FILTERS,-anonymousAuthenticationFilter,-exceptionTranslationFilter,-authenticationProcessingFilter,-securityContextPersistenceFilter,-rememberMeAuthenticationFilter'
],
//Traditional, stateful chain
[
pattern: '/stateful/**',
filters: 'JOINED_FILTERS,-restTokenValidationFilter,-restExceptionTranslationFilter'
]
]To understand this syntax, please read the
Spring Security Core documentation.
Long story short: JOINED_FILTERS refers to all the configured filters. The minus (-) notation means all the previous values
but the neglected one.
So the first chain applies all the filters except the stateful ones. The second one applies all the filters but the stateless ones.
|
Make sure that the stateless chain applies not only to your REST controllers, but also to the URL’s where this plugin
filters are listening: by default, |
The difference is that, in a traditional form-based authentication, Spring Security will respond with an HTTP 302 redirect to the login controller. That doesn’t work for an API, so in the stateless approach, an HTTP 401 response will be sent back.
The Spring Security Rest plugin fires events exactly like Spring Security Core does.
Event Notification
You can set up event notifications in two ways. The sections that follow describe each approach in more detail.
-
Register an event listener, ignoring events that do not interest you. Spring allows only partial event subscription; you use generics to register the class of events that interest you, and you are notified of that class and all subclasses.
-
Register one or more callback closures in
grails-app/conf/application.groovythat take advantage of the plugin’sgrails.plugin.springsecurity.rest.RestSecurityEventListener. The listener does the filtering for you.
AuthenticationEventPublisher
Spring Security REST publishes events using an
AuthenticationEventPublisher
which in turn fire events using the
ApplicationEventPublisher.
By default no events are fired since the AuthenticationEventPublisher instance registered is a
grails.plugin.springsecurity.rest.authentication.NullRestAuthenticationEventPublisher. But you can enable event
publishing by setting grails.plugin.springsecurity.useSecurityEventListener = true in grails-app/conf/application.[groovy|yml].
You can use the useSecurityEventListener setting to temporarily disable and enable the callbacks, or enable them
per-environment.
Token Creation
Currently the Spring Security REST plugin supports a single event in addition to the default spring security events.
The event is fired whenever a new token is created. See grails.plugin.springsecurity.rest.RestTokenCreationEvent
|
Every time a token is successfully submitted, an |
Registering an Event Listener
Enable events with grails.plugin.springsecurity.useSecurityEventListener = true and create one or more Groovy or Java
classes, for example:
Listing 2. Custom event listener
package com.foo.bar
import org.springframework.context.ApplicationListener
import grails.plugin.springsecurity.rest.RestTokenCreationEvent
class MySecurityEventListener
implements ApplicationListener<RestTokenCreationEvent> {
void onApplicationEvent(RestTokenCreationEvent event) {
// The access token is a delegate of the event, so you have access to an instance of `grails.plugin.springsecurity.rest.token.AccessToken`
}
}Register the class in grails-app/conf/spring/resources.groovy:
Listing 3. Event listener registration
import com.foo.bar.MySecurityEventListener
beans = {
mySecurityEventListener(MySecurityEventListener)
}Registering Callback Closures
Alternatively, enable events with grails.plugin.springsecurity.useSecurityEventListener = true and register one or
more callback closure(s) in grails-app/conf/Config.groovy and let SecurityEventListener do the filtering.
Implement the event handlers that you need, for example:
Listing 4. Callback closures
grails.plugin.springsecurity.useSecurityEventListener = true
grails.plugin.springsecurity.onRestTokenCreationEvent = { e, appCtx ->
// handle RestTokenCreationEvent
}None of these closures are required; if none are configured, nothing will be called. Just implement the event handlers that you need.
The authentication filter
uses the default authenticationManager bean, which in turn uses all the registered authentication
providers. See the Spring Security Core guide
for more information about how to define your own providers. Note that you can easily plug any Spring Security sub-plugin
(like the LDAP one) to use a different authentication strategy.
If the authentication is successful, a token generator is used to generate a token, and a
token storage implementation is used to store the token. Finally, the JSON response sent back to the
client is rendered by a restAuthenticationTokenJsonRenderer bean. See the token rendering documentation for more details.
|
This authentication filter will only be applied to the above configured URL and can also be disabled, in case a different approach for token creation is followed. In the rest of the cases, the request will continue through the filter chain, reaching Spring Security Core filters. Bear in mind that, by default, Spring Security Core 2.x locks down all URL’s unless a explicit securiy rule has been specified for each of them. See Spring Security Core documentation for more information. |
The following are the configuration properties available:
| Config key | Default value |
|---|---|
|
|
|
|
|
|
Extracting credentials from the request
The plugin supports 2 ways of extracting the username and password: using request parameters, and using a JSON payload. To align with the RESTful principles, JSON payload is the default behaviour.
From a JSON request
| Config key | Default value |
|---|---|
|
|
|
|
|
|
The default implementation expects a request like this:
Listing 5. Example JSON authentication request
{
"username": "john.doe",
"password": "dontTellAnybody"
}If you use usernamePropertyName and passwordPropertyName properties mentioned above, your JSON request can look like:
Listing 6. Custom JSON authentication request
{
"login": "john.doe",
"pwd": "dontTellAnybody"
}With the following config:
Listing 7. Custom JSON authentication configuration properties
grails.plugin.springsecurity.rest.login.usernamePropertyName = 'login'
grails.plugin.springsecurity.rest.login.passwordPropertyName = 'pwd'If your JSON request format is different, you can plug your own implementation by defining a class which extends AbstractJsonPayloadCredentialsExtractor. The default implementation looks like this:
Listing 8.
DefaultJsonPayloadCredentialsExtractor/**
* Extracts credentials from a JSON request like: <code>{"username": "foo", "password": "bar"}</code>
*/
@Slf4j
class DefaultJsonPayloadCredentialsExtractor extends AbstractJsonPayloadCredentialsExtractor {
String usernamePropertyName
String passwordPropertyName
UsernamePasswordAuthenticationToken extractCredentials(HttpServletRequest httpServletRequest) {
def jsonBody = getJsonBody(httpServletRequest)
if (jsonBody) {
String username = jsonBody."${usernamePropertyName}"
String password = jsonBody."${passwordPropertyName}"
log.debug "Extracted credentials from JSON payload. Username: ${username}, password: ${password?.size() ? '[PROTECTED]' : '[MISSING]'}"
new UsernamePasswordAuthenticationToken(username, password)
} else {
log.debug 'No JSON body sent in the request'
return null
}
}
}Once you are done, register it in resources.groovy with the name credentialsExtractor.
From request parameters
Note that the name of the parameters can also be customised:
| Config key | Default value |
|---|---|
|
|
|
|
|
|
Logout
|
Logout is not possible when using JWT tokens (the default strategy), as no state is kept in the server. If
you still want to have logout, you can provide your own implementation by creating a subclass of
JwtTokenStorageService
and overriding the methods Then, register your implementation in However, a more rational approach would be just to remove the token from the client (eg, browser’s local storage) and let the tokens expire (they will expire anyway, unlike with other storages like Memcached or Redis where they get refreshed on every access). |
The logout filter exposes an endpoint for deleting tokens. It will read the token from an HTTP header. If found, will delete it from the storage, sending a 200 response. Otherwise, it will send a 404 response.
You can configure it using this properties:
| Config key | Default value |
|---|---|
|
|
|
|
By default, the plugin generates JWT tokens. Note that when using JWT, you can’t plug any other token generator. For more information about how this plugin uses JWT’s, check the JSON Web Token section.
JWT
Claims
It is possible, to include additional claims in the JWT generated. To do so, you can plug one or more implementations of the interface CustomClaimProvider, and register them in Spring.
The plugin comes prepackaged with a
IssuerClaimProvider,
that sets the iss field of the JWT claim set, and which value is configurable using the following configuration property:
grails.plugin.springsecurity.rest.token.generation.jwt.issuer.
Customising the JWT to include additional claims is a piece of cake. First, create the claim provider:
class BookListClaimProvider implements CustomClaimProvider {
@Override
void provideCustomClaims(JWTClaimsSet.Builder builder, UserDetails details, String principal, Integer expiration) {
builder.claim('books', Book.findAllByAuthor(details.username).collect { it.name })
}
}Then, register it in Spring via resources.groovy, or using the @Bean annotation in a method of the Application class
(or any @Configuration class):
@Bean
CustomClaimProvider bookListClaimProvider() {
new BookListClaimProvider()
}Algorithms
This plugin uses Nimbus JOSE+JWT library to generate and parse JWT’s, and the signing / encryption algorithms are configurable, as long as they are supported in Nimbus.
If using signed JWT’s, the relevant configuration is the following:
| Config key | Possible values | Default value |
|---|---|---|
|
Any |
|
|
At least 256 bits (32 characters) |
|
When using encrypted JWT’s, those are the possible configuration options:
| Config key | Possible values | Default value |
|---|---|---|
|
Any |
|
|
Any |
|
Memcached, GORM, Redis, Grails Cache
If you are not using JWT, but any stateful strategy like Memcached or GORM, the following strategies are available:
The strategy used is configurable:
| Config key | Default value |
|---|---|
|
|
|
|
Both of them generate tokens of 32 alphanumeric characters.
That should be enough for most of the human beings. But if you still want to provide your own implementation,
simply write a class implementing
TokenGenerator
and wire it up in resources.groovy as tokenGenerator.
The tokens are stored on the server using a tokenStorageService bean. The plugin comes with out-of-the-box support
for JWT, Memcached, GORM and Grails Cache, but you can use your own strategy implementing the
TokenStorageService
interface.
|
The default implementation, JWT, is stateless. Nothing is really stored. However, the plugin still gives a chance to the other implementations to store the principal if they need to. |
JSON Web Token
JSON Web Token (JWT) is an IETF standard which defines a secure way to encapsulate arbitrary data that can be sent over unsecure URL’s.
Generally speaking, JWT’s can be useful in the following use cases:
-
When generating "one click" action emails, like "delete this comment" or "add this to favorites". Instead of giving the users URL’s like
/comment/delete/123, you can give them something like/comment/delete/<JWT_TOKEN>, where theJWT_TOKENcontains encapsulated information about the user and the comment, in a safe way, so authentication is not required. -
To achieve single sign-on, by sharing a JWT across applications.
In the context of authentication and authorization, JWT will help you implement a stateless implementation, as the principal information is stored directly in the JWT.
How does a JWT looks like?
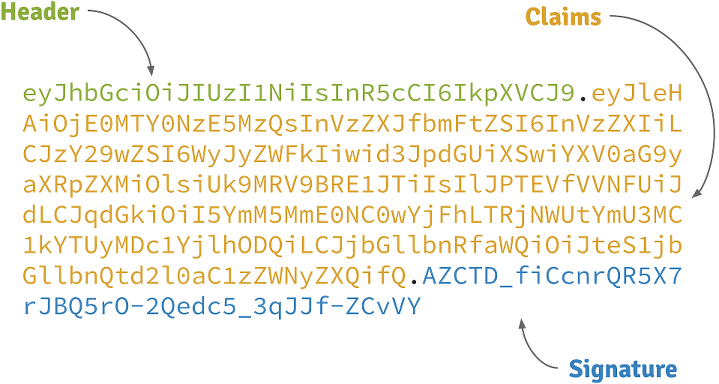
Figure 2. JWT example
Header
A base64-encoded JSON like:
Listing 9. JWT header
{
"alg": "HS256",
"typ": "JWT"
}Claims
A base64-encoded JSON like:
Listing 10. JWT claims
{
"exp": 1422990129,
"sub": "jimi",
"roles": [
"ROLE_ADMIN",
"ROLE_USER"
],
"iat": 1422986529
}Signature
Depends on the algorithm specified on the header, it can be a digital signature of the base64-encoded header and claims, or an encryption of them using RSA.
Signed JWT’s
By default, this plugin uses signed JWT’s as specified by the JSON Web Signature specification. More specifically, the algorithm used is HMAC SHA-256 with a specified shared secret. The relevant configuration properties are:
| Config key | Default value |
|---|---|
|
|
|
|
|
|
|
|
Encrypted JWT’s
|
Grails’s Listing 11. Excluding BouncyCastle’s libraries
|
In the previous strategy, the claims are just signed, so it prevents an attacker to tamper its contents to introduce malicious data or try a privilege escalation by adding more roles. However, the claims can be decoded just by using Base 64.
If the claims contains sensitive information, you can use a JSON Web Encryption algorithm to prevent them to be decoded. Particularly, this plugin uses RSAES OAEP for key encryption and AES GCM (Galois/Counter Mode) algorithm with a 256 bit key for content encryption.
By default, RSA public/private keys are generated every time the application runs. This means that generated tokens won’t be decrypted across executions of the application. So better create your own key pair using OpenSSL:
Listing 12. Certificate generation for JWT
openssl genrsa -out private_key.pem 2048
openssl pkcs8 -topk8 -inform PEM -outform DER -in private_key.pem -out private_key.der -nocrypt
openssl rsa -in private_key.pem -pubout -outform DER -out public_key.derThen, configure the keys properly, along with the rest of the configuration:
| Config key | Default value |
|---|---|
|
|
|
|
|
|
Example configuration:
Listing 13. JWT encryption example configuration
grails.plugin.springsecurity.rest.token.storage.jwt.useEncryptedJwt = true
grails.plugin.springsecurity.rest.token.storage.jwt.privateKeyPath = '/path/to/private_key.der'
grails.plugin.springsecurity.rest.token.storage.jwt.publicKeyPath = '/path/to/public_key.der'|
The performance of encryption algorithms is much slower compared with signing ones. If you are considering encrypting you JWT’s, think if you really need it. |
Token expiration and refresh tokens
When using JWT, issued access tokens expire after a period of time, and they are paired with refresh tokens, eg:
Listing 14. Sample access token response, including refresh token
{
"username": "jimi",
"roles": [
"ROLE_ADMIN",
"ROLE_USER"
],
"expires_in": 3600,
"token_type": "Bearer",
"refresh_token": "eyJhbGciOiJSU0EtT0FFUCIsImVuYyI6IkEyNTZHQ00ifQ.fUaSWIdZakFX7CyimRIPhuw0sfevgmwL2xzm5H0TuaqwKx24EafCO0TruGKG-lN-wGCITssnF2LQTqRzQGp0PoLXHfUJ0kkz5rBl6LtnRu7cdD1ZUNYXLJtFjQ3IATzoo15tPafRPyStG1Qm7-1L0VxquhrLxkkpti0F1_VTytZAq8ltFrnxM4ahJUwS7eriivvdLqmHtnwuXw0kBXEseIyCkiyKklWDJAcD_P_gHoQJvSCoXedlr7Pp0n6LEUrRWJ2Hb-Zyt9dWqWDxm9nyDeEVtEZGcQtpgCGgbXxaUpULIy5nvrbRzXSNyT6iXhK1CLqiFVkfh-Y-DHXdB6Q4sg.uYdpxl835KnlkqC5.gBgSnPWZOo6FINovJNG7Xx2RuS09QJbU4-_J4EgZQkygt8xE-HfdYaOmtmJLjGJR1XKoaRsuX1gNjFoCZgqWAon6.Zsrk52dkjskSVQLXZBQooQ",
"access_token": "eyJhbGciOiJSU0EtT0FFUCIsImVuYyI6IkEyNTZHQ00ifQ.n-gGe65x0SlSXS3fTG8ZLdXvv6b5_1pDvkcGyCjFy-vm1VhaBEQL5p3hc6iUcCAcuyrqzGk95lV9dHCv46cNfCiUFHWfbEcd4nqScIxBbc28xO9L1mNLnZ0G1rx1Mx1L0Y_ZPoSxDXpJaHCT28cdZffHLxx2B9ioIClgdlYBAJ5Oz8VT39-D0QSomS6QhFqmcpbDsXrsKxs545Pn-TIlu-fSQ4wpIvAxusOKB6CV2EYKqBplMBrh-3btE8WksVcX2N3LsrcMhrKxSKi93c06MZh6JzSLWe5bl9hvUvBdEuwDrk-fQgD3ZlmjjoevRWYhv_kslW1PlqUHYmKOQ7csUw.3mvvsFWikEjZzExA.YixjnnzzcPRy_uUpgPv5zqOfshv3pUwfrME0AijpsB7u9CmJe94g6f2y_3vqUps-5weKKGZyk3ZtnwEbPVAk9-HZt-Y27SbZl4JNCFEOLVsMsK8.h4j9BdFXuWKKez6xxRAwJA"
}Refresh tokens never expire, by default, and can be used to obtain a new access token by sending a POST request to the
/oauth/access_token endpoint.
If you prefer to configure your refresh tokens to expire automatically, you can set
grails.plugin.springsecurity.rest.token.storage.jwt.refreshExpiration to the number of seconds before the token
is invalid. After this period, a client would be forced to present login credentials in order to obtain a new access token.
Listing 15. Sample HTTP request to obtain an access token
POST /myApp/oauth/access_token HTTP/1.1
Host: server.example.com
Content-Type: application/x-www-form-urlencoded
grant_type=refresh_token&refresh_token=eyJhbGciOiJSU0EtT0FFUCIsImVuYyI6IkEyNTZHQ00ifQ....As you can see, is a form request with 2 parameters:
-
grant_type: must berefresh_tokenalways. -
refresh_token: the refresh token provided earlier.
|
By default, refresh tokens never expire and must be securely stored in your client application. See section 10.4 of the OAuth 2.0 spec for more information. |
Memcached
To use Memcached, simply define the following configuration properties to match your environments accordingly:
| Config key | Default value |
|---|---|
|
|
|
|
|
|
|
|
For development, if you have Memcached installed locally with the default settings, it should just work with the defaults.
In Memcached tokens will expire automatically after the configured timeout (1h by default). They get refreshed on every access
GORM
To use GORM, these are the relevant configuration properties:
| Config key | Default value |
|---|---|
|
|
|
|
|
|
The relevant domain class should look something like this:
Listing 16. Authentication token domain class example
package org.example.product
class AuthenticationToken {
String tokenValue
String username
static mapping = {
version false
}
}|
For the |
A few things to take into consideration when using GORM for token storage:
-
Instead of storing the whole
UserDetailsobject, probably only the username is needed. This is because applications using this strategy will probably have the standard User and Role domain classes. When the token is verified the username is passed to the defaultuserDetailsServicebean, which in the case of the default Spring Security Core GORM implementation will fetch the information from the mentioned domain classes. -
GORM’s optimistic locking feature is likely unnecessary and may cause performance issues.
-
You’ll have to handle token expiration by yourself via Quartz jobs or a similar mechanism. There are various ways you might go about this.
GORM Token Expiration Examples
Adding a GORM autoTimestamp property like lastUpdated or dateCreated and sorting out stale or old tokens with Quartz jobs
are the most obvious routes. Each has its drawbacks though.
dateCreated is useful if you want tokens to expire a set time after they are issued. However, API users who didn’t pay
attention to when their token was issued may find themselves needing a new token unexpectedly.
Date dateCreatedlastUpdated requires a change to the token domain instance in order to be triggered. Something as simple as an access
counter may work as a strategy to keepTokens fresh, but doing a write to a disk based database on each token access may
be something you would prefer to avoid for the sake of performance.
Date lastUpdated
Integer accessCount = 0
def afterLoad() {
accessCount++
}Simply using your own date or timestamp is also a valid option.
Date refreshed = new Date()
def afterLoad() {
// if being accessed and it is more than a day since last marked as refreshed
// and it hasn't been wiped out by Quartz job (it exists, duh)
// then refresh it
if (refreshed < new Date() -1) {
refreshed = new Date()
it.save()
}
}Here is an example quartz job to go with the custom refresh timestamp above:
class RemoveStaleTokensJob {
static triggers = {
cron name: 'every4hours', cronExpression: '0 0 */4 * * *'
}
void execute() {
AuthenticationToken.executeUpdate('delete AuthenticationToken a where a.refreshed < ?' [new Date()-1])
}
}Redis
To use Redis as a token store simply you just have to enable it in you configuration by setting useRedis to true
(see table below).
You have to have the redis plugin installed in order to be able to use Redis as your token store. Refer to the
Redis plugin documentation for more details about how to configure it.
Configuration options for Redis:
| Config key | Default value |
|---|---|
|
|
Grails Cache
To use Grails Cache, simply define a cache name:
| Config key | Default value |
|---|---|
|
|
The cache name should correspond to a name specified in the [cache DSL|http://grails-plugins.github.io/grails-cache/docs/manual/guide/usage.html#dsl].
|
Token expiration / eviction / TTL
By default, Spring Cache abstraction does not support expiration. It depends on the specific support of the actual providers. Grails has several plugins for this: |
|
There is a bug in |
By default, this plugin renders the token in RFC 6750 Bearer Token format:
Sample Access token response
HTTP/1.1 200 OK
Content-Type: application/json;charset=UTF-8
Cache-Control: no-store
Pragma: no-cache
{
"access_token":"eyJhbGciOiJIUzI1NiJ9...",
"token_type":"Bearer",
"username": "john.doe",
"roles": [
"ROLE_ADMIN",
"ROLE_USER"
]
}|
As per the RFC, |
The JSON structure can be customised with the following configuration keys:
| Config key | Default value |
|---|---|
|
|
|
|
E.g., with the following configuration:
grails.plugin.springsecurity.rest.token.rendering.usernamePropertyName = 'login'
grails.plugin.springsecurity.rest.token.rendering.authoritiesPropertyName = 'permissions'The output will look like:
{
"access_token":"eyJhbGciOiJIUzI1NiJ9...",
"token_type":"Bearer",
"login": "john.doe",
"permissions": [
"ROLE_ADMIN",
"ROLE_USER"
]
}Disabling bearer tokens support for full response customisation
In order to fully customise the response, you need first to disable bearer tokens support by setting
grails.plugin.springsecurity.rest.token.validation.useBearerToken = false. That will enable you to use this additional
property:
| Config key | Default value |
|---|---|
|
|
|
Disabling bearer token support impacts the way tokens are extracted from the HTTP request. Please, read carefully the chapter about token validation first. |
If you want your own implementation, simply create a class implementing
AccessTokenJsonRenderer
and wire it up in resources.groovy with name accessTokenJsonRenderer.
|
The principal object stored in the security context, and passed to the JSON renderer, is coming from the configured
authentication providers. In most cases, this will be a If you want to render additional information in your JSON response, you have to:
|
The token validation filter looks for the token in the request and then tries to validate it using the configured token storage implementation.
If the validation is successful, the principal object is stored in the security context. This allows you to use in
your application @Secured, springSecurityService.principal and so on.
|
|
This plugin supports RFC 6750 Bearer Token specification out-of-the-box.
Sending tokens in the request
The token can be sent in the Authorization request header:
Listing 17. Accessing a protected resource using
Authorization request headerGET /protectedResource HTTP/1.1
Host: server.example.com
Authorization: Bearer eyJhbGciOiJIUzI1NiJ9.eyJleHAiOjE0MjI5OTU5MjIsInN1YiI6ImppbWkiLCJyb2xlcyI6WyJST0xFX0FETUlOIiwiUk9MRV9VU0VSIl0sImlhdCI6MTQyMjk5MjMyMn0.rA7A2Gwt14LaYMpxNRtrCdO24RGrfHtZXY9fIjV8x8oOr using form-encoded body parameters:
Listing 18. Accessing a protected resource using body parameters
POST /protectedResource HTTP/1.1
Host: server.example.com
Content-Type: application/x-www-form-urlencoded
access_token=eyJhbGciOiJIUzI1NiJ9.eyJleHAiOjE0MjI5OTU5MjIsInN1YiI6ImppbWkiLCJyb2xlcyI6WyJST0xFX0FETUlOIiwiUk9MRV9VU0VSIl0sImlhdCI6MTQyMjk5MjMyMn0.rA7A2Gwt14LaYMpxNRtrCdO24RGrfHtZXY9fIjV8x8oIf you need to use the GET HTTP method (to render images in an img tag, for example), you can also send the access token
in a query string parameter named access_token:
If you disable the bearer token support, you can customise it further:
grails.plugin.springsecurity.rest.token.validation.useBearerToken = false
grails.plugin.springsecurity.rest.token.validation.headerName = 'X-Auth-Token'If you still want to have full access and read the token from a different part of the request, you can implement a
TokenReader
and register it in your resources.groovy as tokenReader.
|
You must disable bearer token support to register your own |
Anonymous access
If you want to enable anonymous access to URL’s where this plugin’s filters are applied, you need to:
-
Configure
enableAnonymousAccess = true(see table below). -
Make sure that the
anonymousAuthenticationFilteris applied beforerestTokenValidationFilter. See how to configure filters for more details.
For example, with this configuration:
Sample configuration to allow anonymous access
grails {
plugin {
springsecurity {
filterChain {
chainMap = [
[pattern: '/api/guest/**', filters: 'anonymousAuthenticationFilter,restTokenValidationFilter,restExceptionTranslationFilter,filterInvocationInterceptor'],
[pattern: '/api/**', filters: 'JOINED_FILTERS,-anonymousAuthenticationFilter,-exceptionTranslationFilter,-authenticationProcessingFilter,-securityContextPersistenceFilter,-rememberMeAuthenticationFilter'],
[pattern: '/**', filters: 'JOINED_FILTERS,-restTokenValidationFilter,-restExceptionTranslationFilter']
]
}
//Other Spring Security settings
//...
rest {
token {
validation {
enableAnonymousAccess = true
}
}
}
}
}
}The following chains are configured:
-
/api/guest/**is a stateless chain that allows anonymous access when no token is sent. If however a token is on the request, it will be validated. -
/api/**is a stateless chain that doesn’t allow anonymous access. Thus, the token will always be required, and if missing, a Bad Request reponse will be sent back to the client. -
/**(read: everything else) is a traditional stateful chain.
Validation Endpoint
There is also an endpoint available that you can call in case you want to know if a given token is valid. It looks for
the token in a HTTP header as well, and if the token is still valid, it renders guide:authentication[its JSON representation].
If the token does not exist, it will render a grails.plugin.springsecurity.rest.login.failureStatusCode response
(401 by default).
The relevant configuration properties for the validation endpoint are:
| Config key | Default value |
|---|---|
|
|
|
|
|
|
Note that headerName is only considered if grails.plugin.springsecurity.rest.token.validation.useBearerToken is set
to false. Otherwise (the default approach), as per RFC 6750, the header name will be Authorization and the value
will be Bearer TOKEN_VALUE.
Since Grails 3.2.1, CORS support is built-in into the framework. Check the documentation on the Grails guide for more information.
If you are using any Grails 3 version prior to 3.2.1, you can define your own filter, as described in https://github.com/davidtinker/grails-cors#grails-3.
Alternatively, you can also use this plugin.
This plugin is meant to be used in applications serving a REST API’s to pure Javascript clients. The main authentication flow of this plugin is to allow you to authenticate your users against any Spring Security-compatible user directory (like a DB or an LDAP server).
However, there might be situations where you want to delegate the authentication against a third-party provider, like Google or Facebook. Unfortunately, your pure Javascript front-end application cannot request the providers directly using OAuth, because then the access keys will be made public.
So is this plugin’s responsibility to provide endpoints so your Grails backend acts as a proxy for your front-end client.
The flow is something like the following:
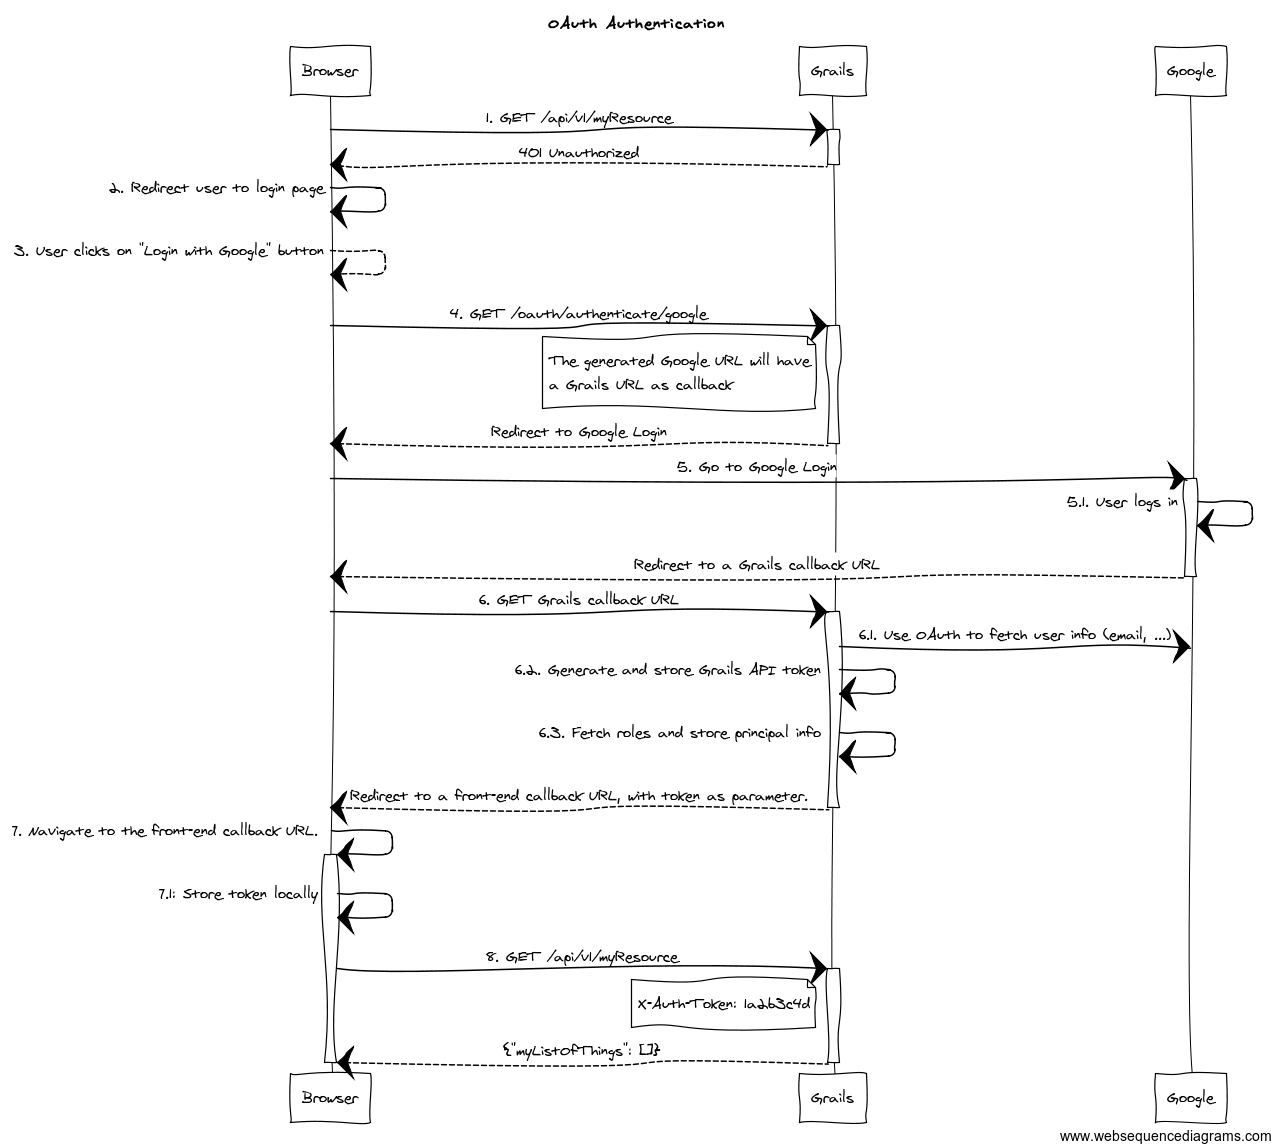
Figure 3. OAuth delegation protocol
-
The client application requests and endpoint that requires authentication, so the server responds with a 401 response (*).
-
The client redirects the user to the login form (*).
-
This time, instead of using username and password, the user clicks on "Login with Google" button.
-
Browser navigates to a Grails URL. Grails will generate a Google Login URL, giving Google a Grails callback URL.
-
Browser navigates to Google Login. User logs in, and Google redirects the browser to the Grails callback URL.
-
Browser navigates to that Grails callback URL. Then, Grails will use OAuth to fetch user information (like email) from Google. Based on that, will generate a REST API token and fetch and store principal information. The response from Grails will be a front-end URL where the token is a parameter.
-
The browser will navigate to that URL, and the Javascript logic will read the token from the URL and store it locally.
-
The client sends again a request to the protected resource, passing the token as an HTTP header (*).
The steps flagged with (*) remain unchanged from the normal flow.
The Grails callback URL mentioned above has this general format: ${grails.serverURL}/oauth/callback/${providerName}.
You will need to configure such URL in your OAuth 2.0 provider.
To support OAuth, this plugin uses Profile & Authentication Client for Java. So you can use any OAuth 2.0 provider they support. This includes at the time of writing:
-
Dropbox.
-
Facebook.
-
GitHub.
-
Google.
-
LinkedIn.
-
Windows Live.
-
Wordpress.
-
Yahoo.
-
Paypal.
Note that OAuth 1.0a providers also work, like Twitter.
If your provider is not supported by pac4j, you can write your own. Please refer to the pac4j documentation for that.
The plugin also supports CAS (Central Authentication Service) using the OAuth authentication flow. See CAS Authentication for details.
To start the OAuth authentication flow, from your frontend application, generate a link to
<YOUR_GRAILS_APP>/oauth/authenticate/<provider>. The user clicking on that link represents step 4 in the previous
diagram.
Note that you can define the frontend callback URL in application.groovy under
grails.plugin.springsecurity.rest.oauth.frontendCallbackUrl. You need to define a closure that will be called with
the token value as parameter:
grails.plugin.springsecurity.rest.oauth.frontendCallbackUrl = { String tokenValue -> "http://my.frontend-app.com/welcome.token=${tokenValue}" }You can also define the URL as a callback parameter in the original link, eg:
In this case, the token will be concatenated to the end of the URL.
Upon successful OAuth authorisation (after step 6.1 in the above diagram), an
OauthUser
will be stored in the security context. This is done by a bean named oauthUserDetailsService. The
default implementation
delegates to the configured userDetailsService bean, passing the profile ID as the username:
Listing 19. DefaultOauthUserDetailsService
/**
* Builds an {@link OauthUser}. Delegates to the default {@link UserDetailsService#loadUserByUsername(java.lang.String)}
* where the username passed is {@link UserProfile#getId()}.
*
* If the user is not found, it will create a new one with the the default roles.
*/
@Slf4j
@CompileStatic
class DefaultOauthUserDetailsService implements OauthUserDetailsService {
@Delegate
UserDetailsService userDetailsService
UserDetailsChecker preAuthenticationChecks
OauthUser loadUserByUserProfile(UserProfile userProfile, Collection<GrantedAuthority> defaultRoles)
throws UsernameNotFoundException {
String userDomainClass = userDomainClassName()
if (!userDomainClass) {
return instantiateOauthUser(userProfile, defaultRoles)
}
loadUserByUserProfileWhenUserDomainClassIsSet(userProfile, defaultRoles)
}
OauthUser loadUserByUserProfileWhenUserDomainClassIsSet(UserProfile userProfile, Collection<GrantedAuthority> defaultRoles) {
OauthUser oauthUser
try {
log.debug "Trying to fetch user details for user profile: ${userProfile}"
UserDetails userDetails = userDetailsService.loadUserByUsername userProfile.id
log.debug "Checking user details with ${preAuthenticationChecks.class.name}"
preAuthenticationChecks?.check(userDetails)
Collection<GrantedAuthority> allRoles = []
allRoles.addAll(userDetails.authorities)
allRoles.addAll(defaultRoles)
oauthUser = new OauthUser(userDetails.username, userDetails.password, allRoles, userProfile)
} catch (UsernameNotFoundException ignored) {
log.debug "User not found. Creating a new one with default roles: ${defaultRoles}"
oauthUser = instantiateOauthUser(userProfile, defaultRoles)
}
oauthUser
}
OauthUser instantiateOauthUser(UserProfile userProfile, Collection<GrantedAuthority> defaultRoles) {
new OauthUser(userProfile.id, 'N/A', defaultRoles, userProfile)
}
@CompileDynamic
String userDomainClassName() {
SpringSecurityUtils.getSecurityConfig()?.get('userLookup')?.get('userDomainClassName')
}
}If you want to provide your own implementation, define it in resources.groovy with bean name oauthUserDetailsService.
Make sure you implements the interface OauthUserDetailsService
If you want to do any additional post-OAuth authorisation check, you should do it on your loadUserByUserProfile
implementation. This is useful if you want to allow your corporate users to log into your application using their Gmail
account. In this case, you should decide based on OAuth20Profile.getEmail(), for instance:
Listing 20. Custom loadUserByUserProfile implementation
OauthUser loadUserByUserProfile(OAuth20Profile userProfile, Collection<GrantedAuthority> defaultRoles) throws UsernameNotFoundException {
if (userProfile.email.endsWith('example.org')) {
return new OauthUser(userProfile.id, 'N/A', defaultRoles, userProfile)
} else {
throw new UsernameNotFoundException("User with email ${userProfile.email} is not allowed. Only `example.org` accounts are allowed.")
}
}In case of any OAuth authentication failure, the plugin will redirect back to the frontend application anyway, so it
has a chance to render a proper error message and/or offer the user the option to try again. In that case, the token
parameter will be empty, and both error and message params will be appended:
Below are some examples on how to configure it for Google, Facebook and Twitter.
Define the following block in your application.groovy:
Listing 21. Google OAuth sample configuration
grails {
plugin {
springsecurity {
rest {
oauth {
frontendCallbackUrl = { String tokenValue -> "http://my.frontend-app.com/welcome#token=${tokenValue}" }
google {
client = org.pac4j.oauth.client.Google2Client
key = 'xxxx.apps.googleusercontent.com'
secret = 'xxx'
scope = org.pac4j.oauth.client.Google2Client.Google2Scope.EMAIL_AND_PROFILE
defaultRoles = ['ROLE_USER', 'ROLE_GOOGLE']
}
}
}
}
}
}|
The |
Define the following block in your application.groovy:
Listing 22. Facebook OAuth sample configuration
grails {
plugin {
springsecurity {
rest {
oauth {
frontendCallbackUrl = { String tokenValue -> "http://my.frontend-app.com/welcome#token=${tokenValue}" }
facebook {
client = org.pac4j.oauth.client.FacebookClient
key = 'xxx'
secret = 'yyy'
scope = 'email,user_location'
fields = 'id,name,first_name,middle_name,last_name,username'
defaultRoles = ['ROLE_USER', 'ROLE_FACEBOOK']
}
}
}
}
}
}The scope is a comma-separated list, without blanks, of Facebook permissions. See the
Facebook documentation for more details.
fields may contain a comma-separated list, without blanks, of
user fields.
Both scope and fields are optional, but it’s highly recommendable to fine tune those lists so you don’t ask for
information you don’t need.
Define the following block in your application.groovy:
Listing 23. Twitter OAuth sample configuration
grails {
plugin {
springsecurity {
rest {
oauth {
frontendCallbackUrl = { String tokenValue -> "http://my.frontend-app.com/welcome#token=${tokenValue}" }
twitter {
client = org.pac4j.oauth.client.TwitterClient
key = 'xxx'
secret = 'yyy'
defaultRoles = ['ROLE_USER', 'ROLE_TWITTER']
}
}
}
}
}
}There is no additional configuration for Twitter.
CAS (Central Authentication Service)
Define the following block in your application.groovy:
Listing 24. CAS sample configuration
grails {
plugin {
springsecurity {
rest {
oauth {
frontendCallbackUrl = { String tokenValue -> "http://my.frontend-app.com/welcome#token=${tokenValue}" }
cas {
client = org.pac4j.cas.client.CasClient
configuration = new org.pac4j.cas.config.CasConfiguration("https://my.cas-server.com/cas/login")
}
}
}
}
}
}Set configuration to an instance of org.pac4j.cas.config.CasConfiguration passing the login URL of your CAS server as the argument of the constructor.
If you need debug information, you can specify the following entries in logback.groovy:
Listing 25. Logging setup
logger("org.springframework.security", DEBUG, ['STDOUT'], false)
logger("grails.plugin.springsecurity", DEBUG, ['STDOUT'], false)
logger("org.pac4j", DEBUG, ['STDOUT'], false)Why this token-based implementation? Can’t I use HTTP basic authentication?
In theory you can. The only restriction to be truly stateless is to not use HTTP sessions at all. So if you go with basic authentication, you need to transfer the credentials back and forth every time.
Let’s think about that. Keep in mind that your frontend is a pure HTML/Javascript application, consuming a REST API
from the Grails side. So the first time, the Javascript application will make an API query and will receive a 401 response
indicating that authentication is required. Then you present the user a form to enter credentials, you grab them, encode
them with Base64 and in the next request, you send an HTTP header like Authorization: Basic QWxhZGRpbjpvcGVuIHNlc2FtZQ==.
Now remember you are doing RESTful application, so the session state is maintained in the client. That means that you would need to store that Base64 encoded string somewhere: cookies? HTML5 local storage? In any case, they are accessible using browser tools. And that’s the point: there is a huge security risk because Base64 it’s not encryption, just encoding. And it can be easily decoded.
You could argue that someone can access the token in the browser. Yes, but having the token will not allow him to obtain user’s credentials. The tokens are just not decodable. And they can be revoked if necessary.
Fortunately for you, a token-based solution is not a magic idea that I only got; it’s actually a specification: RFC 6750 - The OAuth 2.0 Authorization Framework: Bearer Token Usage.
Moreover, if you use tokens, you have the chance to implement expiration policies.
A couple of link with further explanations on the token-based flow:
Why can’t the API be secured with OAuth?
RFC 6749 - OAuth 2.0 specification does cover this scenario in what they call "public clients":
Clients incapable of maintaining the confidentiality of their credentials (e.g., clients executing on the device used by the resource owner, such as an installed native application or a web browser-based application), and incapable of secure client authentication via any other means.
The OAuth 2.0 specification supports public clients with the implicit grant. This plugin supports that by default when you delegate the authentication to another OAuth provider. If it’s you who are authenticating the users (via DB, LDAP, etc), the token-based flow of this plugin is OAuth-ish.
Why you didn’t use any of the existing OAuth plugins? Why pac4j?
I’m aware of plugins like OAuth and Spring Security OAuth, but all of them rely on Spring Security Core’s way of using HTTP sessions. So not acceptable.
I chose pac4j because:
-
They support major OAuth 2.0 providers out-of-the-box, whereas Scribe does not.
-
It’s deadly simple and works just fine.
I’m also aware of a pac4j-spring-security module. See my previous response on HTTP sessions.
API Reference
The REST plugin Groovydoc API documentation for historical (pre-merge) releases is available at the legacy Spring Security REST plugin API reference.
18.5.1.7 UI Plugin
Introduction to the Spring Security UI Plugin
The Spring Security UI plugin provides CRUD screens and other user management workflows.
The CRUD screens are protected from cross-site request forgery (CSRF) attacks through the use of the useToken attribute
in forms. For more details, refer to the
Handling Duplicate Form Submissions section in the
Grails Core documentation.
Non-default functionality is available only if the feature is available. This includes:
-
ACL Controllers and Views, which are enabled if the ACL Plugin is installed.
-
Requestmaps support, which is available if
grails.plugin.springsecurity.securityConfigTypeis set to"Requestmap"orSecurityConfigType.Requestmapinapplication.groovy. -
Persistent cookies support, which is enabled if it has been configured with the
s2-create-persistent-tokenscript.
Installation
Add an entry in the dependencies block of your build.gradle file, changing the version as needed:
build.gradleimplementation 'org.apache.grails:grails-spring-security-ui'Also be sure to update the version when new releases are available.
User Management
User search
The default action for the User controller is search. By default only the standard fields (username, enabled, accountExpired, accountLocked, and passwordExpired) are available but this is customizable with the s2ui-override script - see the Customization section for details.
You can search by any combination of fields, and the username field has an Ajax autocomplete to assist in finding instances. In this screenshot you can see that an email field has been added to the domain class and UI. Leave all fields empty and all checkboxes set at "Either" to return all instances.
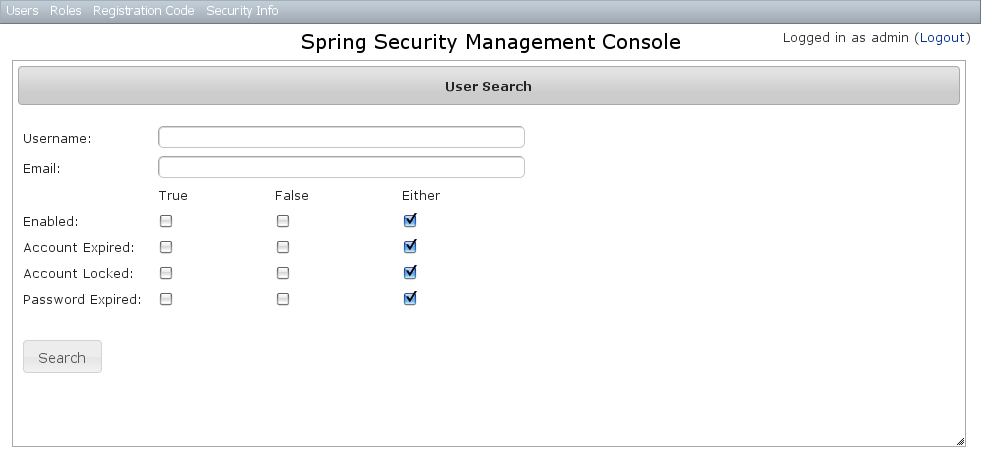
This example shows a search for usernames containing 'adm' (the search is case-insensitive and the search string can appear anywhere in the username). Results are shown paginated in groups of 10. All of the column headers are clickable and will sort the results by that field.
User edit
After clicking through to the 'admin' User you get to the edit page (there are no view pages):
You can update any of the attributes or delete the User. You can see that there’s a "Login as user" button here - that is only shown if you’re authenticated with a User who is granted ROLE_SWITCH_USER (this role name can be configured in application.groovy):
This allows you to temporarily assume the identity of another User (see the Grails Spring Security Core Plugin documentation for more information about switch-user). The "Logged in as …" information in the top right of the screen will change to show that you’re running as another User and provide a link to switch back. The role name ROLE_SWITCH_USER is the default but you can change the value with the grails.plugin.springsecurity.ui.switchUserRoleName setting in application.groovy.
If you click the Roles tab you can see the roles granted to this User and can click through to its edit page:
User creation
You can create new Users by going to /user/create or by clicking the Create action in the Users menu.
Role Management
Role search
The default action for the Role controller is search. By default only the authority field is available but this is customizable with the s2ui-override script - see the Customization section for details.
The authority field has an Ajax autocomplete to assist in finding instances. Leave the field empty to return all instances.
Search is case-insensitive and the search string can appear anywhere in the name (and you can omit the ROLE_ prefix). Results are shown paginated in groups of 10 but if there’s only one result you’ll be forwarded to the edit page for that Role. The authority column header is clickable and will sort the results by that field.
Role edit
After clicking through to a Role you get to the edit page (there are no view pages):
You can update any of the attributes or delete the Role. Any user that had been granted the Role will lose the grant but otherwise be unaffected.
If you click the Users tab you can see which users have a grant for this Role and can click through to their edit page:
Role creation
You can create new Roles by going to /role/create or by clicking the Create action in the Roles menu.
Requestmap Management
The default approach to securing URLs is with annotations, so the Requestmaps menu is only shown if grails.plugin.springsecurity.securityConfigType has the value "Requestmap" or SecurityConfigType.Requestmap in application.groovy.
Requestmap search
The default action for the Requestmap controller is search. By default only the standard fields (url and configAttribute) are available but this is customizable with the s2ui-override script - see the Customization section for details.
You can search by any combination of fields, and the url and configAttribute fields have an Ajax autocomplete to assist in finding instances. Leave both fields empty to return all instances.
Searching is case-insensitive and the search string can appear anywhere in the field. Results are shown paginated in groups of 10 and you can click on either header to sort by that field:
Requestmap edit
After clicking through to a Requestmap you get to the edit page (there are no view pages):
You can update any of the attributes or delete the Requestmap. Editing or deleting a Requestmap resets the cache of loaded instances, so your changes will take effect immediately.
Requestmap creation
You can create new Requestmaps by going to /requestmap/create or by clicking the Create action in the Requestmaps menu.
Creating a Requestmap resets the cache of loaded instances, so your changes will take effect immediately.
User Registration
Most of the plugin’s controllers are intended to be part of a backend admin application, but the Registration and Forgot Password workflows are expected to be user-facing. So they’re not available in the admin menu like the User, Role, and other backend functionality - you’ll need to expose them to your users.
One way to do this is to replace the default login.gsp that’s provided by the Spring Security Core plugin with this plugin’s version. You can do this by running grails s2ui-override auth - s2ui-override script - see the Customization section for details. If you do this your users will have links to both workflows from the login screen:
Registration
Navigate to /register/:
By default e-mail validation for user creation is turned on. If you wish to turn it off see the 'E-Mail Validation Parameter' section below. If this is turned off then no e-mail is sent to the user and they are automatically redirected to the link that would have been sent in the e-mail.
After filling out valid values an email will be sent and you’ll see a success screen:

Click on the link in the email:
and you’ll finalize the process, which involves enabling the locked user and pre-authenticating, then redirecting to the configured destination:

Configuration
The post-registration destination url is configurable in grails-app/conf/application.groovy using the postRegisterUrl attribute:
If you don’t specify a value then the grails.plugin.springsecurity.successHandler.defaultTargetUrl value will be used, which is '/' by default.
In addition, each new user will be granted ROLE_USER after finalizing the registration. If you want to change the default role, add more, or grant no roles at all (for example if you want an admin to approve new users and explicitly enable new users) then you can customize that with the defaultRoleNames attribute (which is a List of Strings):
grails.plugin.springsecurity.ui.register.postRegisterUrl = '/welcome'E-Mail Validation Parameter
You can customize if the user should get e-mail for validation before they can log in for the first time. To turn off
e-mail validation set the parameter requireEmailValidation to false, if not set it will default to true. This
can be set in grails-app/conf/application.groovy or grails-app/conf/application.yml under
grails.plugin.springsecurity.ui.register.requireEmailValidation = falsePlease Note if you turn off e-mail validation in production it is strongly recommended to have additional user creation validation
Mail configuration
By default the plugin uses the Mail plugin to send emails, but only if it is installed. This is configurable by registering your own MailStrategy implementation - see the section on Customization for more information. The plugin assumes that the Mail plugin and an SMTP server are already configured.
You can customize the subject, body, and from address of the registration email by overriding the default values in grails-app/conf/application.groovy, for example:
grails.plugin.springsecurity.ui.register.emailBody = '...'
grails.plugin.springsecurity.ui.register.emailFrom = '...'
grails.plugin.springsecurity.ui.register.emailSubject = '...'The emailBody property should be a GString and will have the User domain class instance in scope in the user variable, and the generated url to click to finalize the signup in the url variable.
grails.plugin.springsecurity.ui.register.defaultRoleNames = [] // no rolesor
grails.plugin.springsecurity.ui.register.defaultRoleNames = ['ROLE_CUSTOMER']Notes
You should consider the registration code as starter code - every signup workflow will be different, and this should help you get going but is unlikely to be sufficient. You may wish to collect more information than just username and email - first and last name for example. Run grails s2ui-override register to copy the registration controller and GSPs into your application to be customized.
If there are unexpected validation errors during registration (which can happen when there is a disconnect between the domain classes and the code in RegisterController they will be logged at the warn or error level, so enable logging to ensure that you see the messages, e.g.
...
logger 'grails.plugin.springsecurity.ui.SpringSecurityUiService', WARN
...|
|
RegistrationCode search
The plugin uses its grails.plugin.springsecurity.ui.RegistrationCode domain class to store a token associated with the new users' username for use when finishing the registration process after the user clicks the link in the generated email (and also as part of the forgot-password workflow). The plugin includes a controller and GSPs to manage these instances.
The default action for the RegistrationCode controller is search. By default only the standard fields (username and token) are available but this is customizable with the s2ui-override script - see the Customization section for details.
You can search by any combination of fields, and both fields have an Ajax autocomplete to assist in finding instances. Leave both fields empty to return all instances.
Searching is case-insensitive and the search string can appear anywhere in the field. Results are shown paginated in groups of 10 and you can click on any header to sort by that field:
RegistrationCode edit
After clicking through to a RegistrationCode you get to the edit page (there are no view pages):
You can update the username or token attribute or delete the RegistrationCode.
Since instances are created during the "User Registration" and "Forgot Password" workflows, there is no functionality in this plugin to create new instances.
Forgot Password
Like the Registration workflow, the Forgot Password workflow is expected to be user-facing. So it’s not available in the admin menu like the User, Role, and other backend functionality - you’ll need to expose them to your users.
One way to do this is to replace the default login.gsp that’s provided by the Spring Security Core plugin with this plugin’s version. You can do this by running grails s2ui-override auth - see the section on Customization for more details. If you do this your users will have links to both workflows from the login screen:
Forgot Password
Navigate to /register/forgotPassword:
The default is to have e-mail validation for forgetting a password. This is now configurable which will be explained below.
After entering a valid username an email will be sent and you’ll see a success screen:
Click on the link in the email:
and you’ll open the reset password form:
After entering a valid password you’ll finalize the process, which involves storing the new password hashed in the user table and pre-authenticating, then redirecting to the configured destination:
Configuration
The post-reset destination url is configurable in grails-app/conf/application.groovy using the postResetUrl attribute:
grails.plugin.springsecurity.ui.forgotPassword.postResetUrl = '/reset'If you don’t specify a value then the defaultTargetUrl value will be used, which is '/' by default.
Email Validation Configuration
You can customize if you want to have the user get e-mails for validation before they can reset their password. To turn off
e-mail validation set the parameter requireForgotPassEmailValidation to false. If not set it will default to true. This
can be set in grails-app/conf/application.groovy or grails-app/conf/application.yml under
grails.plugin.springsecurity.ui.forgotPassword.requireForgotPassEmailValidation = falseIf e-mail validation is turned off, it is recommended to use the forgotPasswordExtraValidation below.
Challenge Questions Configuration
It is recommended the provided script named s2ui-create-challenge-questions be used to generate challenge questions.
All the answers will be encrypted and it will use the same encryption settings as the what is used to store the password for each user. The service to handle this listener is automatically created and configured when you use the plugin.
The option to add challenge questions can be turned on will work independent of e-mail validation. If the e-mail validation is turned on this step will occur before the e-mail is sent out.
To make this work, the domain object must have a link to your User Object. This is done by setting the validationUserLookUpProperty which defaults to 'user'.
This can be customized in either grails-app/conf/application.groovy or grails-app/conf/application.yml
grails.plugin.springsecurity.ui.forgotPassword.validationUserLookUpProperty = 'user'Each list item in the forgotPasswordExtraValidation has three options, though each should only have two. If you have both
labelDomain and labelMessage then labelDomain will be used as it takes precedences.
| Header 1 | Header 2 |
|---|---|
labelDomain |
This is the property in the domain object that will used to ask the question |
labelMessage |
If labelDomain is not present then this can be used as a message property to ask a question (ie if your questions are static). |
prop |
This is used as the property of the domain object to determine if the answer is correct. |
This can be customized in either grails-app/conf/application.groovy or grails-app/conf/application.yml
grails-app/conf/application.yml
grails:
plugin:
springsecurity:
ui:
forgotPassword:
forgotPasswordExtraValidation:
-
labelDomain: myQuestion
prop: myAnswer
-
labelMessage: securityvalidations.labelMessage.label1
prop: myAnswer2If the above is configured you will see a menu item to List and Create Challenge questions for each user.
To use the challenge questions functionality please set the domain class which will hold the answers with the
forgotPasswordExtraValidationDomainClassName property. This is Domain object that contains any reference that is needed by prop (question) and labelDomain (answer).
grails:
plugin:
springsecurity:
ui:
forgotPassword:
forgotPasswordExtraValidationDomainClassName: com.mycompany.Profile
Mail configuration
By default the plugin uses the Mail plugin to send emails, but only if it is installed. This is configurable by registering your own MailStrategy implementation - see the section on Customization for more information. The plugin assumes that the Mail plugin and an SMTP server are already configured.
You can customize the subject, body, and from address of the reset email by overriding the default values in grails-app/conf/application.groovy, for example:
grails.plugin.springsecurity.ui.forgotPassword.emailBody = '...'
grails.plugin.springsecurity.ui.forgotPassword.emailFrom = '...'
grails.plugin.springsecurity.ui.forgotPassword.emailSubject = '...'The emailBody property should be a GString and will have the User domain class instance in scope in the user variable, and the generated url to click to reset the password in the url variable.
Notes
Like the registration code, consider this workflow as starter code. Run grails s2ui-override register to copy the registration controller and GSPs into your application to be customized.
|
|
ACL Management
ACL management should be done using the API exposed by AclService and AclUtilService. Both services have a much more intuitive and convenient high-level approach to managing ACLs, ACEs, etc. The functionality in this plugin is to provide a CRUD interface for fine-grained ACL management.
The ACL menu is only available if the ACL plugin is installed.
AclClass Management
The default action for the AclClass controller is search. By default only the standard fields are available but this is customizable with the s2ui-override script - see the Customization section for details.
The className field has an Ajax autocomplete to assist in finding instances. Leave the field empty to return all instances.
Searching is case-insensitive and the search string can appear anywhere in the field. Results are shown paginated in groups of 10 and you can click on the className column header to sort the results by that field:
AclClass Edit
After clicking through an AclClass you get to the edit page (there are no view pages):
You can update the name, and delete the instance if there aren’t any associated AclObjectIdentity or AclEntry instances - by default there is no support for cascading.
You can also see the associated AclObjectIdentity instances (OIDs) or AclEntry instances.
AclClass Create
You can create new instances by going to /aclClass/create or by clicking the Create action in the Class menu under ACL.
AclSid Management
The default action for the AclSid controller is search. By default only the standard fields are available but this is customizable with the s2ui-override script - see the Customization section for details.
The sid field has an Ajax autocomplete to assist in finding instances. Leave the field empty and principal set to Either to return all instances.
Results are shown paginated in groups of 10. The column headers are clickable and will sort the results by that field:
AclSid Edit
After clicking through to a sid you get to the edit page (there are no view pages):
You can update the name and whether it’s a Principal sid or a Role sid, and delete the instance if there aren’t any associated AclObjectIdentity or AclEntry instances - by default there is no support for cascading.
You can also see the associated AclObjectIdentity instances (OIDs) or AclEntry instances.
AclSid Create
You can create new instances by going to /aclSid/create or by clicking the Create action in the SID menu under ACL.
AclObjectIdentity Management
The default action for the AclObjectIdentity controller is search. By default only the standard fields are available but this is customizable with the s2ui-override script - see the Customization section for details.
Leave all fields at their default values to return all instances.
Results are shown paginated in groups of 10 and you can click on any header to sort by that field:
AclObjectIdentity Edit
After clicking through to an AclObjectIdentity you get to the edit page (there are no view pages):
You can update any of the attributes, and can delete the instance if there aren’t any associated AclEntry instances - by default there is no support for cascading.
You can also see the associated AclEntry instances.
AclObjectIdentity Create
You can create new instances by going to /aclObjectIdentity/create or by clicking the Create action in the OID menu under ACL.
AclEntry Management
The default action for the AclEntry controller is search. By default only the standard fields are available but this is customizable with the s2ui-override script - see the Customization section for details.
Leave all fields at their default values to return all instances.
Results are shown paginated in groups of 10 and you can click on any header to sort by that field:
AclEntry Edit
After clicking through to an AclEntry you get to the edit page (there are no view pages):
You can update any of the attributes or delete the AclEntry.
AclEntry Create
You can create new instances by going to /aclEntry/create or by clicking the Create action in the Entry menu under ACL.
Persistent Cookie Management
Persistent cookies aren’t enabled by default - you must enable them by running the s2-create-persistent-token script. See the Spring Security Core Plugin documentation for details about this feature.
The Persistent Logins menu is only shown if this feature is enabled.
Persistent logins search
The default action for the PersistentLogin controller is search. By default only the standard fields (username, token, and series) are available but this is customizable with the s2ui-override script - see the Customization section for details.
You can search by any combination of fields, and all fields have an Ajax autocomplete to assist in finding instances. Leave all fields empty to return all instances.
Searching is case-insensitive and the search string can appear anywhere in the field. Results are shown paginated in groups of 10 and you can click on any header to sort by that field:
Persistent logins edit
After clicking through to an instance you get to the edit page (there are no view pages):
You can update the token or lastUsed attribute or delete the instance.
Persistent logins creation
Since instances are created during authentication by the spring-security-core plugin, there is no functionality in this plugin to create new instances.
Security Configuration UI
The Security Info menu has links for several pages that contain read-only views of much of the Spring Security configuration:
Security Configuration
The Security Configuration menu item displays all security-related attributes in application.groovy. The names omit the grails.plugin.springsecurity prefix:
Mappings
The Mappings menu item displays the current request mapping mode (Annotation, Requestmap, or Static) and all current mappings:
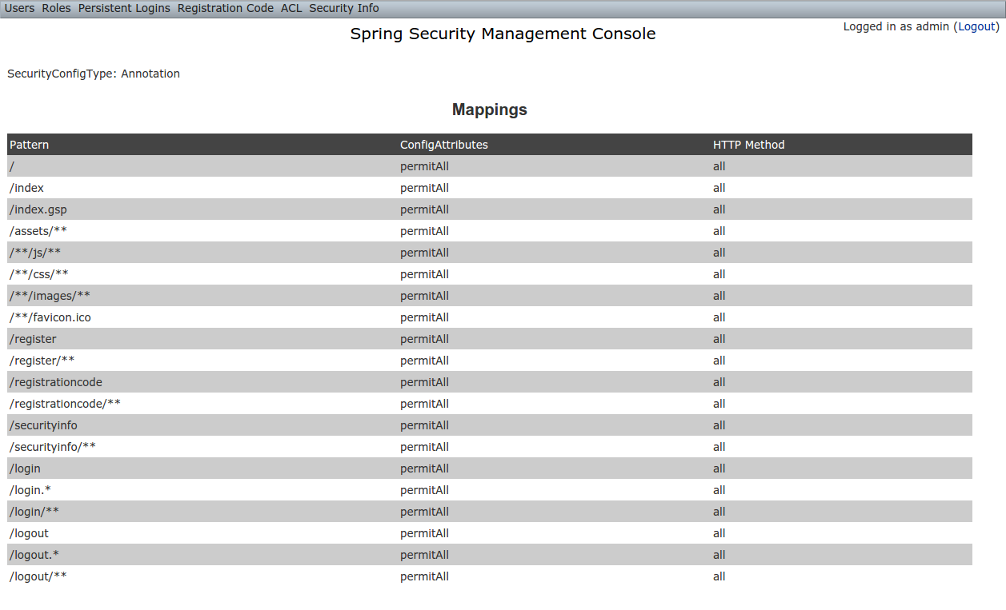
Current Authentication
The Current Authentication menu item displays your Authentication information, mostly for reference to see what a typical one contains:
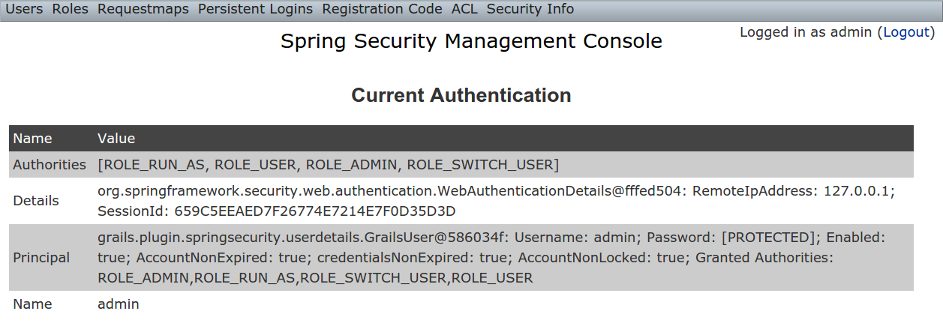
User Cache
The User Cache menu item displays information about cached users if the feature is enabled (it is disabled by default).
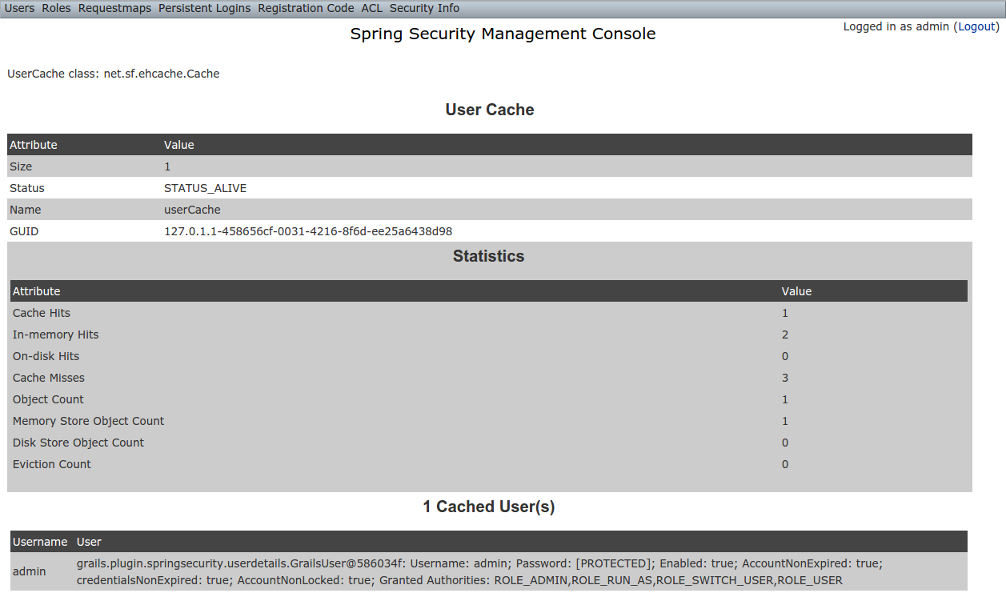
Filter Chains
The Filter Chains menu item displays your configured Filter chains. It is possible to have multiple URL patterns each with its own filter chain, for example when using HTTP Basic Auth for a web service. By default since the 3.0.0 release the spring-security-core s2-quickstart script configures empty filter chains for static assets to avoid unnecessary security checks (although of course if you need to secure some or all of your static assets you should reconfigure these).
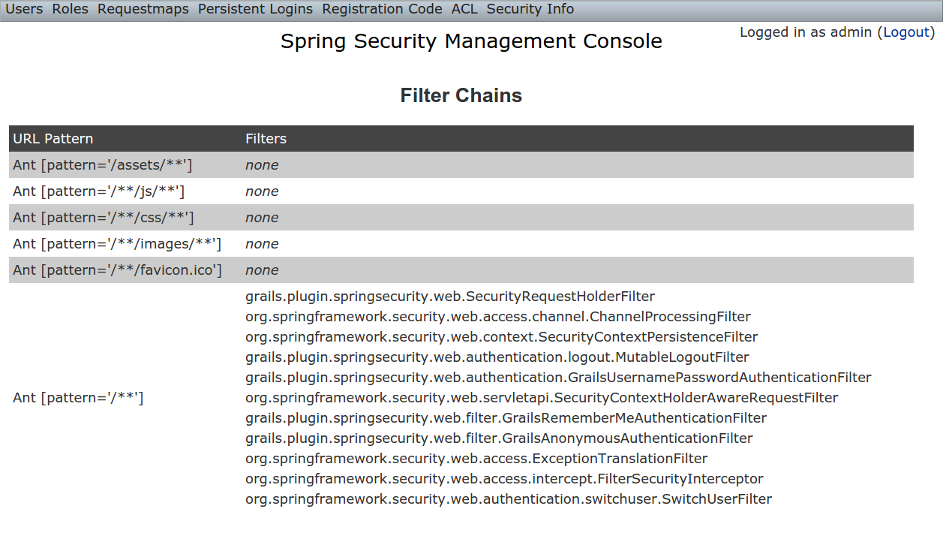
Logout Handlers
The Logout Handlers menu item displays your registered LogoutHandlers. Typically there will be just the ones shown here, but you can register your own custom implementations, or a plugin might contribute more:
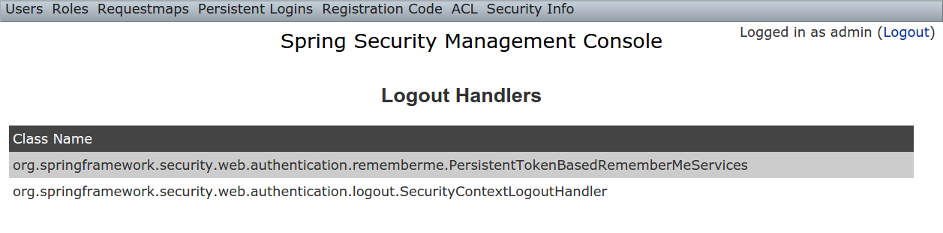
Voters
The Voters menu item displays your registered AccessDecisionVoters. Typically there will be just the ones shown here, but you can register your own custom implementations, or a plugin might contribute more:
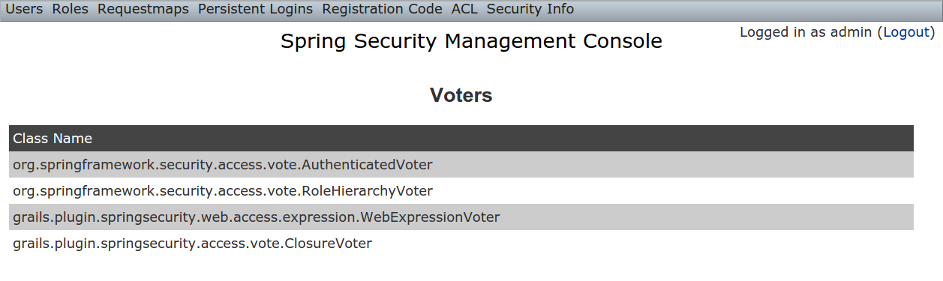
Authentication Providers
The Authentication Providers menu item displays your registered AuthenticationProviders. Typically there will be just the ones shown here, but you can register your own custom implementations, or a plugin (e.g. LDAP) might contribute more:
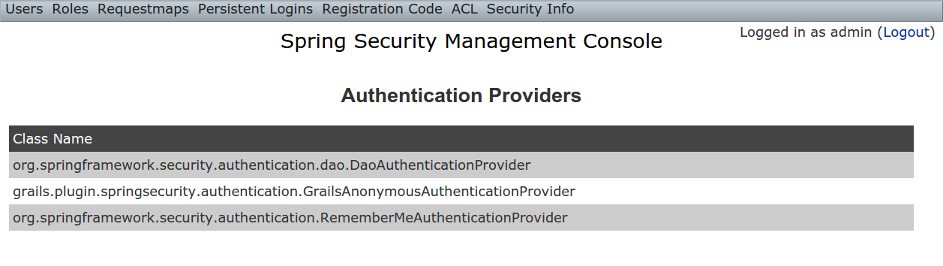
Secure Channel Definition
The Secure Channel Definition menu item displays your registered channel security mappings.
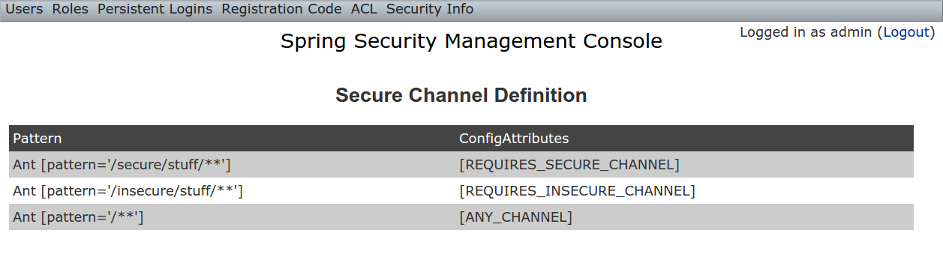
Customization
Most aspects of the plugin are configurable.
s2ui-override script
The plugin’s controllers and GSPs are easily overridden using the s2ui-override script. The general syntax for running the script is
grails s2ui-override <type> [<controller-package>]
The script will copy an empty controller that extends the corresponding plugin controller into your application so you can override individual actions and methods as needed. It also copies the controller’s GSPs. The exceptions are 'auth' and 'layout' which only copy GSPs.
For auth and layout, you do not supply a package name.
For example:
grails s2ui-override auth
For the other types aclclass, aclentry, aclobjectidentity, aclsid, persistentlogin,register, registrationcode, requestmap, role, securityinfo, user, you supply a package name as command parameter. That it is to say:
grails s2ui-override persistentlogin com.company.myapp
The files copied for each type are summarized here:
-
aclclass
-
controller/AclClassController.groovy -
views/aclClass/create.gsp -
views/aclClass/edit.gsp -
views/aclClass/search.gsp
-
-
aclentry
-
controller/AclEntryController.groovy -
views/aclEntry/create.gsp -
views/aclEntry/edit.gsp -
views/aclEntry/search.gsp
-
-
aclobjectidentity
-
controller/AclObjectIdentityController.groovy -
views/aclObjectIdentity/create.gsp -
views/aclObjectIdentity/edit.gsp -
views/aclObjectIdentity/search.gsp
-
-
aclsid
-
controller/AclSidController.groovy -
views/aclSid/create.gsp -
views/aclSid/edit.gsp -
views/aclSid/search.gsp
-
-
auth
-
views/login/auth.gsp
-
-
layout
-
views/layouts/springSecurityUI.gsp -
views/includes/_ajaxLogin.gsp
-
-
persistentlogin
-
controller/PersistentLoginController.groovy -
views/persistentLogin/edit.gsp -
views/persistentLogin/search.gsp
-
-
register
-
controller/RegisterController.groovy -
views/layouts/email.gsp -
views/register/forgotPassword.gsp -
views/register/_forgotPasswordMail.gsp -
views/register/register.gsp -
views/register/resetPassword.gsp -
views/register/_verifyRegistrationMail.gsp
-
-
registrationcode
-
controller/RegistrationCodeController.groovy -
views/registrationCode/edit.gsp -
views/registrationCode/search.gsp
-
-
requestmap
-
controller/RequestmapController.groovy -
views/requestmap/create.gsp -
views/requestmap/edit.gsp -
views/requestmap/search.gsp
-
-
role
-
controller/RoleController.groovy -
views/role/create.gsp -
views/role/edit.gsp -
views/role/search.gsp
-
-
securityinfo
-
controller/SecurityInfoController.groovy -
views/securityInfo/config.gsp -
views/securityInfo/currentAuth.gsp -
views/securityInfo/filterChains.gsp -
views/securityInfo/logoutHandlers.gsp -
views/securityInfo/mappings.gsp -
views/securityInfo/providers.gsp -
views/securityInfo/secureChannel.gsp -
views/securityInfo/usercache.gsp -
views/securityInfo/voters.gsp
-
-
user
-
controller/UserController.groovy -
views/user/create.gsp -
views/user/edit.gsp -
views/user/search.gsp
-
I18N
All of the plugin’s displayed strings are localized and stored in the plugin’s grails-app/i18n/spring-security-ui.properties file. You can override any of these values by putting an override in your application’s grails-app/i18n/messages.properties file, which takes precedence over every plugin’s bundles.
application.groovy attributes
There are a few configuration options specified in DefaultUiSecurityConfig.groovy that can be overridden in your application’s grails-app/conf/application.groovy
Registration attributes
These settings are used in the registration workflow; see the User Registration section for more details:
-
grails.plugin.springsecurity.ui.register.defaultRoleNames
-
grails.plugin.springsecurity.ui.register.emailBody
-
grails.plugin.springsecurity.ui.register.emailFrom
-
grails.plugin.springsecurity.ui.register.emailSubject
-
grails.plugin.springsecurity.ui.register.postRegisterUrl
Forgot Password attributes
These settings are used in the forgot-password workflow; see the Forgot Password section for more details:
-
grails.plugin.springsecurity.ui.forgotPassword.emailBody
-
grails.plugin.springsecurity.ui.forgotPassword.emailFrom
-
grails.plugin.springsecurity.ui.forgotPassword.emailSubject
-
grails.plugin.springsecurity.ui.forgotPassword.postResetUrl
GSP layout attributes
The layout attribute in the GSPs is configurable. If this is the only change you want to make in some or all of the GSPs then you can avoid copying the GSPs into your application just to make this change.
The default value for the registration workflow GSPs (forgotPassword.gsp, register.gsp, and resetPassword.gsp) is “register” and the default for the rest is “springSecurityUI”. These values can be overridden with the grails.plugin.springsecurity.ui.gsp.layoutRegister and grails.plugin.springsecurity.ui.gsp.layoutUi settings.
Miscellaneous attributes
The role name required to be able to run as another user defaults to ROLE_SWITCH_USER but you can override this name with the grails.plugin.springsecurity.ui.switchUserRoleName setting.
CSS and JavaScript
The plugin uses the Asset Pipeline plugin to manage its resources. This makes it very easy to provide your own version of some or all of the static resources since asset-pipeline will always use a file in the application’s assets directory instead of a plugin’s if it exists.
Instead of depending on either the jQuery or jQuery UI plugins, this plugin includes its own copy of jquery.js, jquery-ui.js, and jquery-ui.css. Note that the versions are not hard-coded, but instead they take advantage of the feature in asset-pipeline where you can embed Groovy code in a file to specify the name and path.
The layouts use grails-app/assets/javascripts/jquery.js, which contains this:
//=require jquery/jquery-${grails.plugin.springsecurity.ui.Constants.JQUERY_VERSION}.jsThis resolves to grails-app/assets/javascripts/jquery/jquery-2.1.4.js, and to use your own version, either use the same approach in a file called jquery.js or rename your file to jquery.js.
Likewise for jQuery UI, the JavaScript file is grails-app/assets/javascripts/jquery-ui.js, which contains this
//=require jquery-ui/jquery-ui-${grails.plugin.springsecurity.ui.Constants.JQUERY_UI_VERSION}.jsand the CSS file grails-app/assets/stylesheets/jquery-ui.css, which contains
/*
*= require smoothness/jquery-ui-${grails.plugin.springsecurity.ui.Constants.JQUERY_UI_VERSION}.css
*/The JavaScript file resolves to grails-app/assets/javascripts/jquery-ui/jquery-ui-1.10.3.custom.js, and to use your own version, either use the same approach in a file called jquery-ui.js or rename your file to jquery-ui.js.
The CSS file resolves to grails-app/assets/stylesheets/smoothness/jquery-ui-1.10.3.custom.css, and to use your own version, either use the same approach in a file called jquery-ui.js or rename your file to jquery-ui.js.
Use your own jquery-ui.js and/or jquery-ui.css to override the plugin’s.
The springSecurityUI.gsp layout includes grails-app/assets/stylesheets/spring-security-ui.css, which has no style declarations and only includes other CSS files:
/*
*= require reset.css
*= require jquery-ui.css
*= require jquery.jdMenu.css
*= require jquery.jdMenu.slate.css
*= require jquery.jgrowl.css
*= require spring-security-ui-common.css
*/and grails-app/assets/javascripts/spring-security-ui.js which has no JavaScript code and only includes other JavaScript files:
//= require jquery.js
//= require jquery-ui.js
//= require jquery/jquery.jgrowl.js
//= require jquery/jquery.positionBy.js
//= require jquery/jquery.bgiframe.js
//= require jquery/jquery.jdMenu.js
//= require jquery/jquery.form.js
//= require spring-security-ui-ajaxLogin.jsThe register.gsp layout layout includes grails-app/assets/stylesheets/spring-security-ui-register.css, which has no style declarations and only includes other CSS files:
/*
*= require reset.css
*= require jquery-ui.css
*= require jquery.jgrowl.css
*= require spring-security-ui-common.css
*/and grails-app/assets/javascripts/spring-security-ui-register.js which has no JavaScript code and only includes other JavaScript files:
//= require jquery.js
//= require jquery-ui.js
//= require jquery/jquery.jgrowl.jsThe remaining JavaScript files are
-
grails-app/assets/javascripts/spring-security-ui-ajaxLogin.js
-
grails-app/assets/javascripts/jquery/jquery.bgiframe.js
-
grails-app/assets/javascripts/jquery/jquery.dataTables.js
-
grails-app/assets/javascripts/jquery/jquery.form.js
-
grails-app/assets/javascripts/jquery/jquery.jdMenu.js
-
grails-app/assets/javascripts/jquery/jquery.jgrowl.js
-
grails-app/assets/javascripts/jquery/jquery.positionBy.js
and the remaining CSS files are
-
grails-app/assets/stylesheets/jquery.dataTables.css
-
grails-app/assets/stylesheets/jquery.jdMenu.css
-
grails-app/assets/stylesheets/jquery.jdMenu.slate.css
-
grails-app/assets/stylesheets/jquery.jgrowl.css
-
grails-app/assets/stylesheets/reset.css
-
grails-app/assets/stylesheets/spring-security-ui-auth.css
-
grails-app/assets/stylesheets/spring-security-ui-common.css
Password Hashing
In recent versions of the Spring Security Core plugin, the “User” domain class is generated by the s2-quickstart script with code to automatically hash the password. This makes the code simpler (for example in controllers where you create users or update user passwords) but older generated classes don’t have this generated code. This presents a problem for plugins like this one since it’s not possible to reliably determine if the domain class hashes the password or if you use the older approach of explicitly calling springSecurityService.encodePassword().
The unfortunate consequence of mixing a newer domain class that does password hashing with controllers that call springSecurityService.encodePassword() is the the passwords get double-hashed, and users aren’t able to login. So to get around this there’s a configuration option you can set to tell this plugin’s controllers whether to hash or not: grails.plugin.springsecurity.ui.encodePassword.
This option defaults to false, so if you have an older domain class that doesn’t handle hashing just enable this plugin’s hashing:
grails.plugin.springsecurity.ui.encodePassword = trueh4. Strategy classes
The plugin’s SpringSecurityUiService implements several “strategy” interfaces to make it possible to override its functionality in a more fine-grained way.
These are defined by interfaces in the grails.plugin.springsecurity.ui.strategy package:
-
AclStrategy -
ErrorsStrategy -
MailStrategy -
PersistentLoginStrategy -
PropertiesStrategy -
QueryStrategy -
RegistrationCodeStrategy -
RequestmapStrategy -
RoleStrategy -
UserStrategy
The controllers, taglib, and even the service never call strategy methods directly on the service, only via a strategy interface.
Each interface has a default implementation, e.g. DefaultAclStrategy, DefaultErrorsStrategy, etc., and these simply delegate to SpringSecurityUiService (except for MailStrategy, which has MailPluginMailStrategy as its default implementation which uses the Mail plugin to send emails). Each of the default implementations is registered as a Spring bean:
-
uiAclStrategy -
uiErrorsStrategy -
uiMailStrategy -
uiPersistentLoginStrategy -
uiPropertiesStrategy -
uiQueryStrategy -
uiRegistrationCodeStrategy -
uiRequestmapStrategy -
uiRoleStrategy -
uiUserStrategy
To override the functionality defined in one of the strategy interfaces, register your own implementation of the interface in your application’s grails-app/conf/spring/resources.groovy, e.g.
import com.myapp.MyRequestmapStrategy
beans = {
uiRequestmapStrategy(MyRequestmapStrategy)
}and yours will be used instead.
Password Verification
By default the registration controller has rather strict requirements for valid passwords; they must be between 8 and 64 characters and must include at least one uppercase letter, at least one number, and at least one symbol from “!@#$%^&”. You can customize these rules with these application.groovy attributes:
| Property | Default Value |
|---|---|
grails.plugin.springsecurity.ui.password.minLength |
8 |
grails.plugin.springsecurity.ui.password.maxLength |
64 |
grails.plugin.springsecurity.ui.password.validationRegex |
"^.*(?=.*\\d)(?=.*[a-zA-Z])(?=.*[!@#$%^&]).*$" |
Scripts
s2ui-override
Purpose
Generates controllers that extend the plugin’s controllers and copies their GSPs to your application for overriding of functionality.
The general format is:
grails s2ui-override <type> [controllerPackage]
The script will copy an empty controller that extends the corresponding plugin controller into your application so you can override individual actions and methods as needed. It also copies the controller’s GSPs. The exceptions are when type is 'auth' or 'layout' which only copy GSPs.
See the Customization section for more details.
s2ui-create-challenge-questions
Purpose
Generates controllers, services, domain object, views, i18N, and application configuration to have challenge questions
The general format is:
grails s2ui-create-challenge-questions <domain-class-package> <challenge-qa-class-name> <user-domain-class-name> [number-of-questions]
-
domain-class-package is required and is the package where the Domain, Controller, and Services will be created. It is recommend to use the same class where your 'User' class is created.
-
challenge-qa-class-name is required and is the Name of the domain class used to store this information
-
user-domain-class-name is required and is the package and name of the User class. It is recommend to ensure the first parameter is the same package as the User class.
-
number-of-questions is optional but if not given will default to 2.
Example: s2ui-create-challenge-questions com.mycompany Profile com.mycompany.User 4
This script will create one Domain Class. This will contain a link to the user and also contain one entry for each questions and answer. If you pass in either no package or the same package as the what is used for the Challenge Question domain it will not put a package in front of the User class. However, if you pass in a different package then it will add the package in front of the user class.
This script will create one controller which contains all the logic for handling the actions needed to provide a user interface to manage different users challenge questions and answers.
This script will create two services. The first service is to handle to be the implementation for the controller/domain object handling the data needed to set/get questions and answers. The second service is a listener service which ensures that anytime an answer is created or updated the value is encypted before it is stores in the database.
This script will create three views. Each of the three views (List/index, edit, and create) will support all the CRUD operations.
This script will add lines into your application.groovy file in order to ensure the questions and answers are properly configured.
This script will insert one line into messages.properties. This will be the menu item in the nav bar for spring security.
spring.security.ui.menu.<domain-class-package>.<challenge-qa-class-name>=<challenge-qa-class-name> Questions"
API Reference
The UI plugin Groovydoc API documentation for historical (pre-merge) releases is available at the legacy Spring Security UI plugin API reference.
19 Mail
The Grails Mail plugin provides a convenient DSL for sending email. It supports plain-text, HTML, attachments, inline resources and i18n among other features.
Email can be sent using the mailService via the sendMail method. Here is an example:
mailService.sendMail {
to 'fred@gmail.com', 'ginger@gmail.com'
from 'john@gmail.com'
cc 'marge@gmail.com', 'ed@gmail.com'
bcc 'joe@gmail.com'
subject 'Hello John'
text 'Here is some text'
}Here we are sending a plain-text email with no attachments to the given addresses. The sendMail method is injected into all Controllers and Services to simplify access:
sendMail {
to 'fred@example.com'
subject 'Hello Fred'
text 'How are you?'
}Installation
Add the plugin to the dependencies block of your build.gradle. The version is managed by the Grails BOM, so it does not need to be specified:
dependencies {
implementation 'org.apache.grails:grails-mail'
}19.1 Configuration
SMTP Server Configuration
By default, the plugin assumes an unsecured mail server configured on port 25, getting the SMTP host name from the environment variable SMTP_HOST. However, you can change this via the grails-app/conf/application.groovy file.
Here is an example of how you would configure the default sender to send with a Gmail account:
grails {
mail {
host = 'smtp.gmail.com'
port = 465
username = 'youraccount@gmail.com'
password = 'yourpassword'
props = [
'mail.smtp.auth' : 'true',
'mail.smtp.socketFactory.port' : '465',
'mail.smtp.socketFactory.class' : 'javax.net.ssl.SSLSocketFactory',
'mail.smtp.socketFactory.fallback': 'false'
]
}
}And the configuration for sending via a Hotmail/Live account:
grails {
mail {
host = 'smtp.live.com'
port = 587
username = 'youraccount@live.com'
password = 'yourpassword'
props = [
'mail.smtp.starttls.enable': 'true',
'mail.smtp.port' : '587'
]
}
}If your mail session is provided via JNDI, you can use the jndiName setting:
grails.mail.jndiName = 'myMailSession'Configuration Defaults
You can set various default settings via the application configuration that will be used in the absence of explicit values when sending email.
You can set the default "from" address to use for messages in application.groovy using:
grails.mail.default.from = 'server@yourhost.com'You can also set the default "to" address to use for messages in application.groovy using:
grails.mail.default.to = 'user@yourhost.com'Disabling Email Sending
You can completely disable the sending of email by setting:
grails.mail.disabled = trueYou may want to set this value for the development and/or test environments. However, this will treat any call to mailService.sendMail() as a no-op, which means that the mail plugin will not attempt to render the email message or assemble any attachments. This can hide issues such as incorrect view names, or invalid or non-existent configuration, during development.
Overriding Addresses
An alternative to disabling email is to use the overrideAddress config setting for your development and/or test environment to force all email to be delivered to a specific address, regardless of what the addresses were at send time:
grails.mail.overrideAddress = 'test@address.com'When overrideAddress is set, every to, cc and bcc address and the sender are replaced by this value. That includes a from set in the sendMail closure. replyTo and envelopeFrom are not changed.
To override only the recipients or only the sender, use overrideToAddress or overrideFromAddress:
-
grails.mail.overrideToAddressreplaces everyto,ccandbccaddress. It’s also used as thetoaddress when thesendMailclosure doesn’t set one. -
grails.mail.overrideFromAddressreplaces the sender, including afromset in thesendMailclosure. It’s also used as thefromaddress when the closure doesn’t set one.
When overrideAddress is set as well, overrideToAddress and overrideFromAddress take precedence over it.
// Redirect all outgoing mail to a test inbox, but keep the real sender address
grails.mail.overrideToAddress = 'test-inbox@example.com'
// Force a fixed sender address without redirecting recipients
grails.mail.overrideFromAddress = 'noreply@example.com'19.2 Sending Emails
Email is sent using the sendMail() method of the mailService. This plugin also adds a shortcut sendMail() method to all Controllers and Services in your application that simply delegates to the mailService. There is no difference between the two methods, so the choice is stylistic.
class PersonController {
def create() {
// create user
sendMail {
from 'admin@mysystem.com'
subject 'New user'
text 'A new user has been created'
}
}
}class PersonController {
def mailService
def create() {
// create user
mailService.sendMail {
from 'admin@mysystem.com'
subject 'New user'
text 'A new user has been created'
}
}
}The sendMail() method takes a single Closure argument that uses a DSL (Domain Specific Language) to configure the message to be sent. The following sections describe the aspects of the DSL.
19.3 Message Content
Message content is specified by either the text and/or html methods that specify the plain-text or HTML content respectively.
HTML Email
To send HTML email you can use the html method. This will set the content type of the message to text/html.
You can either supply a string value:
sendMail {
to 'user@somewhere.org'
subject 'Hello John'
html '<b>Hello</b> World'
}Or a view to render to form the content:
sendMail {
to 'user@somewhere.org'
subject 'Hello John'
html view: '/emails/hello', model: [param1: 'value1', param2: 'value2']
}See the section on using views for more details of the parameters to this version of html.
Text Email (plain-text)
To send plain-text email you can use the text method. This will set the content type of the message to text/plain.
You can either supply a String value:
sendMail {
to 'user@somewhere.org'
subject 'Hello John'
text 'Hello World'
}Or a view to render to form the content:
sendMail {
to 'user@somewhere.org'
subject 'Hello John'
text view: '/emails/hello', model: [param1: 'value1', param2: 'value2']
}See the section on using views for more details of the parameters to this version of text.
Text and HTML
It is possible to send a multipart message that contains both plain-text and HTML versions of the message. In this situation, the email-reading client is responsible for selecting the variant to display to the user.
To do this, simply use both the html and text methods:
sendMail {
to 'user@somewhere.org'
subject 'Hello John'
text view: '/emails/text-hello', model: [param1: 'value1', param2: 'value2']
html view: '/emails/html-hello', model: [param1: 'value1', param2: 'value2']
}Using Views
Both the text and html methods support specifying a view to render to form the content. These are the accepted parameters:
-
The view is the absolute path (or relative to the current controller if during a request) to the GSP, just like the existing Grails
rendermethod. -
The plugin parameter is only necessary if the view you wish to render comes from a plugin, just like the existing Grails
rendermethod. -
The model parameter is a map representing the model the GSP will see for rendering data, just like the existing Grails
rendermethod.
19.4 Attachments
The Mail plugin is capable of adding attachments to messages as independent files and inline resources. To enable attachment support, you MUST indicate that the message is to be multipart as the first thing you do in the mail DSL.
sendMail {
multipart true
}File Attachments
The term "file attachments" here refers to the attachment being received as a file, not necessarily using a file in your application to form the attachment.
The following methods are available in the mail DSL to attach files:
// Bytes
attach(String fileName, String contentType, byte[] bytes)
// Files
attach(File file)
attach(String fileName, File file)
attach(String fileName, String contentType, File file)
// InputStream
attach(String fileName, String contentType, InputStreamSource source)There are 3 things that need to be provided when creating a file attachment:
-
file name - what the email client will call the file
-
content type - what mime type the email client will treat the file as
-
content source - the actual attachment
The Mail plugin supports using either a byte[], File, or InputStreamSource as the content source.
In the case of the variants that take a File that do not specify a file name, the name of the file will be used. In the case of the variants that take a File that do not specify a content type, the content type will be guessed based on the file extension.
sendMail {
multipart true
to 'someone@org.com'
attach 'yourfile.txt', 'text/plain', 'Hello!' as byte[]
}Inline Attachments
It is also possible to attach content as inline resources. This is particularly useful in the case of HTML email where you wish to embed images in the message. In this case you specify a content id instead of a file name for the attachment, and then reference this content id in your mail message.
To attach an image as an inline resource you could do:
sendMail {
multipart true
to 'someone@org.com'
inline 'logo', 'image/jpeg', new File('logo.jpg')
html view: '/email/welcome'
}Then in your view you reference the inline attachment using the cid: (content id) namespace:
<html>
<body>
<img src="cid:logo" />
<p>Welcome Aboard!</p>
</body>
</html>The following methods are available in the mail DSL to inline-attach files:
// Bytes
inline(String fileName, String contentType, byte[] bytes)
// Files
inline(File file)
inline(String fileName, File file)
inline(String fileName, String contentType, File file)
// InputStream
inline(String fileName, String contentType, InputStreamSource source)There are 3 things that need to be provided when creating an inline attachment:
-
content id - the identifier of the resource
-
content type - what mime type the email client will treat the content as
-
content source - the actual content
The Mail plugin supports using either a byte[], File, or InputStreamSource as the content source.
In the case of the variants that take a File that do not specify a content id, the name of the file will be used. In the case of the variants that take a File that do not specify a content type, the content type will be guessed based on the file extension.
19.5 Testing
Typically, you don’t want to actually send email as part of your automated tests. Besides wrapping all calls to sendMail in an environment-sensitive guard (which is a very bad idea), you can use one of the following techniques to deal with this.
Disabling Email Sending
You can effectively disable email sending globally in your test by setting the following value in your application for the test environment:
grails.mail.disabled = trueThis will effectively cause all calls to sendMail() to be a non-operation, with a warning being logged that mail is disabled. The advantage of this technique is that it is cheap. The disadvantage is that it makes it impossible to test that email would be sent and to inspect any aspects of the sent mail.
Using an Override Address
You can override recipient and/or sender email addresses in sendMail() calls to force messages to be delivered to a certain mailbox or sent from a fixed address.
Overriding All Addresses
grails.mail.overrideAddress redirects both the sender and all recipients to a single address:
application-test.yml
grails:
mail:
overrideAddress: test@myorg.comAll to, cc, and bcc addresses are replaced by this value, and the from address is also replaced.
Overriding Recipients and Sender Independently
Two properties give fine-grained control over address overriding:
-
grails.mail.overrideToAddressreplaces everyto,ccandbccaddress. It’s also used as thetoaddress when thesendMailclosure doesn’t set one. -
grails.mail.overrideFromAddressreplaces the sender, including afromset in thesendMailclosure. It’s also used as thefromaddress when the closure doesn’t set one.
See Mail Configuration for how the three properties interact.
application-test.yml
grails:
mail:
overrideToAddress: test-inbox@myorg.com # redirect recipients onlyapplication-test.yml
grails:
mail:
overrideFromAddress: noreply@myorg.com # fix the sender onlyThe advantage of this mechanism is that it allows you to test using a real SMTP server. The disadvantage is that it requires a real SMTP server and makes it difficult to test address determination logic.
Using an in-memory SMTP server
The preferred approach is to run an in-memory SMTP server (such as GreenMail) inside your application. This allows you to fully exercise your email-sending code and to inspect sent email to assert correct values for recipient addresses and so on.
The advantage of this approach is that it is as close as possible to the real world and gives you access to the sent email in your tests. The disadvantage is that it is another dependency.
20 Background Jobs
Most applications eventually need work to happen on a schedule rather than in response to a request: sending a nightly digest, expiring stale records, polling an upstream feed, rebuilding a cache.
Grails offers two approaches:
-
Basic Scheduling uses Spring’s
@Scheduledannotation. It is built into the framework, needs no dependencies, and is the right default for the large majority of applications. -
Advanced Scheduling uses the Quartz plugin, which adds runtime-modifiable schedules, persistence, operational control, and — once configured for it — clustering across a multi-instance deployment.
Start with Basic Scheduling. Spring’s scheduler is simpler, has nothing to configure, and covers everything a single-instance application with fixed schedules needs. Reach for Quartz when you have a requirement Spring’s scheduler cannot meet.
When you need Quartz
Quartz earns its extra moving parts in these situations:
-
Multiple instances. This is the big one.
@Scheduledfires on every instance independently, so a nightly job on a three-instance deployment runs three times. Quartz can be configured to cluster, so exactly one instance fires each trigger. -
Schedules that change at runtime, driven by user input or data rather than fixed in an annotation.
-
Schedules that must survive a restart, rather than being rebuilt from source at every startup.
-
Operational control — pausing, resuming, inspecting, or interrupting jobs while the application runs.
-
Recovery of work lost to a crash, re-running jobs that were executing when an instance died.
If none of those apply, @Scheduled is the better choice; adding Quartz only adds moving parts to get wrong.
|
Adding the Quartz plugin does not by itself make a schedule cluster-safe. Quartz defaults to an in-memory job store, which duplicates work across instances exactly as |
Comparison
| Basic Scheduling | Advanced Scheduling | |
|---|---|---|
Mechanism |
Spring |
Quartz plugin |
Setup |
Built in — nothing to add |
Add |
Where the schedule lives |
An annotation on a bean method |
A |
Changing the schedule at runtime |
Not supported |
Supported |
Persistent across restarts |
No |
Optional, with a JDBC job store |
Safe to run on multiple instances |
No — every instance fires independently |
Only when clustering is configured; not by default |
Pausing, resuming, inspecting jobs |
Not supported |
Supported |
| The most common production surprise with background jobs is a schedule written when the application ran on one machine, later deployed to three. Nothing fails loudly; the job simply runs several times over. Rolling restarts and blue/green deployments trigger this too, because two instances are briefly live at once even in a nominally single-instance deployment. See Clustering. |
20.1 Basic Scheduling
Spring’s scheduling support is part of the framework, so it is available in every Grails application without adding a dependency.
Enabling scheduling
Annotate your Application class with @EnableScheduling:
package myapp
import grails.boot.GrailsApp
import grails.boot.config.GrailsAutoConfiguration
import org.springframework.scheduling.annotation.EnableScheduling
@EnableScheduling
class Application extends GrailsAutoConfiguration {
static void main(String[] args) {
GrailsApp.run(Application, args)
}
}
Grails 3 enabled scheduling implicitly. From Grails 4 onwards @EnableScheduling must be applied explicitly.
|
Scheduling a method
Annotate any Spring bean method — a service is the natural home — with @Scheduled:
package myapp
import org.springframework.scheduling.annotation.Scheduled
class ReportService {
@Scheduled(cron = '0 0 6 * * ?')
void sendDailyDigest() {
// ...
}
}A @Scheduled method must take no arguments and return void. Spring 6.1 additionally supports reactive return types — a Publisher, an RxJava type, or a Kotlin suspending function — which Spring subscribes to on the configured schedule.
Scheduling attributes
| Attribute | Description |
|---|---|
|
Delay between the end of one execution and the start of the next. Use this when executions must never overlap and the work takes a variable amount of time. |
|
Interval between the start of successive executions. If an execution overruns the interval, the next one is queued rather than skipped. |
|
Delay before the first execution. Combine with |
|
A cron expression, for schedules that are calendar-based rather than interval-based. |
|
The time zone a |
|
The unit for |
Each duration attribute has a String variant — fixedDelayString, fixedRateString, initialDelayString — that accepts a property placeholder, and cron accepts one directly. This is the cleanest way to make a schedule configurable per environment:
class ReportService {
@Scheduled(cron = '${myapp.digest.cron}')
void sendDailyDigest() {
// ...
}
@Scheduled(fixedDelayString = '${myapp.poll.delay}', timeUnit = TimeUnit.SECONDS)
void pollUpstream() {
// ...
}
}application.yml
myapp:
digest:
cron: '0 0 6 * * ?'
poll:
delay: 30
A cron value of - disables the task entirely, which is a convenient way to turn a scheduled method off in a particular environment without changing code.
|
The scheduler thread pool
Spring Boot configures the scheduler with a single thread by default. Every @Scheduled method in the application shares it, so one long-running or blocked task delays every other scheduled task. This is the second most common surprise with @Scheduled, after clustering.
Increase the pool through configuration:
application.yml
spring:
task:
scheduling:
pool:
size: 5
thread-name-prefix: scheduling-
shutdown:
await-termination: true
await-termination-period: 60sOn Java 21 and above, setting spring.threads.virtual.enabled to true switches the scheduler to virtual threads, in which case the pool size no longer applies and spring.task.scheduling.simple.concurrency-limit bounds concurrency instead.
Running work asynchronously
@Scheduled is about when work runs. To run work off the request thread on demand, use @Async together with @EnableAsync:
import org.springframework.scheduling.annotation.Async
class NotificationService {
@Async
void notifyAsync(Long userId) {
// returns to the caller immediately
}
}@Async methods use the spring.task.execution. pool, which is separate from the scheduling pool. As with any Spring proxy-based annotation, calling an @Async or @Scheduled method from another method on the *same bean bypasses the proxy and runs it synchronously.
See also Asynchronous Programming for the Grails-specific async APIs.
The limitation
Nothing in @Scheduled is aware of other instances of your application. Each instance builds its own scheduler from the annotations it finds at startup, in memory, with no shared state — so there is no coordination point, and nowhere for one instance to discover that another has already claimed a firing. With three instances deployed, a @Scheduled(cron = '0 0 6 * * ?') method runs three times at 6:00am — concurrently, on three machines, against the same database.
Common workarounds — designating one instance "the scheduler" with a Spring profile, or taking an advisory lock inside the method — either forfeit high availability or reimplement, badly, what a clustered scheduler already does.
For anything that must run exactly once per schedule across a deployment, see Advanced Scheduling.
20.2 Advanced Scheduling
Advanced scheduling in Grails is provided by the Quartz plugin, which adds a Job artefact type backed by the Quartz Enterprise Job Scheduler.
Use it when you have a scheduling requirement Spring’s @Scheduled cannot meet: a schedule that changes at runtime, a schedule that must survive a restart, jobs that operators need to pause and resume, work that must be recovered after a crash — or, most commonly, a deployment of more than one instance, where the schedule must fire exactly once across the cluster.
If your application runs as a single instance and its schedules are fixed, you do not need this section. Spring’s @Scheduled covers that case with no dependencies and nothing to configure — see Basic Scheduling.
|
Clustering is opt-in
Adding the plugin does not make your schedules cluster-safe.
Out of the box Quartz uses its in-memory RAMJobStore: the schedule is rebuilt from your source at every startup and lives entirely inside a single process, with no knowledge of any other instance. In that default configuration Quartz duplicates work across instances exactly as @Scheduled does.
Clustering has to be turned on deliberately, and it has three requirements — a JDBC job store, a shared set of Quartz tables, and explicit clustering properties. All of it is covered in Clustering. If you adopted this plugin in order to run on several instances, that section is the part that actually solves your problem.
What the plugin provides
A job is an artefact: a class in grails-app/jobs whose name ends in Job and which declares an execute method. The plugin discovers those classes, builds the Quartz JobDetail and Trigger objects described by their triggers block, and registers them with a Scheduler bean named quartzScheduler.
-
A
triggersDSL supporting simple, cron, and custom triggers, with multiple triggers per job. -
Dynamic scheduling — schedule, reschedule, unschedule, and fire jobs at runtime from anywhere in your application.
-
A
jobManagerServicefor inspecting, pausing, and resuming jobs and triggers. -
Optional JDBC persistence, so a schedule survives a restart.
-
Optional clustering, so a trigger fires exactly once across a multi-instance deployment.
-
Recovery of jobs that were executing when an instance died.
-
Binding of a Hibernate
Sessionto each job’s execution thread, so jobs can use GORM the same way a controller or service does.
Nothing prevents using Quartz and @Scheduled in the same application — they are independent schedulers — but a given piece of work should belong to exactly one of them.
Start with Installation.
20.2.1 Installation
Add the plugin to the dependencies block of your build.gradle. The version is managed by the Grails BOM, so it does not need to be specified:
dependencies {
implementation 'org.apache.grails:grails-quartz'
}No further setup is required. By default the plugin uses Quartz’s in-memory RAMJobStore, so jobs are registered from your source at startup and require no database. See Configuration for the available options, including JDBC-backed persistence.
Creating your first job
Use the create-job command to generate a job under grails-app/jobs:
grails create-job MyJobThat produces:
package com.mycompany.myapp
class MyJob {
static triggers = {
simple repeatInterval: 5000L // execute the job every 5 seconds
}
void execute() {
println 'Job run!'
}
}Jobs are Spring beans and are autowired by name, so you can inject services and other beans into them:
class MyJob {
MyService myService
static triggers = {
cron cronExpression: '0 0 6 * * ?'
}
void execute() {
myService.doSomething()
}
}20.2.2 Writing Jobs
A job is a class in grails-app/jobs whose name ends in Job and which declares an execute method. The triggers block describes when it runs:
class MyJob {
static group = 'MyGroup'
static description = 'Example job with a simple trigger'
static triggers = {
simple(
name: 'mySimpleTrigger',
startDelay: 60000,
repeatInterval: 1000
)
}
void execute() {
println 'Job run!'
}
}The example above waits one minute after the scheduler starts, then calls execute() every second. repeatInterval and startDelay are expressed in milliseconds and must be Integer or Long; a negative value is rejected at startup. When they are omitted, the defaults in Triggers apply.
The name of a trigger must be unique across every trigger in the application. If you do not supply one, the plugin generates a name from the job name and a counter.
Scheduling a cron job
Jobs can also be scheduled with a cron expression — for example "at 6:00am every day" or "at 1:30am on the last Friday of the month":
class MyJob {
static group = 'MyGroup'
static description = 'Example job with a cron trigger'
static triggers = {
cron(
name: 'myTrigger',
cronExpression: '0 0 6 * * ?'
)
}
void execute() {
println 'Job run!'
}
}The fields of a cronExpression are:
cronExpression: "s m h D M W Y"
| | | | | | - Year (optional)
| | | | | - Day of Week, 1-7 or SUN-SAT, ?
| | | | - Month, 1-12 or JAN-DEC
| | | - Day of Month, 1-31, ?
| | - Hour, 0-23
| - Minute, 0-59
- Second, 0-59
|
See the Quartz CronExpression documentation for the full set of special characters.
Receiving the execution context
execute may optionally accept the Quartz JobExecutionContext, which carries the merged job data map and the fire-time details:
class MyJob {
static triggers = {
simple repeatInterval: 5000L
}
void execute(JobExecutionContext context) {
println context.mergedJobDataMap.foo
}
}Interrupting a running job
A job that declares an interrupt() method can be interrupted mid-execution through the jobManagerService. The plugin discovers the method reflectively, so the job class does not need to implement any Quartz interface:
class MyJob {
private volatile boolean cancelled = false
static triggers = {
simple repeatInterval: 5000L
}
void execute() {
while (!cancelled) {
// do a unit of work
}
}
void interrupt() {
cancelled = true
}
}Calling interruptJob on a job that has no interrupt() method raises an UnableToInterruptJobException.
20.2.3 Triggers
The triggers block of a job is a small DSL supporting three kinds of trigger. A job may declare as many triggers as it needs.
class MyJob {
static triggers = {
simple(
name: 'simpleTrigger',
startDelay: 10000,
repeatInterval: 30000,
repeatCount: 10
)
cron(
name: 'cronTrigger',
startDelay: 10000,
cronExpression: '0/6 * 15 * * ?',
timeZone: TimeZone.getTimeZone('GMT-8') // optional
)
custom(
name: 'customTrigger',
triggerClass: MyTriggerClass,
myParam: myValue,
myAnotherParam: myAnotherValue
)
}
void execute() {
println 'Job run!'
}
}With that configuration the job runs 11 times at 30-second intervals, starting 10 seconds after the scheduler starts (the simple trigger); it also runs every 6 seconds during the 15th hour — 15:00:00, 15:00:06, 15:00:12, … (the cron trigger); and it runs every time the custom trigger fires.
simple
Executes repeatedly on a fixed interval.
| Attribute | Default | Description |
|---|---|---|
|
|
Uniquely identifies the trigger. Must be unique across the whole application. |
|
|
The trigger group. |
|
|
Delay in milliseconds between scheduler startup and the first execution. Must be a non-negative |
|
|
Interval in milliseconds between consecutive executions. |
|
|
The trigger fires |
cron
Executes according to a cron expression. See Writing Jobs for the expression format.
| Attribute | Default | Description |
|---|---|---|
|
|
Uniquely identifies the trigger. Must be unique across the whole application. |
|
|
The trigger group. |
|
|
Delay in milliseconds between scheduler startup and the first execution. |
|
|
The cron expression that determines the firing schedule. An invalid expression fails at startup. |
|
The system default |
The |
custom
Delegates the firing schedule to your own implementation of the Quartz Trigger interface. This is how you use any Quartz trigger type the DSL does not model directly, such as DailyTimeIntervalTriggerImpl or CalendarIntervalTriggerImpl.
| Attribute | Default | Description |
|---|---|---|
|
required |
A class implementing |
|
|
Uniquely identifies the trigger. |
|
|
The trigger group. |
|
|
Delay in milliseconds between scheduler startup and the first execution. |
Any further attributes are set as properties on the trigger instance, so you can configure the trigger with whatever its class exposes:
class MyJob {
static triggers = {
custom(
name: 'dailyTrigger',
triggerClass: DailyTimeIntervalTriggerImpl,
startTimeOfDay: new TimeOfDay(9, 0, 0),
endTimeOfDay: new TimeOfDay(17, 0, 0),
repeatIntervalUnit: DateBuilder.IntervalUnit.HOUR,
repeatInterval: 1
)
}
void execute() {
println 'Job run!'
}
}A trigger that can never fire — a cron expression whose last occurrence is in the past, or an end time
that has already passed — is reported as an error in the log and left unscheduled, so it does not keep the
application from starting. Configure quartz.failOnNeverFiringTriggers to have startup fail instead; see
Configuration.
The triggers closure is given access to the grailsApplication object, so trigger attributes can be driven from configuration:
class MyJob {
static triggers = {
simple repeatInterval: grailsApplication.config.getProperty('myapp.myJob.interval', Long, 60000L)
}
void execute() {
println 'Job run!'
}
}20.2.4 Job Properties
Beyond the triggers block, a job class can declare a number of static properties that control how it is registered with the scheduler.
| Property | Default | Description |
|---|---|---|
|
|
The Quartz job group the job belongs to. Grouping lets you pause or resume a set of related jobs together — see Managing Jobs at Runtime. |
|
|
A short description of the job. It is carried on the Quartz |
|
|
Whether a new execution may begin while a previous execution of the same job is still running. Set to |
|
|
Whether a Hibernate |
|
|
Set to |
|
|
Whether the job is retained by the scheduler once it has no remaining triggers. Only meaningful with a persistent job store. |
|
|
Whether the job is re-executed after a hard shutdown — the process crashing, or the machine being switched off — while it was running. On the recovered execution, |
For example:
class ReportJob {
static group = 'reporting'
static description = 'Generates the nightly sales report'
static concurrent = false
static requestsRecovery = true
static triggers = {
cron cronExpression: '0 0 2 * * ?'
}
void execute() {
// ...
}
}20.2.5 Dynamic Job Scheduling
Triggers declared in a job’s triggers block are fixed at startup. To schedule work at runtime, the plugin adds a set of static methods to every job class:
// fire the job immediately, once
MyJob.triggerNow()
MyJob.triggerNow(foo: 'It works!')
// a simple trigger: repeat every `repeatInterval` ms, `1 + repeatCount` times
MyJob.schedule(1000L)
MyJob.schedule(1000L, 10)
MyJob.schedule(1000L, 10, [foo: 'bar'])
// a cron trigger
MyJob.schedule('0 0 6 * * ?')
MyJob.schedule('0 0 6 * * ?', [foo: 'bar'])
// a single execution at a specific date and time
MyJob.schedule(new Date() + 1)
MyJob.schedule(new Date() + 1, [foo: 'bar'])
// any Quartz trigger you have built yourself
MyJob.schedule(myTrigger)
MyJob.schedule(myTrigger, [foo: 'bar'])
// replace an existing trigger with a new one
MyJob.reschedule(myTrigger)
// remove a named trigger, leaving the job registered
MyJob.unschedule('myTriggerName')
MyJob.unschedule('myTriggerName', 'myTriggerGroup')
// remove the job and all of its triggers from the scheduler
MyJob.removeJob()Every method except removeJob and unschedule accepts an optional Map of parameters. Those entries are placed in the trigger’s job data map and are available to the job through the execution context:
class MyJob {
void execute(JobExecutionContext context) {
println context.mergedJobDataMap.foo
}
}class MyController {
def index() {
MyJob.triggerNow(foo: 'It works!')
render 'scheduled'
}
}When a trigger is passed directly to schedule, its job key is rewritten to point at the job class, so the trigger must be mutable — that is, an instance of org.quartz.spi.MutableTrigger, which every trigger implementation shipped with Quartz is. A trigger that is neither mutable nor already keyed to the job is rejected.
The default trigger group used by unschedule is GRAILS_TRIGGERS.
These methods only work on a job that the plugin has registered with the scheduler, which it does for every enabled job artefact while the application starts. Calling them on a job that is turned off with jobEnabled = false, or on a class the application does not manage as a job artefact, throws an IllegalStateException reporting that the job is not registered with a scheduler.
A null argument is rejected with an IllegalArgumentException that names the argument which is missing. Since the runtime type of null carries no information, a null passed by a caller that is not statically compiled always resolves to schedule(Trigger), whichever method the caller meant to reach:
// reports a null trigger, even though the interval read from the configuration is what is null
MyJob.schedule(grailsApplication.config.getProperty('my.job.repeatInterval', Long))20.2.6 Managing Jobs at Runtime
The plugin provides a jobManagerService bean for inspecting and controlling the scheduler at runtime. Inject it like any other Grails service:
class JobAdminController {
JobManagerService jobManagerService
def index() {
[jobs: jobManagerService.allJobs, running: jobManagerService.runningJobs]
}
}Inspecting jobs
| Method | Description |
|---|---|
|
Returns a |
|
Returns the |
|
Returns the |
A JobDescriptor exposes the job’s name and group, the underlying Quartz jobDetail, and a triggerDescriptors list. Each TriggerDescriptor carries the trigger’s name and group, its current state as a Trigger.TriggerState, and the underlying Quartz trigger — from which the fire times and schedule details can be read.
Controlling jobs and triggers
| Method | Description |
|---|---|
|
Pauses or resumes a single job. |
|
Pauses or resumes every job in a group. |
|
Pauses or resumes a single trigger. |
|
Pauses or resumes every trigger in a group. |
|
Pauses or resumes the entire scheduler. |
|
Removes all of a job’s triggers, leaving the job itself registered. |
|
Removes the job and its triggers from the scheduler. |
|
Interrupts a currently executing job. The job class must declare an |
The Quartz Scheduler itself is also available as the quartzScheduler bean if you need an operation the service does not wrap.
20.2.7 Long-Running Jobs
A job whose execution takes longer than the interval of the trigger that started it needs three decisions: whether its executions may overlap, how many of the scheduler’s threads they may occupy, and how an execution that has run for too long is stopped.
Overlapping executions
concurrent defaults to true, so every fire starts an execution whether or not the previous one has finished. A job that runs for hours on a trigger that fires every few minutes therefore stacks executions up, each holding one of the scheduler’s worker threads for its whole run. Once every thread is occupied nothing fires at all: the scheduler looks stuck, the log fills with misfires, and no work gets done.
Set concurrent = false on such a job, and the scheduler never runs two of its executions at the same time:
class ImportJob {
static concurrent = false
static triggers = {
simple repeatInterval: 100_000L
}
void execute() {
// ...
}
}A fire that arrives while the job is still running is then held, and what becomes of it is the trigger’s misfire instruction.
Threads
Jobs run on a fixed pool of worker threads — ten of them unless configured otherwise. A long-running job holds one of those threads for its entire execution, so the pool has to be large enough for every execution that can be in flight at once, plus the short jobs that must keep firing meanwhile:
quartz:
threadPool:
threadCount: 25Misfires
A trigger misfires when the scheduler cannot fire it when it was due — because the previous execution is still running and the job is not concurrent, or because no worker thread is free. What happens to the fires that were missed is the trigger’s misfireInstruction, set like any other trigger attribute. Left unset, a trigger uses Quartz’s smart policy, which depends on the trigger type: an indefinitely repeating simple trigger drops the fires it missed and carries on at its next scheduled time, while a cron trigger fires once immediately.
So to have an hourly report skip the run it missed instead of starting it the moment the long execution finishes:
class ReportJob {
static concurrent = false
static triggers = {
cron cronExpression: '0 0 * * * ?',
misfireInstruction: CronTrigger.MISFIRE_INSTRUCTION_DO_NOTHING
}
void execute() {
// ...
}
}The instructions to choose from are the constants of the Quartz trigger type — SimpleTrigger and CronTrigger. How late a fire may be before the scheduler counts it as a misfire is quartz.jobStore.misfireThreshold, in milliseconds; it is passed straight through to Quartz, so set it explicitly if the tolerance matters to your schedule.
Watching what is running
jobManagerService.runningJobs returns the JobExecutionContext of every execution in flight. Each one carries the job it belongs to as jobDetail.key and the moment its execution began as fireTime, which is all that is needed to find work that has been running for too long:
jobManagerService.runningJobs.each { JobExecutionContext context ->
println "${context.jobDetail.key} has been running since ${context.fireTime}"
}Stopping an execution
There is no timeout setting. Nothing can safely stop a thread in the middle of arbitrary work, so a job is asked to stop itself instead: declare an interrupt() method on the job, and the plugin routes interruption requests to it. It is up to the job to notice and return from execute.
class ImportJob {
static concurrent = false
private volatile boolean interrupted
static triggers = {
simple repeatInterval: 100_000L
}
void execute() {
for (batch in batches) {
if (interrupted) {
return
}
process batch
}
}
void interrupt() {
interrupted = true
}
}A field is enough to carry the flag: every execution is given its own instance of the job class, so nothing is shared between executions.
Ask for the interruption from anywhere in the application, by job group and job name:
jobManagerService.interruptJob('GRAILS_JOBS', 'com.example.ImportJob')A job that does not declare interrupt() cannot be stopped; the request raises an UnableToInterruptJobException saying so. Code that interrupts jobs it does not own — a watchdog job which interrupts whatever it finds running past a limit, for instance — has to allow for that.
Hibernate sessions
A Hibernate Session is bound to the job’s thread for the whole execution unless the job sets sessionRequired = false. A session that lives for hours keeps every entity it has loaded in its first-level cache, so memory grows with the work done and the entities it holds drift further from the database.
Process the work of a long job in chunks, each in a session of its own, so neither grows without bound:
class ImportJob {
static concurrent = false
void execute() {
batches.each { batch ->
Invoice.withNewSession {
process batch
}
}
}
}Note that the session is bound regardless of sessionRequired when quartz.jdbcStore is enabled, because the job store needs it.
20.2.8 Configuration
The plugin is configured under the quartz key in grails-app/conf/application.yml:
quartz:
autoStartup: true
jdbcStore: falsePlugin options
| Property | Default | Description |
|---|---|---|
|
|
Set to |
|
|
Whether the scheduler is started once the application has finished bootstrapping. When |
|
|
Set to |
|
|
The name of the Spring bean holding the |
|
|
When |
|
|
Whether shutdown blocks until currently executing jobs have finished. Set to |
|
|
Whether the scheduler is registered with the Quartz |
|
|
Whether startup fails when a job declares a trigger which can never fire — a cron expression whose last occurrence is in the past, for example. By default such a trigger is reported as an error in the log and skipped, and the application starts with the rest of its jobs and triggers scheduled. Set this to |
|
The bean name |
The name given to the scheduler. Set this when several applications share a job store, so their schedulers do not collide. |
Passing options straight through to Quartz
Every key beneath quartz is flattened and handed to Quartz itself with an org.quartz. prefix, so any Quartz configuration property can be set the same way. For example, this configures the thread pool:
quartz:
threadPool:
threadCount: 10
threadPriority: 5which Quartz receives as org.quartz.threadPool.threadCount and org.quartz.threadPool.threadPriority. The plugin options in the table above are read from the same flattened set, which is why they share the quartz prefix.
Logging
A logger is injected into every job class, so no setup is required to use log from within execute. To change the level, configure the grails.app.jobs logger — for example in grails-app/conf/logback.groovy:
logger 'grails.app.jobs', DEBUGAny exception thrown from a job is logged by a global job listener registered by the plugin, so failures are never silently swallowed.
Hibernate sessions and jobs
When a Hibernate plugin is on the classpath, the plugin binds a Hibernate Session to the thread for the duration of each job execution. This is what allows a job to use GORM — lazy-loading collections, or applying unique constraints — exactly as a service would.
Set sessionRequired to false on a job to opt out of this behaviour. This is rarely useful; note that the session is bound regardless when jdbcStore is enabled, because the job store needs it.
class MyJob {
static sessionRequired = false
}The binding covers the job’s execute method only. Job listeners run outside it and must manage their
own session — see Job listeners.
Job listeners
To run code around every job — binding a security context, populating a logging context, or any other
setup a job inherits rather than repeats — register a Quartz JobListener with the scheduler. This is
the supported way to share behaviour across all jobs; the plugin uses the same mechanism internally for
its own exception logging.
Implement JobListener (or extend Quartz’s JobListenerSupport, which no-ops the callbacks you do not
need):
import org.quartz.JobExecutionContext
import org.quartz.JobExecutionException
import org.quartz.listeners.JobListenerSupport
class SecurityContextJobListener extends JobListenerSupport {
String getName() { 'securityContextJobListener' }
void jobToBeExecuted(JobExecutionContext context) {
// bind whatever every job should see
}
void jobWasExecuted(JobExecutionContext context, JobExecutionException exception) {
// and unbind it again
}
}Register it against the quartzScheduler bean, typically from BootStrap:
import org.quartz.Scheduler
class BootStrap {
Scheduler quartzScheduler
def init = { servletContext ->
quartzScheduler.listenerManager.addJobListener(new SecurityContextJobListener())
}
}A listener registered with no matcher observes every job. To restrict it to particular jobs, pass a
Matcher — KeyMatcher.keyEquals(…) for a single job, or GroupMatcher.jobGroupEquals(…) for a
whole job group.
A job listener has no Hibernate Session bound to its thread. The session opened for the job
is flushed and closed before jobWasExecuted is called, so a listener that needs GORM must open its own
with withNewSession or withTransaction. See Hibernate sessions and jobs.
|
Persistent job storage
By default Quartz keeps jobs and triggers in memory, so they are rebuilt from your source every time the application starts. Setting jdbcStore to true switches Quartz to its JDBC job store, which persists them in the database:
quartz:
jdbcStore: trueTwo things are required for this to work:
-
The Quartz tables must exist in the database. Quartz ships the schema for each supported database with its distribution.
-
A
quartz.propertiesfile on the classpath, or equivalentquartz.*configuration, describing the job store — see the Quartz documentation on job stores.
Persistent storage interacts with the durability and requestsRecovery job properties described in Job Properties.
The application only removes its own jobs
When an application starts, the plugin removes the jobs it finds in the store which are no longer enabled
job artefacts of that application — a job class that has been deleted, or one turned off with
jobEnabled = false. Every job it registers is stamped with the name of the application, taken from
info.app.name or from the application metadata when that is unset, and only jobs carrying that name are
candidates for removal. A job another application registered, and a job scheduled through the Quartz API
rather than declared as a job artefact, are left where they are.
That matters as soon as a job store is shared — between the instances of a clustered application, or between two applications pointing at the same Quartz tables:
-
Two applications sharing a store must not share an application name, or each treats the other’s jobs as its own and removes them on startup. An application which does not name itself uses the default name, which every unnamed application shares, and the plugin warns about that when it starts against a JDBC job store.
-
A job written to the store by a version of the plugin older than Grails 8 carries no application name, so it is never removed automatically. Remove such a leftover through jobManagerService or from the Quartz tables.
Trigger names are permanent
A trigger is identified by its name and group, and with a persistent job store that identity outlives the application. On startup the plugin reconciles the triggers a job declares against the ones already in the store: a declared trigger whose name is already present is rescheduled, and a declared trigger that is missing is added. A trigger in the store that the job no longer declares is left alone, because the plugin cannot tell it apart from one scheduled at runtime through dynamic scheduling or jobManagerService.
The practical consequence is that renaming a trigger does not replace it — it adds a second one, and
the job then fires on both the old schedule and the new one. Changing the cronExpression of an
existing trigger is safe; changing its name is not.
This applies to the generated names too. A trigger declared without a name is named
<jobClassName><n>, numbered in declaration order — so inserting a trigger ahead of an existing one
renumbers the rest and orphans their old names. Give every trigger an explicit name when using a
persistent job store, and treat those names as permanent.
|
class ReportJob {
static triggers = {
cron name: 'reportNightly', cronExpression: '0 0 2 * * ?' // renaming this later adds a trigger
}
void execute() { }
}If a trigger has already been orphaned, remove it from the scheduler — through jobManagerService, or by deleting the row from the Quartz tables — before restarting. Nothing detects or reports the duplicate on its own.
Clustering
Quartz can coordinate a schedule across several instances of your application, so a given trigger fires exactly once no matter how many instances are deployed. This requires jdbcStore, a shared set of Quartz tables, and a handful of additional properties.
Clustering is covered in full — including the requirements and the pitfalls — in the Clustering section.
20.2.9 Clustering
By default the Quartz plugin uses Quartz’s in-memory RAMJobStore: the schedule is rebuilt from your source at every startup and lives entirely inside one process. That is fine for a single instance, but it means a deployment of three instances fires every trigger three times, exactly as Basic Scheduling does.
Clustering fixes that. It is not on by default and requires deliberate configuration.
| Duplicate firing is a quiet failure. Nothing throws, nothing is logged, and it usually does not surface in a single-instance test environment. It shows up in production as duplicated emails, double-counted totals, or deadlocks between instances competing for the same rows. |
How Quartz clustering works
Quartz clusters through the database. Every instance is configured with the same scheduler name and points at the same set of Quartz tables. When a trigger’s firing time arrives, each instance races to acquire a row lock on it; the first to take the lock is the one that fires it, and the others move on. The result is load balancing across the cluster with exactly-once firing per trigger.
Failover works from the same mechanism. Instances check in on an interval; when one stops checking in, another detects the failure and recovers its work — re-firing the jobs that declared requestsRecovery.
Enabling clustering
Three things are required.
1. A JDBC job store. Clustering works only with the JDBC job store — the default in-memory RAMJobStore cannot cluster, because there is nothing shared to coordinate through.
application.yml
quartz:
jdbcStore: true2. The Quartz tables. Quartz ships a schema script for each supported database with its distribution; create the QRTZ_* tables before starting the application.
3. Clustering configuration. Every key under quartz is passed through to Quartz with an org.quartz. prefix, so the standard clustering properties are set the same way:
application.yml
quartz:
jdbcStore: true
scheduler:
instanceName: myAppScheduler # identical on every instance
instanceId: AUTO # unique per instance; AUTO generates one
jobStore:
isClustered: true
clusterCheckinInterval: 20000 # millisecondsEvery instance must use the same instanceName and the same tables. Only instanceId and the thread-pool size should differ.
Requirements and pitfalls
|
If you are not clustering
A single-instance deployment does not need any of this, and quartz.jdbcStore should be left at its default of false — the in-memory store is simpler and faster, and the schedule is rebuilt from your source at every startup.
If you have a single instance but need the schedule itself to survive restarts — because it is modified at runtime — enable jdbcStore without isClustered.
20.2.10 Useful Links
The plugin is a thin, convention-driven layer over Quartz itself. When you need detail the guide does not cover — the full cron syntax, the trigger types, job-store and clustering configuration — the Quartz documentation is the authority.
-
Quartz Enterprise Job Scheduler — the project home page.
-
Quartz documentation — tutorials, configuration reference, and cookbook.
-
Jobs and triggers — how Quartz models the two, and the trigger types available.
-
CronExpression— the complete cron expression syntax, including the special characters. -
Quartz configuration reference — every
org.quartz.*property that can be set through thequartzblock described in Configuration.
21 Redis
The Grails Redis plugin provides access to Redis and a number of utilities (a service, taglib, and memoization annotations) for using Redis as a flexible, high-performance cache within a Grails application.
What is Redis?
Redis is often described as a "collection of data structures exposed over the network". It is an insanely fast key/value store, in some ways similar to Memcached, but the values it stores are not just dumb blobs of data — they are data structures such as strings, lists, hash maps, sets, and sorted sets. Redis can also act as a lightweight pub/sub or message-queueing system.
Redis is used in production by a number of very popular websites. It is commonly used as a caching layer, but because it provides network-available data structures it is very flexible and able to solve all kinds of problems. The creator of Redis, Salvatore Sanfilippo, has a nice post on taking advantage of Redis by adding it to your stack. With the Grails Redis plugin, adding Redis to your Grails application is very easy.
For a gentle start there is an introduction to Redis using Groovy that shows how to install Redis and use some basic Groovy commands, as well as a presentation given at gr8conf 2011. The official Redis documentation is excellent and includes a comprehensive list of Redis commands; each command page also has an embedded REPL that lets you test the command against a live Redis server.
What is Jedis?
The plugin connects to Redis using Jedis, a fast and actively-maintained Java client. One of the nice things about Jedis is that it does not munge the Redis command names but follows them as closely as possible. This means that for almost all commands the Redis command documentation can also be used to understand how to use the Jedis connection objects — you do not need to translate the Redis documentation into Jedis commands.
21.1 Installation and Configuration
Add the plugin to the dependencies block of your build.gradle. The version is managed by the Grails BOM, so it does not need to be specified:
dependencies {
implementation 'org.apache.grails:grails-redis'
}Out of the box, the plugin expects Redis to be running on localhost:6379. The easiest way to run a local instance for development and testing is with Docker:
docker run -d --name redis -p 6379:6379 redisThe connection — along with any pool configuration options — can be customized under the grails.redis key in grails-app/conf/application.yml. A connection requires either a host and port combination or a sentinels and masterName combination:
grails:
redis:
poolConfig:
# any property exposed by the Jedis `JedisPoolConfig` may be set here, for example:
# testWhileIdle: true
# maxTotal: 10
# maxIdle: 8
timeout: 2000 # connection timeout in milliseconds (default)
password: somepassword # defaults to no password
useSSL: false # set to true to connect over SSL
# --- Option 1: a single Redis server (use only if NOT using a sentinel cluster) ---
host: localhost
port: 6379
database: 5 # selects the Redis database to use
# --- Option 2: a redis-sentinel cluster (use only if NOT using host/port) ---
sentinels: # list of sentinel instance host/ports
- host1:6379
- host2:6379
- host3:6379
masterName: mymaster # the name of the master the sentinel cluster is configured to monitorThe poolConfig section lets you tweak any of the setter values exposed by Jedis' JedisPoolConfig, which implements the Apache Commons GenericObjectPool.
| See the Redis Sentinel documentation for more information on using redis-sentinel for high availability. |
21.2 Using the redisService
The redisService bean
The redisService bean wraps the connection pool. It provides caching/memoization helpers, template methods, and basic Redis commands, and it will be your primary interface to Redis.
The service overrides propertyMissing and methodMissing to delegate any unknown request to a Redis connection, so any method you would normally call on a Redis connection can be called directly on redisService:
def redisService
redisService.foo = 'bar'
assert 'bar' == redisService.foo
redisService.sadd('months', 'february')
assert true == redisService.sismember('months', 'february')The withRedis template method takes a closure and passes it a Jedis connection. The pool connection is automatically obtained and always returned to the pool when the closure finishes, even if an error occurs. Using withRedis for a sequence of commands uses a single connection rather than one per command:
redisService.withRedis { Jedis redis ->
redis.set('foo', 'bar')
}Redis supports pipelining, which lets you send commands without waiting for each response. The withPipeline template works like withRedis:
redisService.withPipeline { Pipeline pipeline ->
pipeline.set('foo', 'bar')
}Redis transactions guarantee that all commands in the transaction execute as an atomic unit (Redis does not, however, support rolling back modifications). The withTransaction template opens and closes the transaction automatically, telling Redis to execute it if the closure does not throw:
redisService.withTransaction { Transaction transaction ->
transaction.set('foo', 'bar')
}Utility methods
The service also provides a few utility methods:
redisService.flushDB() // dangerous! - should generally only be used for test cleanup
// deletes all keys matching a pattern. This is relatively expensive as it uses the
// `keys` operation; if you do this frequently, consider aggregating your own set of
// keys to delete instead.
redisService.deleteKeysWithPattern('key:pattern:*')The redisPool bean
You can access the pool of Redis connection objects directly by injecting the redisPool bean. Normally you will interact with redisService instead, but the pool is available if you need to work with it directly:
def redisPoolThe redis:memoize taglib
The redis:memoize tag lets you leverage memoization within your GSP files. Wrap it around any expensive-to-generate content and it will be cached in Redis and served quickly on subsequent requests until the key expires:
<redis:memoize key="mykey" expire="3600">
<div id="header">
... expensive header content that can be cached ...
</div>
</redis:memoize>21.3 Memoization
Memoization is a write-through caching technique. The plugin provides a number of methods that take a key and a closure. Each method first checks Redis for the key: if it exists, the cached value is returned and the closure is not executed; if it does not, the closure is executed and its result is stored in Redis under the key. Subsequent calls are served the cached value rather than recalculating it.
This is very useful for values that are frequently requested but expensive to calculate.
String memoization
redisService.memoize("user:$userId:helloMessage") {
// expensive calculation that returns a String
"Hello ${security.currentLoggedInUser().firstName}"
}By default the key/value is cached indefinitely. You can refresh it by deleting the key, by including a date or timestamp in the key, or by using the optional expire parameter (the number of seconds before Redis expires the key):
def ONE_HOUR = 3600
redisService.memoize("user:$userId:helloMessage", [expire: ONE_HOUR]) {
"Hello ${security.currentLoggedInUser().firstName}. The temperature this hour is ${currentTemperature()}"
}Domain object memoization
You can memoize a single domain object. The plugin caches the id of the object returned by the closure and, on subsequent cache hits, returns a proxy via DomainObject.load(cachedId):
String key = 'user:42:favorite:author'
Author author = redisService.memoizeDomainObject(Author, key) {
Author a = ... // expensive calculation of user 42's favorite author
return a
}Because a proxy is returned, you can query with it without hydrating the full object:
def recommendedBooks = Book.findByAuthor(author)The id field is populated and the remaining fields are loaded lazily only when requested, so author.name still resolves correctly.
Domain list memoization
You can also memoize a list of domain object identifiers. Only the database ids are cached, not the full objects, so you still fetch the freshest objects from the database while avoiding the cost of repeatedly building an expensive list:
def key = "user:$id:friends-books-user-does-not-own"
redisService.memoizeDomainList(Book, key, ONE_HOUR) { redis ->
// expensive process to determine the relevant Book ids; the ids are stored in
// Redis, but the Book objects are hydrated from the database
}Other memoization methods
The plugin provides memoization methods for the other Redis data types:
// Redis hash
redisService.memoizeHash('saved-hash') { return [foo: 'bar'] }
redisService.memoizeHashField('saved-hash', 'foo') { return 'bar' }
// Redis list
redisService.memoizeList('saved-list') { return ['foo', 'bar', 'baz'] }
// Redis set
redisService.memoizeSet('saved-set') { return ['foo', 'bar', 'baz'] as Set }
// Redis sorted set
redisService.memoizeScore('saved-sorted-set', 'set-item') { return score }21.4 Memoization Annotations
In addition to the concrete redisService.memoize* methods, you may annotate a method with the corresponding @Memoize* annotation. The annotation performs an AST transformation at compile time that wraps the body of the method with the matching memoization method. Parameters such as key and expire are passed to the annotation and used in the redisService memoize call.
The following annotations are available:
| Annotation | Description |
|---|---|
|
Memoizes methods that return a String — |
|
Memoizes methods that return an object (stored as JSON) — |
|
Memoizes methods that return a domain object — |
|
Memoizes methods that return a list of domain objects — |
|
Memoizes methods that return a hash — |
|
Memoizes methods that return a hash field — |
|
Memoizes methods that return a list — |
|
Memoizes methods that return a set — |
|
Memoizes methods that return a score from a hash — |
Annotation keys
Because the key value is passed in and also transformed by the AST, you cannot use $-style GString values in the keys. Instead, use the sign to represent a GString value, e.g. @Memoize(key = "{book.title}:#{book.id}"). During the AST transformation these are replaced with $ and evaluate at runtime as redisService.memoize("${book.title}:${book.id}"){…}.
Anything not in the format key='#text' or key="${text}" is treated as a string literal — key="text" is equivalent to using the literal string "text" as the memoize key. Any variable referenced in the key must be in scope; an out-of-scope reference produces a runtime error. The same rules apply to the expire field.
Notes
You do not need to import grails.plugins.redis.RedisService or declare def redisService on objects that use these annotations — the AST transform detects whether the field is present and adds it if needed. The entire annotated method body is wrapped in the Redis service call, so any computation it contains is skipped on a cache hit.
If compilation succeeds but the method fails at runtime, verify that your key or value is configured correctly and that the key uses #{} for every variable you want referenced. If compilation does not succeed, check the stack trace — each annotation type validates its AST transform (required properties are provided, expire is a valid Integer, value is a valid closure, and key is a valid String).
@Memoize
Used for objects stored in Redis as strings. Parameters:
-
value— a closure (key OR value required) -
key— a unique cache key (key OR value required) -
expire— expiry in seconds; defaults to never
You may specify either a closure OR a key and expire. When using the closure-style key @Memoize({"#{text}"}) you may not also pass a key or expire, because the closure is evaluated directly and used as the key. This is a limitation of how Java handles closure annotation parameters.
|
@Memoize({"#{text}"})
def getAnnotatedTextUsingClosure(String text, Date date) {
return "$text $date"
}
@Memoize(key = '#{text}')
def getAnnotatedTextUsingKey(String text, Date date) {
return "$text $date"
}
@Memoize(key = '#{text}', expire = '3600')
def getAnnotatedTextUsingKeyAndExpire(String text, Date date) {
return "$text $date"
}
@Memoize(key = "#{book.title}:#{book.id}")
def getAnnotatedBook(Book book) {
return book.toString()
}@MemoizeObject
Used for simple (non-domain) objects whose contents are stored in Redis as JSON. The returned object is converted to JSON, stored, and converted back, so the object class must be convertible to and from JSON. Parameters: key (required), expire, and clazz (the object class, required).
@MemoizeObject(key = "#{title}", expire = "#{grailsApplication.config.cache.ttl}", clazz = Book.class)
def createObject(String title, Date date) {
new Book(title: title, createDate: date)
}This is also available directly from the service:
redisService.memoizeObject(Book.class, title, grailsApplication.config.cache.ttl) {
new Book(title: title, createDate: date)
}@MemoizeDomainObject
Used for domain objects whose ids are stored in Redis (see domain object memoization). Parameters: key (required), expire, and clazz (required).
@MemoizeDomainObject(key = "#{title}", clazz = Book.class)
def createDomainObject(String title, Date date) {
Book.build(title: title, createDate: date)
}@MemoizeDomainList
Used for lists of domain objects whose ids are stored in Redis (see domain list memoization). Parameters: key (required), expire, and clazz (required).
@MemoizeDomainList(key = "getDomainListWithKeyClass:#{title}", clazz = Book.class)
def getDomainListWithKeyClass(String title, Date date) {
Book.findAllByTitle(title)
}@MemoizeList
Used for list-type objects. Parameters: value / key (one required) and expire.
@MemoizeList(key = "#{list[0]}")
def getAnnotatedList(List list) {
return list
}@MemoizeScore
Used for scores in hashes. Parameters: key (required), expire, and member (the hash property to store, required).
@MemoizeScore(key = "#{map.key}", member = "foo")
def getAnnotatedScore(Map map) {
return map.foo
}@MemoizeHash
Used for map/hash-type objects. Parameters: value / key (one required) and expire.
@MemoizeHash(key = "#{map.foo}")
def getAnnotatedHash(Map map) {
return map
}21.5 Multiple Redis Servers
If you use multiple, non-clustered Redis servers and want to perform discrete operations on each from a single application, you can configure additional named connections under the connections block. The standard configuration block (described in Installation and Configuration) describes the default connection; each named connection accepts the same options, including its own poolConfig and its own host/port or sentinels/masterName combination.
grails:
redis:
poolConfig:
# pool-specific tweaks for the default connection
# numTestsPerEvictionRun: 4
# the default connection requires either a host & port combo, or a sentinels & masterName combo
host: localhost
port: 6379
# sentinels:
# - host1:6379
# - host2:6379
# masterName: mymaster
connections:
cache:
poolConfig:
# pool-specific tweaks for the 'cache' connection
host: localhost
port: 6380
# sentinels / masterName may be used here instead of host/port
search:
poolConfig:
# pool-specific tweaks for the 'search' connection
host: localhost
port: 6381Connection names must be unique. For each named connection, a service bean is wired in addition to the default redisService bean, with the capitalized connection name appended — the example above creates redisServiceCache and redisServiceSearch. The connection-specific pool beans (redisPoolCache and redisPoolSearch) are created using the same convention.
Alternatively, you can keep using the default redisService bean and refer to a connection by name with withConnection, e.g. redisService.withConnection('cache').withRedis { … }. Whether you inject the connection-specific beans or use withConnection on the default bean, the result is the same — withConnection is simply a pass-through to the named beans.
class FooService {
def redisService
// connection-specific beans; you can use these or the `withConnection` method
def redisServiceCache
def redisServiceSearch
def doWork() {
redisService.withRedis { Jedis redis ->
redis.set('foo', 'bar')
}
redisService.withConnection('cache').withTransaction { Transaction transaction ->
transaction.set('foo', 'bar')
}
redisServiceSearch.withPipeline { Pipeline pipeline ->
pipeline.set('foo', 'bar')
}
redisServiceCache.memoize('somecachekey') {
return cacheData
}
redisService.withConnection('search').memoizeDomainList(Book, 'domainkey') {
return Book.findAllByTitleInList(['book1', 'book3'])
}
}
}21.6 Useful Links
The following external resources are useful when working with Redis and the Jedis client:
-
Redis — the official Redis website
-
Redis commands — a comprehensive reference for every Redis command, each with an embedded REPL to try against a live server
-
Redis Sentinel — high-availability documentation
-
Redis benchmarks — performance benchmarks
-
Who’s using Redis — production users of Redis
-
Jedis — the Java Redis client used by this plugin
-
JedisPoolConfig — the pool configuration options surfaced through
poolConfig -
Apache Commons GenericObjectPool — the pool implementation underlying the Jedis pool configuration
-
Intro to using Redis with Groovy — a hands-on introduction
-
Redis, Groovy and Grails (gr8conf 2011) — presentation
22 Plugins
Grails is first and foremost a web application framework, but it is also a platform. By exposing a number of extension points that let you extend anything from the command line interface to the runtime configuration engine, Grails can be customised to suit almost any needs. To hook into this platform, all you need to do is create a plugin.
Extending the platform may sound complicated, but plugins can range from trivially simple to incredibly powerful. If you know how to build a Grails application, you’ll know how to create a plugin for sharing a data model or some static resources.
22.1 Creating and Installing Plugins
Creating Plugins
Creating a Grails plugin is a simple matter of running one of the supported plugin generators:
Grails Shell CLI
grails create-plugin <<PLUGIN NAME>>Grails Forge CLI
grails -t forge create-plugin <<PLUGIN NAME>>This will create a plugin project for the name you specify. For example running grails create-plugin example would create a new plugin project called example.
You should consider whether the plugin you create requires a web environment or whether the plugin can be used with other profiles. If your plugin requires a web environment then use the "web-plugin" profile instead of the default "plugin" profile:
Grails Shell CLI
grails create-web-plugin <<PLUGIN NAME>>Grails Forge CLI
grails -t forge create-web-plugin <<PLUGIN NAME>>Make sure the plugin name does not contain more than one capital letter in a row, or it won’t work. Camel case is fine, though.
Being a regular Grails project has a number of benefits in that you can immediately test your plugin by running (if the plugin targets the "web" profile):
grails run-app
Plugin projects don’t provide an index.gsp by default since most plugins don’t need it. So, if you try to view the plugin running in a browser right after creating it, you will receive a page not found error. You can easily create a grails-app/views/index.gsp for your plugin if you’d like.
|
The structure of a Grails plugin is very nearly the same as a Grails application project’s except that in the src/main/groovy directory under the plugin package structure you will find a plugin descriptor class (a class that ends in "GrailsPlugin"). For example:
import grails.plugins.*
class ExampleGrailsPlugin extends Plugin {
...
}All plugins must have this class under the src/main/groovy directory, otherwise they are not regarded as a plugin. The plugin class defines metadata about the plugin, and optionally various hooks into plugin extension points (covered shortly).
You can also provide additional information about your plugin using several special properties:
-
title- short one-sentence description of your plugin -
grailsVersion- The version range of Grails that the plugin supports. eg. "1.2 > *" (indicating 1.2 or higher) -
author- plugin author’s name -
authorEmail- plugin author’s contact e-mail -
developers- Any additional developers beyond the author specified above. -
description- full multi-line description of plugin’s features -
documentation- URL of the plugin’s documentation -
license- License of the plugin -
issueManagement- Issue Tracker of the plugin -
scm- Source code management location of the plugin
Here is a slimmed down example from the Quartz Grails plugin:
package quartz
@Slf4j
class QuartzGrailsPlugin extends Plugin {
// the version or versions of Grails the plugin is designed for
def grailsVersion = "3.0.0.BUILD-SNAPSHOT > *"
// resources that are excluded from plugin packaging
def pluginExcludes = [
"grails-app/views/error.gsp"
]
def title = "Quartz" // Headline display name of the plugin
def author = 'Apache Grails Team'
def authorEmail = "zzz@yyy.com"
def description = '''\
Adds Quartz job scheduling features
'''
def profiles = ['web']
List loadAfter = ['hibernate3', 'hibernate4', 'hibernate5', 'services']
def documentation = "https://apache.github.io/grails-quartz/latest/"
def license = "APACHE"
def issueManagement = [ system: "Github Issues", url: "https://github.com/apache/grails-quartz/issues" ]
def developers = [
[ name: "Joe Dev", email: "joedev@example.com" ]
]
def scm = [ url: "https://github.com/apache/grails-quartz" ]
BeanRegistrar beanRegistrar()......Plugin Configuration
A Grails plugin can be configured in one of the following files:
-
grails-app/conf/plugin.yml -
grails-app/conf/plugin.groovy
These files will be included in the plugin package while the application.* files are only used internally when developing the plugin. See Notes on excluded Artefacts.
Reading configuration properties
Instead of directly accessing Grails configuration as grailsApplication.config.mail.hostName, use a Spring Boot configuration bean (or a POJO) annotated with ConfigurationProperties annotation. Here is an example plugin configuration:
/src/main/groovy/example/MailPluginConfiguration.groovy
package example
import org.springframework.boot.context.properties.ConfigurationProperties
@ConfigurationProperties(prefix = "mail")
class MailPluginConfiguration {
String hostName
int port
String from
}You can inject the MailPluginConfiguration bean into your bean like any other bean.
/grails-app/services/example/MailService.groovy
package example
class MailService {
MailPluginConfiguration mailPluginConfiguration
void sendMail() {
}
}Please read the Spring Boot Externalized Configuration section for more information.
Installing Local Plugins
In order to install the Grails plugin to your local Maven, you could use Gradle Maven Publish plugin. You may also need to configure the publishing extension as:
publishing {
publications {
maven(MavenPublication) {
versionMapping {
usage('java-api') {
fromResolutionOf('runtimeClasspath')
}
usage('java-runtime') {
fromResolutionResult()
}
}
from components.java
}
}
}| Please refer to the Gradle Maven Publish plugin documentation for up-to-date information. |
To make your plugin available for use in a Grails application run the ./gradlew publishToMavenLocal command:
./gradlew publishToMavenLocalThis will install the plugin into your local Maven cache. Then to use the plugin within an application declare a dependency on the plugin in your build.gradle file and include mavenLocal() in your repositories hash:
...
repositories {
...
mavenLocal()
}
...
implementation "org.apache.grails:grails-quartz:0.1"| In Grails 2.x plugins were packaged as ZIP files, however from Grails 3.x+ plugins are simple JAR files that can be added to the classpath of the IDE. |
Plugins and Multi-Project Builds
If you wish to setup a plugin as part of a multi project build then follow these steps.
Step 1: Create the application and the plugin
Using the grails command create an application and a plugin:
$ grails create-app myapp
$ grails create-plugin mypluginStep 2: Create a settings.gradle file
In the same directory create a settings.gradle file with the following contents:
include "myapp", "myplugin"The directory structure should be as follows:
PROJECT_DIR
- settings.gradle
- myapp
- build.gradle
- myplugin
- build.gradleStep 3: Declare a project dependency on the plugin
Within the build.gradle of the application declare a dependency on the plugin within the plugins block:
grails {
plugins {
implementation project(':myplugin')
}
}
You can also declare the dependency within the dependencies block, however reloading will not work correctly if defined this way.
|
*Step 4: (Optional) Configure the plugin for reloading
Within the build.gradle of the plugin, apply the gradle plugin org.apache.grails.gradle.grails-exploded to allow for proper reloading of the plugin:
apply plugin: 'org.apache.grails.gradle.grails-exploded'
This plugin ensures that development commands such as bootRun use the exploded classes and resources of the plugin rather than the packaged JAR file.
|
Step 5: Run the application
Now run the application using the grails run-app command from the root of the application directory, you can use the verbose flag to see the Gradle output:
$ cd myapp
$ grails run-app -verboseYou will notice from the Gradle output that plugins sources are built and placed on the classpath of your application:
:myplugin:compileAstJava UP-TO-DATE
:myplugin:compileAstGroovy UP-TO-DATE
:myplugin:processAstResources UP-TO-DATE
:myplugin:astClasses UP-TO-DATE
:myplugin:compileJava UP-TO-DATE
:myplugin:configScript UP-TO-DATE
:myplugin:compileGroovy
:myplugin:copyAssets UP-TO-DATE
:myplugin:copyCommands UP-TO-DATE
:myplugin:copyTemplates UP-TO-DATE
:myplugin:processResources
:myapp:compileJava UP-TO-DATE
:myapp:compileGroovy
:myapp:processResources UP-TO-DATE
:myapp:classes
:myapp:findMainClass
:myapp:bootRun
Grails application running at http://localhost:8080 in environment: developmentNotes on excluded Artefacts
Although the create-plugin command creates certain files for you so that the plugin can be run as a Grails application, not all of these files are included when packaging a plugin. The following is a list of artefacts created, but not included by package-plugin:
-
grails-app/build.gradle(although it is used to generatedependencies.groovy) -
grails-app/conf/logback.xml -
grails-app/conf/logback-spring.xml -
grails-app/conf/application.yml -
grails-app/conf/application.groovy -
grails-app/conf/spring/resources.groovy -
Everything within
/src/test/*\* -
SCM management files within
*\*/.svn/*\*and*\*/CVS/*\*
Customizing the plugin contents
When developing a plugin you may create test classes and sources that are used during the development and testing of the plugin but should not be exported to the application.
To exclude test sources you need to modify the pluginExcludes property of the plugin descriptor AND exclude the resources inside your build.gradle file. For example say you have some classes under the com.demo package that are in your plugin source tree but should not be packaged in the application. In your plugin descriptor you should exclude these:
// resources that should be loaded by the plugin once installed in the application
def pluginExcludes = [
'**/com/demo/**'
]And in your build.gradle you should exclude the compiled classes from the JAR file:
jar {
exclude "com/demo/**/**"
}Inline Plugins in Grails
In Grails 2.x it was possible to specify inline plugins in BuildConfig, from Grails 3.x+ this functionality has been replaced by Gradle’s multi-project build feature.
To set up a multi project build create an application and a plugin in a parent directory:
$ grails create-app myapp
$ grails create-plugin mypluginThen create a settings.gradle file in the parent directory specifying the location of your application and plugin:
include 'myapp', 'myplugin'Finally add a dependency in your application’s build.gradle on the plugin:
grails {
plugins {
implementation project(':myplugin')
}
}
You can also declare the dependency within the dependencies block, however your subproject will not reload correctly.
|
Using this technique you have achieved the equivalent of inline plugins from Grails 2.x.
Grails Forge Creating Plugins
Creating a Grails plugin is a simple matter of running the command:
grails create-plugin <<PLUGIN NAME>>This will create a web-plugin project for the name you specify. For example running grails create-plugin example would create a new web-plugin project called example.
In Grails you should consider whether the plugin you create requires a web environment or whether the plugin can be used with other profiles. If your plugin does not require a web environment then use the "plugin" profile instead of the default "web-plugin" profile:
grails create-plugin <<PLUGIN NAME>> --profile=pluginMake sure the plugin name does not contain more than one capital letter in a row, or it won’t work. Camel case is fine, though.
Being a regular Grails project has a number of benefits in that you can immediately test your plugin by running (if the plugin targets the "web" profile):
./gradlew bootRun
Plugin projects don’t provide an index.gsp by default since most plugins don’t need it. So, if you try to view the plugin running in a browser right after creating it, you will receive a page not found error. You can easily create a grails-app/views/index.gsp for your plugin if you’d like.
|
The structure of a Grails plugin is very nearly the same as a Grails application project’s except that in the src/main/groovy directory under the plugin package structure you will find a plugin descriptor class (a class that ends in "GrailsPlugin"). For example:
import grails.plugins.*
class ExampleGrailsPlugin extends Plugin {
...
}All plugins must have this class under the src/main/groovy directory, otherwise they are not regarded as a plugin. The plugin class defines metadata about the plugin, and optionally various hooks into plugin extension points (covered shortly).
You can also provide additional information about your plugin using several special properties:
-
title- short one-sentence description of your plugin -
grailsVersion- The version range of Grails that the plugin supports. eg. "1.2 > *" (indicating 1.2 or higher) -
author- plugin author’s name -
authorEmail- plugin author’s contact e-mail -
developers- Any additional developers beyond the author specified above. -
description- full multi-line description of plugin’s features -
documentation- URL of the plugin’s documentation -
license- License of the plugin -
issueManagement- Issue Tracker of the plugin -
scm- Source code management location of the plugin
Here is a slimmed down example from the Quartz Grails plugin:
package quartz
@Slf4j
class QuartzGrailsPlugin extends Plugin {
// the version or versions of Grails the plugin is designed for
def grailsVersion = "3.0.0.BUILD-SNAPSHOT > *"
// resources that are excluded from plugin packaging
def pluginExcludes = [
"grails-app/views/error.gsp"
]
def title = "Quartz" // Headline display name of the plugin
def author = 'Apache Grails Team'
def authorEmail = "zzz@yyy.com"
def description = '''\
Adds Quartz job scheduling features
'''
def profiles = ['web']
List loadAfter = ['hibernate3', 'hibernate4', 'hibernate5', 'services']
def documentation = "https://apache.github.io/grails-quartz/latest/"
def license = "APACHE"
def issueManagement = [ system: "Github Issues", url: "https://github.com/apache/grails-quartzissues" ]
def developers = [
[ name: "Joe Dev", email: "joedev@example.com" ]
]
def scm = [ url: "https://github.com/apache/grails-quartz" ]
BeanRegistrar beanRegistrar()......Plugin Configuration
Instead of directly accessing Grails configuration as grailsApplication.config.getProperty('mail.hostName', String), use a Spring Boot configuration bean (or a POJO) annotated with ConfigurationProperties annotation. Here is an example plugin configuration:
/src/main/groovy/example/MailPluginConfiguration.groovy
package example
import org.springframework.boot.context.properties.ConfigurationProperties
@ConfigurationProperties(prefix = "mail")
class MailPluginConfiguration {
String hostName
int port
String from
}You can inject the MailPluginConfiguration bean into your bean like any other bean.
/grails-app/services/example/MailService.groovy
package example
class MailService {
MailPluginConfiguration mailPluginConfiguration
void sendMail() {
}
}Please read the Spring Boot Externalized Configuration section for more information.
22.2 Plugin Repositories
Distributing Plugins in the Grails Central Plugin Repository
The preferred way to distribute plugin is to publish to the official Grails Central Plugin Repository. This will make your plugin visible to the list-plugins command:
grails list-pluginswhich lists all plugins that are in the central repository. Your plugin will also be available to the plugin-info command:
grails plugin-info [plugin-name]which prints extra information about it, such as its description, who wrote, etc.
| If you have created a Grails plugin and want it to be listed on the plugin portal website, please submit a pull request on https://github.com/apache/grails-plugins-metadata |
22.3 Providing Basic Artefacts
Add Command Line Commands
A plugin can add new commands to the Grails interactive shell in one of two ways. First, using the create-script you can create a code generation script which will become available to the application. The create-script command will create the script in the src/main/scripts directory:
+ src/main/scripts <-- additional scripts here
+ grails-app
+ controllers
+ services
+ etc.Code generation scripts can be used to create artefacts within the project tree and automate interactions with Gradle.
When the plugin also applies org.apache.grails.gradle.grails-plugin-cli (see
Ship plugin commands as a companion -cli artifact below), files under src/main/scripts
(including .groovy, .yml, and *.json multi-step commands) are packaged into the companion
-cli jar as META-INF/commands and are not copied into the runtime plugin jar. That keeps
command-only resources off runtimeClasspath, bootJar, and bootWar while still making them
discoverable through grailsCliClasspath. Plugins that do not publish a companion keep the
historical behavior and continue to ship src/main/scripts in the runtime jar so unmigrated
Grails 7 plugins remain discoverable under legacyCommandSupport.
If you want to create a new shell command that interacts with a loaded Grails application instance then you should use the create-command command:
$ grails create-command MyExampleCommandThis will create a file called grails-app/commands/PACKAGE_PATH/MyExampleCommand.groovy that extends ApplicationCommand:
import org.apache.grails.core.cli.*
class MyExampleCommand implements ApplicationCommand {
boolean handle(ExecutionContext ctx) {
println "Hello World"
return true
}
}An ApplicationCommand has access to the GrailsApplication instance and is subject to autowiring like any other Spring bean.
Ship plugin commands as a companion -cli artifact
Commands are only ever executed by the CLI, so a plugin should keep them off the application
runtime classpath. Publish them as a companion artifact under the plugin’s coordinate with a -cli
suffix by applying the org.apache.grails.gradle.grails-plugin-cli Gradle plugin:
build.gradle
plugins {
id 'org.apache.grails.gradle.grails-plugin'
id 'org.apache.grails.gradle.grails-plugin-cli'
}
cliArtifact {
automaticModuleName = 'org.example.myplugin.cli'
}Place the command sources in src/cli/groovy (not grails-app/commands, which is compiled into
the runtime plugin jar). The plugin creates the cli source set as a feature variant, puts the
grails-core-cli command contract and the plugin’s own runtime classes on its compile classpath,
and registers compiled commands automatically in META-INF/grails-cli.factories inside the cli
jar. It also advertises the companion coordinate through the Grails-Cli-Artifact manifest
attribute of the runtime jar — the Grails Gradle plugin scans an application’s dependency graph
for this attribute and adds each advertised artifact to grailsCli, so applications only declare
the runtime plugin:
build.gradle
dependencies {
implementation 'org.example:my-plugin' // org.example:my-plugin-cli follows automatically
}When the Grails publish plugin (org.apache.grails.gradle.grails-publish) is applied, the
companion is published alongside the plugin as org.example:my-plugin-cli with its own pom,
sources, and javadoc. See the
Creating Custom Commands section for the complete
workflow.
You can also inform Grails to skip the execution of Bootstrap.groovy files with a simple property in your command:
class MyExampleCommand implements ApplicationCommand {
boolean skipBootstrap = true
boolean handle(ExecutionContext ctx) {
...
}
}For each ApplicationCommand present Grails will create a shell command and a Gradle task to invoke the ApplicationCommand. In the above example you can invoke the MyExampleCommand class using either:
$ grails my-exampleOr
$ gradle myExampleThe Grails version is all lower case hyphen separated and excludes the "Command" suffix.
The main difference between code generation scripts and ApplicationCommand instances is that the latter has full access to the Grails application state and hence can be used to perform tasks that interactive with the database, call into GORM etc.
In Grails 2.x Gant scripts could be used to perform both these tasks, from Grails 3.x+ code generation and interacting with runtime application state has been cleanly separated.
Adding a new grails-app artifact (Controller, Tag Library, Service, etc.)
A plugin can add new artifacts by creating the relevant file within the grails-app tree.
+ grails-app
+ controllers <-- additional controllers here
+ services <-- additional services here
+ etc. <-- additional XXX hereProviding Views, Templates and View resolution
When a plugin provides a controller it may also provide default views to be rendered. This is an excellent way to modularize your application through plugins. Grails' view resolution mechanism will first look for the view in the application it is installed into and if that fails will attempt to look for the view within the plugin. This means that you can override views provided by a plugin by creating corresponding GSPs in the application’s grails-app/views directory.
For example, consider a controller called BookController that’s provided by an 'amazon' plugin. If the action being executed is list, Grails will first look for a view called grails-app/views/book/list.gsp then if that fails it will look for the same view relative to the plugin.
However if the view uses templates that are also provided by the plugin then the following syntax may be necessary:
<g:render template="fooTemplate" plugin="amazon"/>Note the usage of the plugin attribute, which contains the name of the plugin where the template resides. If this is not specified then Grails will look for the template relative to the application.
Excluded Artefacts
By default Grails excludes the following files during the packaging process:
-
grails-app/conf/logback.xml -
grails-app/conf/logback-spring.xml -
grails-app/conf/application.yml -
grails-app/conf/application.groovy -
grails-app/conf/spring/resources.groovy -
Everything within
/src/test/*\* -
SCM management files within
*\*/.svn/*\*and*\*/CVS/*\*
The default UrlMappings.groovy file is not excluded, so remove any mappings that are not required for the plugin to work. You are also free to add a UrlMappings definition under a different name which will be included. For example a file called grails-app/controllers/BlogUrlMappings.groovy is fine.
The list of excludes is extensible with the pluginExcludes property:
// resources that are excluded from plugin packaging
def pluginExcludes = [
"grails-app/views/error.gsp"
]This is useful for example to include demo or test resources in the plugin repository, but not include them in the final distribution.
22.4 Evaluating Conventions
Before looking at providing runtime configuration based on conventions you first need to understand how to evaluate those conventions from a plugin. Every plugin has an implicit application variable which is an instance of the GrailsApplication interface.
The GrailsApplication interface provides methods to evaluate the conventions within the project and internally stores references to all artifact classes within your application.
Artifacts implement the GrailsClass interface, which represents a Grails resource such as a controller or a tag library. For example to get all GrailsClass instances you can do:
for (grailsClass in application.allClasses) {
println grailsClass.name
}GrailsApplication has a few "magic" properties to narrow the type of artefact you are interested in. For example to access controllers you can use:
for (controllerClass in application.controllerClasses) {
println controllerClass.name
}The dynamic method conventions are as follows:
-
*Classes- Retrieves all the classes for a particular artefact name. For exampleapplication.controllerClasses. -
get*Class- Retrieves a named class for a particular artefact. For exampleapplication.getControllerClass("PersonController") -
is*Class- Returnstrueif the given class is of the given artefact type. For exampleapplication.isControllerClass(PersonController)
The GrailsClass interface has a number of useful methods that let you further evaluate and work with the conventions. These include:
-
getPropertyValue- Gets the initial value of the given property on the class -
hasProperty- Returnstrueif the class has the specified property -
newInstance- Creates a new instance of this class. -
getName- Returns the logical name of the class in the application without the trailing convention part if applicable -
getShortName- Returns the short name of the class without package prefix -
getFullName- Returns the full name of the class in the application with the trailing convention part and with the package name -
getPropertyName- Returns the name of the class as a property name -
getLogicalPropertyName- Returns the logical property name of the class in the application without the trailing convention part if applicable -
getNaturalName- Returns the name of the property in natural terms (e.g. 'lastName' becomes 'Last Name') -
getPackageName- Returns the package name
For a full reference refer to the javadoc API.
22.5 Hooking into Runtime Configuration
Grails provides a number of hooks to leverage the different parts of the system and perform runtime configuration by convention.
Hooking into the Grails Spring configuration
The recommended way to register beans from a plugin is to override the beanRegistrar method from the Plugin class and return a Spring Framework BeanRegistrar. BeanRegistrar is a functional interface, so a closure coerced with as BeanRegistrar is all that is required — no separate class:
import org.springframework.beans.factory.BeanRegistrar
import org.springframework.beans.factory.BeanRegistry
import org.springframework.core.env.Environment
import org.springframework.web.servlet.i18n.CookieLocaleResolver
import org.springframework.web.servlet.i18n.LocaleChangeInterceptor
import org.springframework.context.support.ReloadableResourceBundleMessageSource
import grails.plugins.Plugin
class I18nGrailsPlugin extends Plugin {
def version = "0.1"
@Override
BeanRegistrar beanRegistrar() {
{ BeanRegistry registry, Environment environment ->
registry.registerBean('messageSource', ReloadableResourceBundleMessageSource) { spec ->
spec.supplier { context ->
new ReloadableResourceBundleMessageSource(basename: 'WEB-INF/grails-app/i18n/messages')
}
}
registry.registerBean('localeChangeInterceptor', LocaleChangeInterceptor) { spec ->
spec.supplier { context ->
new LocaleChangeInterceptor(paramName: 'lang')
}
}
registry.registerBean('localeResolver', CookieLocaleResolver)
} as BeanRegistrar
}
}For more involved or reusable registration you can instead implement BeanRegistrar as its own class and return an instance of it from beanRegistrar().
Plugin beans are registered before Spring Boot processes its auto-configurations, so a bean registered here takes precedence over any Spring Boot default guarded by @ConditionalOnMissingBean — there is no need to override or remove Boot’s beans afterwards.
Alternatively, plugins may override the doWithSpring method and return a closure that defines beans using the Spring Bean Builder syntax:
import org.springframework.web.servlet.i18n.CookieLocaleResolver
import org.springframework.web.servlet.i18n.LocaleChangeInterceptor
import org.springframework.context.support.ReloadableResourceBundleMessageSource
import grails.plugins.*
class I18nGrailsPlugin extends Plugin {
def version = "0.1"
Closure doWithSpring() {{->
messageSource(ReloadableResourceBundleMessageSource) {
basename = "WEB-INF/grails-app/i18n/messages"
}
localeChangeInterceptor(LocaleChangeInterceptor) {
paramName = "lang"
}
localeResolver(CookieLocaleResolver)
}}
}
doWithSpring is deprecated as of Grails 8 in favour of beanRegistrar. It continues to work — the beans it defines register at the same early point in the lifecycle — but new code should prefer the BeanRegistrar API.
|
Alternatively, you can override the doWithSpring(BeanBuilder) method and register beans directly against the supplied BeanBuilder instead of returning a closure. This avoids the closure indirection and is the recommended form for statically compiled plugins:
import org.springframework.web.servlet.i18n.CookieLocaleResolver
import org.springframework.web.servlet.i18n.LocaleChangeInterceptor
import org.springframework.context.support.ReloadableResourceBundleMessageSource
import grails.plugins.*
import grails.spring.BeanBuilder
class I18nGrailsPlugin extends Plugin {
def version = "0.1"
@Override
void doWithSpring(BeanBuilder beans) {
beans.messageSource(ReloadableResourceBundleMessageSource) {
basename = "WEB-INF/grails-app/i18n/messages"
}
beans.localeChangeInterceptor(LocaleChangeInterceptor) {
paramName = "lang"
}
beans.localeResolver(CookieLocaleResolver)
}
}A plugin may override either doWithSpring() or doWithSpring(BeanBuilder), but not both. The closure-returning doWithSpring() remains fully supported for backwards compatibility. Defining both forms in the same plugin is an error: the plugin will fail to load with an exception, since the two forms are alternatives and defining both indicates an incomplete migration between them. Consolidate the bean definitions into a single form.
Compiling Bean Definitions into a Spring Boot AutoConfiguration
beanRegistrar() and doWithSpring register beans at a single, fixed point in startup: before Spring Boot processes any AutoConfiguration. That is enough for a bean to win against a Boot default guarded by @ConditionalOnMissingBean, but it cannot express ordering relative to a specific auto-configuration — running before WebMvcAutoConfiguration but after MessageSourceAutoConfiguration, say, regardless of where those two land in Boot’s overall sort. Only a real AutoConfiguration class can declare that ordering, via @AutoConfiguration(before = …, after = …).
The GrailsBeans annotation lets you author bean definitions with DSL syntax similar to the classic Beans DSL, while compiling them at build time into genuine @Bean factory methods on a plain AutoConfiguration class — no closures, and nothing DSL-specific, survive into the compiled bytecode. Declare a class whose beans property is a closure of bean(["name", ] Type) { … } statements:
On a *GrailsPlugin.groovy plugin descriptor or an application’s Application class the annotation is implicit — a beans property is compiled automatically, the same way doWithSpring and watchedResources are conventions rather than annotated members. @GrailsBeans is written out only on a standalone class, as in the first example below. A class with no beans property is untouched.
|
import grails.compiler.beans.GrailsBeans
import org.springframework.boot.autoconfigure.AutoConfiguration
import org.springframework.boot.autoconfigure.context.MessageSourceAutoConfiguration
import org.springframework.boot.webmvc.autoconfigure.WebMvcAutoConfiguration
import org.springframework.context.MessageSource
import org.springframework.context.support.ReloadableResourceBundleMessageSource
import org.springframework.web.servlet.i18n.CookieLocaleResolver
import org.springframework.web.servlet.i18n.LocaleChangeInterceptor
@GrailsBeans
@AutoConfiguration(before = [MessageSourceAutoConfiguration, WebMvcAutoConfiguration])
class I18nBeans {
def beans = {
bean('messageSource', ReloadableResourceBundleMessageSource) {
new ReloadableResourceBundleMessageSource(basename: 'WEB-INF/grails-app/i18n/messages')
}
bean('localeResolver', CookieLocaleResolver).conditionalOnMissingBean(CookieLocaleResolver) {
new CookieLocaleResolver('locale')
}
bean('localeChangeInterceptor', LocaleChangeInterceptor) { MessageSource messageSource ->
new LocaleChangeInterceptor(paramName: 'lang')
}
}
}Each bean(["name", ] Type) statement compiles to a public method returning the declared type and annotated @Bean("name"). The generated method’s name is an implementation detail — Spring resolves the bean by its @Bean("name") value, never by the method name. It matches the bean name when that is a valid Java identifier not already taken by an existing member (declared, inherited, or defined elsewhere in the DSL — a bean named toString will not override Object.toString()); otherwise a synthesized <type>$N name (service$0, service$1, …) is used instead, so any legal, non-blank Spring bean name compiles:
-
The bean name defaults to the decapitalized simple class name when omitted.
-
The factory closure itself may be omitted when a bean is nothing but its own no-argument construction:
bean(XmlDataBindingSourceCreator)declares exactly whatbean(XmlDataBindingSourceCreator) { new XmlDataBindingSourceCreator() }does, without restating the type twice. It takes an explicit name (bean('xmlCreator', XmlDataBindingSourceCreator)) and chains the qualifiers below just as the closure form does (bean(Widget).primary().lazy()). The declared type is the one constructed, so it must be concrete and have an accessible no-argument constructor; for an interface or abstract type, give the bean a body naming the implementation. -
Leaving the closure’s body empty means the same thing for a bean with dependencies: the parameters say what is injected, and the constructor call is generated.
bean('validateableConstraintsEvaluator', DefaultConstraintEvaluatorFactoryBean).lazy() { List<MessageSource> messageSources, @Qualifier('grailsDomainClassMappingContext') MappingContext mappingContext, GrailsApplication grailsApplication → }generates a method with exactly those three parameters whose body isnew DefaultConstraintEvaluatorFactoryBean(messageSources, mappingContext, grailsApplication)— the parameters in the order written. Which constructor that selects is decided by the compiler from the parameter types, exactly as for a body you wrote yourself, so nothing here depends on the declared type’s other constructors. A body is still needed whenever construction is more than passing the parameters straight through —new ConfigProperties(grailsApplication.config), or anything followed by.tap { }. -
bean(["name", ] Type, Implementation)declares a bean as the interface its consumers inject while constructing something else:bean('calendarUserProvider', CalendarUserProvider, DefaultCalendarUserProvider)compiles to a method returningCalendarUserProviderwhose body isnew DefaultCalendarUserProvider(), taking constructor arguments from the closure parameters exactly as the bodyless form does. Naming an implementation is itself the construction, so that form takes no body; an interface with neither an implementation nor a body is an error. -
Whatever a bean constructs — a named implementation, or a body that is just a
new …expression — also settles the declared type’s type arguments wherever it binds them concretely, sobean('auditorAware', AuditorAware, SpringSecurityAuditorAware)declares anAuditorAware<Long>without repeatingLong. Where it does not — the construction is raw, its binding is itself a type variable, or the body is anything but a bare construction — the raw type stands and.typeArguments(Type, …)states them:bean('webExpressionHandler', SecurityExpressionHandler).typeArguments(FilterInvocation) { … }. This matters because Spring resolves an injection point by its full generic type, and the type inbean(…)is a class literal, on which Groovy has no syntax for writing type arguments. -
An implementation configured by properties rather than constructor arguments still needs a body, but only ever one expression: Groovy’s map construction says in one line what declare-set-return says in four, and being a construction it settles type arguments like any other —
bean('panel', Panel) { PanelService service → new PanelImpl(service: service) }. -
The same bean name may be declared by more than one
bean(…)statement — the standard Spring Boot pattern for mutually exclusive variants of one bean, such as the framework’s owngrailsUrlConverterselected by@ConditionalOnProperty— provided every declaration with the name carries its own discriminating condition (such as.annotate(ConditionalOnProperty, …)), so that at most one of them registers at runtime. Duplicating a bean name without that is a compile-time error, since Spring would keep the first definition and silently skip the rest. -
Chaining
.conditionalOnMissingBean(…)adds a@ConditionalOnMissingBeanannotation to the generated method, matching Spring Boot’s usual back-off semantics. It takes positional types (.conditionalOnMissingBean(Greeter)), the annotation’s own named attributes (.conditionalOnMissingBean(name: 'localeResolver', search: SearchStrategy.CURRENT)), or both. With no arguments at all it compiles to the bare annotation, letting Spring Boot infer the back-off type from the method’s return type — the recommended form when a bean simply backs off its own type, sincebean(AvailableLocaleResolver).conditionalOnMissingBean()already says everything.conditionalOnMissingBean(AvailableLocaleResolver)would repeat. -
Chaining
.conditionalOnMissingBeanName(…)is the name-based counterpart: "register this bean unless a bean with this bean’s name already exists". The condition’snamemember is set from the bean’s own (explicit or convention-derived) name, sobean(MessageSource).conditionalOnMissingBeanName(search: SearchStrategy.CURRENT) { … }statesmessageSourceonce and it feeds both@Beanand the condition — the two strings the explicit form has to keep in sync cannot diverge. It accepts the annotation’s other attributes (search:,ignored:, …) but rejectsname:and types, which would contradict its purpose; use.conditionalOnMissingBean(…)for those. -
Chaining
.conditionalOnBean(…)is the positive counterpart — "register this only when something else supplied that" — taking the same positional types and named attributes. It has no zero-argument form: with nothing named Spring deduces the type from the bean’s own return type, conditioning a bean on a bean of its own type already existing. Note that it matches only against bean definitions the context has already processed, which is why Spring restricts it to auto-configurations; naming a bean declared beside it in the same block is not a condition that reliably holds. -
Chaining
.conditionalOnProperty("app.offline"[, …], havingValue: "false", matchIfMissing: true)takes property names positionally or asname:/value:, and the annotation’s other attributes by name. All named properties must match, as the annotation defines. -
Chaining
.conditionalOnExpression("…")takes one SpEL string, for what the others cannot say — most often a disjunction, since.conditionalOnPropertyonly ever conjoins. Write it single-quoted in Groovy: the${…}placeholders are Spring’s, and a double-quoted string would interpolate them away at compile time. -
Chaining
.conditionalOnClass(SomeType[, "com.example.Other", …])takes types and String class names in the same positional list. The two are not interchangeable: a literal reads better and is checked by the compiler, but can only be written for a class this module compiles against, while a class that may be absent has to be named as a String or the reference is itself what fails — which is why Spring’s own annotation carries bothvalueandname. Mind where the condition goes: Spring reads it from the bytecode before loading anything, but a@Beanmethod’s parameter and return types are resolved when the configuration class is parsed, so guarding a method whose own signature names the absent class is not reliably safe. Usegroup(…)below for that. -
Chaining
.conditionalOnGrailsEnv("development"[, …])registers the bean only in those Grails environments. -
Chaining
.aliases("legacyName"[, …])gives the bean additional names, which Spring resolves to the same singleton. The canonical name stays the onebean(…)states — it is what the generated method is named after and what duplicate-name validation runs against — so aliases are their own call rather than more arguments there. The case they exist for is a migration: something reachable under an old name that must stay reachable while its callers move. -
Chaining
.primary(),.lazy(), and/or.scope("name")adds@Primary,@Lazy, and@Scope("name")respectively..scope(…)also takes the annotation’s other attributes by name —proxyModebeing the one to know about, since a session- or request-scoped bean injected into a singleton needs.scope('session', proxyMode: ScopedProxyMode.TARGET_CLASS), or the singleton captures one scope instance for the lifetime of the application and serves it to everyone. -
Chaining
.staticMethod()makes the generated factory methodstatic— required forBeanFactoryPostProcessorandBeanPostProcessorbeans, which must be creatable without instantiating their declaring configuration class, and rejected at compile time when such a bean is declared without it. A static bean’s closure cannot referencefield(…)ormethod(…)members, since those are instance members; under@CompileStaticthat mistake is a compile error. -
Chaining
.annotate(AnnotationType[, attr: value, …])attaches any other annotation directly, with as many attributes as it declares — an array-valued one takes either a list or a single value that widens into a one-element array, exactly as it would written out (.annotate(DependsOn, value: 'other')). Naming an annotation a qualifier already attached is not a collision but a merge into it, which is the only way to reach attributes no qualifier sets:.annotate(Bean, destroyMethod: '')is how a bean wrapping a client it does not own stops Spring inferring and callingclose()on it — any@Conditional*(built-in or a customCondition),@Order,@DependsOn, or anything else a hand-written@Beanmethod could carry. It’s repeatable, so several different annotations can be chained onto the same bean:bean('special', Special).annotate(Order, value: 1).annotate(ConditionalOnProperty, prefix: 'myapp', name: 'enabled', havingValue: 'true') { … }. -
Any combination of the above can be chained together, in any order — for example
bean('slowGreeter', SlowGreeter).lazy().scope('prototype') { … }. -
Typed closure parameters (
{ MessageSource messageSource → … }) become the generated method’s parameters, so other beans are injected the same way a hand-written@Beanmethod would declare them — and a parameter-level annotation such as{ @Qualifier('special') Greeter g → … }carries straight through too, since the closure’s own parameters become the generated method’s parameters directly.
A member’s name may be a String literal or any compile-time String constant — a bare reference to one declared on the same class, a qualified Other.CONSTANT, or a concatenation of those. Bean names are often already constants, because something else looks the bean up by one, and the DSL being the single place that could not say the constant’s name would mean writing the string twice.
Two more statement kinds can appear inside beans { } alongside bean(…), for state and logic shared across bean methods — the same role a hand-written @Configuration class’s own fields and private methods play:
-
field(["name", ] Type), optionally chained with.value(…)and/or (repeatably).annotate(AnnotationType[, attr: value, …]), declares a private field on the generated class. The usual case is injected configuration, and.value(…)covers it directly:field('encoding', String).value('grails.views.gsp.encoding', 'UTF-8')compiles to@Value("${grails.views.gsp.encoding:UTF-8}"). The two-argument form takes a config key and default — and because the DSL builds the placeholder itself, the key may be a bare constant reference (.value(Settings.GSP_VIEW_ENCODING, 'UTF-8')), the one shape a directly-written annotation value can’t accept. The one-argument form takes a bare config key with no default —.value('grails.web.linkGenerator.useCache')compiles to@Value("${grails.web.linkGenerator.useCache}")— while a string already containing a${…}placeholder or a{…}SpEL expression passes through verbatim:.value('{T(java.lang.Runtime).getRuntime().availableProcessors()}'). -
method(["name", ] Type) { … }, chainable with.annotate(…)only (.value(…)is field-specific), declares a private helper method the same waybean(…)declares a public one — typed closure parameters become method parameters, and the closure body becomes the method body.
Both are ordinary private members of the generated class, so a bean(…) closure reads a field(…) or calls a method(…) exactly like a hand-written @Bean method would reference a sibling field or method on its own class:
field('suffix', String).value('myapp.greeting-suffix', '!')
method('buildGreeting', String) { String name ->
"Hello, ${name}${suffix}"
}
bean('greeting', Greeting) {
new Greeting(buildGreeting('World'))
}A third statement kind, group(["name"]).<conditions> { … }, declares a nested static @Configuration(proxyBeanMethods = false) class holding the declarations in its body, with the chained conditions on the class rather than on each bean:
group('imageServing').conditionalOnClass(name: 'com.example.ManagedFileAccessProvider') {
bean('roomFileAccessProvider', RoomFileAccessProvider)
bean('chatFileAccessProvider', ChatFileAccessProvider)
}This is the shape real auto-configurations take — Spring Boot’s own JacksonAutoConfiguration carries four nested @ConditionalOnClass configuration classes — and it is the only shape that works for a bean whose own signature names a class that may be absent. A condition is read from the bytecode before anything is loaded, but a @Bean method’s parameter and return types are resolved when its configuration class is parsed, so guarding such a bean on the method is not reliably safe; moving it into a group moves the guard onto a class that is never parsed when the condition fails. Spring finds the nested class unaided, since ConfigurationClassParser processes a configuration class’s member classes. Groups take the condition qualifiers and .annotate(…); they do not nest, and the closure takes no parameters, since it declares a class rather than a bean.
Diagnostics
Three mistakes the DSL used to accept are now compile errors, because each of them fails at runtime in a way that is hard to trace back:
-
A
beansclosure containing any top-levelbean/field/methodcall must be entirely such calls. A stray statement among real declarations — a typo in a call name, or anifwrapped around some beans — used to make the whole block register nothing, silently, with the failure surfacing far away as beans that are simply absent. To register a bean conditionally, put the condition on the bean rather than around it; for state or logic shared between beans, usefield(…)ormethod(…). Abeansclosure containing no such calls at all is not the DSL and is left alone, as before. -
Calling one bean from another does not return the registered singleton unless the host is a proxied
@Configurationclass — and the DSL’s usual hosts are not:@AutoConfigurationis@Configuration(proxyBeanMethods = false), a generated plugin sibling carries exactly that, and anApplicationclass is a configuration source without being annotated at all. Such a call silently constructs a second instance, so it is rejected; inject the bean as a closure parameter instead. A static@Beanmethod is never intercepted even on a proxied class, so.staticMethod()beans are checked everywhere. -
A
BeanFactoryPostProcessororBeanPostProcessorbean must be.staticMethod().
|
An anonymous inner class written in a bean body keeps the class the |
Seeing what a block compiled to
The property is read by the transform, which runs inside the process that runs the Groovy compiler — and GroovyCompile forks by default, so ./gradlew build -Dgrails.beans.dsl.dumpdir=… sets it on the Gradle client and daemon, not on the compiler, and nothing is written. Set it where the compiler will see it:
tasks.withType(GroovyCompile).configureEach {
groovyOptions.forkOptions.jvmArgs += '-Dgrails.beans.dsl.dumpdir=/absolute/path/to/beans'
}An absolute path is the safe form, since a relative one resolves against that worker process’s working directory rather than the project’s.
Building with the property set writes one <qualified name>.beans.txt per generated class — not per host: a plugin descriptor’s beans are filed under its sibling’s name, and each group(…) writes its own file under the nested class’s name, holding only the beans declared inside it. Each lists the generated members — bean names, the annotations the qualifiers became, modifiers, declared types with any type arguments they ended up carrying, and parameter annotations. Bodies are omitted, being the closure bodies from the source. Nothing is written unless the property is set.
Because the result is an ordinary AutoConfiguration class, it must be registered the same way any Spring Boot auto-configuration is: listed in META-INF/spring/org.springframework.boot.autoconfigure.AutoConfiguration.imports. The compiler writes that entry for you. The class is generated rather than written, so its name is one only the compiler knows — leaving the registration to be typed by hand made a plugin whose beans are silently never registered the ordinary consequence of not knowing the class exists.
A module that keeps the imports file by hand at src/main/resources/META-INF/spring/org.springframework.boot.autoconfigure.AutoConfiguration.imports keeps it, and nothing is generated beside it: two copies of the same resource cannot both go into the jar, and folding the hand-authored entries into a copy under the build directory would lose them as soon as anyone deleted the file they were written in. Such a module is warned at compile time when the generated class is missing from its file. Deleting that file is what opts in, and is safe once it lists nothing that is not generated — a module may still need it for entries no compilation can discover, such as a class from another jar, one annotated with a composed annotation, or one carrying no annotation at all, the imports file being the registration and @AutoConfiguration only supplying ordering.
That conventional path is the only one the compiler can look in, since a source set’s resource directories are a build-tool notion rather than something the compiler is told — the same reason META-INF/grails.factories is read from a fixed location. A module that relocates its resource directories keeps a file this cannot see, and gets a second copy generated that the build reports as two resources at one path.
A standalone @GrailsBeans class — one that is neither a plugin descriptor nor an Application — is a source file you can see, so it is registered by hand like any other auto-configuration.
@GrailsBeans does not require extending Plugin at all — it produces a plain Spring Boot AutoConfiguration, so it can be used by any Spring Boot module, not just a Grails plugin descriptor. Applications can use it too, including directly on the Application class — where no imports-file registration is needed, since Spring Boot processes the application class itself — see Configuring Additional Beans. Within a plugin, reach for it specifically when a bean’s registration needs to be ordered against a particular other auto-configuration; otherwise beanRegistrar() remains the recommended way to register beans from a Plugin.
|
The DSL still covers a narrower surface than doWithSpring(BeanBuilder):
-
Each top-level statement inside
beans { }must be exactlybean(…),field(…), ormethod(…), with their respective chaining — anif, aforloop, or any other imperative Groovy directly insidebeans { }is a compile-time error, not a runtime one. Note that this is about the DSL’s own top-level statements, not the bodies ofbean(…)/method(…)closures themselves, which accept arbitrary Groovy, subject only to what is reachable from the generated class (see the last bullet below) — andfield(…)/method(…)already cover the common reasons to want shared state or logic in the first place. -
.annotate(…)attribute values must resolve to a constant at compile time: a literal, a reference to astatic finalfield, or a concatenation of those..annotate(Value, value: '${' + Settings.I18N_LOCALE_RESOLVER + ':session}')folds,@CompileStaticincluded, the same way.value(…)folds its arguments — the resolution happens while the DSL is compiled, before@CompileStaticruns, so it makes no difference whether the constant is declared on an interface or on a class. What cannot be used is anything that is not a compile-time constant: a method call, a local variable, a value read from configuration. An attribute that itself takes a nested annotation as its value isn’t supported. -
Dependencies on other beans are expressed through typed closure parameters, autowired by type; there is no
ref('beanName')lookup. Where the type alone is ambiguous, select by name with a parameter annotation —@Qualifier('beanName')— asDomainClassGrailsPlugindoes with@Qualifier('grailsDomainClassMappingContext') MappingContext mappingContext. -
A
bean(…)/method(…)closure body cannot reach members of thePluginit was written in. The body is relocated verbatim onto the generated sibling, which extendsObjectand holds no reference to the plugin instance, so readingconfig,grailsApplicationorapplicationContextfrom a body fails — at compile time under@CompileStatic, and otherwise not until Spring invokes the factory method during startup. This is the one habit worth unlearning when converting fromdoWithSpring, whose closures can read plugin state freely: take injected configuration throughfield(…), and aGrailsApplication(or any other bean) through a typed closure parameter.
Using @GrailsBeans directly on a *GrailsPlugin.groovy class
@GrailsBeans may also be applied directly to a Plugin subclass, so bean definitions can live in the familiar *GrailsPlugin.groovy file instead of a separate class:
import grails.compiler.beans.GrailsBeans
import grails.plugins.Plugin
import grails.util.GrailsUtil
import org.springframework.boot.autoconfigure.AutoConfiguration
import org.springframework.boot.autoconfigure.context.MessageSourceAutoConfiguration
import org.springframework.boot.webmvc.autoconfigure.WebMvcAutoConfiguration
import org.springframework.context.MessageSource
import org.springframework.context.support.ReloadableResourceBundleMessageSource
import org.springframework.web.servlet.i18n.CookieLocaleResolver
import org.springframework.web.servlet.i18n.LocaleChangeInterceptor
@GrailsBeans
@AutoConfiguration(before = [MessageSourceAutoConfiguration, WebMvcAutoConfiguration])
class I18nGrailsPlugin extends Plugin {
def version = GrailsUtil.getGrailsVersion()
def beans = {
bean('messageSource', ReloadableResourceBundleMessageSource) {
new ReloadableResourceBundleMessageSource(basename: 'WEB-INF/grails-app/i18n/messages')
}
bean('localeResolver', CookieLocaleResolver).conditionalOnMissingBean(CookieLocaleResolver) {
new CookieLocaleResolver('locale')
}
bean('localeChangeInterceptor', LocaleChangeInterceptor) { MessageSource messageSource ->
new LocaleChangeInterceptor(paramName: 'lang')
}
}
@Override
void doWithApplicationContext() {
// other Plugin lifecycle hooks work exactly as they do without @GrailsBeans
}
}A Plugin subclass is instantiated by DefaultGrailsPlugin via plain reflection, never as a Spring bean, so it cannot itself carry @Bean methods or a meaningful @AutoConfiguration/@Conditional* annotation. When @GrailsBeans is applied to a Plugin subclass, the compiled @Bean methods land on a generated sibling class instead, in the plugin’s own package by default. Its name follows the Grails plugin-descriptor convention: a class named *GrailsPlugin swaps that suffix for AutoConfiguration — the example above produces both I18nGrailsPlugin (with beans stripped, doWithApplicationContext untouched) and a separate I18nAutoConfiguration class carrying the three @Bean methods, exactly the name the hand-written class it replaces would have had. Any other class name appends AutoConfiguration (FooPlugin → FooPluginAutoConfiguration). Everything else about the plugin class — version, watchedResources, doWithApplicationContext, onChange, and so on — works exactly as it does without @GrailsBeans.
Every annotation on the plugin class that only makes sense on whatever Spring Boot actually evaluates moves onto that sibling too, since none of them has any effect on a class Spring never processes as a bean: @AutoConfiguration, the whole @Conditional* family, @Import/@ImportAutoConfiguration/@ImportResource, @ComponentScan, @EnableConfigurationProperties, @PropertySource/@PropertySources, and @AutoConfigureOrder/Before/After. This also recognises a composed annotation built on top of any of these — for example a project-specific @ConditionalOnFeature that is itself meta-annotated with Spring Boot’s @ConditionalOnProperty (rather than @Conditional directly), or a custom @EnableSomething meta-annotated with @Import — so it isn’t limited to Spring’s own built-in annotation types. An annotation outside that set (one neither listed nor meta-annotated with anything listed) stays on the plugin class, where Spring never sees it — for those, name them explicitly with @GrailsBeans(moveAnnotations = [SomeVendorAnnotation]) and they move like the recognised ones do.
The @AutoConfiguration annotation is required whenever @GrailsBeans is applied to a Plugin subclass, even with no before=/after=: without it, the generated sibling would carry no annotation telling Spring Boot to process it, and its beans would silently never be registered. Omitting it is a compile-time error rather than a silent runtime gap.
Set @GrailsBeans(autoConfigurationName = "…") to override the derived name — useful when converting an existing, already-public @AutoConfiguration class whose name doesn’t follow the convention, since other modules may reference it by name (exclude =, before=/after= ordering, AutoConfiguration.imports) or import it directly in tests.
A bare identifier renames the sibling within the plugin’s own package. What those references actually name is the qualified name, though, and a plugin descriptor conventionally sits in the package its implementation classes sit beneath rather than alongside them — so the class being replaced is frequently in another package. Give a qualified name and the sibling is generated there instead:
package com.example
@GrailsBeans(autoConfigurationName = 'com.example.web.ExampleAutoConfiguration')
@AutoConfiguration
class ExampleGrailsPlugin extends Plugin {
def beans = { /* ... */ }
}Each part of the name must be a valid Java identifier and none may be a keyword; anything else is a compile-time error. A name containing a dot is taken as written — it is never resolved relative to the plugin’s package. Name one of the plugin’s own packages: generating into a package the plugin does not otherwise own splits that package across two jars, which a modular or native-image consumer pays for.
@GrailsBeans compiles cleanly alongside @CompileStatic/@GrailsCompileStatic on the same class. The beans closure is rewritten into real @Bean methods during CompilePhase.CANONICALIZATION, which runs before static type checking (CompilePhase.INSTRUCTION_SELECTION) ever examines the class, so the type checker only ever sees the generated, concretely-typed methods — never the bean(…) DSL calls themselves.
On both the standalone-class and Plugin-subclass forms, the generated @Bean methods are genuinely statically compiled whenever @CompileStatic or @GrailsCompileStatic is present — verified directly by disassembling the bytecode (no invokedynamic call sites). The Plugin form requires one additional step internally: because its sibling class is generated after Groovy discovers local annotation transforms, @GrailsBeans invokes Groovy’s static-compilation transform directly after generating the sibling’s methods.
Customizing the Servlet Environment
In previous versions of Grails it was possible to dynamically modify the generated web.xml. From Grails 3.x+ there is no web.xml file and it is not possible to programmatically modify the web.xml file anymore.
However, it is possible to perform the most commons tasks of modifying the Servlet environment in Grails 3.x and above.
Adding New Servlets
If you want to add a new Servlet instance the simplest way is simply to define a new Spring bean in the doWithSpring method:
Closure doWithSpring() {{->
myServlet(MyServlet)
}}If you need to customize the servlet you can use Spring Boot’s ServletRegistrationBean:
Closure doWithSpring() {{->
myServlet(ServletRegistrationBean, new MyServlet(), "/myServlet/*") {
loadOnStartup = 2
}
}}Adding New Servlet Filters
Just like Servlets, the simplest way to configure a new filter is to simply define a Spring bean:
Closure doWithSpring() {{->
myFilter(MyFilter)
}}However, if you want to control the order of filter registrations you will need to use Spring Boot’s FilterRegistrationBean:
myFilter(FilterRegistrationBean) {
filter = bean(MyFilter)
urlPatterns = ['/*']
order = Ordered.HIGHEST_PRECEDENCE
}
Grails' internal registered filters (GrailsWebRequestFilter, HiddenHttpMethodFilter etc.) are defined by incrementing HIGHEST_PRECEDENCE by 10 thus allowing several filters to be inserted before or between Grails' filters.
|
Doing Post Initialisation Configuration
Sometimes it is useful to be able do some runtime configuration after the Spring ApplicationContext has been built. In this case you can define a doWithApplicationContext closure property.
class SimplePlugin extends Plugin{
def name = "simple"
def version = "1.1"
@Override
void doWithApplicationContext() {
def sessionFactory = applicationContext.sessionFactory
// do something here with session factory
}
}22.6 Adding Methods at Compile Time
Grails makes it easy to add new traits to existing artefact types from a plugin. For example say you wanted to add methods for manipulating dates to controllers. This can be done by defining a trait in src/main/groovy:
package myplugin
@Enhances("Controller")
trait DateTrait {
Date currentDate() {
return new Date()
}
}The @Enhances annotation defines the types of artefacts that the trait should be applied to.
As an alternative to using the @Enhances annotation above, you can implement a TraitInjector to tell Grails which artefacts you want to inject the trait into at compile time:
package myplugin
@CompileStatic
class ControllerTraitInjector implements TraitInjector {
@Override
Class getTrait() {
SomeTrait
}
@Override
String[] getArtefactTypes() {
['Controller'] as String[]
}
}The above TraitInjector will add the SomeTrait to all controllers. The getArtefactTypes method defines the types of artefacts that the trait should be applied to.
Applying traits conditionally
A TraitInjector implementation can also implement the SupportsClassNode interface to apply traits to only those artefacts which satisfy a custom requirement.
For example, if a trait should only be applied if the target artefact class has a specific annotation, it can be done as below
package myplugin
@CompileStatic
class AnnotationBasedTraitInjector implements TraitInjector, SupportsClassNode {
@Override
Class getTrait() {
SomeTrait
}
@Override
String[] getArtefactTypes() {
['Controller'] as String[]
}
boolean supports(ClassNode classNode) {
return GrailsASTUtils.hasAnnotation(classNode, SomeAnnotation)
}
}Above TraitInjector will add the SomeTrait to only those controllers which has the SomeAnnotation declared.
The framework discovers trait injectors by way of a META-INF/grails.factories descriptor that is in the .jar file. This descriptor is automatically generated. The descriptor generated for the code shown above would look like this:
#Grails Factories File
grails.compiler.traits.TraitInjector=
myplugin.ControllerTraitInjector,myplugin.DateTraitTraitInjector| Due to formatting issues, above code snippet includes a line break after equal sign. |
That file is generated automatically and added to the .jar file at build time. If for any reason the application defines its own grails.factories file at src/main/resources/META-INF/grails.factories, it is important that the trait injectors be explicitly defined in that file. The auto-generated metadata is only reliable if the application does not define its own src/main/resources/META-INF/grails.factores file.
22.7 Adding Dynamic Methods at Runtime
The Basics
Grails plugins let you register dynamic methods with any Grails-managed or other class at runtime. This work is done in a doWithDynamicMethods method.
Note that Grails 3.x and above features newer features such as traits that are usable from code compiled with CompileStatic. It is recommended that dynamic behavior is only added for cases that are not possible with traits.
|
class ExamplePlugin extends Plugin {
void doWithDynamicMethods() {
for (controllerClass in grailsApplication.controllerClasses) {
controllerClass.metaClass.myNewMethod = {-> println "hello world" }
}
}
}In this case we use the implicit application object to get a reference to all of the controller classes' MetaClass instances and add a new method called myNewMethod to each controller. If you know beforehand the class you wish the add a method to you can simply reference its metaClass property.
For example we can add a new method swapCase to java.lang.String:
class ExamplePlugin extends Plugin {
@Override
void doWithDynamicMethods() {
String.metaClass.swapCase = {->
def sb = new StringBuilder()
delegate.each {
sb << (Character.isUpperCase(it as char) ?
Character.toLowerCase(it as char) :
Character.toUpperCase(it as char))
}
sb.toString()
}
assert "UpAndDown" == "uPaNDdOWN".swapCase()
}
}Interacting with the ApplicationContext
The doWithDynamicMethods closure gets passed the Spring ApplicationContext instance. This is useful as it lets you interact with objects within it. For example if you were implementing a method to interact with Hibernate you could use the SessionFactory instance in combination with a HibernateTemplate:
import org.springframework.orm.hibernate3.HibernateTemplate
class ExampleHibernatePlugin extends Plugin{
void doWithDynamicMethods() {
for (domainClass in grailsApplication.domainClasses) {
domainClass.metaClass.static.load = { Long id->
def sf = applicationContext.sessionFactory
def template = new HibernateTemplate(sf)
template.load(delegate, id)
}
}
}
}Also because of the autowiring and dependency injection capability of the Spring container you can implement more powerful dynamic constructors that use the application context to wire dependencies into your object at runtime:
class MyConstructorPlugin {
void doWithDynamicMethods()
for (domainClass in grailsApplication.domainClasses) {
domainClass.metaClass.constructor = {->
return applicationContext.getBean(domainClass.name)
}
}
}
}Here we actually replace the default constructor with one that looks up prototyped Spring beans instead!
22.8 Participating in Auto Reload Events
Monitoring Resources for Changes
Often it is valuable to monitor resources for changes and perform some action when they occur. This is how Grails implements advanced reloading of application state at runtime. For example, consider this simplified snippet from the Grails ServicesPlugin:
class ServicesGrailsPlugin extends Plugin {
...
def watchedResources = "file:./grails-app/services/**/*Service.groovy"
...
void onChange( Map<String, Object> event) {
if (event.source) {
def serviceClass = grailsApplication.addServiceClass(event.source)
def serviceName = "${serviceClass.propertyName}"
beans {
"$serviceName"(serviceClass.getClazz()) { bean ->
bean.autowire = true
}
}
}
}
}First it defines watchedResources as either a String or a List of strings that contain either the references or patterns of the resources to watch. If the watched resources specify a Groovy file, when it is changed it will automatically be reloaded and passed into the onChange closure in the event object.
The event object defines a number of useful properties:
-
event.source- The source of the event, either the reloadedClassor a SpringResource -
event.ctx- The SpringApplicationContextinstance -
event.plugin- The plugin object that manages the resource (usuallythis) -
event.application- TheGrailsApplicationinstance -
event.manager- TheGrailsPluginManagerinstance
These objects are available to help you apply the appropriate changes based on what changed. In the "Services" example above, a new service bean is re-registered with the ApplicationContext when one of the service classes changes.
Influencing Other Plugins
In addition to reacting to changes, sometimes a plugin needs to "influence" another.
Take for example the Services and Controllers plugins. When a service is reloaded, unless you reload the controllers too, problems will occur when you try to auto-wire the reloaded service into an older controller Class.
To get around this, you can specify which plugins another plugin "influences". This means that when one plugin detects a change, it will reload itself and then reload its influenced plugins. For example consider this snippet from the ServicesGrailsPlugin:
def influences = ['controllers']Observing other plugins
If there is a particular plugin that you would like to observe for changes but not necessary watch the resources that it monitors you can use the "observe" property:
def observe = ["controllers"]In this case when a controller is changed you will also receive the event chained from the controllers plugin.
It is also possible for a plugin to observe all loaded plugins by using a wildcard:
def observe = ["*"]The Logging plugin does exactly this so that it can add the log property back to any artefact that changes while the application is running.
22.9 Understanding Plugin Load Order
Controlling Plugin Dependencies
Plugins often depend on the presence of other plugins and can adapt depending on the presence of others. This is implemented with two properties. The first is called dependsOn. For example, take a look at this snippet from the Hibernate plugin:
class HibernateGrailsPlugin {
def version = "1.0"
def dependsOn = [dataSource: "1.0",
domainClass: "1.0",
i18n: "1.0",
core: "1.0"]
}The Hibernate plugin is dependent on the presence of four plugins: the dataSource, domainClass, i18n and core plugins.
The dependencies will be loaded before the Hibernate plugin and if all dependencies do not load, then the plugin will not load.
The dependsOn property also supports a mini expression language for specifying version ranges. A few examples of the syntax can be seen below:
def dependsOn = [foo: "* > 1.0"]
def dependsOn = [foo: "1.0 > 1.1"]
def dependsOn = [foo: "1.0 > *"]When the wildcard * character is used it denotes "any" version. The expression syntax also excludes any suffixes such as -BETA, -ALPHA etc. so for example the expression "1.0 > 1.1" would match any of the following versions:
-
1.1
-
1.0
-
1.0.1
-
1.0.3-SNAPSHOT
-
1.1-BETA2
Controlling Load Order
Using dependsOn establishes a "hard" dependency in that if the dependency is not resolved, the plugin will give up and won’t load. It is possible though to have a weaker dependency using the loadAfter and loadBefore properties:
def loadAfter = ['controllers']Here the plugin will be loaded after the controllers plugin if it exists, otherwise it will just be loaded. The plugin can then adapt to the presence of the other plugin, for example the Hibernate plugin has this code in its doWithSpring closure:
if (manager?.hasGrailsPlugin("controllers")) {
openSessionInViewInterceptor(OpenSessionInViewInterceptor) {
flushMode = HibernateAccessor.FLUSH_MANUAL
sessionFactory = sessionFactory
}
grailsUrlHandlerMapping.interceptors << openSessionInViewInterceptor
}Here the Hibernate plugin will only register an OpenSessionInViewInterceptor if the controllers plugin has been loaded. The manager variable is an instance of the GrailsPluginManager interface and it provides methods to interact with other plugins.
You can also use the loadBefore property to specify one or more plugins that your plugin should load before:
def loadBefore = ['rabbitmq']Scopes and Environments
It’s not only plugin load order that you can control. You can also specify which environments your plugin should be loaded in and which scopes (stages of a build). Simply declare one or both of these properties in your plugin descriptor:
def environments = ['development', 'test', 'myCustomEnv']In this example, the plugin will only load in the 'development', 'test' and 'myCustomEnv' environments.
The properties can be one of:
-
a string - a sole inclusion
-
a list - a list of environments to include
-
a map - for full control, with 'includes' and/or 'excludes' keys that can have string or list values
For example,
def environments = "test"will only include the plugin in the test environment, whereas
def environments = ["development", "test"]will include it in both the development and test environments. Finally,
def environments = [includes: ["development", "test"]]will do the same thing.
22.10 The Artefact API
You should by now understand that Grails has the concept of artefacts: special types of classes that it knows about and can treat differently from normal Groovy and Java classes, for example by enhancing them with extra properties and methods. Examples of artefacts include domain classes and controllers. What you may not be aware of is that Grails allows application and plugin developers access to the underlying infrastructure for artefacts, which means you can find out what artefacts are available and even enhance them yourself. You can even provide your own custom artefact types.
22.10.1 Asking About Available Artefacts
As a plugin developer, it can be important for you to find out about what domain classes, controllers, or other types of artefact are available in an application. For example, the Elasticsearch plugin needs to know what domain classes exist so it can check them for any searchable properties and index the appropriate ones. So how does it do it? The answer lies with the grailsApplication object, and instance of GrailsApplication that’s available automatically in controllers and GSPs and can be injected everywhere else.
The grailsApplication object has several important properties and methods for querying artefacts. Probably the most common is the one that gives you all the classes of a particular artefact type:
for (cls in grailsApplication.<artefactType>Classes) {
...
}In this case, artefactType is the property name form of the artefact type. With core Grails you have:
-
domain
-
controller
-
tagLib
-
service
-
codec
-
bootstrap
-
urlMappings
So for example, if you want to iterate over all the domain classes, you use:
for (cls in grailsApplication.domainClasses) {
...
}and for URL mappings:
for (cls in grailsApplication.urlMappingsClasses) {
...
}You need to be aware that the objects returned by these properties are not instances of Class. Instead, they are instances of GrailsClass that has some particularly useful properties and methods, including one for the underlying Class:
-
shortName- the class name of the artefact without the package (equivalent ofClass.simpleName). -
logicalPropertyName- the artefact name in property form without the 'type' suffix. SoMyGreatControllerbecomes 'myGreat'. -
isAbstract()- a boolean indicating whether the artefact class is abstract or not. -
getPropertyValue(name)- returns the value of the given property, whether it’s a static or an instance one. This works best if the property is initialised on declaration, e.g.static transactional = true.
The artefact API also allows you to fetch classes by name and check whether a class is an artefact:
-
get<type>Class(String name)
-
is<type>Class(Class clazz)
The first method will retrieve the GrailsClass instance for the given name, e.g. 'MyGreatController'. The second will check whether a class is a particular type of artefact. For example, you can use grailsApplication.isControllerClass(org.example.MyGreatController) to check whether MyGreatController is in fact a controller.
22.10.2 Adding Your Own Artefact Types
Plugins can easily provide their own artefacts so that they can easily find out what implementations are available and take part in reloading. All you need to do is create an ArtefactHandler implementation and register it in your main plugin class:
class MyGrailsPlugin {
def artefacts = [ org.somewhere.MyArtefactHandler ]
...
}The artefacts list can contain either handler classes (as above) or instances of handlers.
So, what does an artefact handler look like? Well, put simply it is an implementation of the ArtefactHandler interface. To make life a bit easier, there is a skeleton implementation that can readily be extended: ArtefactHandlerAdapter.
In addition to the handler itself, every new artefact needs a corresponding wrapper class that implements GrailsClass. Again, skeleton implementations are available such as AbstractInjectableGrailsClass, which is particularly useful as it turns your artefact into a Spring bean that is auto-wired, just like controllers and services.
The best way to understand how both the handler and wrapper classes work is to look at the Quartz plugin:
Another example is the Shiro plugin which adds a realm artefact.
23 Grails and Spring
This section is for advanced users and those who are interested in how Grails integrates with and builds on the Spring Framework. It is also useful for plugin developers considering doing runtime configuration Grails.
23.1 Configuring Additional Beans
Using the Spring Bean DSL
You can easily register new (or override existing) beans by configuring them in grails-app/conf/spring/resources.groovy which uses the Grails Spring DSL. Beans are defined inside a beans property (a Closure):
beans = {
// beans here
}As a simple example you can configure a bean with the following syntax:
import my.company.MyBeanImpl
beans = {
myBean(MyBeanImpl) {
someProperty = 42
otherProperty = "blue"
}
}Once configured, the bean can be auto-wired into Grails artifacts and other classes that support dependency injection (for example BootStrap.groovy and integration tests) by declaring a public field whose name is your bean’s name (in this case myBean):
class ExampleController {
def myBean
...
}Using the DSL has the advantage that you can mix bean declarations and logic, for example based on the environment:
import grails.util.Environment
import my.company.mock.MockImpl
import my.company.MyBeanImpl
beans = {
switch(Environment.current) {
case Environment.PRODUCTION:
myBean(MyBeanImpl) {
someProperty = 42
otherProperty = "blue"
}
break
case Environment.DEVELOPMENT:
myBean(MockImpl) {
someProperty = 42
otherProperty = "blue"
}
break
}
}The GrailsApplication object can be accessed with the application variable and can be used to access the Grails configuration (amongst other things):
import grails.util.Environment
import my.company.mock.MockImpl
import my.company.MyBeanImpl
beans = {
if (application.config.getProperty('my.company.mockService')) {
myBean(MockImpl) {
someProperty = 42
otherProperty = "blue"
}
} else {
myBean(MyBeanImpl) {
someProperty = 42
otherProperty = "blue"
}
}
}
If you define a bean in resources.groovy with the same name as one previously registered by Grails or an installed plugin, your bean will replace the previous registration. This is a convenient way to customize behavior without resorting to editing plugin code or other approaches that would affect maintainability.
|
Using XML
Beans can also be configured using a grails-app/conf/spring/resources.xml. In earlier versions of Grails this file was automatically generated for you by the run-app script, but the DSL in resources.groovy is the preferred approach now so it isn’t automatically generated now. But it is still supported - you just need to create it yourself.
This file is typical Spring XML file and the Spring documentation has an excellent reference on how to configure Spring beans.
The myBean bean that we configured using the DSL would be configured with this syntax in the XML file:
<bean id="myBean" class="my.company.MyBeanImpl">
<property name="someProperty" value="42" />
<property name="otherProperty" value="blue" />
</bean>Like the other bean it can be auto-wired into any class that supports dependency injection:
class ExampleController {
def myBean
}Referencing Existing Beans
Beans declared in resources.groovy or resources.xml can reference other beans by convention. For example if you had a BookService class its Spring bean name would be bookService, so your bean would reference it like this in the DSL:
beans = {
myBean(MyBeanImpl) {
someProperty = 42
otherProperty = "blue"
bookService = ref("bookService")
}
}or like this in XML:
<bean id="myBean" class="my.company.MyBeanImpl">
<property name="someProperty" value="42" />
<property name="otherProperty" value="blue" />
<property name="bookService" ref="bookService" />
</bean>The bean needs a public setter for the bean reference (and also the two simple properties), which in Groovy would be defined like this:
package my.company
class MyBeanImpl {
Integer someProperty
String otherProperty
BookService bookService
}or in Java like this:
package my.company;
class MyBeanImpl {
private BookService bookService;
private Integer someProperty;
private String otherProperty;
public void setBookService(BookService theBookService) {
this.bookService = theBookService;
}
public void setSomeProperty(Integer someProperty) {
this.someProperty = someProperty;
}
public void setOtherProperty(String otherProperty) {
this.otherProperty = otherProperty;
}
}Using ref (in XML or the DSL) is very powerful since it configures a runtime reference, so the referenced bean doesn’t have to exist yet. As long as it’s in place when the final application context configuration occurs, everything will be resolved correctly.
For a full reference of the available beans see the plugin reference in the reference guide.
Defining Beans at Compile Time with @GrailsBeans
resources.groovy and doWithSpring wire their beans at runtime, every time the application starts. The GrailsBeans annotation is a compile-time alternative: a similar closure style of bean definition, compiled at build time into real @Bean factory methods — no closures, and nothing DSL-specific, survive into the bytecode.
@GrailsBeans is not plugin-specific. It works on any class Spring Boot processes as a configuration source — including the application’s own Application class, since Spring Boot reads @Bean methods directly off the class it is launched with. Declare a beans closure whose statements construct and return each bean:
import grails.boot.GrailsApp
import grails.boot.config.GrailsAutoConfiguration
import my.company.MyBeanImpl
class Application extends GrailsAutoConfiguration {
static void main(String[] args) {
GrailsApp.run(Application, args)
}
def beans = {
bean(MyService)
bean('myBean', MyBeanImpl) {
new MyBeanImpl(someProperty: 42, otherProperty: 'blue')
}
}
}Both the name and the body are optional. bean(MyService) declares a bean named myService — the type’s decapitalized simple name — that is simply new MyService(); give it a name only when the type does not produce the one you want, and a body only when there is something to say beyond constructing it.
No annotation is required on the Application class, or on a *GrailsPlugin.groovy plugin descriptor: a beans property on either is compiled automatically, in the same way doWithSpring and watchedResources are conventions rather than annotated members. @GrailsBeans is only needed on a class that is neither — a standalone @AutoConfiguration class, which must also be listed in META-INF/spring/org.springframework.boot.autoconfigure.AutoConfiguration.imports like any other hand-written auto-configuration. The sibling generated for a plugin descriptor is listed there by the compiler instead, since its name is not something the author can read off a source file. Declaring the annotation explicitly on a plugin or application class is harmless, and a class with no beans property is left entirely alone.
A unit test’s beans property is compiled automatically too, onto a static nested @Configuration class named BeansConfiguration that the test’s application context registers; see Unit Testing.
No further registration is needed on the Application class — Spring Boot already processes it. Beans declared here are also ordinary user beans as far as Spring Boot is concerned, so any auto-configuration guarded by @ConditionalOnMissingBean backs off in their favour, exactly as it would for a bean defined in resources.groovy. A standalone class annotated with both @GrailsBeans and @AutoConfiguration must instead be listed in META-INF/spring/org.springframework.boot.autoconfigure.AutoConfiguration.imports, like any other hand-written auto-configuration.
The DSL’s full surface — the bean(…) qualifiers such as .conditionalOnMissingBean(…), .primary() and .annotate(…), plus field(…) and method(…) for state and logic shared across bean methods — is documented in the plugin development chapter, together with applying @GrailsBeans directly to a plugin descriptor.
23.2 Runtime Spring with the Beans DSL
This Bean builder in Grails aims to provide a simplified way of wiring together dependencies that uses Spring at its core.
In addition, Spring’s regular way of configuration (via XML and annotations) is static and difficult to modify and configure at runtime, other than programmatic XML creation which is both error prone and verbose. Grails' BeanBuilder changes all that by making it possible to programmatically wire together components at runtime, allowing you to adapt the logic based on system properties or environment variables.
This enables the code to adapt to its environment and avoids unnecessary duplication of code (having different Spring configs for test, development and production environments)
The BeanBuilder class
Grails provides a grails.spring.BeanBuilder class that uses dynamic Groovy to construct bean definitions. The basics are as follows:
import org.apache.commons.dbcp.BasicDataSource
import org.grails.orm.hibernate.ConfigurableLocalSessionFactoryBean
import org.springframework.context.ApplicationContext
import grails.spring.BeanBuilder
def bb = new BeanBuilder()
bb.beans {
dataSource(BasicDataSource) {
driverClassName = "org.h2.Driver"
url = "jdbc:h2:mem:grailsDB"
username = "sa"
password = ""
}
sessionFactory(ConfigurableLocalSessionFactoryBean) {
dataSource = ref('dataSource')
hibernateProperties = ["hibernate.hbm2ddl.auto": "create-drop",
"hibernate.show_sql": "true"]
}
}
ApplicationContext appContext = bb.createApplicationContext()
Within plugins and the grails-app/conf/spring/resources.groovy file you don’t need to create a new instance of BeanBuilder. Instead the DSL is implicitly available inside the doWithSpring and beans blocks respectively.
|
This example shows how you would configure Hibernate with a data source with the BeanBuilder class.
Each method call (in this case dataSource and sessionFactory calls) maps to the name of the bean in Spring. The first argument to the method is the bean’s class, whilst the last argument is a block. Within the body of the block you can set properties on the bean using standard Groovy syntax.
Bean references are resolved automatically using the name of the bean. This can be seen in the example above with the way the sessionFactory bean resolves the dataSource reference.
Certain special properties related to bean management can also be set by the builder, as seen in the following code:
sessionFactory(ConfigurableLocalSessionFactoryBean) { bean ->
// Autowiring behaviour. The other option is 'byType'. <<autowire>>
bean.autowire = 'byName'
// Sets the initialisation method to 'init'. [init-method]
bean.initMethod = 'init'
// Sets the destruction method to 'destroy'. [destroy-method]
bean.destroyMethod = 'destroy'
// Sets the scope of the bean. <<scope>>
bean.scope = 'request'
dataSource = ref('dataSource')
hibernateProperties = ["hibernate.hbm2ddl.auto": "create-drop",
"hibernate.show_sql": "true"]
}The strings in square brackets are the names of the equivalent bean attributes in Spring’s XML definition.
Using BeanBuilder with Spring MVC
Include the grails-spring-<version>.jar file in your classpath to use BeanBuilder in a regular Spring MVC application. Then add the following <context-param> values to your /WEB-INF/web.xml file:
<context-param>
<param-name>contextConfigLocation</param-name>
<param-value>/WEB-INF/applicationContext.groovy</param-value>
</context-param>
<context-param>
<param-name>contextClass</param-name>
<param-value>
grails.web.servlet.context.GrailsWebApplicationContext
</param-value>
</context-param>Then create a /WEB-INF/applicationContext.groovy file that does the rest:
import org.apache.commons.dbcp.BasicDataSource
beans {
dataSource(BasicDataSource) {
driverClassName = "org.h2.Driver"
url = "jdbc:h2:mem:grailsDB"
username = "sa"
password = ""
}
}Loading Bean Definitions from the File System
You can use the BeanBuilder class to load external Groovy scripts that define beans using the same path matching syntax defined here. For example:
def bb = new BeanBuilder()
bb.loadBeans("classpath:*SpringBeans.groovy")
def applicationContext = bb.createApplicationContext()Here the BeanBuilder loads all Groovy files on the classpath ending with SpringBeans.groovy and parses them into bean definitions. An example script can be seen below:
import org.apache.commons.dbcp.BasicDataSource
import org.grails.orm.hibernate.ConfigurableLocalSessionFactoryBean
beans {
dataSource(BasicDataSource) {
driverClassName = "org.h2.Driver"
url = "jdbc:h2:mem:grailsDB"
username = "sa"
password = ""
}
sessionFactory(ConfigurableLocalSessionFactoryBean) {
dataSource = dataSource
hibernateProperties = ["hibernate.hbm2ddl.auto": "create-drop",
"hibernate.show_sql": "true"]
}
}Adding Variables to the Binding (Context)
If you’re loading beans from a script you can set the binding to use by creating a Groovy Binding:
def binding = new Binding()
binding.maxSize = 10000
binding.productGroup = 'finance'
def bb = new BeanBuilder()
bb.binding = binding
bb.loadBeans("classpath:*SpringBeans.groovy")
def ctx = bb.createApplicationContext()Then you can access the maxSize and productGroup properties in your DSL files.
23.3 The BeanBuilder DSL Explained
Using Constructor Arguments
Constructor arguments can be defined using parameters to each bean-defining method. Put them after the first argument (the Class):
bb.beans {
exampleBean(MyExampleBean, "firstArgument", 2) {
someProperty = [1, 2, 3]
}
}This configuration corresponds to a MyExampleBean with a constructor that looks like this:
MyExampleBean(String foo, int bar) {
...
}Configuring the BeanDefinition (Using factory methods)
The first argument to the closure is a reference to the bean configuration instance, which you can use to configure factory methods and invoke any method on the AbstractBeanDefinition class:
bb.beans {
exampleBean(MyExampleBean) { bean ->
bean.factoryMethod = "getInstance"
bean.singleton = false
someProperty = [1, 2, 3]
}
}As an alternative you can also use the return value of the bean defining method to configure the bean:
bb.beans {
def example = exampleBean(MyExampleBean) {
someProperty = [1, 2, 3]
}
example.factoryMethod = "getInstance"
}Using Factory beans
Spring defines the concept of factory beans and often a bean is created not directly from a new instance of a Class, but from one of these factories. In this case the bean has no Class argument and instead you must pass the name of the factory bean to the bean defining method:
bb.beans {
myFactory(ExampleFactoryBean) {
someProperty = [1, 2, 3]
}
myBean(myFactory) {
name = "blah"
}
}Another common approach is provide the name of the factory method to call on the factory bean. This can be done using Groovy’s named parameter syntax:
bb.beans {
myFactory(ExampleFactoryBean) {
someProperty = [1, 2, 3]
}
myBean(myFactory: "getInstance") {
name = "blah"
}
}Here the getInstance method on the ExampleFactoryBean bean will be called to create the myBean bean.
Creating Bean References at Runtime
Sometimes you don’t know the name of the bean to be created until runtime. In this case you can use a string interpolation to invoke a bean defining method dynamically:
def beanName = "example"
bb.beans {
"${beanName}Bean"(MyExampleBean) {
someProperty = [1, 2, 3]
}
}In this case the beanName variable defined earlier is used when invoking a bean defining method. The example has a hard-coded value but would work just as well with a name that is generated programmatically based on configuration, system properties, etc.
Furthermore, because sometimes bean names are not known until runtime you may need to reference them by name when wiring together other beans, in this case using the ref method:
def beanName = "example"
bb.beans {
"${beanName}Bean"(MyExampleBean) {
someProperty = [1, 2, 3]
}
anotherBean(AnotherBean) {
example = ref("${beanName}Bean")
}
}Here the example property of AnotherBean is set using a runtime reference to the exampleBean. The ref method can also be used to refer to beans from a parent ApplicationContext that is provided in the constructor of the BeanBuilder:
ApplicationContext parent = ...//
def bb = new BeanBuilder(parent)
bb.beans {
anotherBean(AnotherBean) {
example = ref("${beanName}Bean", true)
}
}Here the second parameter true specifies that the reference will look for the bean in the parent context.
Using Anonymous (Inner) Beans
You can use anonymous inner beans by setting a property of the bean to a block that takes an argument that is the bean type:
bb.beans {
marge(Person) {
name = "Marge"
husband = { Person p ->
name = "Homer"
age = 45
props = [overweight: true, height: "1.8m"]
}
children = [ref('bart'), ref('lisa')]
}
bart(Person) {
name = "Bart"
age = 11
}
lisa(Person) {
name = "Lisa"
age = 9
}
}In the above example we set the marge bean’s husband property to a block that creates an inner bean reference. Alternatively if you have a factory bean you can omit the type and just use the specified bean definition instead to setup the factory:
bb.beans {
personFactory(PersonFactory)
marge(Person) {
name = "Marge"
husband = { bean ->
bean.factoryBean = "personFactory"
bean.factoryMethod = "newInstance"
name = "Homer"
age = 45
props = [overweight: true, height: "1.8m"]
}
children = [ref('bart'), ref('lisa')]
}
}Abstract Beans and Parent Bean Definitions
To create an abstract bean definition define a bean without a Class parameter:
class HolyGrailQuest {
def start() { println "lets begin" }
}class KnightOfTheRoundTable {
String name
String leader
HolyGrailQuest quest
KnightOfTheRoundTable(String name) {
this.name = name
}
def embarkOnQuest() {
quest.start()
}
}import grails.spring.BeanBuilder
def bb = new BeanBuilder()
bb.beans {
abstractBean {
leader = "Lancelot"
}
...
}Here we define an abstract bean that has a leader property with the value of "Lancelot". To use the abstract bean set it as the parent of the child bean:
bb.beans {
...
quest(HolyGrailQuest)
knights(KnightOfTheRoundTable, "Camelot") { bean ->
bean.parent = abstractBean
quest = ref('quest')
}
}| When using a parent bean you must set the parent property of the bean before setting any other properties on the bean! |
If you want an abstract bean that has a Class specified you can do it this way:
import grails.spring.BeanBuilder
def bb = new BeanBuilder()
bb.beans {
abstractBean(KnightOfTheRoundTable) { bean ->
bean.'abstract' = true
leader = "Lancelot"
}
quest(HolyGrailQuest)
knights("Camelot") { bean ->
bean.parent = abstractBean
quest = quest
}
}In this example we create an abstract bean of type KnightOfTheRoundTable and use the bean argument to set it to abstract. Later we define a knights bean that has no Class defined, but inherits the Class from the parent bean.
Using Spring Namespaces
Since Spring 2.0, users of Spring have had easier access to key features via XML namespaces. You can use a Spring namespace in BeanBuilder by declaring it with this syntax:
xmlns context:"https://www.springframework.org/schema/context"and then invoking a method that matches the names of the Spring namespace tag and its associated attributes:
context.'component-scan'('base-package': "my.company.domain")You can do some useful things with Spring namespaces, such as looking up a JNDI resource:
xmlns jee:"https://www.springframework.org/schema/jee"
jee.'jndi-lookup'(id: "dataSource", 'jndi-name': "java:comp/env/myDataSource")This example will create a Spring bean with the identifier dataSource by performing a JNDI lookup on the given JNDI name. With Spring namespaces you also get full access to all of the powerful AOP support in Spring from BeanBuilder. For example given these two classes:
class Person {
int age
String name
void birthday() {
++age;
}
}class BirthdayCardSender {
List peopleSentCards = []
void onBirthday(Person person) {
peopleSentCards << person
}
}You can define an aspect that uses a pointcut to detect whenever the birthday() method is called:
xmlns aop:"https://www.springframework.org/schema/aop"
fred(Person) {
name = "Fred"
age = 45
}
birthdayCardSenderAspect(BirthdayCardSender)
aop {
config("proxy-target-class": true) {
aspect(id: "sendBirthdayCard", ref: "birthdayCardSenderAspect") {
after method: "onBirthday",
pointcut: "execution(void ..Person.birthday()) and this(person)"
}
}
}23.4 Property Placeholder Configuration
Grails supports the notion of property placeholder configuration through an extended version of Spring’s PropertyPlaceholderConfigurer.
Settings defined in either ConfigSlurper scripts or Java properties files can be used as placeholder values for Spring configuration in grails-app/conf/spring/resources.xml and grails-app/conf/spring/resources.groovy. For example given the following entries in grails-app/conf/application.groovy (or an externalized config):
database.driver="com.mysql.jdbc.Driver"
database.dbname="mysql:mydb"Or the equivalent in grails-app/conf/application.yml:
database:
driver: "com.mysql.jdbc.Driver"
dbname: "mysql:mydb"You can then specify placeholders in resources.xml as follows using the familiar ${..} syntax:
<bean id="dataSource"
class="org.springframework.jdbc.datasource.DriverManagerDataSource">
<property name="driverClassName">
<value>${database.driver}</value>
</property>
<property name="url">
<value>jdbc:${database.dbname}</value>
</property>
</bean>To specify placeholders in resources.groovy you need to use single quotes:
dataSource(org.springframework.jdbc.datasource.DriverManagerDataSource) {
driverClassName = '${database.driver}'
url = 'jdbc:${database.dbname}'
}This sets the property value to a literal string which is later resolved against the config by Spring’s PropertyPlaceholderConfigurer.
A better option for resources.groovy is to access properties through the grailsApplication variable:
dataSource(org.springframework.jdbc.datasource.DriverManagerDataSource) {
driverClassName = grailsApplication.config.getProperty('database.driver', String)
url = "jdbc\:${grailsApplication.config.getProperty('database.dbname', String)}"
}Using this approach will keep the types as defined in your config.
23.5 Property Override Configuration
Grails supports setting of bean properties via configuration.
You define a beans block with the names of beans and their values:
beans {
bookService {
webServiceURL = "https://www.amazon.com"
}
}The general format is:
<<bean name>>.<<property name>> = <<value>>The same configuration in a Java properties file would be:
beans.bookService.webServiceURL=https://www.amazon.com23.6 Spring Boot Actuators
Spring Boot Actuator endpoints allow you to monitor and interact with your application. Spring Boot includes a number of built-in endpoints. For example the health endpoint provides basic application health information.
These endpoints are disabled by default since Grails 3.1.8.
You can enable actuator endpoints in your application.yml as follows:
grails-app/conf/application.yml
management:
endpoints:
enabled-by-default: true24 Scaffolding
Scaffolding lets you generate some basic CRUD interfaces for a domain class, including:
-
The necessary views
-
Controller actions for create/read/update/delete (CRUD) operations
The way for an application to express a dependency on the scaffolding plugin is by including the following in build.gradle.
dependencies {
// ...
implementation "org.apache.grails:grails-scaffolding"
// ...
}Dynamic Scaffolding
The simplest way to get started with scaffolding is to use the @Scaffold annotation on a controller:
import grails.plugin.scaffolding.annotation.Scaffold
@Scaffold(Book)
class BookController {
}With this configured, when you start your application the actions and views will be autogenerated at runtime. The following actions are dynamically implemented by default by the runtime scaffolding mechanism:
-
index
-
show
-
edit
-
delete
-
create
-
save
-
update
A CRUD interface will also be generated. To access this open http://localhost:8080/book in a browser.
When the application is built, the Gradle plugin’s generateScaffoldedViews task expands the scaffolding templates for every domain class a controller scaffolds with @Scaffold, the application’s or a plugin’s, and compileGroovyPages compiles the resulting pages in the same compilation as the application’s views. The templates are expanded by the application’s own scaffolding library and Groovy, in a JVM on its runtime classpath, exactly as they would be expanded when the view is requested. With a grails-scaffolding the Grails Gradle plugin cannot work with, the build warns and compiles no scaffolded page, and the views are expanded on their first use. A packaged application then renders a scaffolded view without generating it on the first request, and a native image, which cannot compile a page at runtime, can render it at all.
The task covers the application’s scaffolded controllers and those its plugins provide, where the domain class a plugin’s controller scaffolds is on the classpath the pages are compiled against. A plugin the project has only at runtime, such as one that reaches it through another project’s implementation dependency, is not on that classpath. A page naming its domain class could not be compiled here, so its controllers are left to the plugin’s own build. For each controller it covers, it expands every copy of each template the view resolver could choose: the application’s own, in src/main/templates/scaffolding or src/main/resources/META-INF/templates/scaffolding, and every copy on the runtime classpath. Which copy the resolver finds is not something the build can know: on the JVM it looks beside the controller’s class first, then at a plugin that overrides the templates, then along the classpath, while a native image, which keeps no class files to look beside, goes by the order of the classpath it was built from. A namespace-specific template, such as src/main/templates/scaffolding/admin/show.gsp, is expanded only for the domain classes of controllers with a namespace.
A template of the application’s own is its code, as a view is: if it cannot be expanded for a domain class, or a page expanded from it does not compile, the build fails. A copy a dependency supplies is not, and because every copy is compiled, that includes a copy the application has replaced with its own. If such a copy cannot be expanded, or its page does not compile, the build leaves the page out and says so, and the view is expanded on its first use if that copy is ever chosen - which it is not while the application’s own copy comes first on the classpath, as it normally does.
Compiling the pages does not change which page a request gets. A view the application or a plugin declares still takes precedence, and the resolver chooses the template as it always has; the compiled page is used only when it was expanded from that template for the same domain class. Otherwise the template is expanded on its first use, as before, and the log notes it once. That is the case for a controller using the static scaffold property described below, for a controller of a plugin the application has only at runtime whose pages the plugin’s own build did not compile, and for a page the build left out because a template a dependency supplies could not be expanded or its page did not compile, which the build output reports.
A native image cannot expand a template, so there a view with no compiled page fails; where the application has compiled pages of its own, a warning naming the template and the domain class comes first. What to do depends on why the page is missing: declare the controller with @Scaffold rather than static scaffold; for a plugin the application has only at runtime, declare it as a dependency of the application; for a page the build left out, give the application a template of its own in place of the one it came from: the build output names the page, under build/generated/scaffolded-views, and the page ends with a comment saying which template it was expanded from. Otherwise, provide a concrete GSP view. A plugin the application has only at runtime needs declaring because its own build compiled pages only for the template copies it saw, so an application template, or a theme earlier on the application’s classpath, gives a page it never compiled.
If you prefer to keep your domain model in Java and mapped with Hibernate you can still use scaffolding, simply import the domain class and use it in the @Scaffold annotation.
Legacy Static Scaffold Property
The older static scaffold = Book syntax is still supported but the @Scaffold annotation is preferred:
class BookController {
static scaffold = Book // Legacy syntax - @Scaffold annotation is preferred
}
The static scaffold = true form is not supported in Grails 3.0 and above.
|
Scaffolded Services
In addition to controllers, you can also scaffold services using the @Scaffold annotation:
import grails.plugin.scaffolding.annotation.Scaffold

@Scaffold(Book)
class BookService {
}This generates a service that extends grails.plugin.scaffolding.GormService and provides standard CRUD operations:
-
get(id)- Retrieve by ID -
list(Map args)- List with pagination/sorting -
count(Map args)- Count entities -
save(instance)- Create or update -
delete(id)- Delete by ID
Service-Backed Controllers
For better separation of concerns, you can create controllers that delegate to a scaffolded service using RestfulServiceController:
import grails.plugin.scaffolding.annotation.Scaffold
import grails.plugin.scaffolding.RestfulServiceController

@Scaffold(RestfulServiceController<Book>)
class BookController {
}This controller will automatically locate and use the corresponding BookService for all data operations.
Extending Custom Classes
You can specify a custom class to extend for your scaffolded controllers or services:
import grails.plugin.scaffolding.annotation.Scaffold
import com.example.MyCustomService

@Scaffold(MyCustomService<Book>)
class BookService {
}Read-Only Mode
You can create read-only scaffolded controllers or services:
import grails.plugin.scaffolding.annotation.Scaffold

@Scaffold(domain = Book, readOnly = true)
class BookController {
}Adding Custom Actions
You can add new actions to a scaffolded controller:
import grails.plugin.scaffolding.annotation.Scaffold
@Scaffold(Book)
class BookController {
def changeAuthor() {
def b = Book.get(params.id)
b.author = Author.get(params["author.id"])
b.save()
// redirect to a scaffolded action
redirect(action: 'show')
}
}You can also override the scaffolded actions:
import grails.plugin.scaffolding.annotation.Scaffold
@Scaffold(Book)
class BookController {
// overrides scaffolded action to return both authors and books
def index() {
[bookInstanceList: Book.list(),
bookInstanceTotal: Book.count(),
authorInstanceList: Author.list()]
}
def show() {
def book = Book.get(params.id)
log.error("{}", book)
[bookInstance: book]
}
}All of this is what is known as "dynamic scaffolding" where the CRUD interface is generated dynamically at runtime.
| By default, the size of text areas in scaffolded views is defined in the CSS, so adding 'rows' and 'cols' attributes will have no effect. |
Also, the standard scaffold views expect model variables of the form <propertyName>List and <propertyName>Count for collections, and <propertyName> for a single instance. The list view declares the count as Number, so it accepts the Integer or Long a controller supplies.
Static Scaffolding
Grails lets you generate a controller and the views used to create the above interface from the command line.
Generating Controllers and Views
To generate a controller type:
grails generate-controller Bookor to generate the views:
grails generate-views Bookor to generate everything:
grails generate-all BookIf you have a domain class in a package or are generating from a Hibernate mapped class remember to include the fully qualified package name:
grails generate-all com.bookstore.BookA generated controller redirects a successful form save or update to its own show action, so it keeps
working when it is renamed, for example to serve the domain class at a different URL.
Generating Scaffolded Controllers and Services
To generate a scaffolded controller (using @Scaffold annotation):
grails create-scaffold-controller BookTo generate a scaffolded service:
grails create-scaffold-service BookTo generate both a scaffolded service and controller together:
grails generate-scaffold-all BookCommand Options
The create-scaffold-controller command supports the following options:
-
--force- Overwrite existing files -
--namespace- Set the controller namespace -
--service- Usegrails.plugin.scaffolding.RestfulServiceControllerinstead ofgrails.rest.RestfulController -
--extends- Specify a custom class to extend (default:grails.rest.RestfulController)
The create-scaffold-service command supports:
-
--force- Overwrite existing files -
--extends- Specify a custom class to extend (default:grails.plugin.scaffolding.GormService)
The generate-scaffold-all command supports:
-
--force- Overwrite existing files -
--namespace- Set the controller namespace -
--serviceExtends- Specify a custom class to extend for the service (default:grails.plugin.scaffolding.GormService) -
--controllerExtends- Specify a custom class to extend for the controller (default:grails.plugin.scaffolding.RestfulServiceController)
Examples:
# Generate a scaffolded controller that uses a service
grails create-scaffold-controller Book --service
# Generate with a custom class to extend
grails create-scaffold-service Book --extends=com.example.MyCustomService
# Generate both with namespace
grails generate-scaffold-all Book --namespace=apiCustomizing the Generated Views
The views adapt to Validation constraints. For example you can change the order that fields appear in the views simply by re-ordering the constraints in the builder:
def constraints = {
title()
releaseDate()
}You can also get the generator to generate lists instead of text inputs if you use the inList constraint:
def constraints = {
title()
category(inList: ["Fiction", "Non-fiction", "Biography"])
releaseDate()
}Or if you use the range constraint on a number:
def constraints = {
age(range:18..65)
}Restricting the size with a constraint also effects how many characters can be entered in the d view:
def constraints = {
name(size:0..30)
}The Fields Plugin
The Grails scaffolding templates make use of the Fields Plugin. Once you’ve generated the scaffold views, you can customize the forms and tables using the Taglib provided by the plugin (see the Fields plugin docs for details).
<%-- Generate an HTML table from bookInstanceList, showing only 'title' and 'category' columns --%>
<f:table collection="bookInstanceList" properties="['title', 'category']"/>Customizing the Scaffolding templates
The templates used by Grails to generate the controller and views can be customized by installing the templates with the install-templates command.
25 Grails Cache
The Grails Cache plugin provides powerful and easy to use caching functionality to Grails applications and plugins.
25.1 Usage
The cache plugin adds Spring bean method call, GSP page fragment and
template caching to Grails applications. You configure one or more caches
in grails-app/conf/application.yml, and
annotate methods (either in Spring beans (typically Grails services)) to be cached.
You can also wrap GSP sections in cache tags and render cached templates.
There are three annotations; Cacheable,
CachePut,
and CacheEvict. You use
Cacheable to mark a method as one that should check the cache for a
pre-existing result, or generate a new result and cache it. Use CachePut to
mark a method as one that should always be evaluated and store its result in the
cache regardless of existing cache values. And use @CacheEvict to flush a cache
(either fully or partially) to force the re-evaluation of previously cached
results.
When using distributed caching (such as ehcache with distributed cache enabled,
or redis with multiple instances of the application running against one redis
instance), all classes that use annotation caching or XML caching should
override the hashCode method. The hash code of the object with the method
marked as being cacheable is included in the cache key, and the default
hashCode implementation will vary each time the application is run. Overriding
hashCode ensures that each instance of the applications will appropriately
share cache keys.
This 'core' cache plugin uses an in-memory implementation where the caches and
cache manager are backed by a thread-safe java.util.concurrent.ConcurrentMap.
This is fine for testing and possibly for low-traffic sites, but you should
consider using one of the extension plugins if you need clustering, disk
storage, persistence between restarts, and more configurability of features like
time-to-live, maximum cache size, etc. Currently, the only extension plugin available for Grails is cache-ehcache.
25.1.1 Configuration
Configuration Options
There are a few configuration options for the plugin; these are specified in
grails-app/conf/application.yml.
| Property | Default | Description |
|---|---|---|
grails.cache.enabled |
|
Whether to enable the plugin |
grails.cache.clearAtStartup |
|
Whether to clear all caches at startup |
grails.cache.cacheManager |
GrailsConcurrentMapCacheManager |
Cache Manager to use. Default cache manager uses Spring Frameworks ConcurrentMapCache which might grow limitless. If you cannot predict how many cache entries you are going to generate use "GrailsConcurrentLinkedMapCacheManager" instead which uses com.googlecode.concurrentlinkedhashmap.ConcurrentLinkedHashMap and limits by default to 10000 entries per cache. |
The cache implementation used by this plugin is very simple, so there aren’t many configuration options (compared to the Ehcache implementation for example, where you have fine-grained control over features like overflowing to disk, time-to-live settings, maximum size of caches, etc.) So there aren’t many supported options in the cache configuration.
| Since there is no way to configure "time to live" with this plugin, all cached items have no timeout and remain cached until either the JVM restarts (since the backing store is in-memory) or the cache is partially or fully cleared (by calling a method or action annotated with @CacheEvict or programmatically). |
If you don’t need to supply any configuration to your cache, simply don’t include it in the configuration.
If you want to limit the number of cache entries you have to change the default
cache manager to 'GrailsConcurrentLinkedMapCacheManager'. To specify the limit
you can add the maxCapacity parameter to the cache config. Default value for
maxCapacity is 10000.
grails:
cache:
cacheManager: GrailsConcurrentLinkedMapCacheManager
caches:
message:
maxCapacity: 5000
maps:
maxCapacity: 600025.1.2 Cache Annotations
The Cacheable and CacheEvict annotations provided by the plugin have counterparts with the same names provided by Spring.
However, unlike the Spring versions, these apply AST transformations, avoiding the need to create runtime proxies.
Service Method Caching
Given the below simple service, you can see that the getMessage method is configured to cache the results in the "message" cache.
package com.yourcompany
import grails.plugin.cache.*
class MessageService {
@Cacheable('message')
Message getMessage(String title) {
println 'Fetching message'
Message.findByTitle(title)
}
}By default the cache key is calculated using:
-
The class name
-
The method name
-
The parameter names and values
In the previous example, the title parameter will be used as the cache key; if there were multiple parameters they would be combined into the key.
You can use a closure to dynamically define the key. For example:
package com.yourcompany
import grails.plugin.cache.*
class MessageService {
@Cacheable(value = 'message', key = { title.toUpperCase() } )
Message getMessage(String title) {
println 'Fetching message'
Message.findByTitle(title)
}
}The CachePut annotation can be used to place a value into the cache. For example:
package com.yourcompany
import grails.plugin.cache.*
class MessageService {
...
@CachePut(value='message', key = { message.title })
void save(Message message) {
println "Saving message $message"
message.save()
}
}The save method in the example above is configured as one that evicts elements from the cache. There is no need to clear the entire cache in this case; instead any previously cached item with the same title attribute will be replaced with the current Message instance.
Note that you could also use CacheEvict for the save method, which would remove the old cached value but not cache the current value:
package com.yourcompany
import grails.plugin.cache.*
class MessageService {
...
@CacheEvict(value='message', key = { message.title })
void delete(Message message) {
println "Deleting message $message"
message.delete()
}
}This service works with the Message domain class:
package com.yourcompany
class Message implements Serializable {
private static final long serialVersionUID = 1
String title
String body
String toString() {
"$title: $body"
}
}Note that for in-memory cache implementations it’s not required that the objects being cached implement Serializable but if you use an implementation that uses Java serialization (for example the Redis plugin, or the Ehcache plugin when you have configured clustered caching) you must implement Serializable.
To test this out, be sure to define a "message" cache in grails-app/conf/application.yml and save and retrieve Message instances using the service. There are println statements but you can also turn on SQL logging to watch the database access that’s needed to retrieve instances that aren’t cached yet, and you shouldn’t see database access for cached values.
25.1.2.1 Unit Testing
In general, code that is marked with cache related annotations can be unit tested without doing anything special to deal with caching. The caching just won’t be enabled and the code in cached methods will be executed each time the method is invoked.
@CompileStatic
class BasicCachingService {
private int invocationCounter = 0
private int conditionalInvocationCounter = 0
def getInvocationCounter() {
invocationCounter
}
@Cacheable('basic')
def getData() {
++invocationCounter
'Hello World!'
}
}package com.demo
import grails.testing.services.ServiceUnitTest
import spock.lang.Specification
class BasicCachingServiceNoCacheManagerSpec extends Specification implements ServiceUnitTest<BasicCachingService> {
void 'test invoking cacheable method when no cache manager is present'() {
when: 'a cached method is invoked the first time'
def result = service.getData()
then: 'the code in the method is executed'
result == 'Hello World!'
service.invocationCounter == 1
when: 'a cached method is invoked the second time'
result = service.getData()
then: 'the code in the method is still executed because no cache manager is present'
result == 'Hello World!'
service.invocationCounter == 2
}
}In order for caching to be active when the unit test is running, cache manager and key generator beans must be added to the Spring application context by the test.
package com.demo
import grails.plugin.cache.CustomCacheKeyGenerator
import grails.plugin.cache.GrailsConcurrentMapCacheManager
import grails.testing.services.ServiceUnitTest
import spock.lang.Specification
class BasicCachingServiceSpec extends Specification implements ServiceUnitTest<BasicCachingService> {
@Override
Closure doWithSpring() {{ ->
grailsCacheManager(GrailsConcurrentMapCacheManager)
customCacheKeyGenerator(CustomCacheKeyGenerator)
}}
void 'test invoking cacheable method when cache manager is present'() {
when: 'a cached method is invoked the first time'
def result = service.getData()
then: 'the code in the method is executed'
result == 'Hello World!'
service.invocationCounter == 1
when: 'a cached method is invoked the second time'
result = service.getData()
then: 'the cached return value is returned and the code in the method is not executed'
result == 'Hello World!'
service.invocationCounter == 1
}
void 'test invoking a cacheable method that expresses a condition'() {
when: 'multiply is called with x < 10'
def result = service.multiply(4, 7)
then: 'the method should have been invoked'
result == 28
service.conditionalInvocationCounter == 1
when: 'the method is invoked with x > 10'
result = service.multiply(40, 7)
then: 'the method should have executed'
result == 280
service.conditionalInvocationCounter == 2
when: 'multiply is called with x < 10 with a cached value'
result = service.multiply(4, 7)
then: 'the method should not have executed'
result == 28
service.conditionalInvocationCounter == 2
when: 'the method is invoked with x > 10 again'
result = service.multiply(40, 7)
then: 'the condition should prevent caching'
result == 280
service.conditionalInvocationCounter == 3
}
}25.1.3 The CacheManager
The plugin registers an instance of the CacheManager interface as the grailsCacheManager Spring bean, so it’s easy to access using dependency injection.
The most common method you would call on the grailsCacheManager is getCache(String name) to access a Cache instance programmatically. This shouldn’t be needed often however. From the Cache instance you can also access the underlying cache implementation using cache.getNativeCache().
25.2 Caching Tags
The plugin provides GSP tags which are useful for caching the result of evaluating sections of markup. These tags allow for the result of evaluating sections of markup to be cached so subsequent renderings of the same markup do not have to result in the markup being evaluated again. These tags support automatic cache eviction with the use of a time to live (ttl) attribute.
25.3 The Cache Admin Service
The plugin provides a service named GrailsCacheAdminService which support various methods for administering caches.
25.3.1 Clearing Caches
There are methods in GrailsCacheAdminService for clearing the caches used by the block and render tags.
class ReportingController {
def grailsCacheAdminService
def report() {
// clear the cache used by the blocks tag...
grailsCacheAdminService.clearBlocksCache()
// clear the cache used by the render tag...
grailsCacheAdminService.clearTemplatesCache()
...
}
}25.4 Implementation Details
All of the plugin’s classes are designed for extensibility; the classes are all public, and fields and methods are mostly public or protected. Consider subclassing existing classes to reuse as much as possible instead of completely rewriting them.
Cache manager
The core cache plugin registers a grailsCacheManager Spring bean, and the extension plugins replace this bean with one that creates and manages caches for that implementation. The default implementation is an instance of GrailsConcurrentMapCacheManager which uses GrailsConcurrentMapCache as its cache implementation. It uses a java.util.concurrent.ConcurrentHashMap to store cached values.
You can customize the cache manager by replacing the grailsCacheManager Spring bean in resources.groovy with your own; either subclass GrailsConcurrentMapCacheManager (e.g. to override the createConcurrentMapCache() method) or by implementing the GrailsCacheManager interface.
Fragment caching
You can cache partial GSP page sections with the <cache:block> tag. You can specify a key when using this tag but it’s in general unnecessary. This is because the block will be rendered with its own Closure, and the default key is the full closure class name. This is unique since the closures aren’t re-used; for example these two blocks will be cached independently, even in the same GSP:
<cache:block>
foo
</cache:block>
<cache:block>
bar
</cache:block>You can cache the content of templates with the <cache:render> tag. You can specify a key when using this tag but like the block tag, it’s in general unnecessary because the default key is the full template class name.
Service caching
You can cache the return value of a service method by annotating it with Cacheable.
Key generation
The default key generated implements the GrailsCacheKeyGenerator which provides method for generating keys taking into account:
-
The class name
-
The method name
-
A hashCode for the current object
-
The parameters or if a closure is specified to generate the key the value of the closure call
You can override this implementation by defining a bean called customCacheKeyGenerator via Spring.
26 Deployment
Grails applications can run as executable archives, in an external servlet container, or in an OCI container image. Choose the packaging that fits your deployment platform:
| Deployment | Build artifact | When to use it |
|---|---|---|
Executable JAR ( |
A VM or host where a service manager runs Java and supervises the application. |
|
Deployable WAR ( |
An existing Jakarta Servlet container, such as Tomcat, manages the application lifecycle. |
|
An image built with Docker, Buildah, or Spring Boot’s |
A container runtime or orchestrator manages application instances. The embedded servlet container runs inside the image. |
The examples in this chapter target Grails 8, Spring Boot 4.1, and Java 21 or later. Use the Gradle Wrapper and dependency versions supplied by your Grails application. The Java runtime must support the bytecode produced by your build and all its dependencies; test with the Java major version used in production. Applications using Micronaut require Java 25 or later. Run the commands from your application’s root directory, not the Grails Framework source repository.
Build and test a release artifact once, then promote that same artifact or image digest through your environments. Supply environment-specific configuration at runtime, and retain the previous artifact for rollback. The production configuration section covers external configuration, secrets, graceful shutdown, health probes, and HTTPS for these deployment options. For startup optimizations, see ahead-of-time processing and ahead-of-time caching.
26.1 Standalone
A standalone application runs with an embedded servlet container. The deployment host needs a compatible Java runtime, but does not need Grails or Gradle installed.
Build and run an executable archive
Build an executable JAR with the application’s Gradle Wrapper:
./gradlew clean check bootJar
java -Dgrails.env=prod -jar build/libs/myapp-0.1.jarReplace myapp-0.1.jar with the actual bootJar output. A plain JAR (usually named -plain.jar) does not contain the embedded server and dependencies required by java -jar.
Use an exact filename in deployment scripts; build/libs/.jar can match plain archives or artifacts from earlier builds.
check runs the verification tasks configured by your application; include any separately configured integration or functional test jobs in your release pipeline as well.
Grails packaging defaults to the production environment unless it is overridden at build time. The explicit -Dgrails.env=prod above also selects production at runtime.
JVM options, including -D properties and memory settings, go before -jar; Spring Boot application arguments go after the archive name:
java -Xmx768m -Dgrails.env=prod -jar build/libs/myapp-0.1.jar \
--server.port=8081 \
--spring.config.additional-location=file:/etc/myapp/This example requires /etc/myapp/ to exist. Place external application.yml or application.properties there.
Size the heap for your workload and leave memory for metaspace, thread stacks, direct buffers, native libraries, and the operating system.
If the application applies the Gradle war plugin, it can instead produce an executable WAR:
./gradlew clean check bootWar
java -Dgrails.env=prod -jar build/libs/myapp-0.1.warSee external servlet deployment for configuring the embedded container dependencies so the same WAR can also be deployed to Tomcat.
Run as a managed service
Use a service manager such as systemd to start the JVM on boot, restart failed processes, and collect logs.
For example, after creating an unprivileged myapp account and installing the tested JAR at /opt/myapp/application.jar, a Linux service unit can contain:
[Unit]
Description=My Grails application
After=network.target
[Service]
User=myapp
Group=myapp
WorkingDirectory=/opt/myapp
ExecStart=/usr/bin/java -Dgrails.env=prod -jar /opt/myapp/application.jar --spring.config.additional-location=file:/etc/myapp/
Restart=on-failure
RestartSec=5s
TimeoutStopSec=60s
SuccessExitStatus=143
NoNewPrivileges=true
UMask=0027
[Install]
WantedBy=multi-user.targetAdjust the Java path and stop timeout for your host and application. The service account needs read access to the archive and configuration, and write access only to required temporary or application data directories.
Keep the JVM in the foreground so the service manager receives its exit status and can send SIGTERM for graceful shutdown.
Development commands
./gradlew bootRun and grails run-app run an application from its development build. They are useful for local work, including checking production configuration with ./gradlew -Dgrails.env=prod bootRun.
For a production service, deploy and smoke-test the packaged archive rather than keeping a Gradle process and source checkout on the host.
For container images built from that archive, see OCI images and layered builds.
26.2 External Servlet Container Deployment
An external servlet container manages one or more applications deployed as WAR files. This differs from an OCI container image, which normally runs an executable Grails JAR with its embedded server.
Prepare a deployable WAR
Ensure the application applies Gradle’s war plugin. Add it to the existing plugins block, or use apply plugin: 'war' if the build uses imperative plugin application.
The Grails web application plugins configure Spring Boot’s packaging tasks; an additional Spring Boot plugin version is not required.
For a Tomcat application, keep the Tomcat starter as an application dependency and declare its runtime components using providedRuntime in build.gradle:
dependencies {
implementation 'org.springframework.boot:spring-boot-starter-tomcat'
providedRuntime('org.springframework.boot:spring-boot-starter-tomcat-runtime') {
// Grails beans also use Spring Boot's integration classes in an external container.
exclude group: 'org.springframework.boot'
}
}The -runtime starter is Spring Boot 4’s way to identify the runtime components that must be provided by an external servlet container.
It includes the embedded Tomcat libraries. bootWar packages those components in WEB-INF/lib-provided, outside the external servlet container’s application library path, while keeping them available to executable WAR launches.
The exclusion applies only to this provided dependency: Spring Boot’s integration modules remain ordinary application dependencies through spring-boot-starter-tomcat and are packaged in WEB-INF/lib. Grails uses their types when registering application beans, and an external Tomcat installation does not supply them.
providedRuntime also keeps them on the test classpath; testImplementation would make them unavailable when running the packaged WAR with java -jar.
Review any additional servlet-container dependencies for the same packaging requirements.
The Grails Gradle plugin applies the selected Grails BOM to providedRuntime by default, so these dependencies do not need explicit versions.
An application that opts out of automatic BOM management must supply its chosen platform to this configuration as well as its ordinary application configurations.
Grails generates servlet initialization support for the application’s conventional Application class. Retain the generated Grails application structure rather than replacing it with a separate Spring Boot application entry point.
./gradlew clean check bootWarDeploy the resulting executable WAR from build/libs, for example myapp-0.1.war, using the servlet container’s deployment mechanism.
Use the bootWar output, not a *-plain.war. The grails war command is also available.
Container requirements and configuration
Grails 8 requires a Jakarta Servlet 6.1-compatible container, such as Tomcat 11, and Java 21 or later. Older Tomcat generations, including Tomcat 10.1 (Servlet 6.0), do not meet this requirement. Test the packaged WAR against the actual container and Java versions used in production, including any application-server-specific classloading configuration.
For external deployments:
-
Configure listeners, TLS certificates, connection limits, and graceful undeployment in the servlet container. Spring Boot’s embedded-server settings do not configure an external server’s connectors.
-
Configure the context path in the servlet container. For example, Tomcat normally derives it from the WAR name;
ROOT.wardeploys at/. An embedded-serverserver.servlet.context-pathsetting does not replace this configuration. -
Supply external configuration and secrets through the deployment platform. JVM system properties apply to every application in a shared server JVM, so do not use them for settings that must differ between deployed applications.
-
Check startup logs, health, a representative application request, and static resources after deployment. Exercise shutdown and redeployment as part of release testing.
See the Spring Boot traditional deployment guide for further WAR packaging and application server guidance.
26.3 OCI Images and Layered Builds
An OCI image packages the application and a Java runtime for Docker, Podman, Kubernetes, or another compatible platform.
Use a Dockerfile when you need control over the base image and installed software, or Spring Boot’s bootBuildImage task when you want Cloud Native Buildpacks to manage that packaging.
Buildah can build the same Dockerfile on Linux without a Docker daemon.
Prepare the application artifact
Build and verify the application before creating the image. This preserves the complete Grails build, including grails-app, compiled views, assets, resources, and dependencies from other modules.
The image build below consumes the resulting executable JAR; it does not run Gradle inside the image.
In the existing application’s build.gradle, give bootJar a predictable filename and reproducible archive entries readable by a non-root runtime:
tasks.named('bootJar') {
archiveFileName = 'application.jar'
preserveFileTimestamps = false
reproducibleFileOrder = true
filePermissions {
unix('0644')
}
dirPermissions {
unix('0755')
}
}Stable ordering and timestamps help identical content reuse image layers across build hosts. Explicit read permissions also avoid importing owner-only permissions from a build agent’s dependency cache into a buildpack image. If your archive includes native executables, give those specific entries execute permission as well.
Grails applies Spring Boot’s Gradle plugin. In Spring Boot 4.1, layering and the JAR tools are enabled by default; no separate layering plugin or forced plugin dependency is needed.
If the application has disabled bootJar, layering, or includeTools, enable them again for this workflow.
Do not configure launchScript() for this JAR: extraction with jarmode=tools does not support archives with a prepended shell launch script.
./gradlew clean check bootJar
java -Djarmode=tools -jar build/libs/application.jar list-layersThe default layers, in order, are:
-
dependencies: non-project dependencies whose versions do not containSNAPSHOT. -
spring-boot-loader: Spring Boot loader content. -
snapshot-dependencies: non-project dependencies whose versions containSNAPSHOT. -
application: application classes, resources, and dependencies on other projects in the build.
Resources belong to application; there is no separate default resources layer.
The layer index in a JAR is metadata. Copying the entire JAR in a single Dockerfile instruction does not create separately reusable image layers.
Extract the layers and copy them individually, from least frequently changed to most frequently changed.
This reduces repeated registry transfers and storage across image versions that share identical layers. It does not remove dependencies or necessarily make one image smaller than a single-JAR image.
Build a layered image with Docker
Create Dockerfile in the application root:
ARG JAVA_IMAGE=docker.io/library/eclipse-temurin:21-jre-noble
FROM ${JAVA_IMAGE} AS extract
WORKDIR /builder
COPY build/libs/application.jar application.jar
RUN java -Djarmode=tools -jar application.jar extract --layers --destination extracted
FROM ${JAVA_IMAGE} AS runtime
WORKDIR /application
RUN groupadd --gid 10001 app \
&& useradd --uid 10001 --gid app --no-create-home --no-log-init --home-dir /application app
COPY --from=extract /builder/extracted/dependencies/ ./
COPY --from=extract /builder/extracted/spring-boot-loader/ ./
COPY --from=extract /builder/extracted/snapshot-dependencies/ ./
COPY --from=extract /builder/extracted/application/ ./
USER 10001:10001
EXPOSE 8080
ENTRYPOINT ["java", "-Dgrails.env=prod", "-jar", "application.jar"]The runtime application.jar is the small archive produced by compact extraction, containing the application classes and resources, including compiled assets. Its manifest references the extracted dependencies beside it.
Keep all extracted layers together in /application, and run this archive with java -jar as shown above.
The original large JAR stays in the extraction stage. This layout does not require a hard-coded Spring Boot launcher class.
The application runs as a non-root user, with root-owned, read-only application files. Provide separate writable mounts if it stores data.
The base image tag is a readable example. For release builds, resolve and record a tested base-image digest and pass its full name@sha256:… reference as the JAVA_IMAGE build argument.
Update that digest regularly to take in runtime and OS fixes. Use a compatible Java version in both stages; select a JDK instead of a JRE only when runtime diagnostics or application requirements need it.
Changing the distribution also requires adapting groupadd and useradd. Check native libraries, fonts, locale data, and CA certificates before choosing a smaller base; Alpine’s musl libc is not a drop-in replacement for glibc for every dependency.
Limit the build context with a .dockerignore beside the Dockerfile:
**
!Dockerfile
!build/
!build/libs/
!build/libs/application.jarOnly the packaged application is needed. This also prevents source checkouts, local Gradle caches, and external credentials from being sent as build context.
It cannot remove secrets already packaged into the JAR: keep those in runtime configuration.
For a multi-project application, run the subproject’s bootJar task and adjust the JAR path and ignore rules, or stage that task’s exact output in a dedicated build context.
docker build --pull --tag myapp:0.1 .
docker run --rm --name myapp \
--publish 127.0.0.1:8080:8080 \
--memory=1g --cpus=2 \
--read-only --tmpfs /tmp:rw,nosuid,nodev,size=128m \
--cap-drop=ALL --security-opt=no-new-privileges \
--env JAVA_TOOL_OPTIONS='-XX:MaxRAMPercentage=60.0 -XX:+ExitOnOutOfMemoryError' \
myapp:0.1Supply the database and other required runtime configuration before starting your application.
The limits above are examples to load-test, not universal Grails defaults. The writable /tmp supports the embedded server and temporary files; add appropriately permissioned volumes for uploads or other required writes.
EXPOSE documents the port but does not publish it. This example binds it to host loopback for local testing; production traffic should enter through your platform’s service or ingress.
See production configuration for memory sizing, probes, logging, and shutdown.
Build with rootless Buildah
Install Buildah on a Linux build host with user namespaces, subordinate UID/GID mappings, and rootless container storage configured for the build account. Run the following as that account after building the JAR. On macOS or Windows, use a Linux VM or a Linux CI runner for Buildah.
buildah build --layers --pull=always \
--file Dockerfile --tag localhost/myapp:0.1 .
podman run --rm --name myapp \
--publish 127.0.0.1:8080:8080 \
--memory=1g --cpus=2 \
--read-only --tmpfs /tmp:rw,nosuid,nodev,size=128m \
--cap-drop=ALL --security-opt=no-new-privileges \
--env JAVA_TOOL_OPTIONS='-XX:MaxRAMPercentage=60.0 -XX:+ExitOnOutOfMemoryError' \
localhost/myapp:0.1Buildah reads .dockerignore when no .containerignore is present; if both exist, it uses .containerignore. Keep their rules consistent.
--layers enables caching of intermediate builds. Keep the separate layer COPY instructions; squashing the image defeats reuse of those layers.
Rootless building and a non-root runtime USER are separate properties: this example provides both.
Podman can use Buildah’s local image storage when run as the same user with the same storage configuration. Docker uses separate storage, so transfer the image through a registry when switching runtimes.
Resource controls for rootless containers also depend on the host’s cgroup configuration.
To publish a tested image, authenticate to your registry, then push it. Replace registry.example.com/team with your own registry namespace:
buildah login registry.example.com
buildah push --digestfile build/image-digest.txt \
localhost/myapp:0.1 docker://registry.example.com/team/myapp:0.1In CI, supply authentication with a protected auth file or buildah login --password-stdin. Do not put credentials in build arguments or image layers.
The digest file contains the pushed manifest digest; deploy registry.example.com/team/myapp@sha256:… using that value.
For ephemeral runners, Buildah can store its build cache in a registry:
buildah build --layers --pull=always \
--cache-from registry.example.com/team/myapp-build-cache \
--cache-to registry.example.com/team/myapp-build-cache \
--file Dockerfile --tag localhost/myapp:0.1 .Authenticate before using a private cache, restrict its writers, and configure retention. Buildah’s registry-cache options differ from Docker BuildKit’s cache options. See the Buildah build reference for host requirements and available flags.
Cloud Native Buildpacks
Spring Boot’s bootBuildImage builds an OCI image from the application’s executable archive without a Dockerfile.
It uses a builder image and a compatible run image to supply the Java runtime and application layers, and runs the resulting application as a non-root user.
It requires a Docker-compatible daemon; a configured Podman API connection is also supported. It does not use Buildah or the Dockerfile above.
Select the executable JAR explicitly, and for Paketo Java buildpacks configure the Java major version to match the application:
tasks.named('bootBuildImage') {
archiveFile = tasks.named('bootJar').flatMap { it.archiveFile }
environment.put('BP_JVM_VERSION', '21')
}Explicitly selecting bootJar matters when the war plugin is also applied: Spring Boot otherwise uses bootWar for image creation, which may select a different buildpack deployment layout.
./gradlew clean check bootBuildImage --imageName=myapp:0.1Use the builder supported by the Spring Boot plugin version in your application, or select a maintained builder and its compatible run image explicitly. For repeatable release builds, pin both images to tested digests and schedule rebuilds when they change. Check that the builder, run image, and buildpacks support your target CPU architecture and any required native libraries.
Paketo’s Java buildpack calculates JVM memory settings from the container memory limit and non-heap requirements.
Set a container limit and tune its documented BPL_JVM_* runtime options for your workload rather than copying the manual Dockerfile’s heap percentage into a buildpack image.
Keep the buildpack launcher as the entry point so its memory calculation, bindings, and runtime configuration execute.
BP_* settings configure the image build; deployment-specific configuration and secrets belong at runtime.
When image tags change on every release, use stable, application-specific buildCache and launchCache volume names if you want to retain buildpack caches across versions.
For a local smoke test, supply the application’s required external configuration and run the image with a memory limit:
docker run --rm --name myapp \
--publish 127.0.0.1:8080:8080 --memory=1g --cpus=2 \
--read-only --tmpfs /tmp:rw,nosuid,nodev,size=128m \
--cap-drop=ALL --security-opt=no-new-privileges \
--env JAVA_TOOL_OPTIONS='-Dgrails.env=prod' \
myapp:0.1Verify writable paths required by the selected buildpacks and any agents or bindings you enable. Here the buildpack retains control of heap sizing; the memory and temporary-storage limits still need workload-specific tuning.
See Spring Boot’s Gradle OCI image reference for daemon connections, cache configuration, registry authentication, and publishing, and Paketo’s Java reference for runtime tuning.
Release and architecture considerations
-
Tag images with a release version or commit identifier, record the source revision and artifact checksum in your build metadata, and promote the tested digest instead of rebuilding per environment.
-
Scan the final image, retain its software bill of materials, and rebuild for base-image and application-dependency fixes. A cached layer is reusable, not automatically up to date.
-
Build for the deployment platform explicitly when it differs from the build host, such as
--platform=linux/amd64on an ARM workstation. Both Docker and Buildah support selecting a platform, but the extraction stage executes Java and therefore needs a native runner or configured emulation for that platform. -
A Java JAR may be portable while JNI libraries and bundled executables are architecture-specific. Build and smoke-test each target architecture. Publish a multi-platform image index only after its constituent images pass; a single-platform image tag is not a multi-platform release.
-
Verify a representative controller request, compiled views, static assets, database access, and termination using the final image and production-like resource limits. Check that an application-only change reuses dependency layers, for example with
docker historyand registry layer digests.
The Spring Boot Dockerfile guide explains JAR extraction, and the efficient container images guide describes layer ordering. For further startup optimizations, see ahead-of-time processing and ahead-of-time caching. A trained JVM cache must match the deployment’s JDK, application, architecture, and runtime layout. See also Docker’s image-building best practices.
26.4 Production Configuration
External configuration and secrets
Select the Grails production environment with -Dgrails.env=prod when starting Java.
Grails environments and Spring profiles are distinct mechanisms; setting SPRING_PROFILES_ACTIVE=prod alone is not a substitute for selecting the Grails environment.
Keep database credentials, signing keys, and certificates outside the release artifact and image.
For a standalone archive or container, Spring Boot can load an additional directory containing application.yml or application.properties:
java -Dgrails.env=prod -jar application.jar \
--spring.config.additional-location=file:/etc/myapp/spring.config.additional-location adds to the default search locations; spring.config.location replaces them.
The trailing slash identifies a directory. This example fails at startup if the location is missing; add optional: only for configuration that really is optional.
In the container examples, mount configuration read-only at /etc/myapp/ and set SPRING_CONFIG_ADDITIONAL_LOCATION=file:/etc/myapp/.
Do not mount over /application, which contains the extracted application and its dependencies.
For Grails-specific Groovy configuration files, see external configuration and grails.config.locations.
That mechanism skips missing locations, so it should not be relied on to enforce the presence of required secrets.
Test the effective configuration in the packaged application, especially when combining Spring properties with Grails environment-specific blocks.
For example, a GORM application can refer to deployment-provided values explicitly in grails-app/conf/application.yml:
environments:
production:
dataSource:
dbCreate: none
url: ${JDBC_URL}
username: ${JDBC_USERNAME}
password: ${JDBC_PASSWORD}Also configure the database driver and its runtime dependency for the chosen database.
Supply the values through your platform’s secret management; do not commit a populated environment file or bake it into an image.
Prefer mounted secret files where available. Spring Boot supports spring.config.import=configtree:/run/secrets/ to expose file names as property names and their contents as values, which application configuration can reference with placeholders.
Use read-only mounts and permissions that allow the runtime user to read the required files. Environment variables and JVM options can appear in process inspection or diagnostic output; do not log their contents.
Apply versioned database migrations as a coordinated release step. Do not use create, create-drop, or automatic schema update as a production migration strategy.
Plan schema changes to support both old and new application versions during a rolling deployment and rollback.
Budget connection pools across all replicas, including temporarily overlapping replicas during rollout.
Memory, storage, and logging
For the manual Dockerfile, set a container memory limit and tune -Xmx or -XX:MaxRAMPercentage against that limit.
Modern supported JVMs detect container limits by default; adding -XX:+UseContainerSupport is normally unnecessary.
Heap is only part of total memory: allow space for metaspace, code cache, direct buffers, thread stacks, native libraries, monitoring agents, and memory-backed temporary files.
A container can be killed for exceeding its limit even if the Java heap has not run out of memory.
Measure resident memory and GC behavior under load rather than copying a fixed heap percentage between applications.
JAVA_TOOL_OPTIONS is read by the JVM and works with the exec-form entry point in the Dockerfile.
JAVA_OPTS has no automatic meaning to java, and Docker does not expand variables inside an exec-form entry point.
For a buildpack image, preserve the launcher and use the buildpack’s memory configuration, as described in Cloud Native Buildpacks.
Write application logs to standard output and standard error for the service manager or container platform to collect, with platform-managed retention.
Keep uploads and durable data in external storage or persistent volumes; an image’s writable layer and /tmp are disposable.
Configure writable paths explicitly when using a read-only root filesystem.
Heap dumps and other diagnostics need a writable destination with sufficient space and controlled access.
Keep JVM debugging and management interfaces private; they should not be exposed through the application’s public ingress.
Graceful shutdown and rolling updates
Spring Boot 4.1 enables graceful shutdown by default for supported embedded web servers. The following configuration makes the intent explicit and sets the timeout per shutdown phase:
server:
shutdown: graceful
spring:
lifecycle:
timeout-per-shutdown-phase: 30sThe container entry point must forward termination signals to Java. The Dockerfile uses exec form so Java is PID 1 and receives SIGTERM directly.
If a startup script is needed, finish it with exec java …. If the application spawns child processes, consider the runtime’s init support (such as docker run --init) for signal forwarding and child reaping.
Allow the platform longer than the application’s shutdown work before it sends SIGKILL. For example, stop a locally running Docker container from another terminal with:
docker stop -t 60 myappThe timeout is per Spring lifecycle phase, not a global upper bound. Allow for all phases, background jobs, and load-balancer draining when setting the service manager’s stop timeout or Kubernetes terminationGracePeriodSeconds.
If using a Kubernetes preStop hook to allow endpoint removal to propagate, its execution also consumes the termination grace period.
Test termination with in-flight requests through the actual ingress, including long-running or streaming requests.
Run scheduled jobs and message consumers with a defined shutdown and multi-replica strategy. Keep HTTP sessions outside the process when they must survive rescheduling, or explicitly design for their loss. Sticky routing alone does not preserve sessions when a replica disappears.
Health probes
Use separate startup, liveness, and readiness probes when deploying to an orchestrator. If the application does not already include Spring Boot Actuator, add its Grails-managed dependency:
dependencies {
implementation 'org.springframework.boot:spring-boot-starter-actuator'
}Merge these settings into application.yml:
management:
endpoints:
web:
exposure:
include: health
endpoint:
health:
show-details: never
probes:
enabled: true
add-additional-paths: trueSpring Boot 4.1 enables the liveness and readiness health groups by default. The configuration makes that explicit and additionally exposes /livez and /readyz on the main server port as well as the Actuator health-group paths.
Probing the main port avoids a separately hosted management server reporting success while the application connector is unavailable.
Allow the probe requests through the application’s security rules without a login redirect, and restrict probe access at the network or ingress layer as appropriate.
Do not expose all Actuator endpoints to make a health check work.
For example, the following is a Kubernetes Pod-spec fragment (the spec.template.spec portion of a Deployment), assuming the default root context path and HTTP on port 8080:
terminationGracePeriodSeconds: 60
containers:
- name: myapp
image: registry.example.com/team/myapp:0.1
ports:
- name: http
containerPort: 8080
startupProbe:
httpGet:
path: /livez
port: http
periodSeconds: 5
failureThreshold: 60
timeoutSeconds: 2
livenessProbe:
httpGet:
path: /livez
port: http
periodSeconds: 10
timeoutSeconds: 2
readinessProbe:
httpGet:
path: /readyz
port: http
periodSeconds: 5
timeoutSeconds: 2Replace the illustrative tag with the tested image digest for release deployment, and add resource requests/limits, configuration, secret mounts, and security context appropriate to the application. Adjust paths and schemes if using a context path or HTTPS. The startup probe allows up to five minutes here before restarts; tune that budget from measured startup times. Kubernetes defers liveness and readiness probes until the startup probe succeeds. A failing readiness probe removes the replica from service traffic; a failing liveness probe restarts it.
Do not make liveness depend on the database, a remote API, or another shared service: an outage can otherwise cause every application instance to restart. Spring Boot’s readiness group does not include external dependencies by default. Include only checks that should prevent that instance from receiving requests, and consider what happens if every replica becomes unready during a shared dependency outage. Validate that probes return the intended status rather than a security redirect or a generic application page. See the Spring Boot Kubernetes probes reference.
HTTPS and reverse proxies
Many deployments terminate TLS at a reverse proxy or ingress. Keep certificate renewal there and restrict direct access to the application port.
Configure forwarded-header handling only for a trusted proxy path, and have the boundary proxy remove untrusted client-supplied Forwarded and X-Forwarded-* headers.
Choose server.forward-headers-strategy=NATIVE for supported embedded-container handling or FRAMEWORK for Spring’s handling, according to your proxy’s headers and trust configuration.
Test redirects, absolute URLs, secure cookies, and client-address handling through that proxy. See the Spring Boot proxy guidance.
To terminate TLS in the embedded server instead, merge settings such as these into application.yml and mount the keystore read-only:
server:
port: 8443
ssl:
enabled: true
key-store: file:/run/secrets/application.p12
key-store-type: PKCS12
key-store-password: ${TLS_KEYSTORE_PASSWORD}
key-alias: applicationProvide the password at runtime and adapt the alias to the keystore. These properties configure the embedded server, not an external servlet container. Properties alone do not create simultaneous HTTP and HTTPS connectors; an additional connector requires programmatic configuration. See the Spring Boot SSL guidance, SSL bundles, and multiple Tomcat connectors.
26.5 Ahead-of-Time Processing
Spring’s ahead-of-time (AOT) processing moves bean wiring from startup to build time. Instead of scanning the classpath, reading annotations and evaluating conditions on every boot, the build generates Java source that registers the bean definitions directly, and the application runs that.
Two things follow from it: startup does less work, and the application becomes eligible for a GraalVM native image, which cannot perform the classpath scanning and reflection that normal startup relies on.
AOT is opt-in.
Enabling AOT
Apply the Spring Boot AOT plugin alongside the Grails plugins:
apply plugin: 'org.springframework.boot.aot'This adds a processAot task, which bootJar then runs as part of the build. Nothing about a normal bootRun or bootJar changes until the application is started with AOT enabled:
java -Dspring.aot.enabled=true -jar build/libs/myapp.jarAn application started this way logs Starting AOT-processed Application rather than Starting Application.
The environment the definitions are generated for
processAot builds the bean definitions the packaged application will use, so it runs in the environment those definitions are meant for. The Grails Gradle plugin sets grails.env to production on the task; nothing needs to be configured for it.
It matters because an application declares different beans in different environments. Under development the URL mappings holder is a proxy whose type cannot be determined without creating it, and generation fails naming a bean unrelated to anything in the application:
Field urlMappings in org.grails.web.mapping.servlet.UrlMappingsErrorPageCustomizer
required a bean of type 'grails.web.mapping.UrlMappings' that could not be found.Reload-mode beans have no meaning in a packaged artifact, so generating in production is correct as well as necessary. To generate for a different environment, set the property on the task yourself:
tasks.named('processAot') {
systemProperty 'grails.env', 'staging'
}What AOT changes at runtime
An AOT-processed application registers the same beans as a normal one. The difference is the annotation-processing infrastructure it no longer needs, since the work those components do has already been done:
-
internalConfigurationAnnotationProcessor -
internalAutowiredAnnotationProcessor -
internalCommonAnnotationProcessor -
Spring Boot’s shared metadata reader factory
-
Grails' own configuration class post-processor
Application beans, plugin beans and auto-configuration beans are all present as usual.
Limitations
Beans contributed from a plugin’s beanRegistrar() are not generated. Spring marks them as registrar-owned and skips them, and they are registered again at runtime when Grails applies the plugin registrars. They behave correctly, but the plugin scan that produces them still runs on every start, so they do not benefit from generation.
Writing bean definitions that hold live objects will fail generation. A definition is a recipe rather than an instance, and there is no general way to generate code that reconstructs an arbitrary object, so a constructor argument or property value holding one cannot be processed:
UnsupportedTypeValueCodeGenerationException:
Code generation does not support com.example.SomeServiceReference another bean by name instead, or express the collaborator as a nested bean definition, and the generator can emit both.
Abstract bean definitions — templates that exist only to be inherited through bean.parent — are excluded from generation, because Spring has no representation for them in generated code. Definitions that inherit from one are unaffected: they are generated from their merged definition, with the inherited values already folded in.
AOT processing on its own does not make an application ready for a native image. A native image additionally requires reachability metadata covering the resources and reflection an application performs at runtime.
Recording reflection for a native image
Some of that metadata is written for you. The build reads its own output — the compiled artefacts, and the manifest naming each compiled page — and registers them, so a controller, a domain class or a GSP survives into an image without anything having to run.
What that cannot describe is the framework reflecting on its own behalf while a request is served: a controller method reached through Groovy’s dispatch, a conversion asked for while a form is bound. Those are not the application’s classes, so nothing in the build output names them. An image built without them starts, serves its home page, and fails on the first request that takes such a path — with MissingReflectionRegistrationError, naming a method nobody wrote.
traceNativeMetadata runs the application under GraalVM’s tracing agent and records what it actually did:
grails {
nativeMetadata {
paths = ['/', '/login', '/book', '/book/create']
forms = ['/book/create']
}
}./gradlew traceNativeMetadataThe result is merged into src/native/resources/META-INF/native-image, alongside the source rather than under build, because which paths an image was built to cover is worth reviewing and worth committing.
paths are asked for. forms are asked for and submitted: the page is read, the fields the form declares are filled in, and they are posted to the action the form names. Submitting matters separately from rendering, because binding a form is a different half of the framework from rendering one — and it is the half that converts. A checkbox arrives as a string and lands on a boolean property, so a form submitted without one never asks the conversion service anything, and the image is built without the answer.
Pages behind a login
Forms are submitted before paths are asked for, whichever order they appear in the configuration, and the session a form establishes is carried through the rest of the trace. That is what makes a protected page traceable: list its login form, and the pages named in paths are reached as a signed-in user.
grails {
nativeMetadata {
forms = ['/login?username=admin&password=secret', '/book/create']
paths = ['/', '/book', '/book/show/1']
}
}A form may be told what to put in it with a query string, as /login is above. Only fields the form actually declares are set from it; a value naming a field that is not there is reported rather than posted, because it was meant for a form that has since changed.
Choosing which form
A page often carries more than one form — a layout’s search box or sign-out button ahead of the page’s own. The form declaring the most fields is the one submitted, and the trace output says which it was:
POST /book/save -> 200 (4 fields, from /book/create form 2 of 2, the one with the most fields)Where the wanted form is not the fullest, name it by its id:
forms = ['/book/create#bookForm']When the trace fails
The task fails if what was recorded is not what was asked for: a request that answers with an error or a not-found, a page listed under forms that carries no form, a named form that is not on the page, or a form page that answered from somewhere else.
That last one is the case worth knowing about. A form page reached without whatever makes it reachable answers from the login form instead, and every check after that passes — the page it landed on has a form, its fields are filled in, it posts, and it answers successfully. What would be reported is the login form submitted a second time under the name of the page that was wanted, while the binding the page was listed for went unexercised. So a form that answers from anywhere other than where it was asked for fails the trace, and the message names where it landed.
Redirects are followed, so an application that sends / to its real home page records that page. A request that ends up somewhere other than where it was asked for is reported as a warning naming where it landed — usually the sign that a page needs its login form listed under forms.
The agent ships with GraalVM rather than with a JDK, and it must trace the archive the image will be built from — which is compiled for GraalVM’s Java. The task uses the project toolchain, which for a project that builds an image is already a GraalVM; grails.nativeMetadata.javaExecutable points it elsewhere.
|
| The agent records only what ran. A path that is not listed is not covered, and it will be missing in the way that only appears when somebody uses that page. Treat the list as the coverage it is, and extend it as the application grows. |
26.6 Ahead-of-Time Caching
Spring’s AOT processing removes the work of deciding what the beans are. What remains is the work the JVM does regardless: loading and linking classes, and interpreting methods until they are compiled. An AOT cache removes most of that as well.
The JDK can record a run of an application — the classes it loaded and linked, and the profiles of the methods it executed — into a cache file, and read that file on the next start instead of doing the work again. The cache is a JDK feature rather than a framework one, so it applies to the whole application: the framework, Spring, Hibernate, and the application’s own classes alike.
It requires JDK 25 or later.
Training is POSIX-only. The cache is written as the training JVM exits normally, so the run has to be asked to stop rather than killed — and a child process on Windows can only be killed. trainAotCache says so and stops rather than training a run it could not end. Reading a cache has no such restriction; only producing one does.
Enabling the cache
The cache is produced by running the application, so it is off unless asked for. Say which pages matter:
grails {
aotCache {
enabled = true
paths = ['/', '/login', '/book/index', '/book/show/1']
}
}That adds two tasks. extractAotCacheApplication unpacks the executable jar into build/aot-cache/application, and trainAotCache runs what it unpacked, asks for each path, stops it, and leaves the cache beside the extracted application:
./gradlew trainAotCacheTrained myapp.aot (167 MB) over 4 pathsThe application is unpacked first because a cache is read against the layout it was trained on. An executable jar loads its dependencies through a nested-jar classloader; the extracted form loads them as ordinary jars on the classpath, and only the second is a layout a cache can be reused against.
Running with the cache
build/aot-cache is what is deployed: the extracted application, and beside it the cache and what it was trained from.
build/aot-cache/
├── application/ (1)
├── myapp.aot (2)
└── aot-cache.properties (3)| 1 | the extracted application, which is the layout the cache was trained against |
| 2 | the cache |
| 3 | what the cache was trained from |
java -XX:AOTCache=build/aot-cache/myapp.aot -Dspring.aot.enabled=true -Dgrails.env=production \
-jar build/aot-cache/application/myapp.jarIt does not matter which directory it is started from. Moving the whole of aot-cache elsewhere is fine too — a container image that unpacks it under /opt is the usual case — as long as the cache and application/ move together and keep their timestamps, which the cache checks the archive against. Copying only the jar out of application/ does not work, and not because of the cache: the extracted layout reaches its dependencies through lib/ beside it.
A JVM given a cache it cannot use does not fail. It reports why, ignores the cache, and starts as it would have anyway — so an invalid cache costs the startup time it was meant to save, silently, and without any other symptom.
Adding -XX:AOTMode=on turns that into a failure to start, which is worth doing wherever the cache is the reason the deployment meets its startup time. A cache that has been invalidated then stops the process rather than quietly making it slower:
[0.003s][warning][aot] Unable to use AOT cache.
[0.003s][error ][aot] Loading static archive failed.What the training run should do
A cache makes the next start fast at whatever the training run did. Training a run that only refreshes the context records the framework starting, and that alone is most of what the startup time is — so most of the benefit is there before any path is named.
Asking for paths adds a little to that and a good deal more to the first request. Each path asked for during training profiles the code that answers it — URL mapping, the controller, GSP rendering, the data access behind it — so the first real request finds that work done rather than doing it itself.
So paths is worth setting for the pages that matter on a cold start: the ones a load balancer hits first, and the ones a user sees first. An application whose startup time is all that matters can leave it empty and still get most of the benefit.
A path that answers with an error still profiles the code that produced the error, which is code the application runs too, so nothing here fails the build. The run is a recording, not a test.
| The training run is a real run of the application. It executes bootstrap code, connects to whatever the configuration points at, and writes whatever that code writes. Point it at a build-time or throwaway database, never at production. |
It follows that the application has to be able to start in the environment it is trained in, which is production by default — the environment the cache is for. A datasource that only exists in development is not there during training, and the run fails with whatever the application says when it cannot reach its database:
The training run ended before it started serving.
What it printed is in build/tmp/trainAotCache/training.logThe build fails rather than carrying on, because a cache that was never written is indistinguishable at deployment time from one that was.
Where the defaults are not right, the rest of the run is configurable:
grails {
aotCache {
enabled = true
paths = ['/']
jvmArguments = ['-Dspring.aot.enabled=true', '-Dgrails.env=production']
port = 18080
startTimeoutSeconds = 120
}
}jvmArguments is given to the training run and has to be given to every run that reads the cache. A cache records what it saw; a run configured differently from the training run is a different application as far as the cache is concerned, and its cache will be declined.
Because those arguments have to be reproduced at deployment time, they are recorded in aot-cache.properties, which ships beside the cache. Keep credentials out of them and pass them to the training run another way.
Knowing whether a cache still applies
A cache is read only by the JDK build that wrote it, against the archive it was trained on, with the arguments it was trained with. Any of those changing invalidates it, and the only symptom is that startup is no longer fast.
Training runs on the project’s Java toolchain where it declares one, so the JDK recorded here is the one the application is compiled for rather than whichever one happened to run Gradle.
So the training run writes aot-cache.properties beside the cache, recording what it was made from:
cache.file=myapp.aot
cache.bytes=175019584
application.archive=myapp-0.1.jar
application.sha256=6f1b...
training.arguments=-Dspring.aot.enabled=true -Dgrails.env=production
training.paths=/ /login /book/index /book/show/1
java.runtime.version=26.0.2+13
java.vendor=BellSoft
os.name=Mac OS X
os.arch=aarch64A deployment can compare those values against the JVM it is about to start and the jar it is about to run, and decide whether it has a cache that applies or one that will be quietly ignored. Because the cache is tied to an exact JDK build, a CI pipeline that produces the cache must publish it alongside the JDK it was produced with, and a base image upgrade invalidates every cache built against the previous one.
What it is worth
Measured on a Grails application with GORM for Hibernate, security and asset pipeline, best of three starts on the same machine and JDK:
| Start | Startup | First hit of four cold paths |
|---|---|---|
Ordinary |
2.594s |
|
Spring AOT |
2.284s |
|
Spring AOT with a cache trained on refresh only |
1.015s |
0.495s |
Spring AOT with a cache trained over those paths |
0.933s |
0.332s |
The shape of that is the point. Spring’s AOT processing on its own moves less than might be expected, because deciding what the beans are was never most of the cost — loading and linking the classes was, and that is what the cache removes, cutting startup by more than half. Naming the paths takes a further tenth off startup and a third off the first requests.
An AOT cache and a native image solve the same problem differently and are not combined: a native image has no cache to read because it has already done all of this at build time. The cache is what an application gets when it stays on the JVM — including applications a native image cannot yet build, which is most of those using Hibernate.
27 Contributing to Grails
Grails is an open source project with an active community, and we rely heavily on that community to help make Grails better. For details on how to contribute or interact with the Grails Developers, please see the Contribution Guide on GitHub.